> ## Documentation Index
> Fetch the complete documentation index at: https://support.dripos.com/llms.txt
> Use this file to discover all available pages before exploring further.
# Onboard
> Kickstart your Dripos Payroll onboarding!
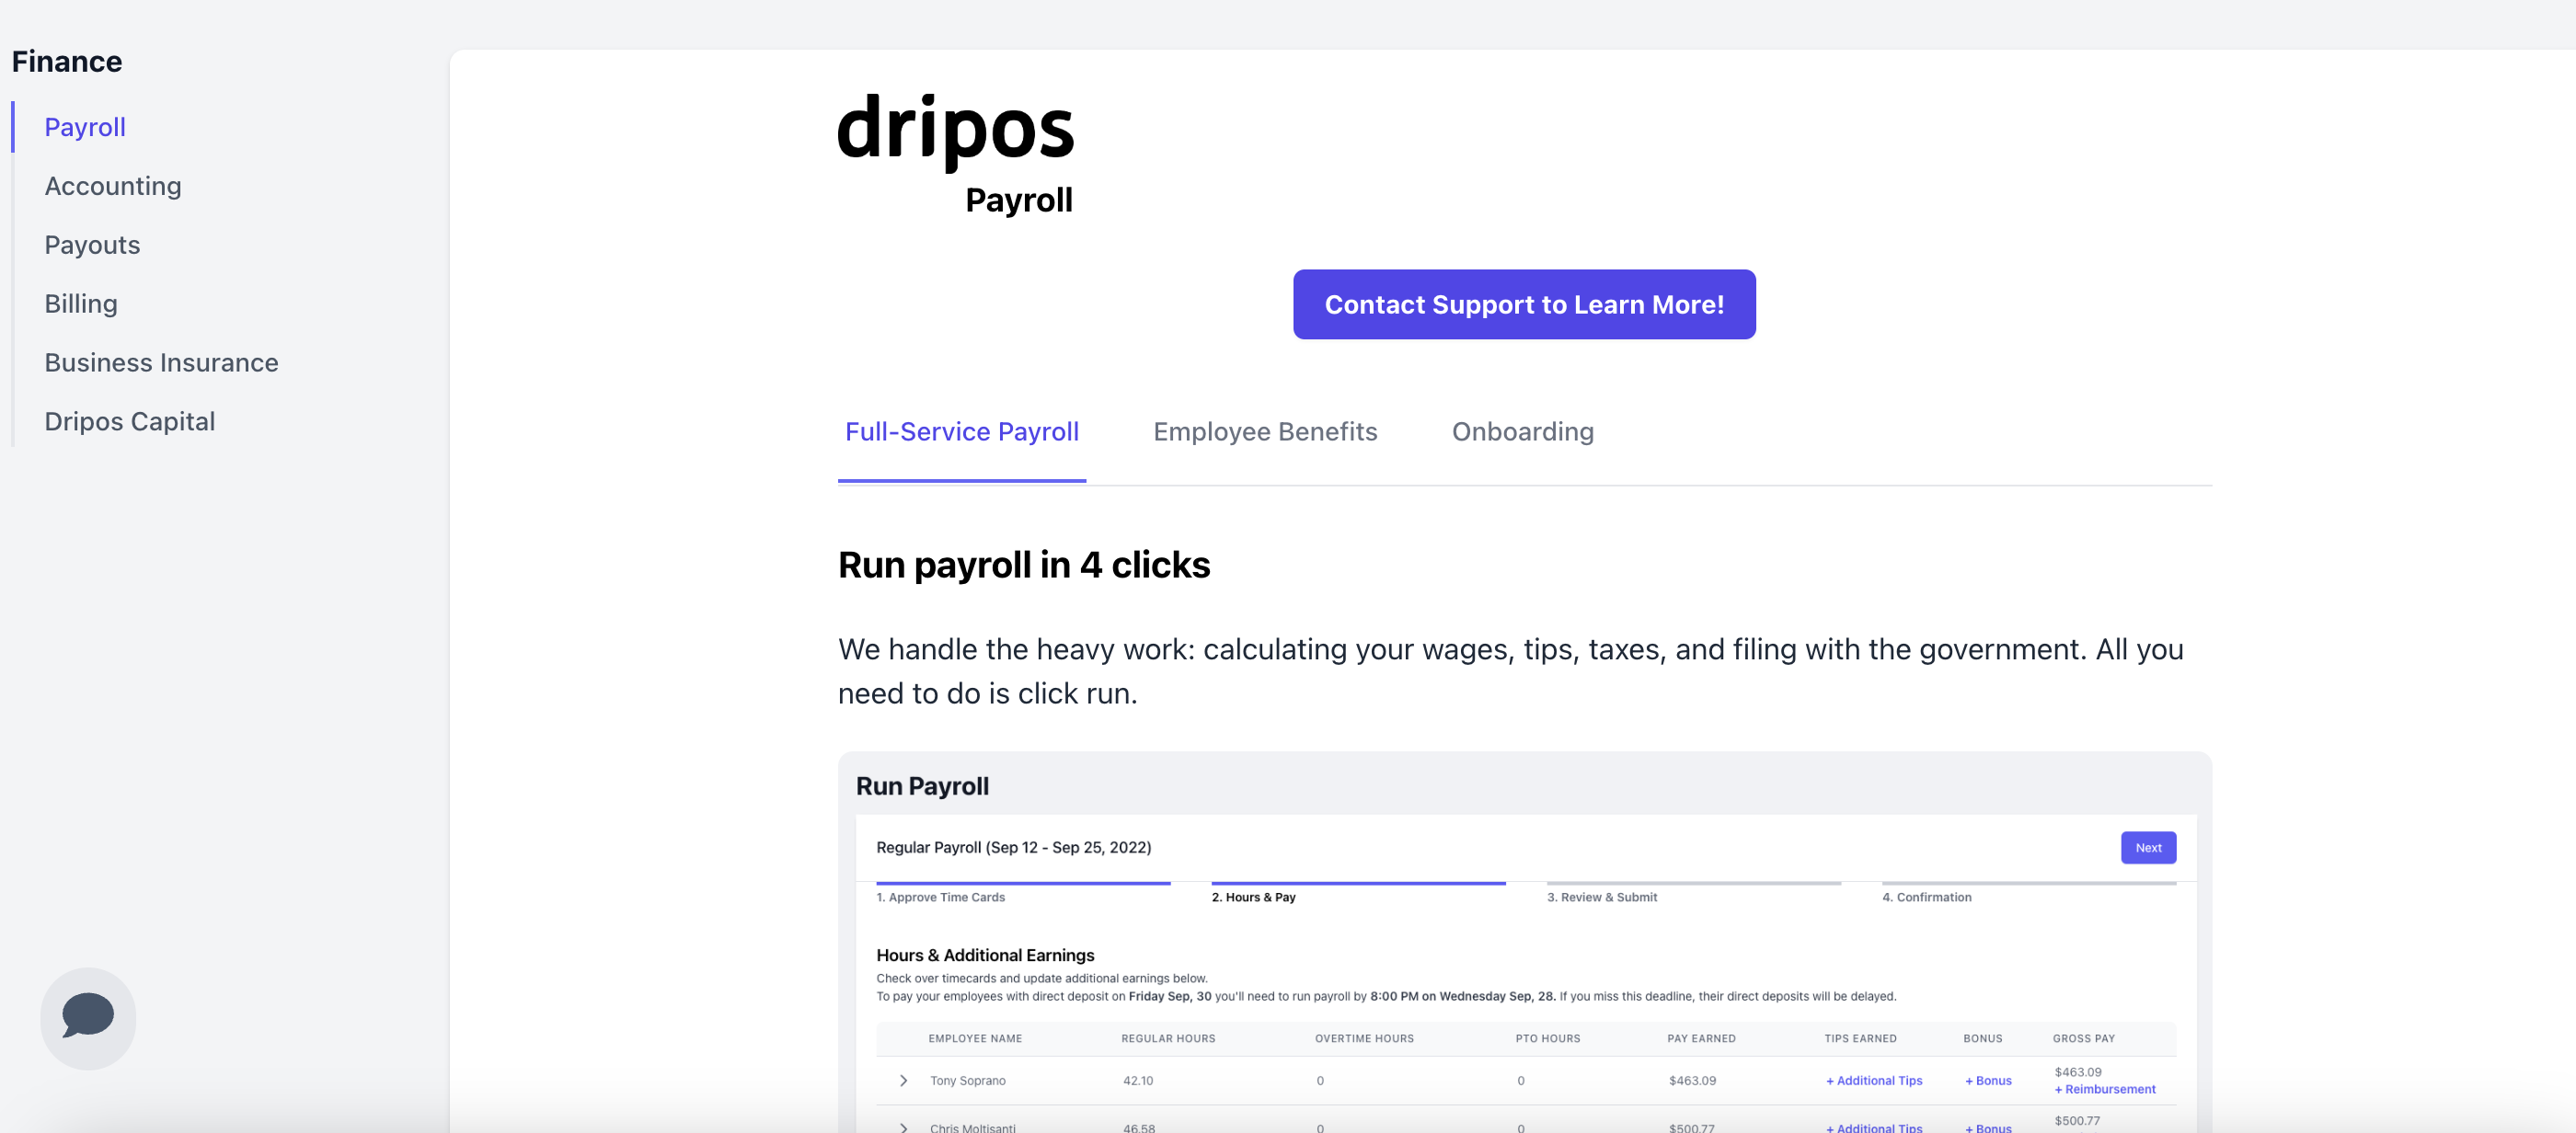 ## Onboarding
Reach out to your onboarding specialist or Dripos Support to kickstart the payroll process.
We'll make this easy!
## Create Account
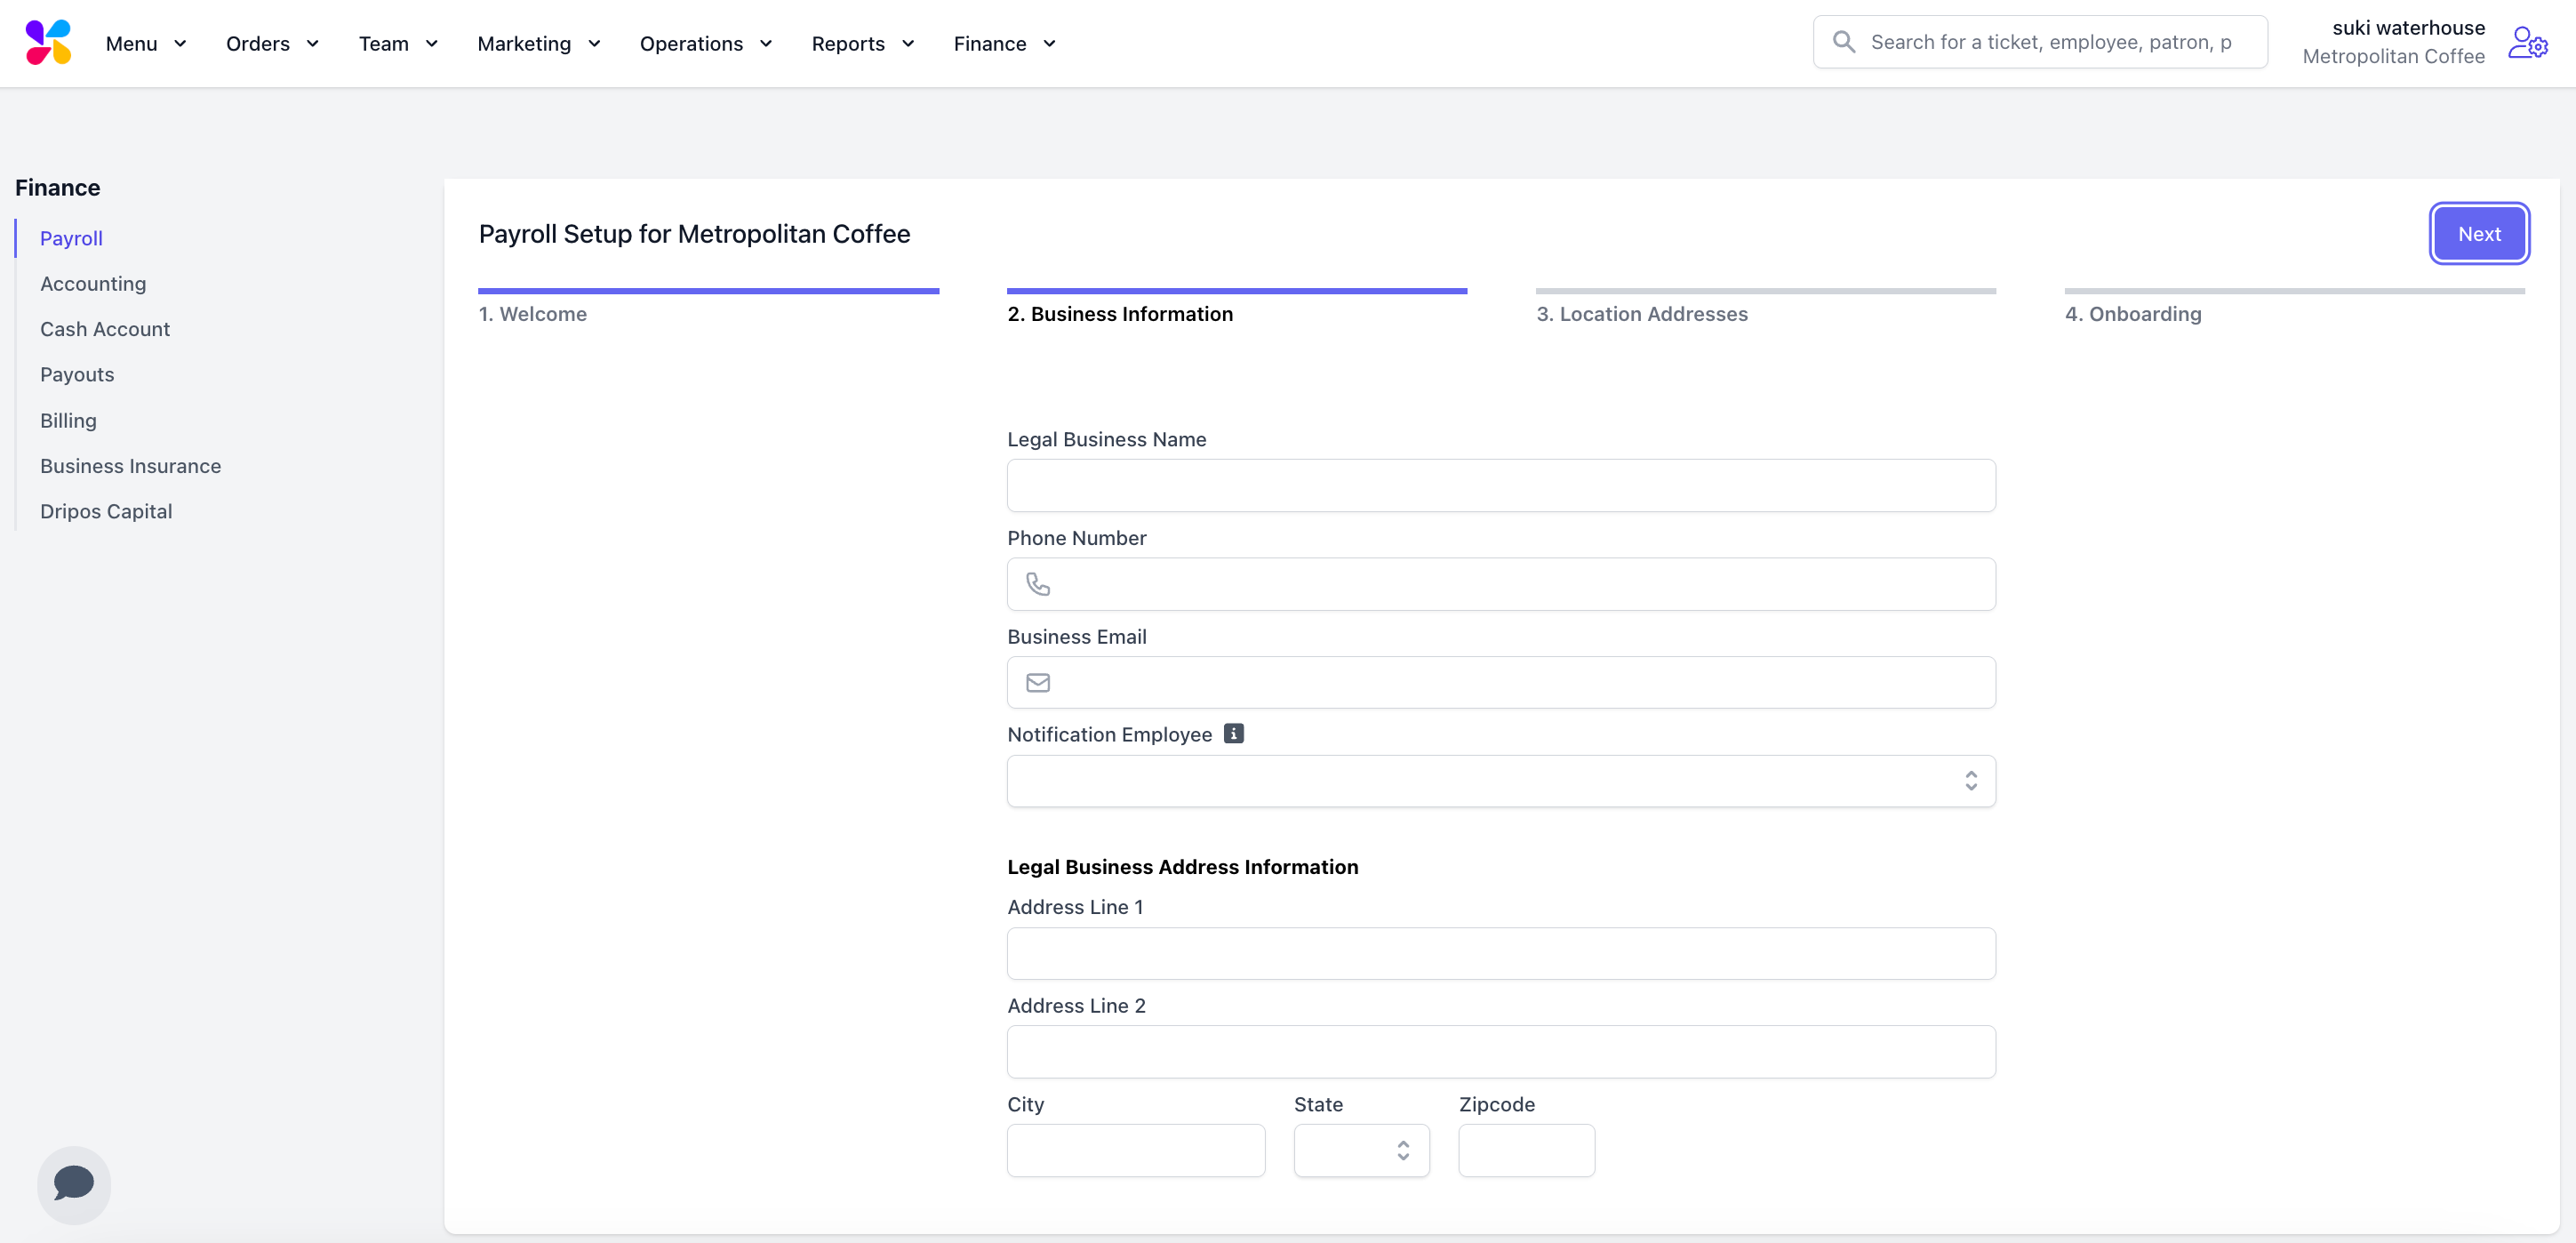
After meeting with your onboarding specialist, continue setting up your payroll account on the [**Payroll Dashboard**](https://dashboard.dripos.com/payroll).
Complete all fields and click **Next**
## Onboarding
Reach out to your onboarding specialist or Dripos Support to kickstart the payroll process.
We'll make this easy!
## Create Account
After meeting with your onboarding specialist, continue setting up your payroll account on the [**Payroll Dashboard**](https://dashboard.dripos.com/payroll).
Complete all fields and click **Next**
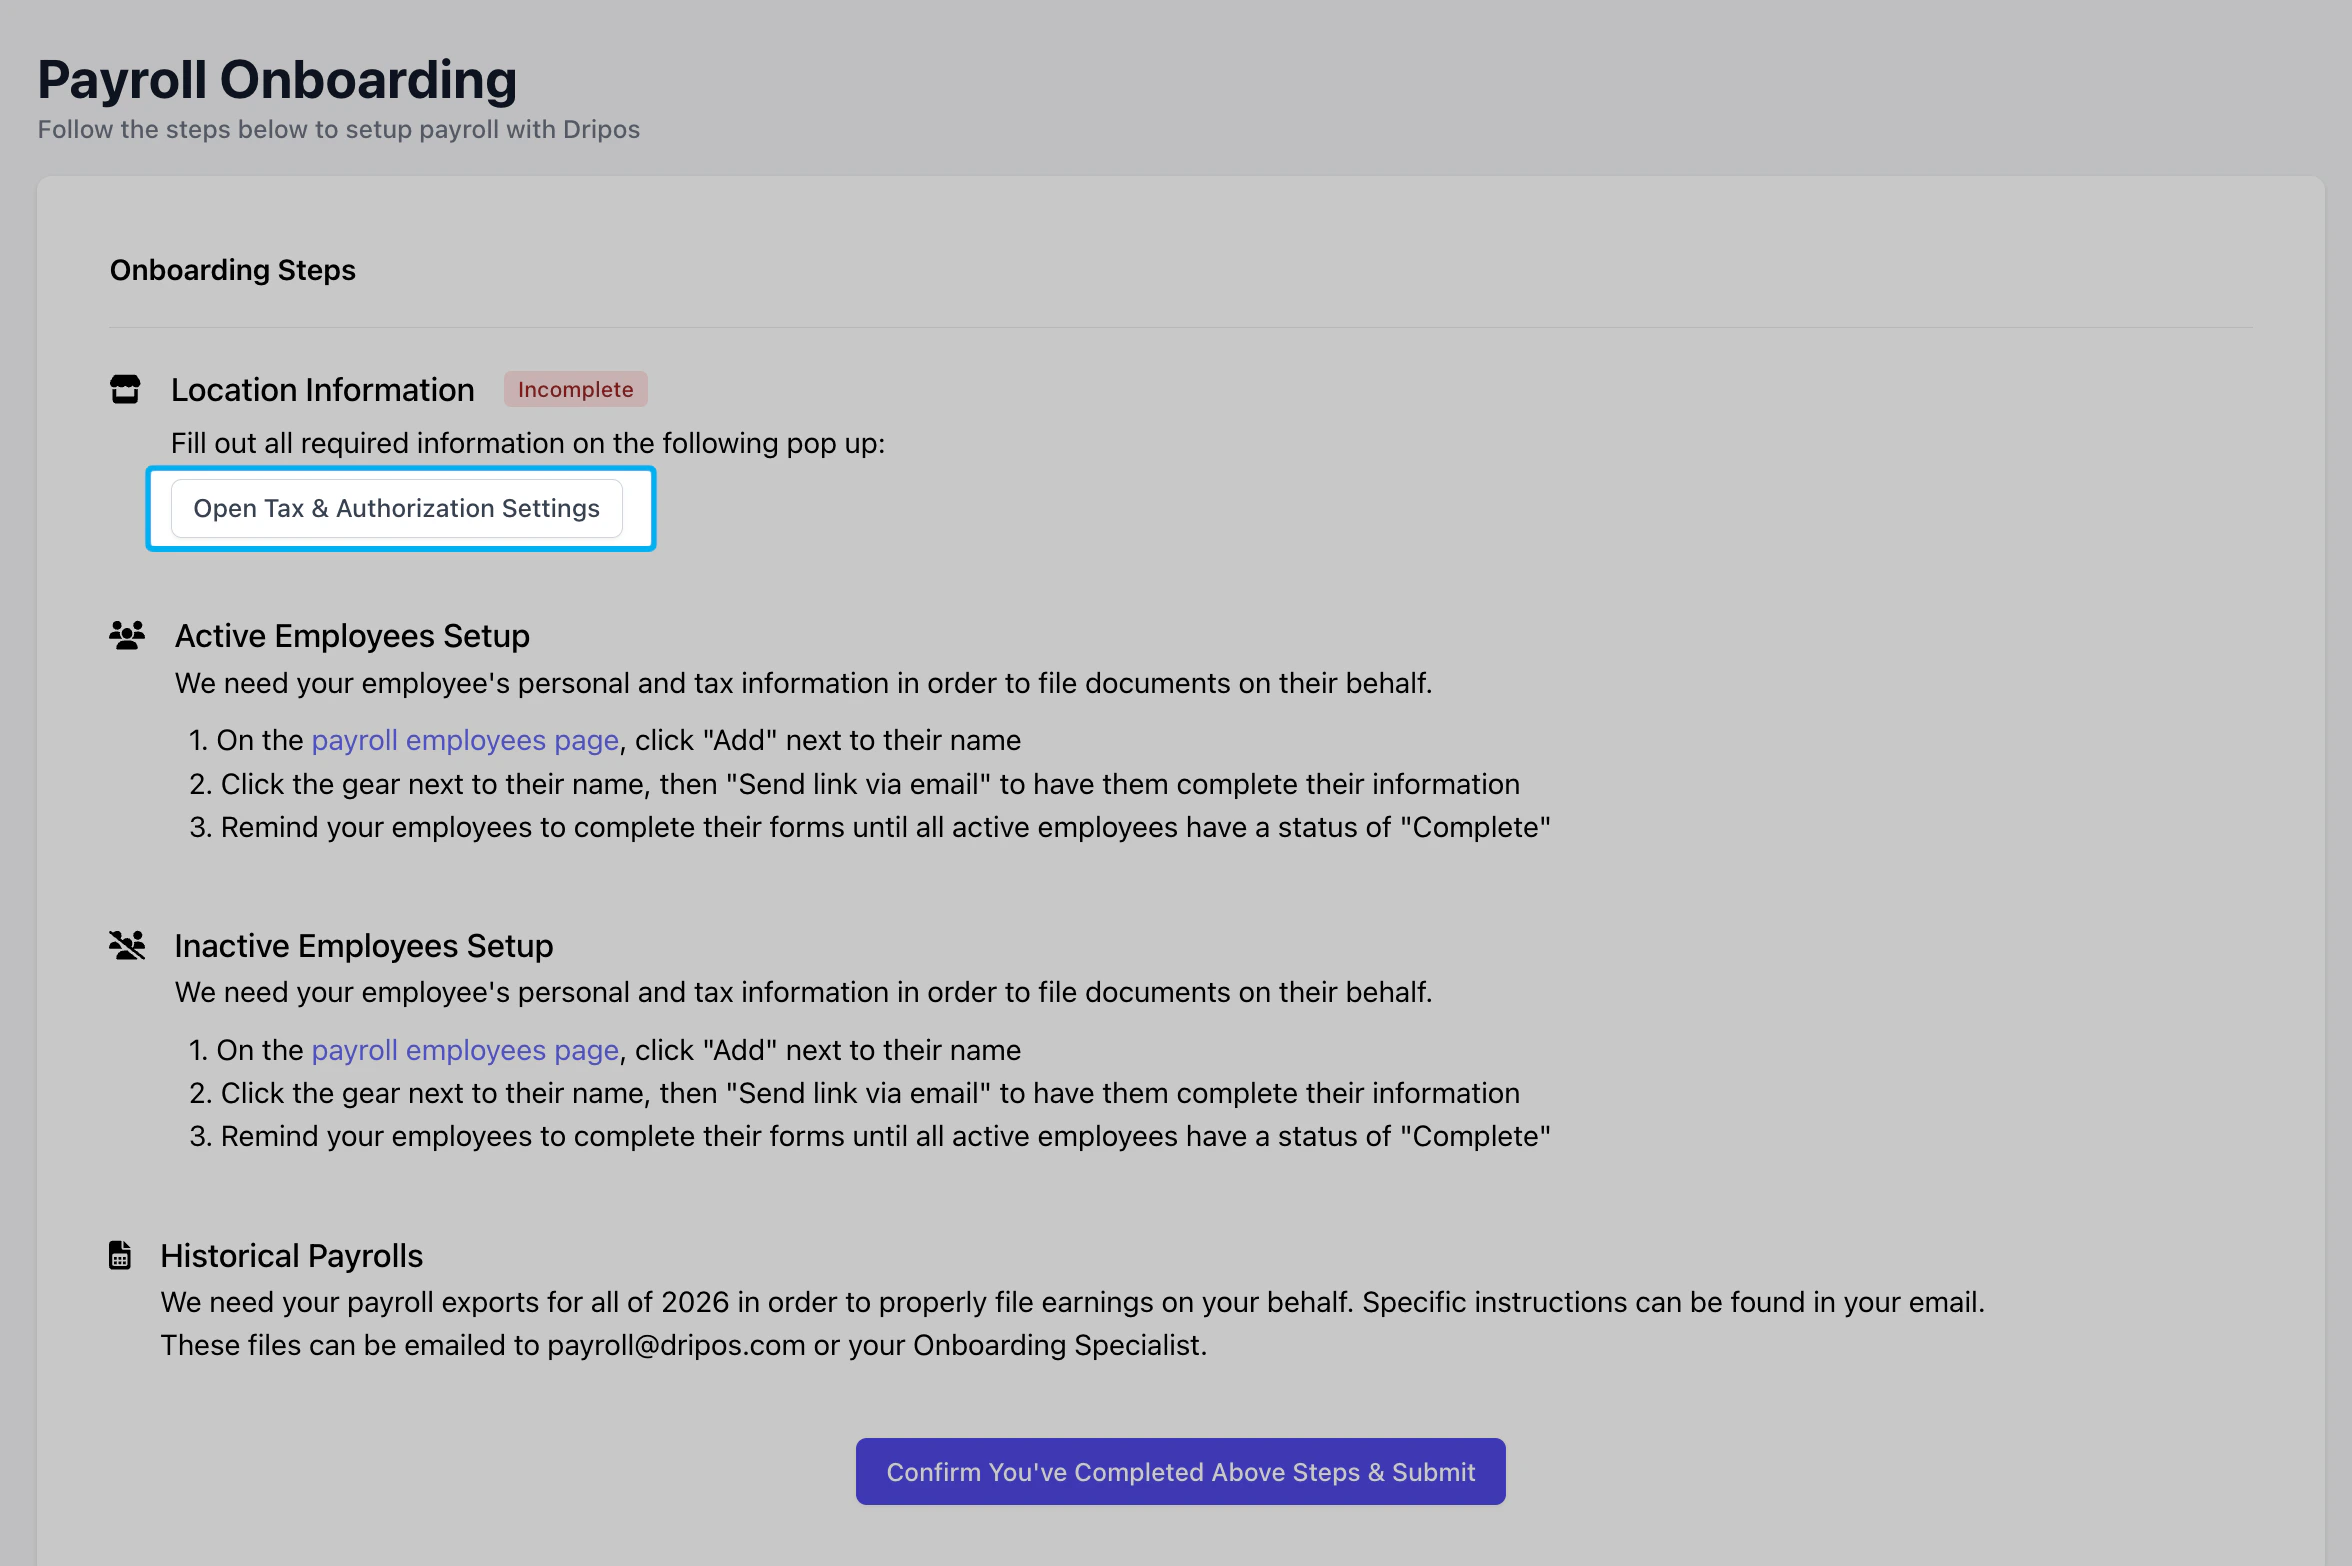
 Click the **Open Tax & Authorization Settings** button to enter additional business information.
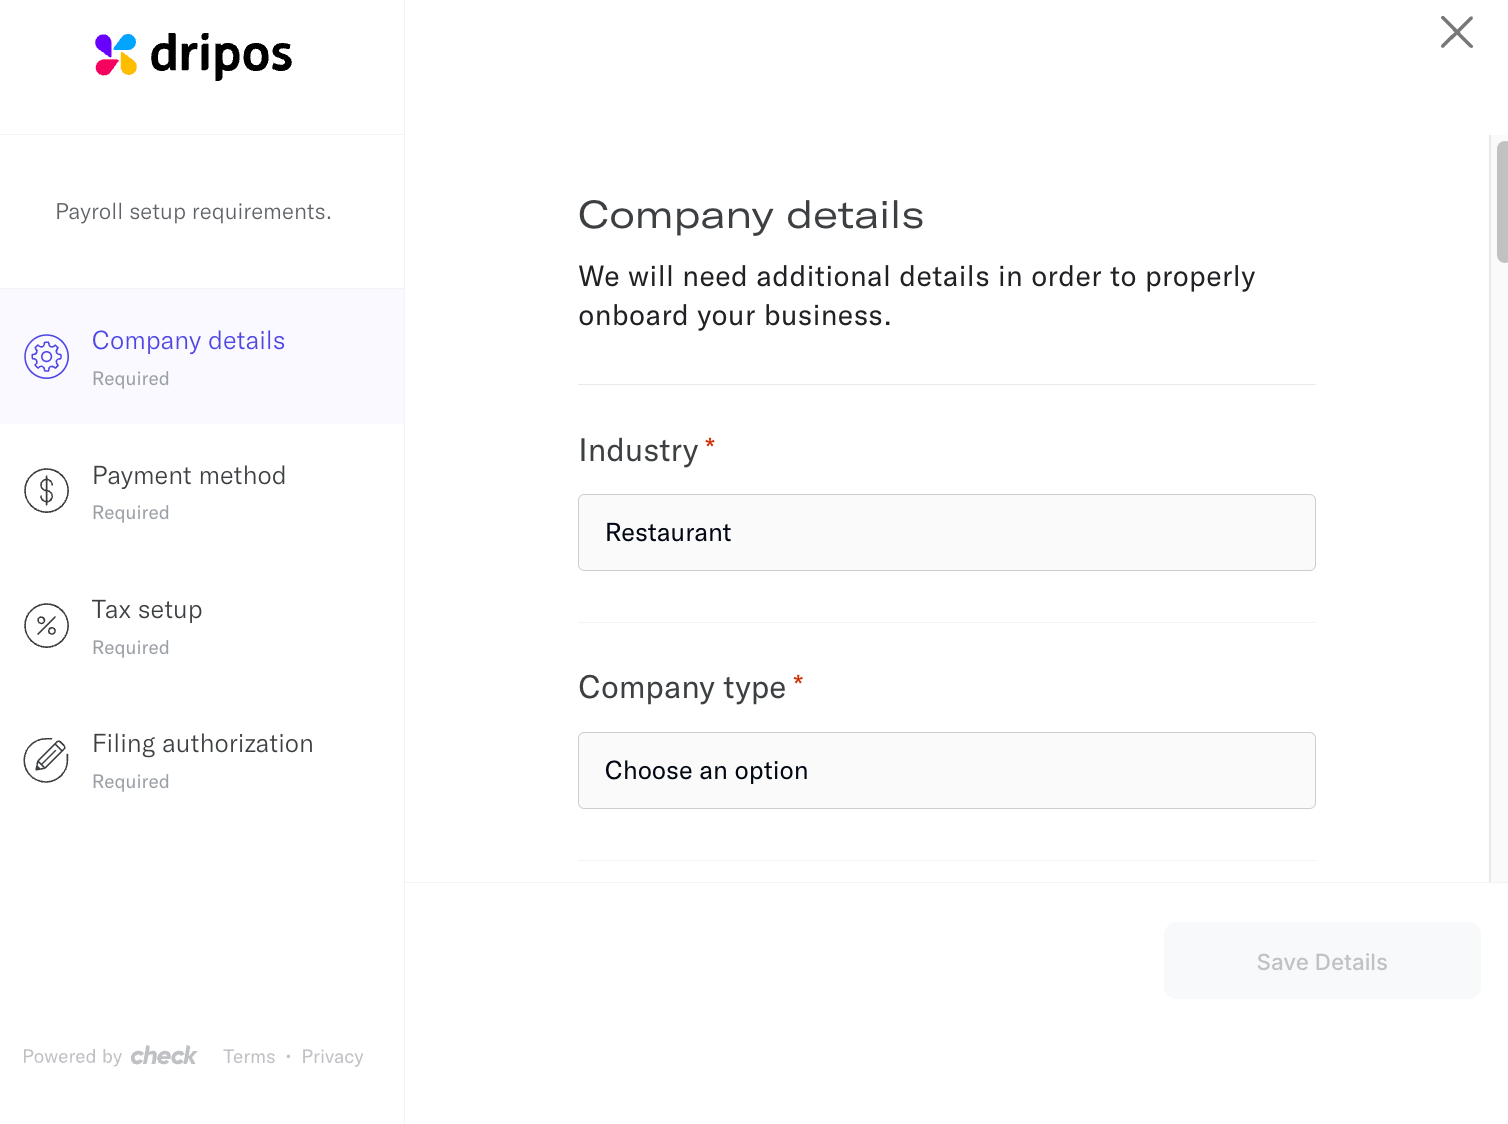 This must be a **business checking** bank account.
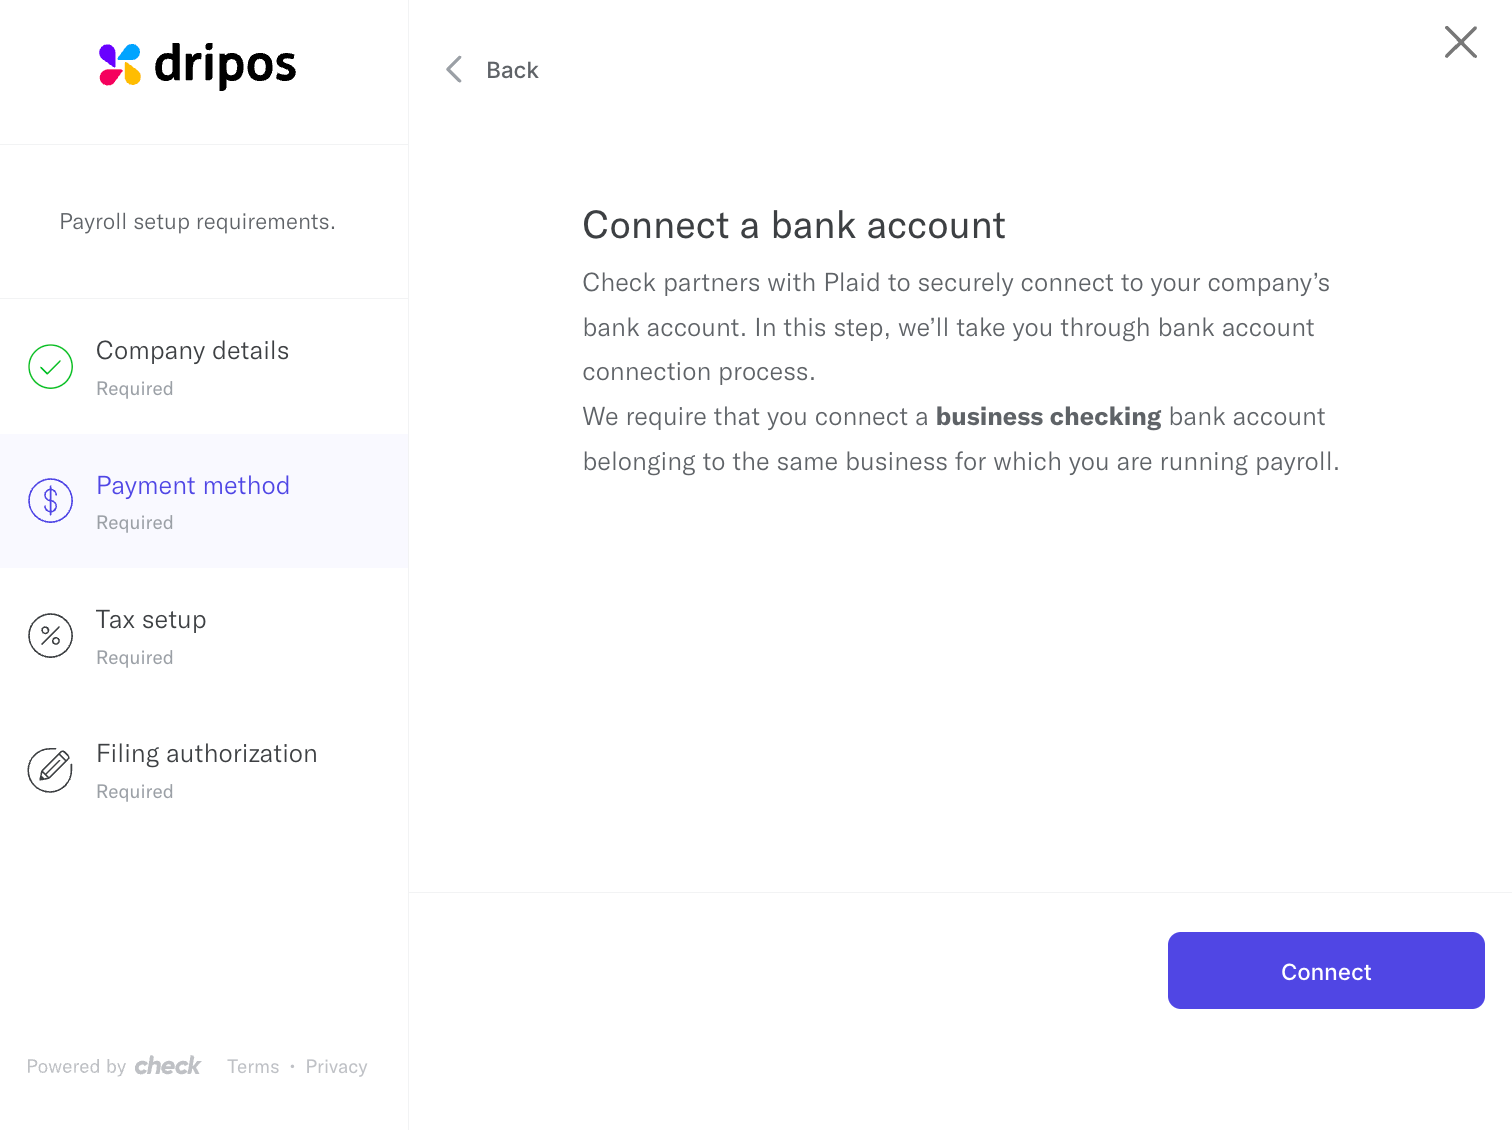 Input all required tax numbers and ensure they are entered correctly.
**Your business will be held responsible for any fees and interest resulting from failed tax filings due to missing or incorrect tax account numbers.**
Learn more about failed filings [here](/finance/payroll/payroll-taxes#failed-filings).
Input all required tax numbers and ensure they are entered correctly.
**Your business will be held responsible for any fees and interest resulting from failed tax filings due to missing or incorrect tax account numbers.**
Learn more about failed filings [here](/finance/payroll/payroll-taxes#failed-filings).
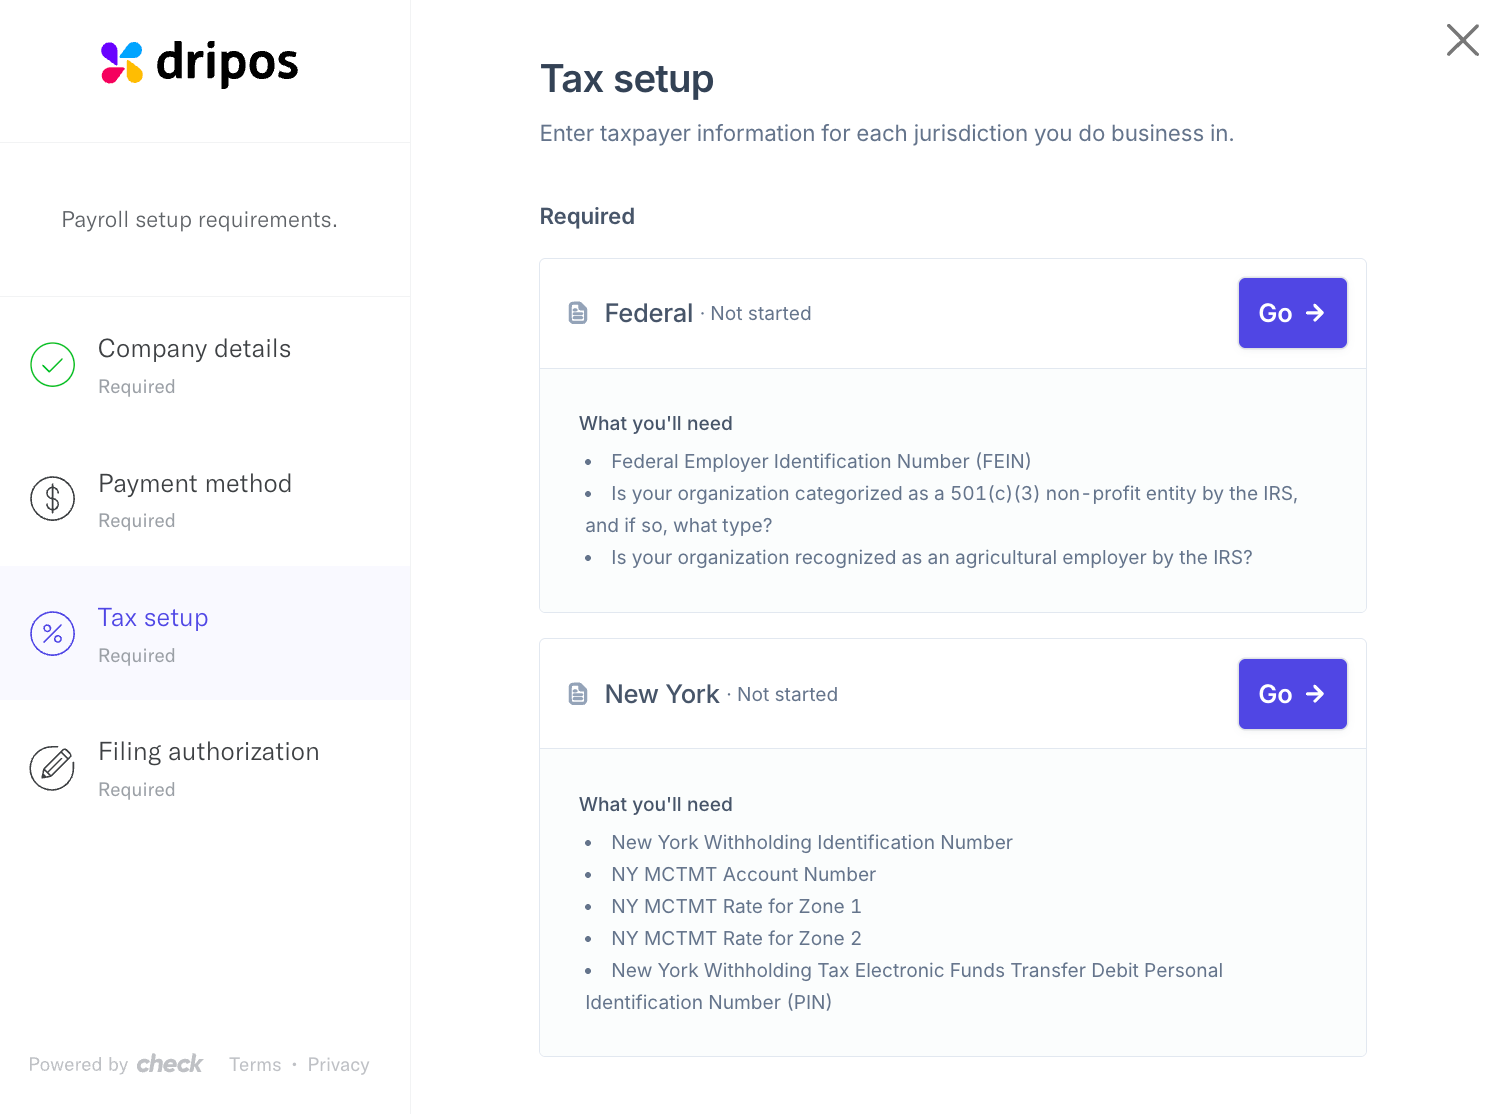 If you are in the process of applying for an account number, you may select *I've applied but have not received it yet*.
Once you have received the account numbers, input this by going to [**Payroll Settings**](https://dashboard.dripos.com/payroll/settings) and clicking **Open Tax & Authorization Settings**.
**All account numbers must be entered before the end of the quarter for Dripos to successfully file your payroll taxes.**
If you are in the process of applying for an account number, you may select *I've applied but have not received it yet*.
Once you have received the account numbers, input this by going to [**Payroll Settings**](https://dashboard.dripos.com/payroll/settings) and clicking **Open Tax & Authorization Settings**.
**All account numbers must be entered before the end of the quarter for Dripos to successfully file your payroll taxes.**
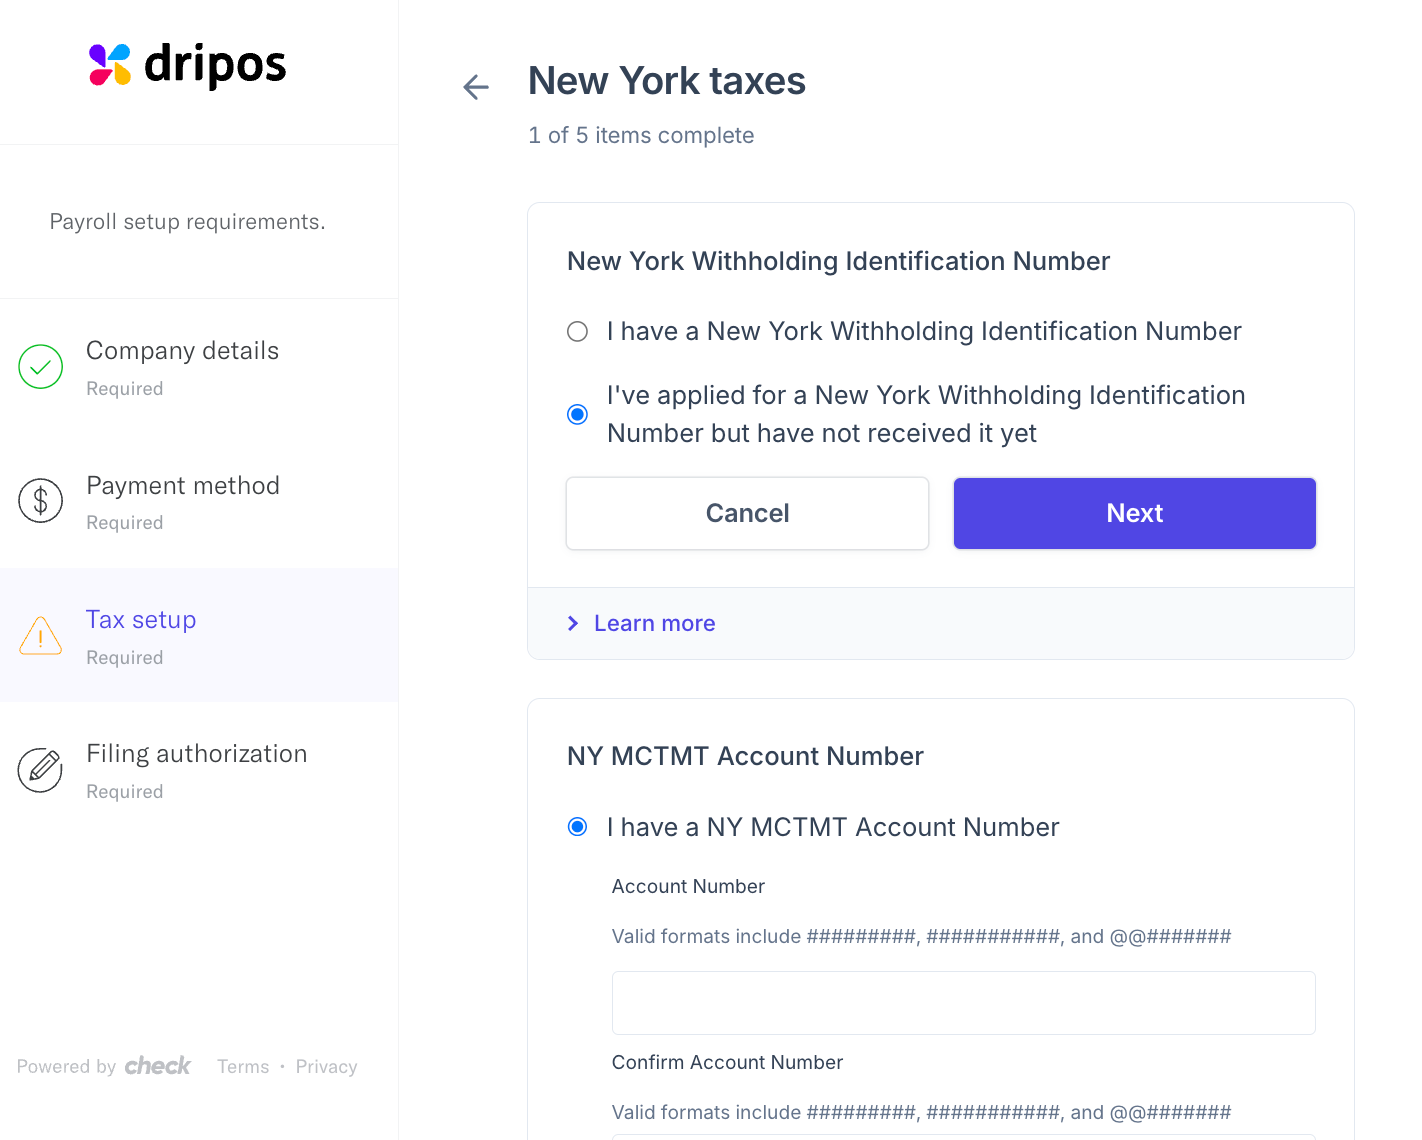 Sign the required authorization forms.
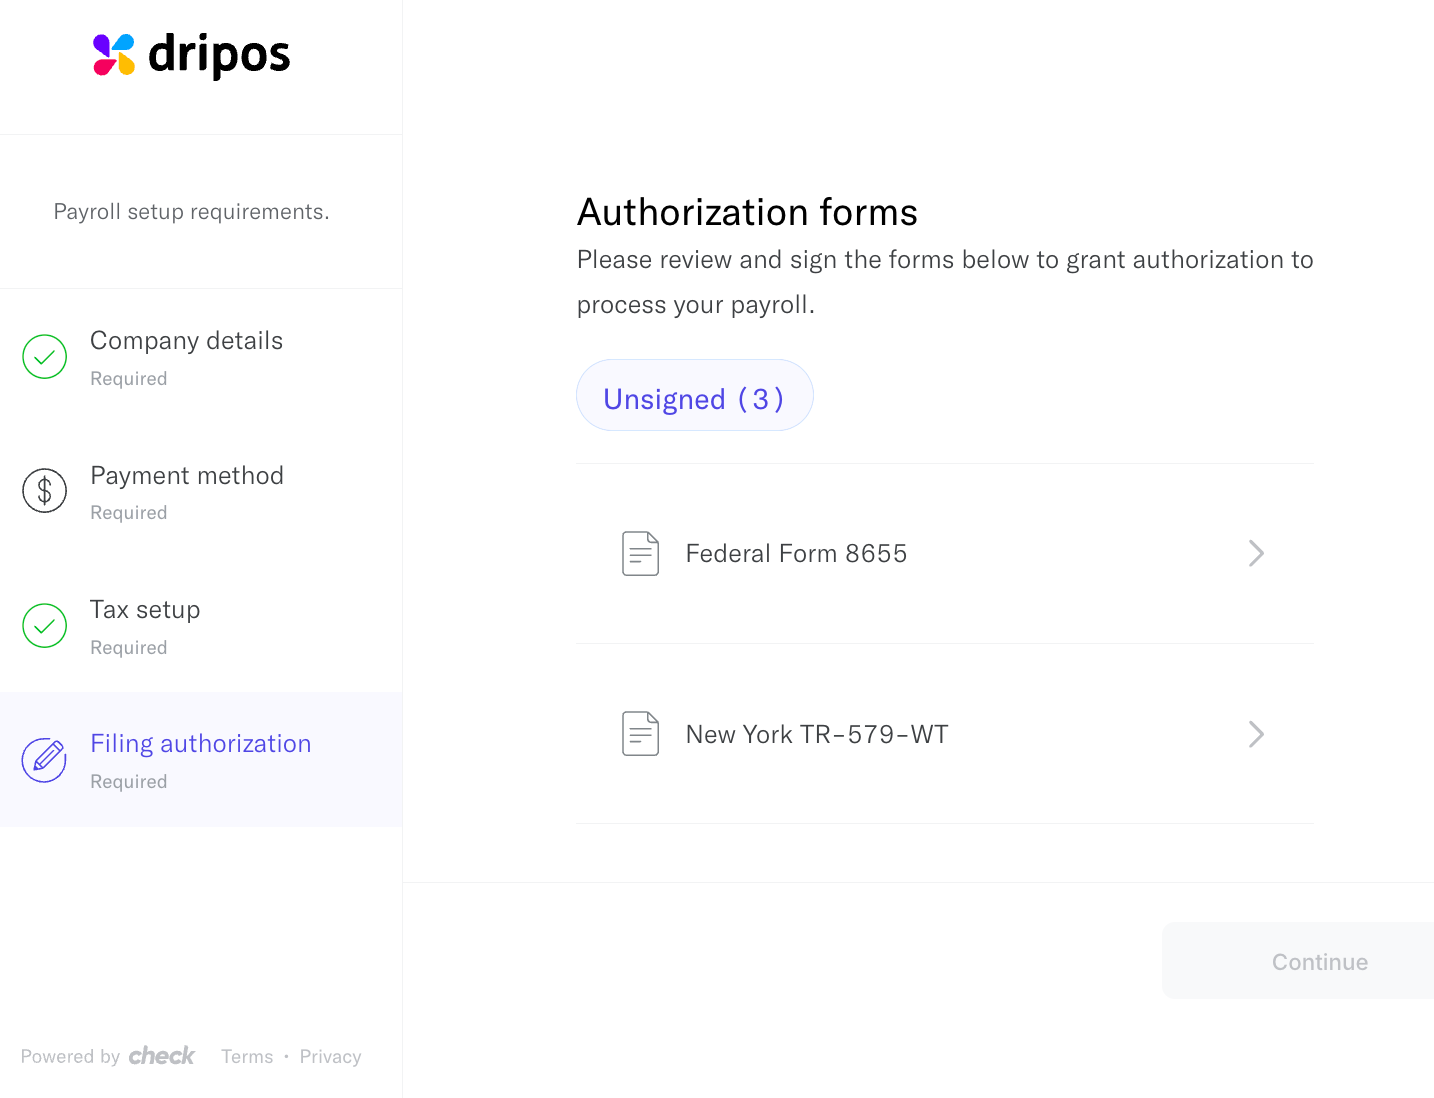 You may need to reach out to your onboarding specialist to set the start date in order to sign these forms.
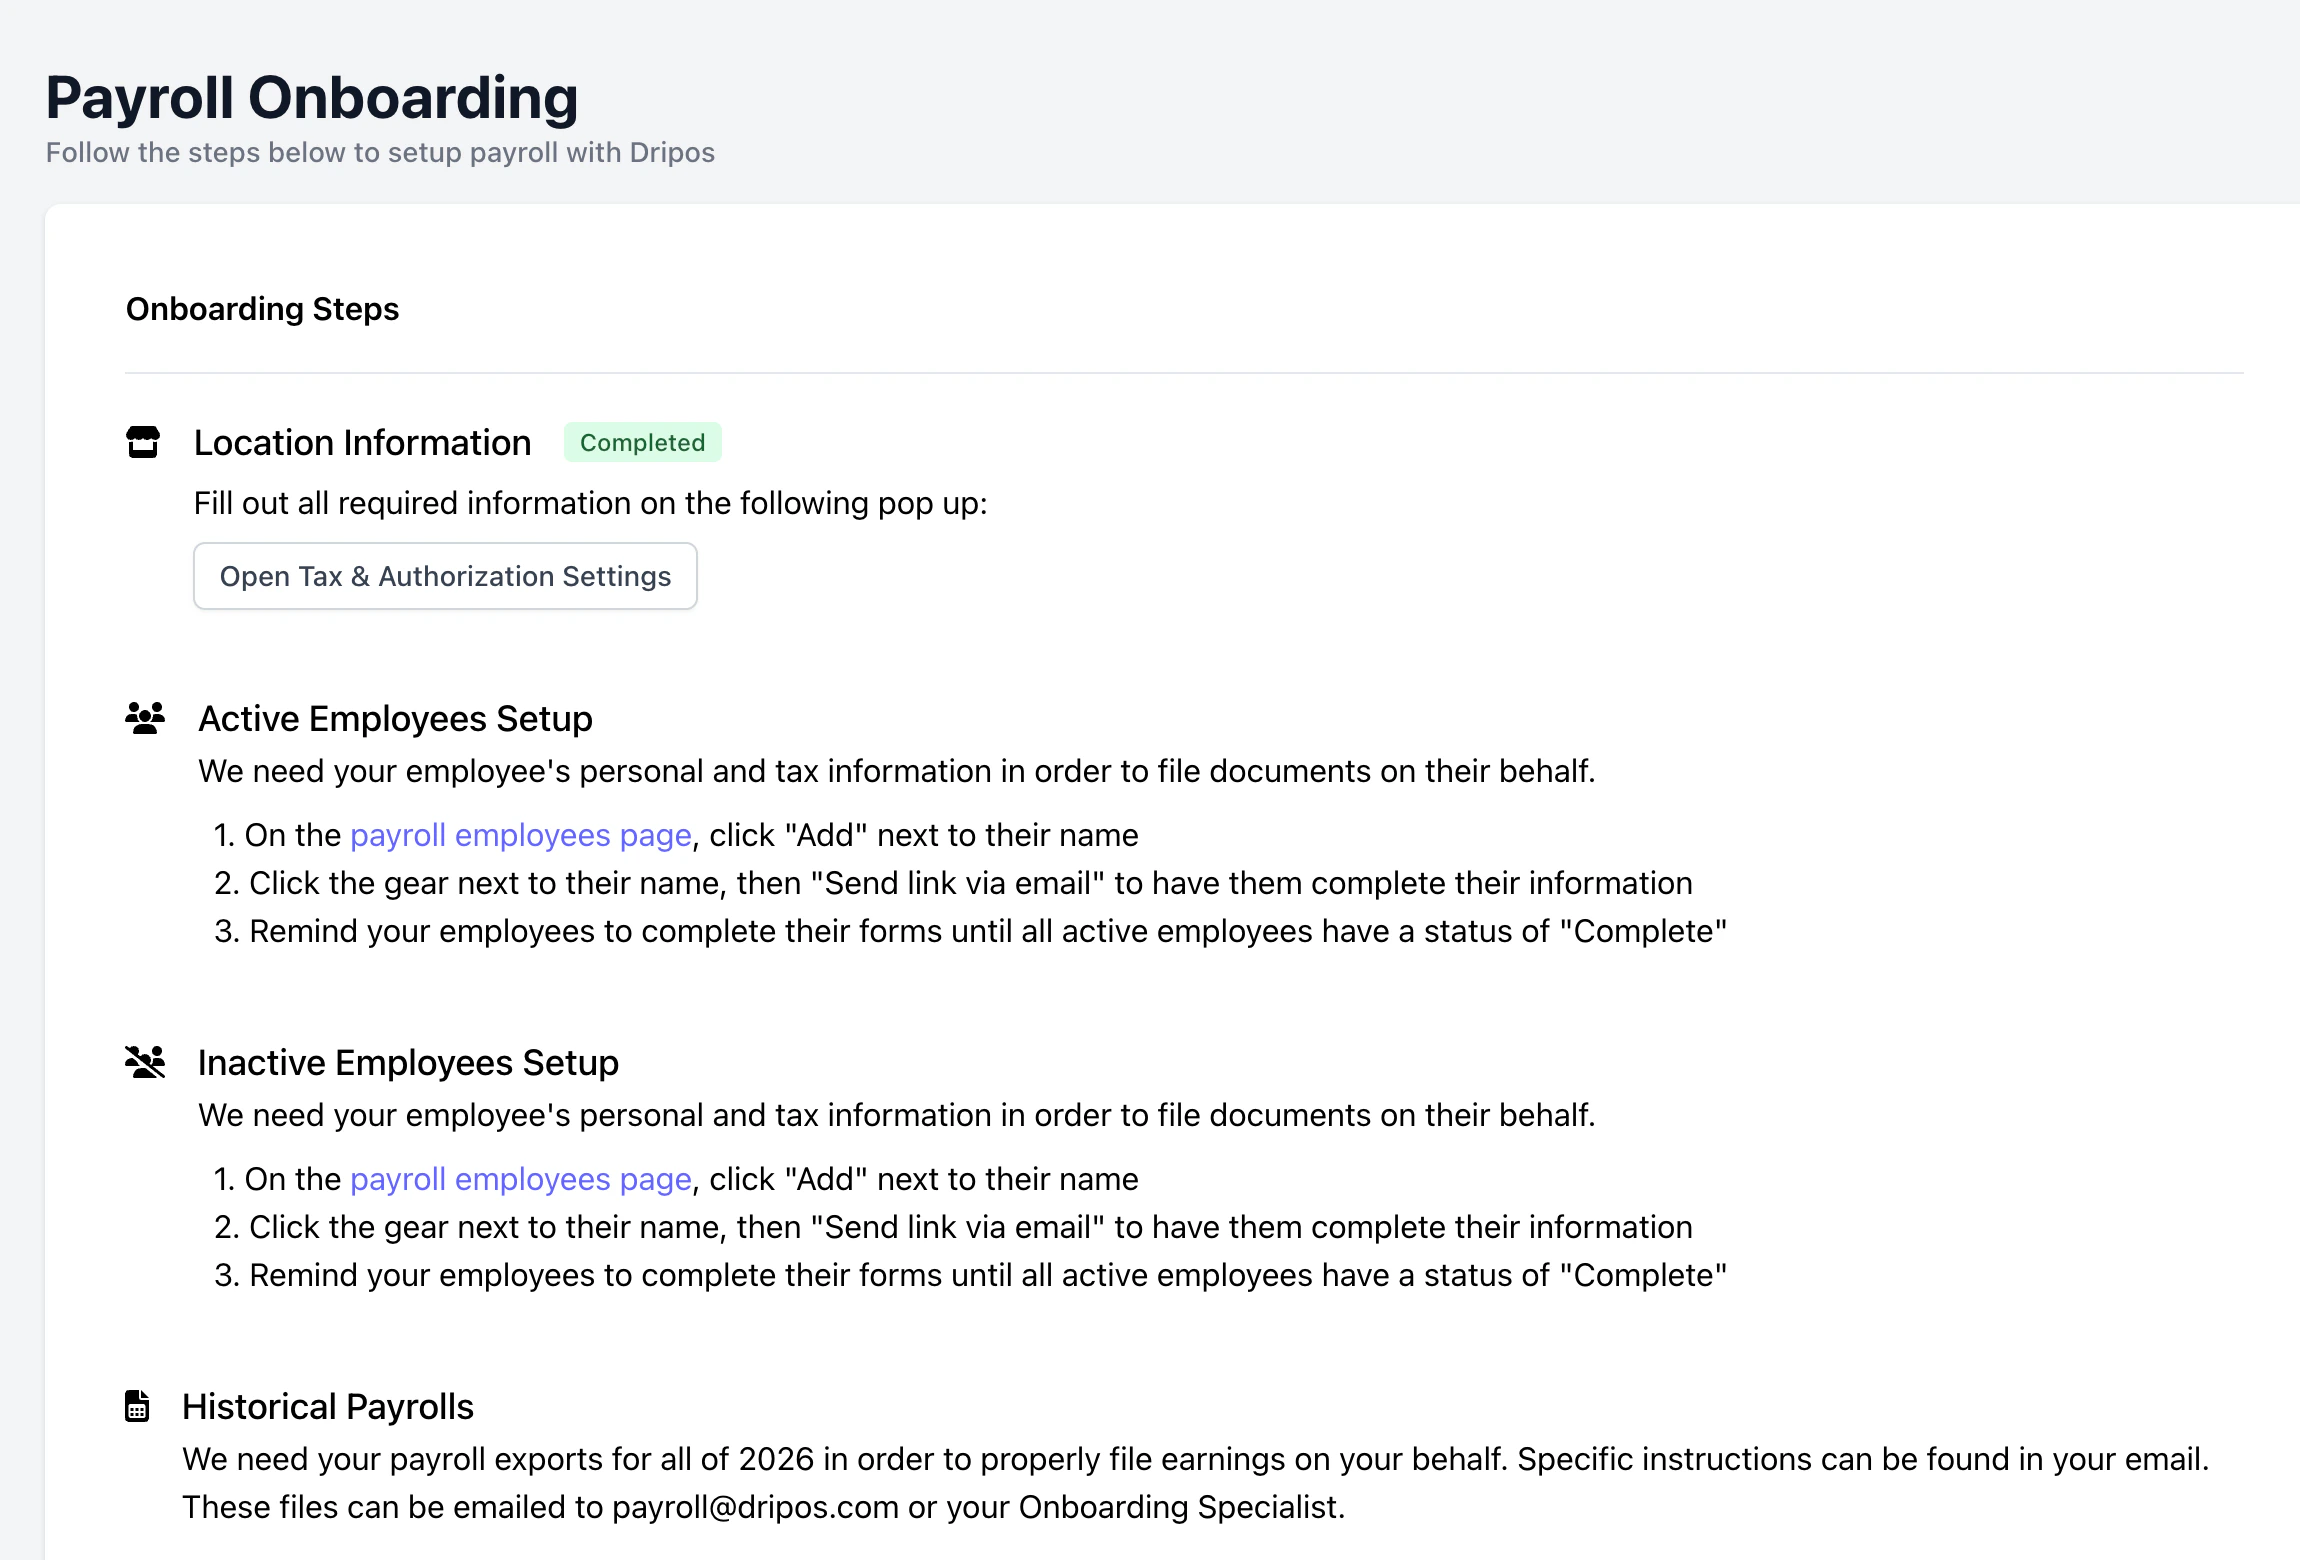
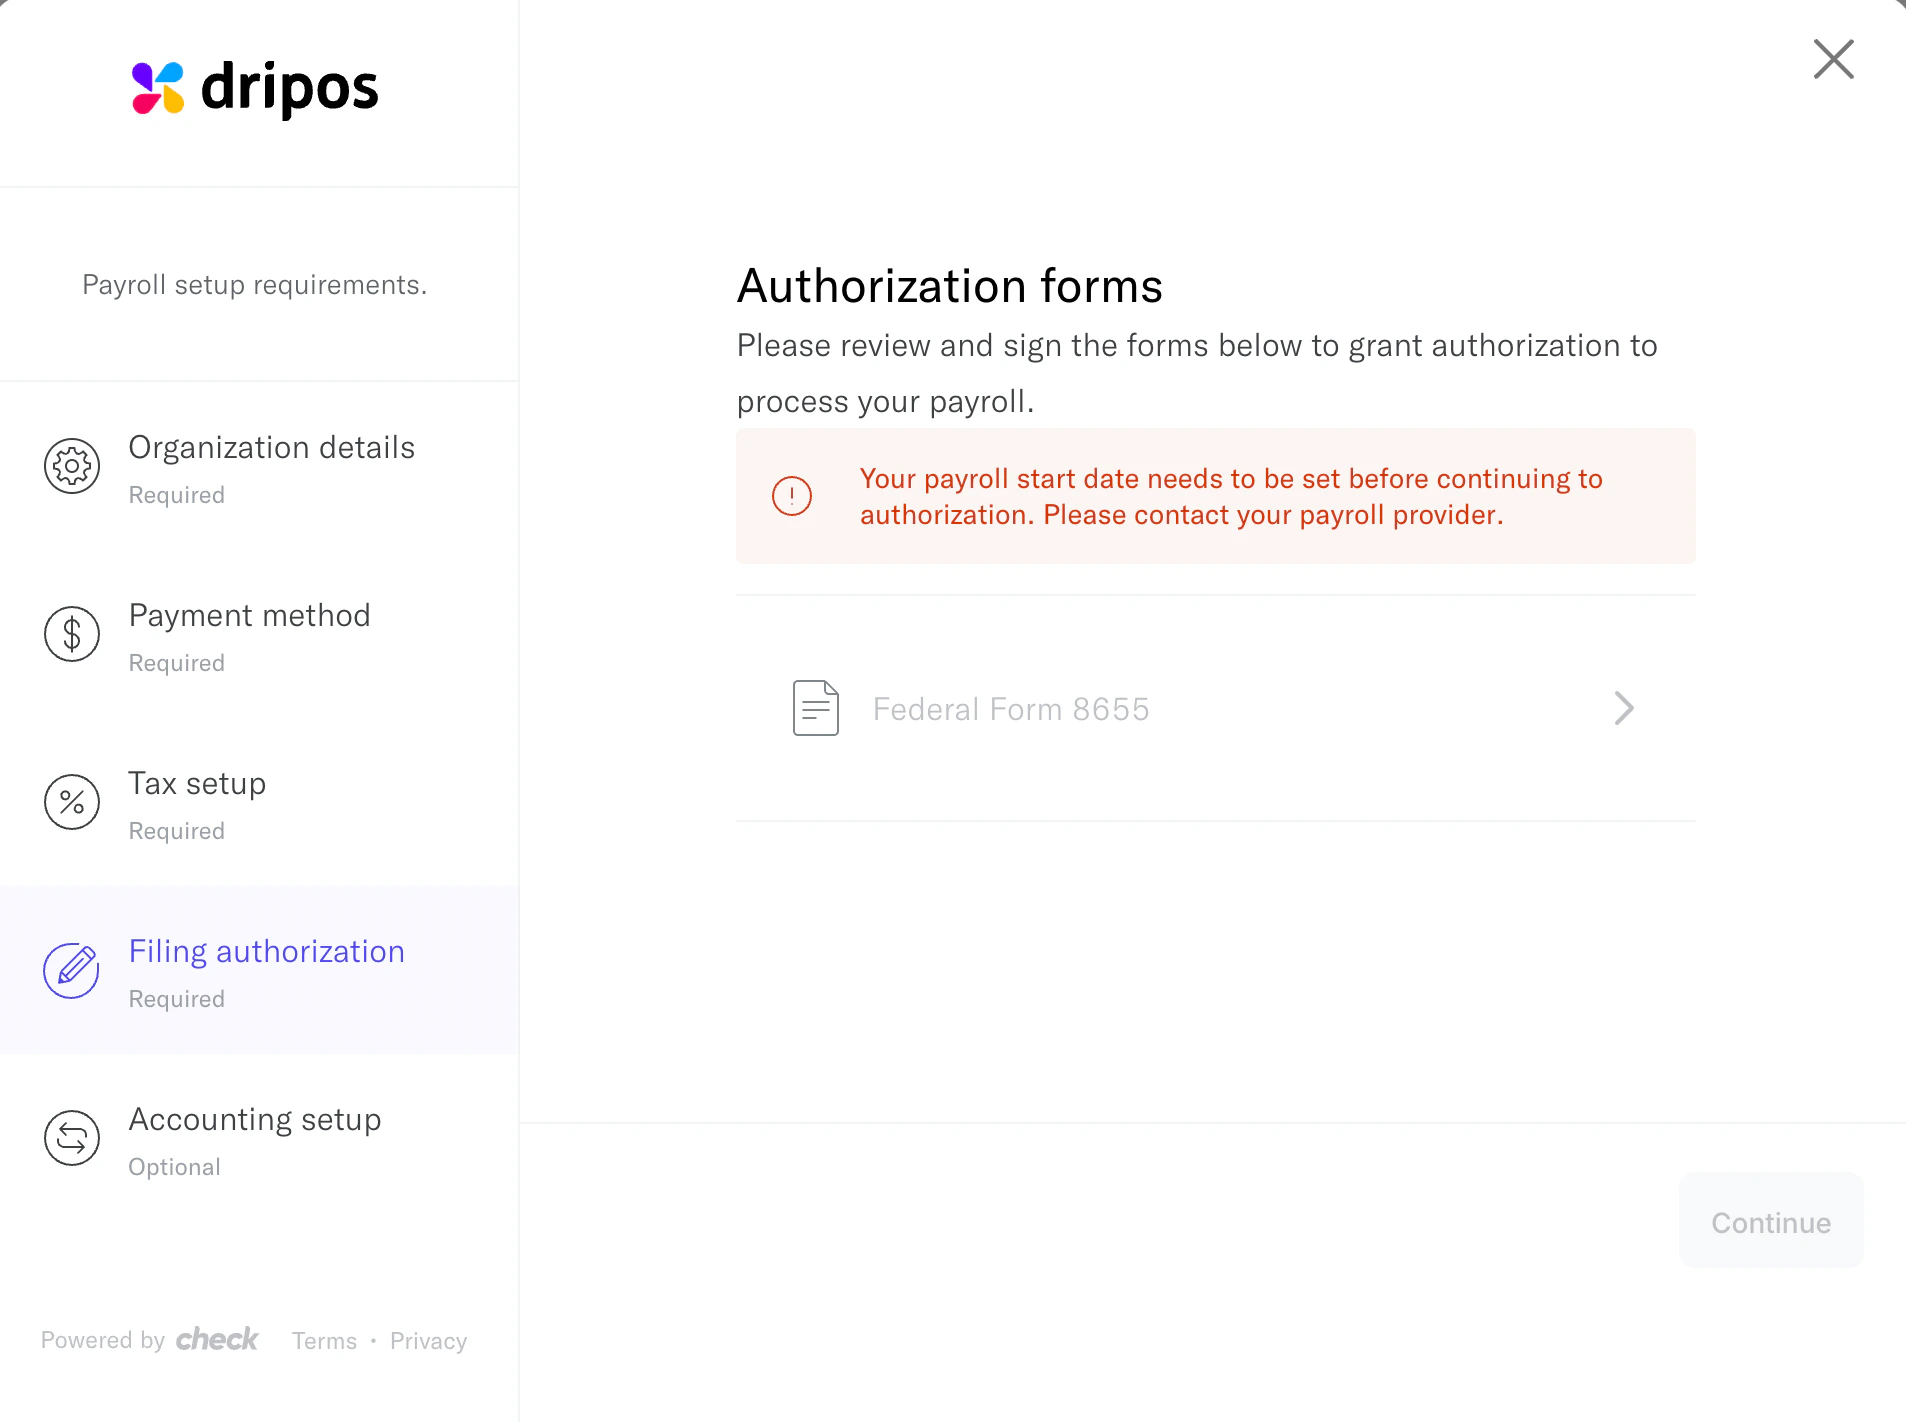 Now that the location information has been completed, reach out to your onboarding specialist to confirm next steps!
 ### Add Employees
Create employees on your Dripos [**Team**](dashboard.dripos.com/employees) before adding them to payroll.
Learn how to create employees [here](/team/setup/setup-employees).
**For Existing Businesses**
For employees that have been paid this year but are no longer employed at your shop, you must still create their employee profiles and input their personal information.
Follow the **Inactive Employees** instructions below for each terminated employee.
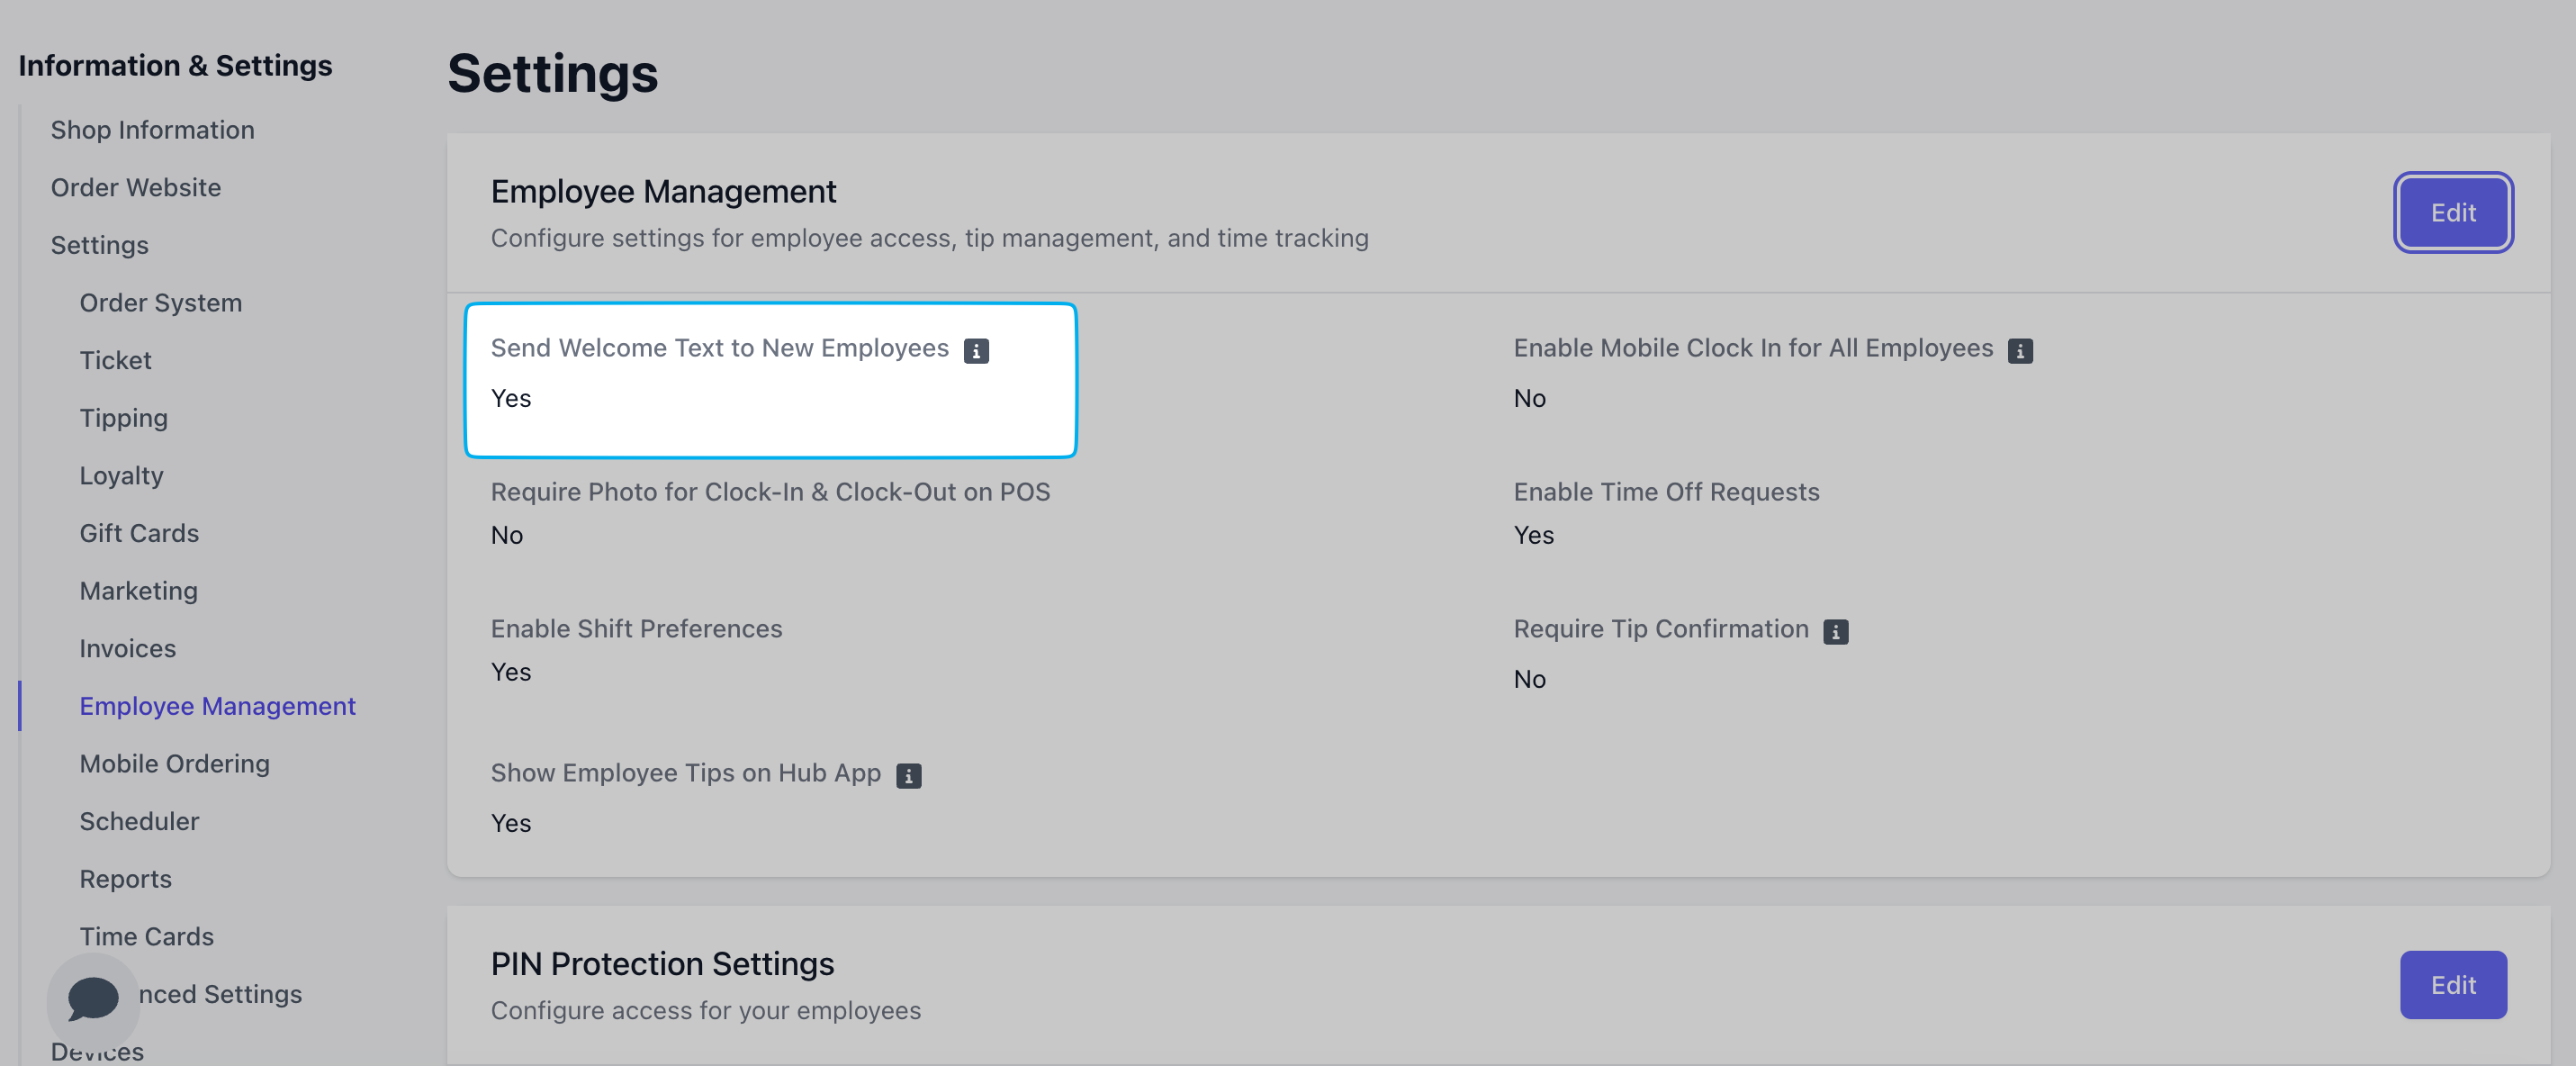
Enable **Send Welcome Text to New Employees** in **Dashboard Settings** > [Employee Management](https://dashboard.dripos.com/settings/employee-management) to send new employees a welcome text with their PIN and a link to download the Dripos Hub App.
### Add Employees
Create employees on your Dripos [**Team**](dashboard.dripos.com/employees) before adding them to payroll.
Learn how to create employees [here](/team/setup/setup-employees).
**For Existing Businesses**
For employees that have been paid this year but are no longer employed at your shop, you must still create their employee profiles and input their personal information.
Follow the **Inactive Employees** instructions below for each terminated employee.
Enable **Send Welcome Text to New Employees** in **Dashboard Settings** > [Employee Management](https://dashboard.dripos.com/settings/employee-management) to send new employees a welcome text with their PIN and a link to download the Dripos Hub App.
 Add employees to your Dripos [**Team**](https://dashboard.dripos.com/team). Learn how to create employees [here](/team/setup/setup-employees).
Navigate to **Finance** > **Payroll** > **Employees** > [**Not Added** tab](https://dashboard.dripos.com/payroll/employees?tab=not_added)
Add employees to your Dripos [**Team**](https://dashboard.dripos.com/team). Learn how to create employees [here](/team/setup/setup-employees).
Navigate to **Finance** > **Payroll** > **Employees** > [**Not Added** tab](https://dashboard.dripos.com/payroll/employees?tab=not_added)
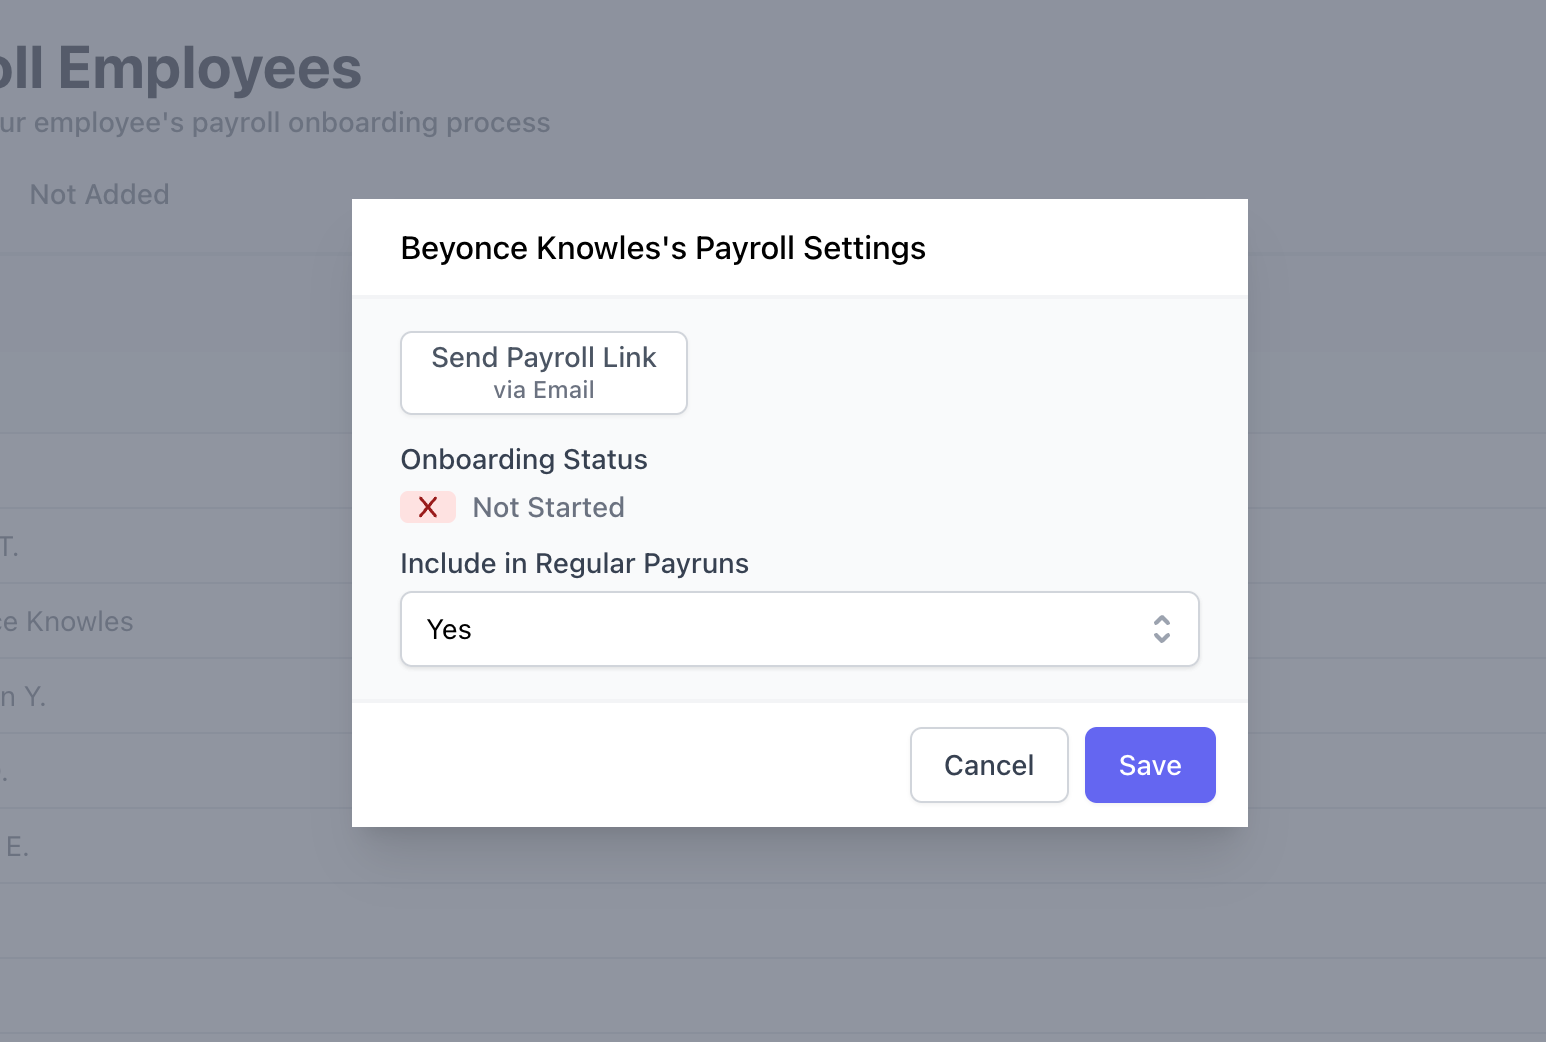
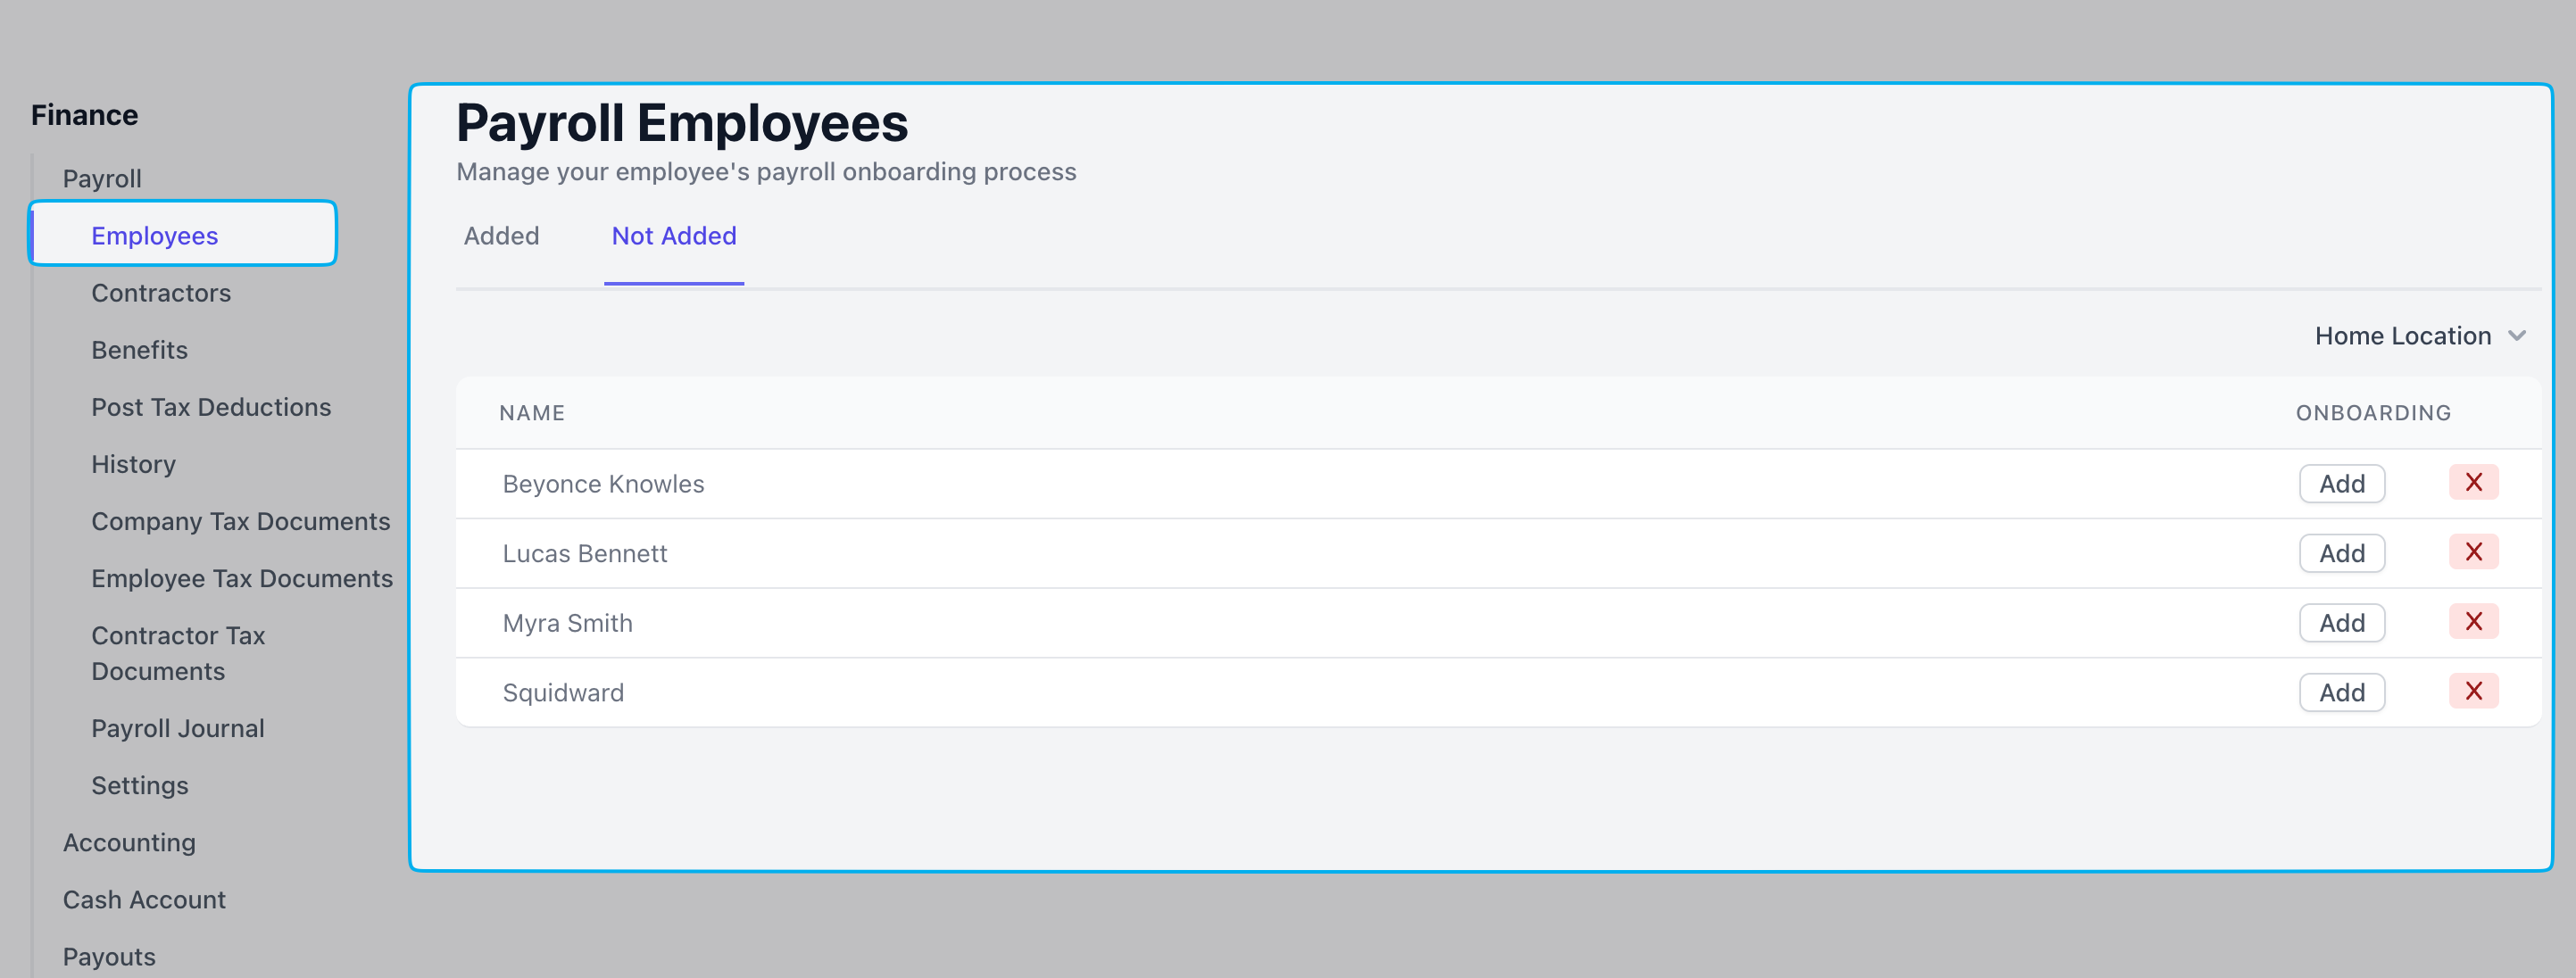 Click **Add** and **Send Payroll Link** to each employee. This will send a link to their email for them to fill out W-4 and direct deposit information.
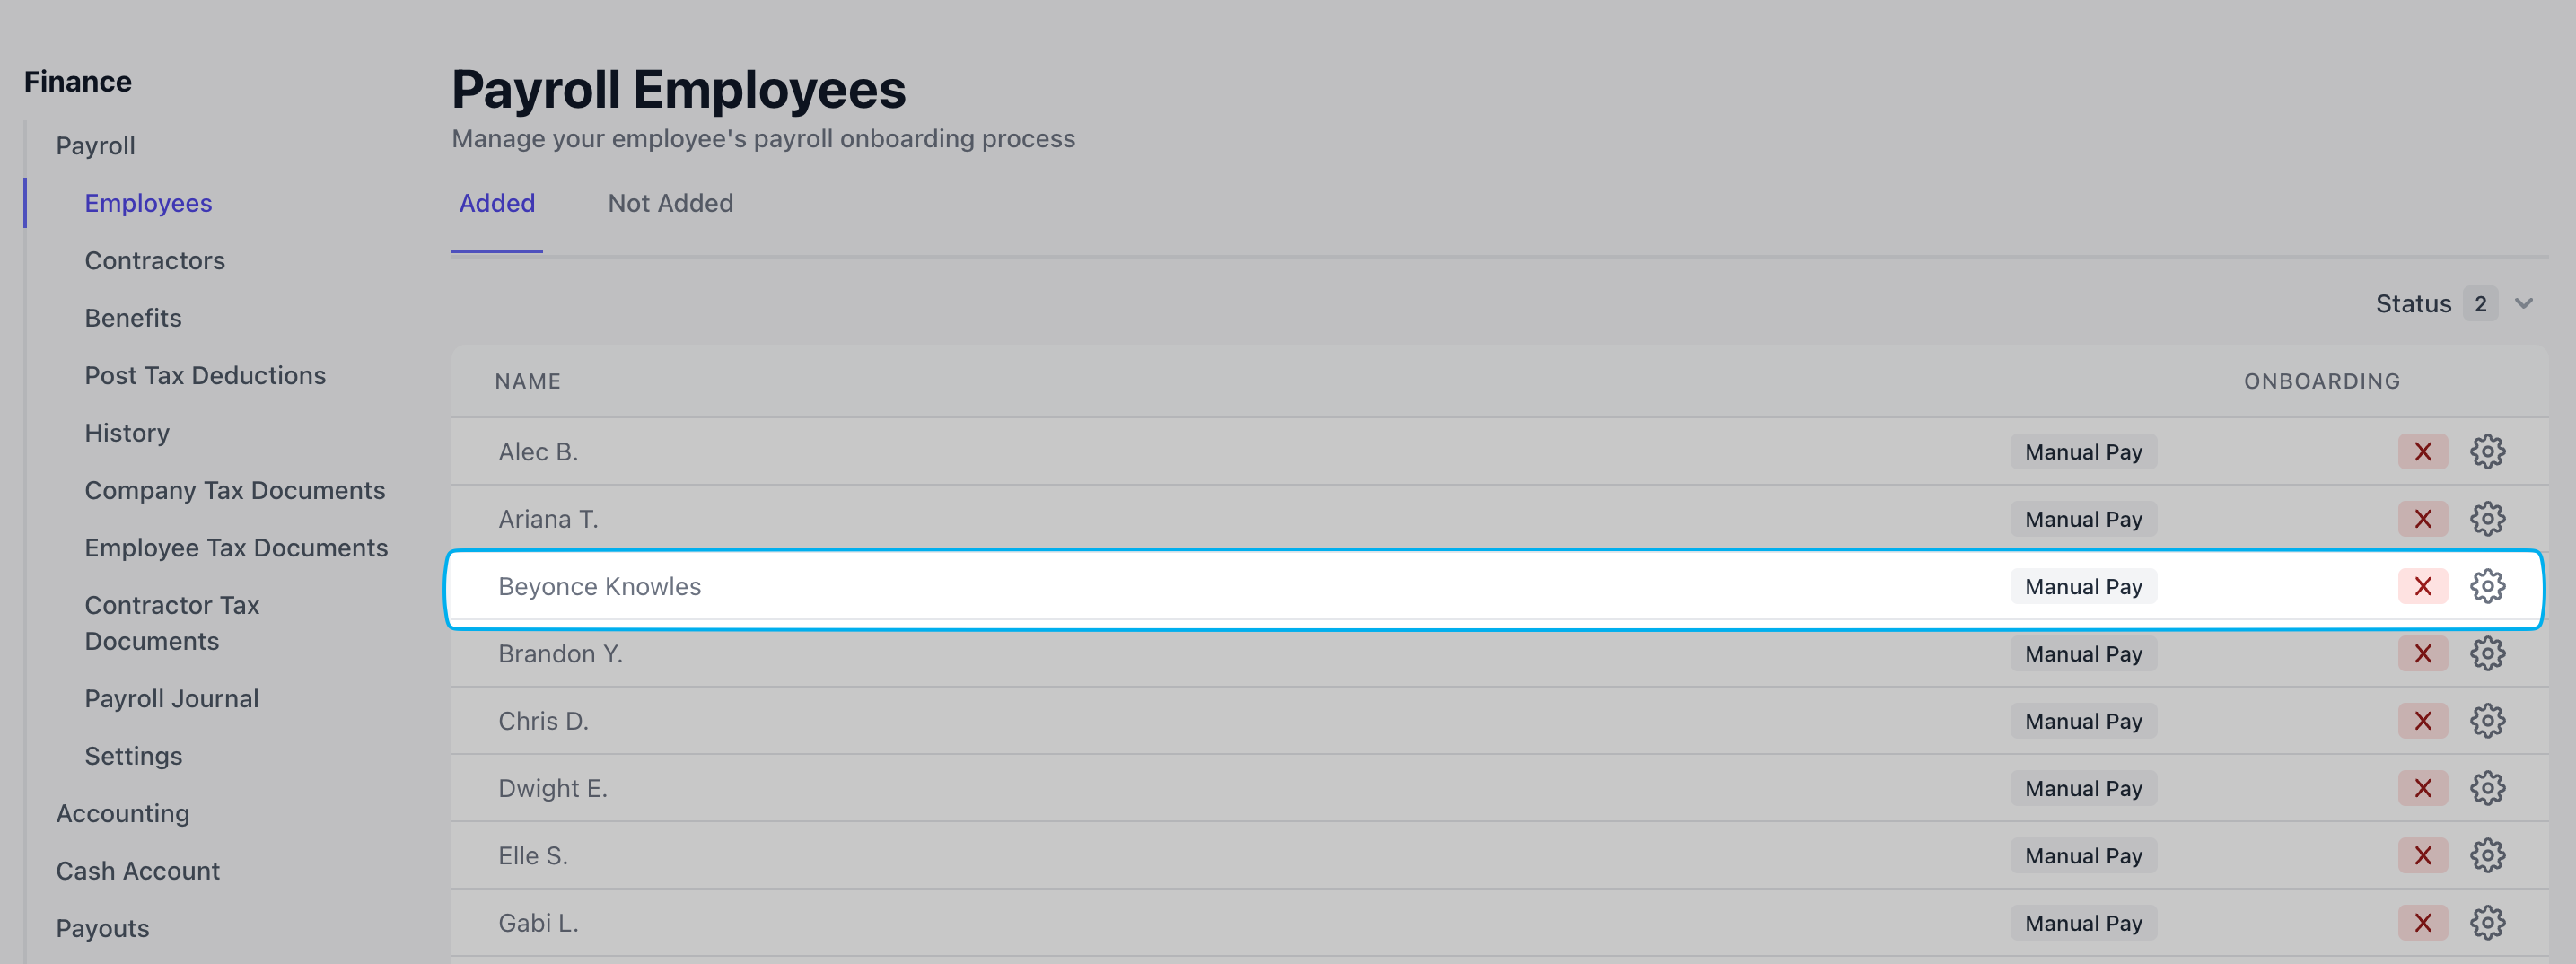
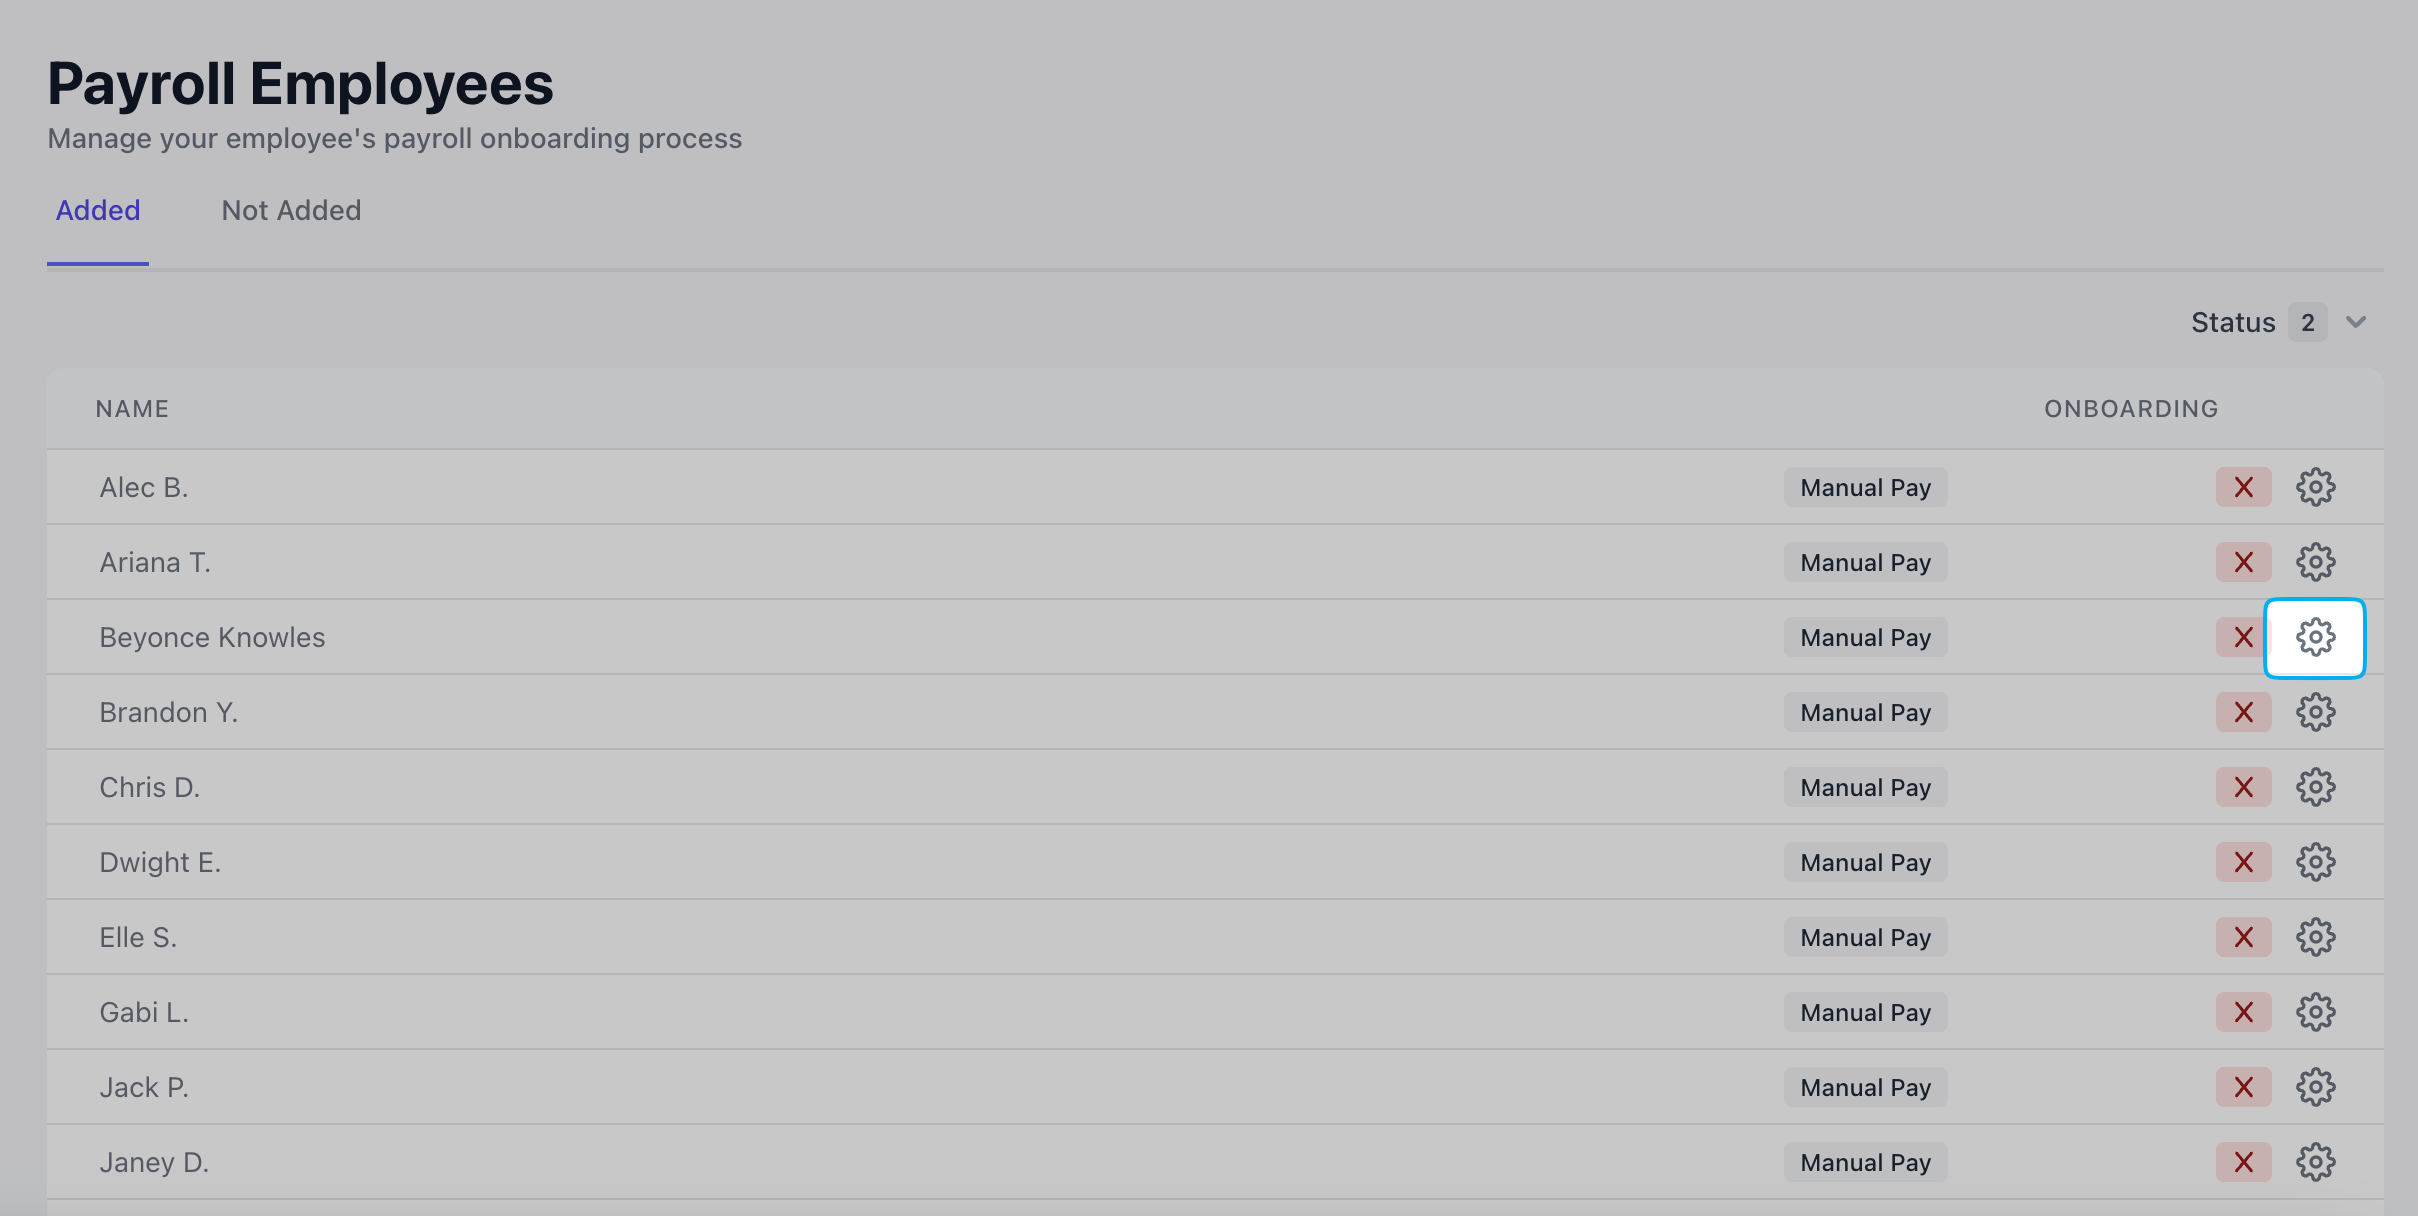
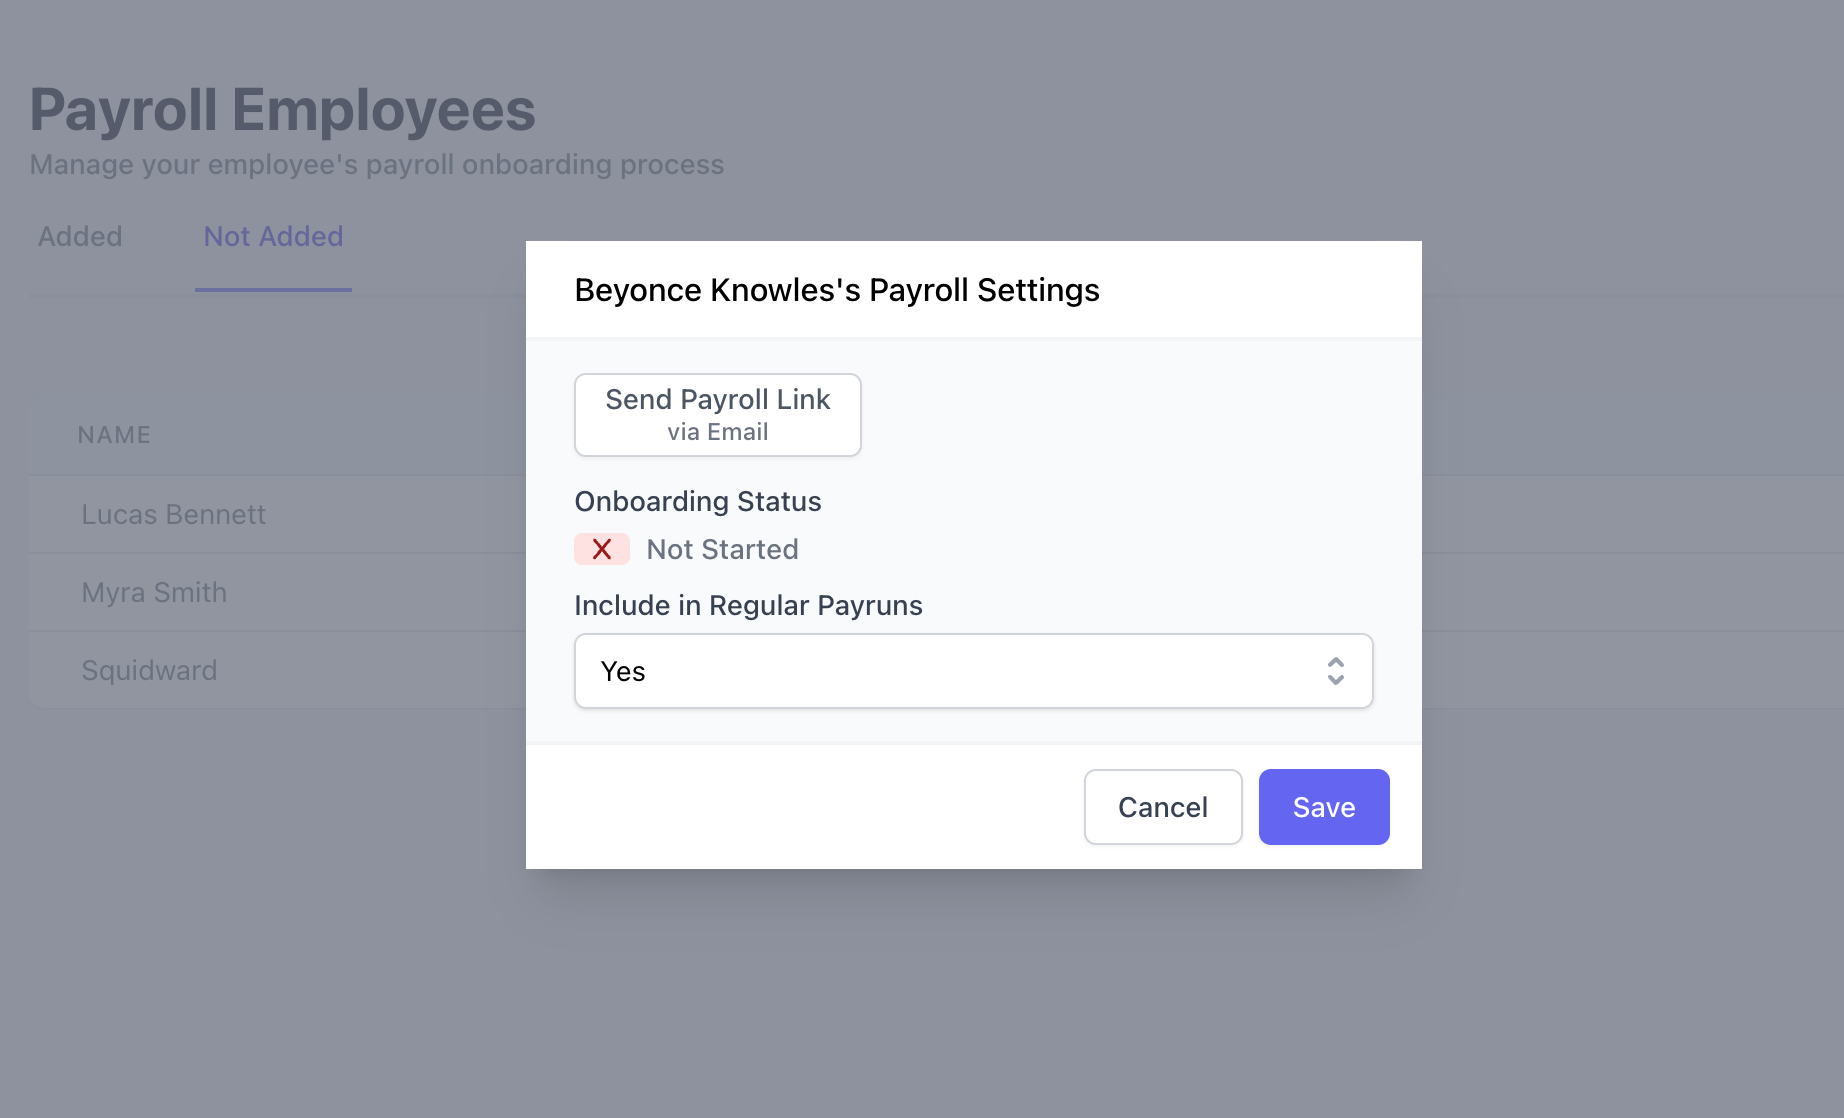 The active employee is now added to payroll under the [**Added tab**](https://dashboard.dripos.com/payroll/employees?tab=added).
A red ❌ next to the employee means their payroll onboarding is incomplete.
A green checkmark ✅ next to the employee means their payroll onboarding is complete.
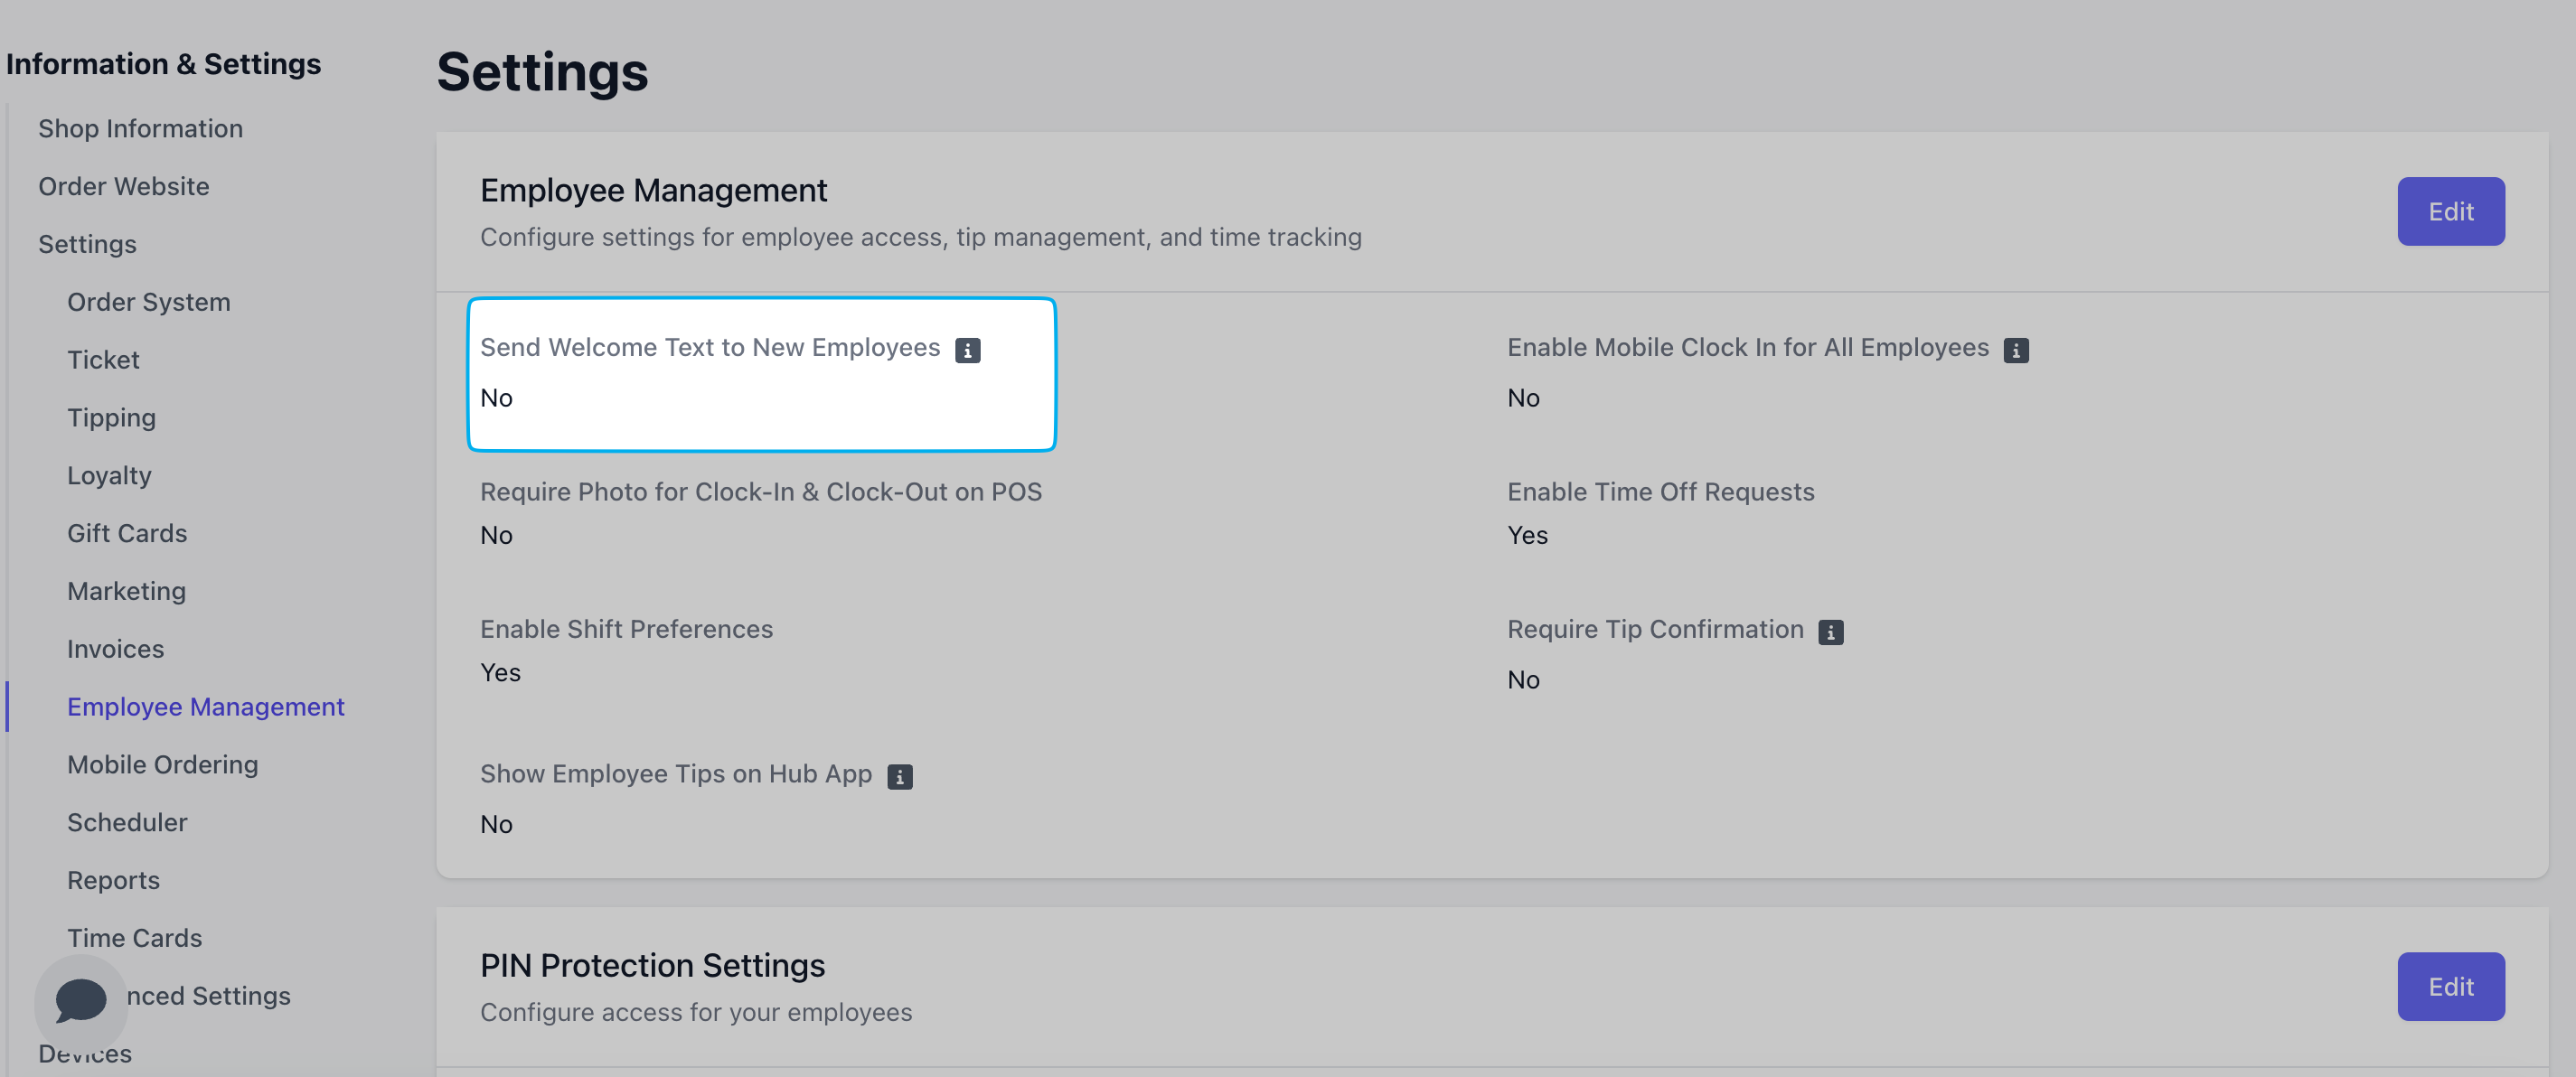
 Disable **Send Welcome Text to New Employees** in **Dashboard Settings** > [Employee Management](https://dashboard.dripos.com/settings/employee-management) to prevent inactive employees from receiving welcome texts.
 Add employees to your Dripos [**Team**](https://dashboard.dripos.com/team). Learn how to create employees [here](/team/setup/setup-employees).
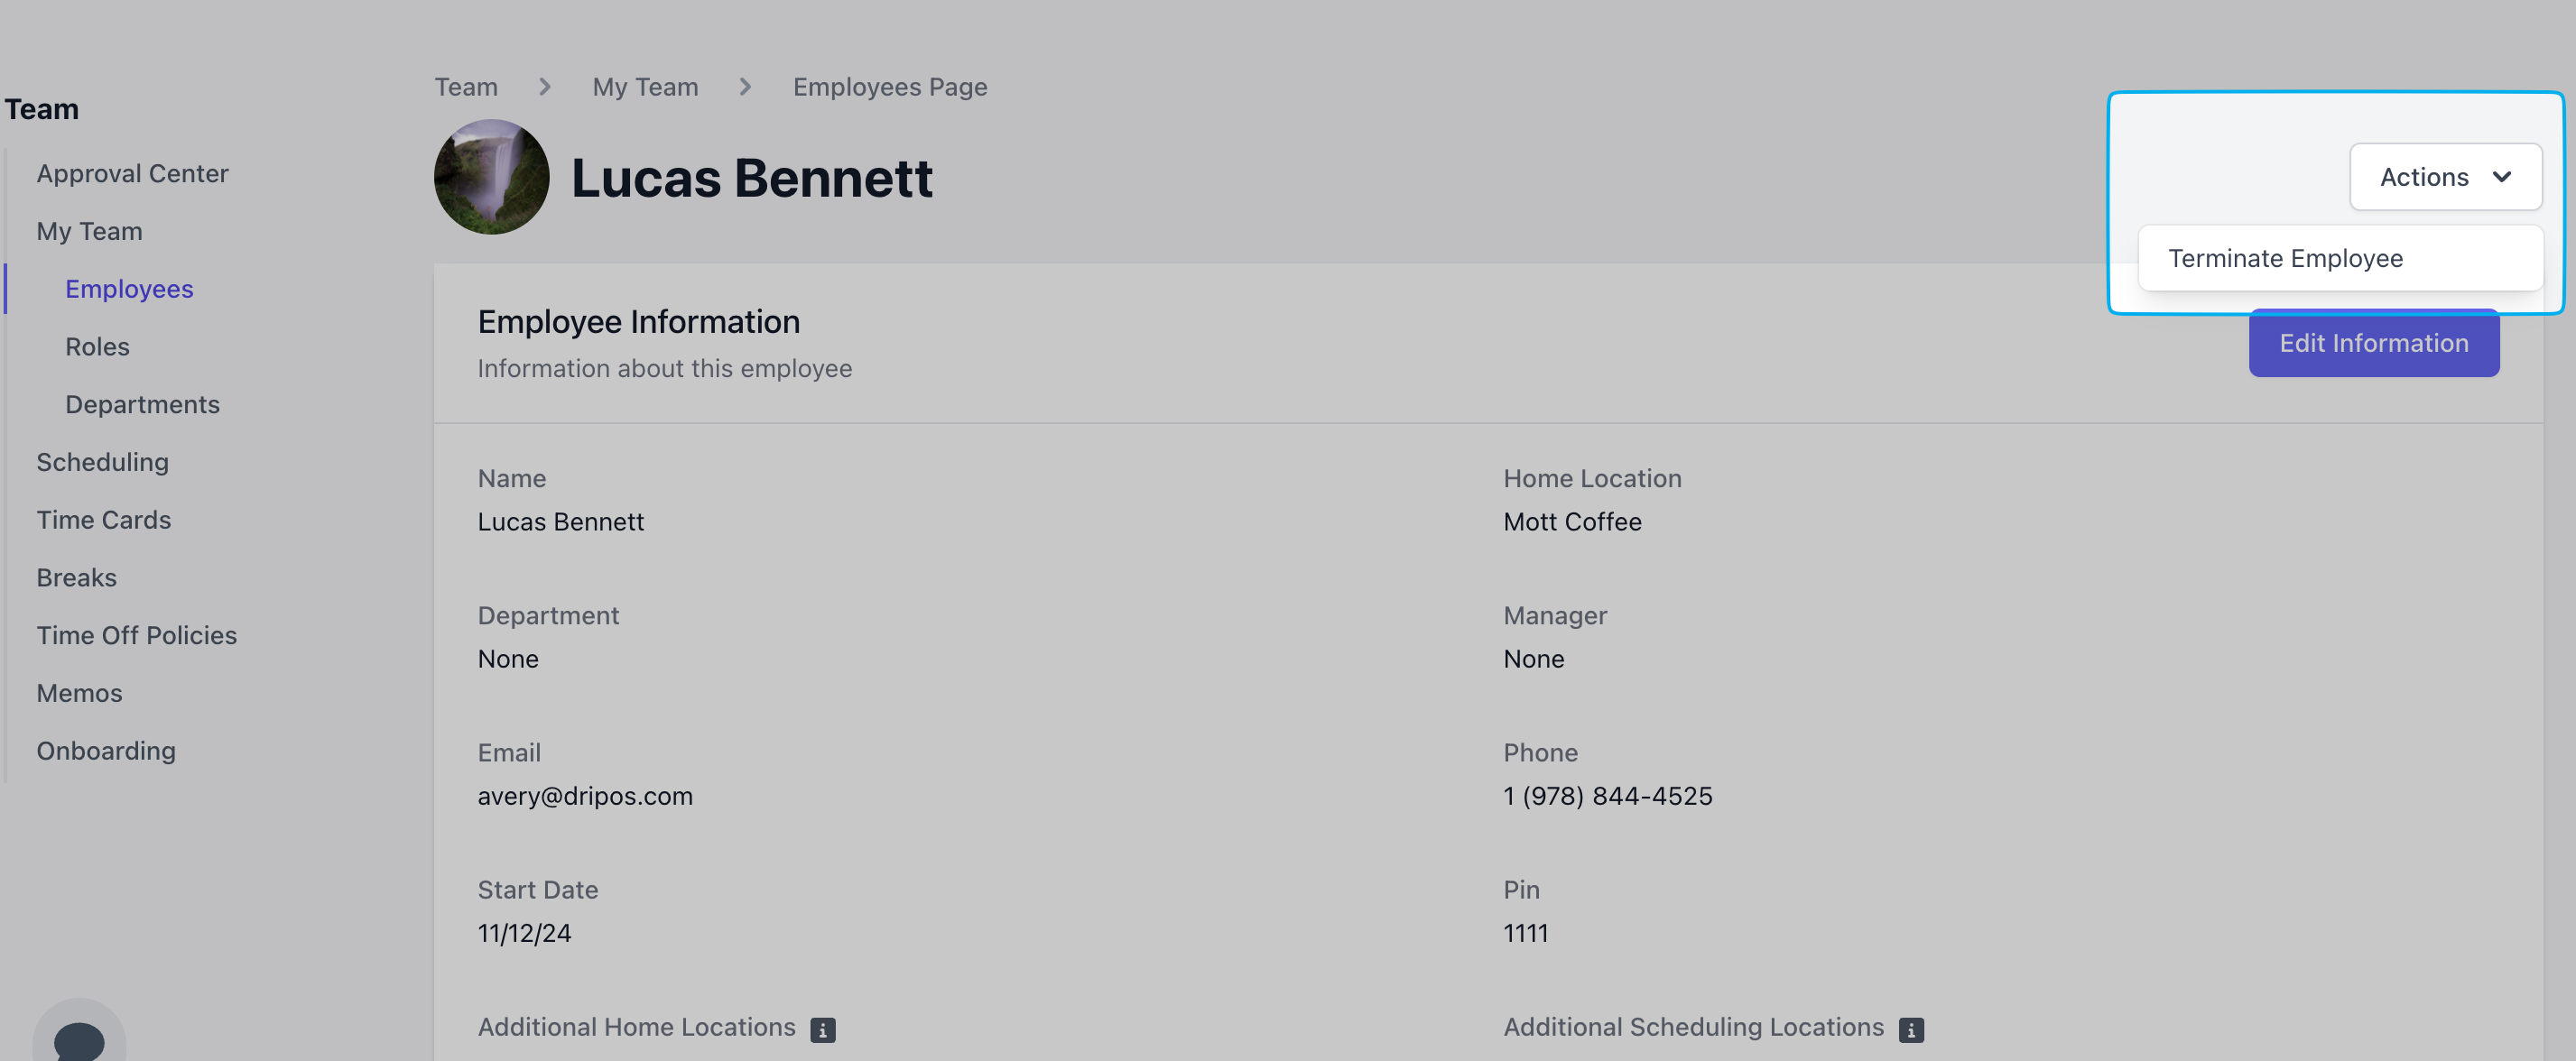
Once the employee is created, **View** their profile and use **Actions** in the top right corner to **Terminate** them
Add employees to your Dripos [**Team**](https://dashboard.dripos.com/team). Learn how to create employees [here](/team/setup/setup-employees).
Once the employee is created, **View** their profile and use **Actions** in the top right corner to **Terminate** them
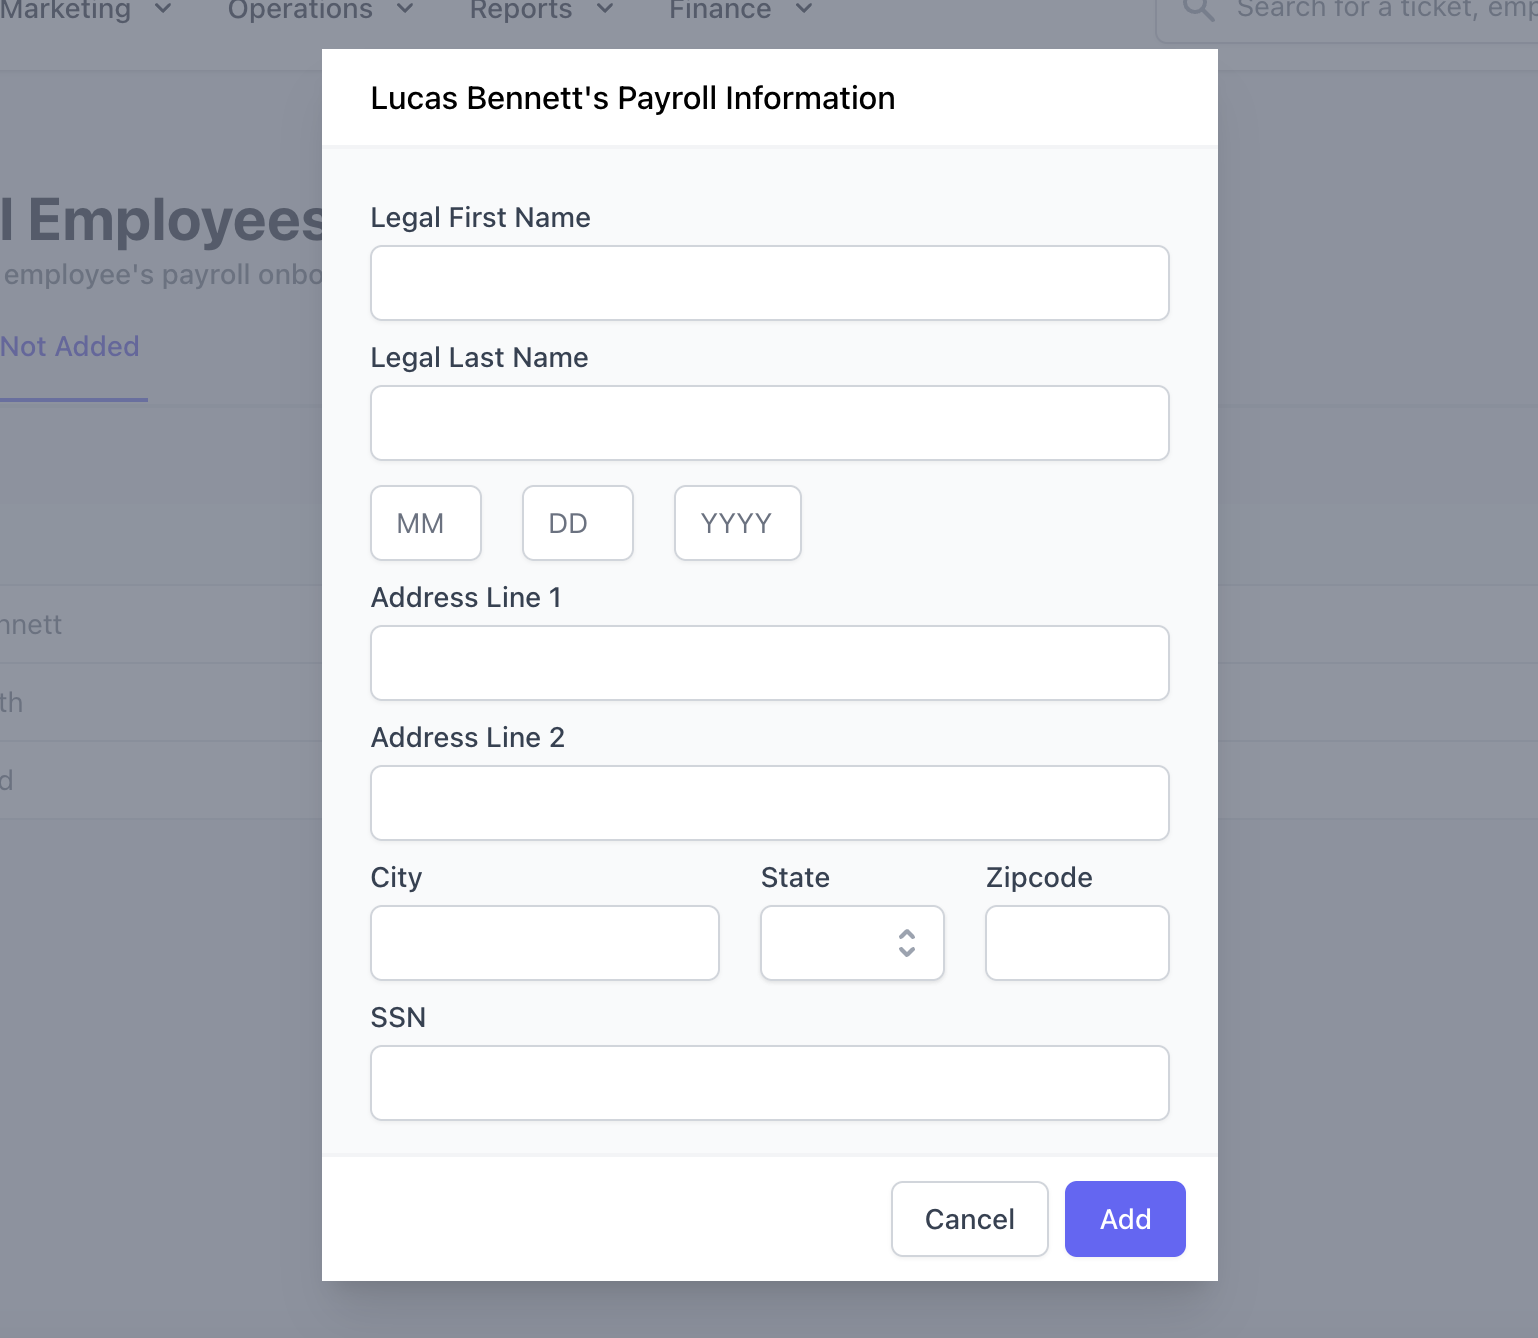
 Make sure to have their address, birthdate, and social security number ready before proceeding!
Navigate to **Finance** > **Payroll** > **Employees** > [**Not Added** tab](https://dashboard.dripos.com/payroll/employees?tab=not_added) and **Add** the inactive employee
Enter the social security number without any dashes, i.e., *987654321*
Make sure to have their address, birthdate, and social security number ready before proceeding!
Navigate to **Finance** > **Payroll** > **Employees** > [**Not Added** tab](https://dashboard.dripos.com/payroll/employees?tab=not_added) and **Add** the inactive employee
Enter the social security number without any dashes, i.e., *987654321*
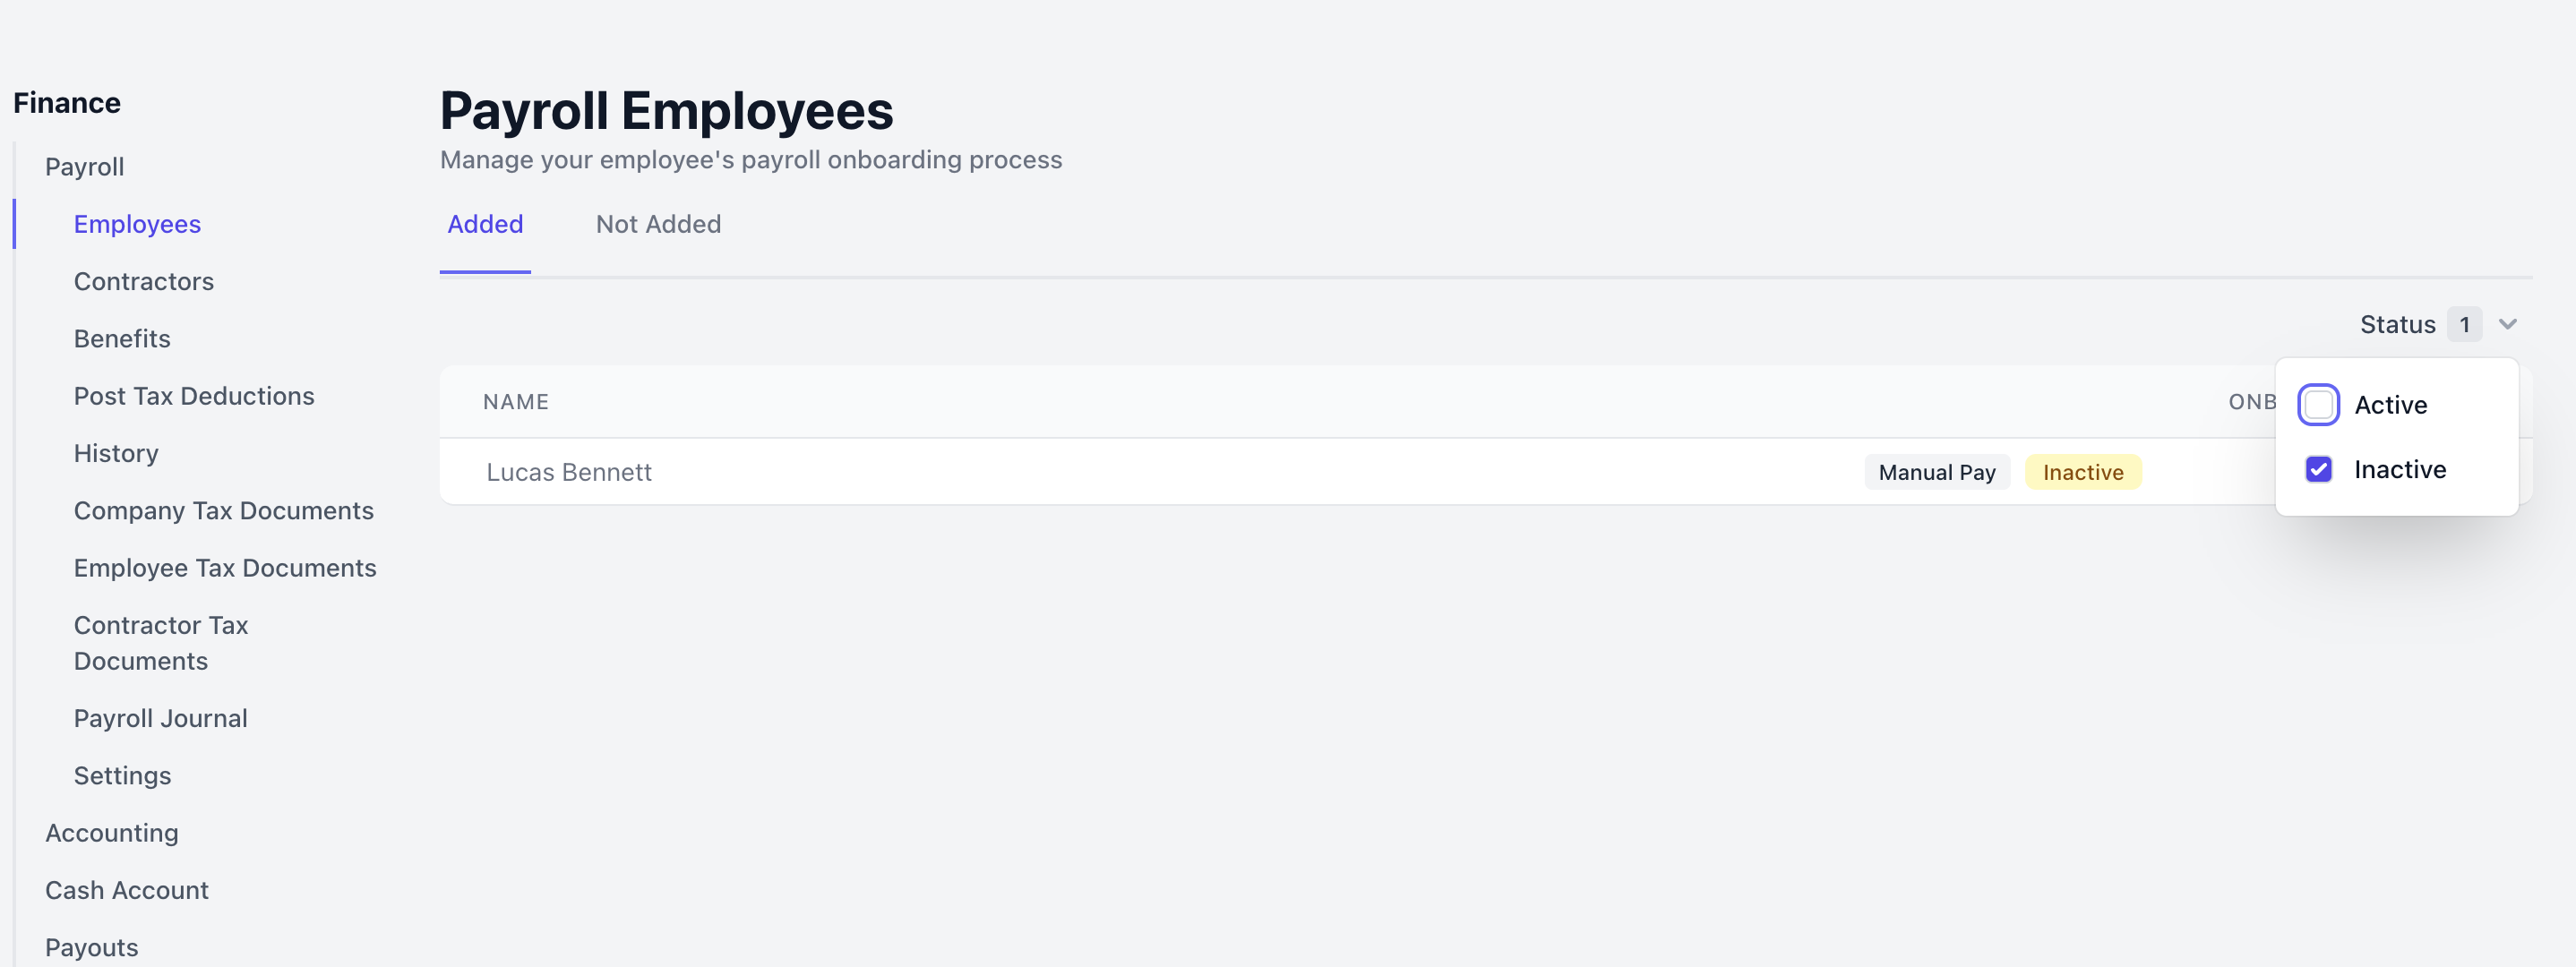
 The inactive employee is now added to payroll under the [**Added** tab](https://dashboard.dripos.com/payroll/employees?tab=added).
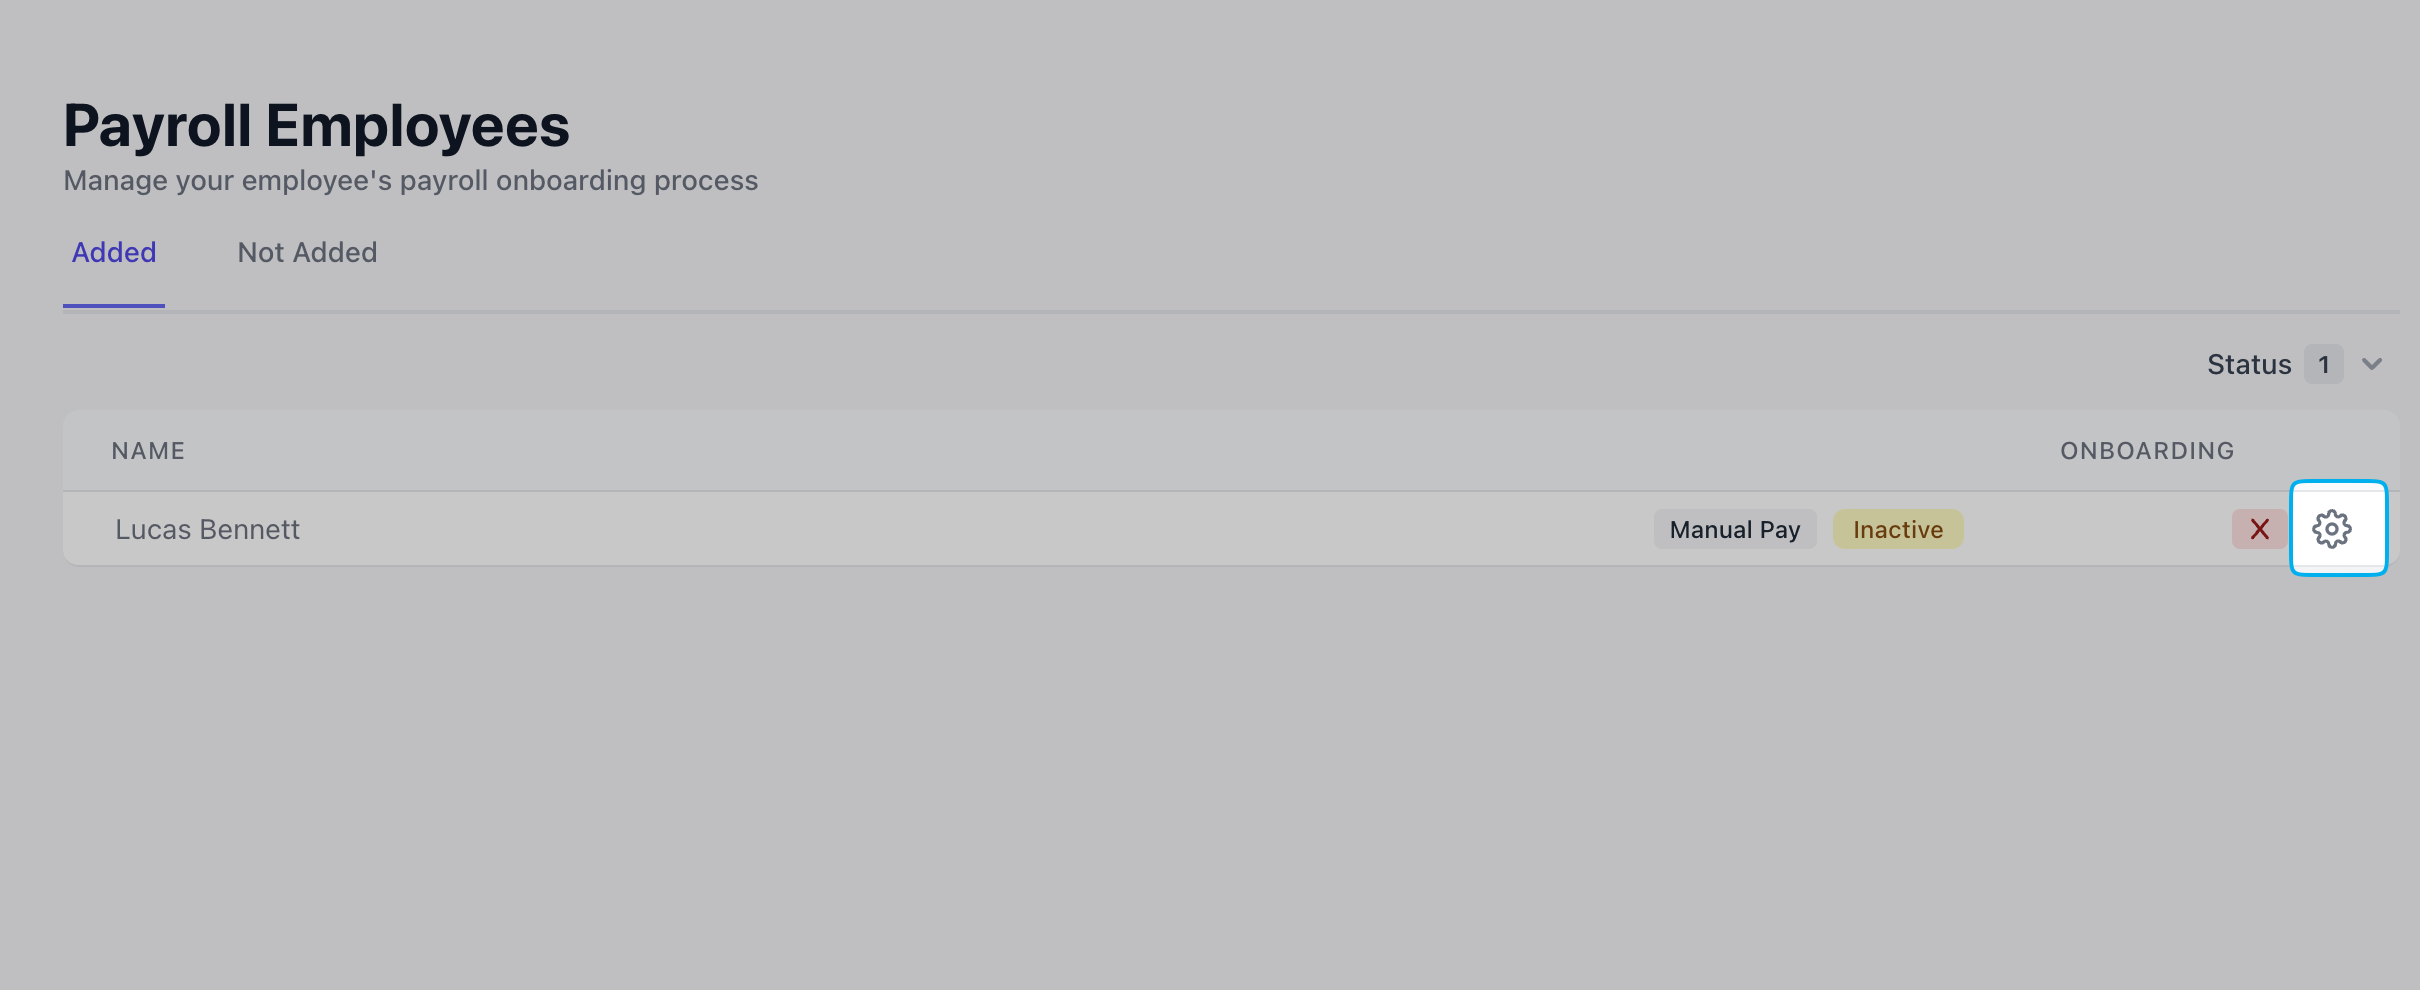
Filter by **Status** > **Inactive** to view all inactive employees added to payroll for the calendar year
The inactive employee is now added to payroll under the [**Added** tab](https://dashboard.dripos.com/payroll/employees?tab=added).
Filter by **Status** > **Inactive** to view all inactive employees added to payroll for the calendar year
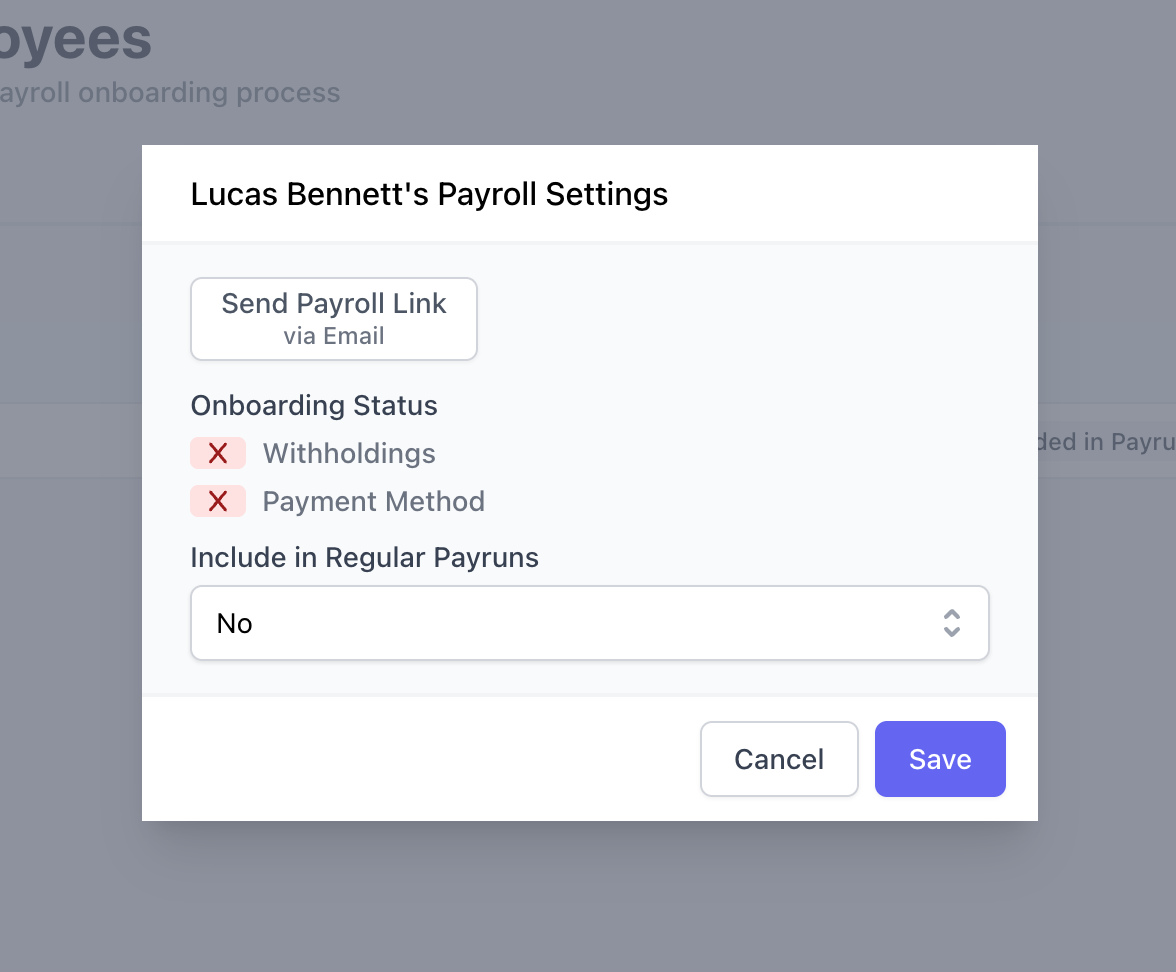
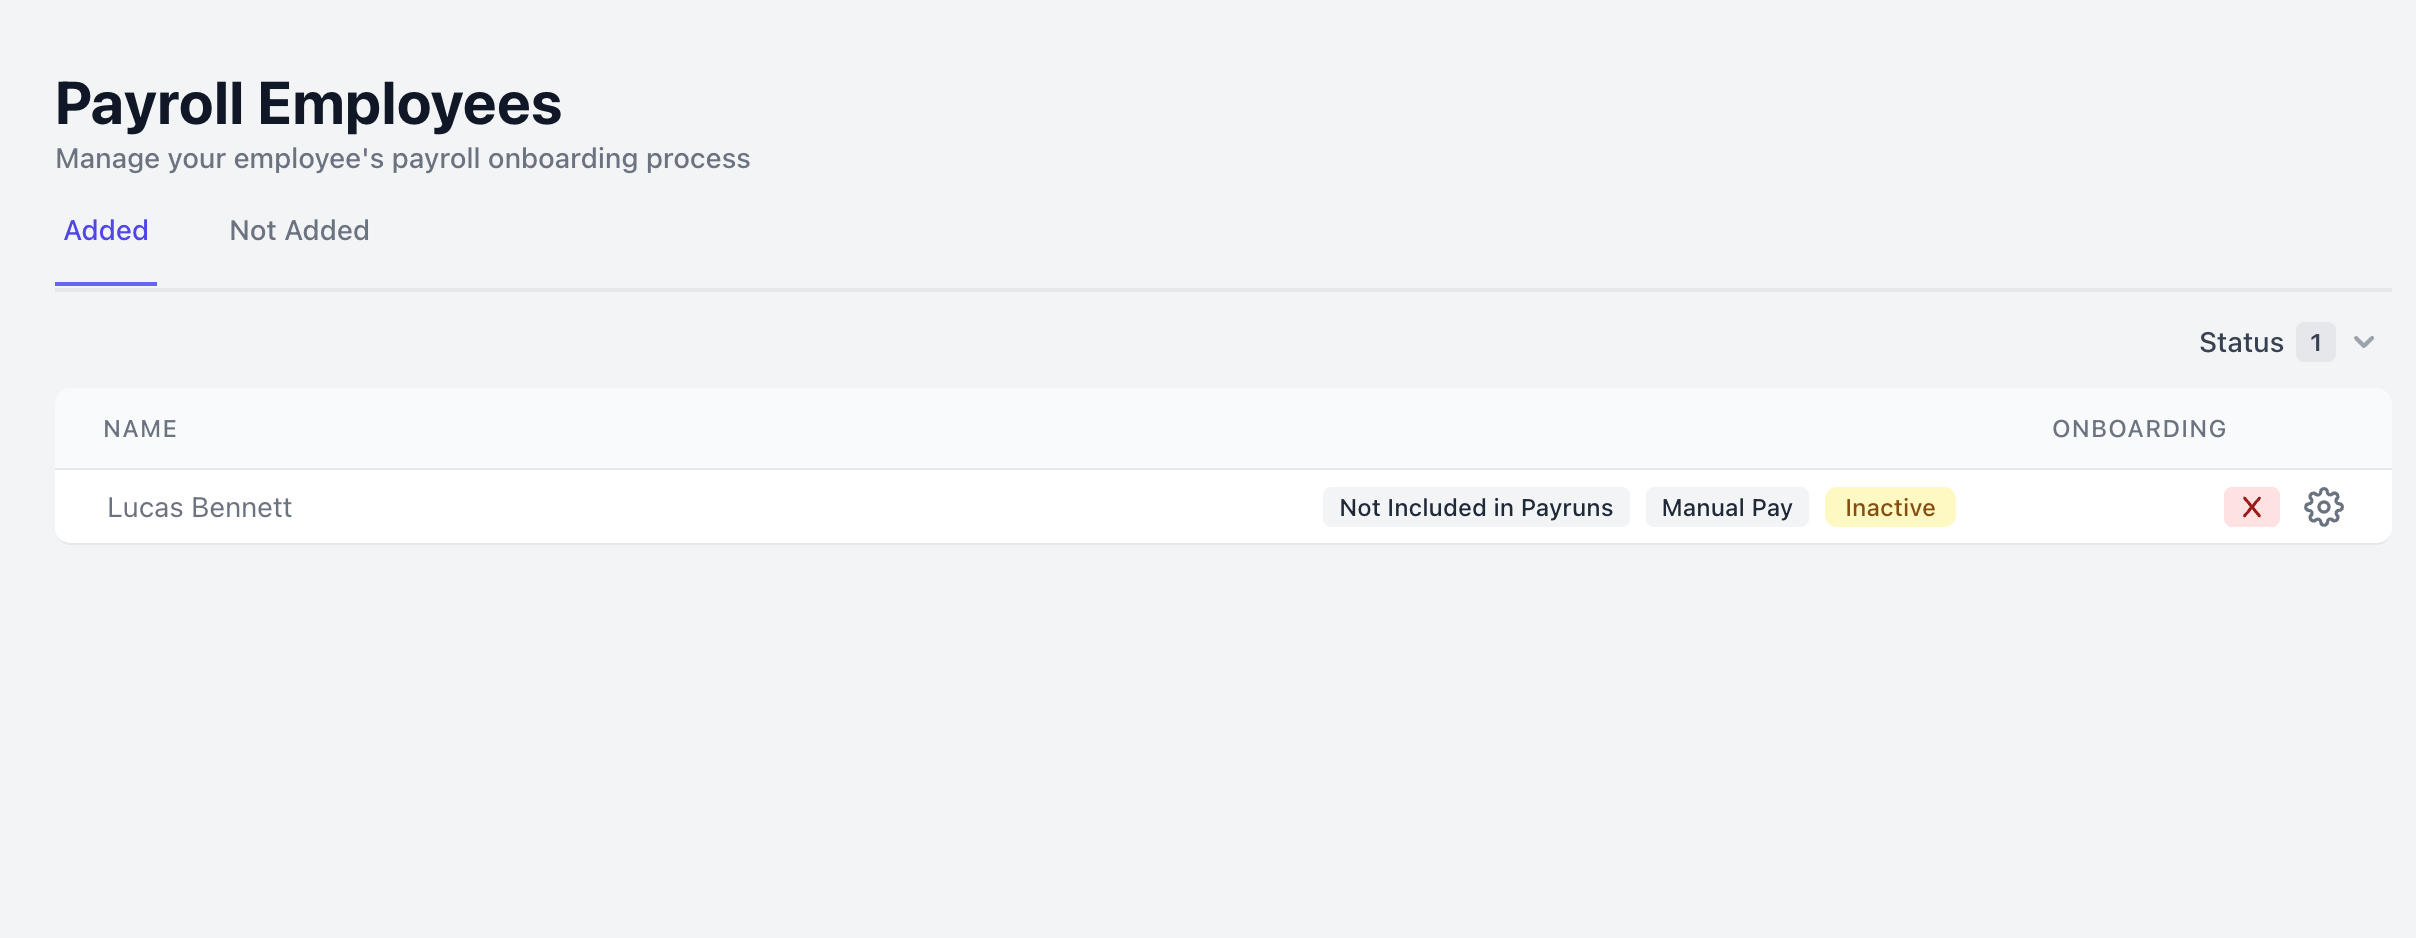
 To ensure inactive employees do not appear in your regular payruns, click the gear icon next to their name and set **Include in Regular Payruns** to **No**.
 ***
## Provide Historical Payruns
If you are an existing business that is switching from a different payroll provider this calendar year, please find your payroll provider below and follow the instructions on how to download your payroll history as a CSV or Excel file.
### Previous Quarters
🗓️ Depending on when you plan to run your first Dripos Payroll, you will need to retrieve information for any past quarters (Closed Quarter) and the ongoing quarter (Open Quarter).
Payroll information for any Closed Quarter can be sent in a summary form for each employee. This report must encompass the Quarter-To-Date and list all earnings, taxes, and deductions.
Payroll information for the Open Quarter must include each paycheck paid out to every employee thus far. Make sure the paycheck details are **separated by each paycheck date**, and includes all earnings, taxes, and deductions.
### Download Historical Payroll Files
**For Existing Businesses**
Send the historical payroll files to your onboarding specialist. They will review the files and confirm all necessary information before you can run your first payroll.
Payroll providers may use different names for their historical payroll files. These are typically in the form of:
* Payroll Details
* Payroll Summary
* Payroll Register
* Payroll Journal
* Paycheck Details
* Employee Reports > Payroll Details
***
## Provide Historical Payruns
If you are an existing business that is switching from a different payroll provider this calendar year, please find your payroll provider below and follow the instructions on how to download your payroll history as a CSV or Excel file.
### Previous Quarters
🗓️ Depending on when you plan to run your first Dripos Payroll, you will need to retrieve information for any past quarters (Closed Quarter) and the ongoing quarter (Open Quarter).
Payroll information for any Closed Quarter can be sent in a summary form for each employee. This report must encompass the Quarter-To-Date and list all earnings, taxes, and deductions.
Payroll information for the Open Quarter must include each paycheck paid out to every employee thus far. Make sure the paycheck details are **separated by each paycheck date**, and includes all earnings, taxes, and deductions.
### Download Historical Payroll Files
**For Existing Businesses**
Send the historical payroll files to your onboarding specialist. They will review the files and confirm all necessary information before you can run your first payroll.
Payroll providers may use different names for their historical payroll files. These are typically in the form of:
* Payroll Details
* Payroll Summary
* Payroll Register
* Payroll Journal
* Paycheck Details
* Employee Reports > Payroll Details