> ## Documentation Index
> Fetch the complete documentation index at: https://support.dripos.com/llms.txt
> Use this file to discover all available pages before exploring further.

# Register Stand Setup

> Assemble your register stand and tablet

## Required Hardware

<Frame>
  <img src="https://mintcdn.com/frostbytetechnologiesinc/wbv1h8zoRW7sYW7K/hardware/hardware-images/registerstand-required.png?fit=max&auto=format&n=wbv1h8zoRW7sYW7K&q=85&s=6bb81f4aad55f1da6140b7a9ded0803c" width="1001" height="699" data-path="hardware/hardware-images/registerstand-required.png" />
</Frame>

<CardGroup cols={2}>
  <Card title="Charging Cable" icon="Plus" />
</CardGroup>

<Steps>
  <Step title="Unscrew Security Bracket">
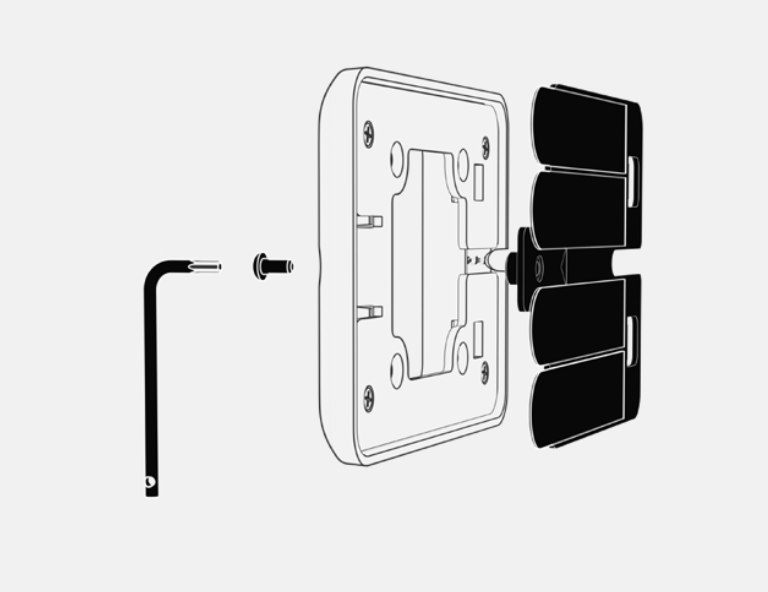
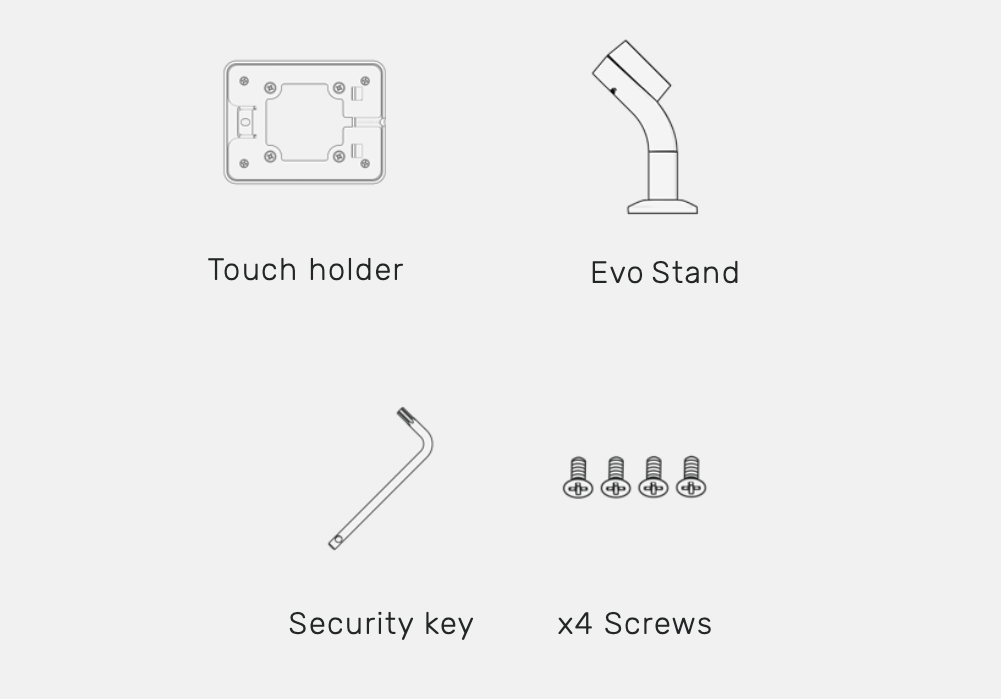
    Locate the Touch holder and unscrew the security screw to remove the top bracket that holds the adhesive.

    <Frame>
      <img src="https://mintcdn.com/frostbytetechnologiesinc/wbv1h8zoRW7sYW7K/hardware/hardware-images/registerstand-new1.png?fit=max&auto=format&n=wbv1h8zoRW7sYW7K&q=85&s=68b6823325fa09d4f6579b2cce5ec830" width="768" height="592" data-path="hardware/hardware-images/registerstand-new1.png" />
    </Frame>
  </Step>

  <Step title="Attach Touch Holder">
    Attach the Touch holder to the stand and screw in the 4 screws to secure.

    <Frame>
      <img src="https://mintcdn.com/frostbytetechnologiesinc/wbv1h8zoRW7sYW7K/hardware/hardware-images/registerstand-new1.png?fit=max&auto=format&n=wbv1h8zoRW7sYW7K&q=85&s=68b6823325fa09d4f6579b2cce5ec830" width="768" height="592" data-path="hardware/hardware-images/registerstand-new1.png" />
    </Frame>
  </Step>

  <Step title="Peel Adhesive Paper">
    Peel off the adhesive paper from the top bracket.

    <Frame>
      <img src="https://mintcdn.com/frostbytetechnologiesinc/wbv1h8zoRW7sYW7K/hardware/hardware-images/registerstand-new3.png?fit=max&auto=format&n=wbv1h8zoRW7sYW7K&q=85&s=dbbee5aa04dc069253bc35504d6f721c" width="779" height="549" data-path="hardware/hardware-images/registerstand-new3.png" />
    </Frame>
  </Step>

  <Step title="Center Bracket">
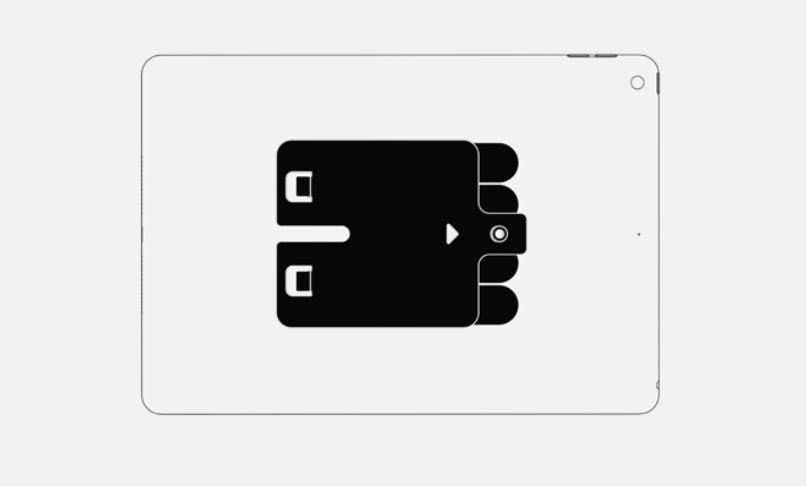
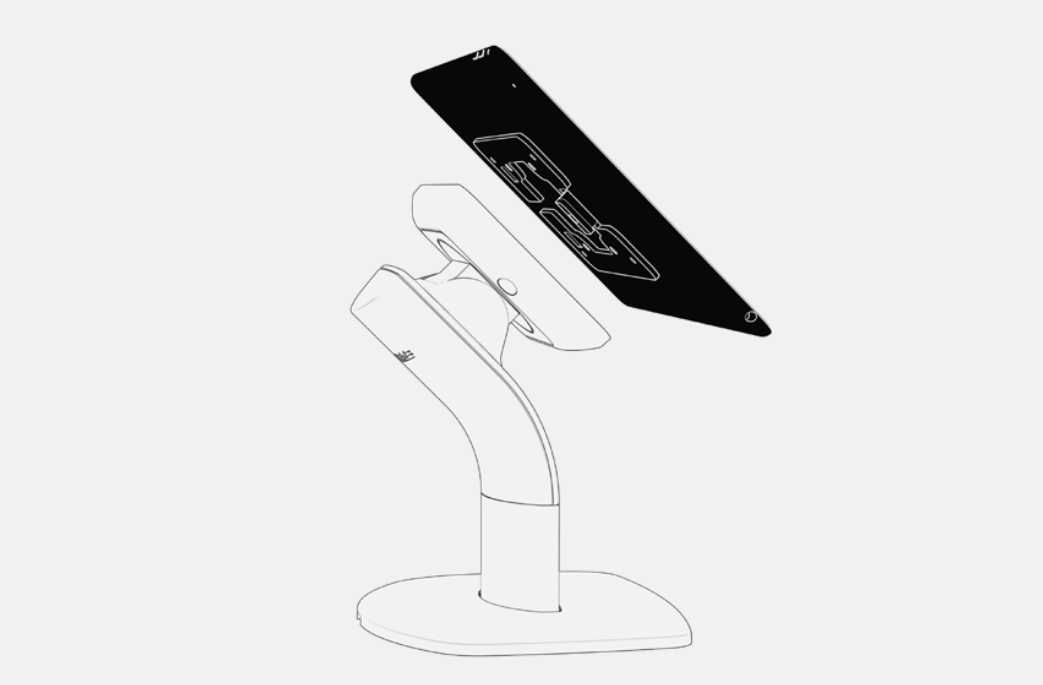
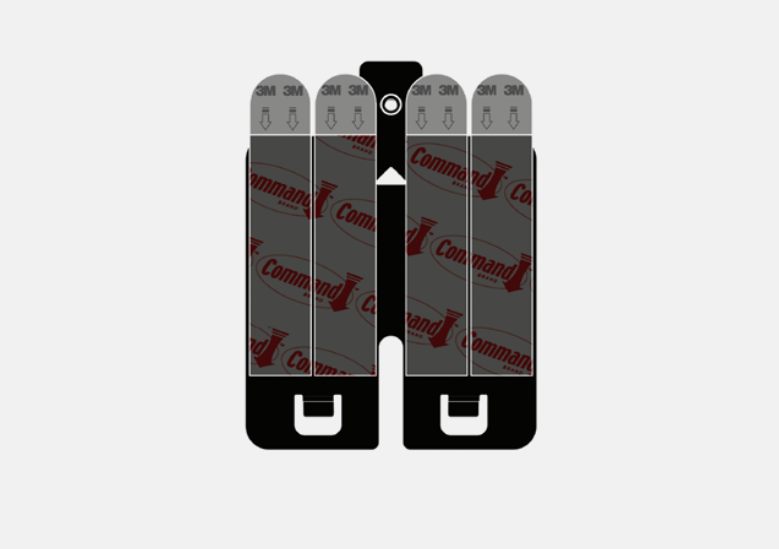
    Place the bracket in the center of the tablet and press down and hold for 20 seconds.

    <Frame>
      <img src="https://mintcdn.com/frostbytetechnologiesinc/wbv1h8zoRW7sYW7K/hardware/hardware-images/registerstand-new4.png?fit=max&auto=format&n=wbv1h8zoRW7sYW7K&q=85&s=568bcfe4c41c87ca5a399b0757c19950" width="806" height="486" data-path="hardware/hardware-images/registerstand-new4.png" />
    </Frame>
  </Step>

  <Step title="Place Charging Cable">
    Feed the charging cable through the middle of the stand and pull out from the bottom.

    <Frame>
      <img src="https://mintcdn.com/frostbytetechnologiesinc/wbv1h8zoRW7sYW7K/hardware/hardware-images/registerstand-newcable.png?fit=max&auto=format&n=wbv1h8zoRW7sYW7K&q=85&s=1d6916e91f73f0e5b1242f16d779fc2a" width="827" height="612" data-path="hardware/hardware-images/registerstand-newcable.png" />
    </Frame>
  </Step>

  <Step title="Attach Top Bracket">
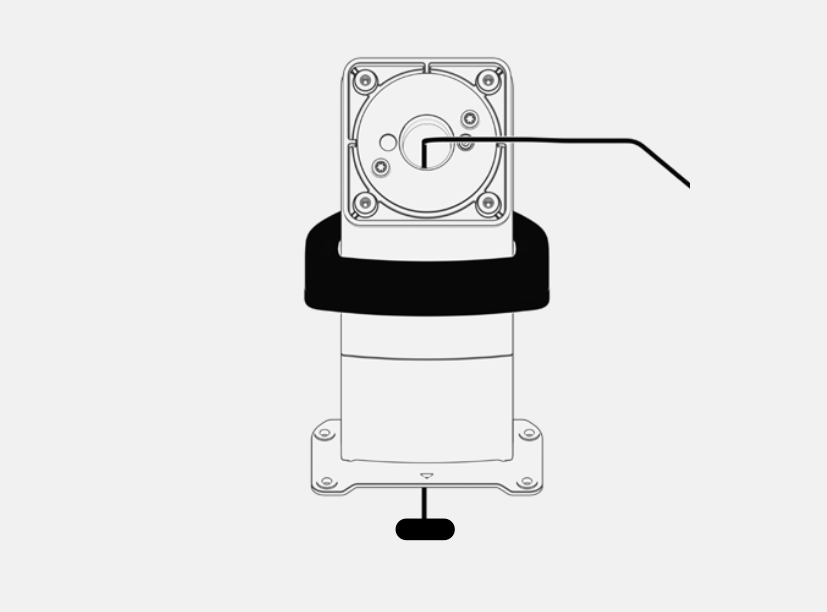
    Attach the top bracket (with your tablet attached) to the stand. Ensure charging cable runs through the cable channel.

    <Frame>
      <img src="https://mintcdn.com/frostbytetechnologiesinc/wbv1h8zoRW7sYW7K/hardware/hardware-images/registerstand-new5.png?fit=max&auto=format&n=wbv1h8zoRW7sYW7K&q=85&s=7627ec3b20a9ac6bb08f7f6eadb3f009" width="1043" height="685" data-path="hardware/hardware-images/registerstand-new5.png" />
    </Frame>
  </Step>

  <Step title="Screw In Security Screw">
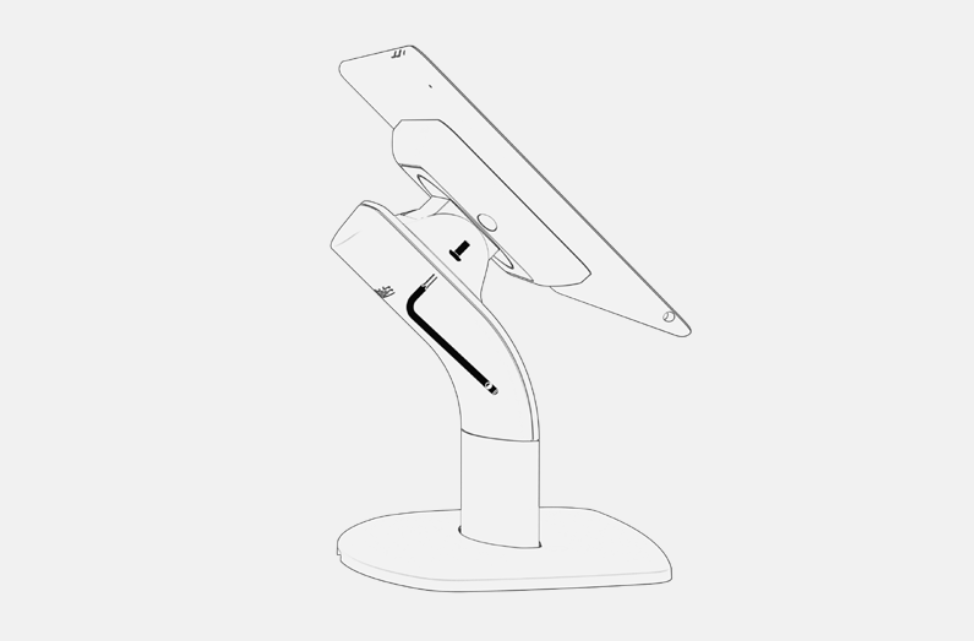
    Screw in the security screw with the provided security key and plug in charging cable.

    <Frame>
      <img src="https://mintcdn.com/frostbytetechnologiesinc/wbv1h8zoRW7sYW7K/hardware/hardware-images/registerstand-new6.png?fit=max&auto=format&n=wbv1h8zoRW7sYW7K&q=85&s=11888a72fc89427b2b38242a19b6686a" width="974" height="641" data-path="hardware/hardware-images/registerstand-new6.png" />
    </Frame>
  </Step>
</Steps>

<Tip>
  Download the Dripos POS App for iPads  [here](https://apps.apple.com/us/app/dripos-point-of-sale/id1545180462) \
  \
  Download the Dripos POS App for Android devices [here](https://play.google.com/store/apps/details?id=com.corkdrinks.drippos\&hl=en_US)
</Tip>

***

<Accordion title="Discontinued Register Setup Instructions">
  <Frame>
    <img src="https://mintlify.s3.us-west-1.amazonaws.com/frostbytetechnologiesinc/hardware/hardware-images/hardware-register1.png" />
  </Frame>

  <CardGroup cols={2}>
    <Card title="Register Stand" icon="1" />

    <Card title="Register Stand Keys" icon="2" />

    <Card title="Register Stand Cushion Inserts" icon="3" />

    <Card title="Right Angle USB-C Charging Cable" icon="4" />

    <Card title="iPad" icon="5">
      **Register Stand Compatible Models**: iPad 10.9” 10th Gen, iPad 11” 11th Gen, iPad Pro 11", iPad Air 11"
    </Card>
  </CardGroup>

  <Steps>
    <Step title="Unlock Stand">
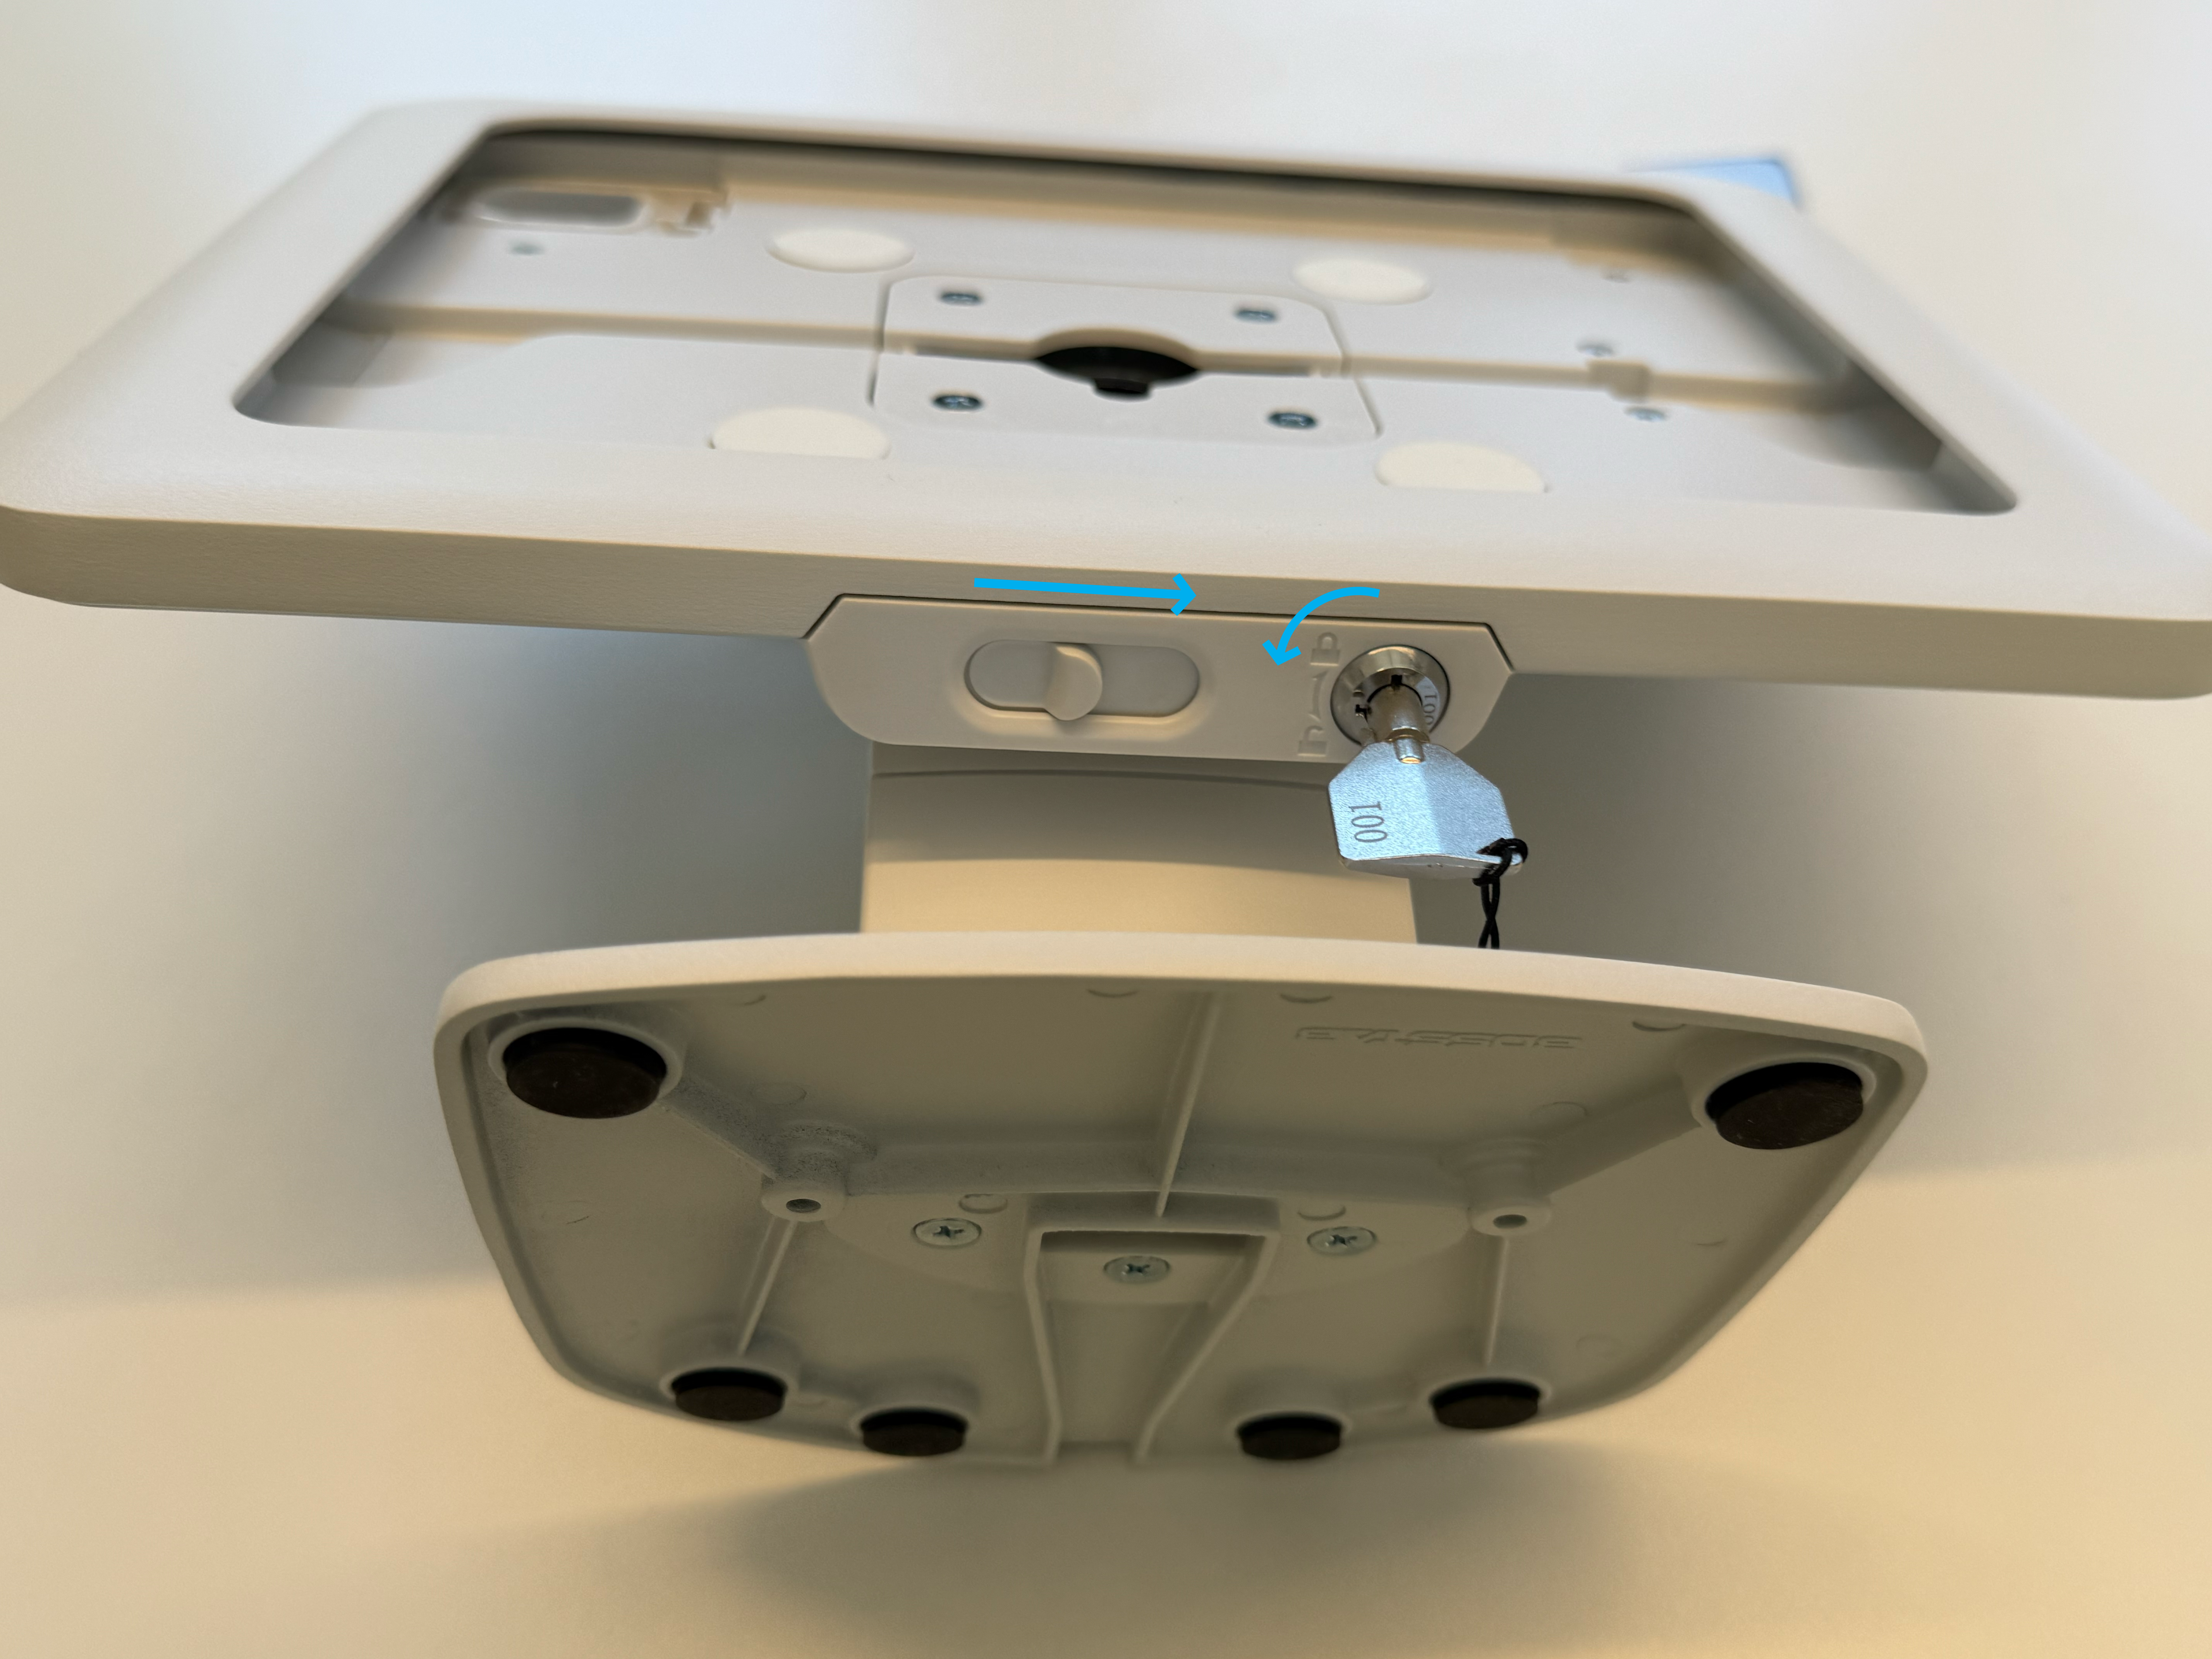
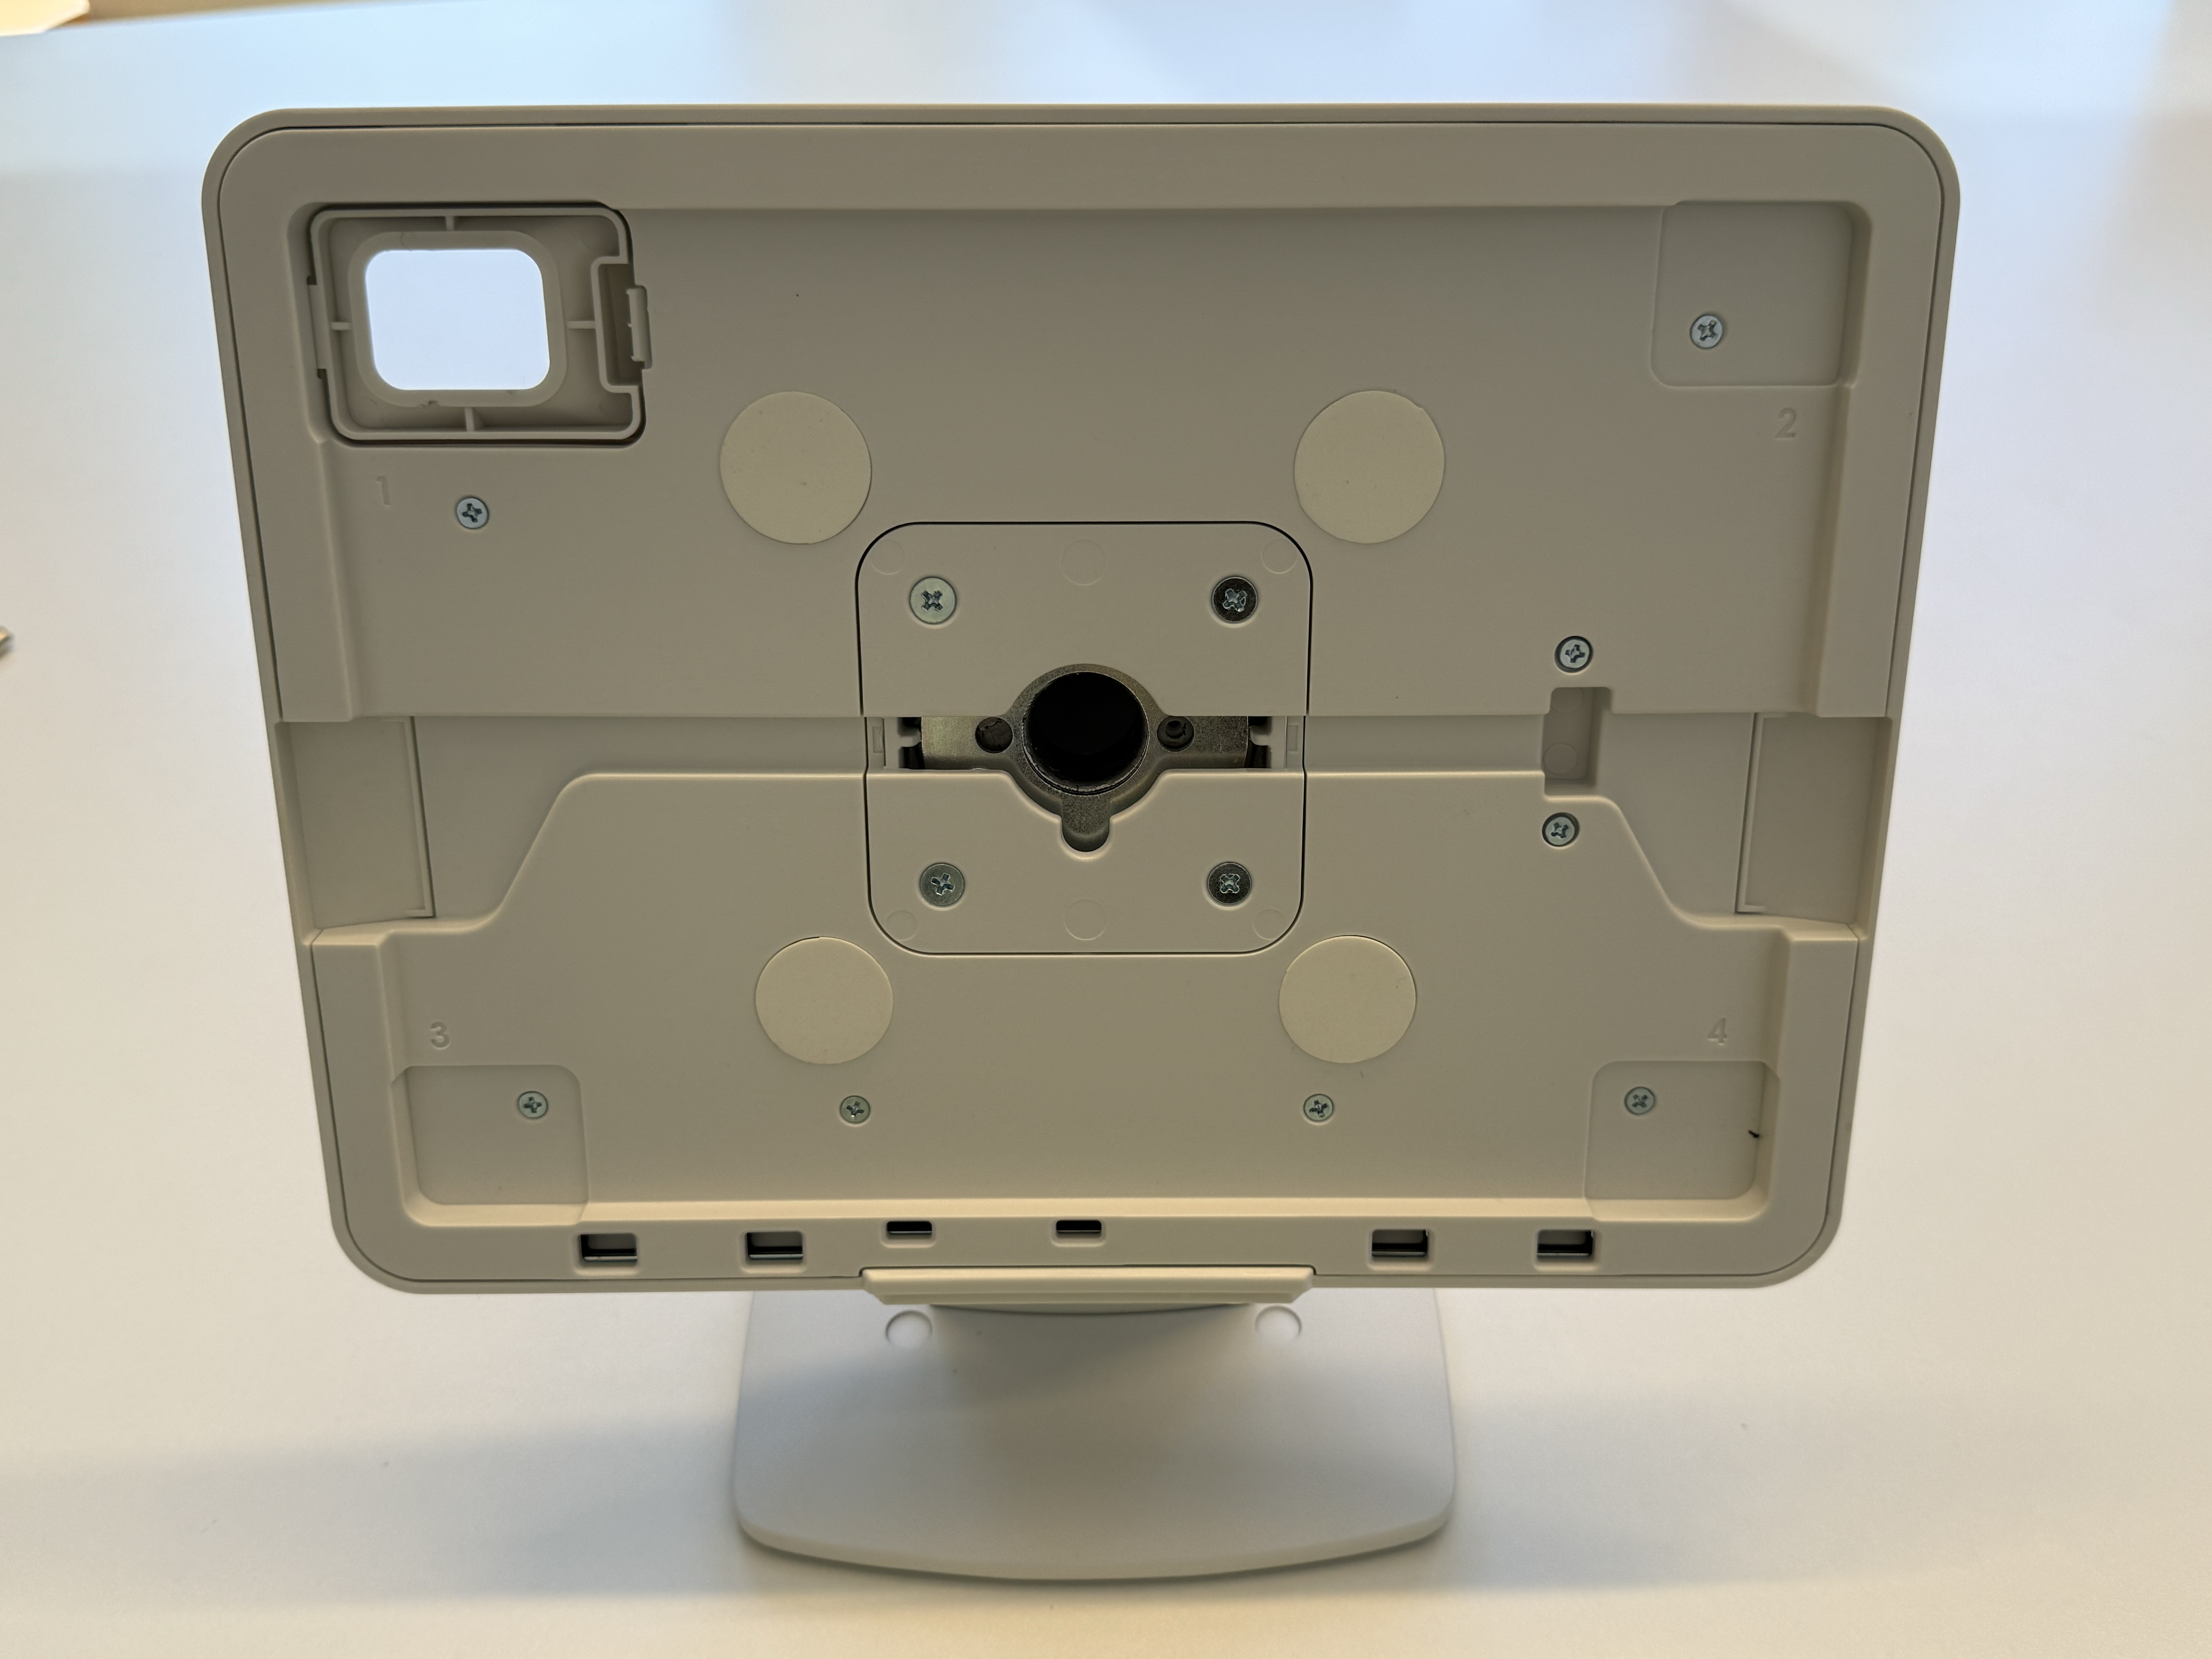
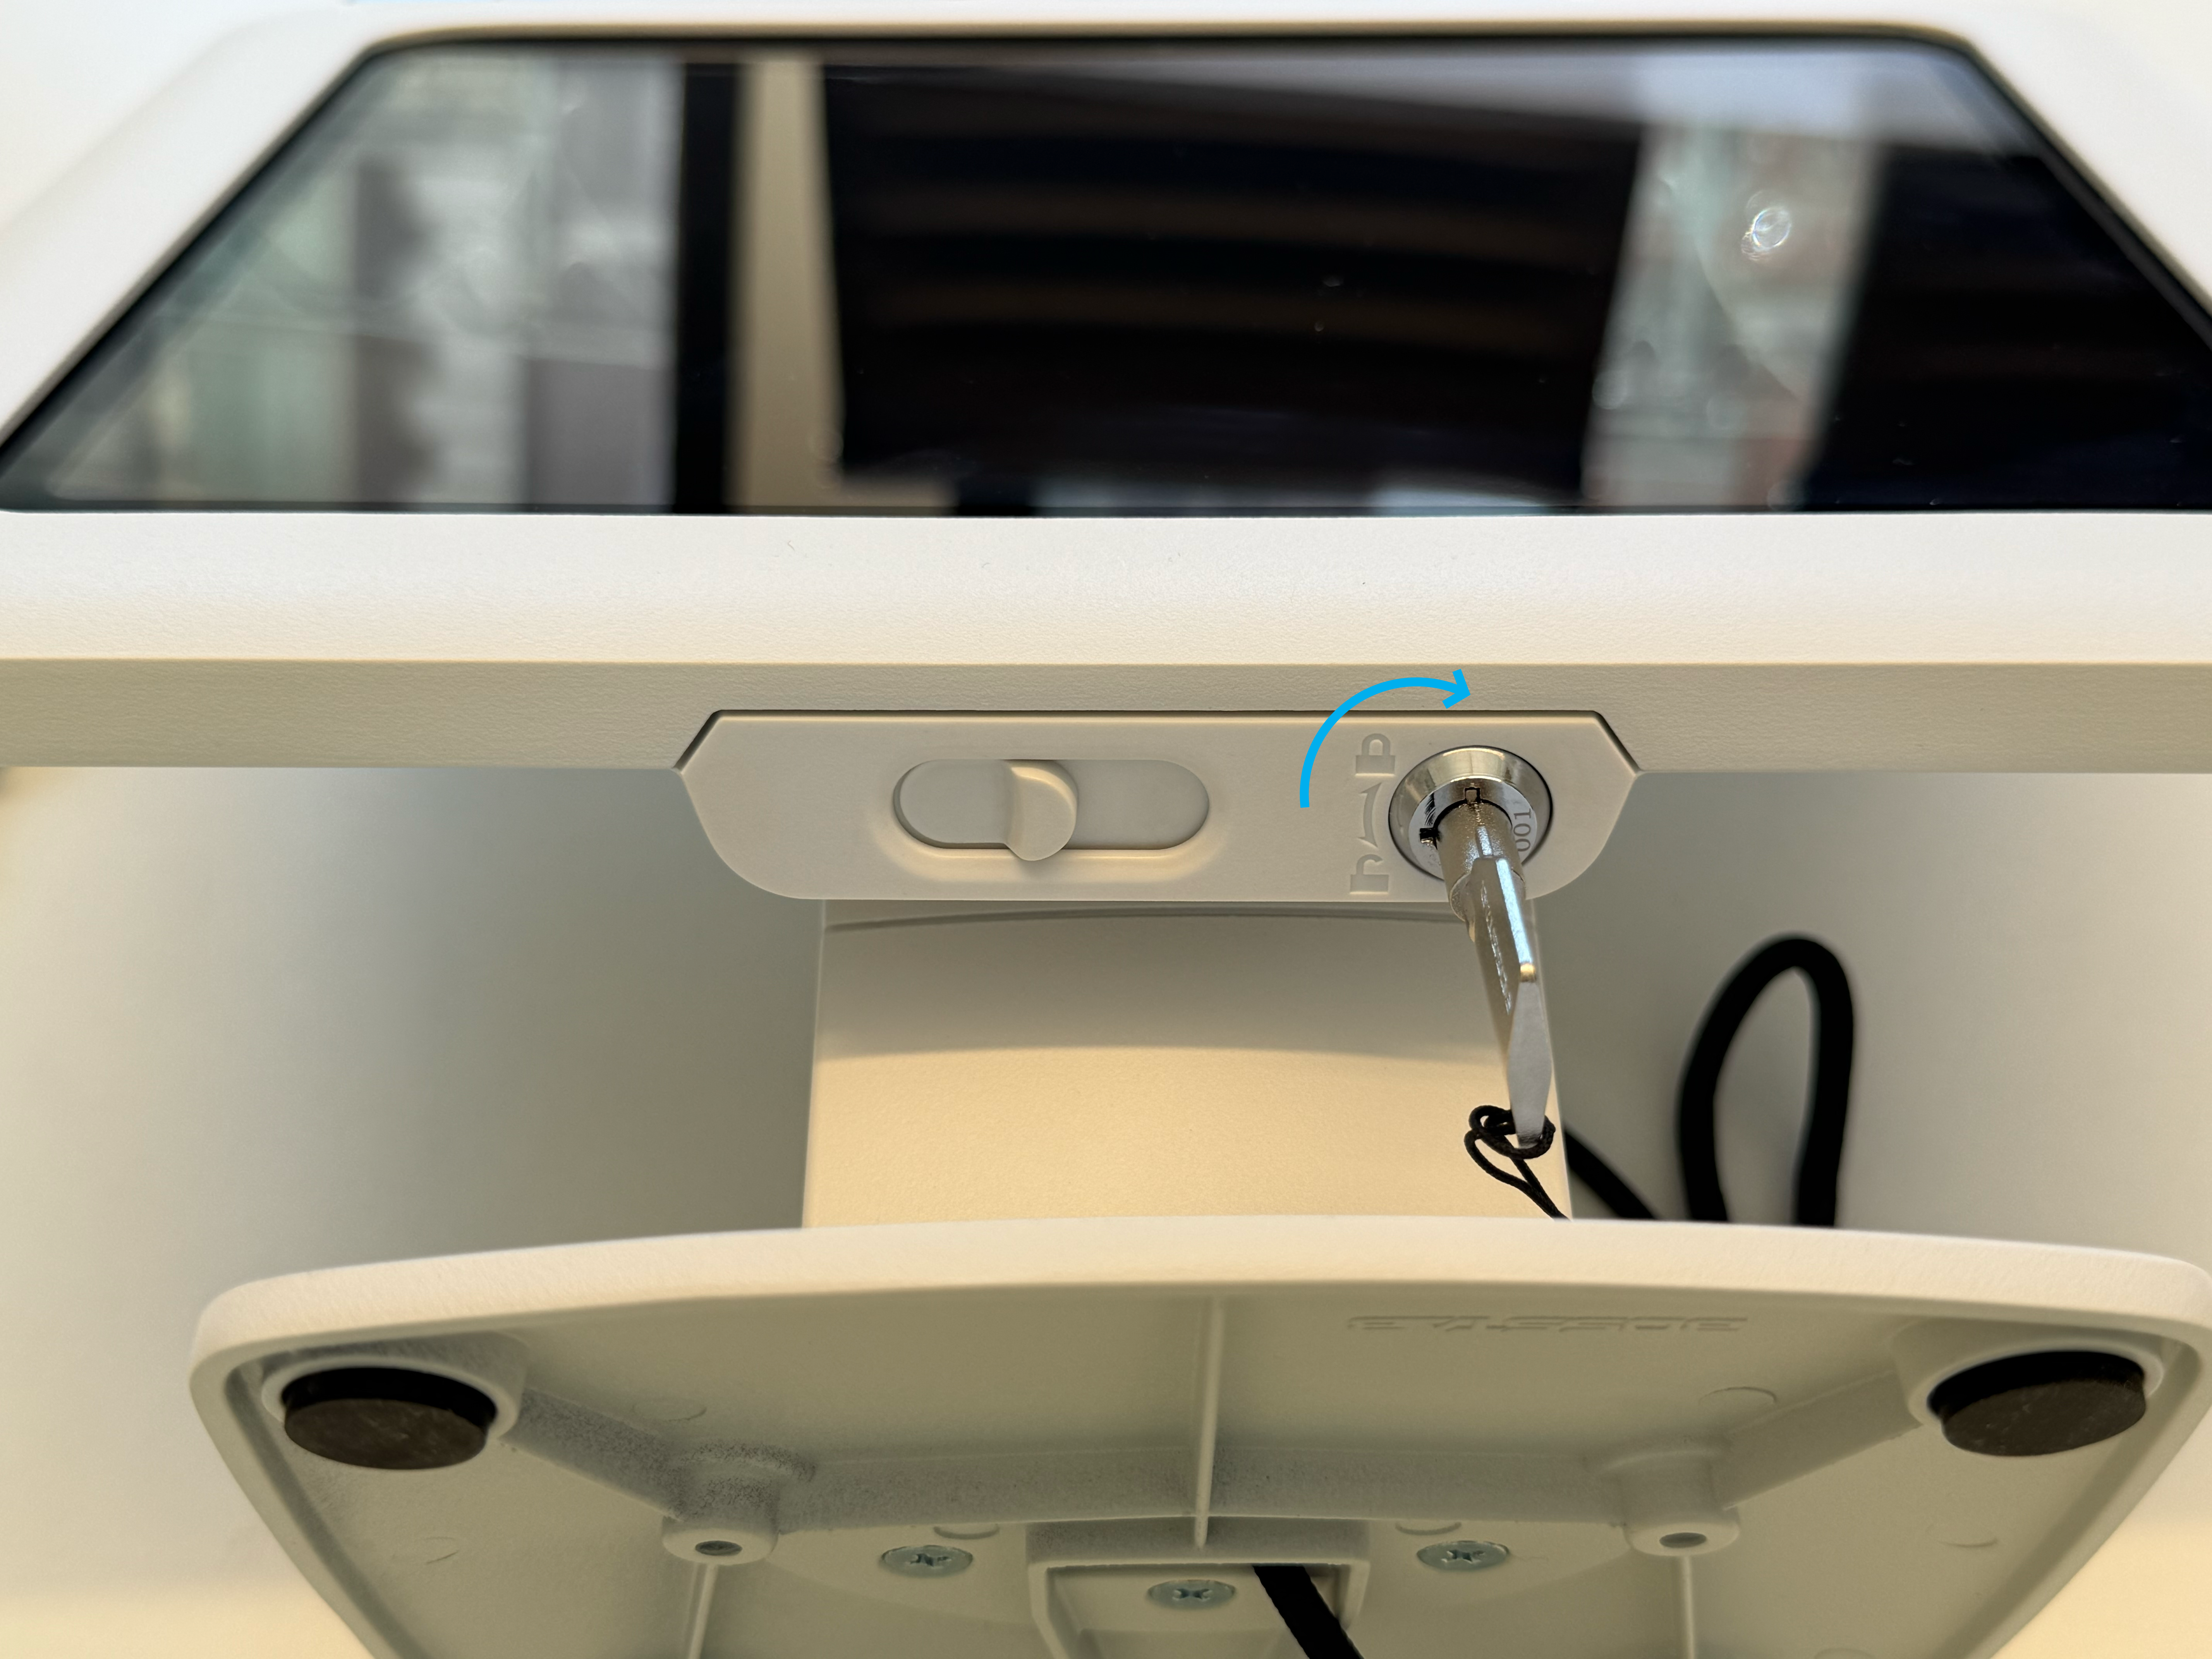
      Insert and turn the register stand key 90 degrees counterclockwise to unlock the stand. Slide the latch from left to right to detach the cover piece and set aside.

      <Frame>
        <img src="https://mintcdn.com/frostbytetechnologiesinc/RVvpmwPHMFEk46DJ/images/hardware/Register/step2-unlock.png?fit=max&auto=format&n=RVvpmwPHMFEk46DJ&q=85&s=f2c39cfcc7509a8f197f993c0df87717" width="5712" height="4284" data-path="images/hardware/Register/step2-unlock.png" />
      </Frame>
    </Step>

    <Step title="Insert Stand Cushions">
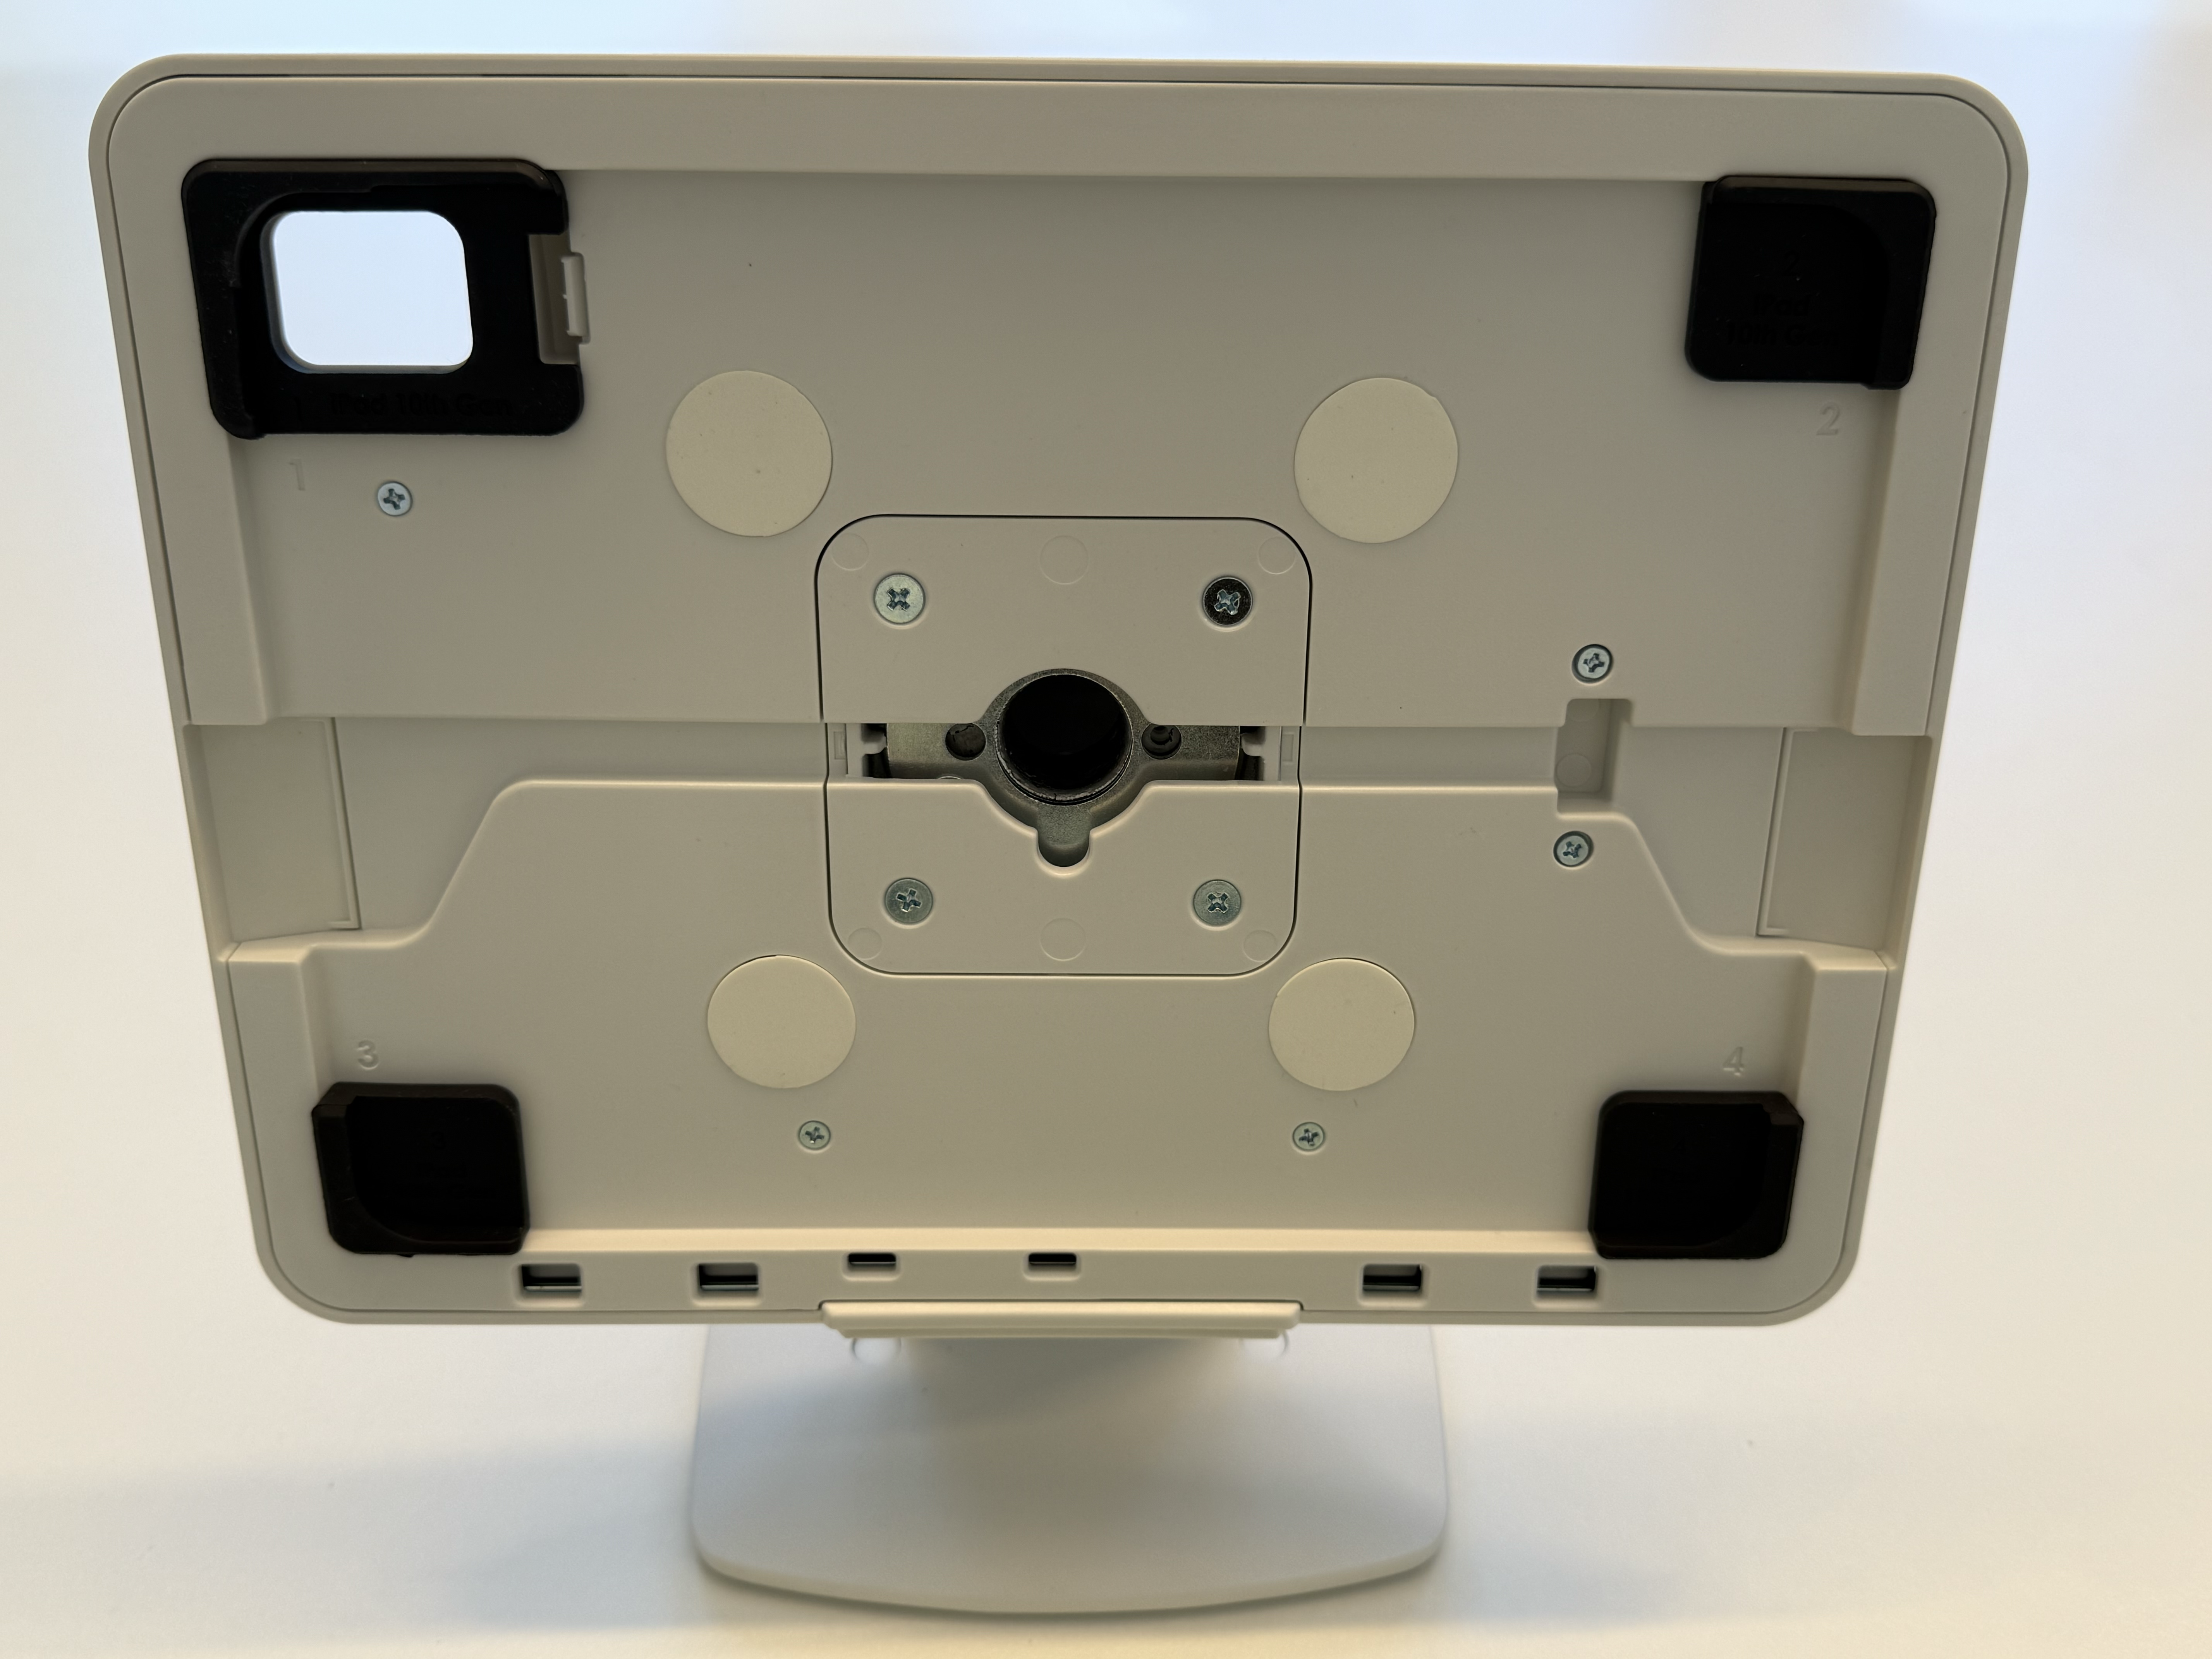
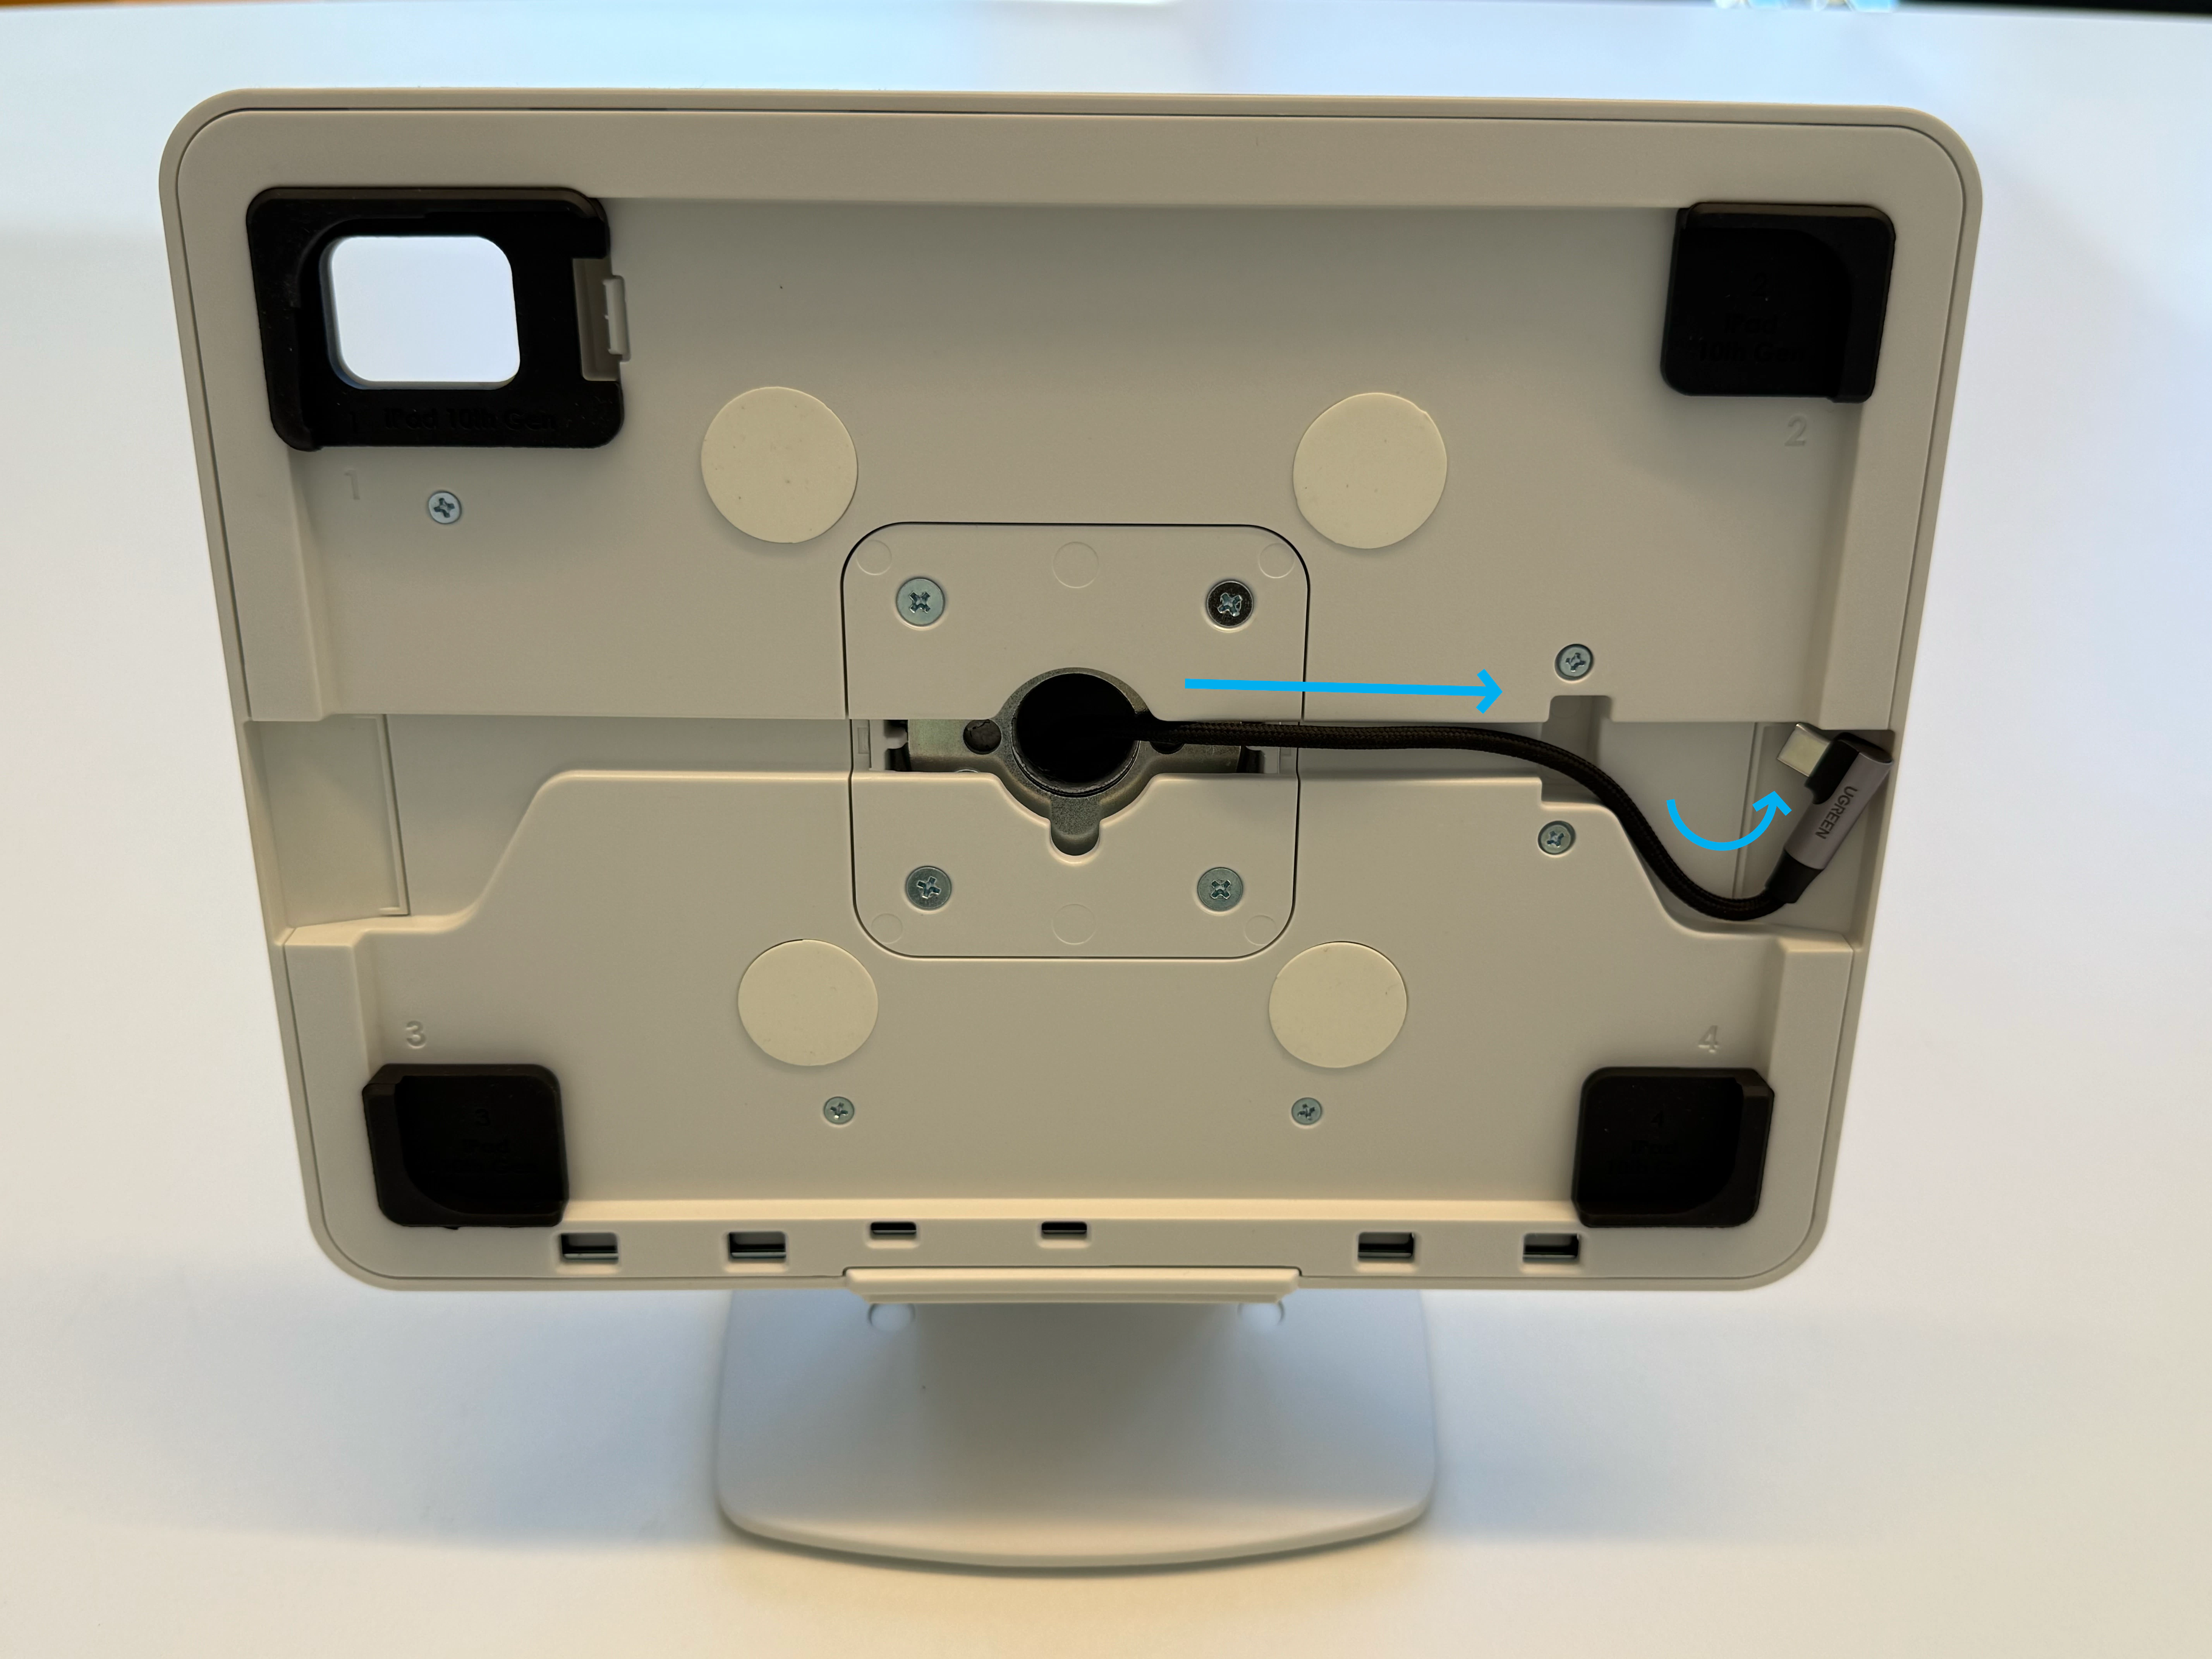
      For 10.9" 10th Gen iPads, insert the register stand cushion inserts at each corner.

      <Frame>
        <img src="https://mintcdn.com/frostbytetechnologiesinc/RVvpmwPHMFEk46DJ/images/hardware/Register/step3-precushion.png?fit=max&auto=format&n=RVvpmwPHMFEk46DJ&q=85&s=23a76c312370e35655c956f15d97fddc" width="5712" height="4284" data-path="images/hardware/Register/step3-precushion.png" />
      </Frame>

      <Frame>
        <img src="https://mintcdn.com/frostbytetechnologiesinc/RVvpmwPHMFEk46DJ/images/hardware/Register/step4-cushioninsert.png?fit=max&auto=format&n=RVvpmwPHMFEk46DJ&q=85&s=bb530337f1edca3646c63ecf2dbd95db" width="5712" height="4284" data-path="images/hardware/Register/step4-cushioninsert.png" />
      </Frame>
    </Step>

    <Step title="Insert Charging Cable">
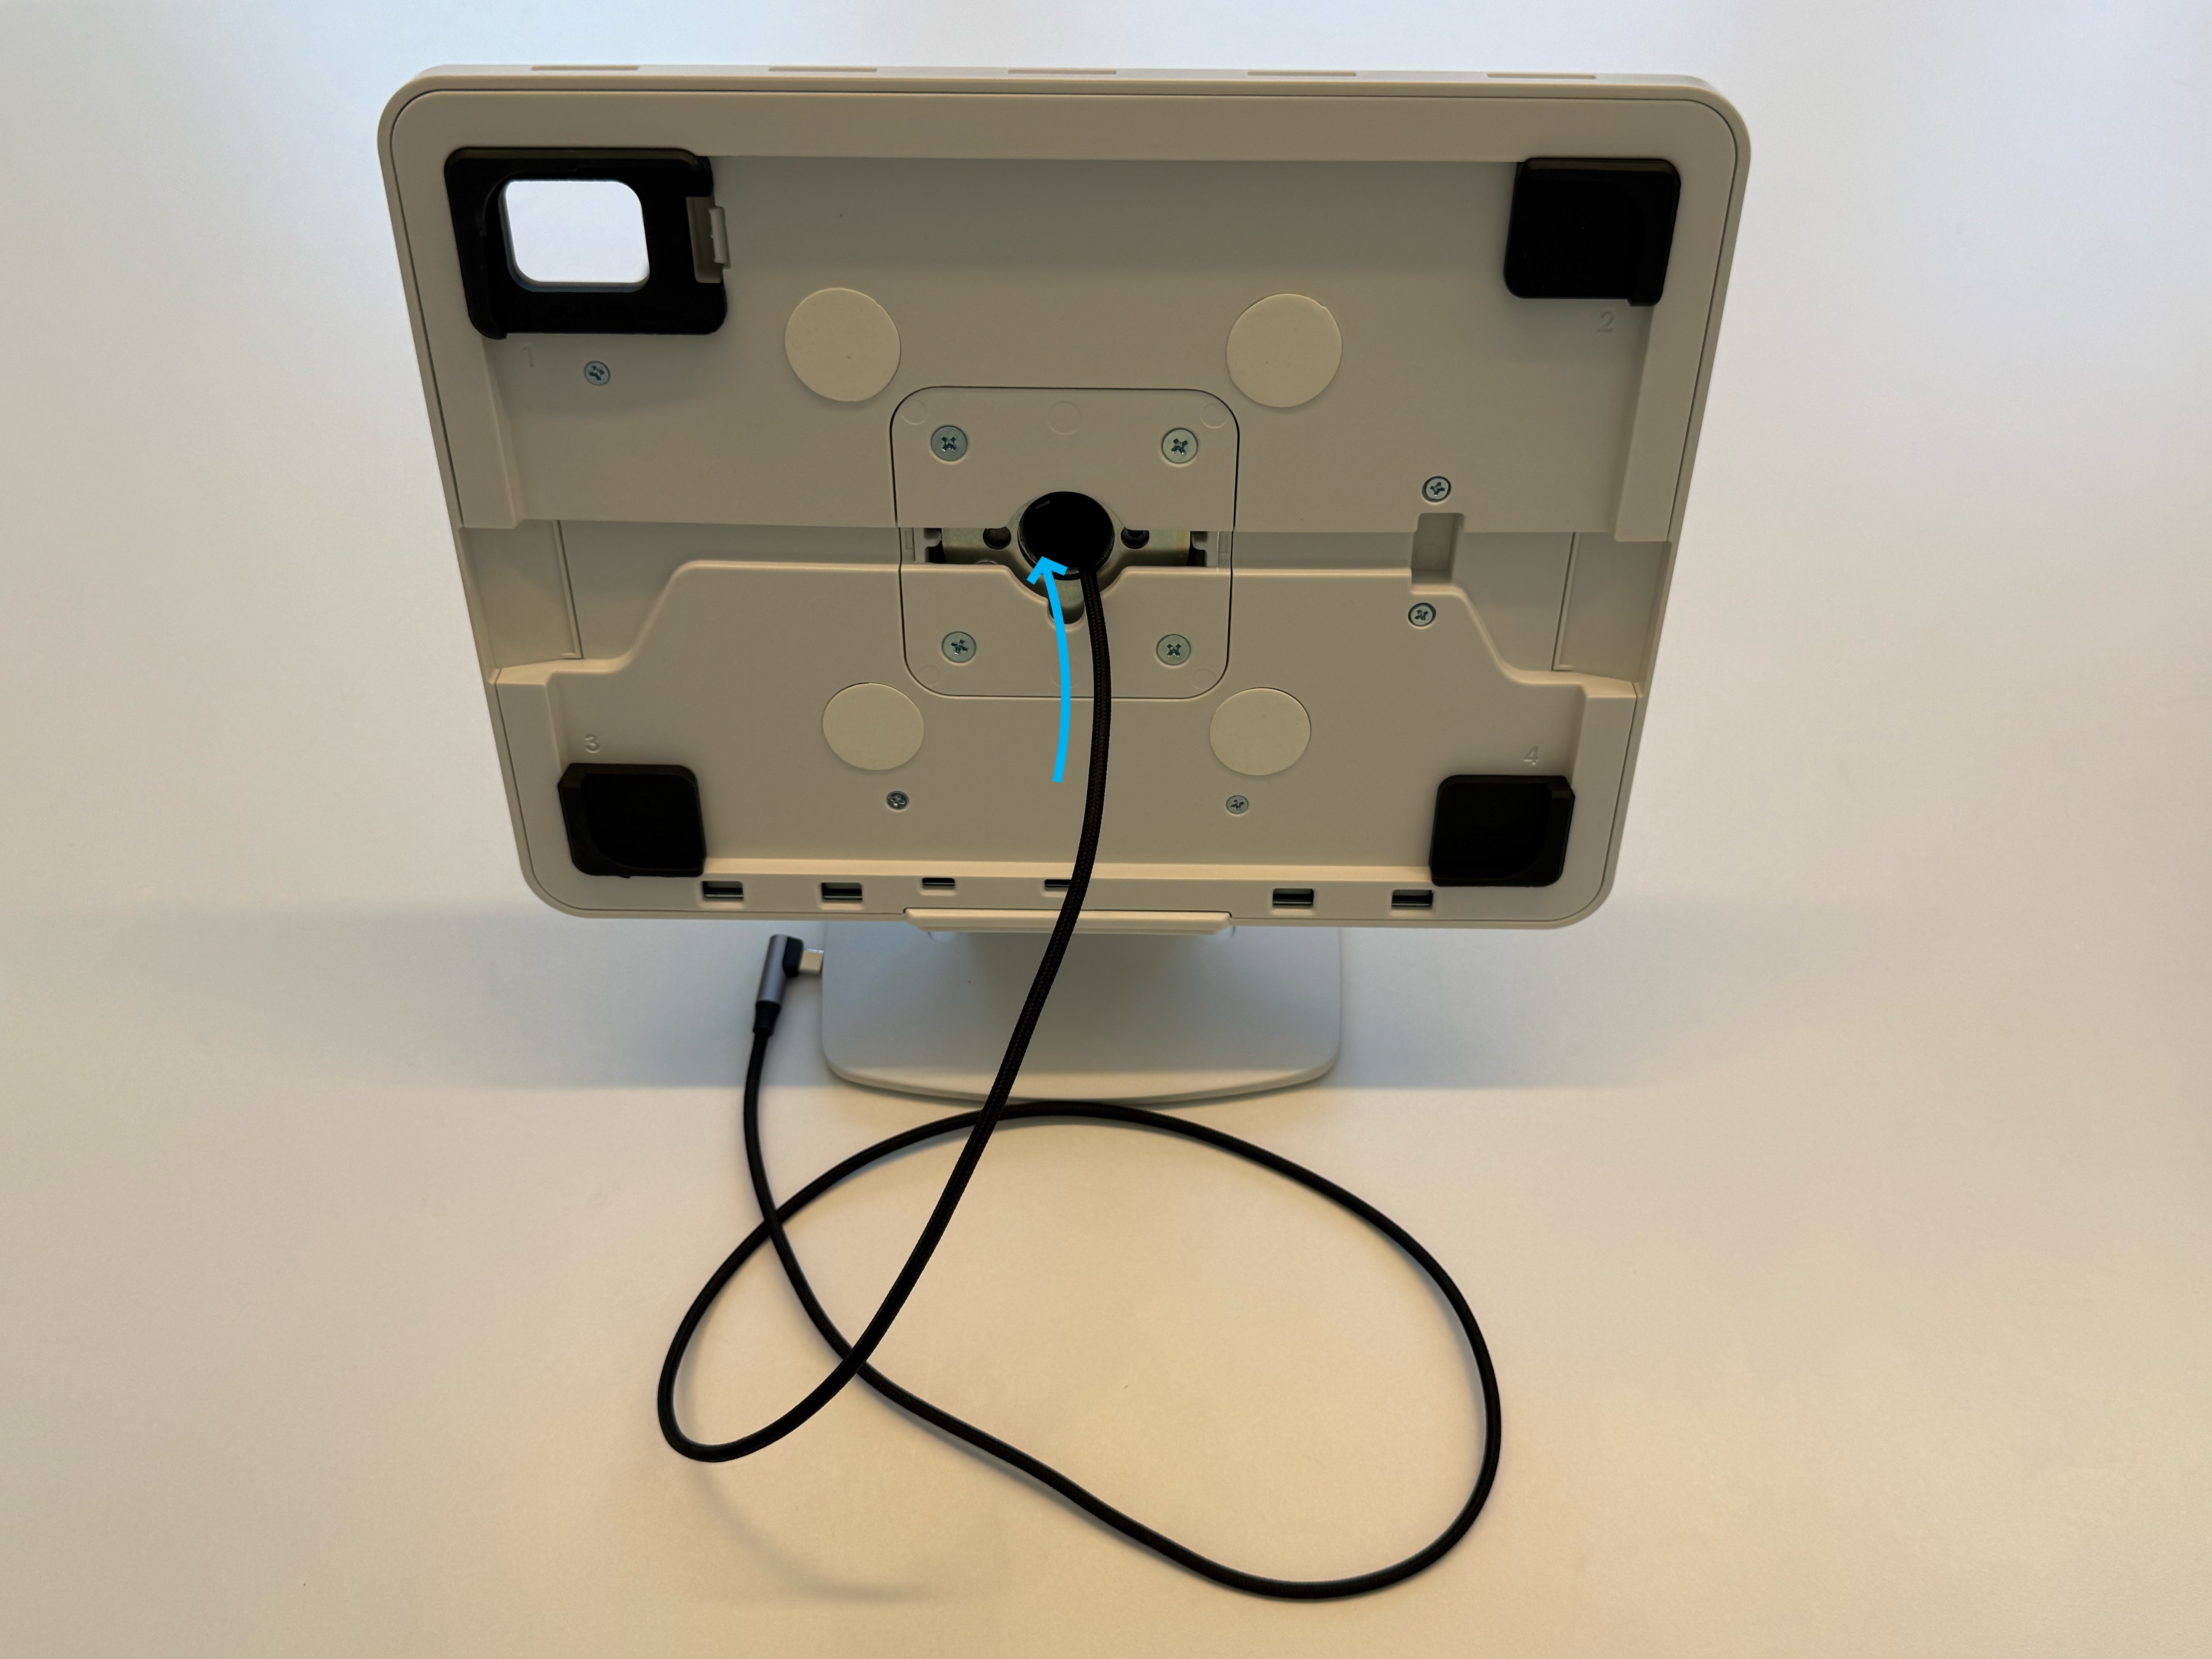
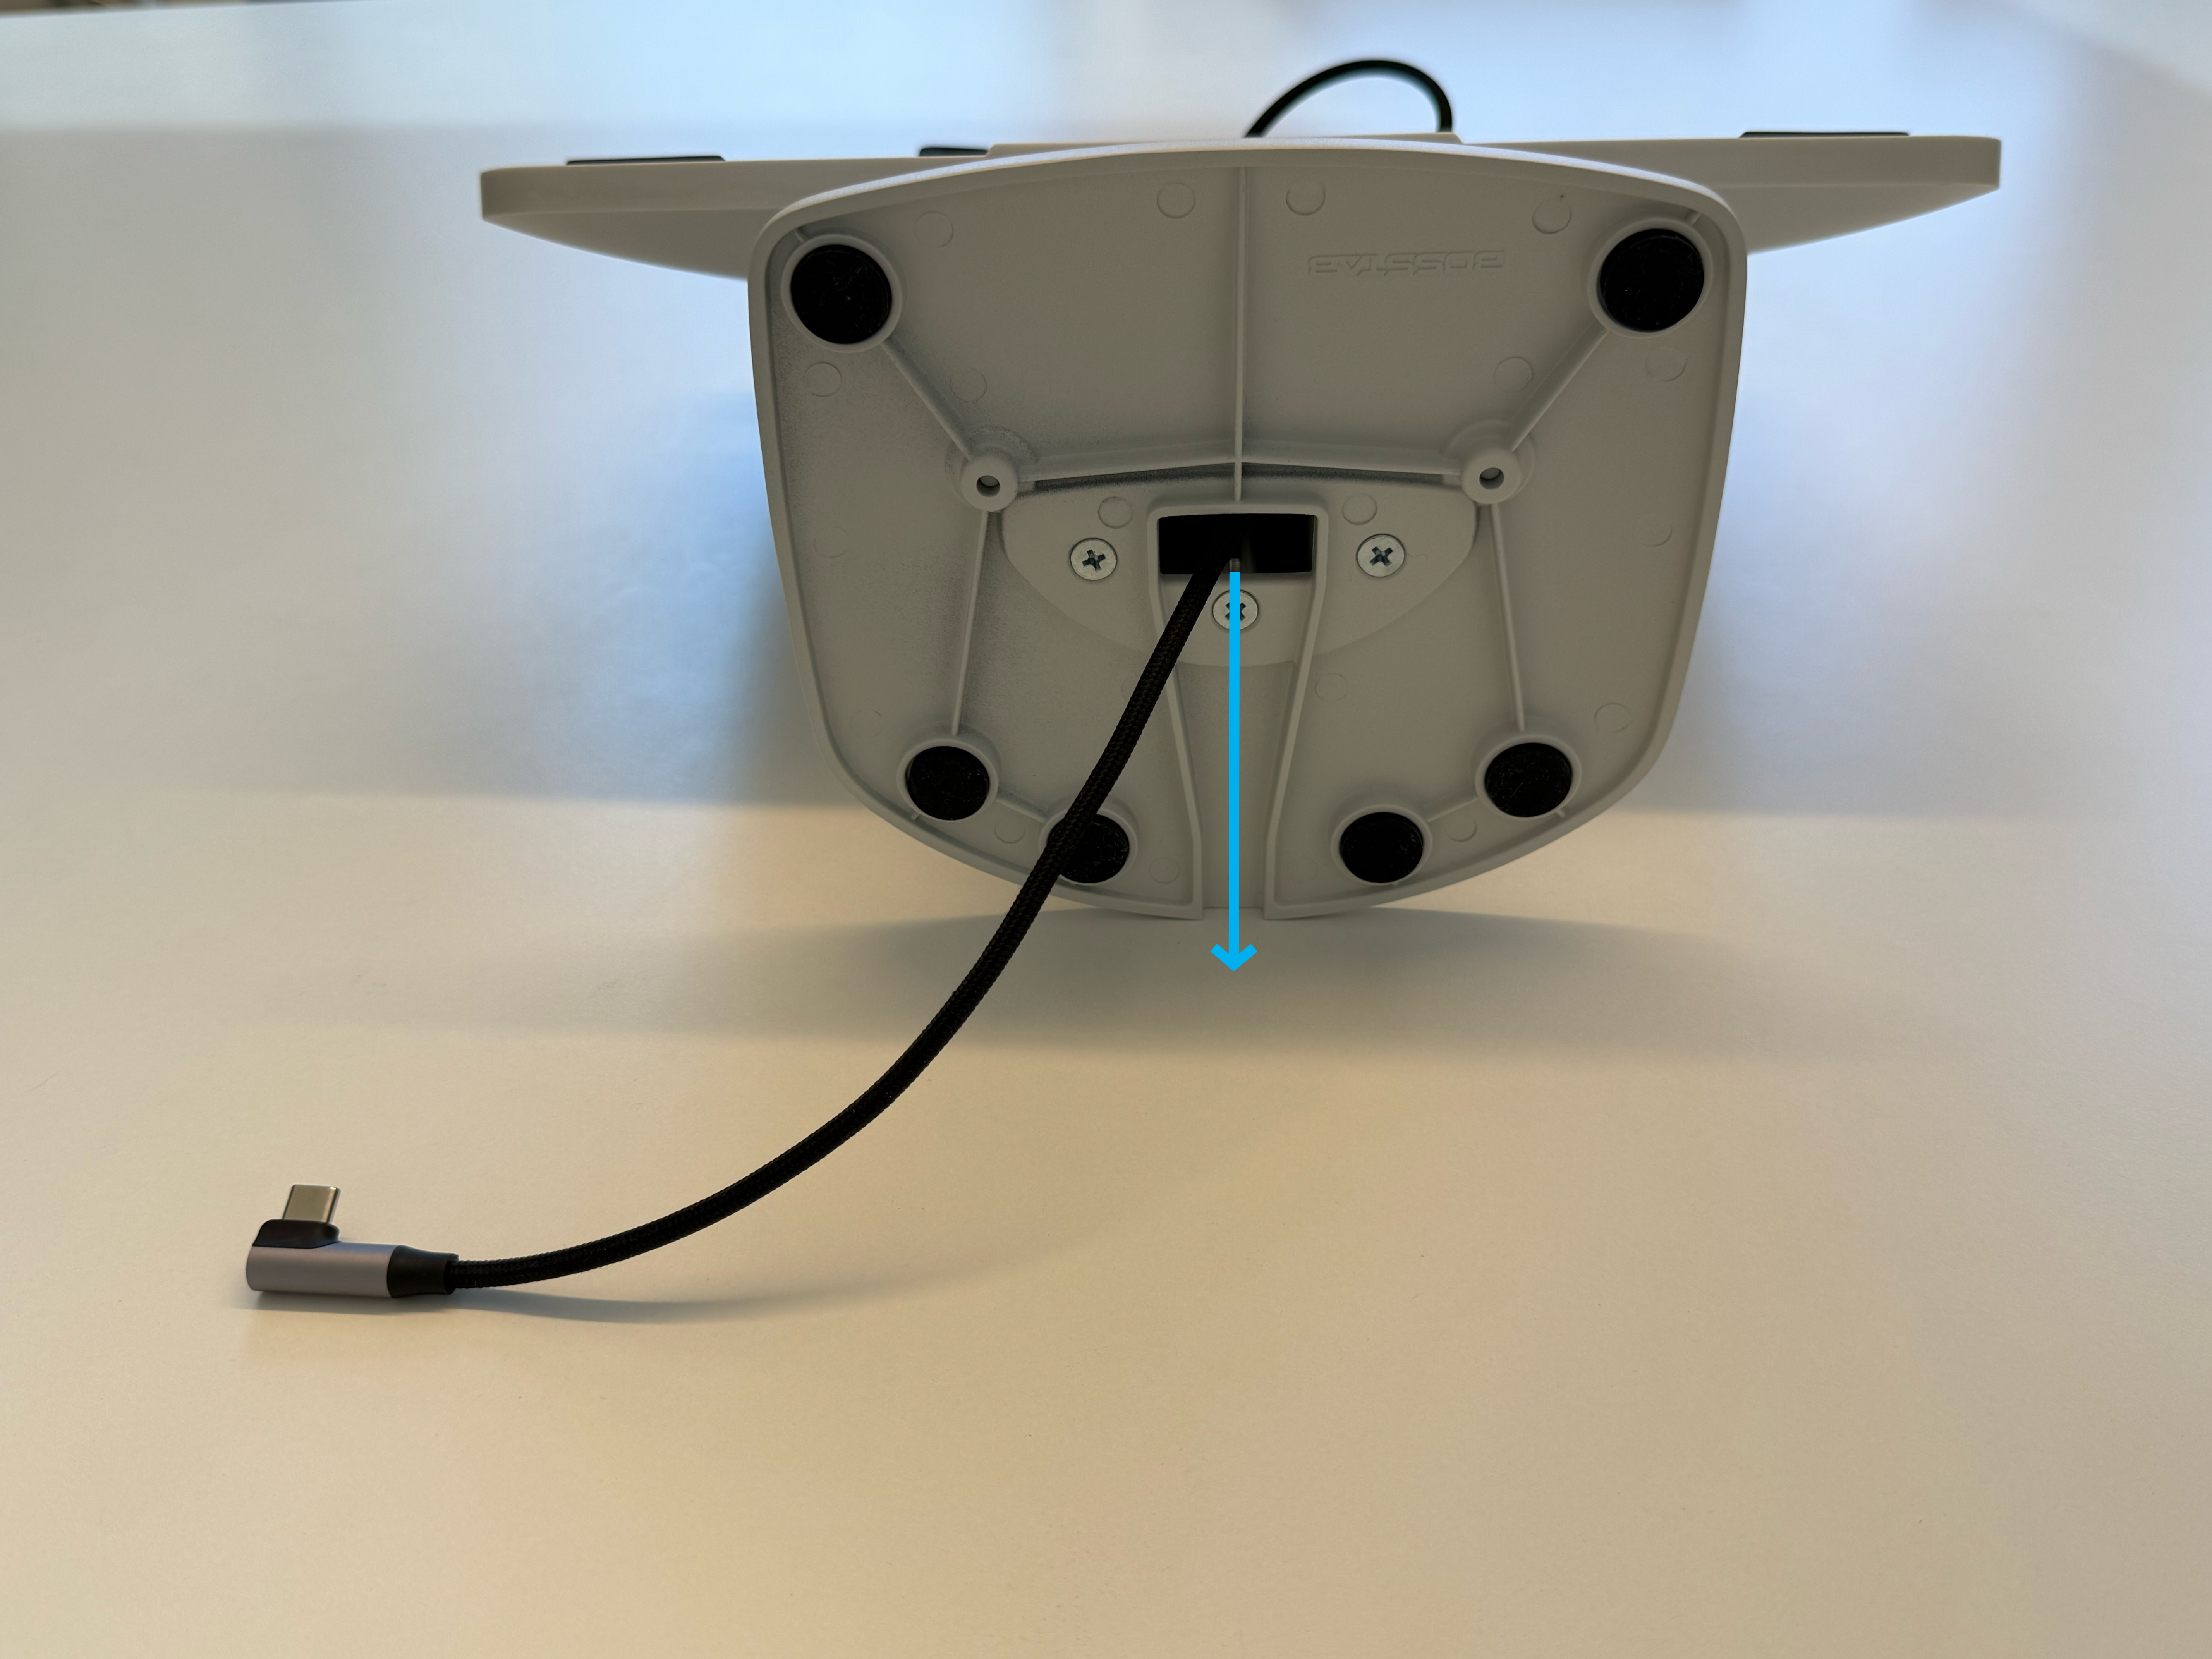
      Insert the right angle USB-C charging cable through the middle of the stand. Feed the cord through the bottom of the stand.

      <Frame>
        <img src="https://mintcdn.com/frostbytetechnologiesinc/RVvpmwPHMFEk46DJ/images/hardware/Register/step5-insertcable.png?fit=max&auto=format&n=RVvpmwPHMFEk46DJ&q=85&s=823d190060aff60ae91e8876e97539c1" width="5712" height="4284" data-path="images/hardware/Register/step5-insertcable.png" />
      </Frame>

      <Frame>
        <img src="https://mintcdn.com/frostbytetechnologiesinc/RVvpmwPHMFEk46DJ/images/hardware/Register/step6-insertcable.png?fit=max&auto=format&n=RVvpmwPHMFEk46DJ&q=85&s=f6b8a920af958c61be7d86e0d9272261" width="5712" height="4284" data-path="images/hardware/Register/step6-insertcable.png" />
      </Frame>

      <Frame>
        <img src="https://mintcdn.com/frostbytetechnologiesinc/RVvpmwPHMFEk46DJ/images/hardware/Register/step7-insertcable.png?fit=max&auto=format&n=RVvpmwPHMFEk46DJ&q=85&s=2be1347c1116bf3c97039373038e2bc0" width="5712" height="4284" data-path="images/hardware/Register/step7-insertcable.png" />
      </Frame>
    </Step>

    <Step title="Align iPad Camera">
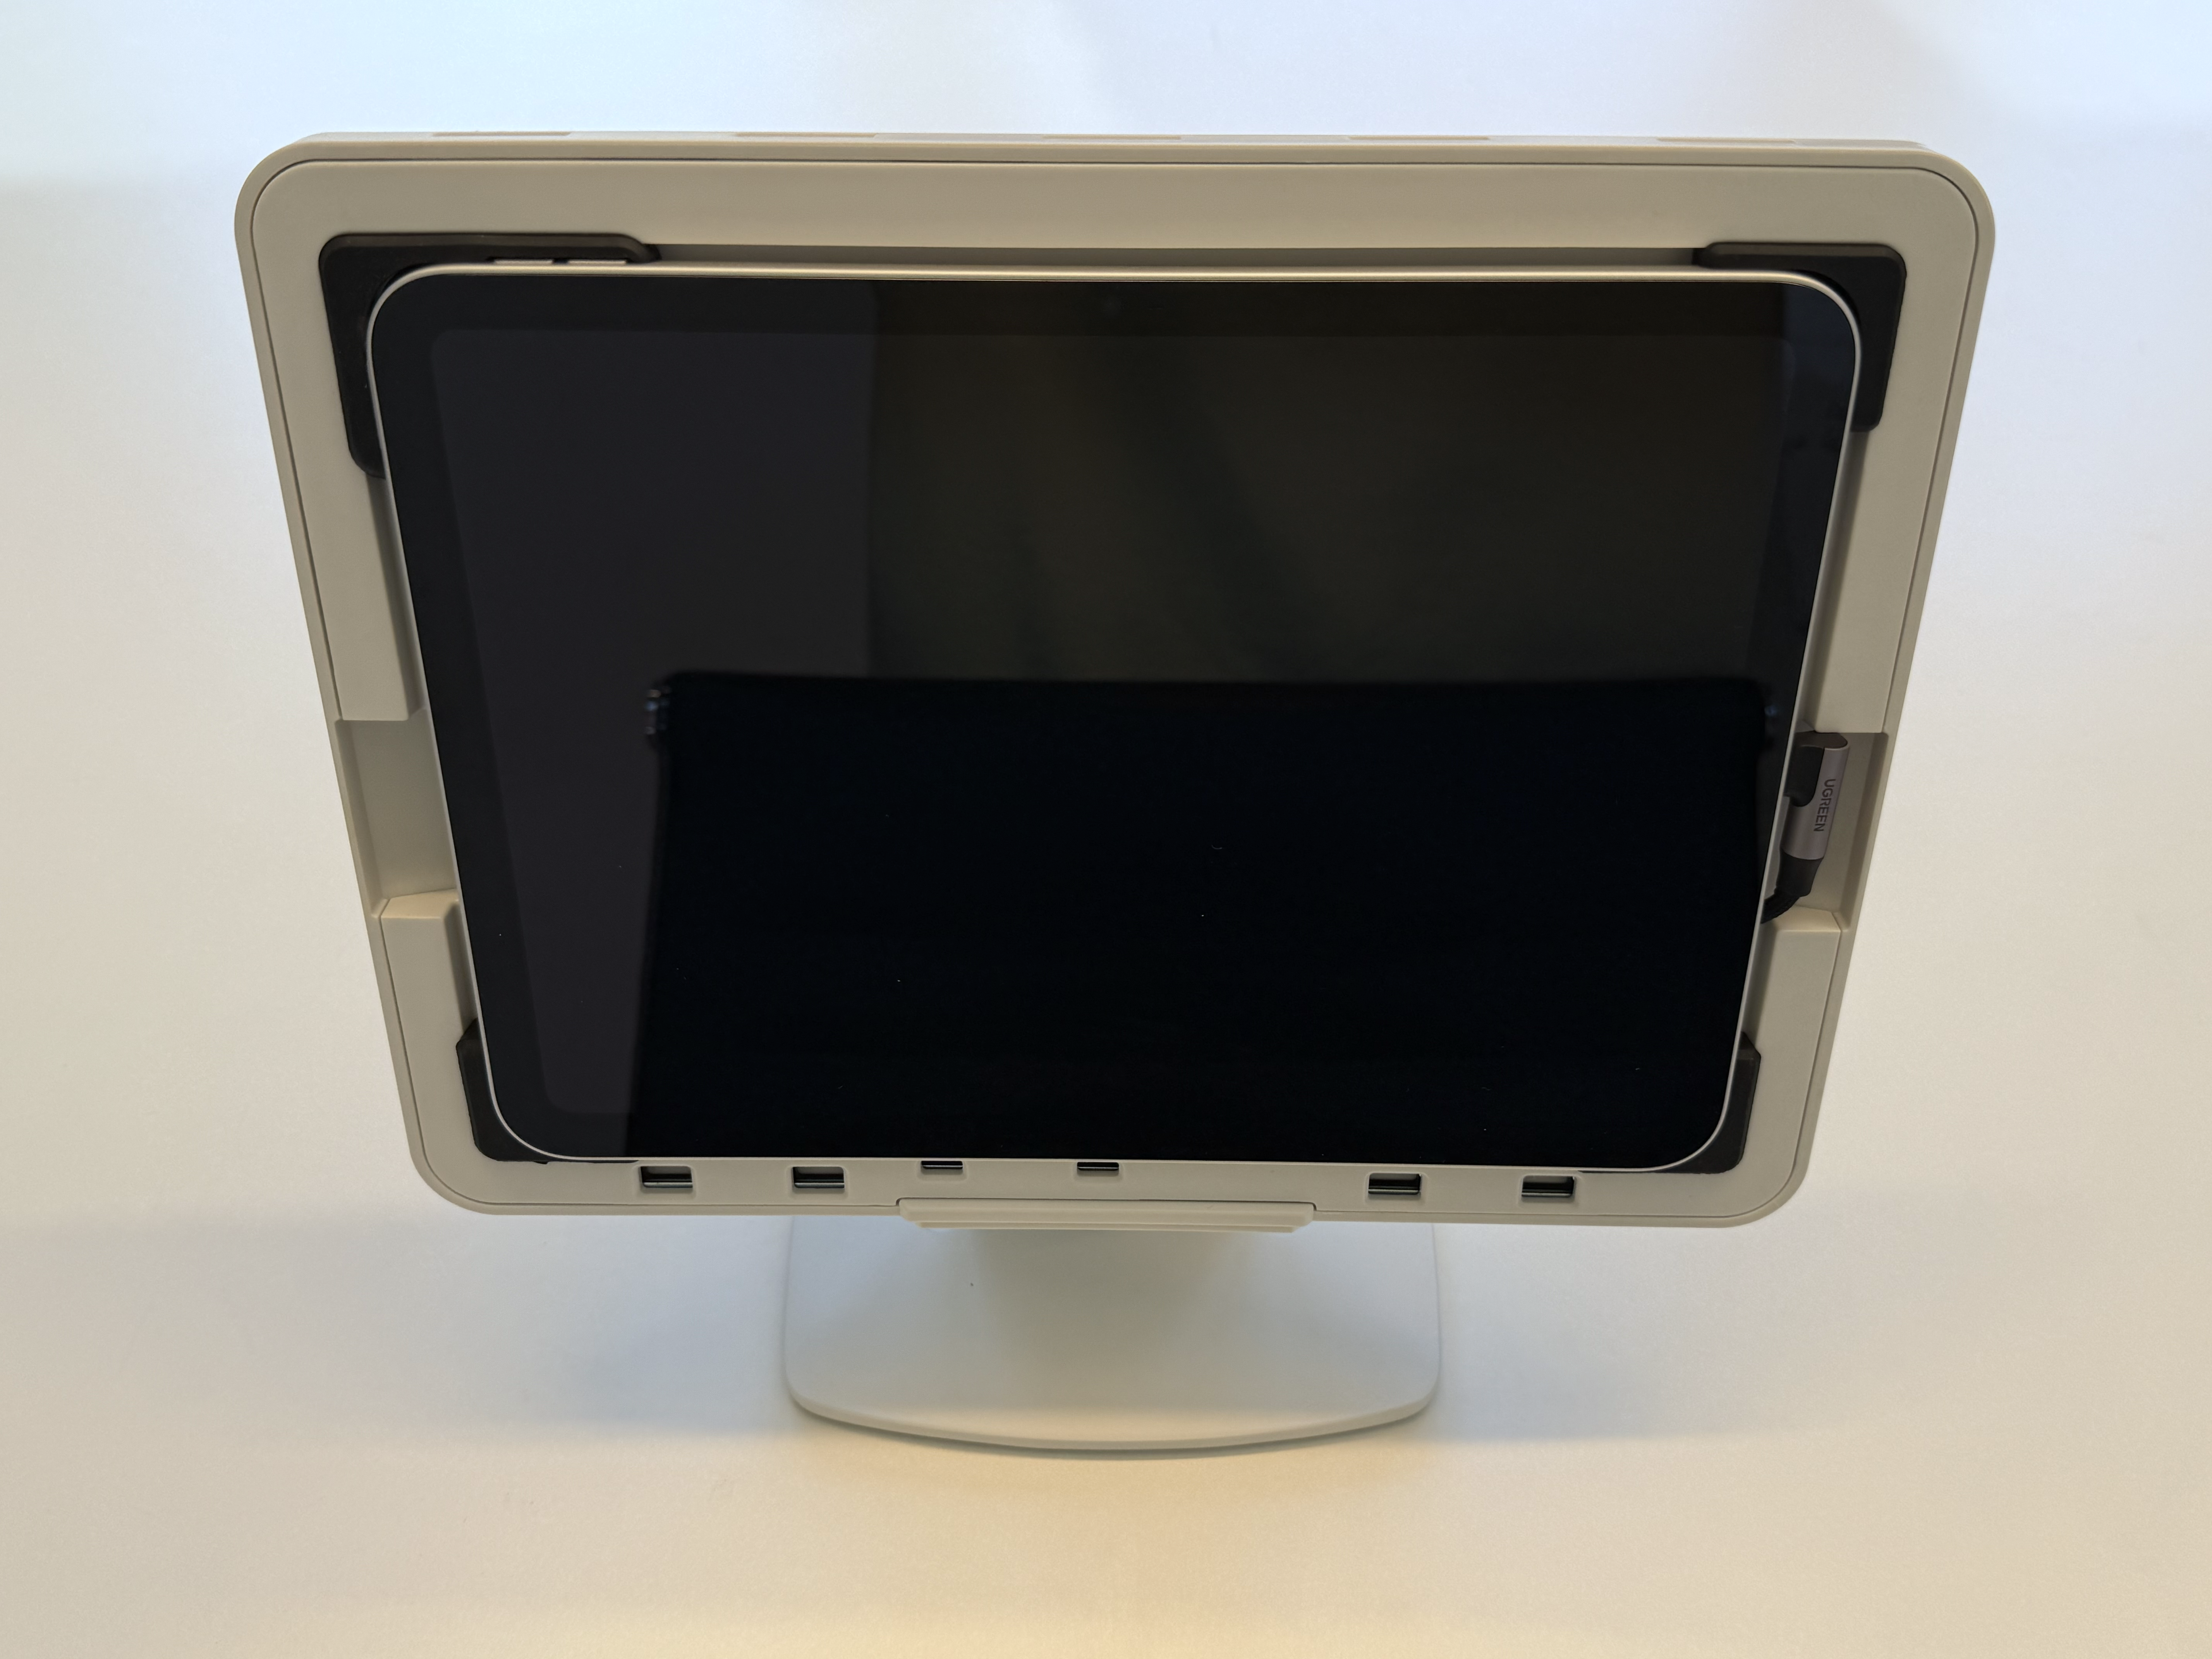
      Plug the USB-C charging cable into the iPad. Place the iPad inside the register stand and ensure the camera is lined up correctly with the register stand opening at the top left corner.

      <Frame>
        <img src="https://mintcdn.com/frostbytetechnologiesinc/RVvpmwPHMFEk46DJ/images/hardware/Register/step8-putipad.png?fit=max&auto=format&n=RVvpmwPHMFEk46DJ&q=85&s=08035e0ecda158154b8c81466b3095f8" width="5712" height="4284" data-path="images/hardware/Register/step8-putipad.png" />
      </Frame>
    </Step>

    <Step title="Secure Register Cover">
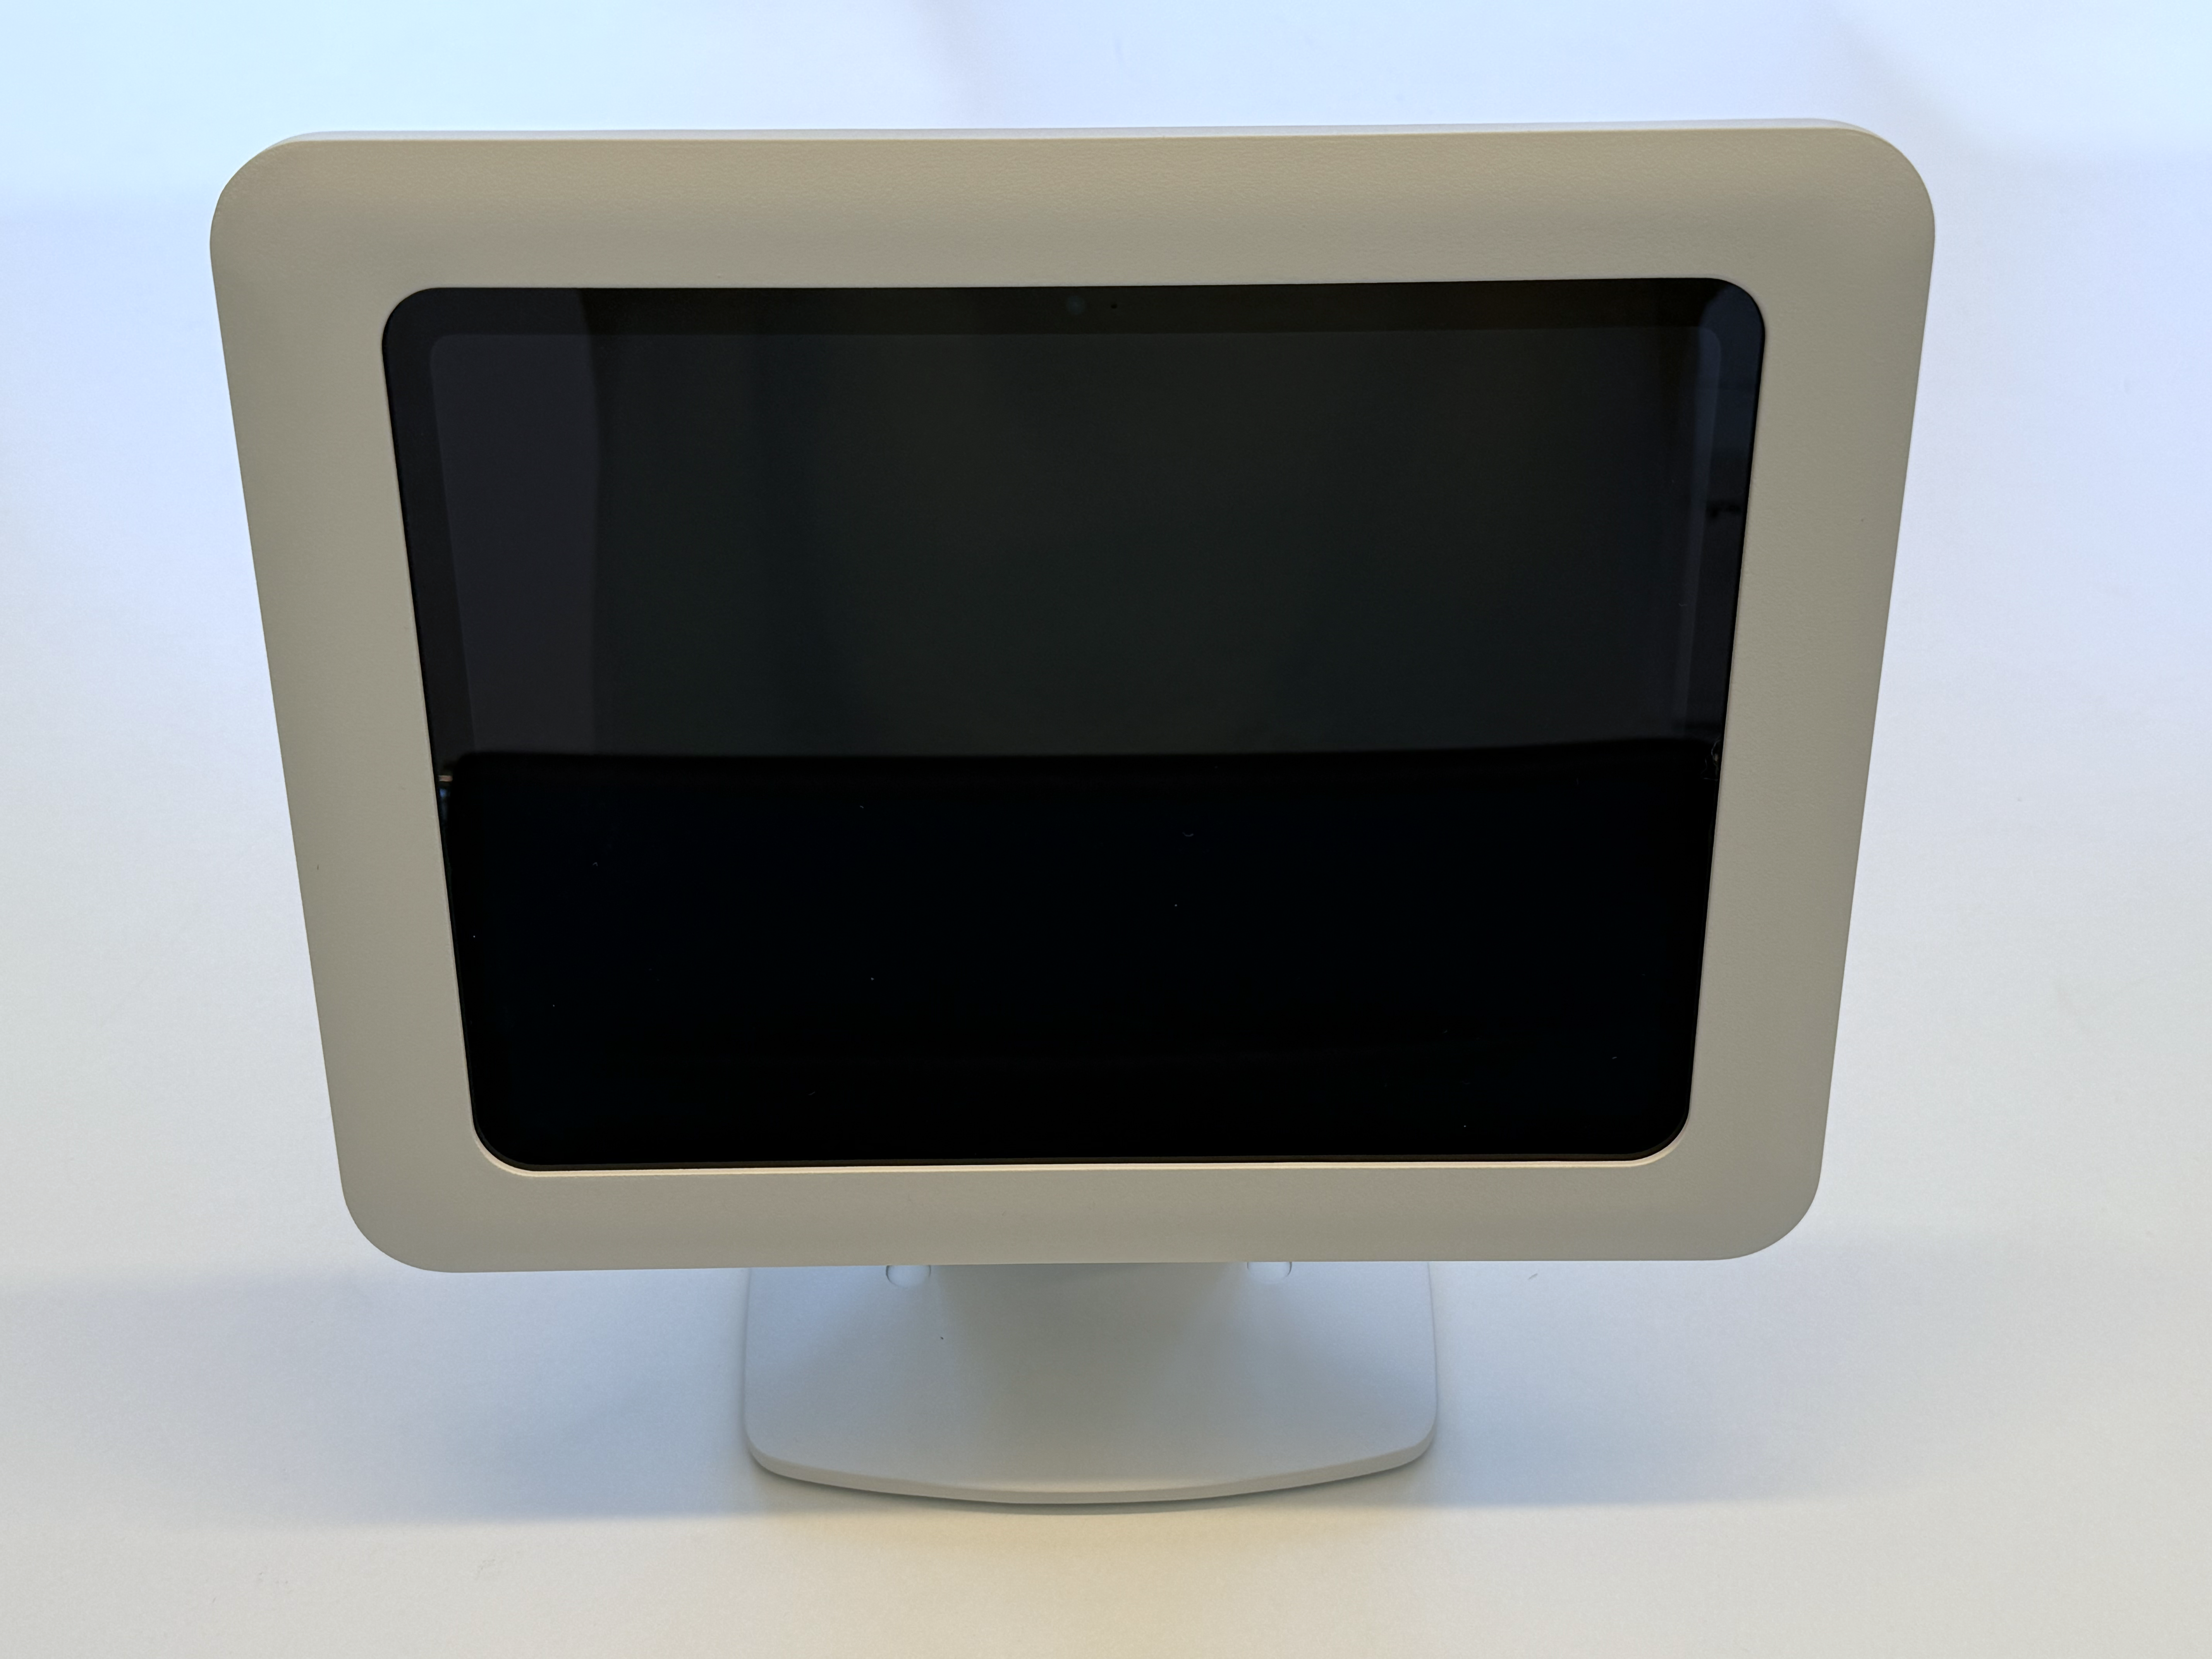
      Place the register stand cover over the iPad. Confirm the cover is securely in place before inserting the register stand key and turning 90 degrees clockwise to lock into place.

      <Frame>
        <img src="https://mintcdn.com/frostbytetechnologiesinc/RVvpmwPHMFEk46DJ/images/hardware/Register/step9-closecover.png?fit=max&auto=format&n=RVvpmwPHMFEk46DJ&q=85&s=85b5a8054eaf8e3427a473b91ae073d1" width="5712" height="4284" data-path="images/hardware/Register/step9-closecover.png" />
      </Frame>

      <Frame>
        <img src="https://mintcdn.com/frostbytetechnologiesinc/RVvpmwPHMFEk46DJ/images/hardware/Register/step10-lockstand.png?fit=max&auto=format&n=RVvpmwPHMFEk46DJ&q=85&s=78304bacdfab0561fcbd2fb3b29e7038" width="5712" height="4284" data-path="images/hardware/Register/step10-lockstand.png" />
      </Frame>
    </Step>

    <Step title="Plug In Charging Cable">
      Plug the other end of the charging cable into a power outlet to ensure the iPad is charged at all times.
    </Step>
  </Steps>
</Accordion>
