> ## Documentation Index
> Fetch the complete documentation index at: https://support.dripos.com/llms.txt
> Use this file to discover all available pages before exploring further.
# Get Started with Simple Inventory
> Determine products to track with Simple Inventory
Simple Inventory is recommended for basic inventory tracking of finished goods
Pastries, bottles of water, grab & go food
When a product you're tracking is sold through any Dripos ordering platform, its inventory will automatically decrease by the quantity sold.
## Add and Track Products
Choose which products you’d like to track or stop tracking inventory levels of.
Menu product quantities aren’t tracked automatically. To enable inventory tracking, simply select the products you'd like to monitor.
On the **Dashboard** navigate to **Operations** > **Simple Inventory**
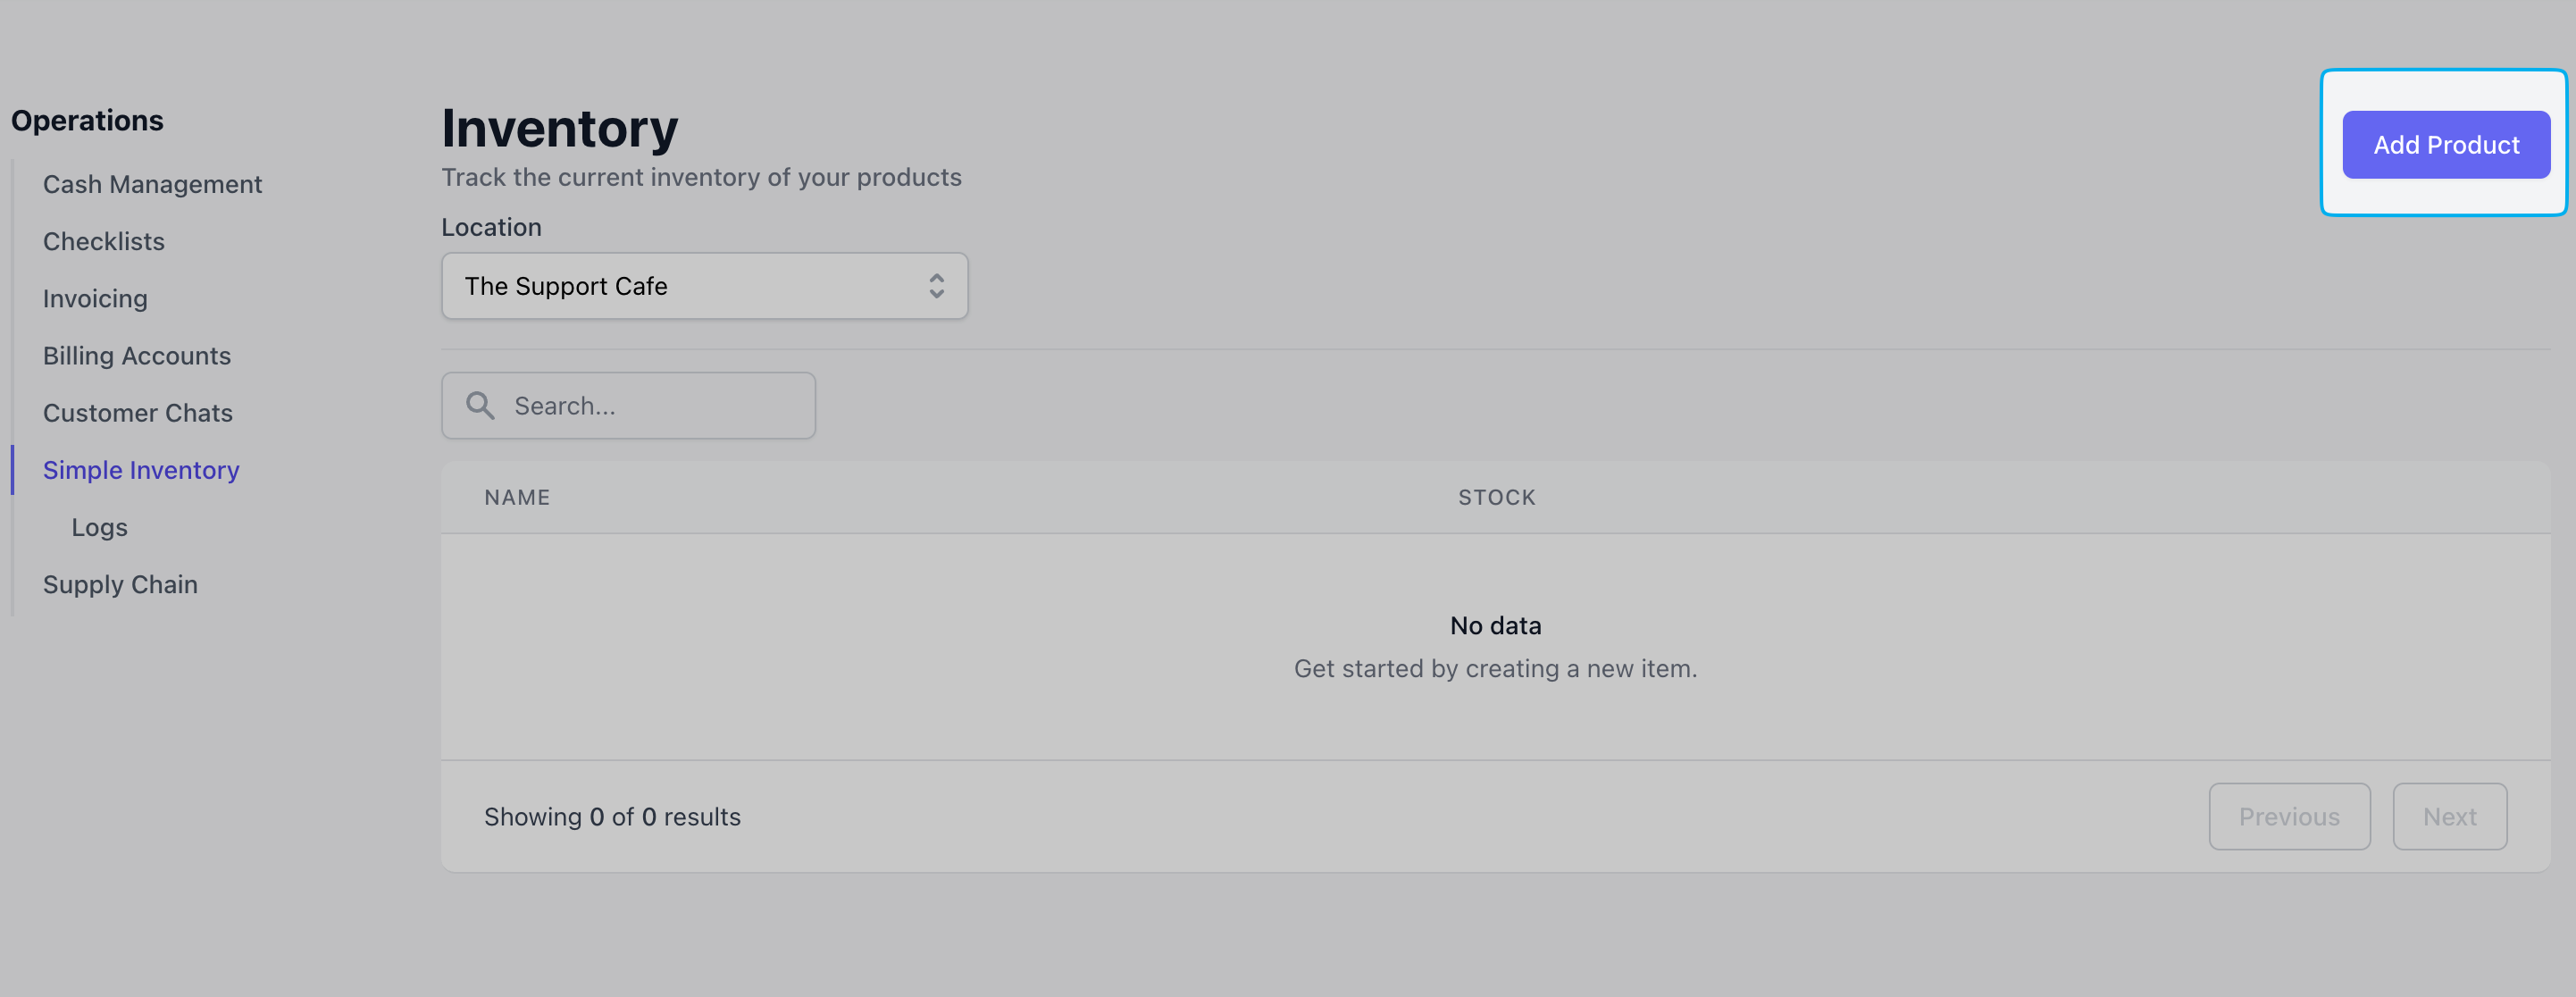
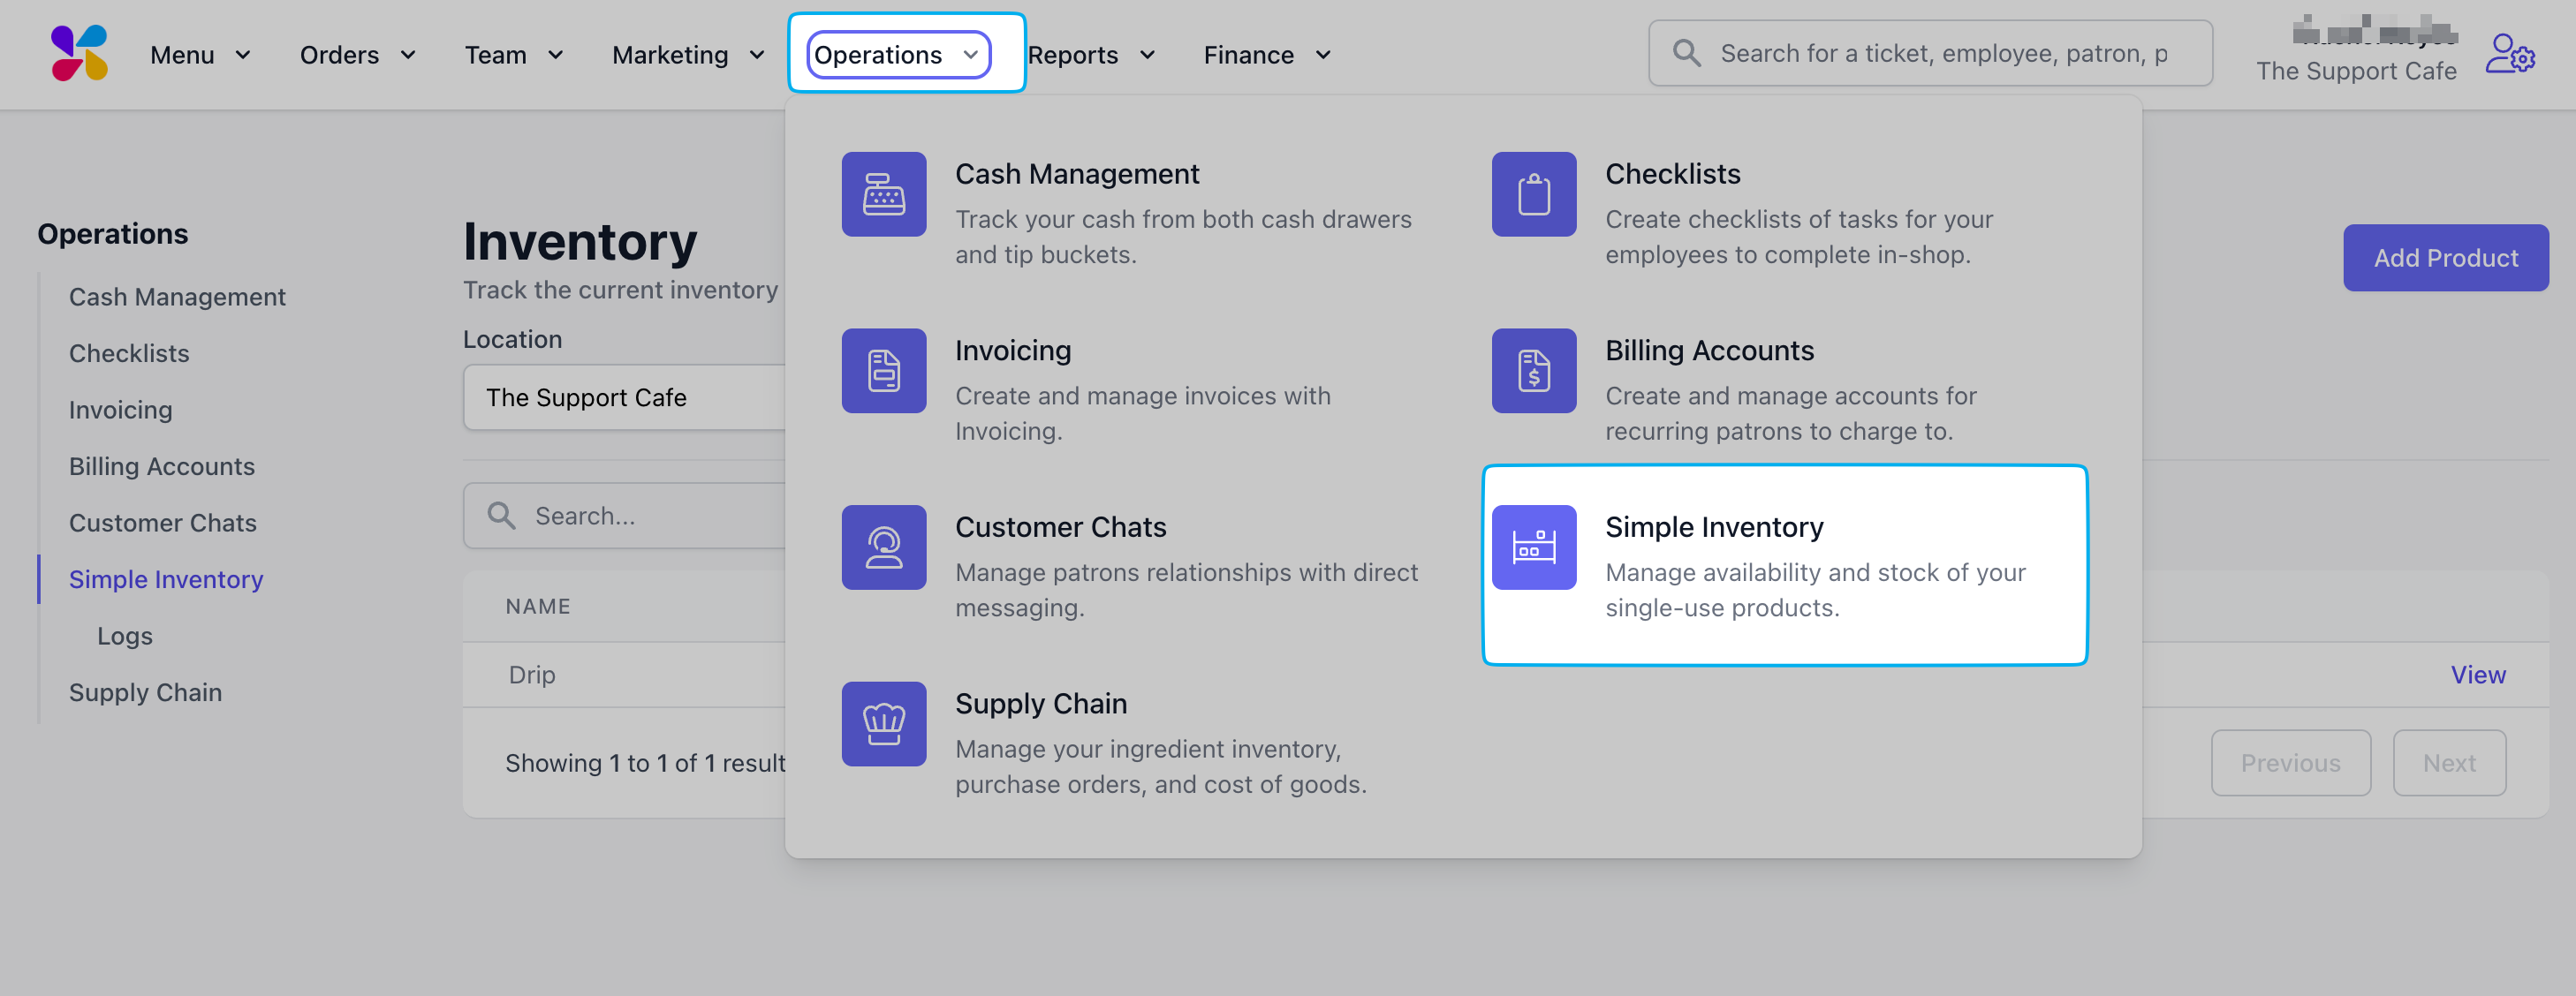 Click **Add Product** to track its sales and inventory on hand
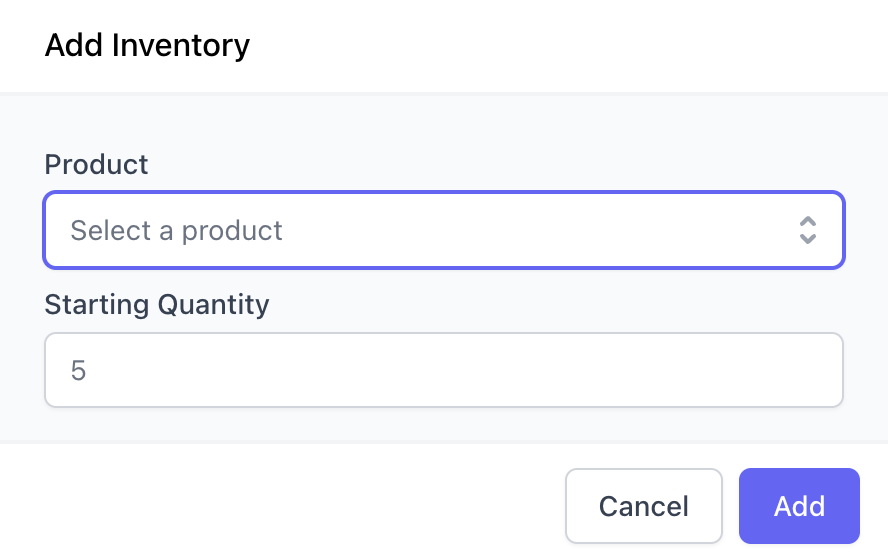
 Select a product and its starting inventory quantity > click **Add**
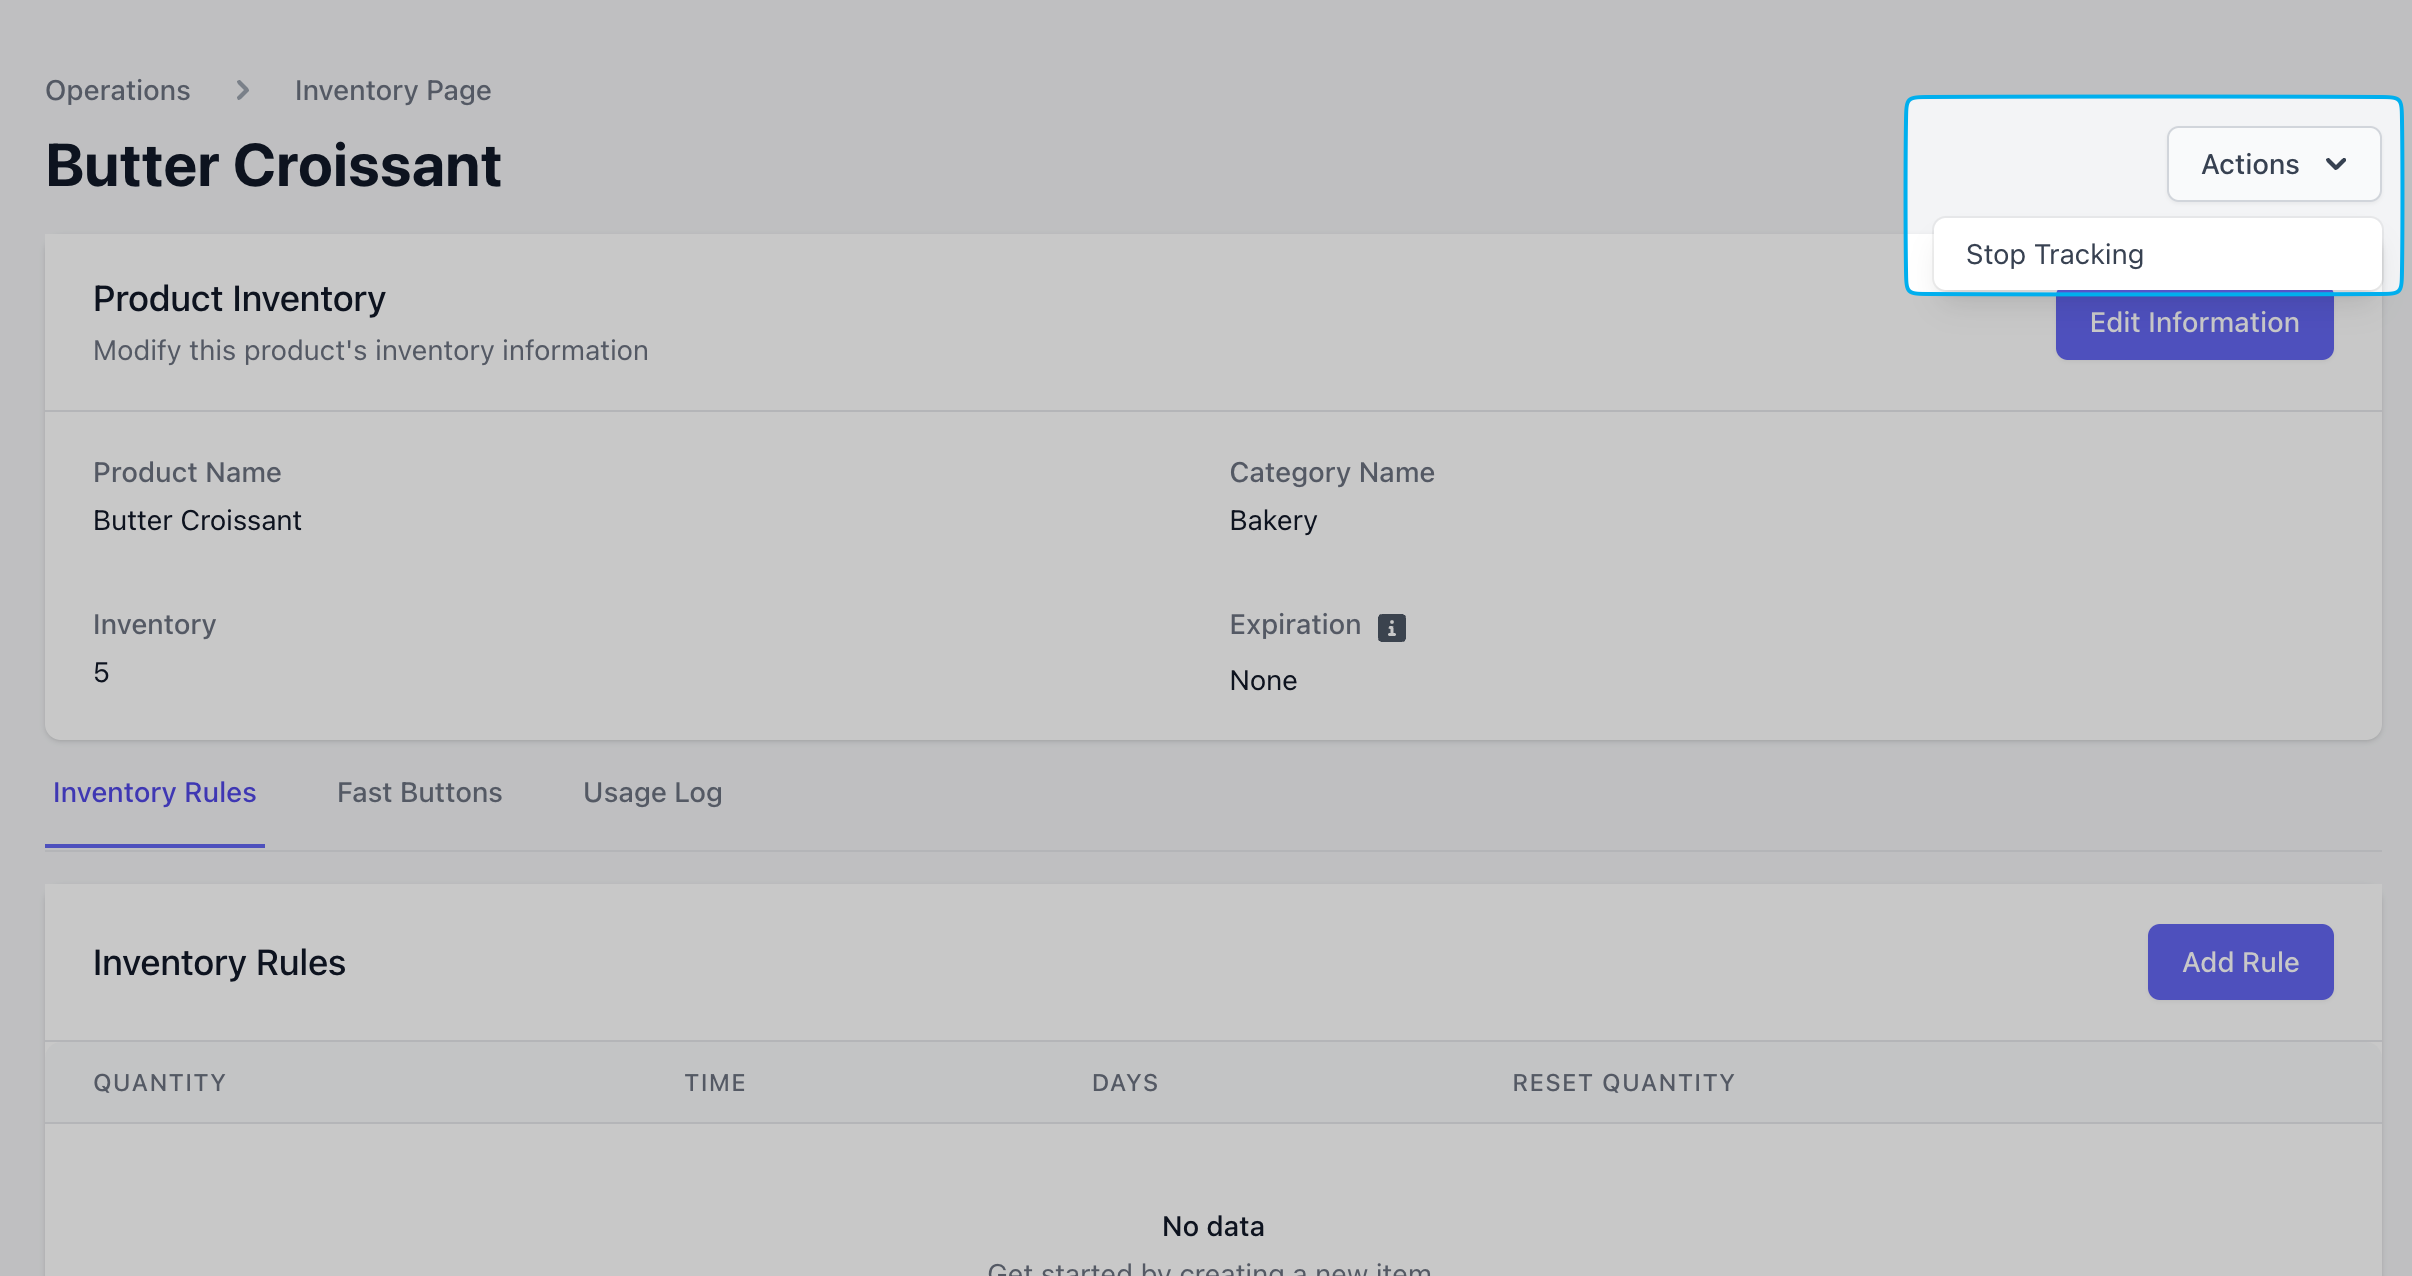
 Stop tracking a product at any time by deleting it from Simple Inventory.
Click **Actions** > **Stop Tracking**
Stop tracking a product at any time by deleting it from Simple Inventory.
Click **Actions** > **Stop Tracking**
 ***
## Manually Adjust Stock
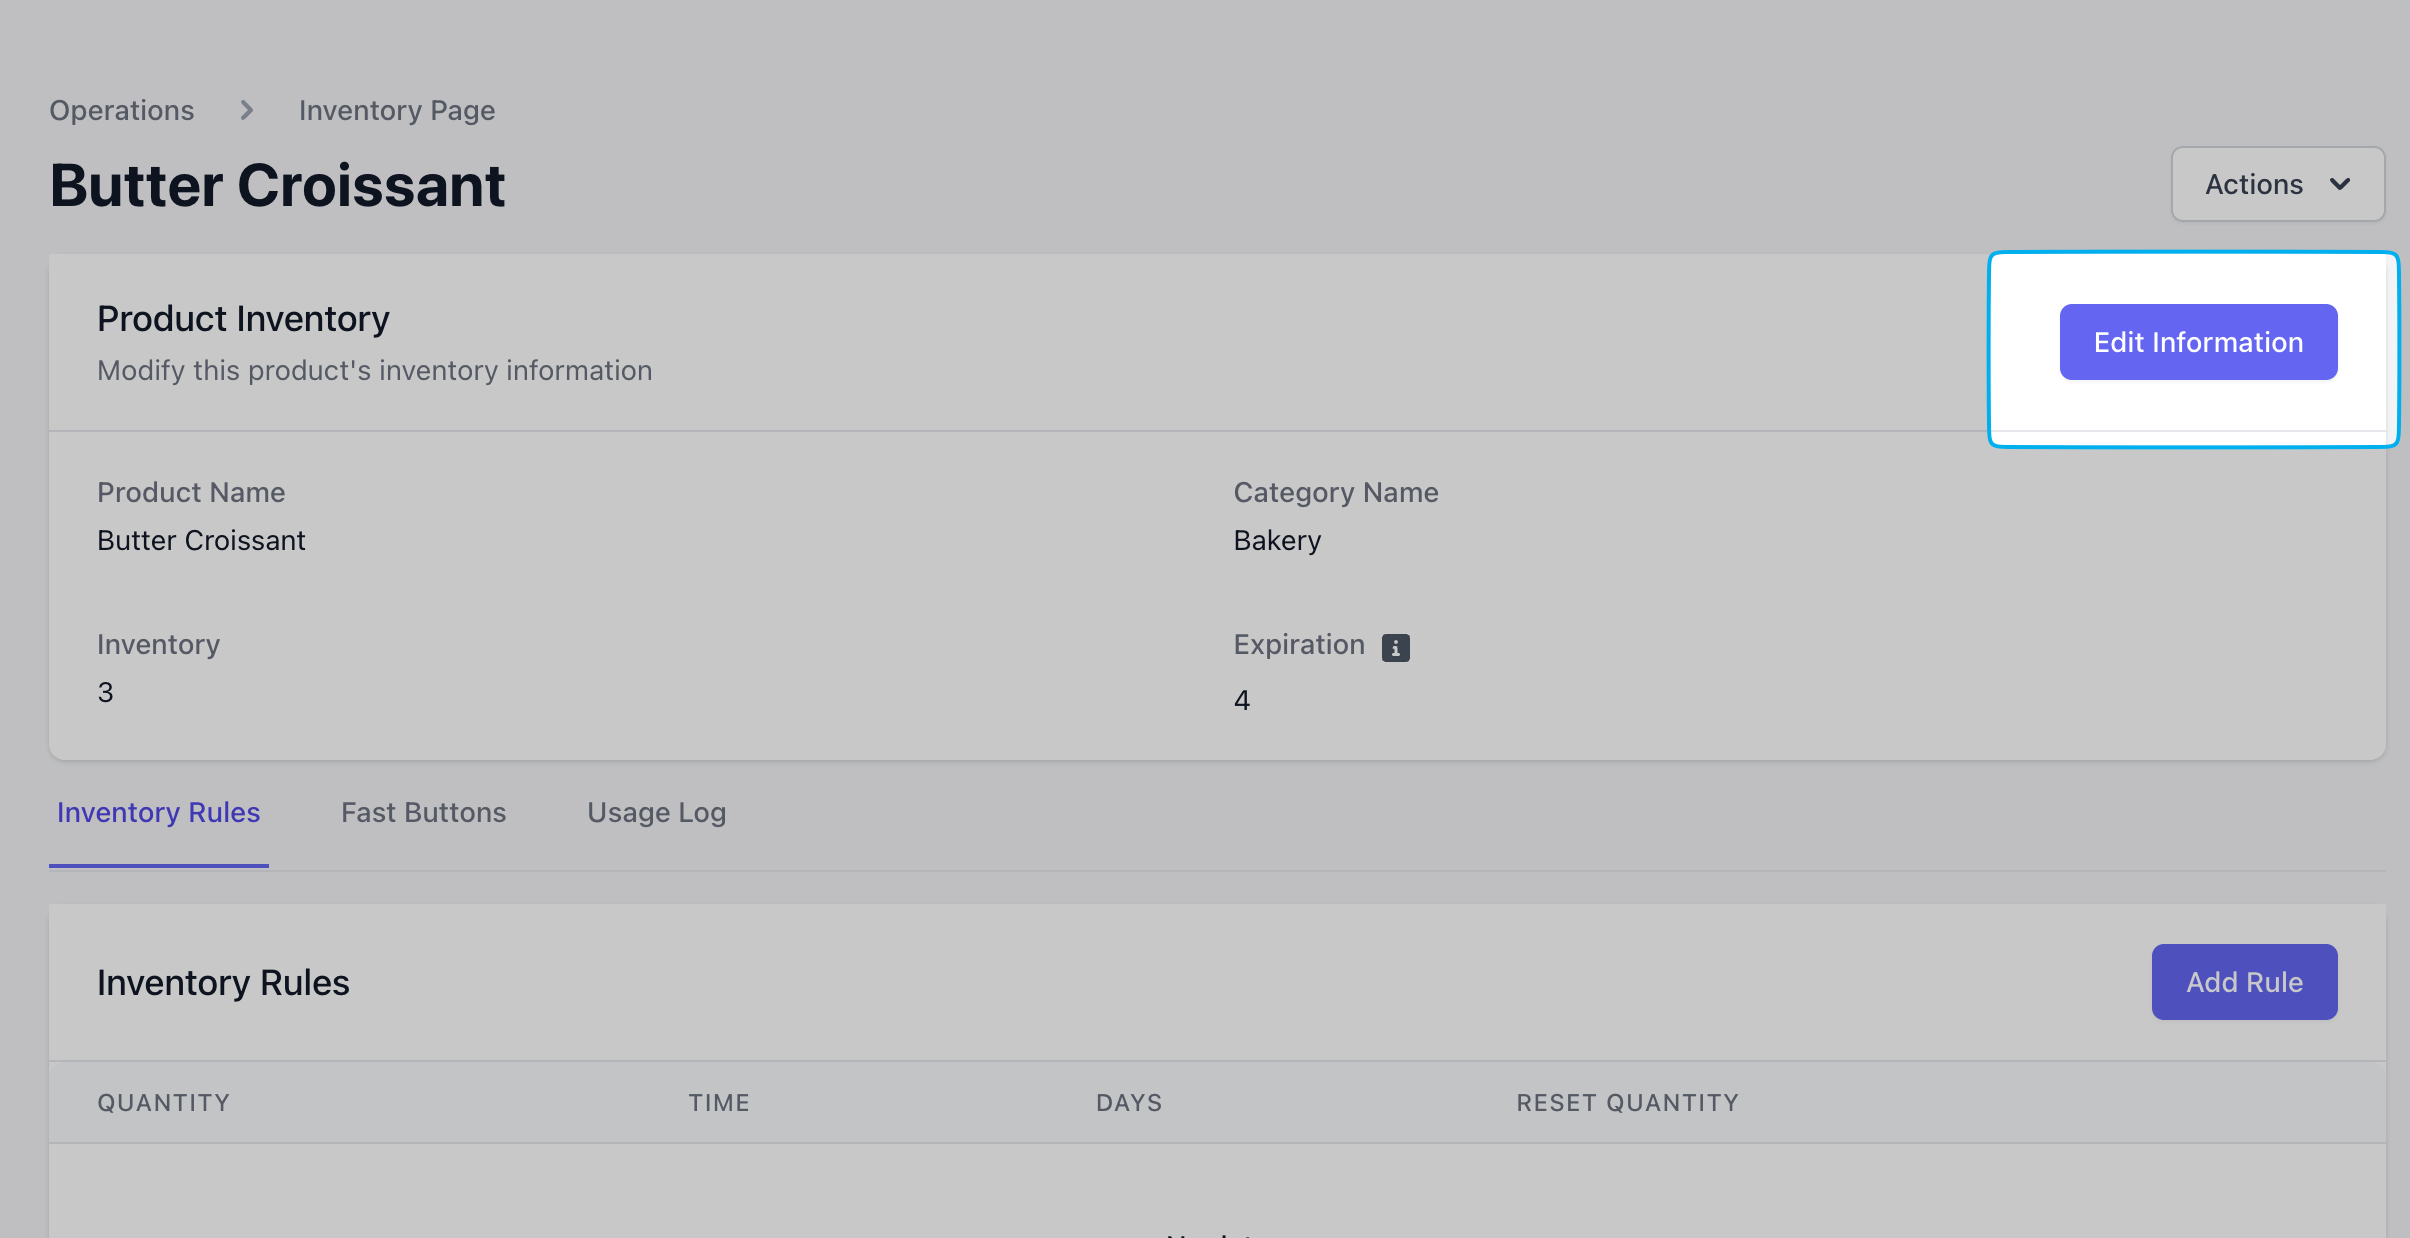
To manually adjust the current stock of a product in simple inventory, navigate to **Simple Inventory** > **View** Product > **Edit Information**
***
## Manually Adjust Stock
To manually adjust the current stock of a product in simple inventory, navigate to **Simple Inventory** > **View** Product > **Edit Information**
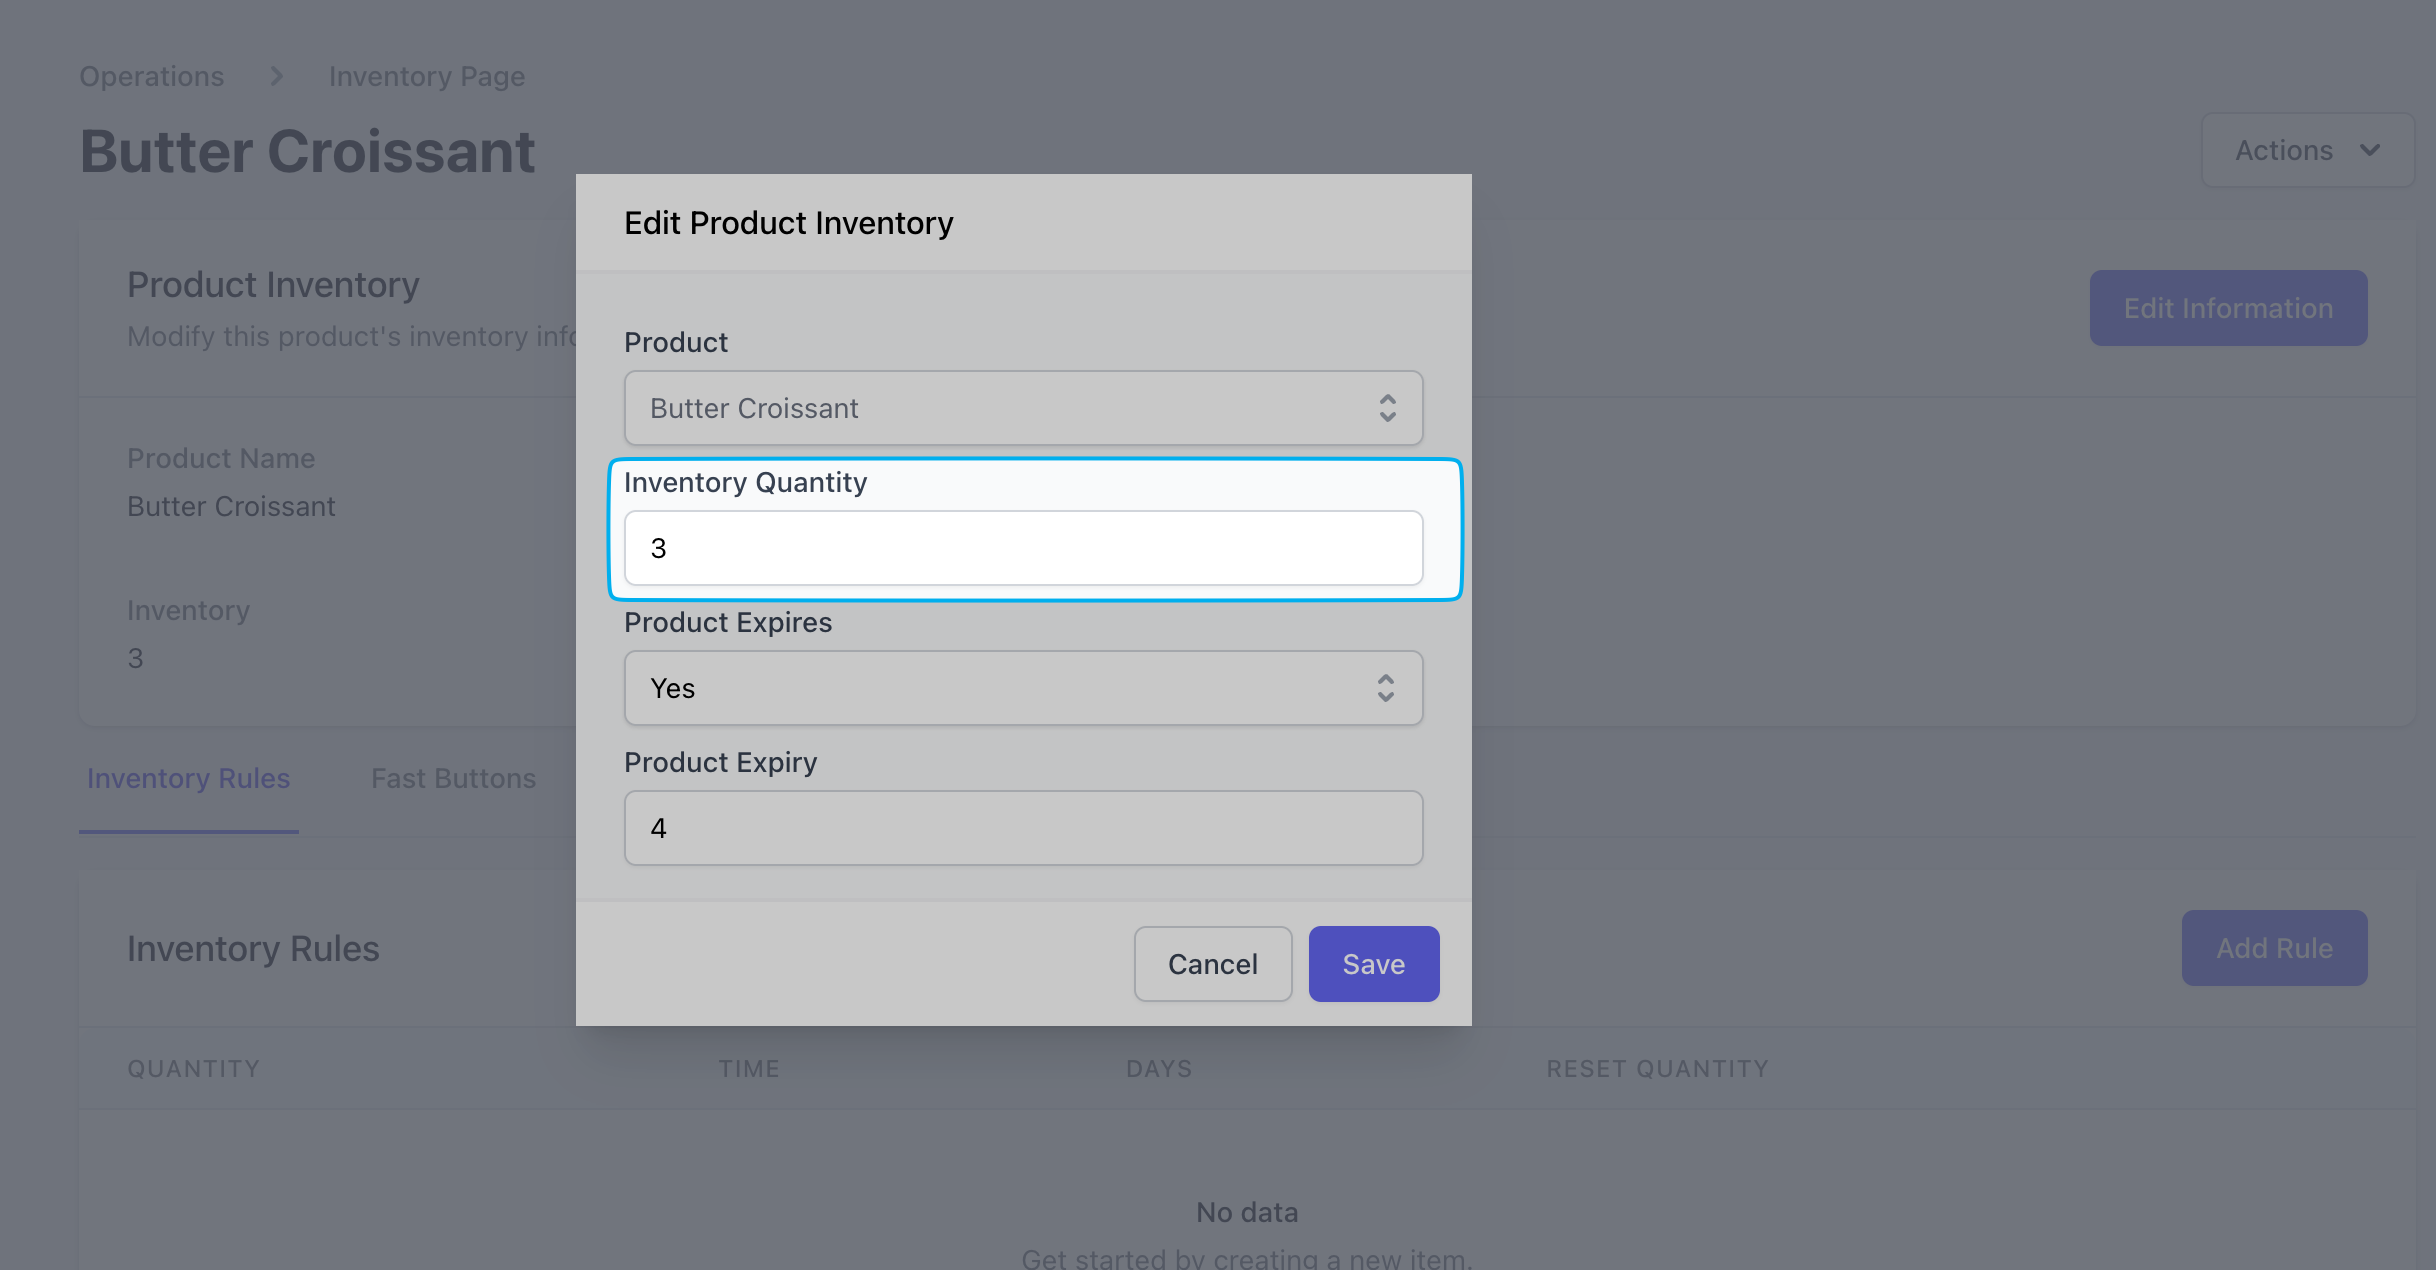
 Adjust the current stock to it's exact quantity and click **Save**
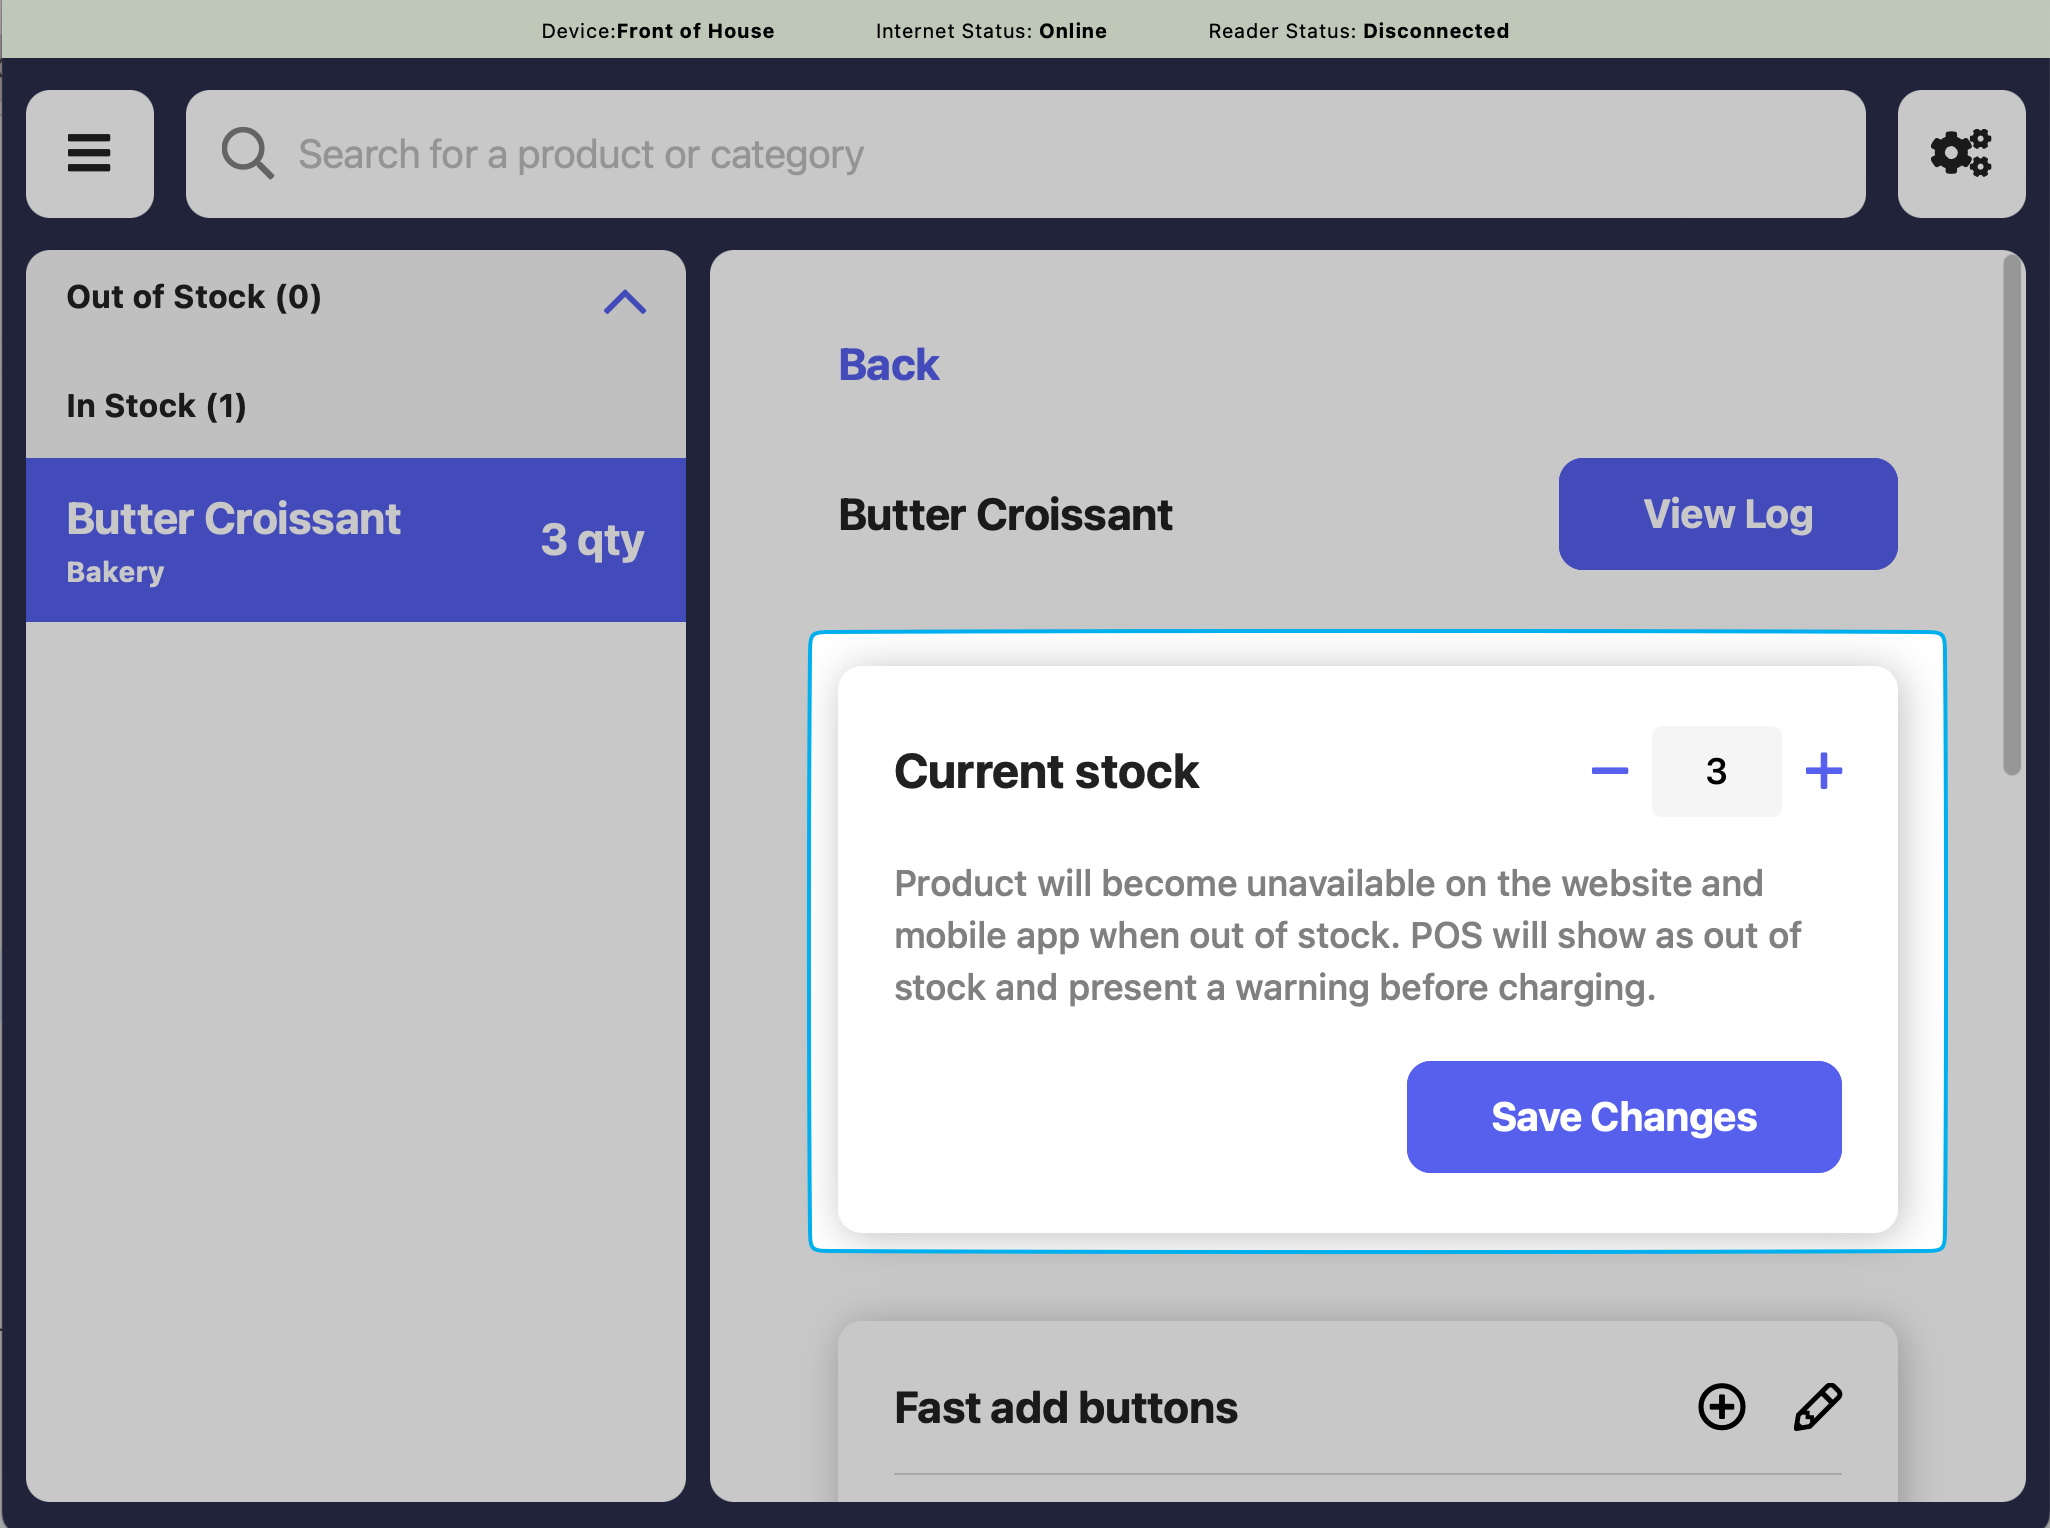
 Click the tribar in the upper left hand corner > **Simple Inventory** > find the product
Increase or decrease the current stock with the - and + signs, and click **Save Changes**
Click the tribar in the upper left hand corner > **Simple Inventory** > find the product
Increase or decrease the current stock with the - and + signs, and click **Save Changes**
 ***
## Inventory Rules
Create automatic stocking rules for a product's inventory. There is no limit to the number of inventory rules that can be created per product.
Examples:
* Restock everyday at 7AM
* Add 5 to stock every Monday at 8AM.
On the **Simple Inventory** page, click **View** on a product > click **Inventory Rules** > **Add Rule**
***
## Inventory Rules
Create automatic stocking rules for a product's inventory. There is no limit to the number of inventory rules that can be created per product.
Examples:
* Restock everyday at 7AM
* Add 5 to stock every Monday at 8AM.
On the **Simple Inventory** page, click **View** on a product > click **Inventory Rules** > **Add Rule**
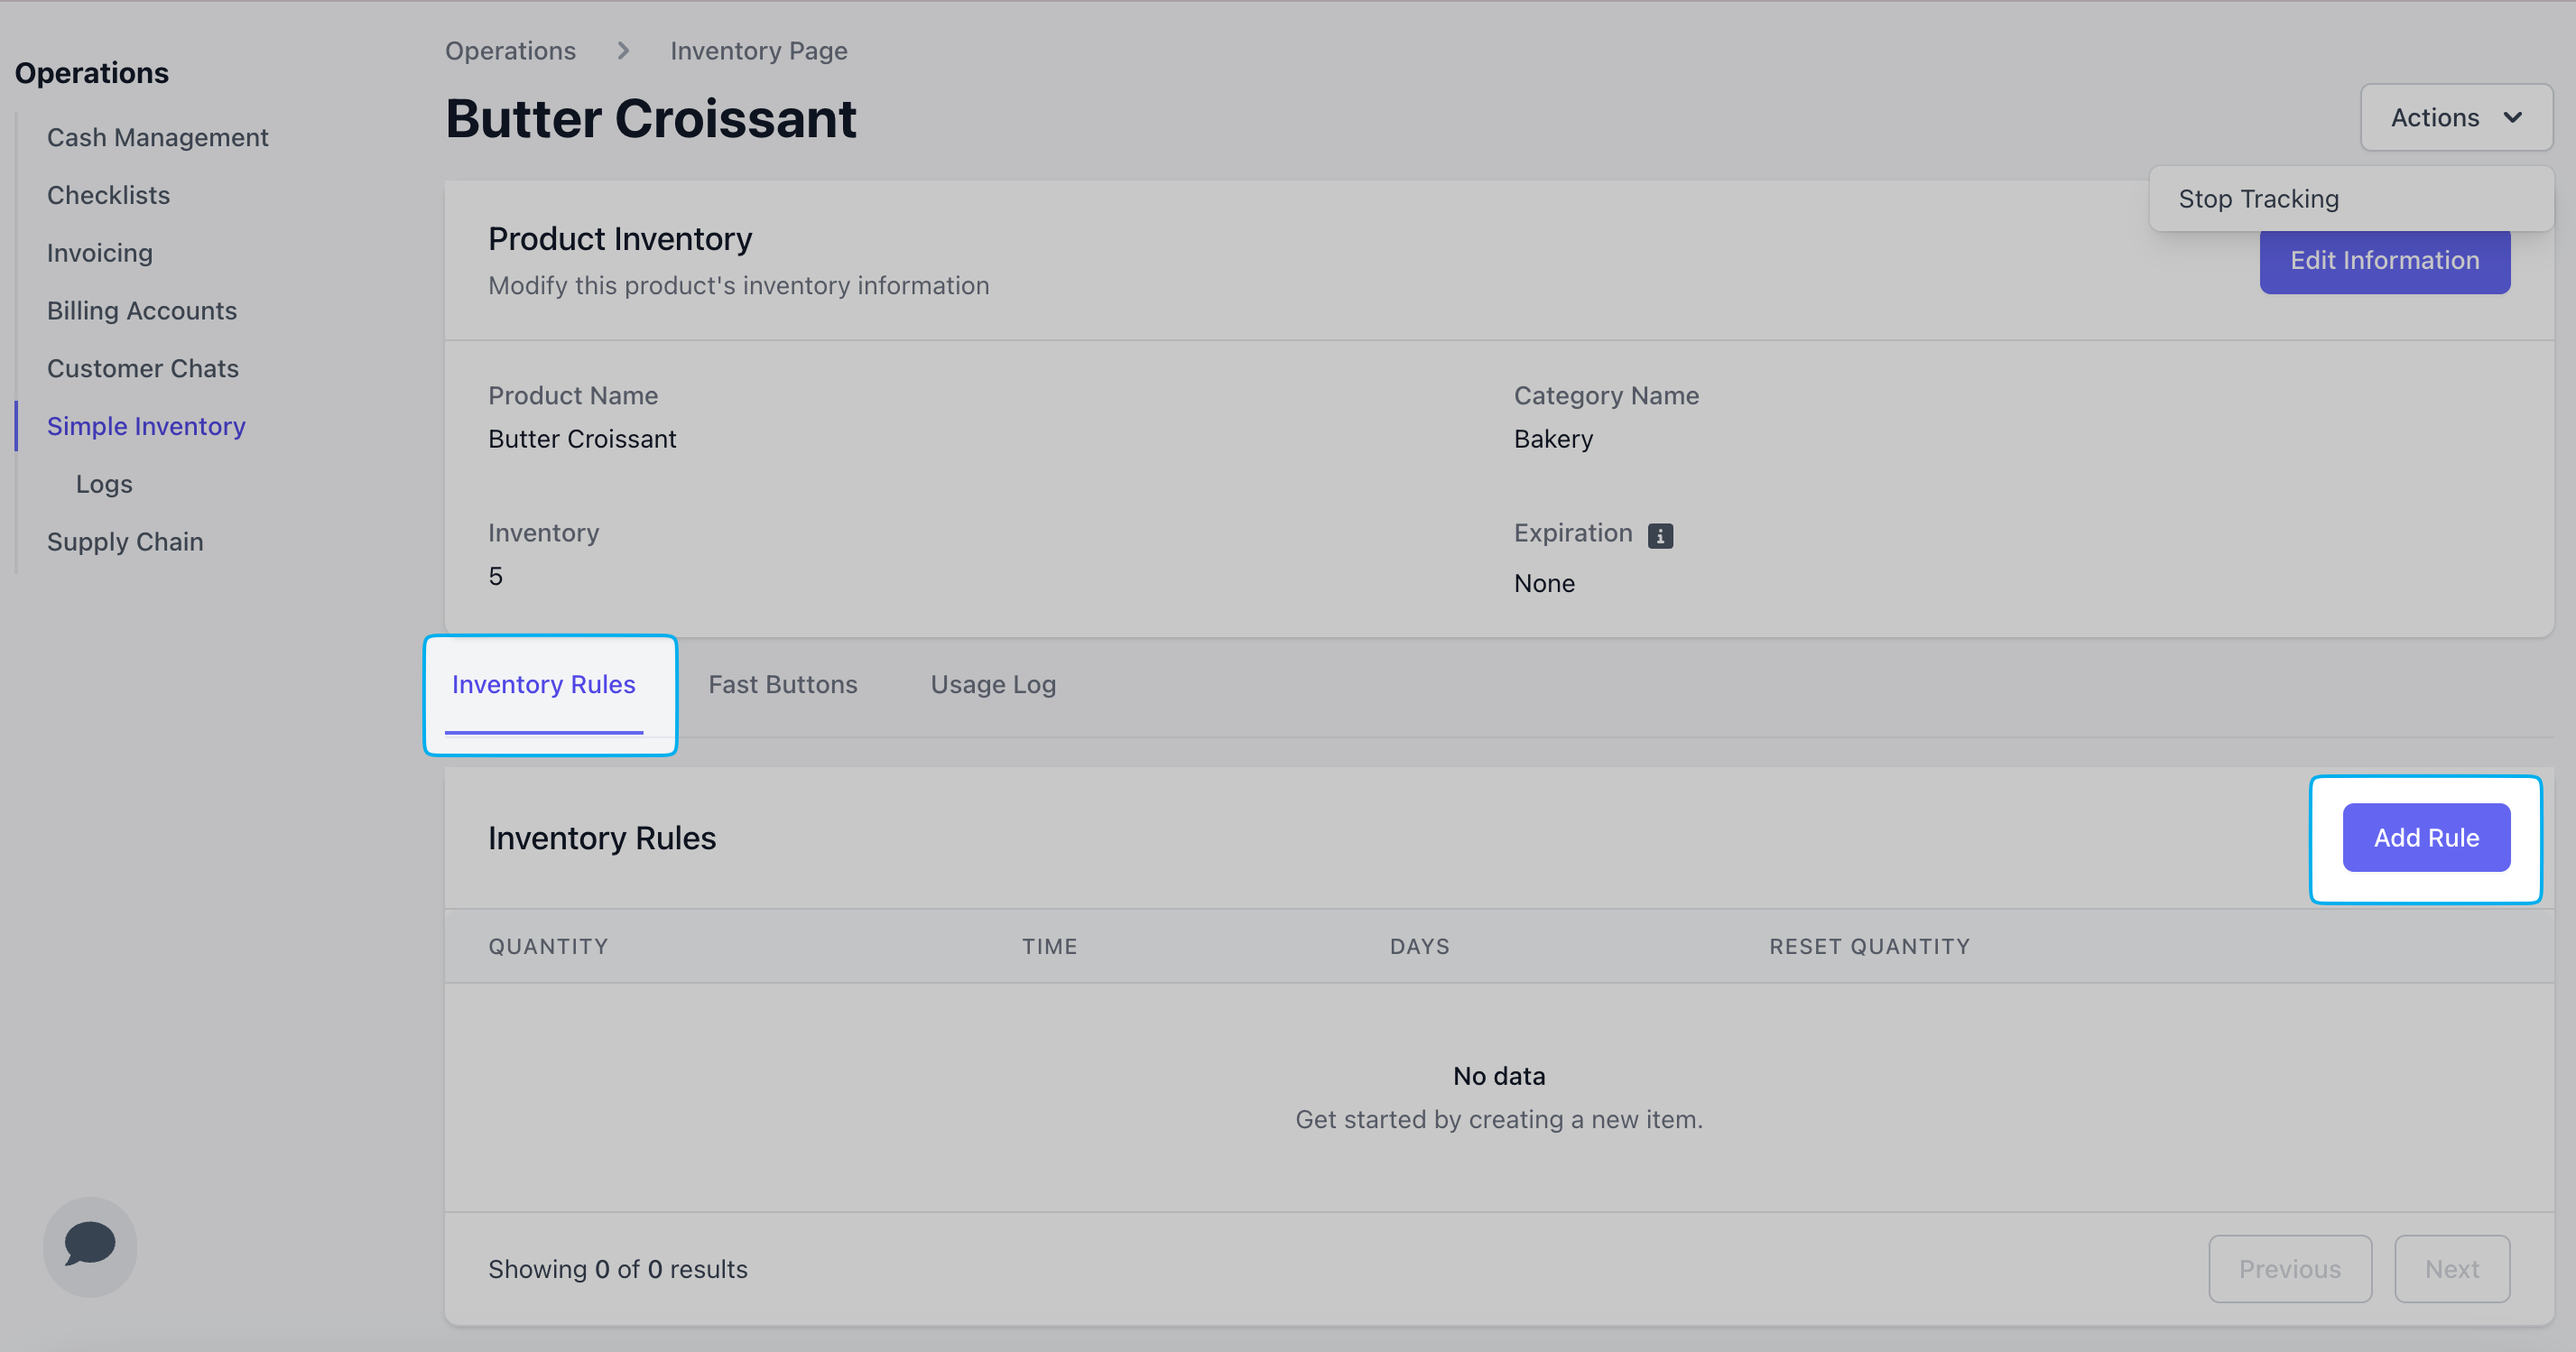 Complete the following fields and click **Add**
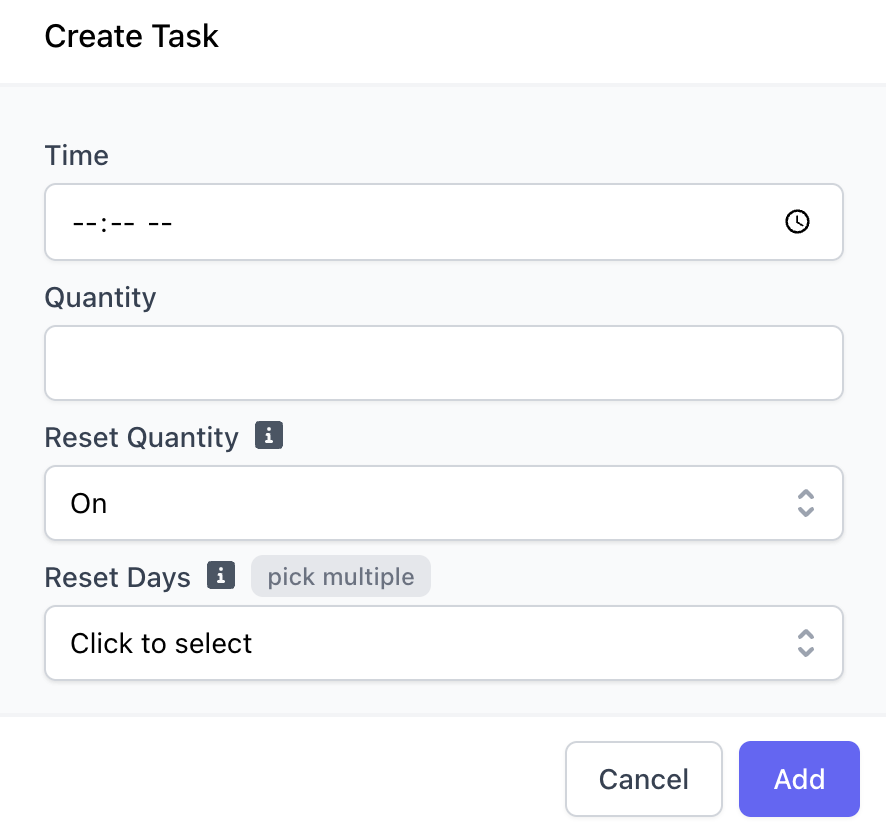 > **Reset Quantity**: If **enabled**, the current stock will reset to the selected quantity. If **disabled**, the selected quantity will be **added** to the current stock.
>
> **Time** & **Reset Days**: Time and day of the week for the rule to occur; multiple days may be selected
>
> **Quantity**: Number to increase or reset stock
***
## Usage Logs
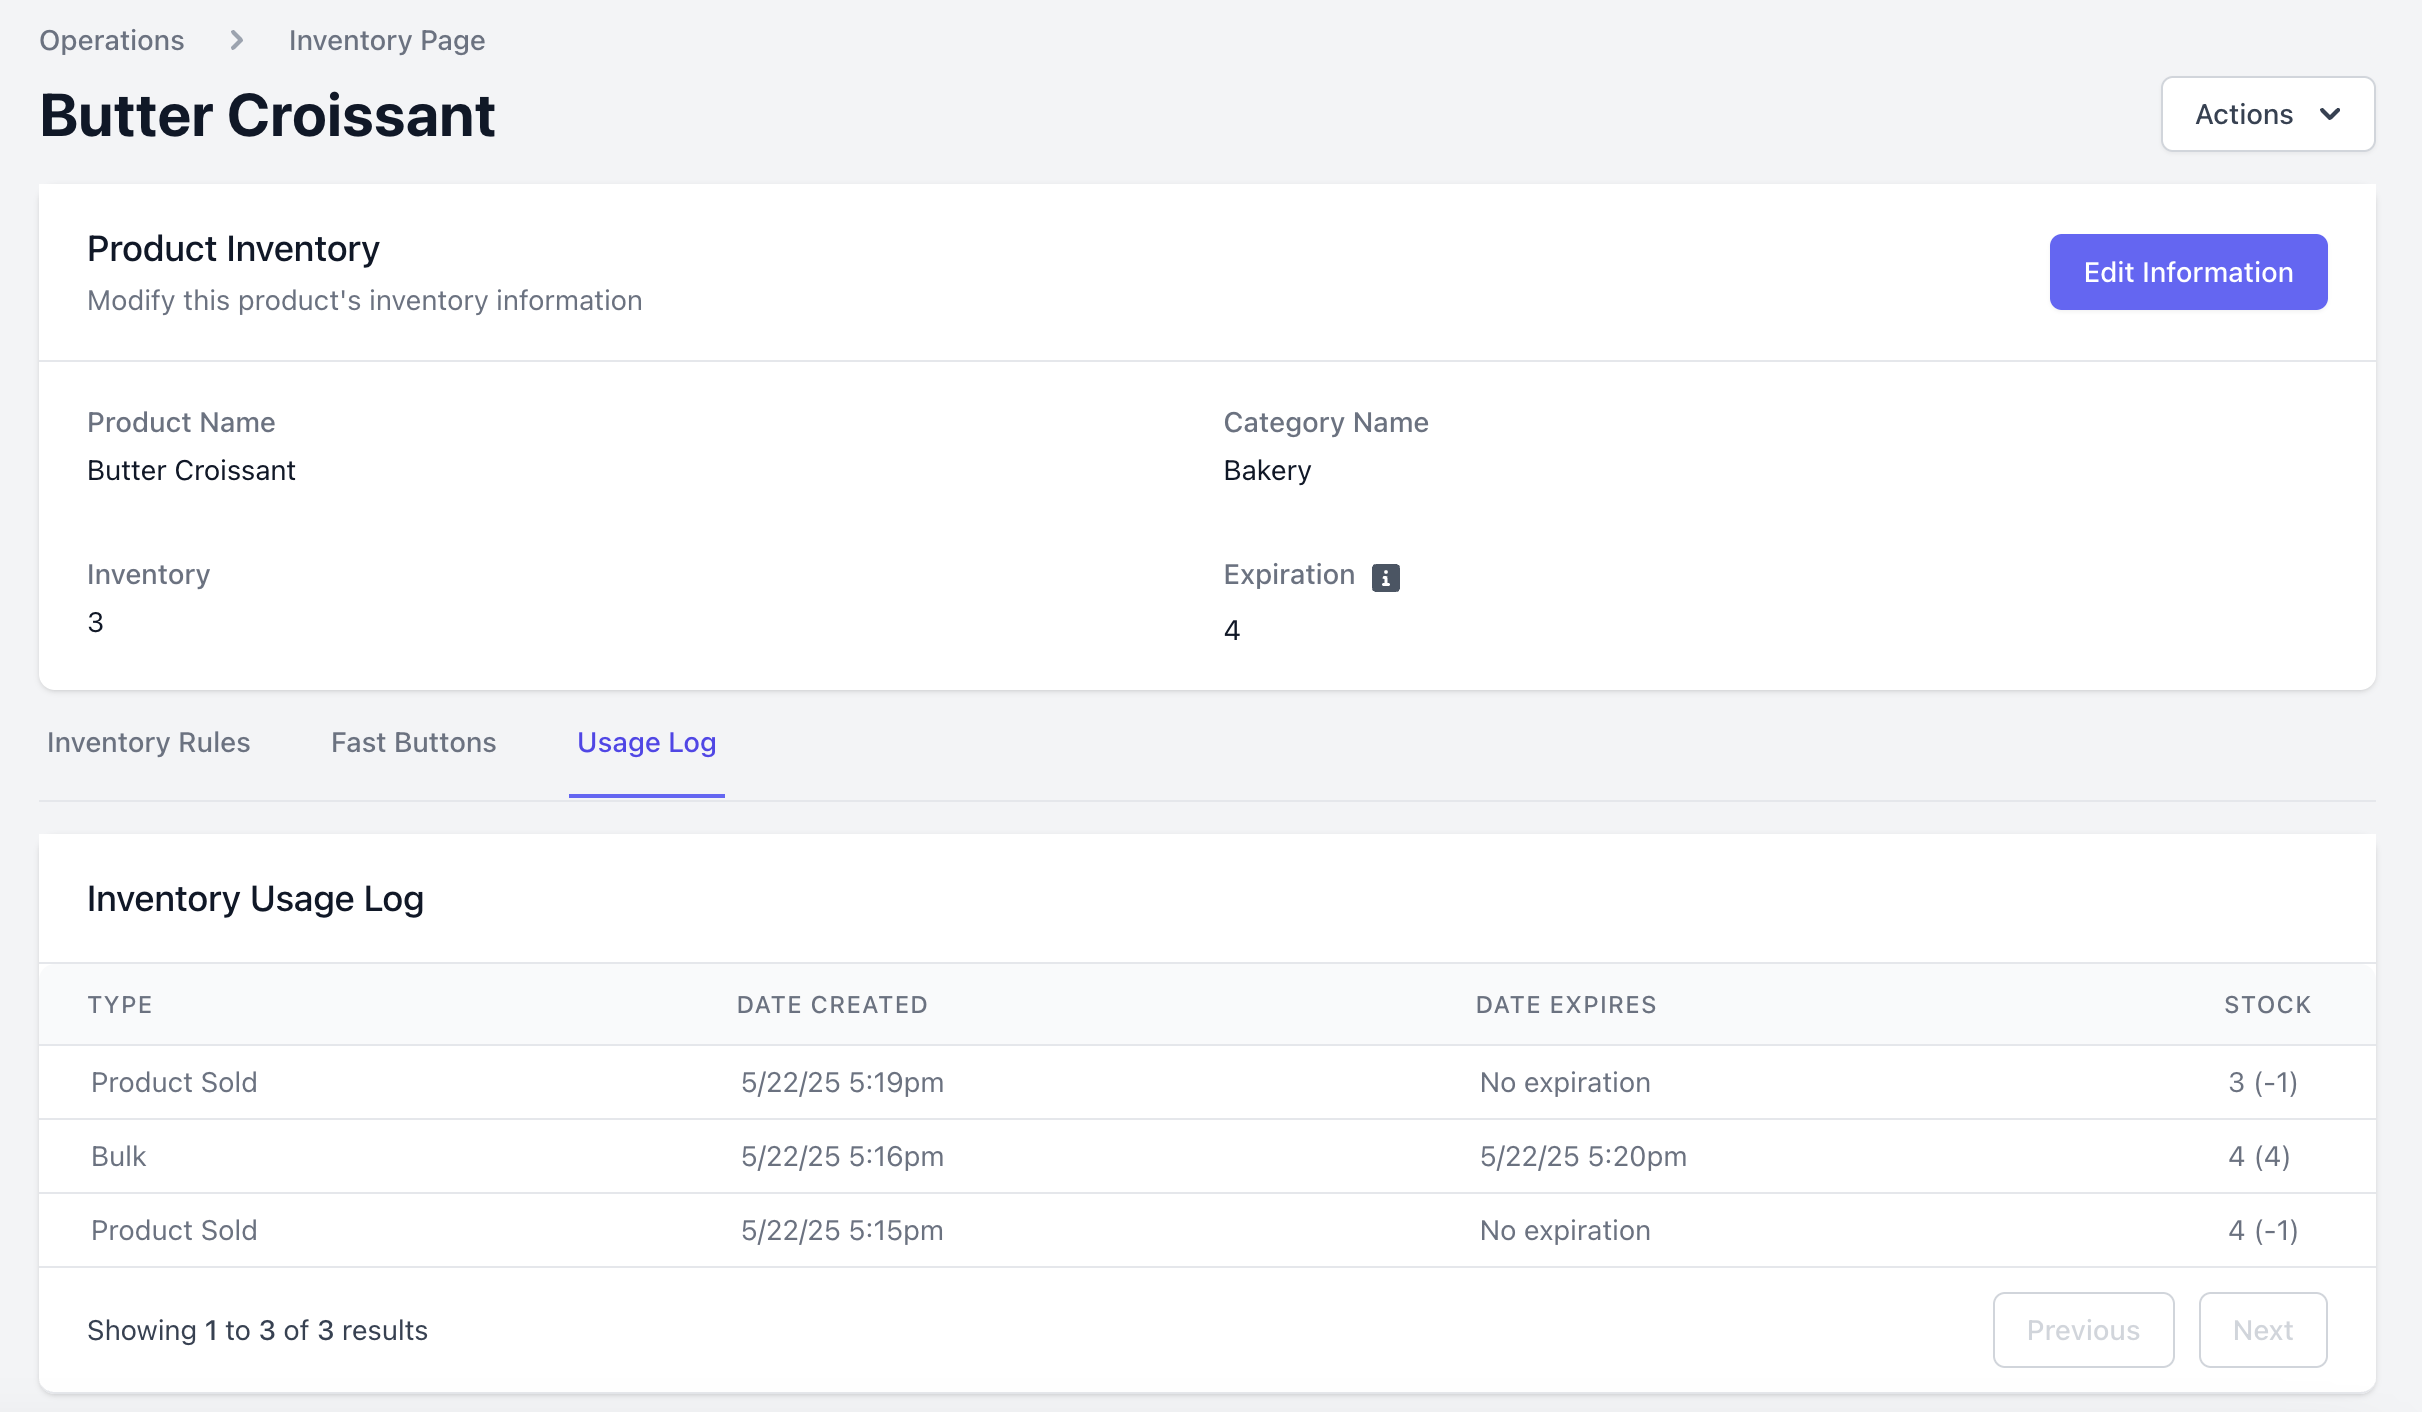
When a product's stock is increased or when a product is sold, the Simple Inventory page will log that instance under **Usage Log**.
When a product is sold, see how many products were sold at the time and the stock quantity that remained after the sale.
When a product is restocked, see how many units were stocked, when their expire (if applicable), and the current level of stock at the time of.
> **Reset Quantity**: If **enabled**, the current stock will reset to the selected quantity. If **disabled**, the selected quantity will be **added** to the current stock.
>
> **Time** & **Reset Days**: Time and day of the week for the rule to occur; multiple days may be selected
>
> **Quantity**: Number to increase or reset stock
***
## Usage Logs
When a product's stock is increased or when a product is sold, the Simple Inventory page will log that instance under **Usage Log**.
When a product is sold, see how many products were sold at the time and the stock quantity that remained after the sale.
When a product is restocked, see how many units were stocked, when their expire (if applicable), and the current level of stock at the time of.
 ***
## Fast Buttons
If you stock your inventory typically in a baker's dozen, or a case of 24, for example, try using fast buttons for quick restocking!
On the **Dashboard** within the simple inventory product page, click **Fast Buttons** > **Add Button**
***
## Fast Buttons
If you stock your inventory typically in a baker's dozen, or a case of 24, for example, try using fast buttons for quick restocking!
On the **Dashboard** within the simple inventory product page, click **Fast Buttons** > **Add Button**
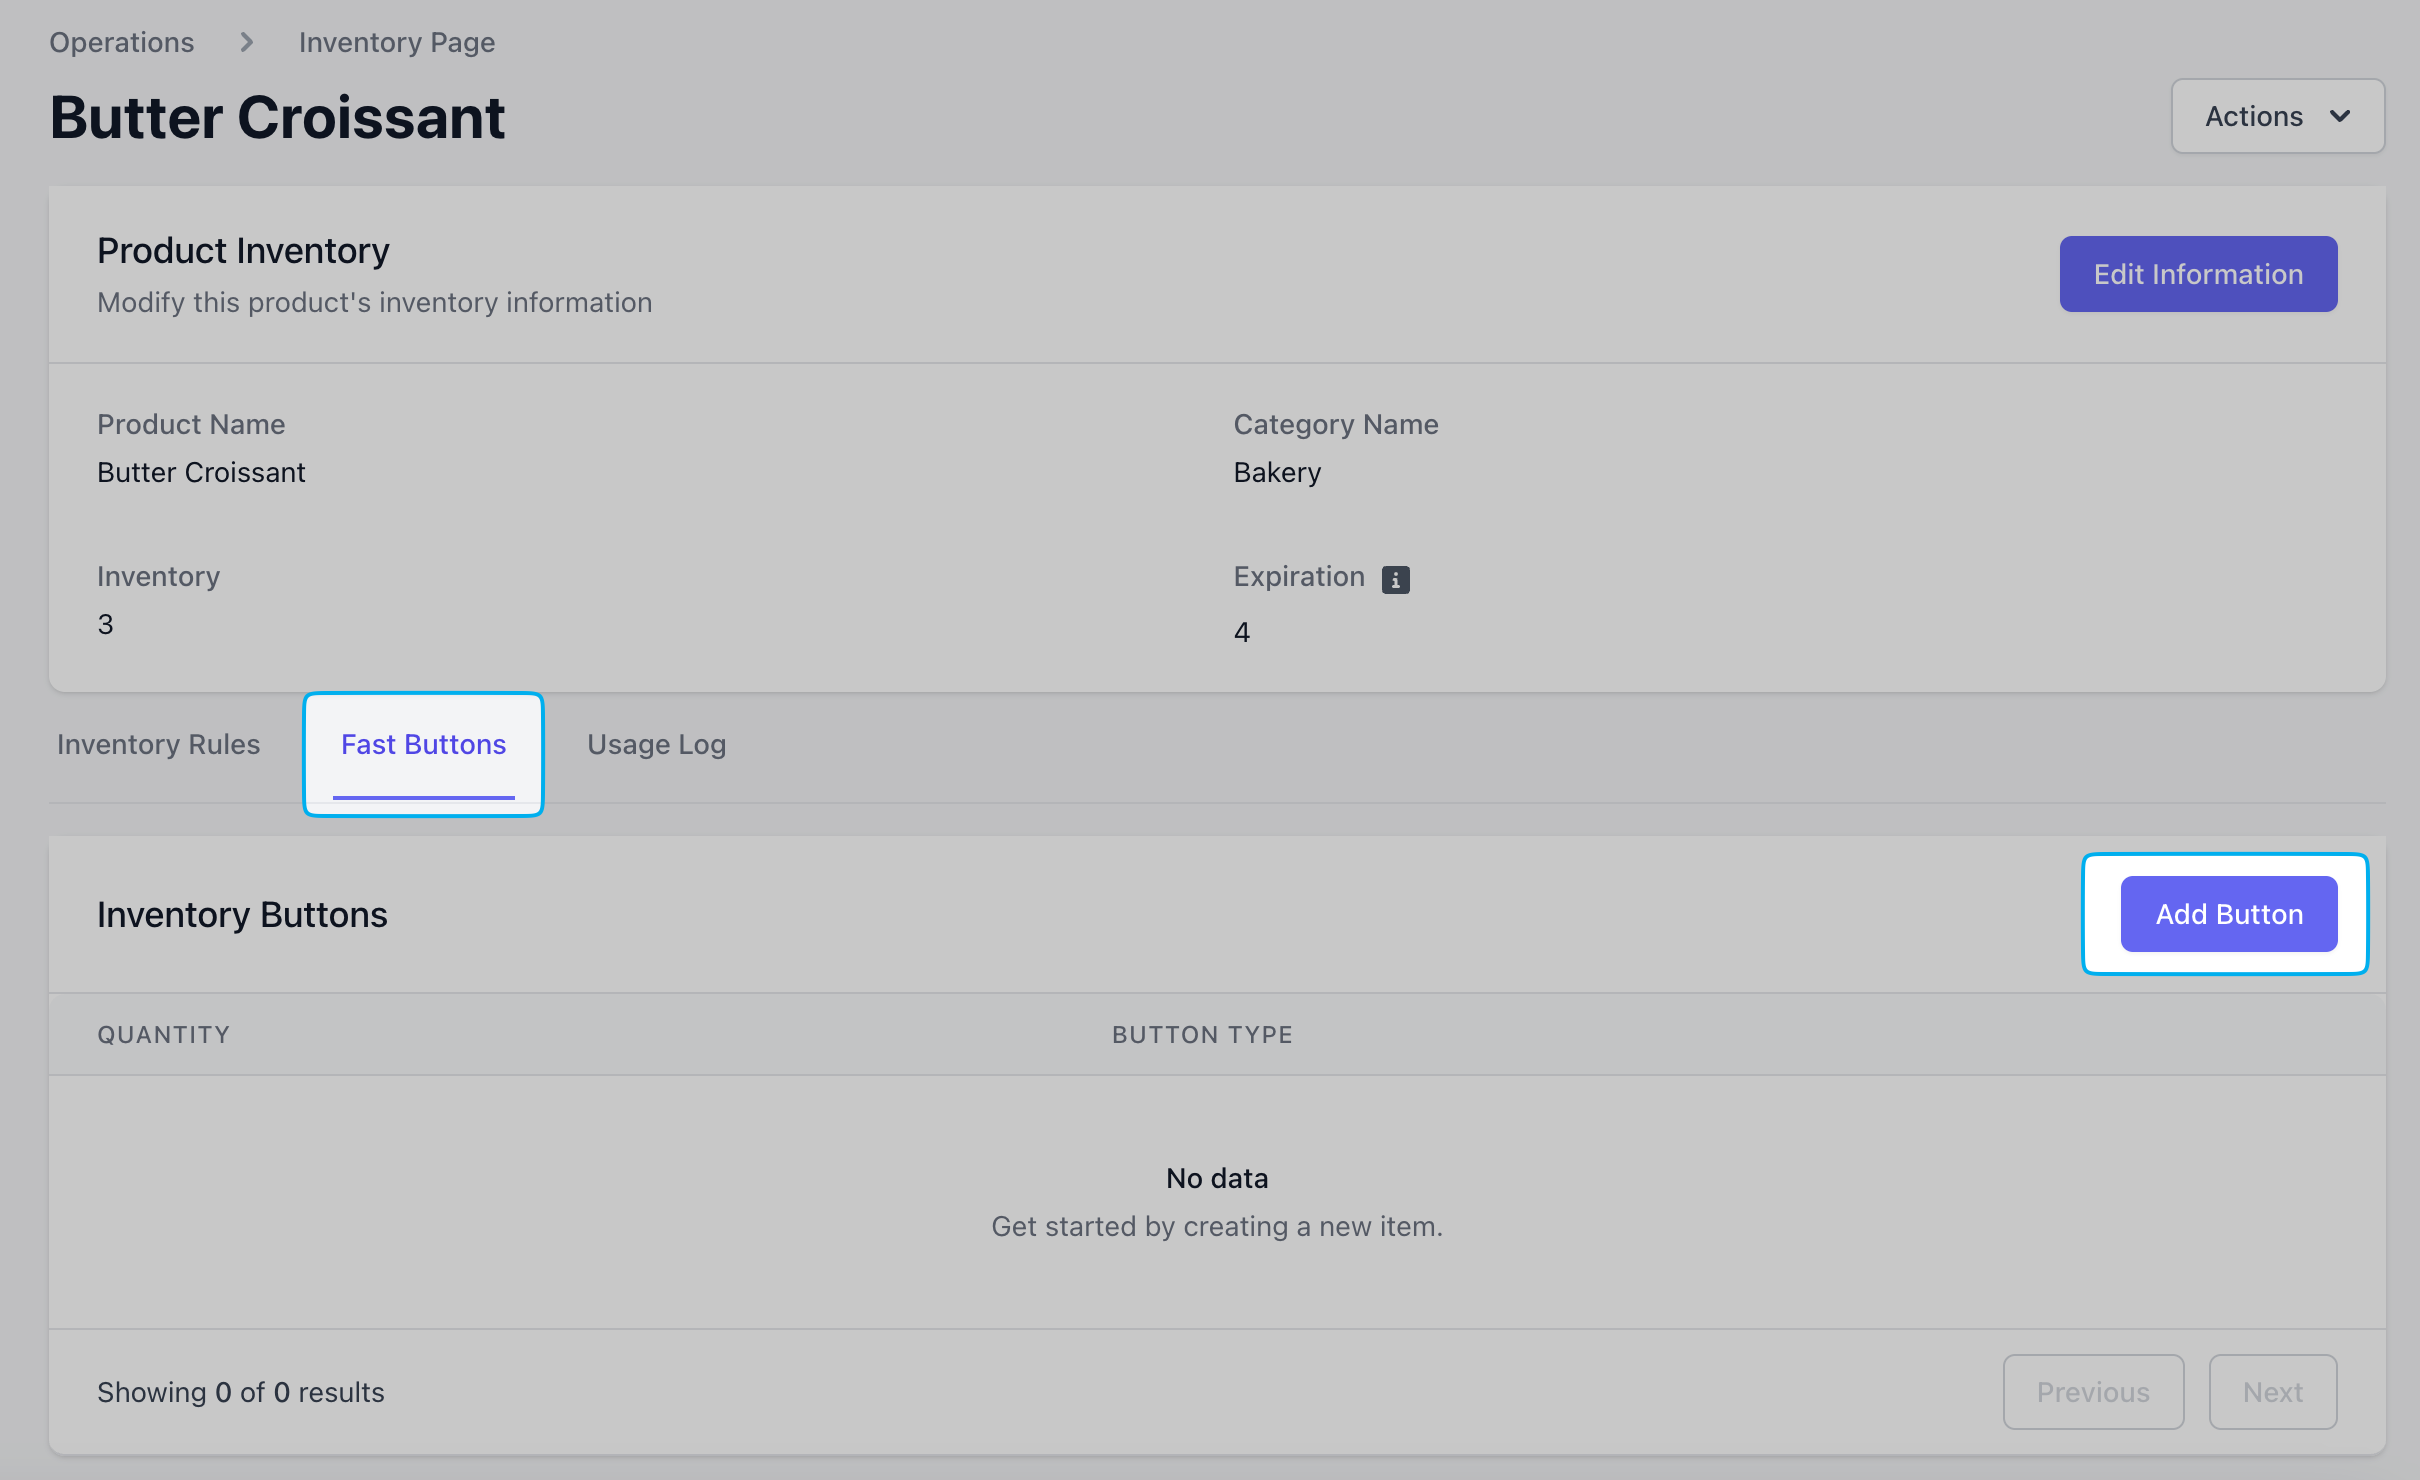 Determine the quantity for the fast button:
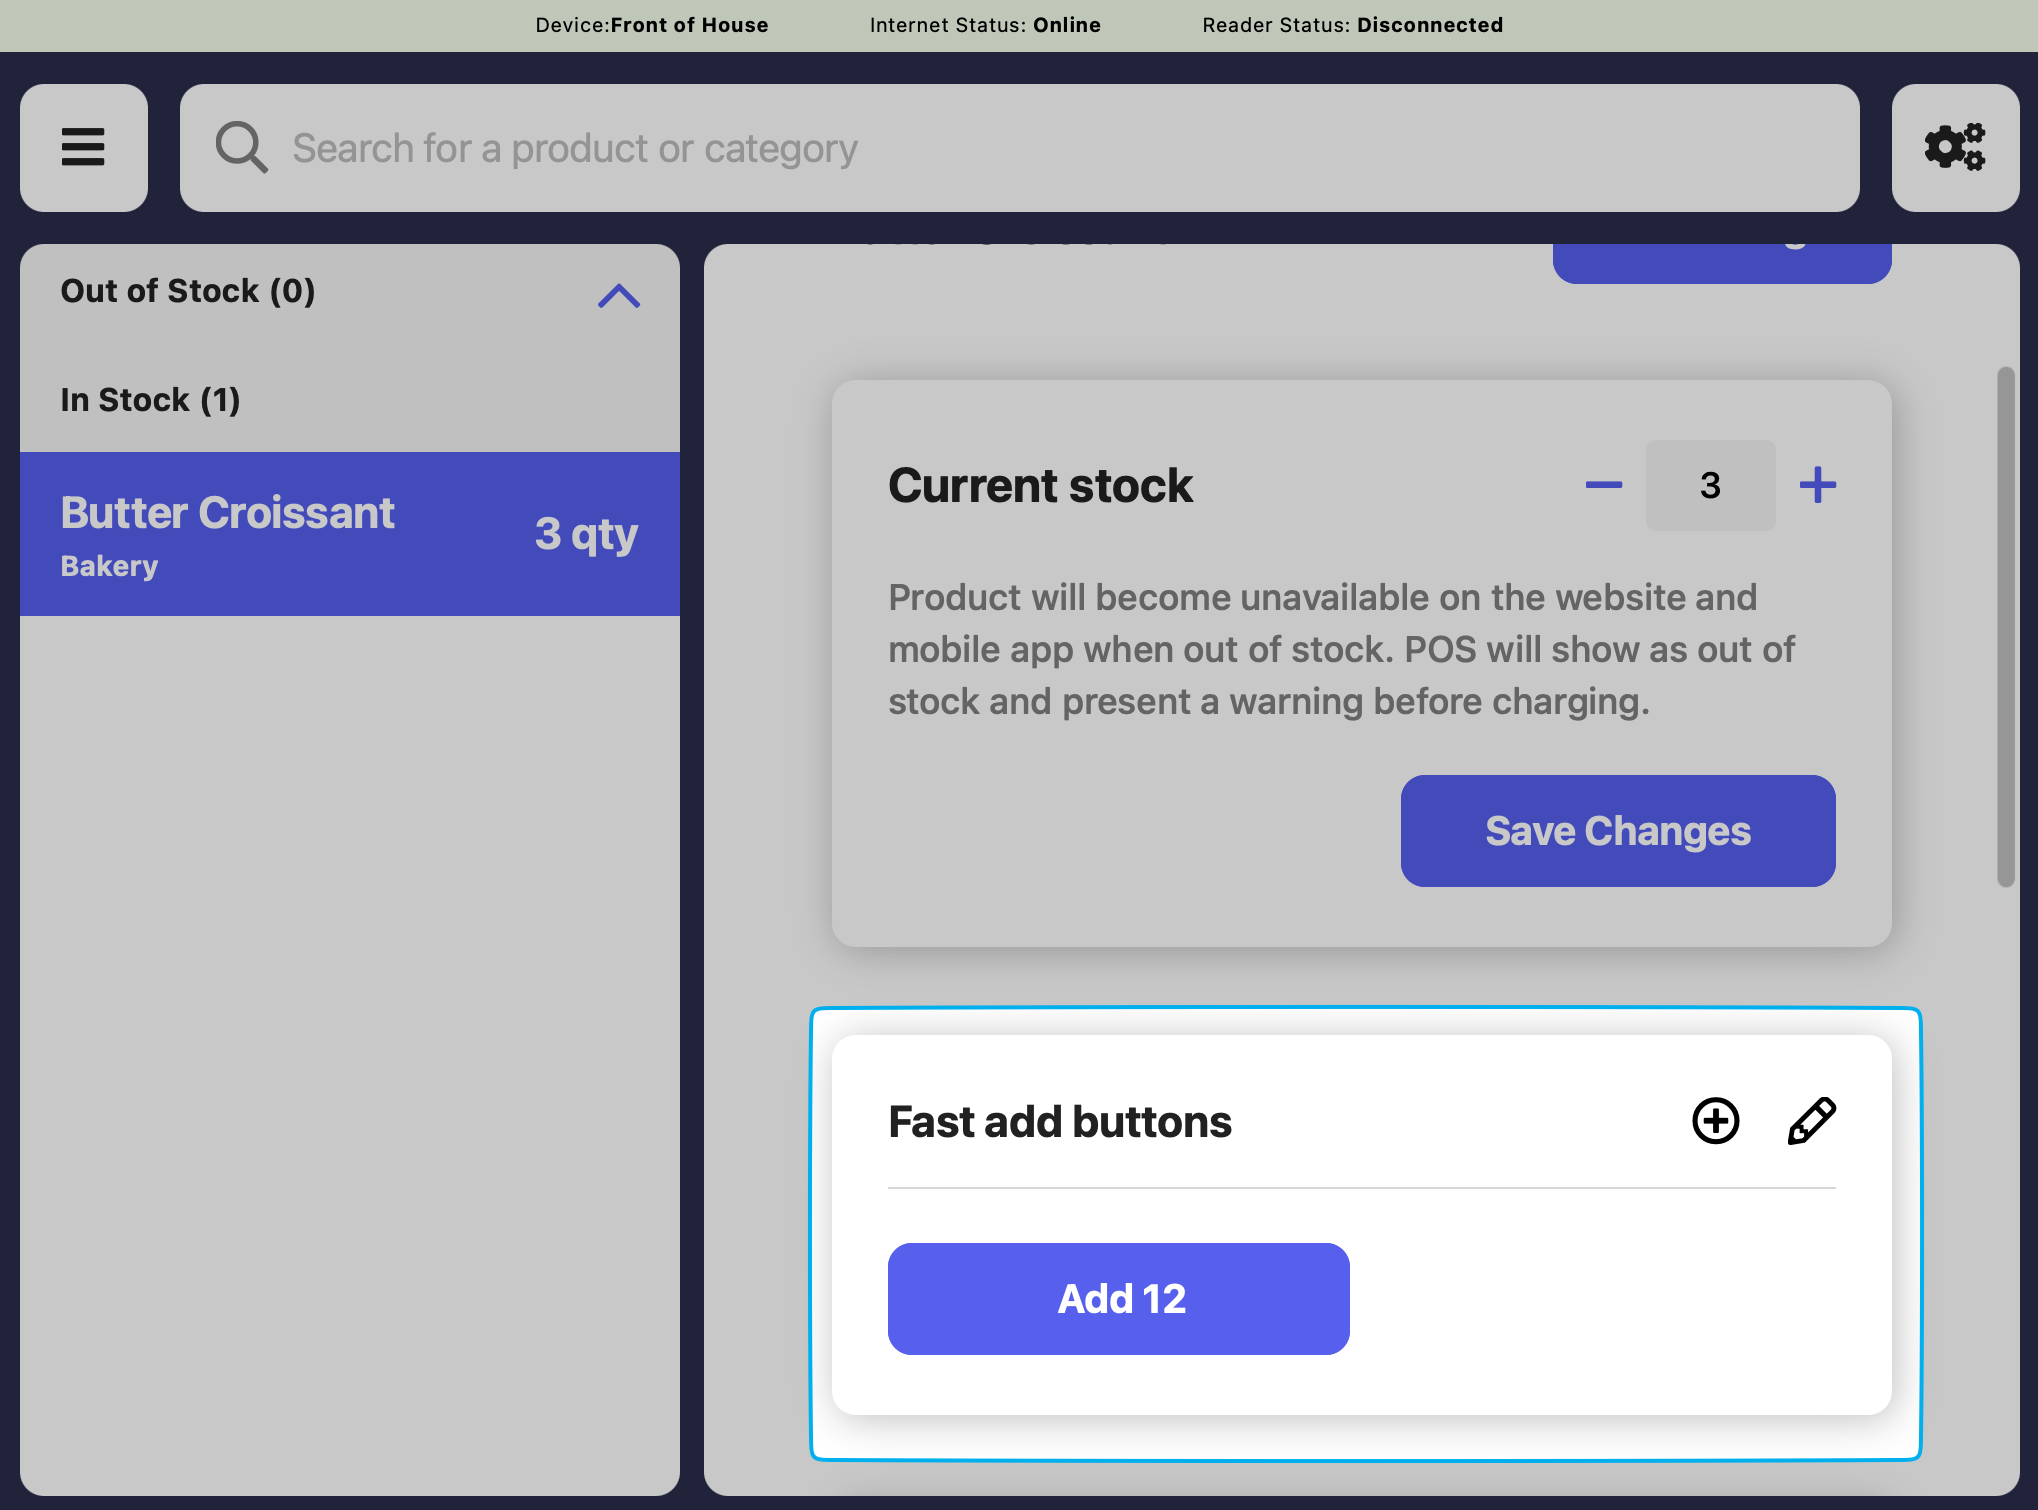
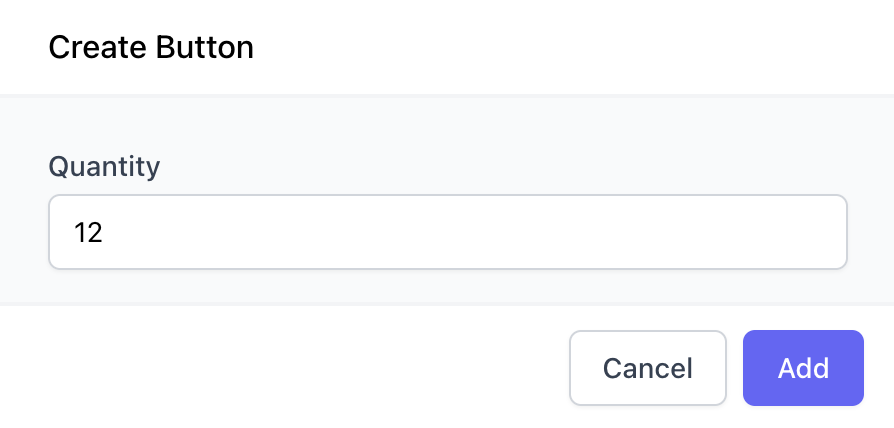 View the fast buttons on the Point of Sale for use!
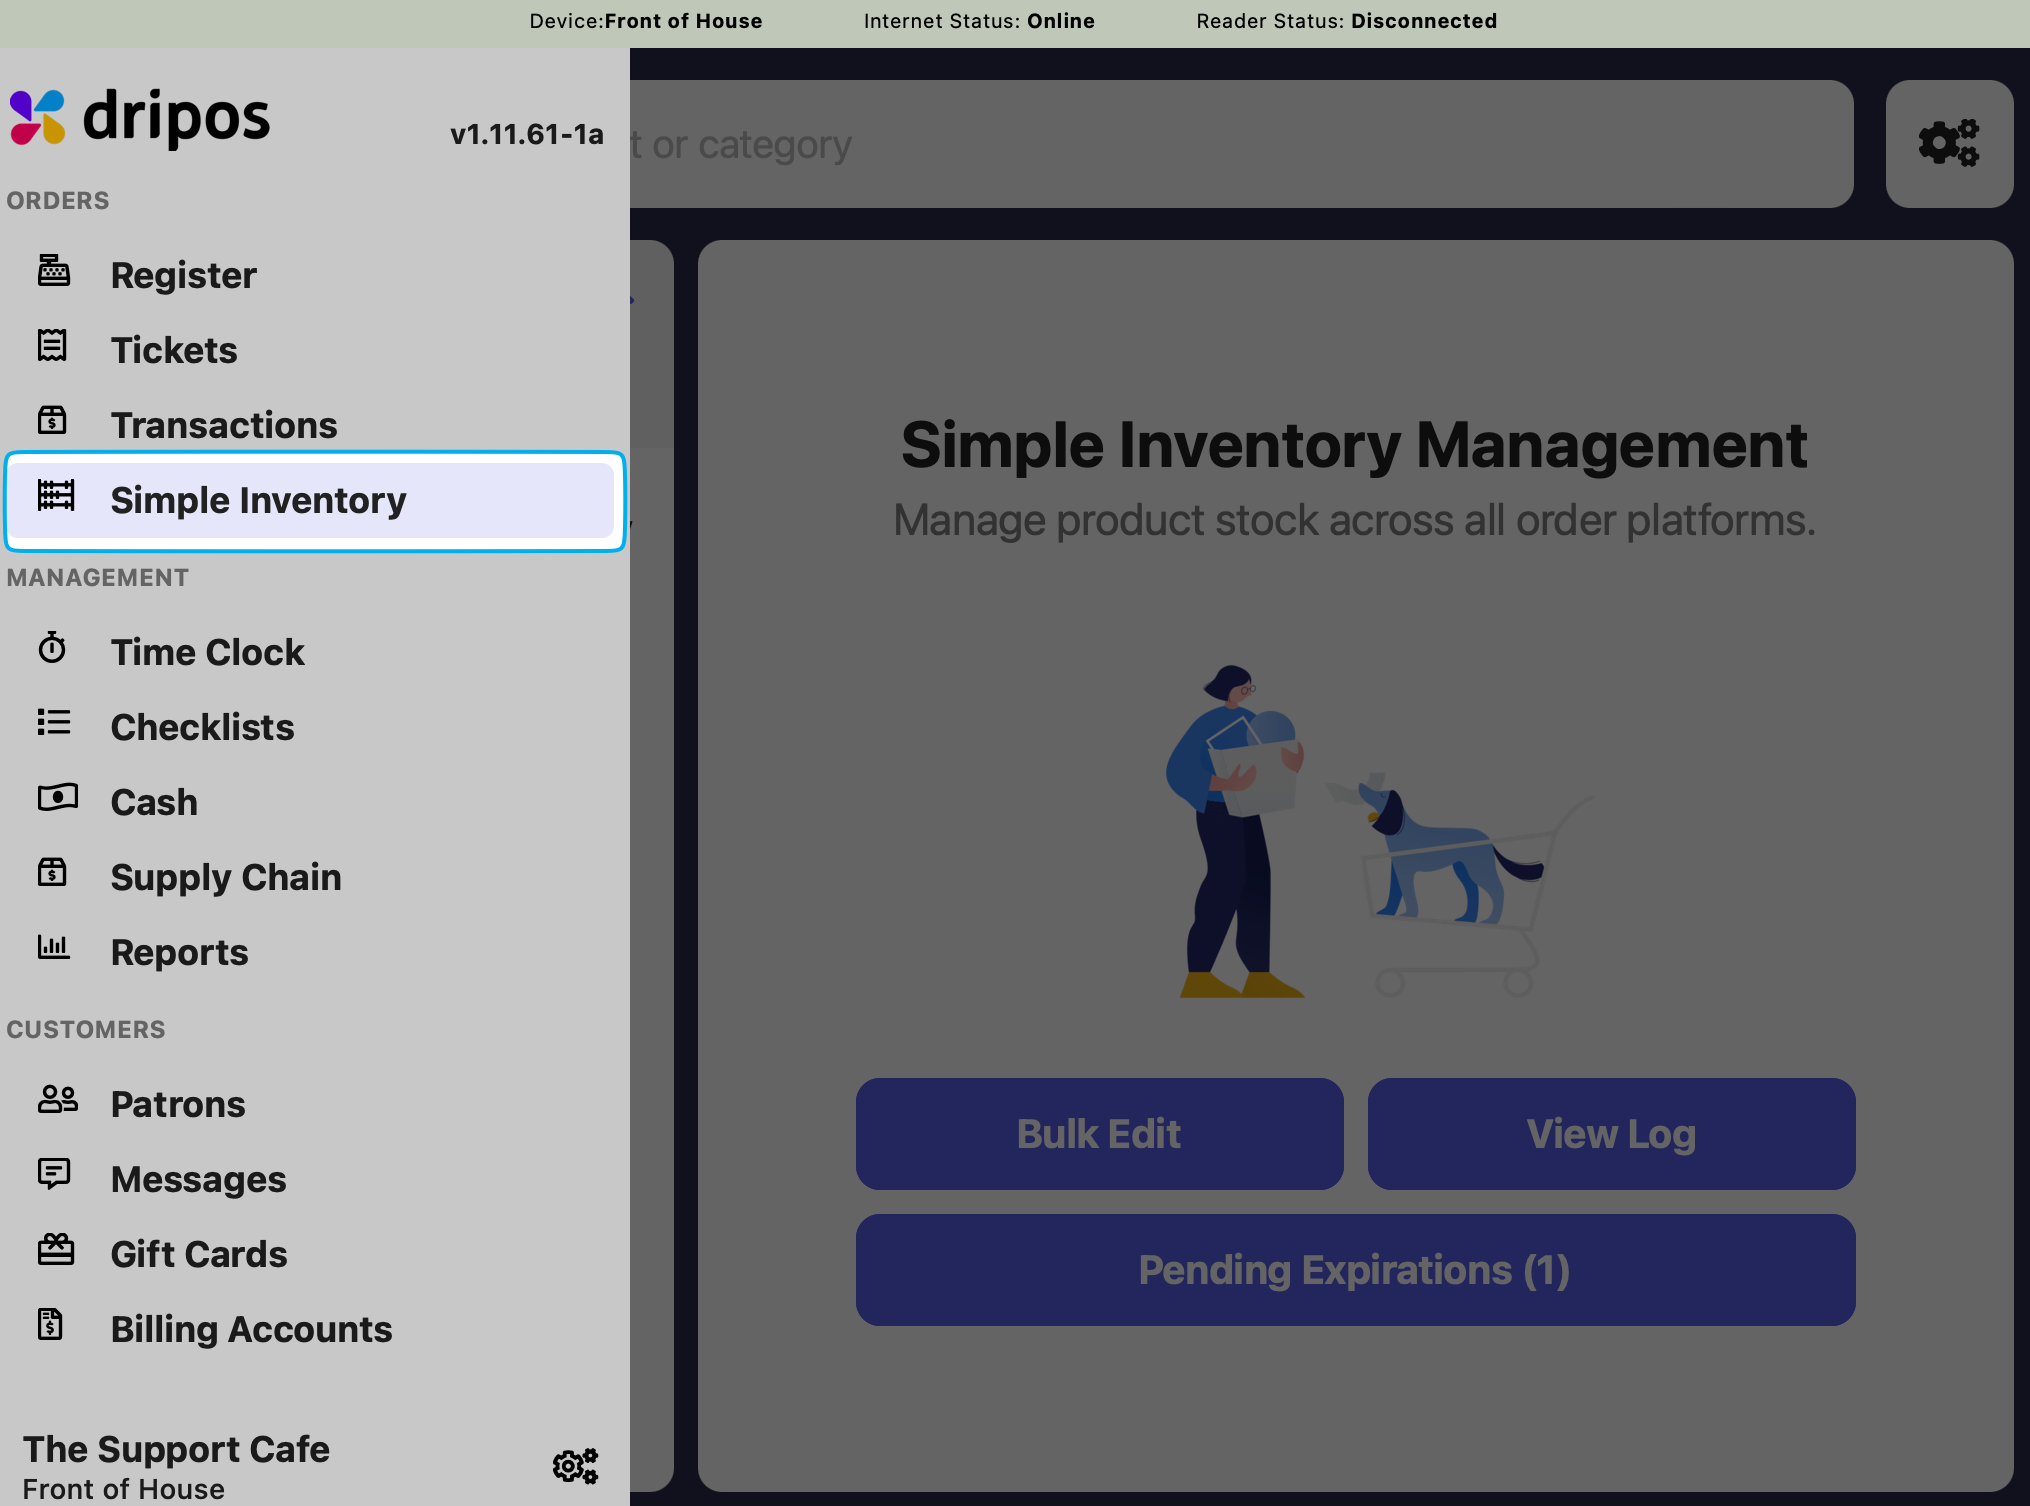
 Press the tribar in the upper left hand corner > **Simple Inventory**
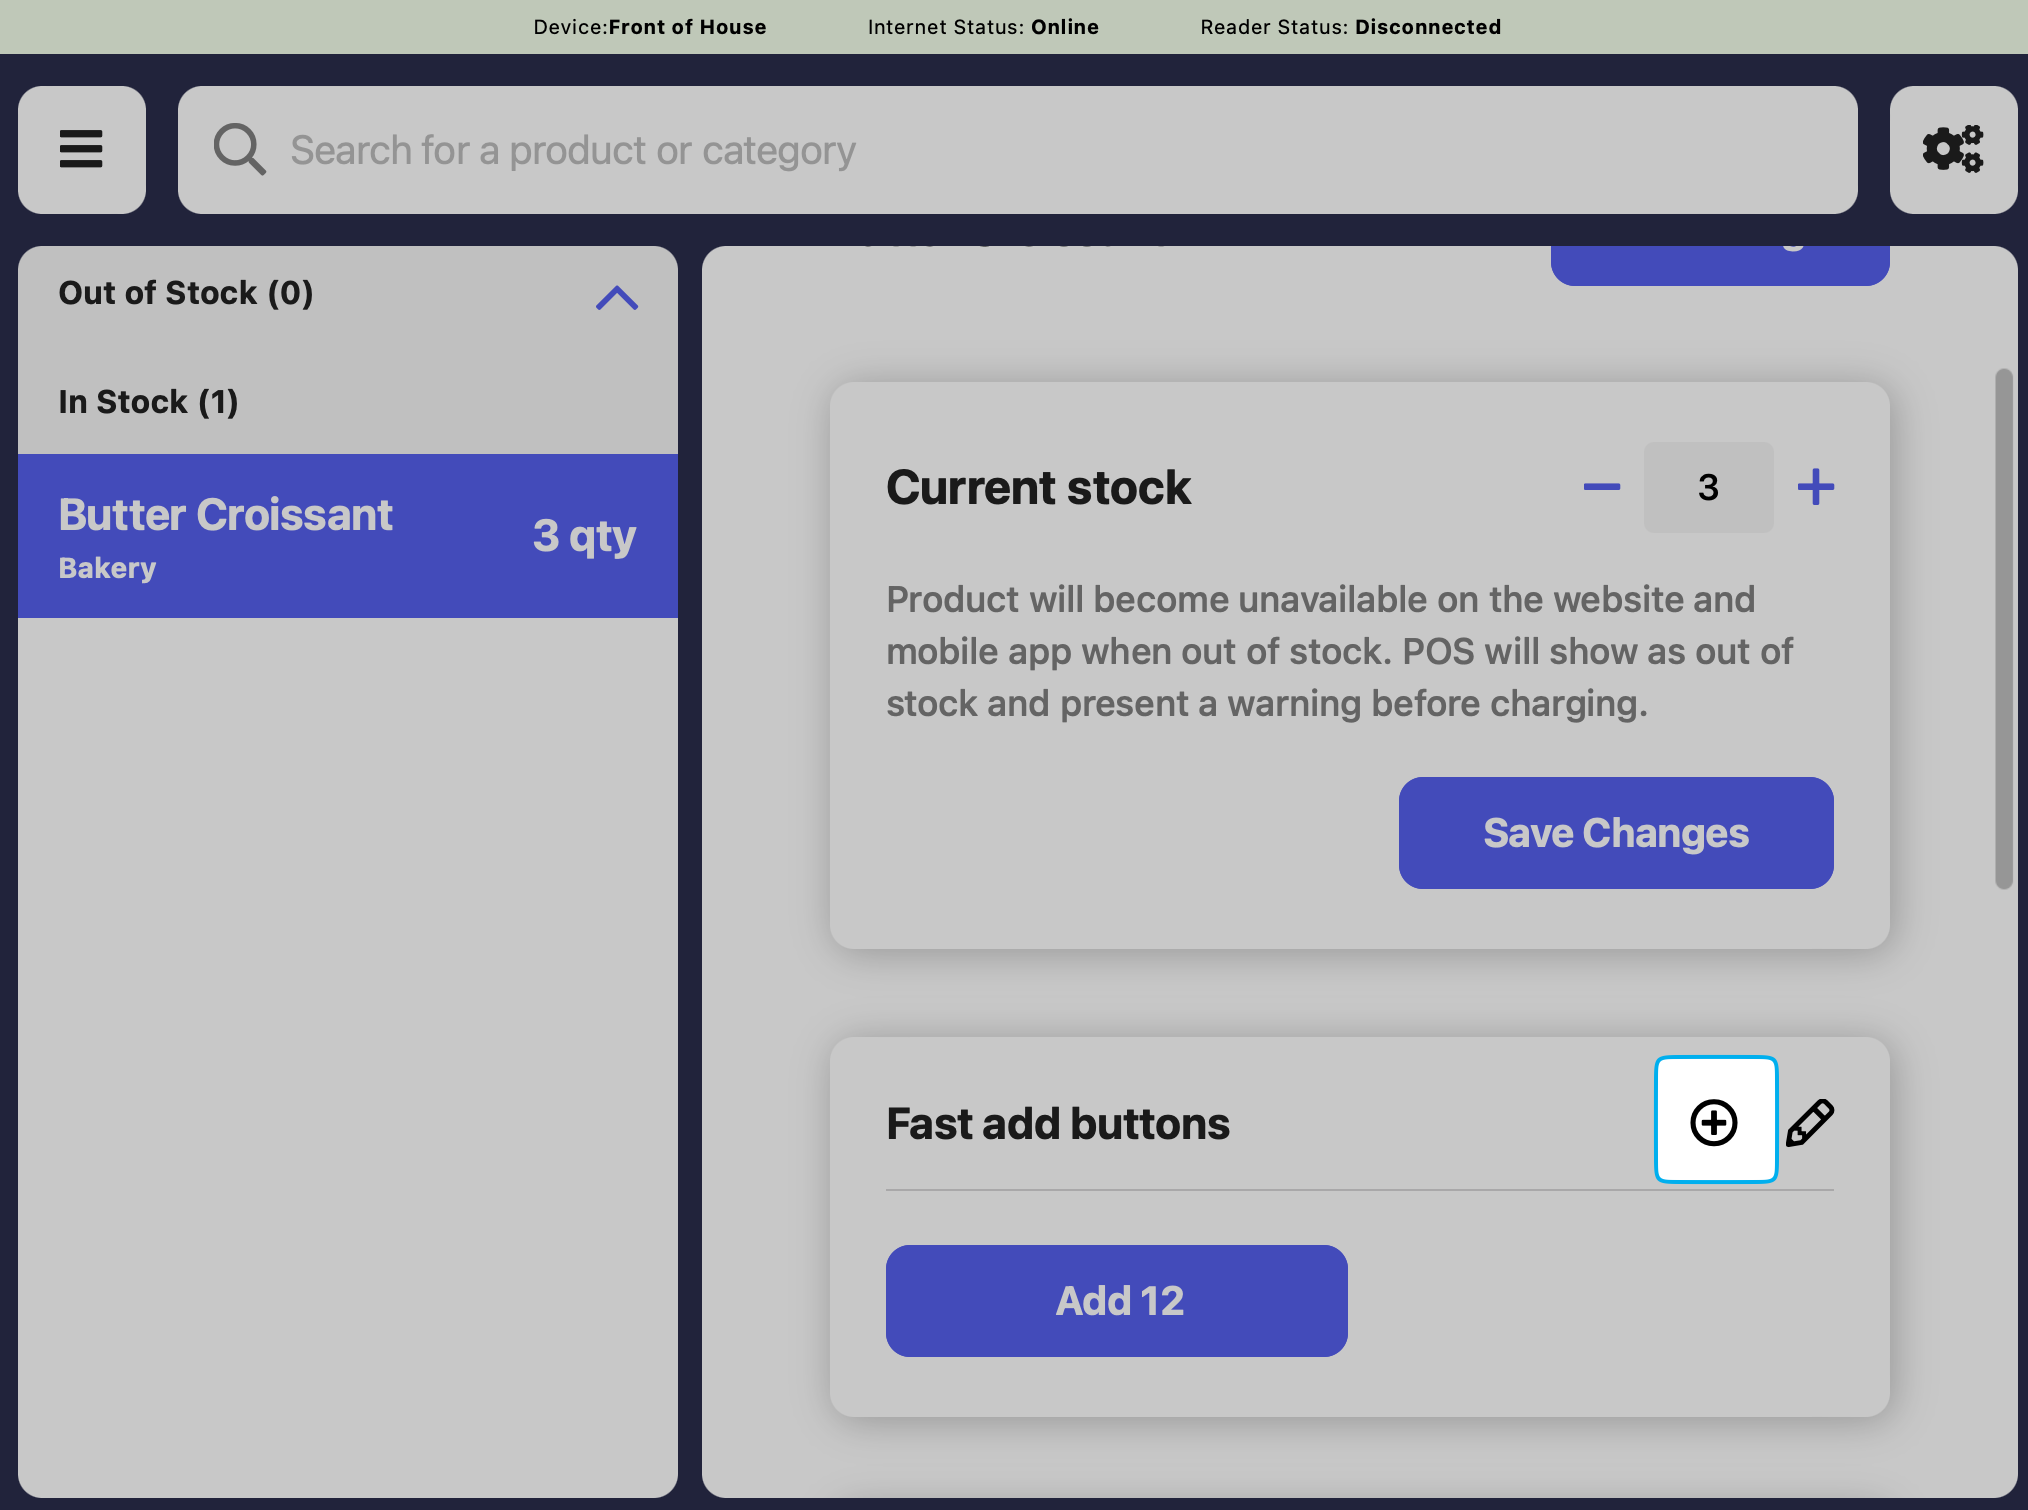
 Press **Add Button** to create a new fast button
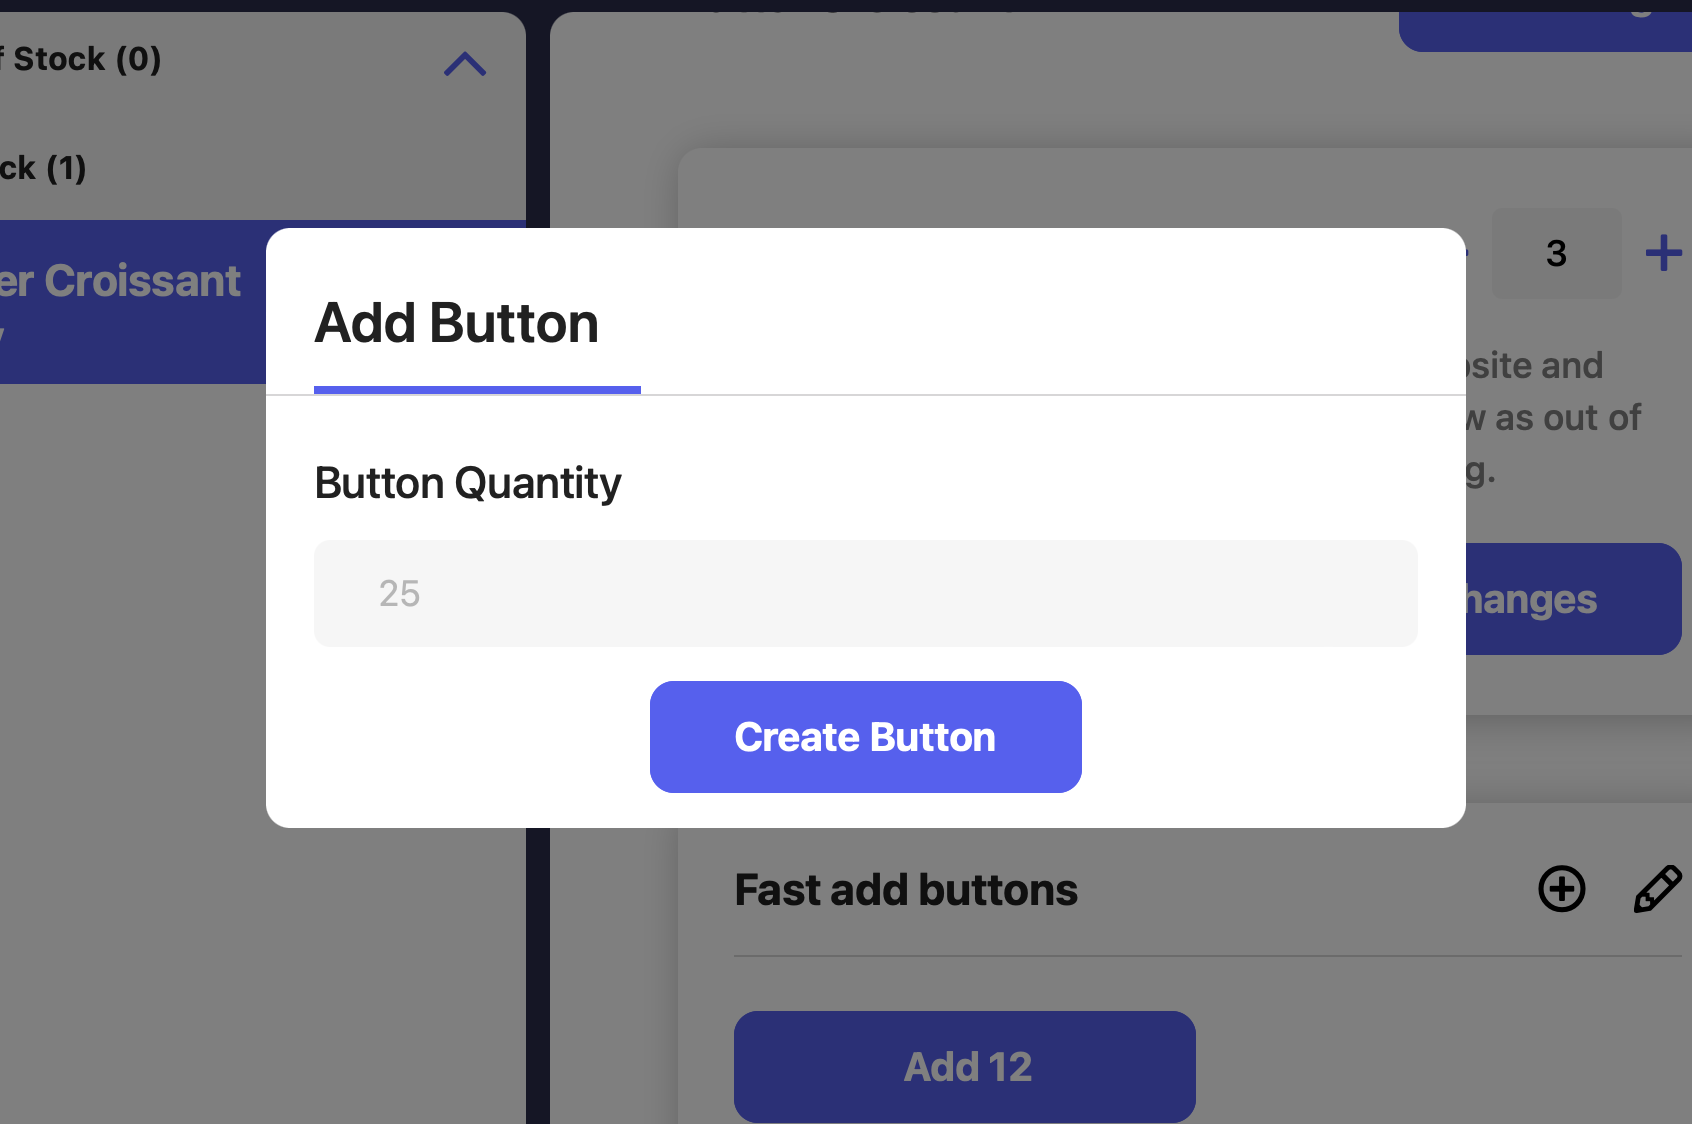 View the fast buttons you created on the Point of Sale for use!
***
## Bulk Edit Inventory
Edit the quantity of inventory for multiple products at once
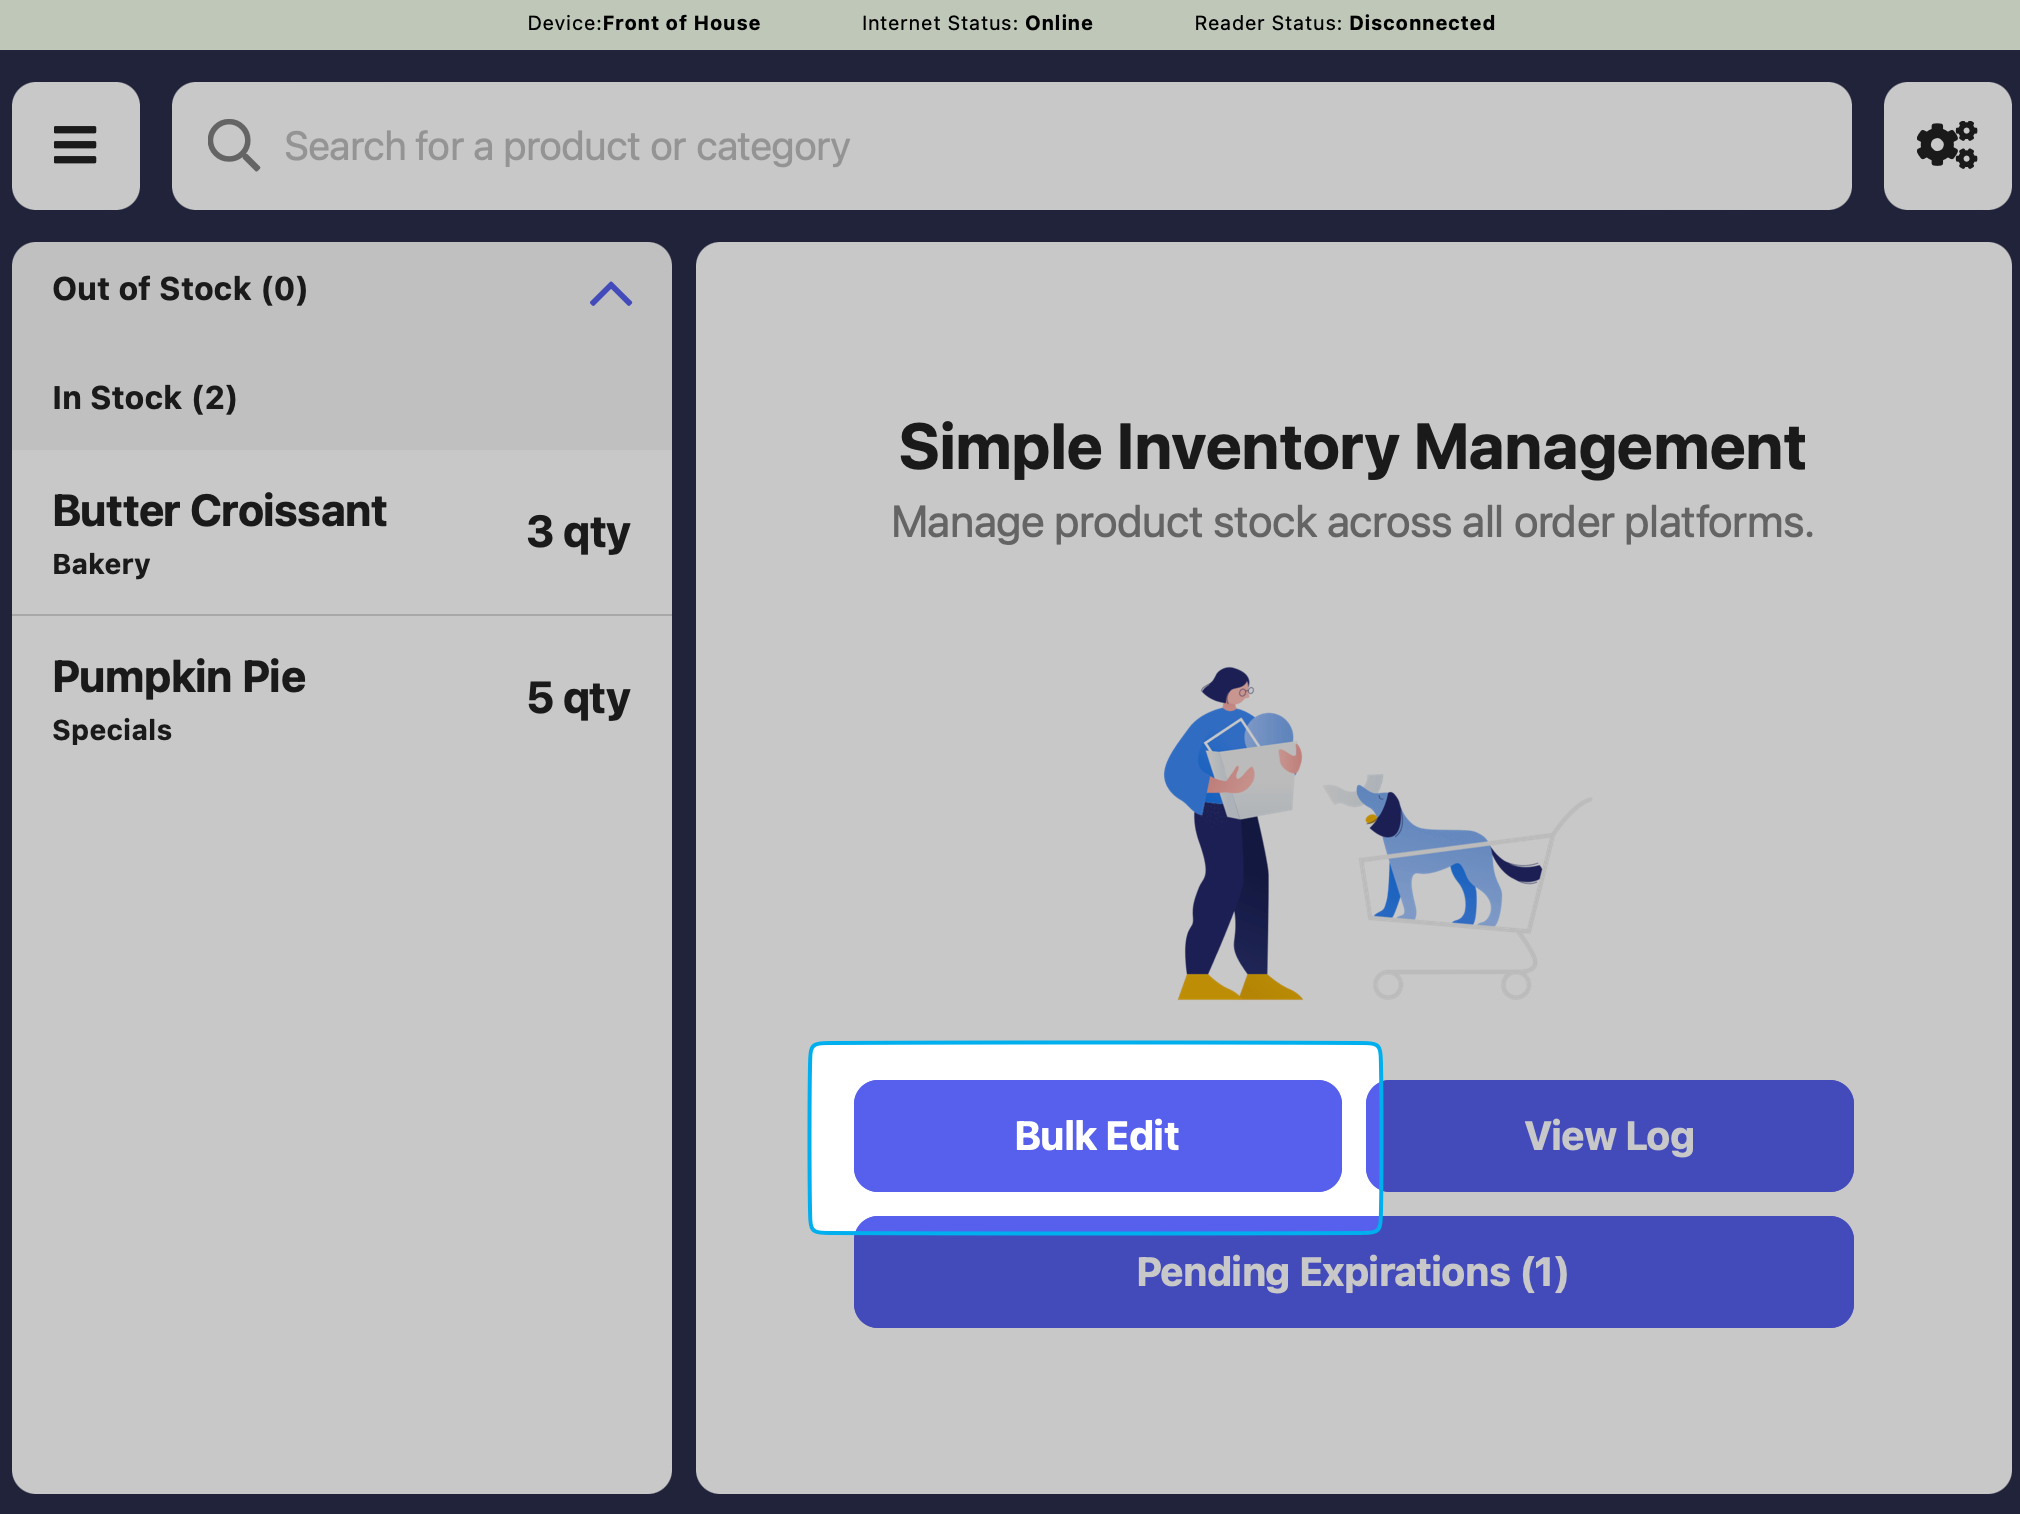
Press the tribar in the upper left hand corner > **Simple Inventory**
Press **Bulk Edit**
View the fast buttons you created on the Point of Sale for use!
***
## Bulk Edit Inventory
Edit the quantity of inventory for multiple products at once
Press the tribar in the upper left hand corner > **Simple Inventory**
Press **Bulk Edit**
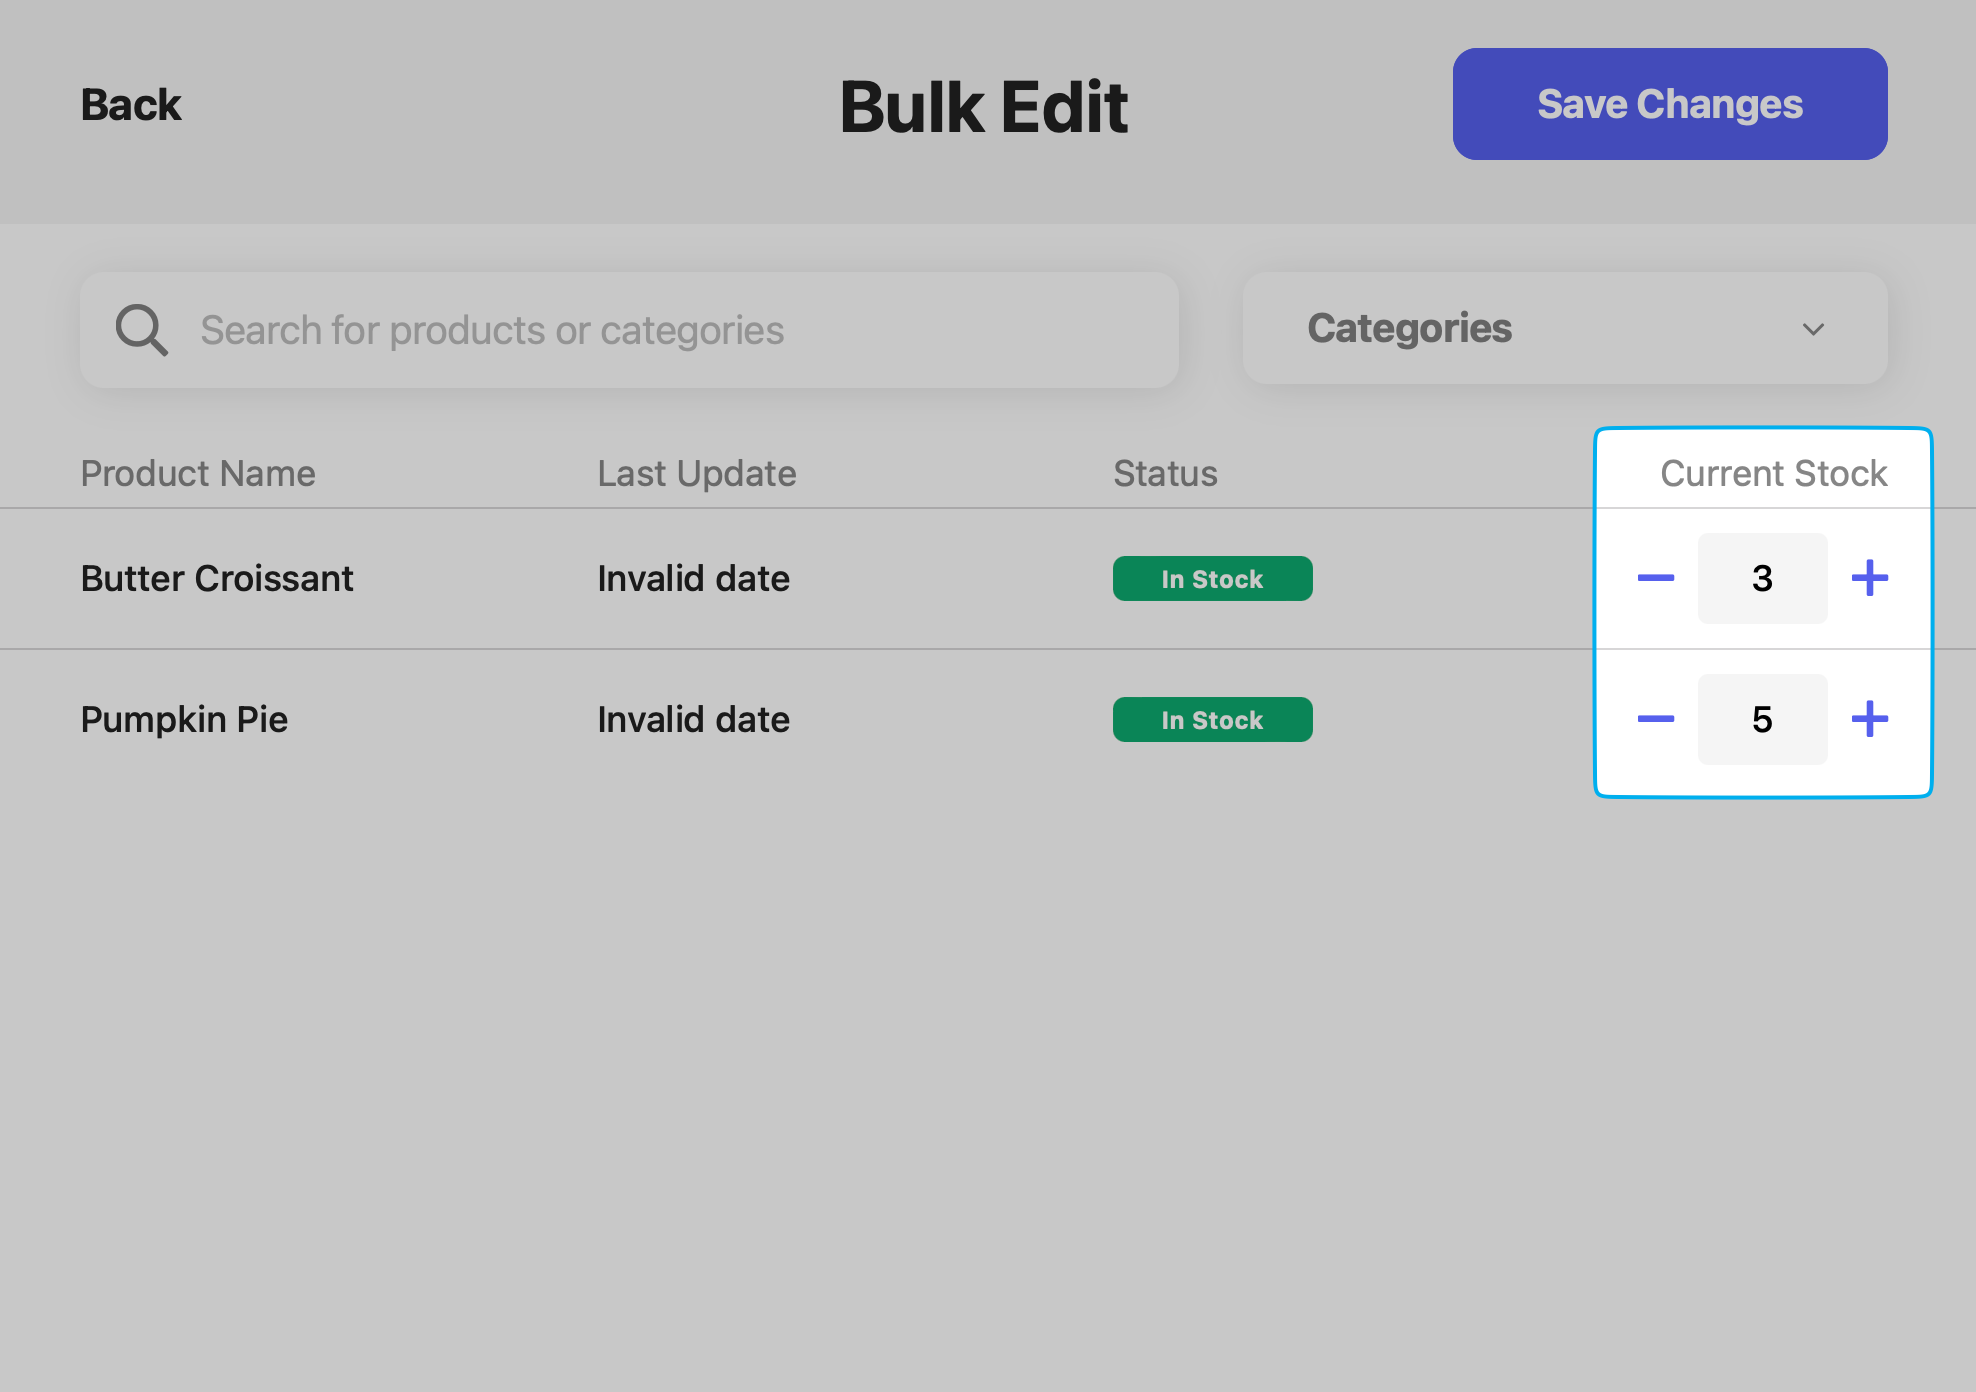
 Adjust the stock of each product. Press **Save Changes** once completed.
 ***
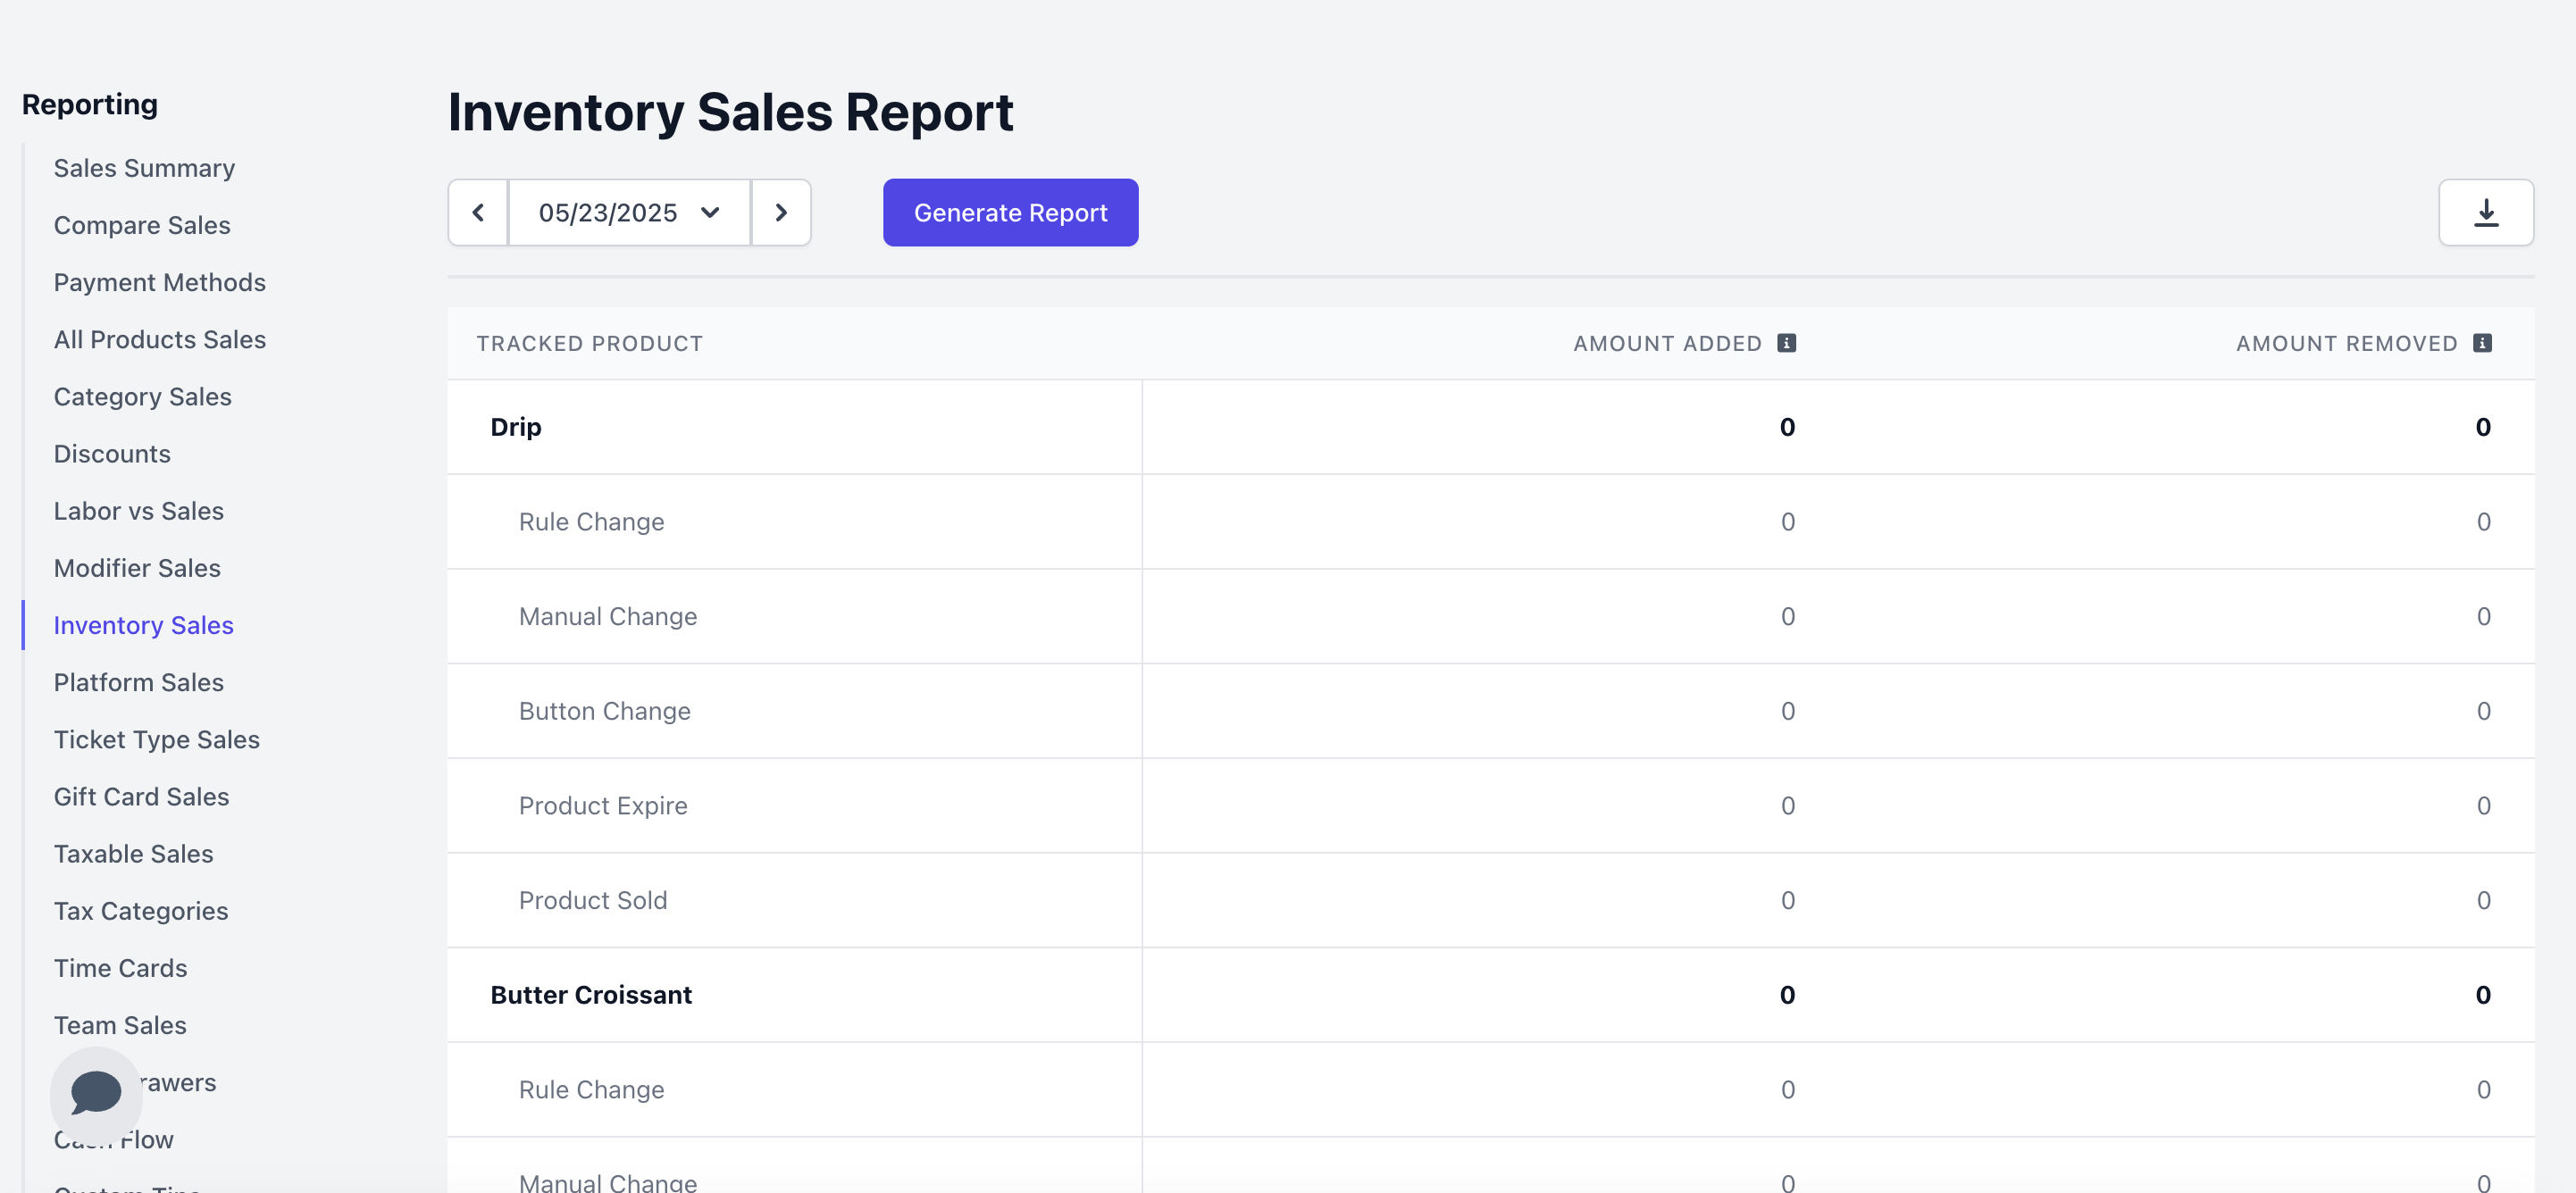
## Inventory Sales Report
View the sales of your simple inventory, including products sold and products expired.
On the **Dashboard** click **Reports** > **Inventory** and generate a report with a specified time frame.
***
## Inventory Sales Report
View the sales of your simple inventory, including products sold and products expired.
On the **Dashboard** click **Reports** > **Inventory** and generate a report with a specified time frame.