> ## Documentation Index
> Fetch the complete documentation index at: https://support.dripos.com/llms.txt
> Use this file to discover all available pages before exploring further.
# Invoice Basics
> Learn how to set up and send invoices to customers
## Create Invoice Contacts
To get started, create or select the contact to send an invoice to.
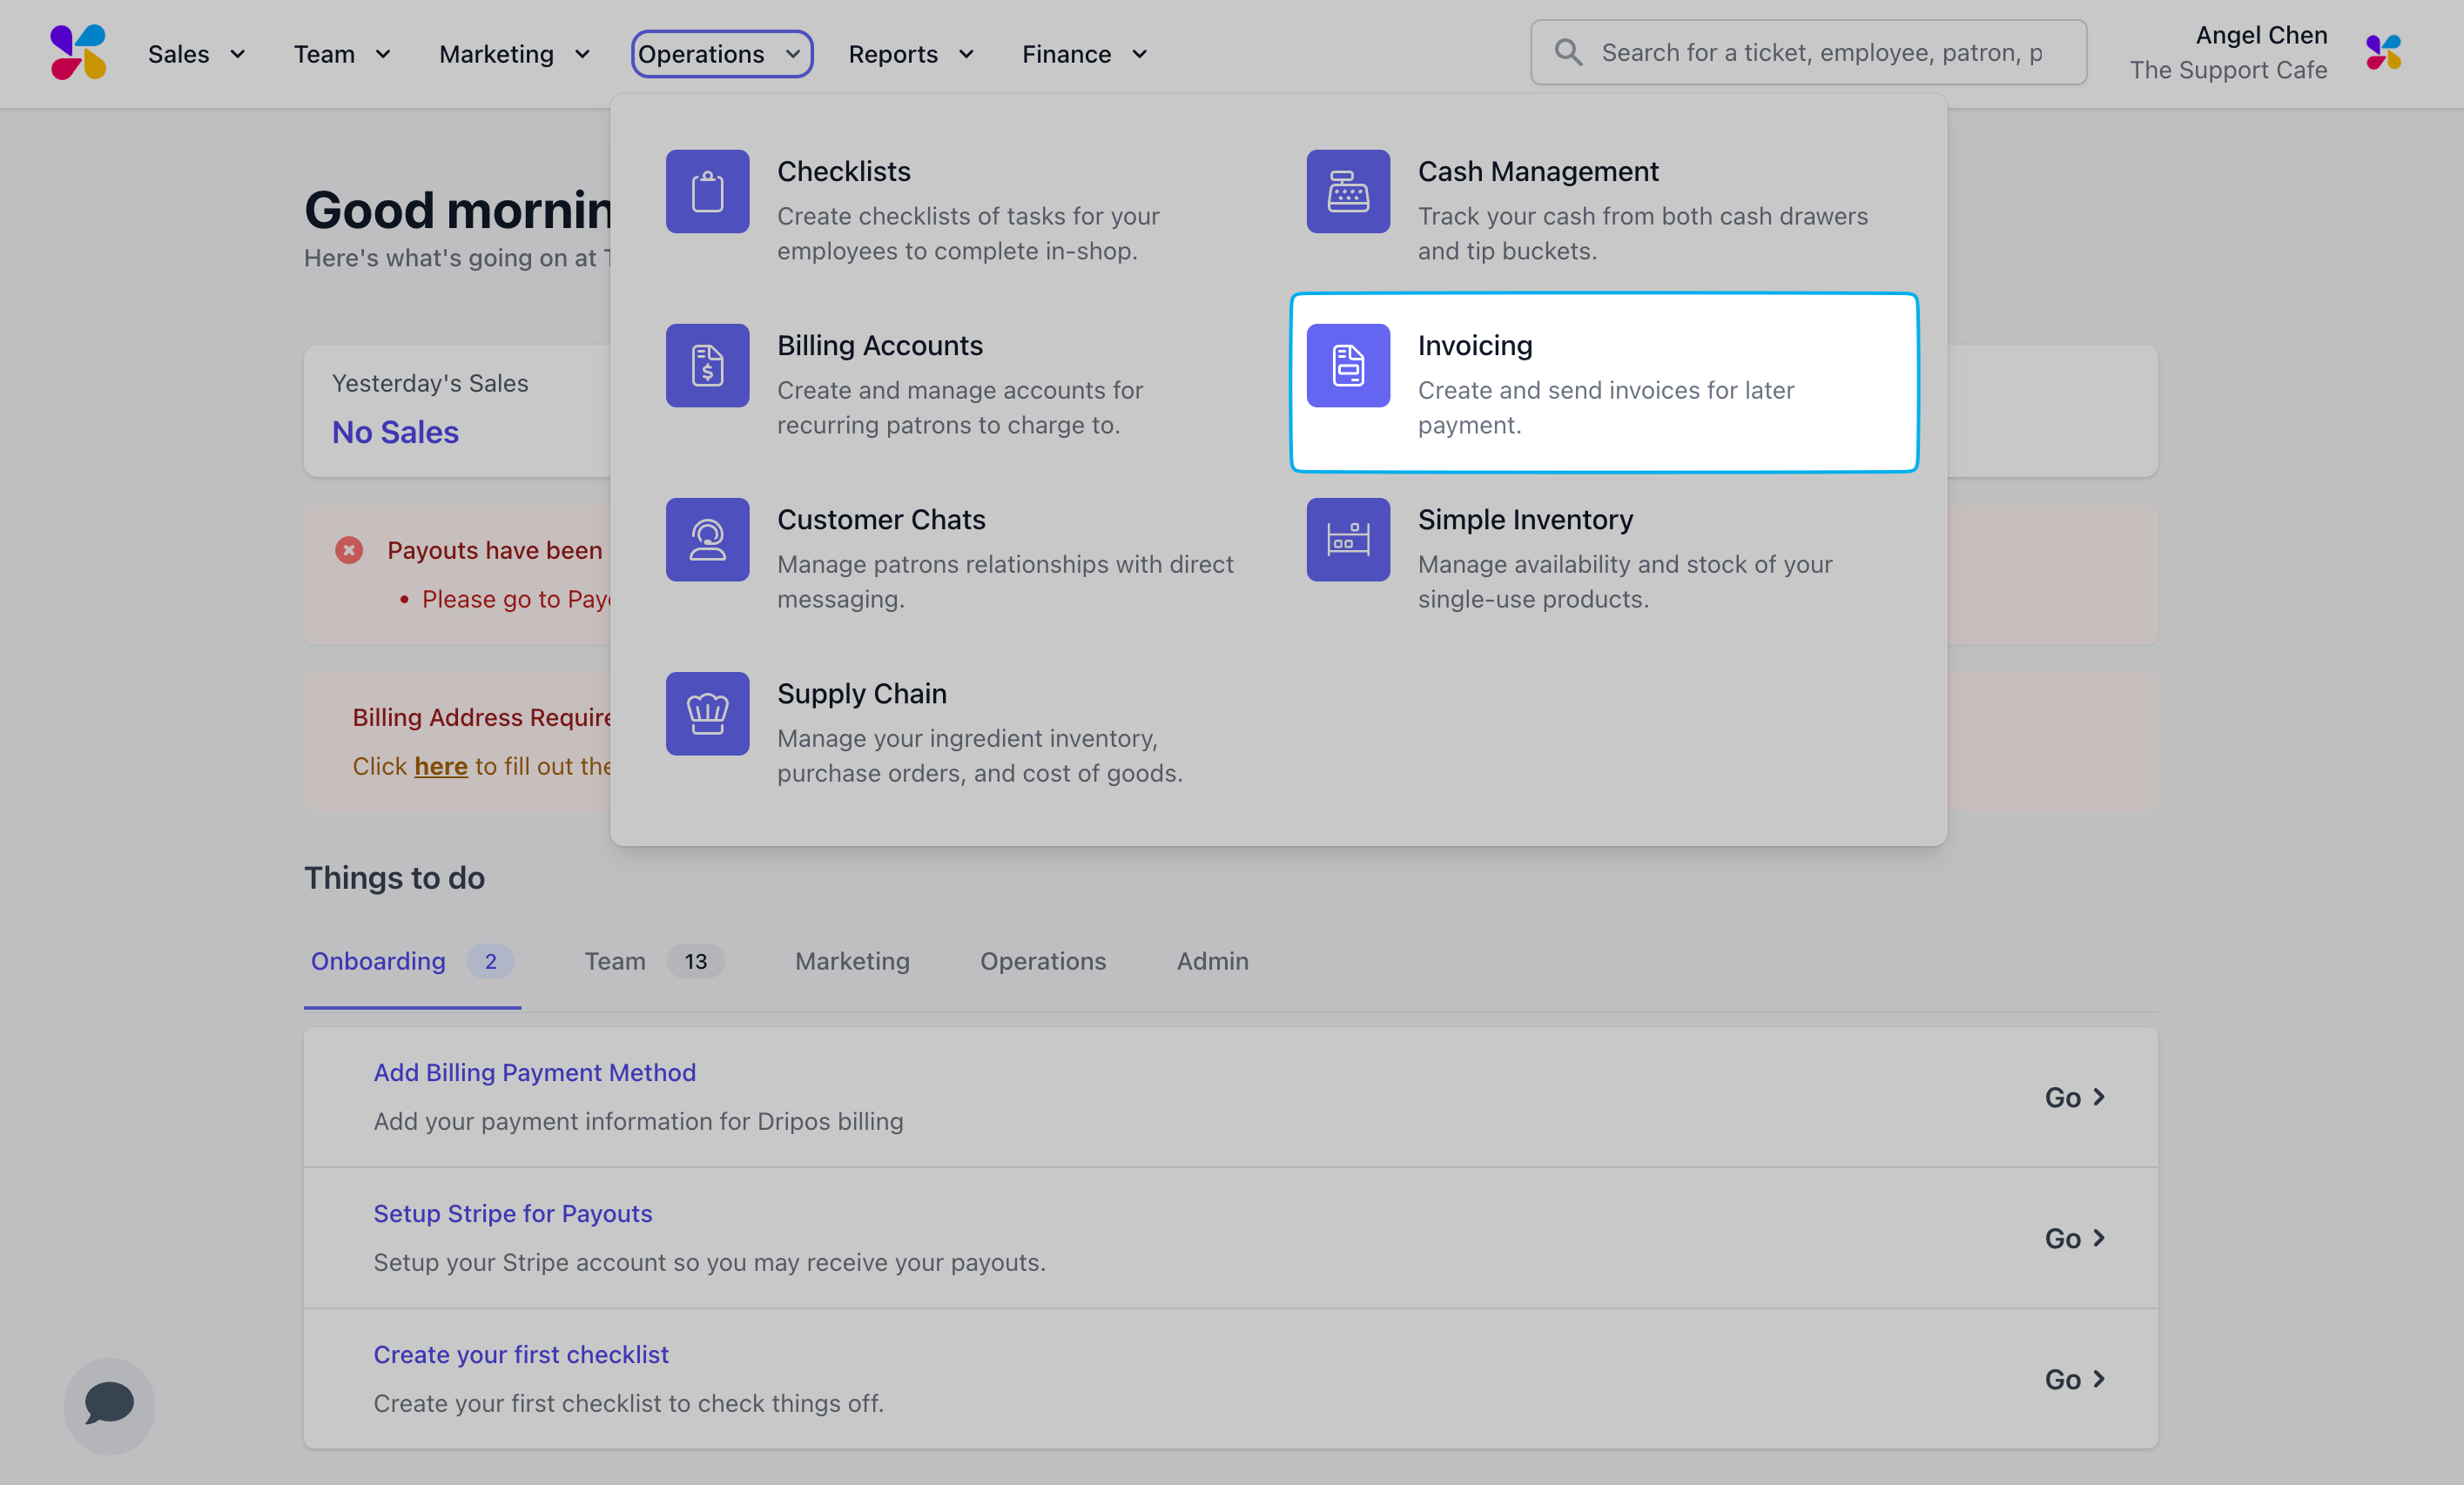
Log in to the **Dashboard** and navigate to **Orders** > **Invoicing**
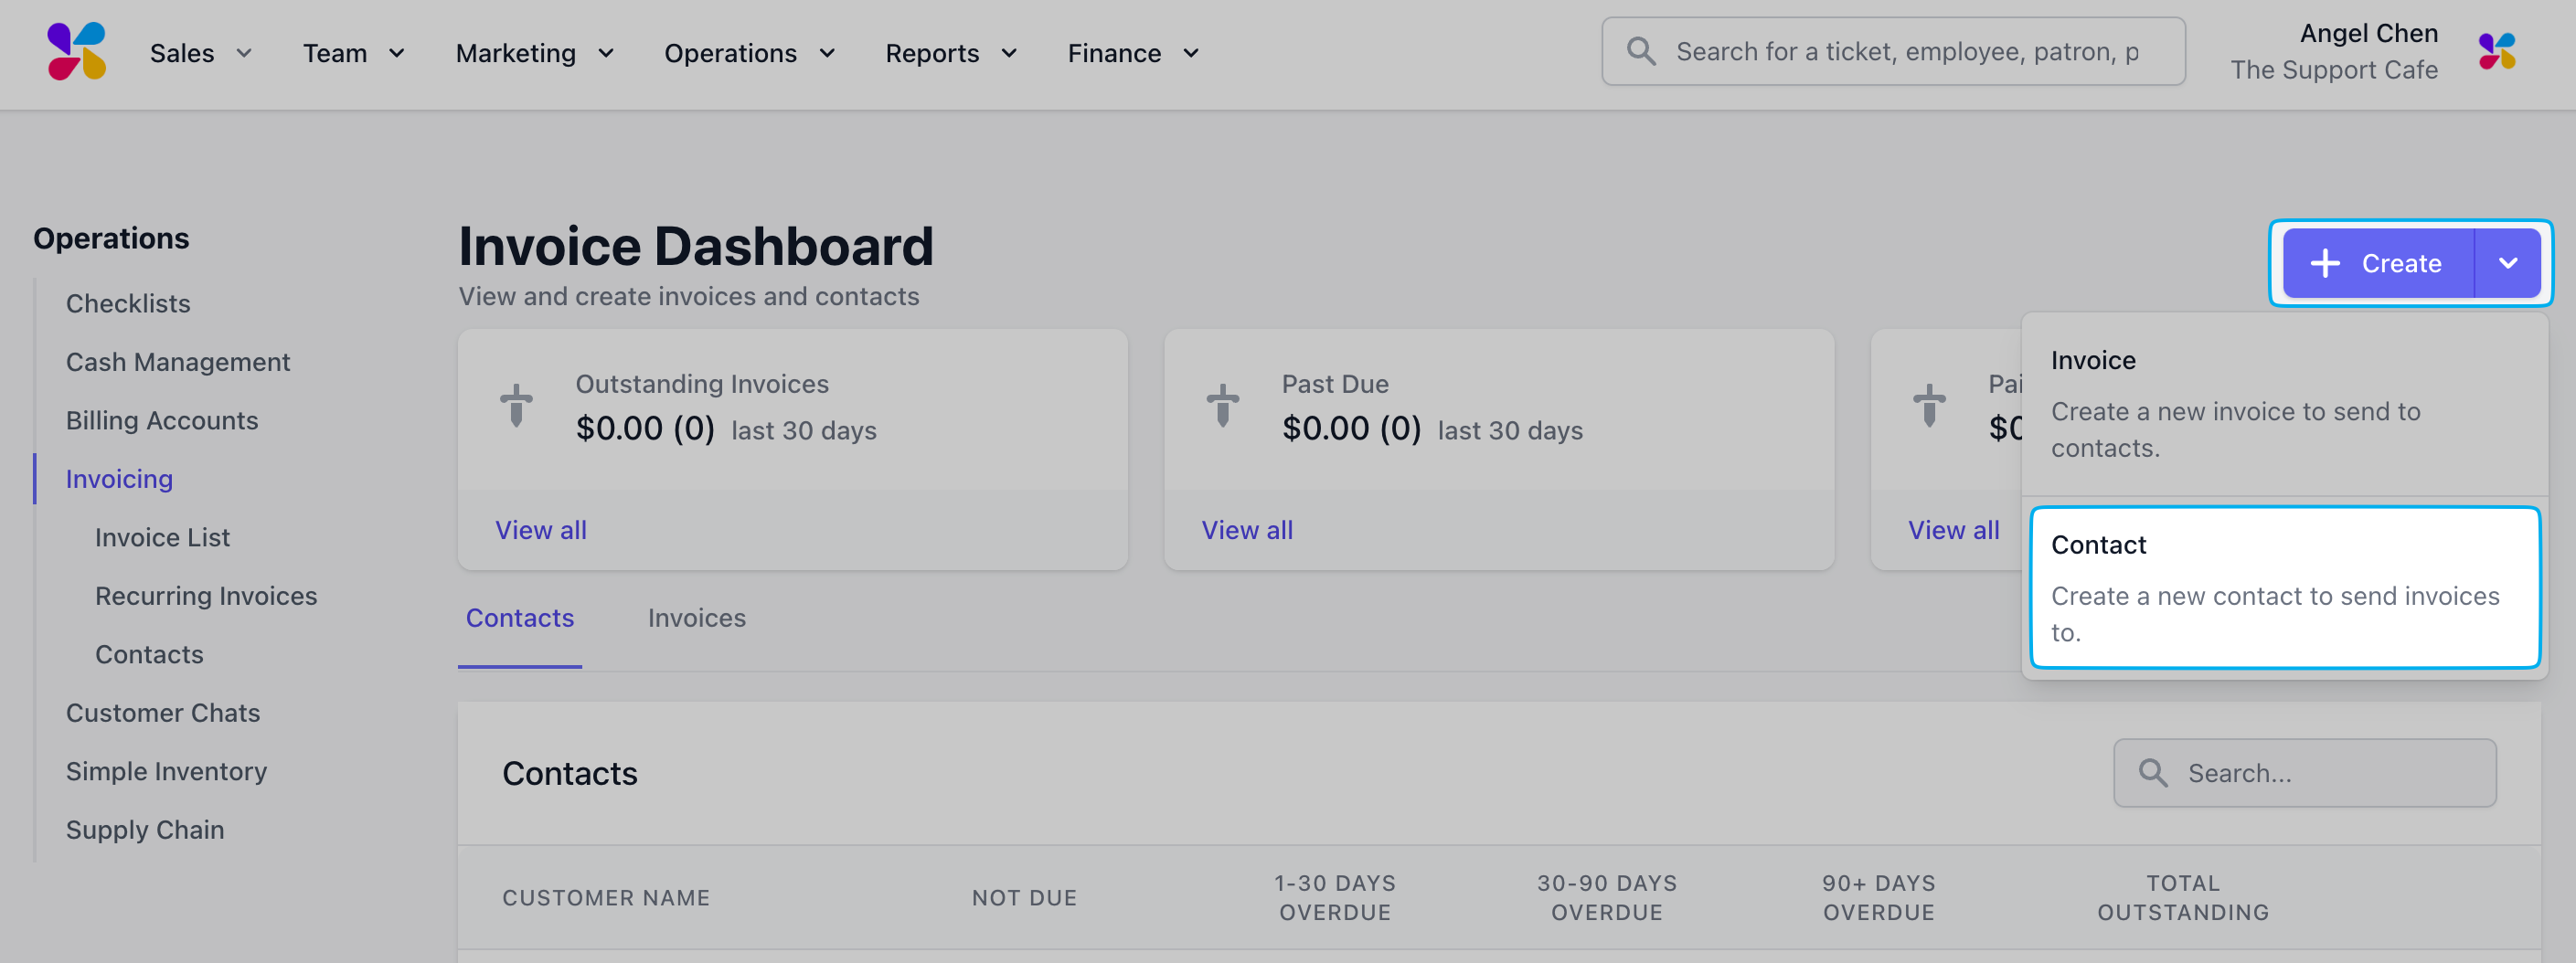
 Click **Create** and select **Contact**
 Input the contact information and click **Add**
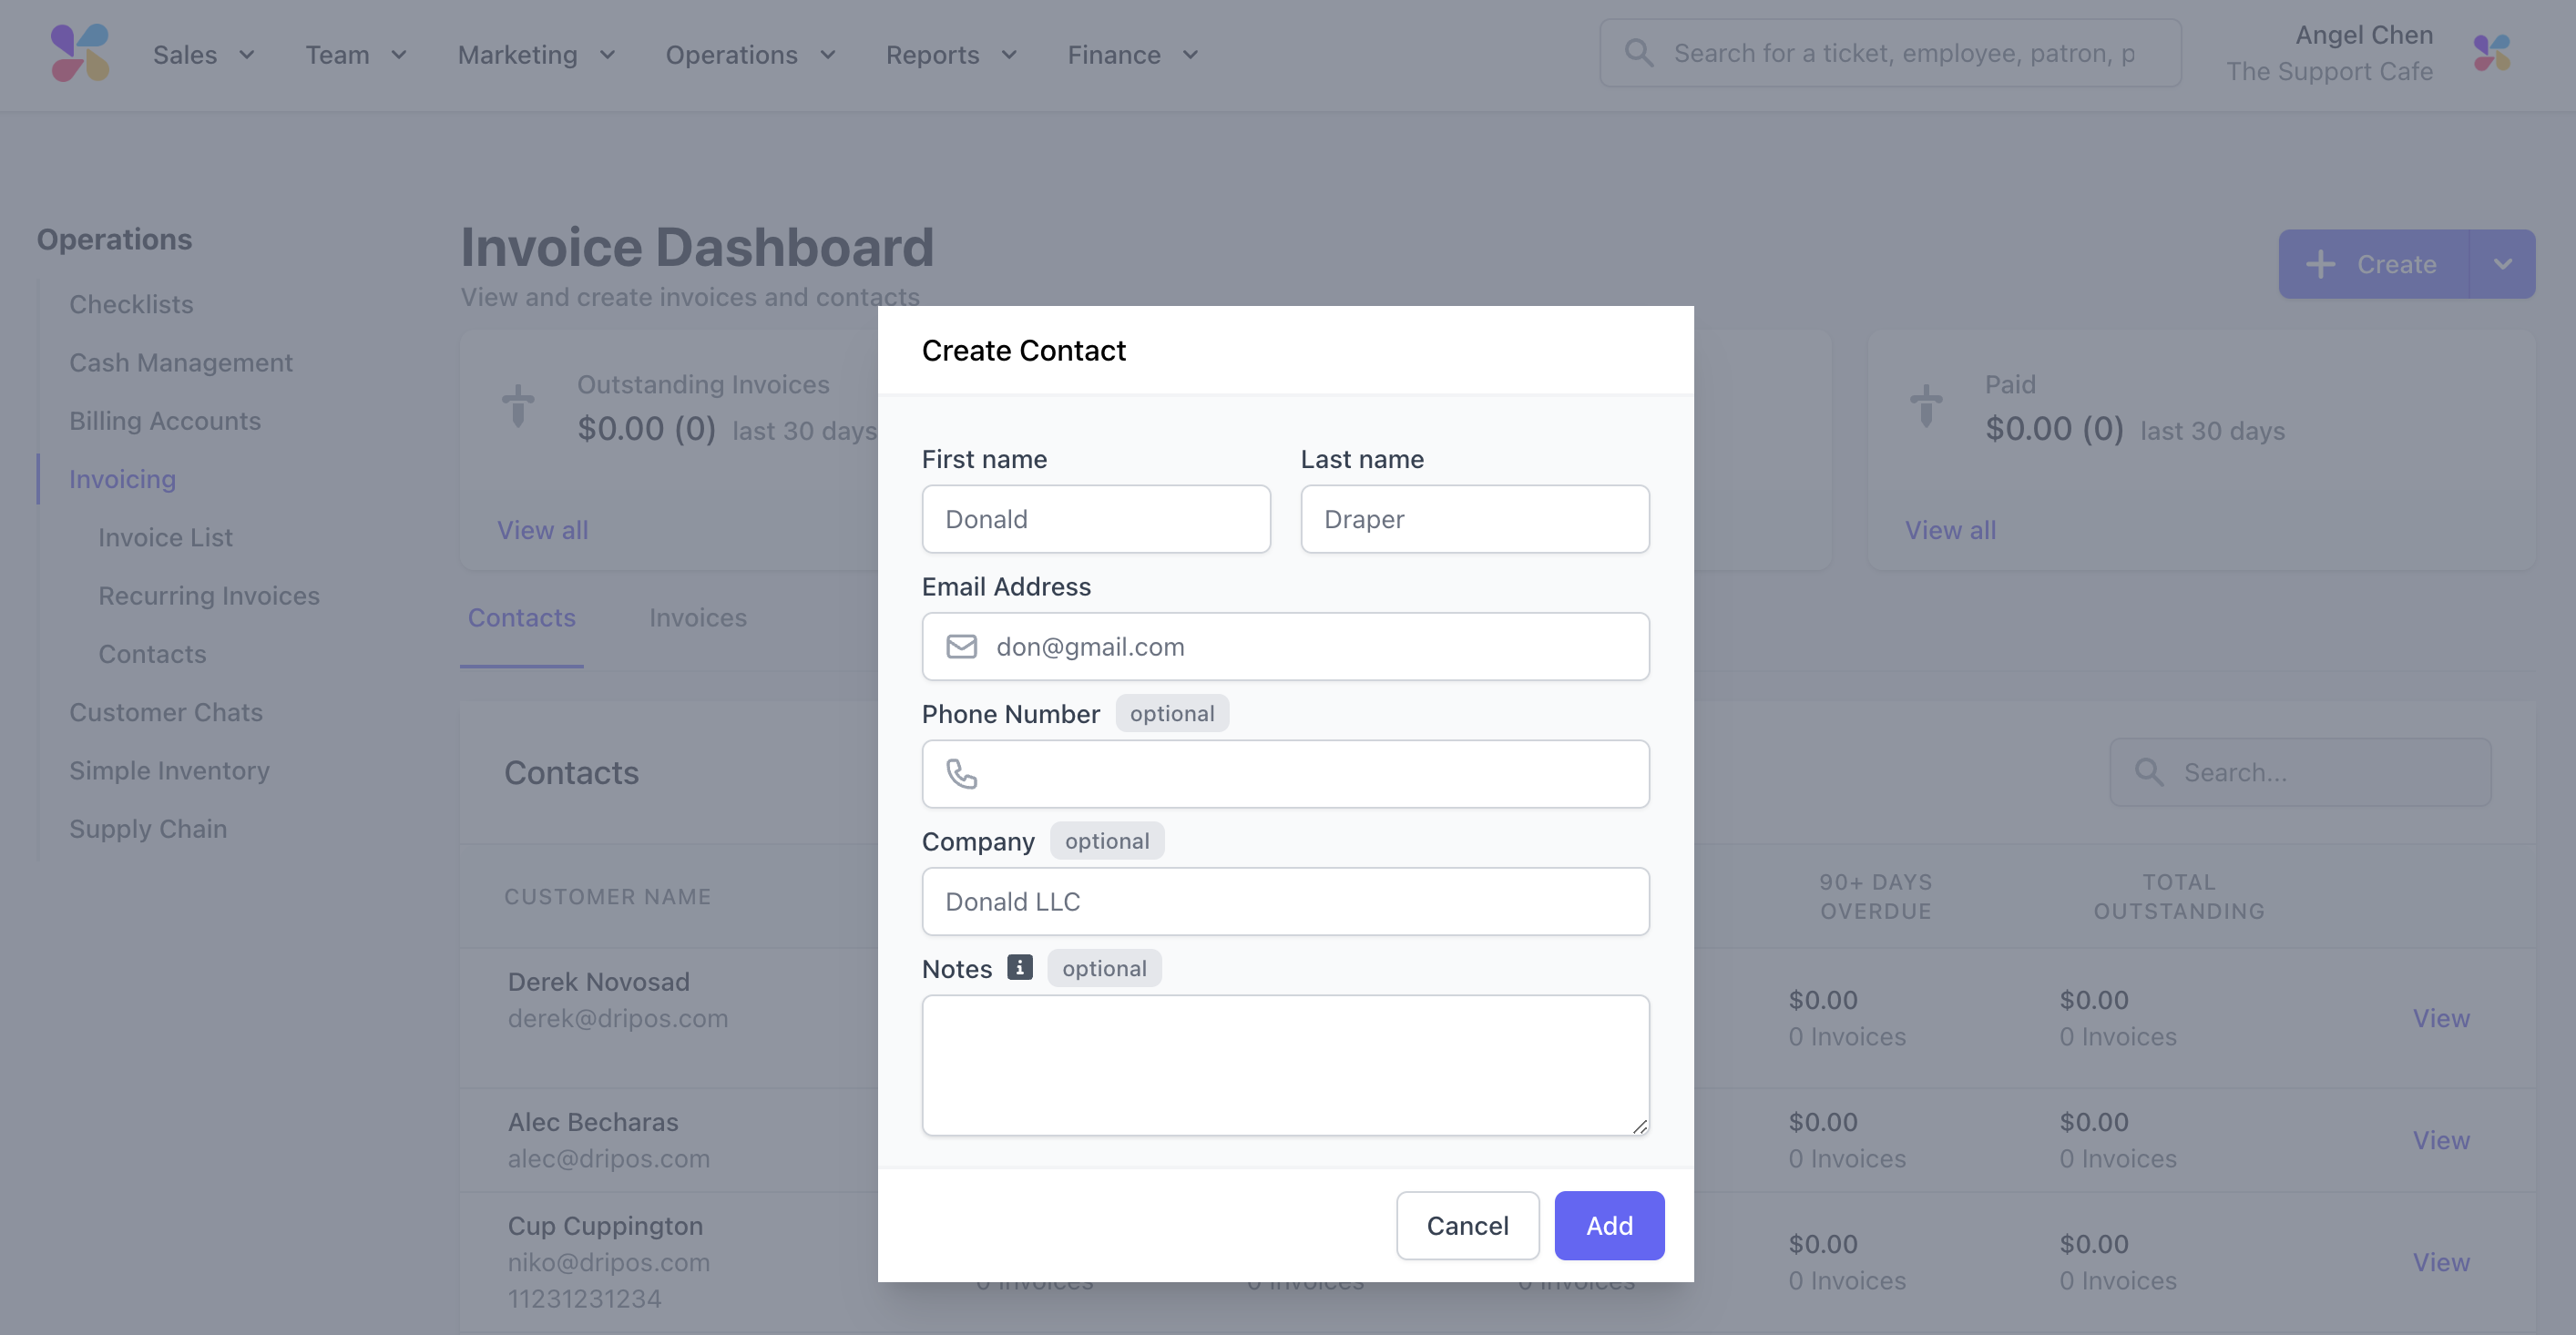 Notes (Optional): Include any notes for internal reference
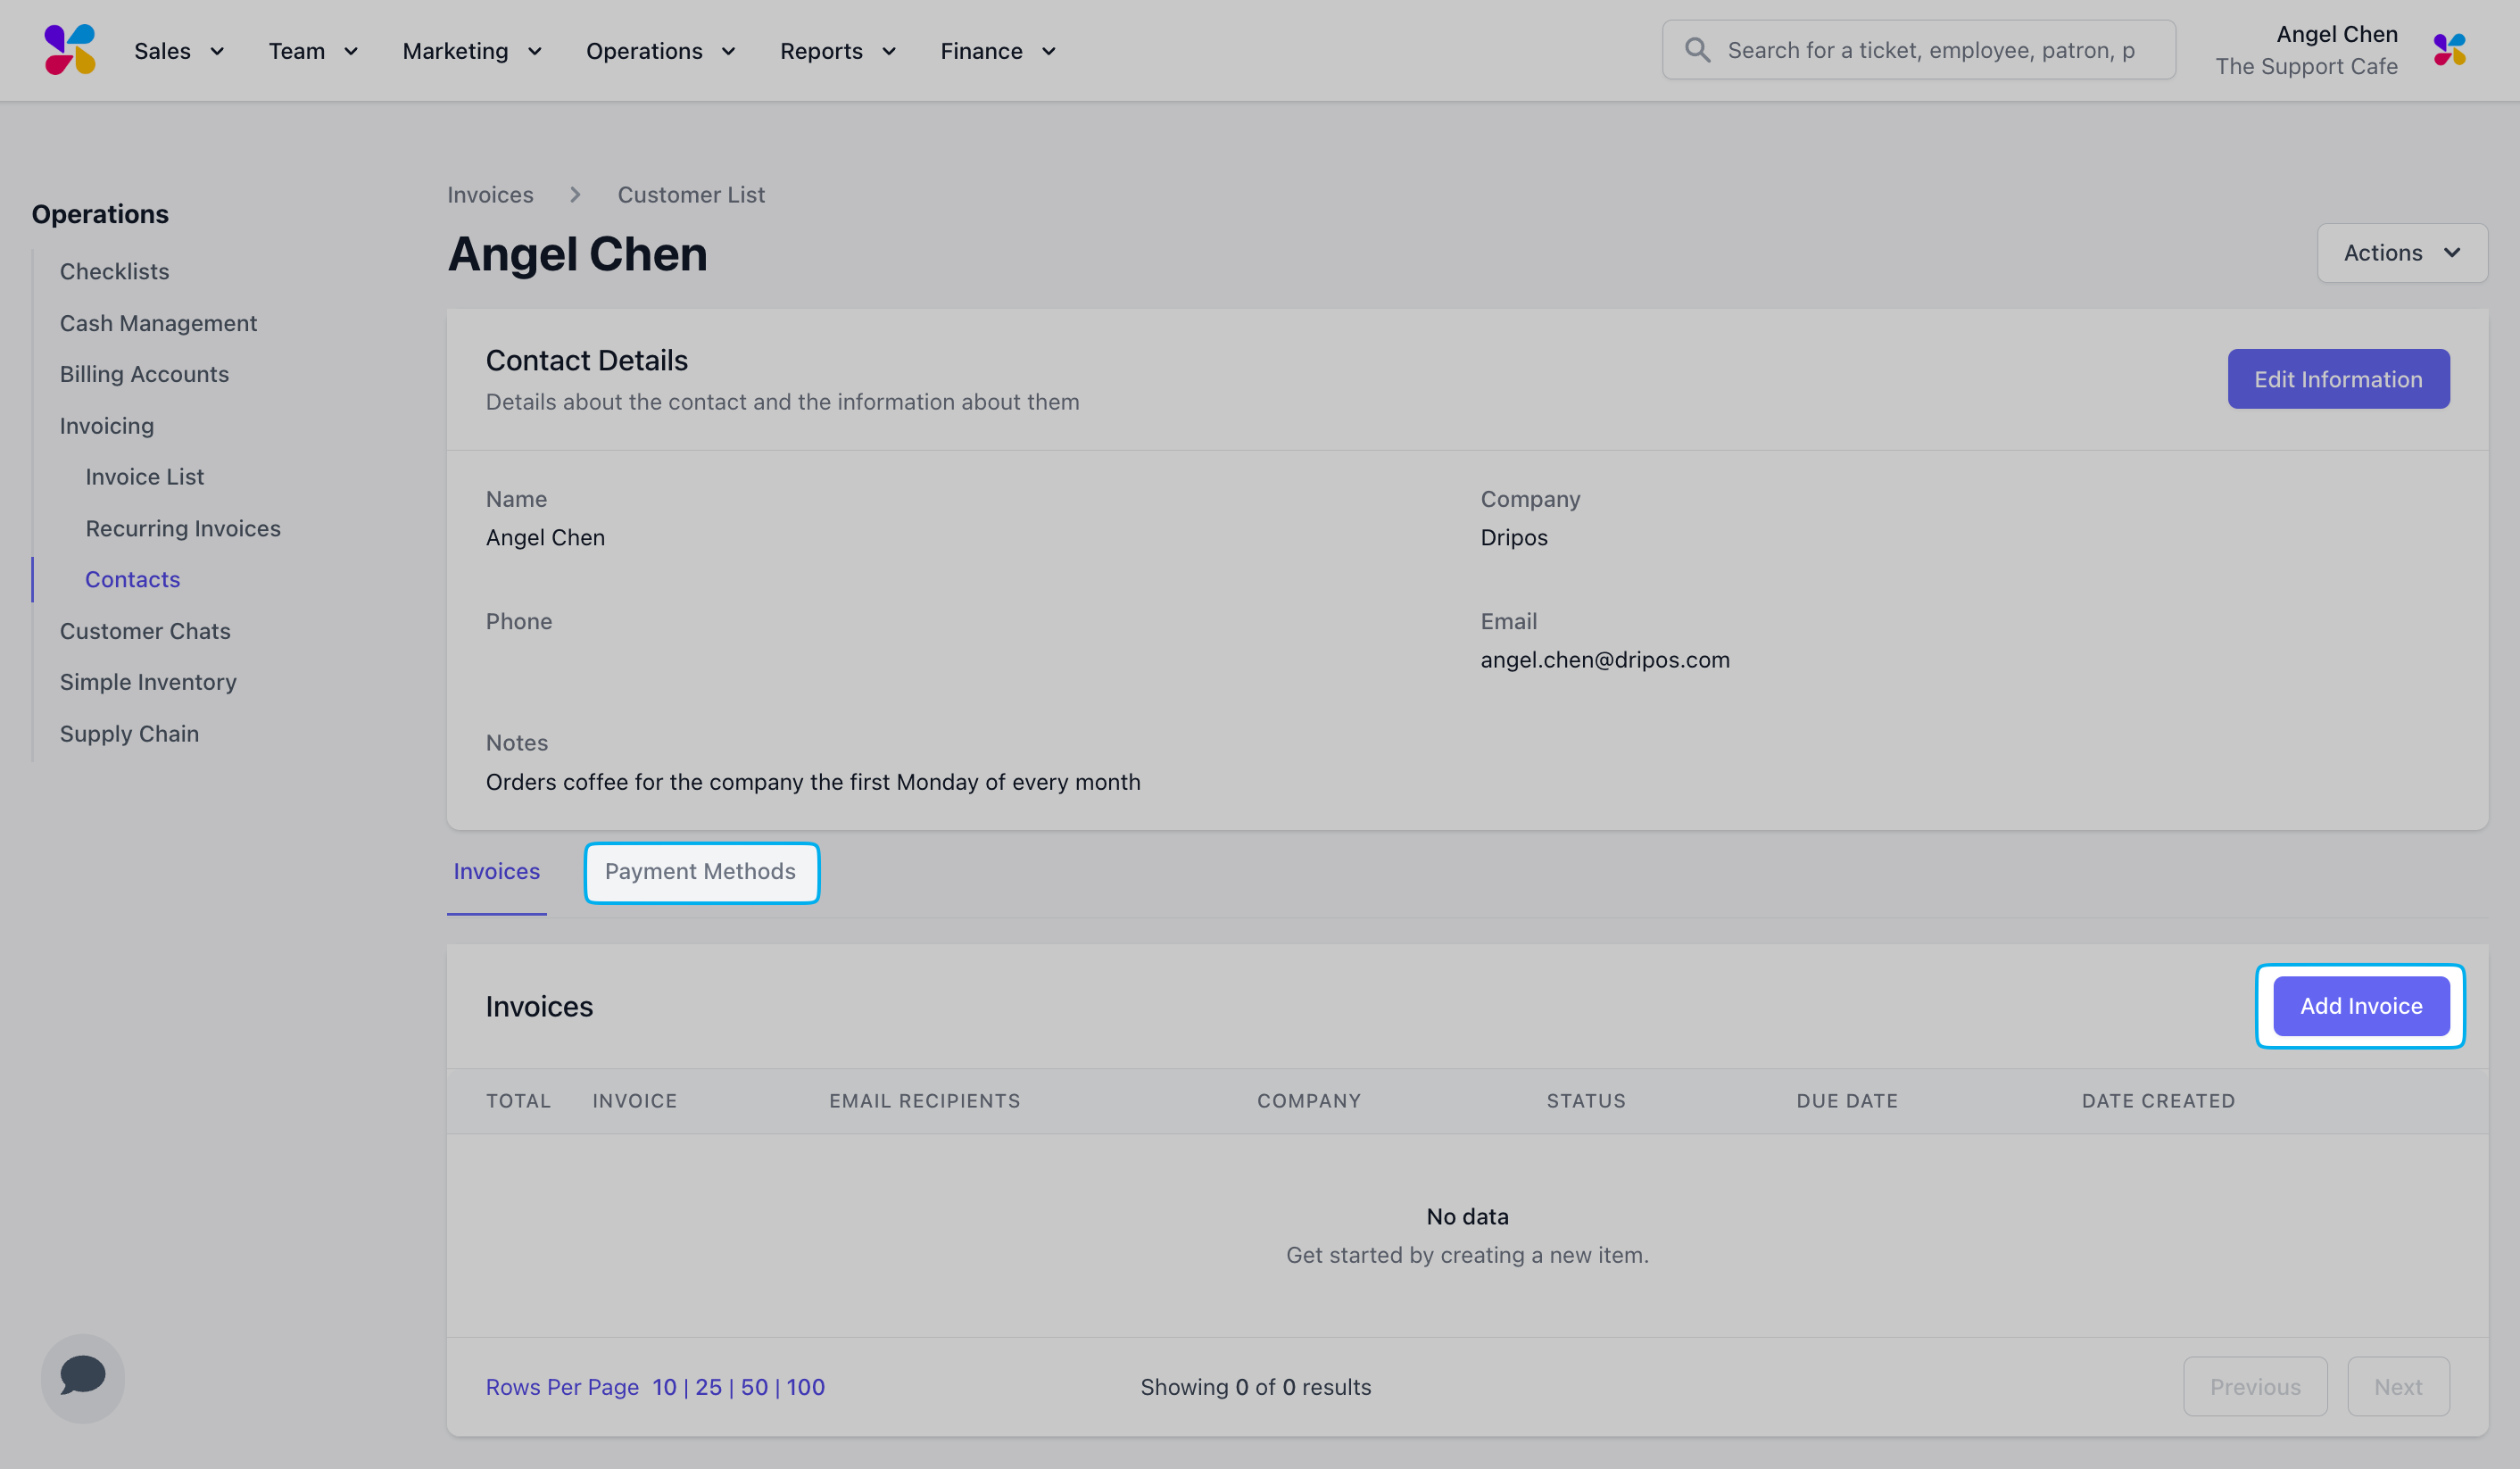
Once the contact is created, you can Edit Information on their page. To delete an invoice contact, use the Actions dropdown.
Notes (Optional): Include any notes for internal reference
Once the contact is created, you can Edit Information on their page. To delete an invoice contact, use the Actions dropdown.
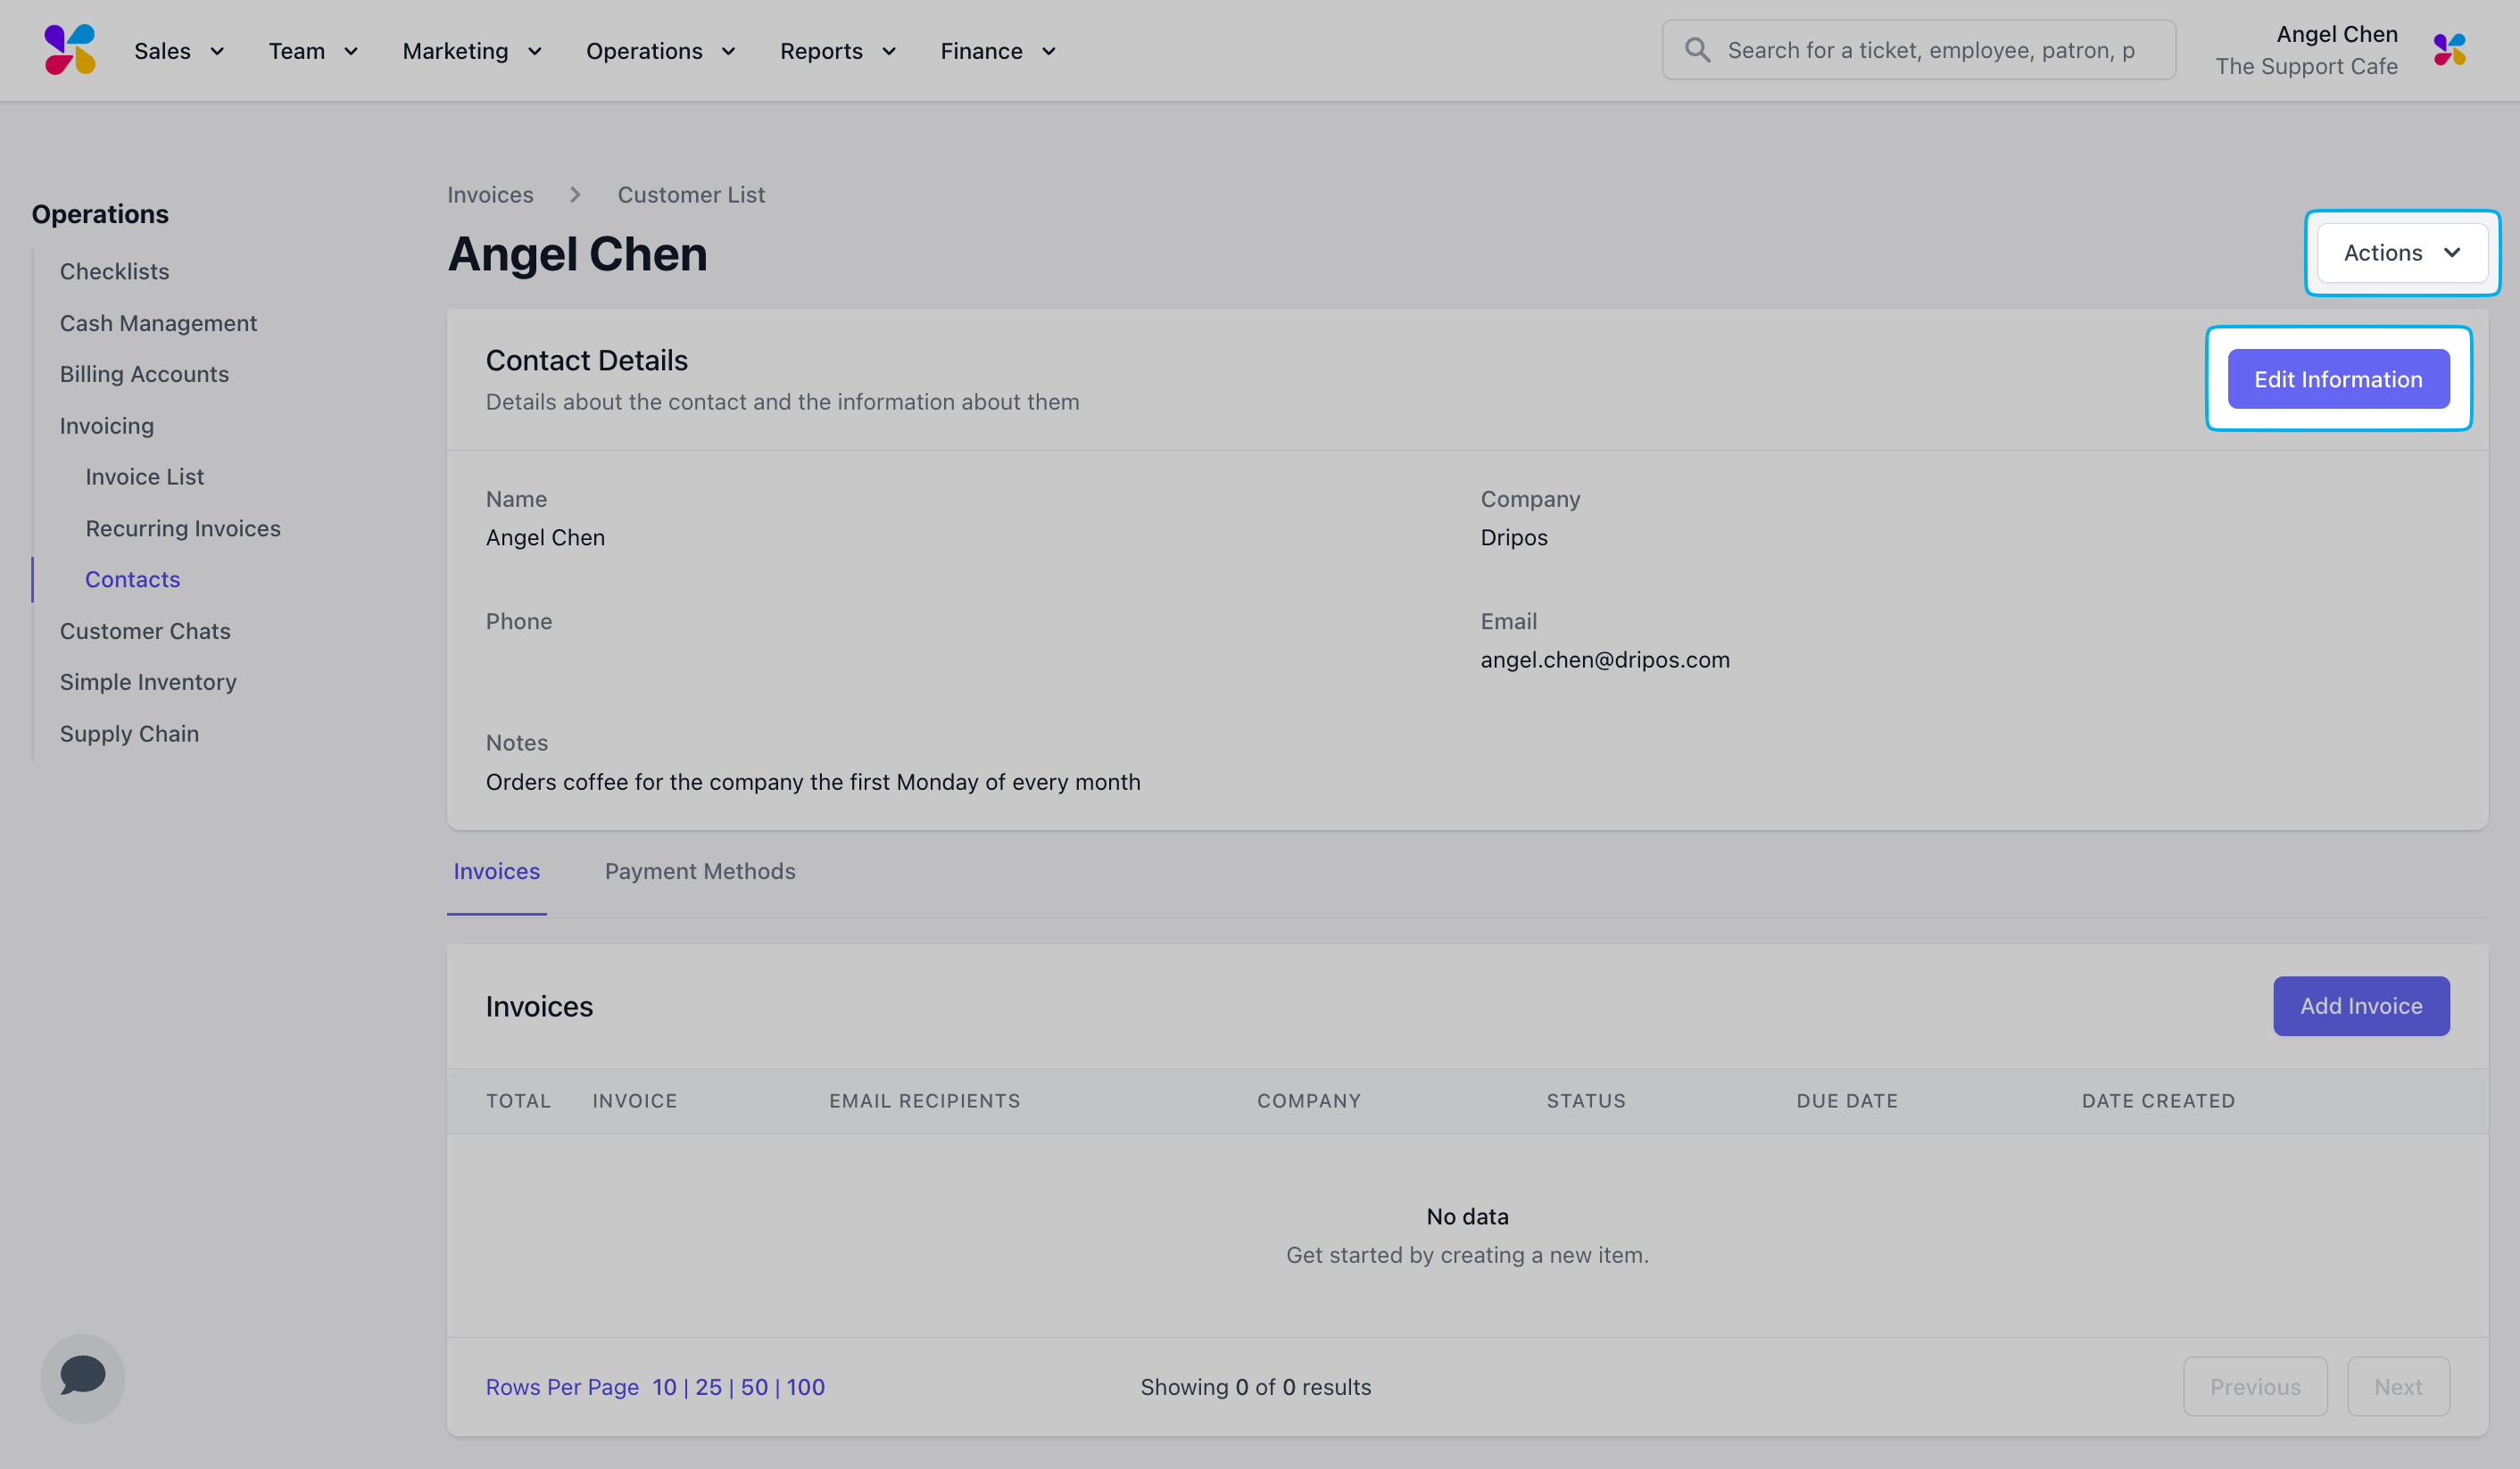 At the bottom of the contact page, you can start creating invoices to send to this customer by using the Add Invoice button or navigate to the Payment Methods tab to input a credit card for recurring and autopay invoices.
 ***
## Create Invoices
Create standalone or recurring invoices to send to customers
## One-Time Invoices
Log in to the **Dashboard** and navigate to **Orders** > **Invoicing**
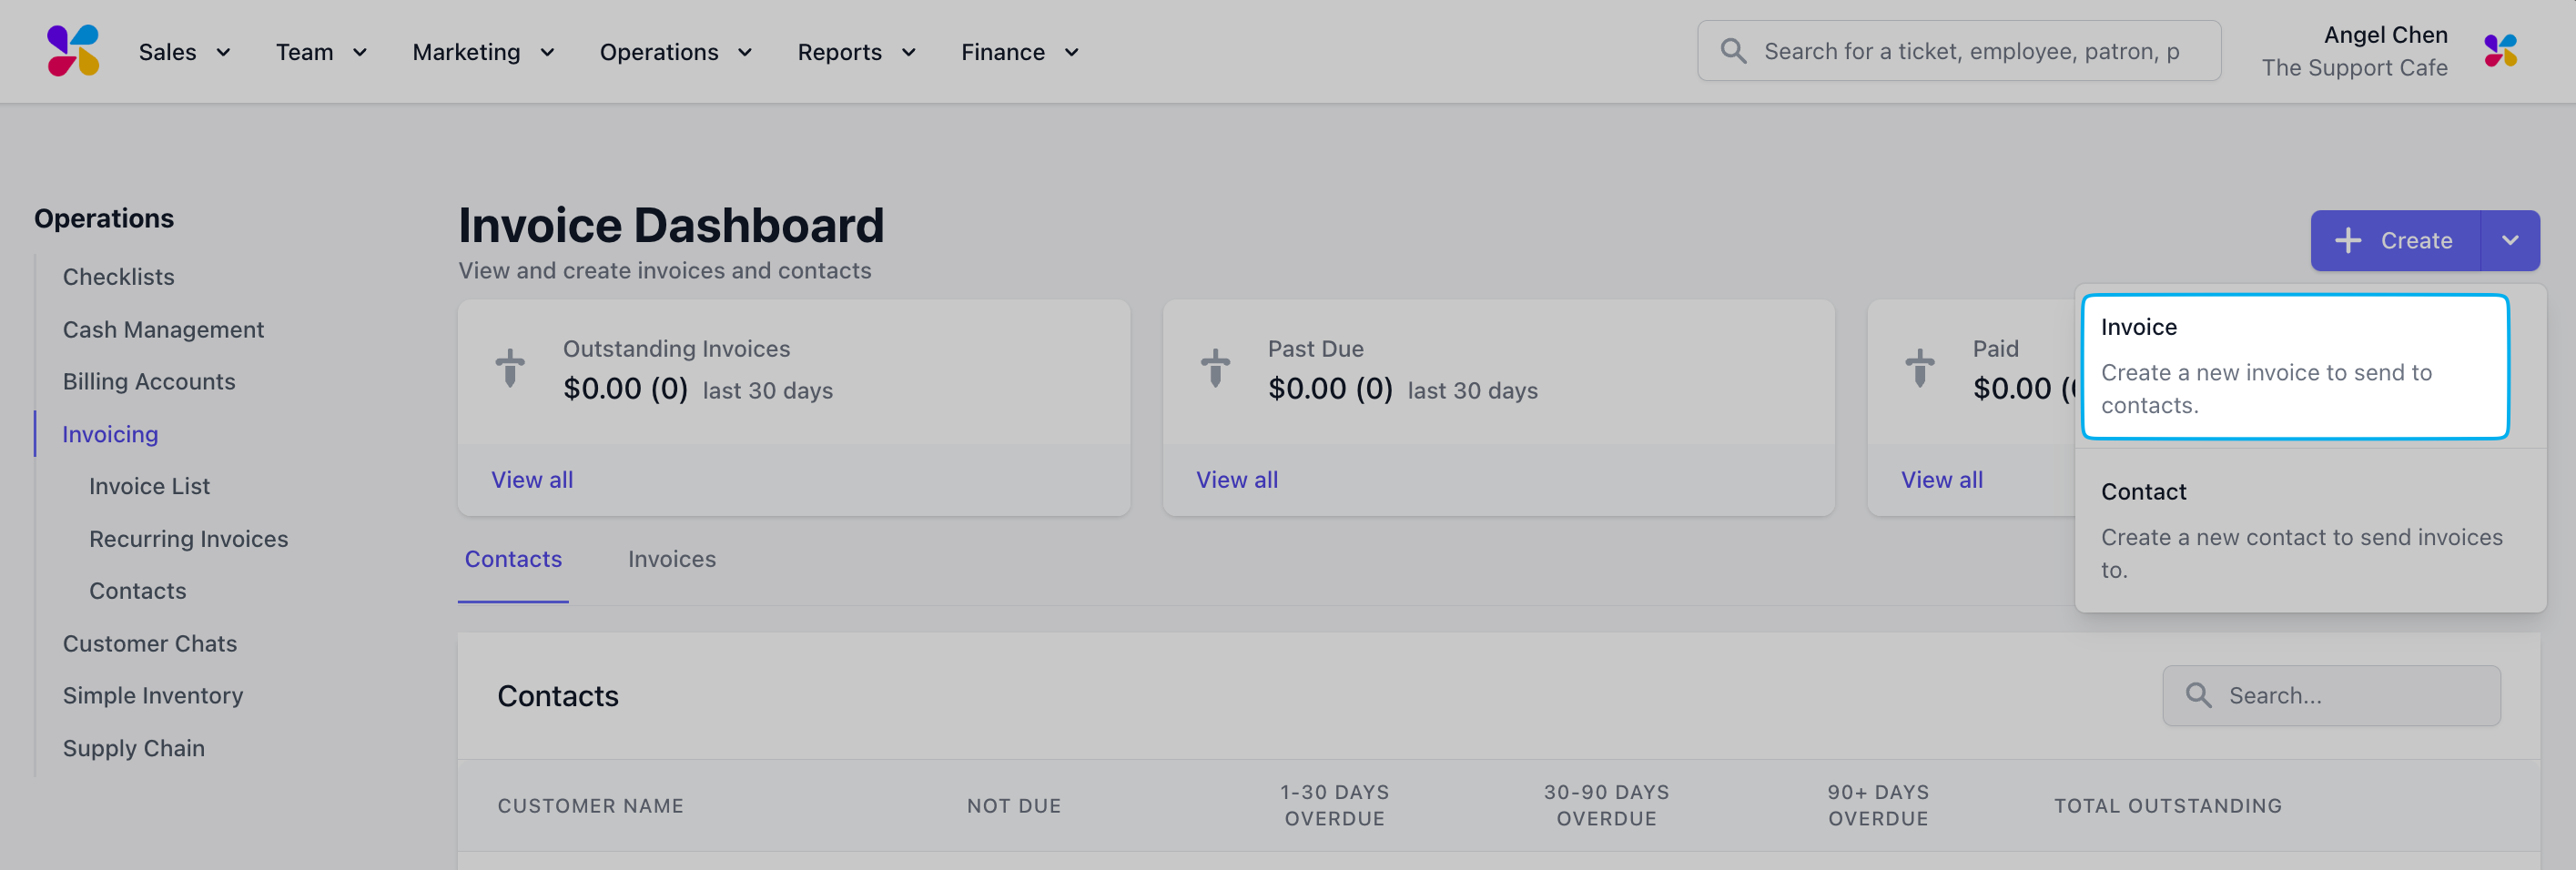
Click **Create** and select **Invoice**
***
## Create Invoices
Create standalone or recurring invoices to send to customers
## One-Time Invoices
Log in to the **Dashboard** and navigate to **Orders** > **Invoicing**
Click **Create** and select **Invoice**
 Input the invoice details and click **Next**
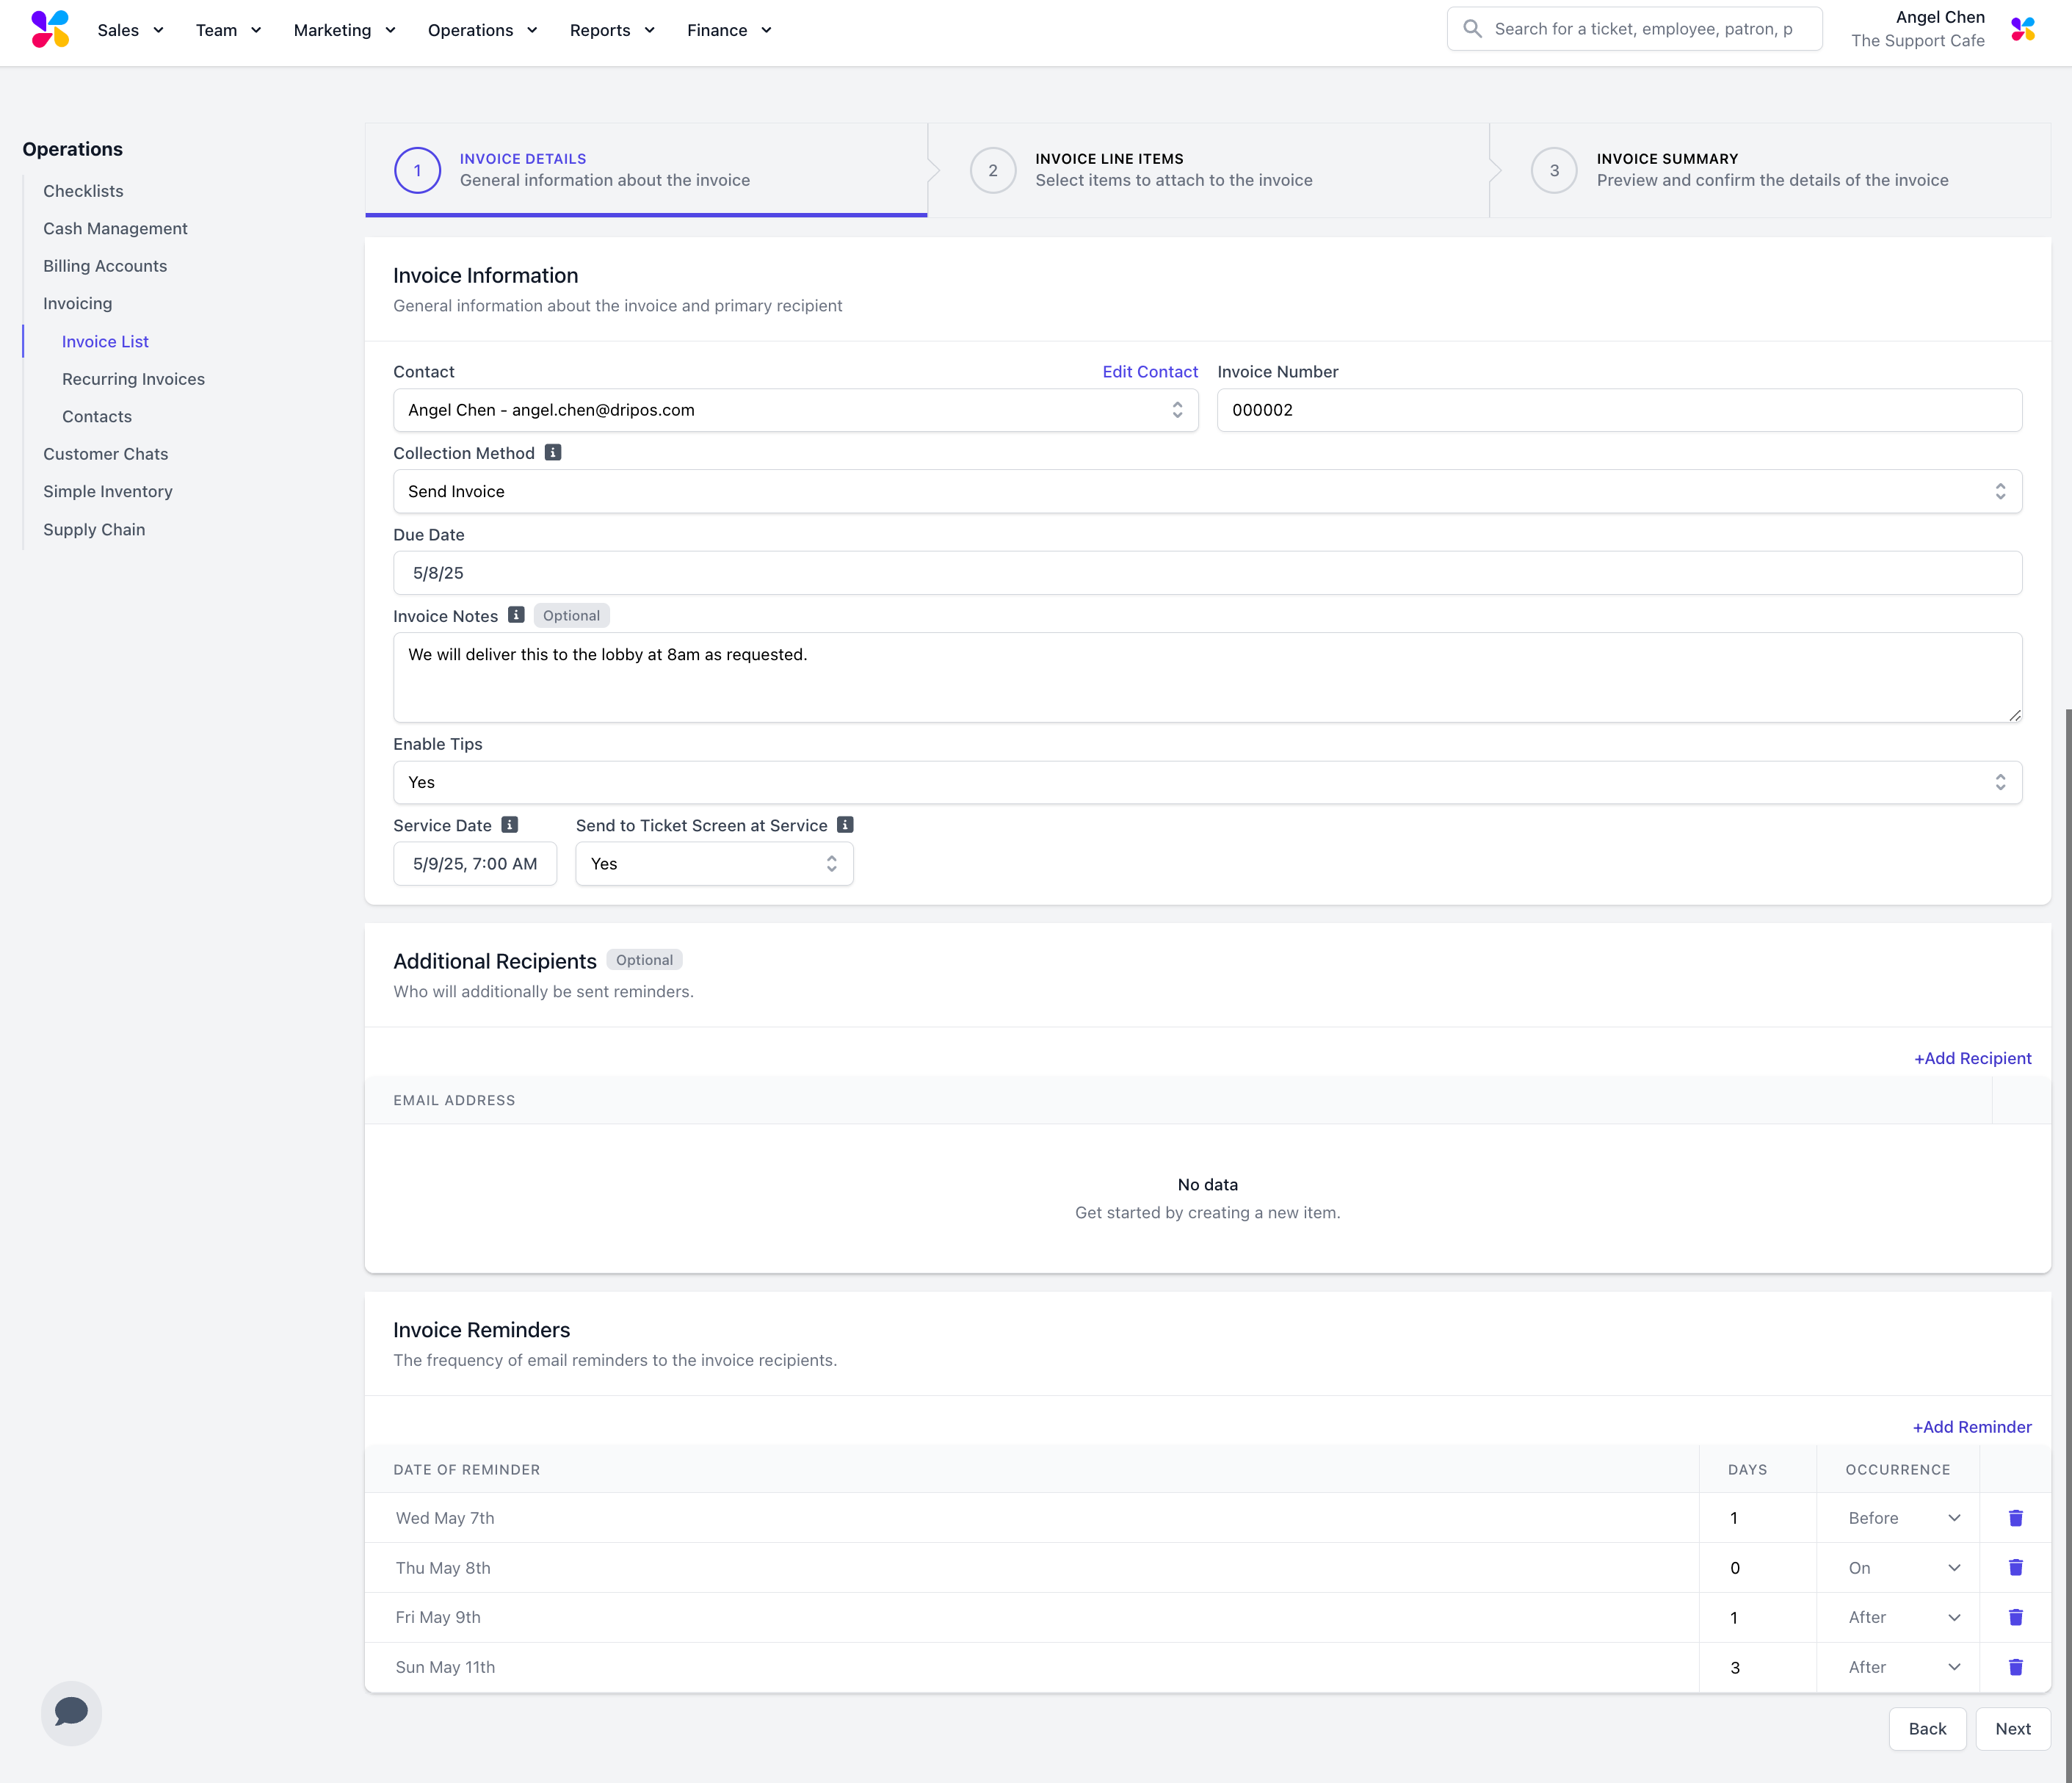 **Contact**: Click the dropdown to select an existing contact to assign this invoice. For new contacts, type in their name and select "Create Contact" to enter their information.
**Invoice Number**: Input your preferred invoice number or use the auto-generated invoice number
**Due Date**: Assign a due date to the invoice
**Invoice Notes (Optional)**: Include any notes to include in the invoice for the customer
**Enable Tips**: If set to Yes, the invoice contact can include a tip when paying off the invoice
**Service Date**: Select the date and time this invoice should be recorded as a sale for reporting purposes
**Send to Ticket Screen at Service**: If set to Yes, the invoice line items will appear on the KDS of your POS on the selected service date
**Additional Recipients**: Use the +Additional Recipients button to attach other emails to send the invoice and any payment reminders
**Invoice Reminders**: Add invoice reminders by using the +Add Reminder button. Edit the frequency by changing the Days and the Occurrence setup (Before, On, After) in relation to the Due Date. Delete reminders by clicking the trash icon next to the unwanted reminder date
Input each invoice line item by using the **Add line item** + button. Add an existing menu item or create custom items for this invoice.
> To add existing menu products, click the **Add line item** + button and type in the name of an existing product you would like to add. Select the corresponding product to add to the invoice.
**Contact**: Click the dropdown to select an existing contact to assign this invoice. For new contacts, type in their name and select "Create Contact" to enter their information.
**Invoice Number**: Input your preferred invoice number or use the auto-generated invoice number
**Due Date**: Assign a due date to the invoice
**Invoice Notes (Optional)**: Include any notes to include in the invoice for the customer
**Enable Tips**: If set to Yes, the invoice contact can include a tip when paying off the invoice
**Service Date**: Select the date and time this invoice should be recorded as a sale for reporting purposes
**Send to Ticket Screen at Service**: If set to Yes, the invoice line items will appear on the KDS of your POS on the selected service date
**Additional Recipients**: Use the +Additional Recipients button to attach other emails to send the invoice and any payment reminders
**Invoice Reminders**: Add invoice reminders by using the +Add Reminder button. Edit the frequency by changing the Days and the Occurrence setup (Before, On, After) in relation to the Due Date. Delete reminders by clicking the trash icon next to the unwanted reminder date
Input each invoice line item by using the **Add line item** + button. Add an existing menu item or create custom items for this invoice.
> To add existing menu products, click the **Add line item** + button and type in the name of an existing product you would like to add. Select the corresponding product to add to the invoice.
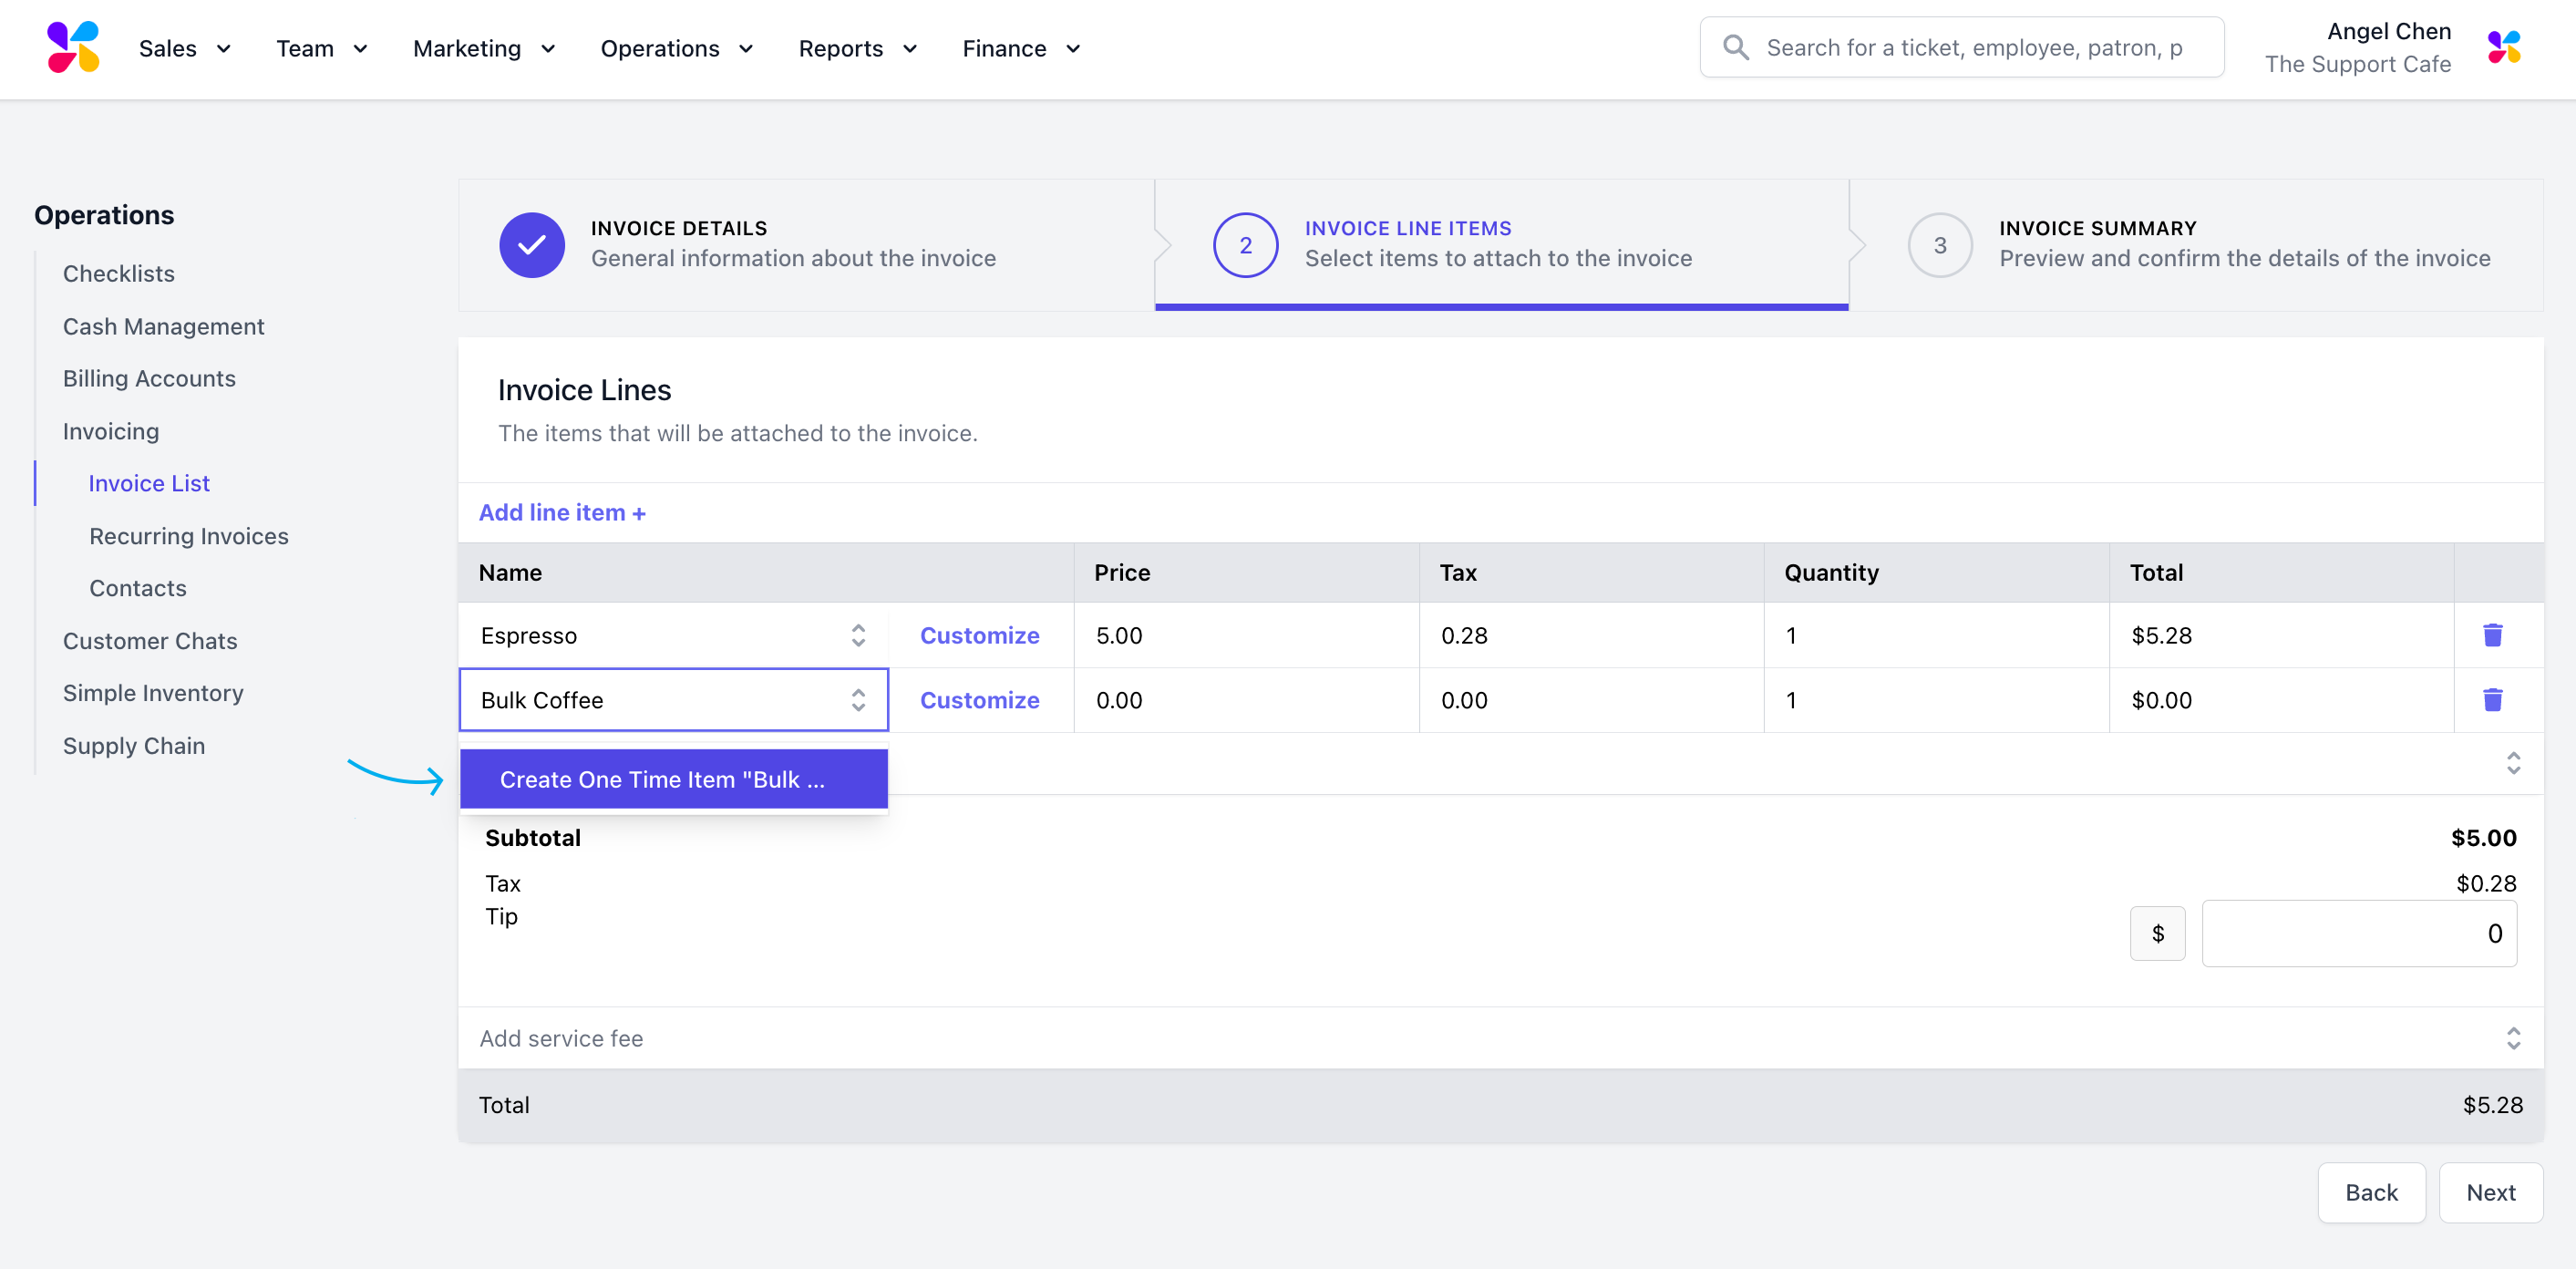
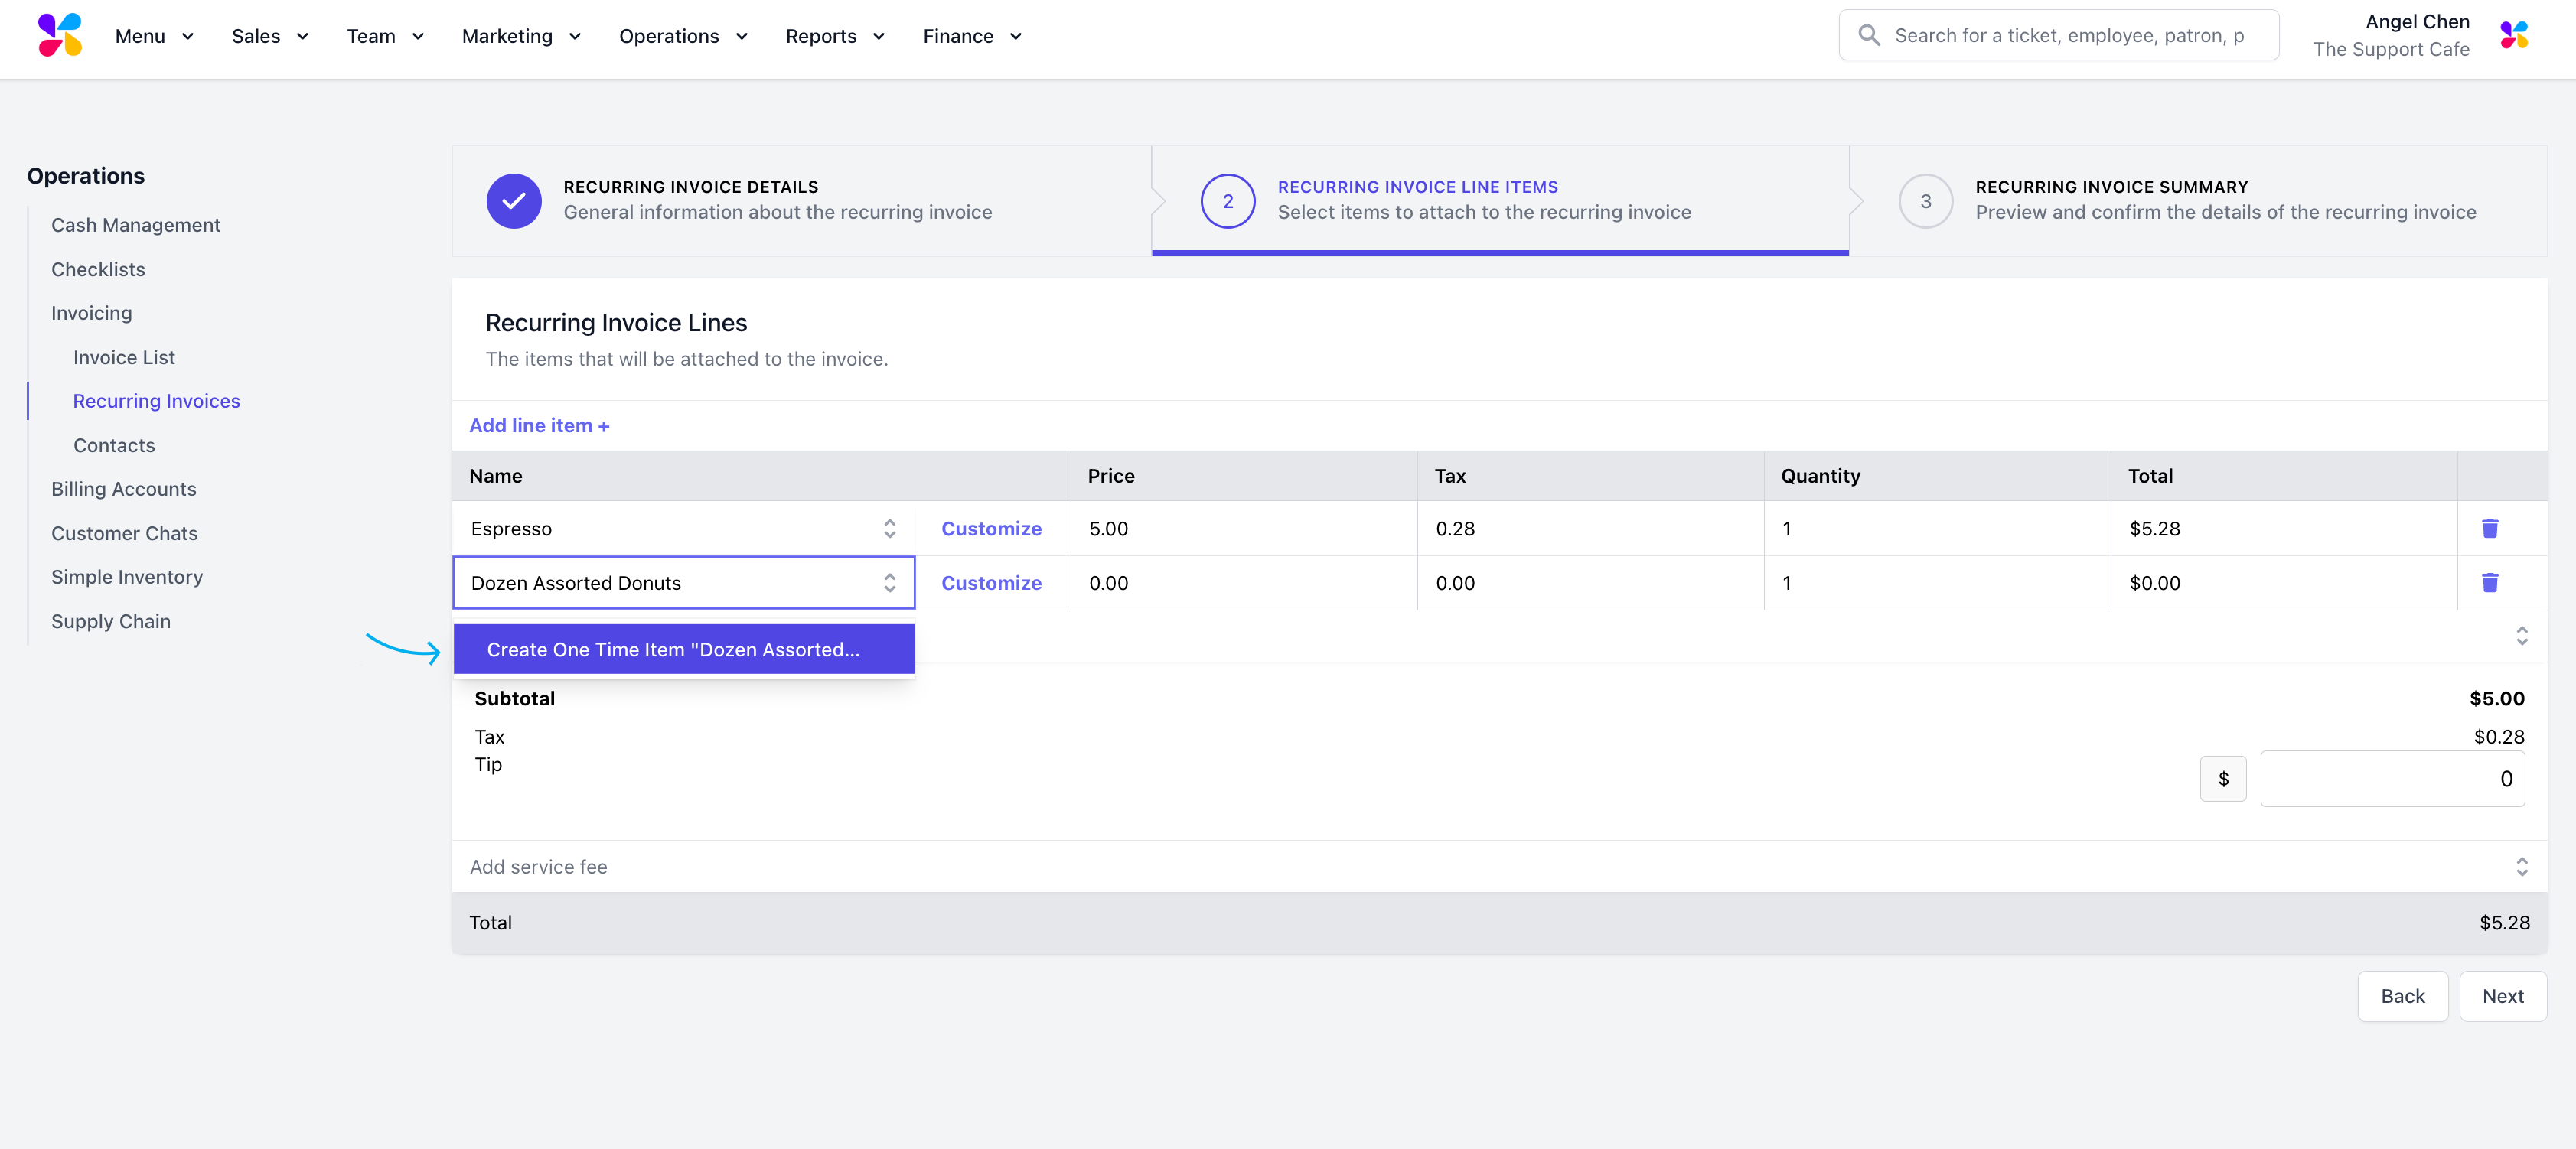
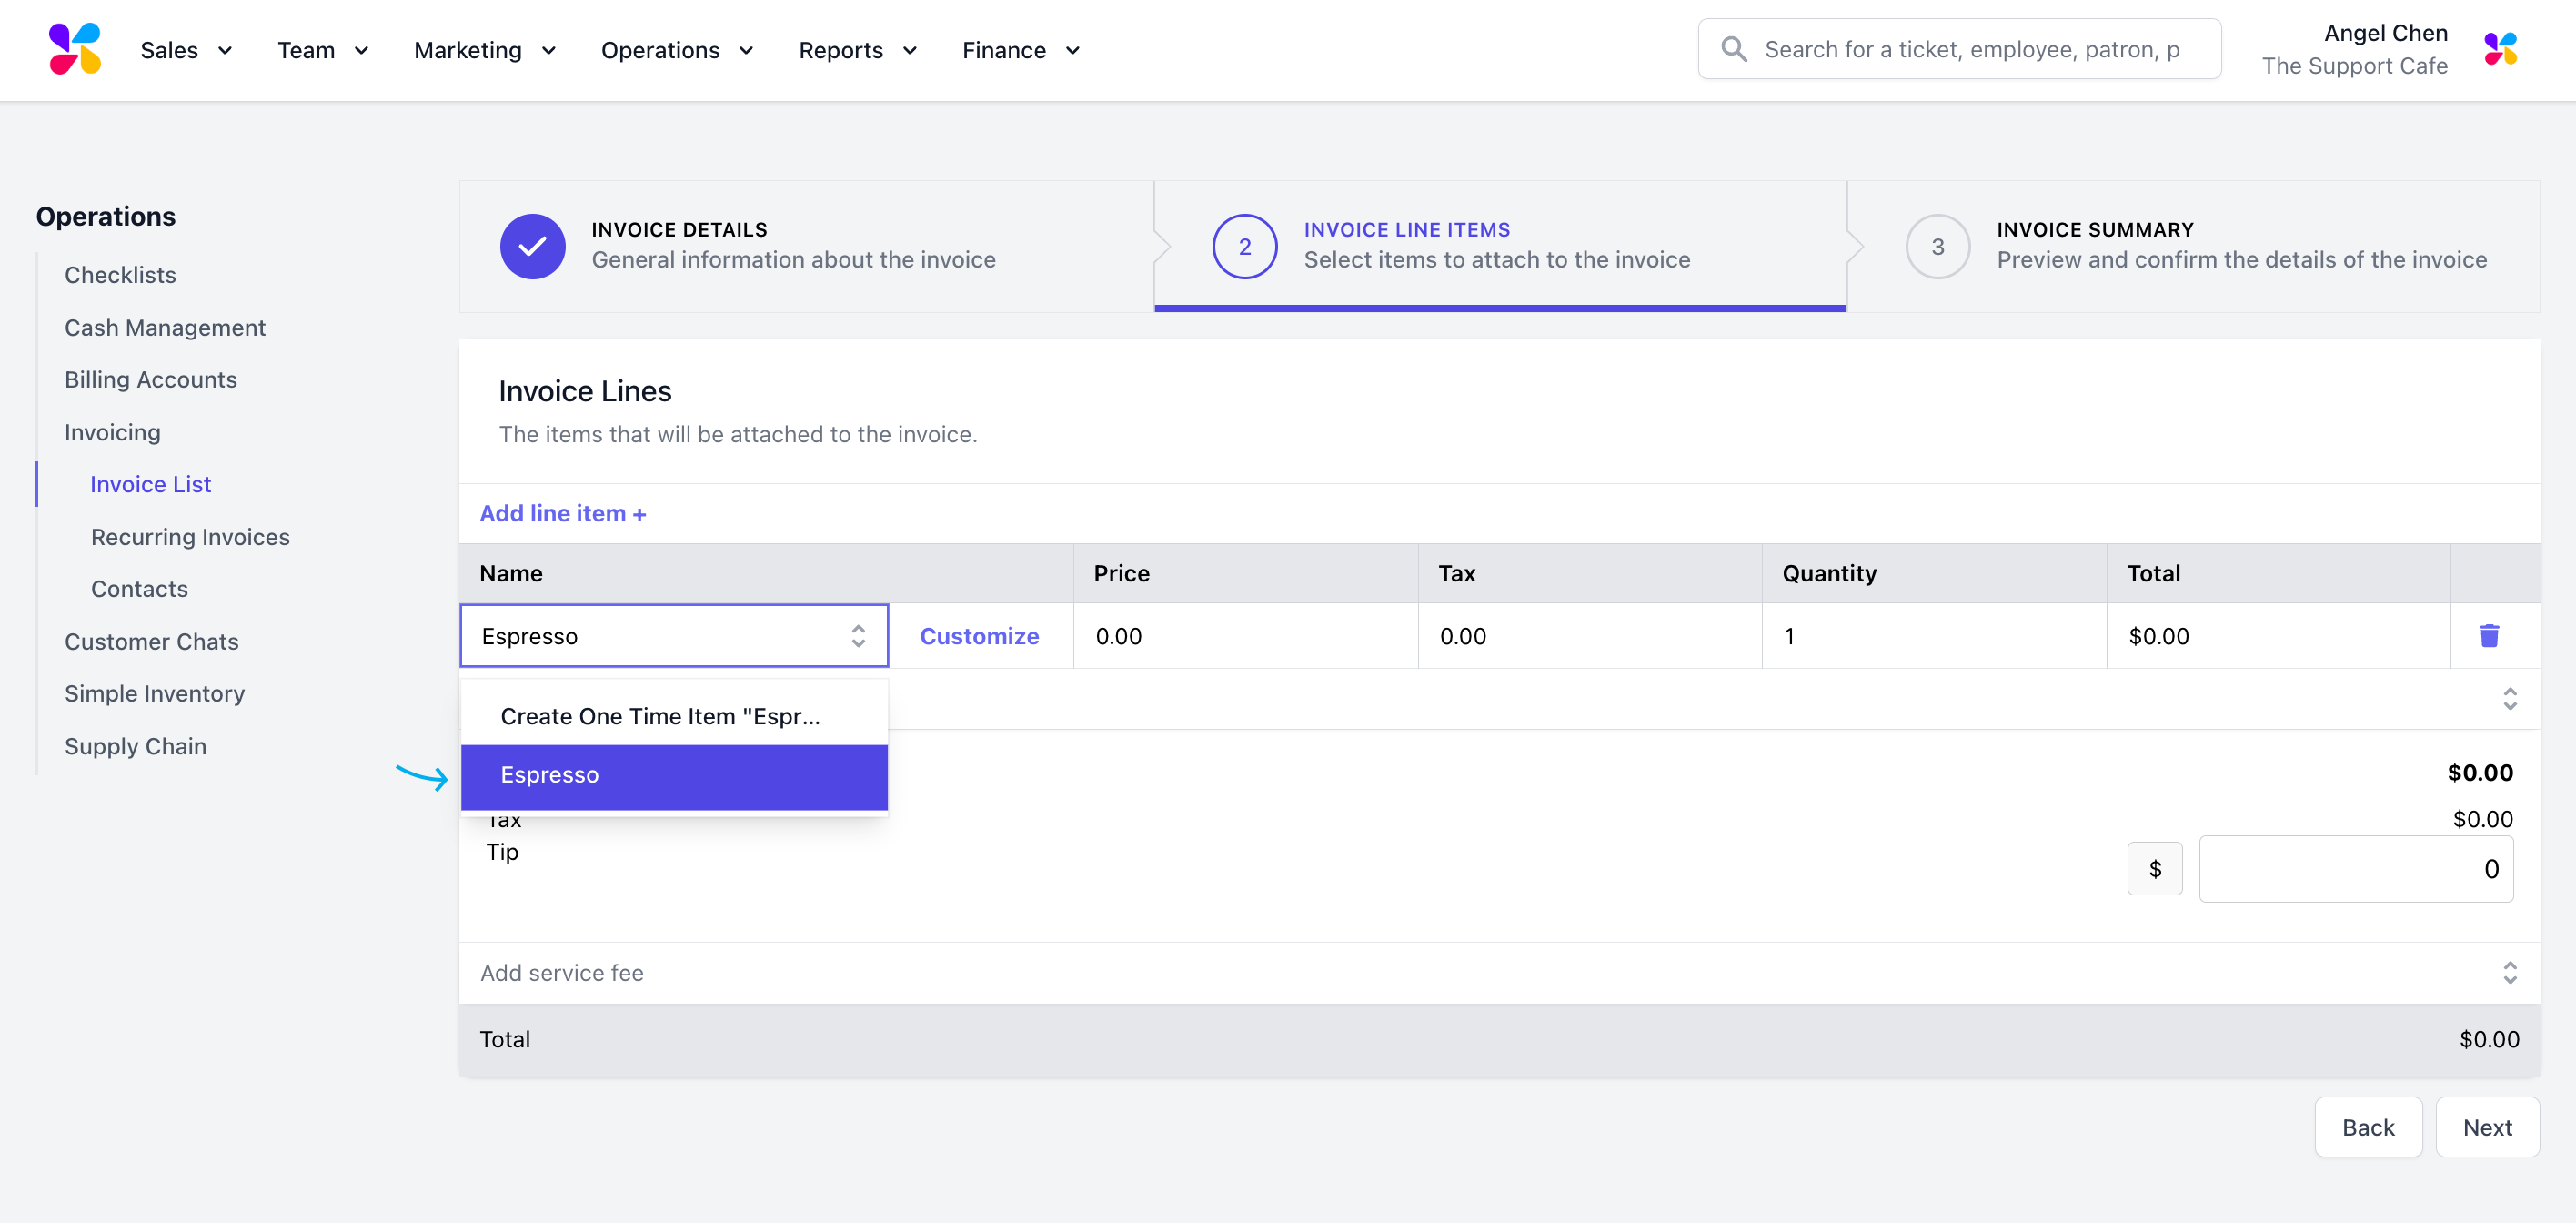 > To create and add custom line items, click the **Add line item** + button and type in a name for the custom product. Select the "Create One Time Item" option to add and manually input the **Price**.
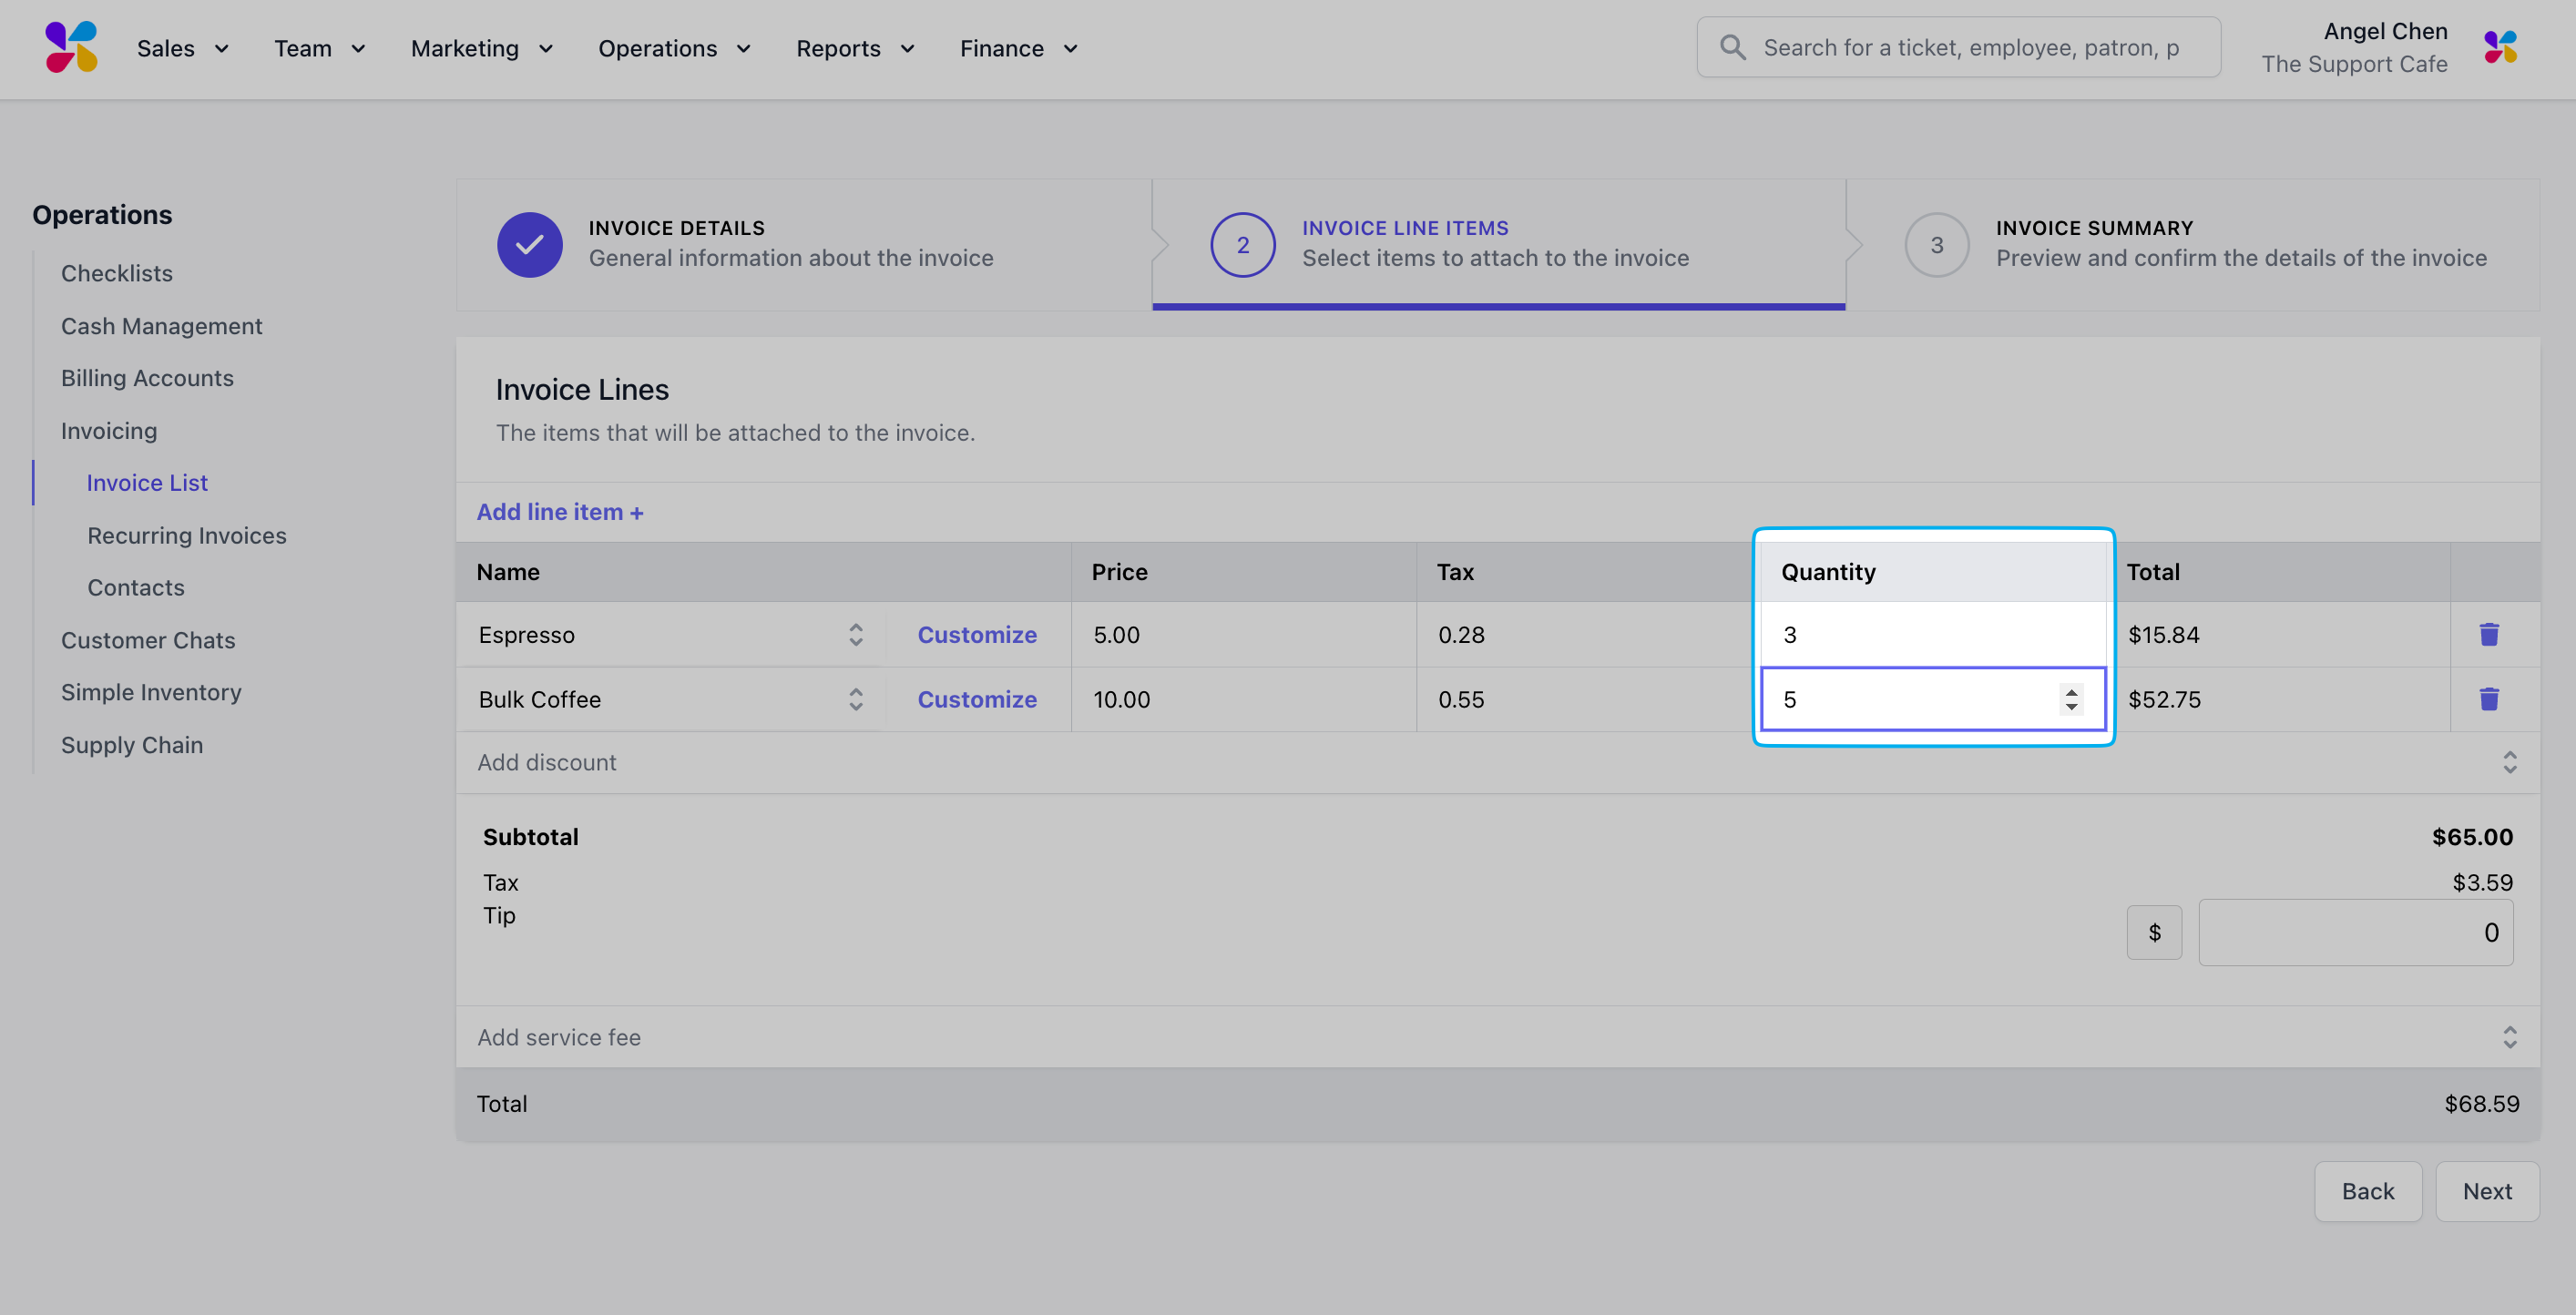
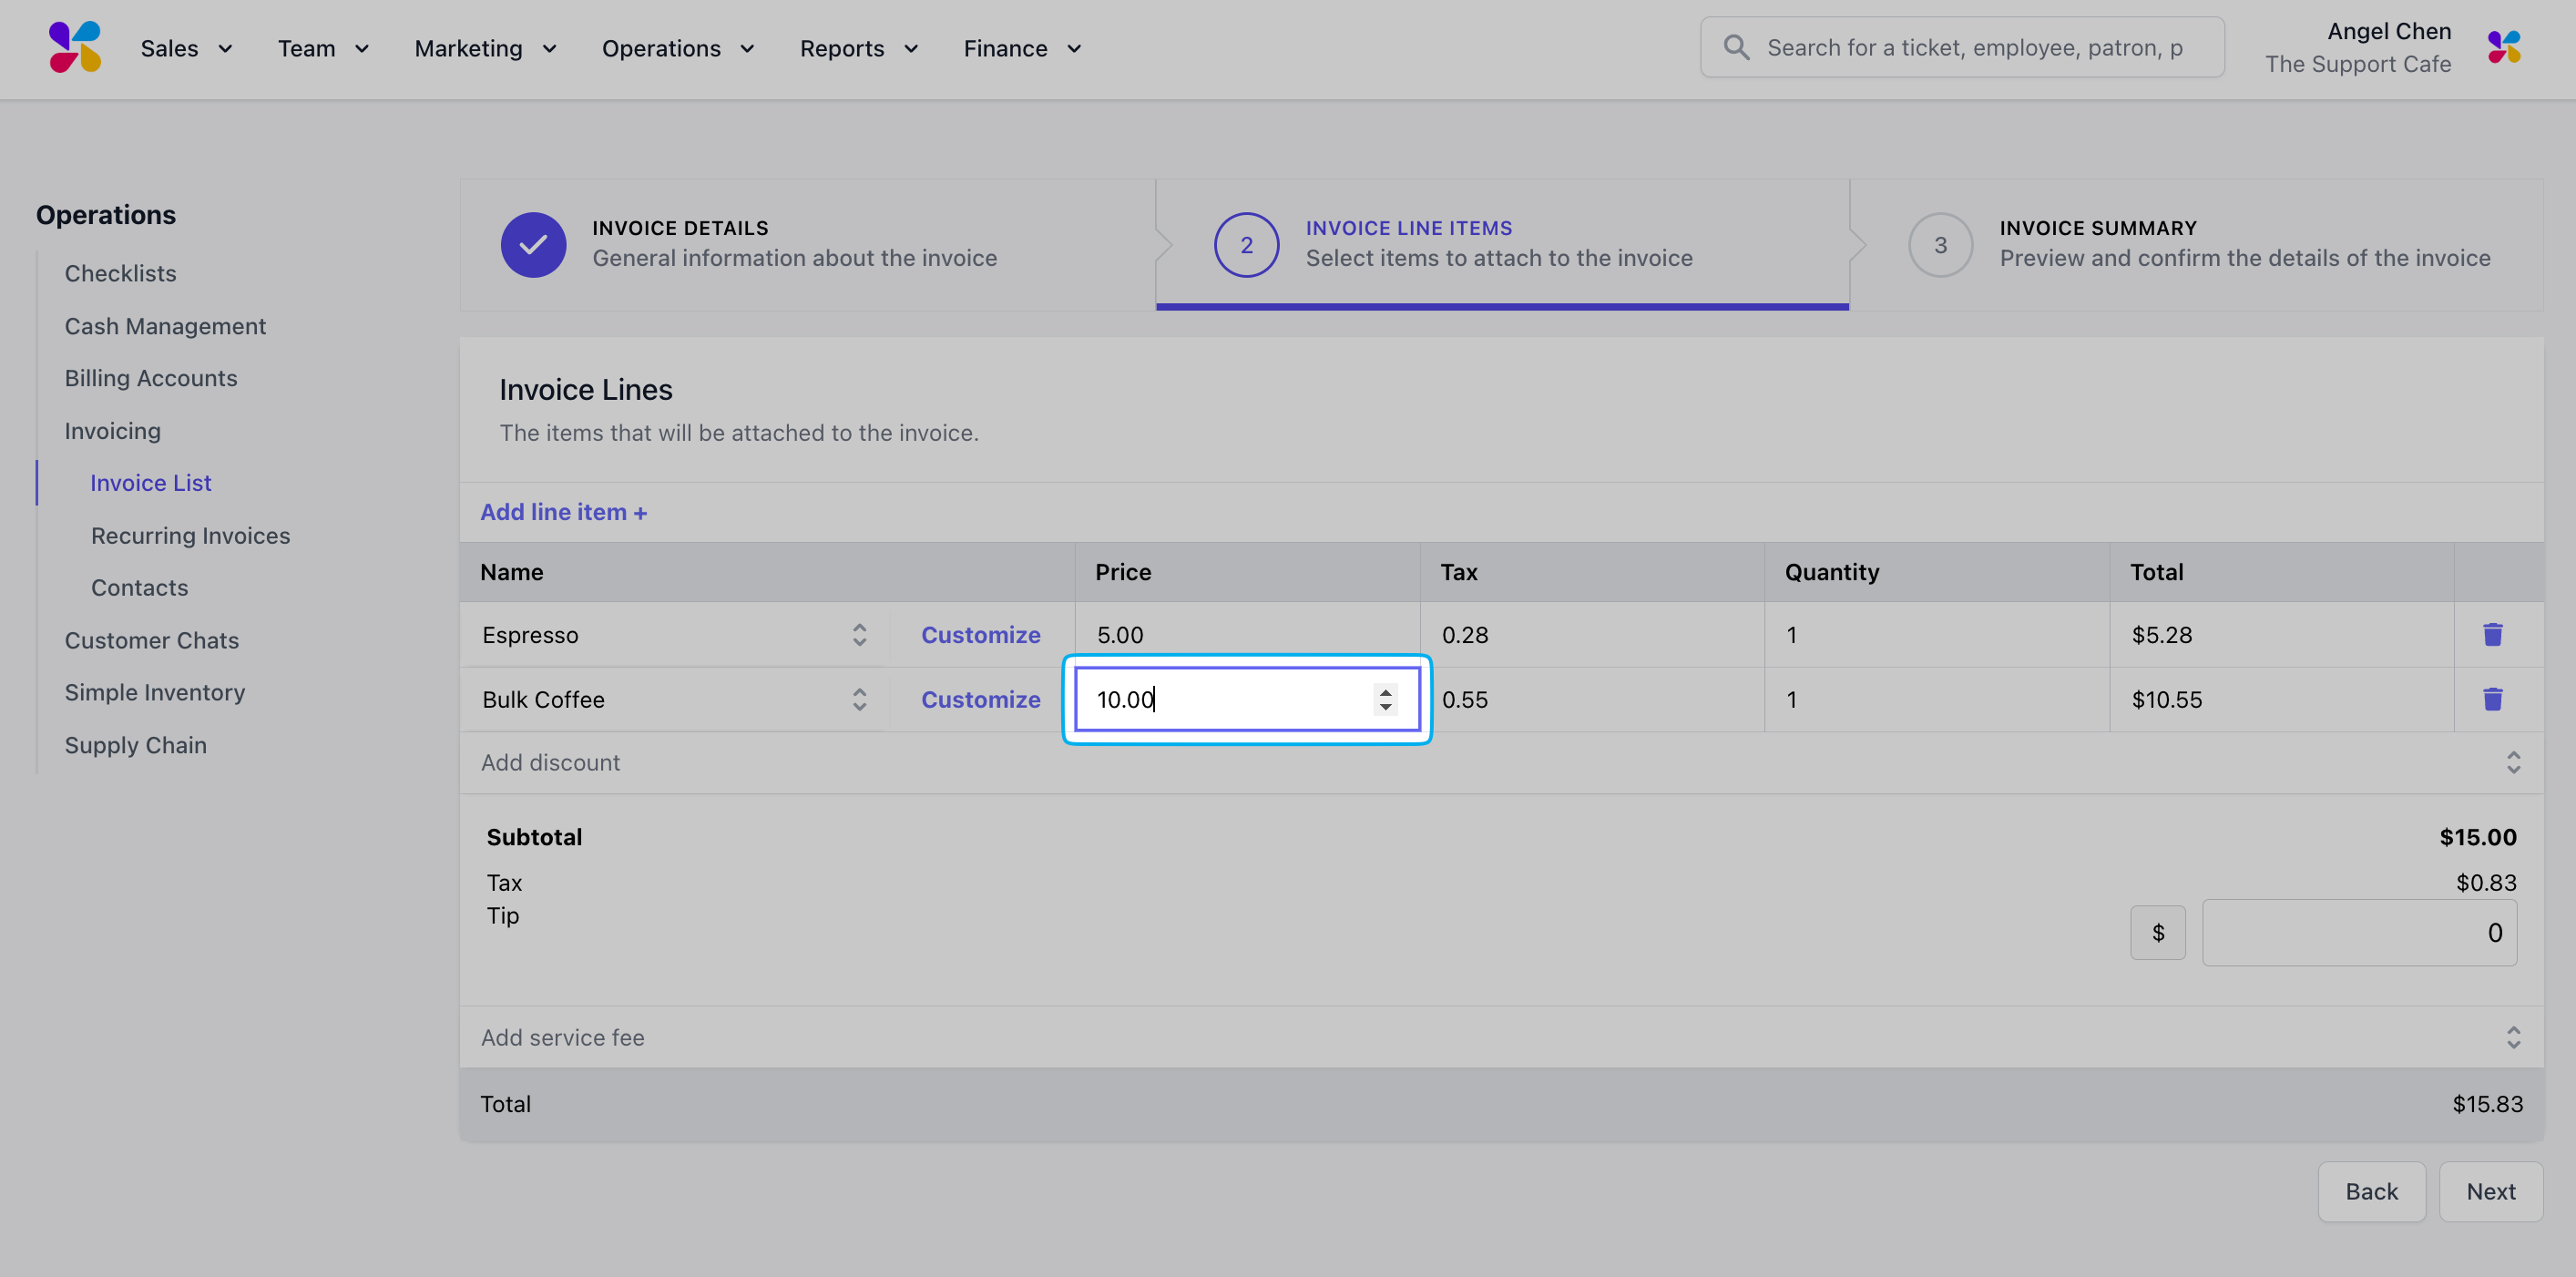 Enter the correct amount of each line item under **Quantity**.
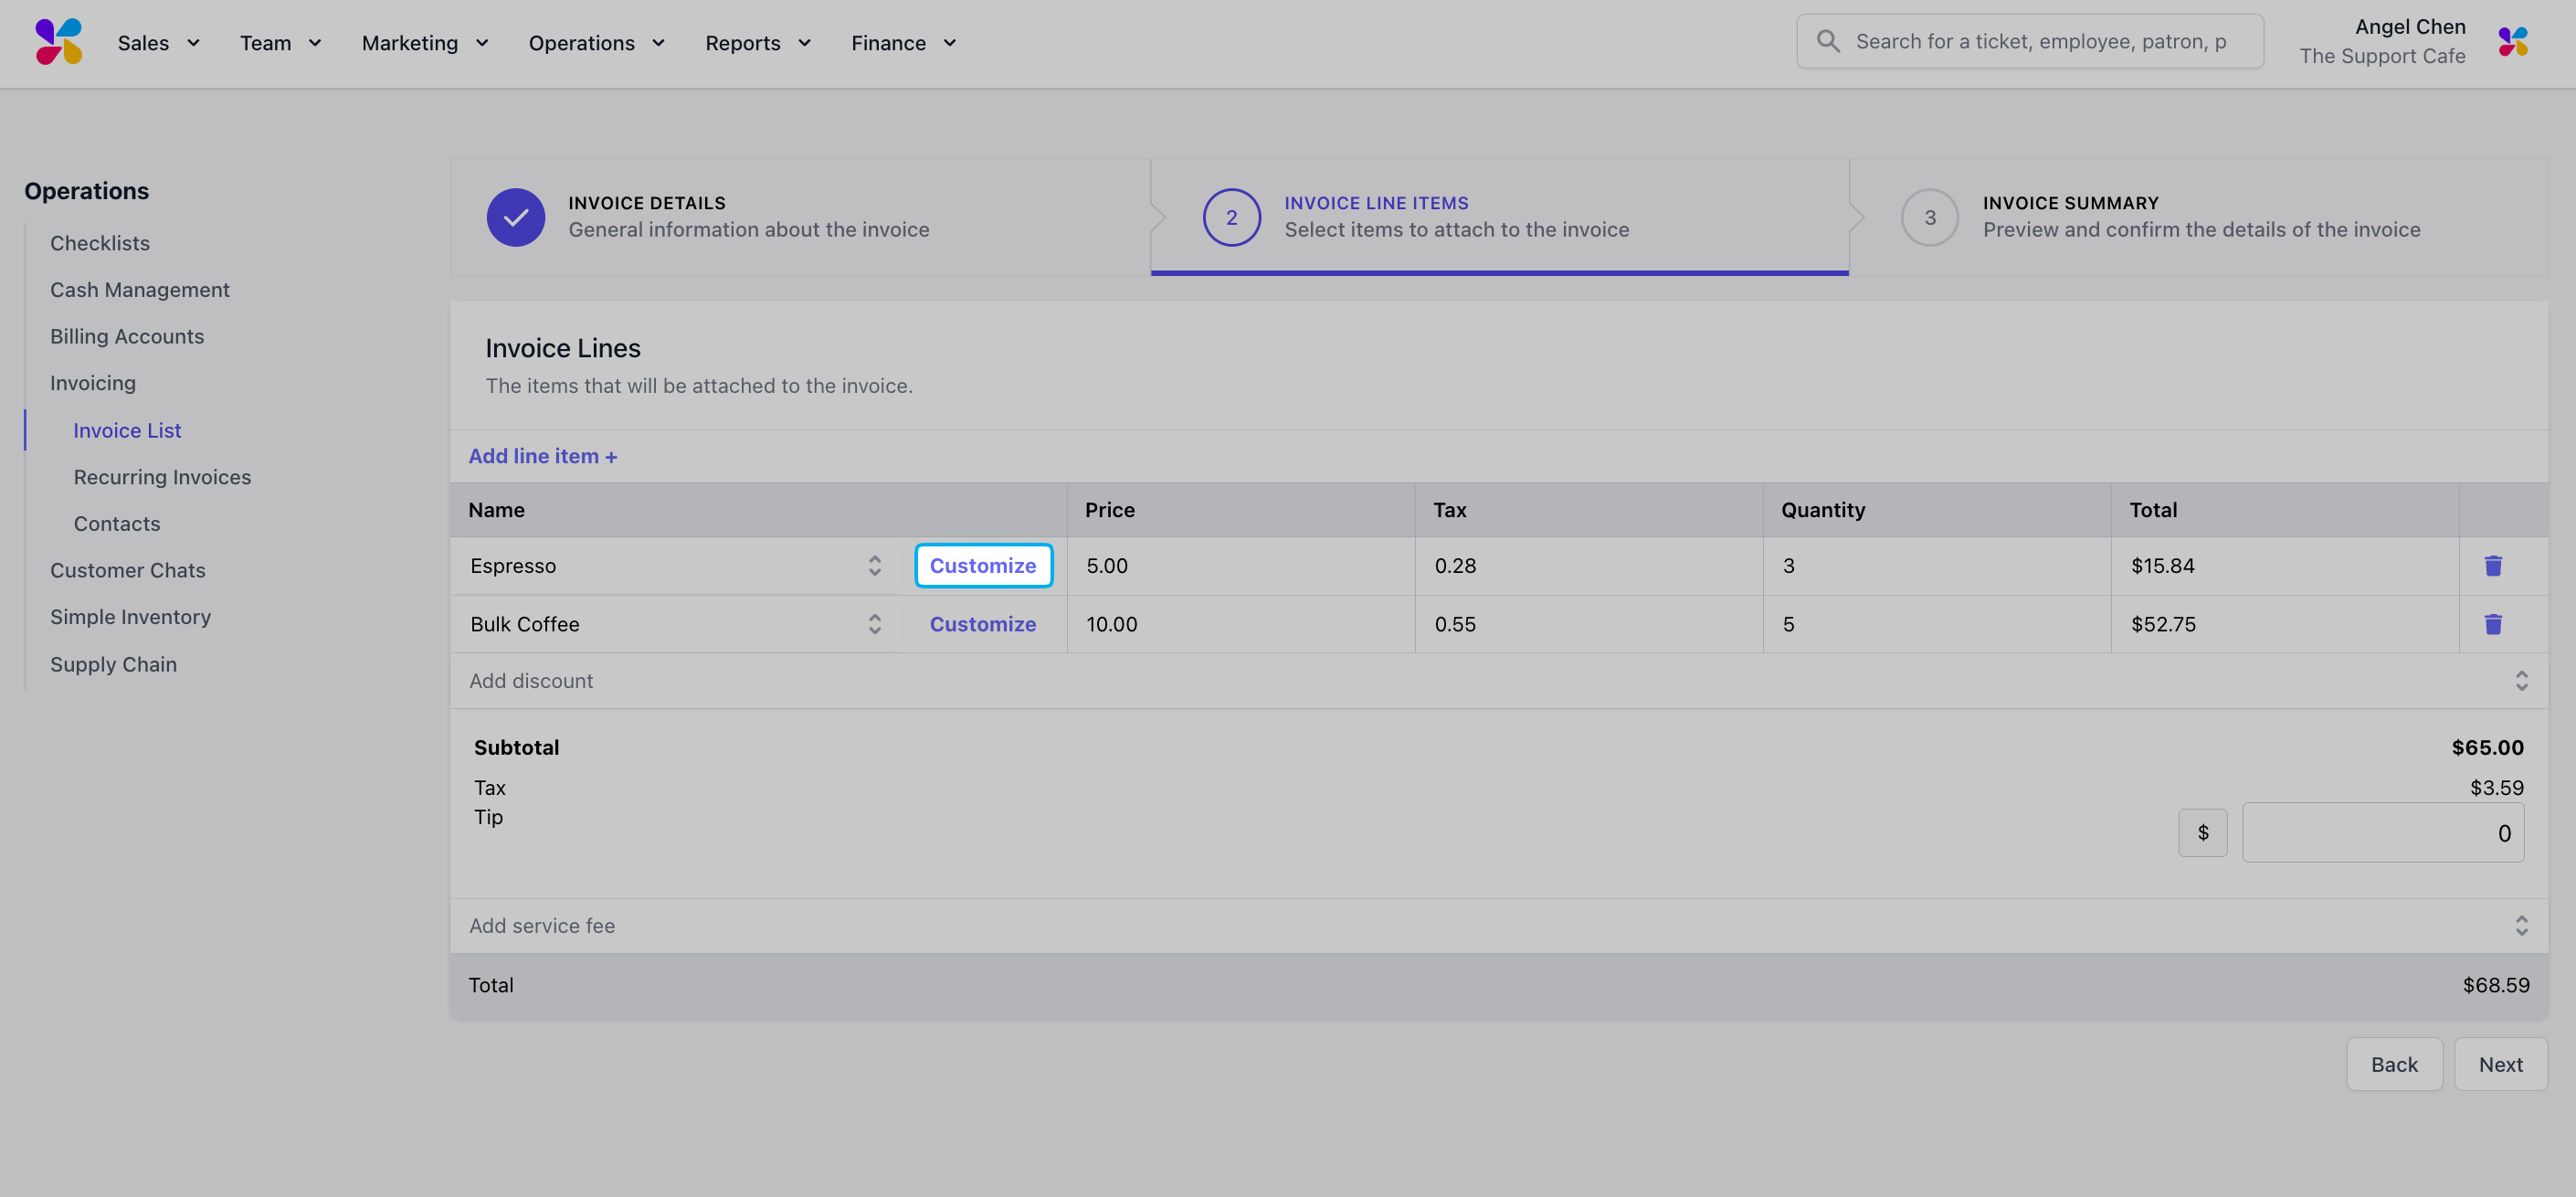
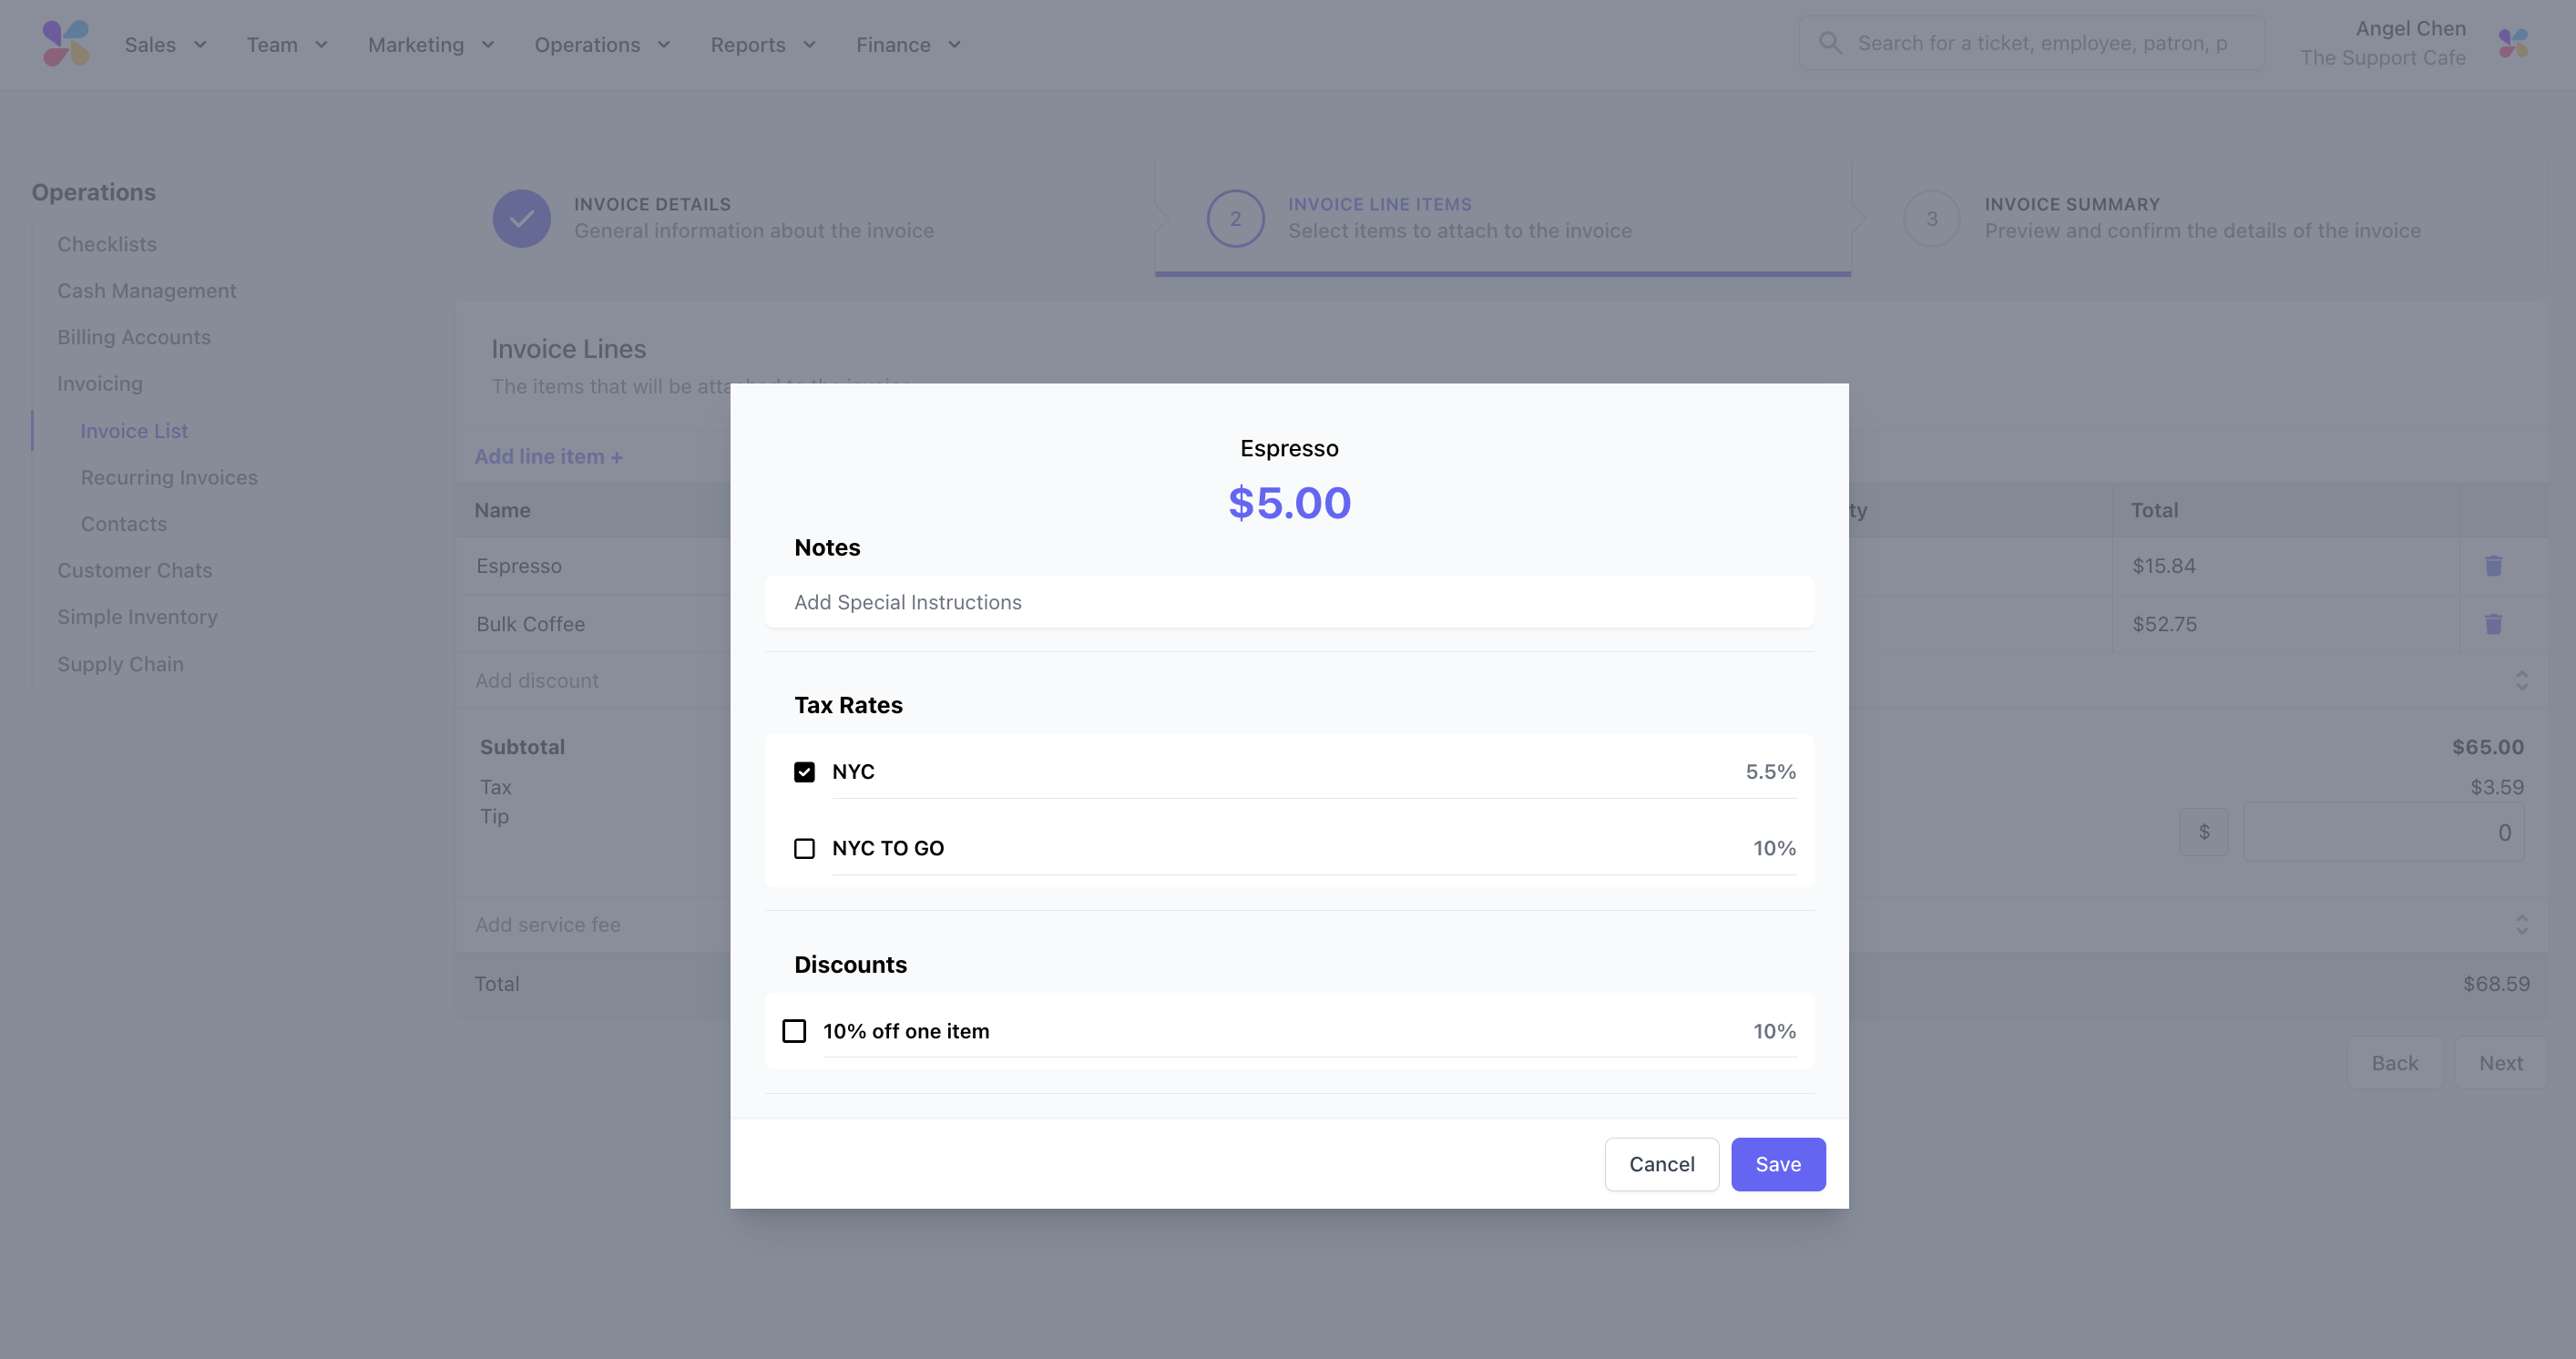
 Customize products and applied tax rates, add Discounts or Service Fees, and include Tips.
Use the **Customize** button to add notes, apply product discounts, or edit tax rates for the selected line item before clicking **Next**.
Customize products and applied tax rates, add Discounts or Service Fees, and include Tips.
Use the **Customize** button to add notes, apply product discounts, or edit tax rates for the selected line item before clicking **Next**.
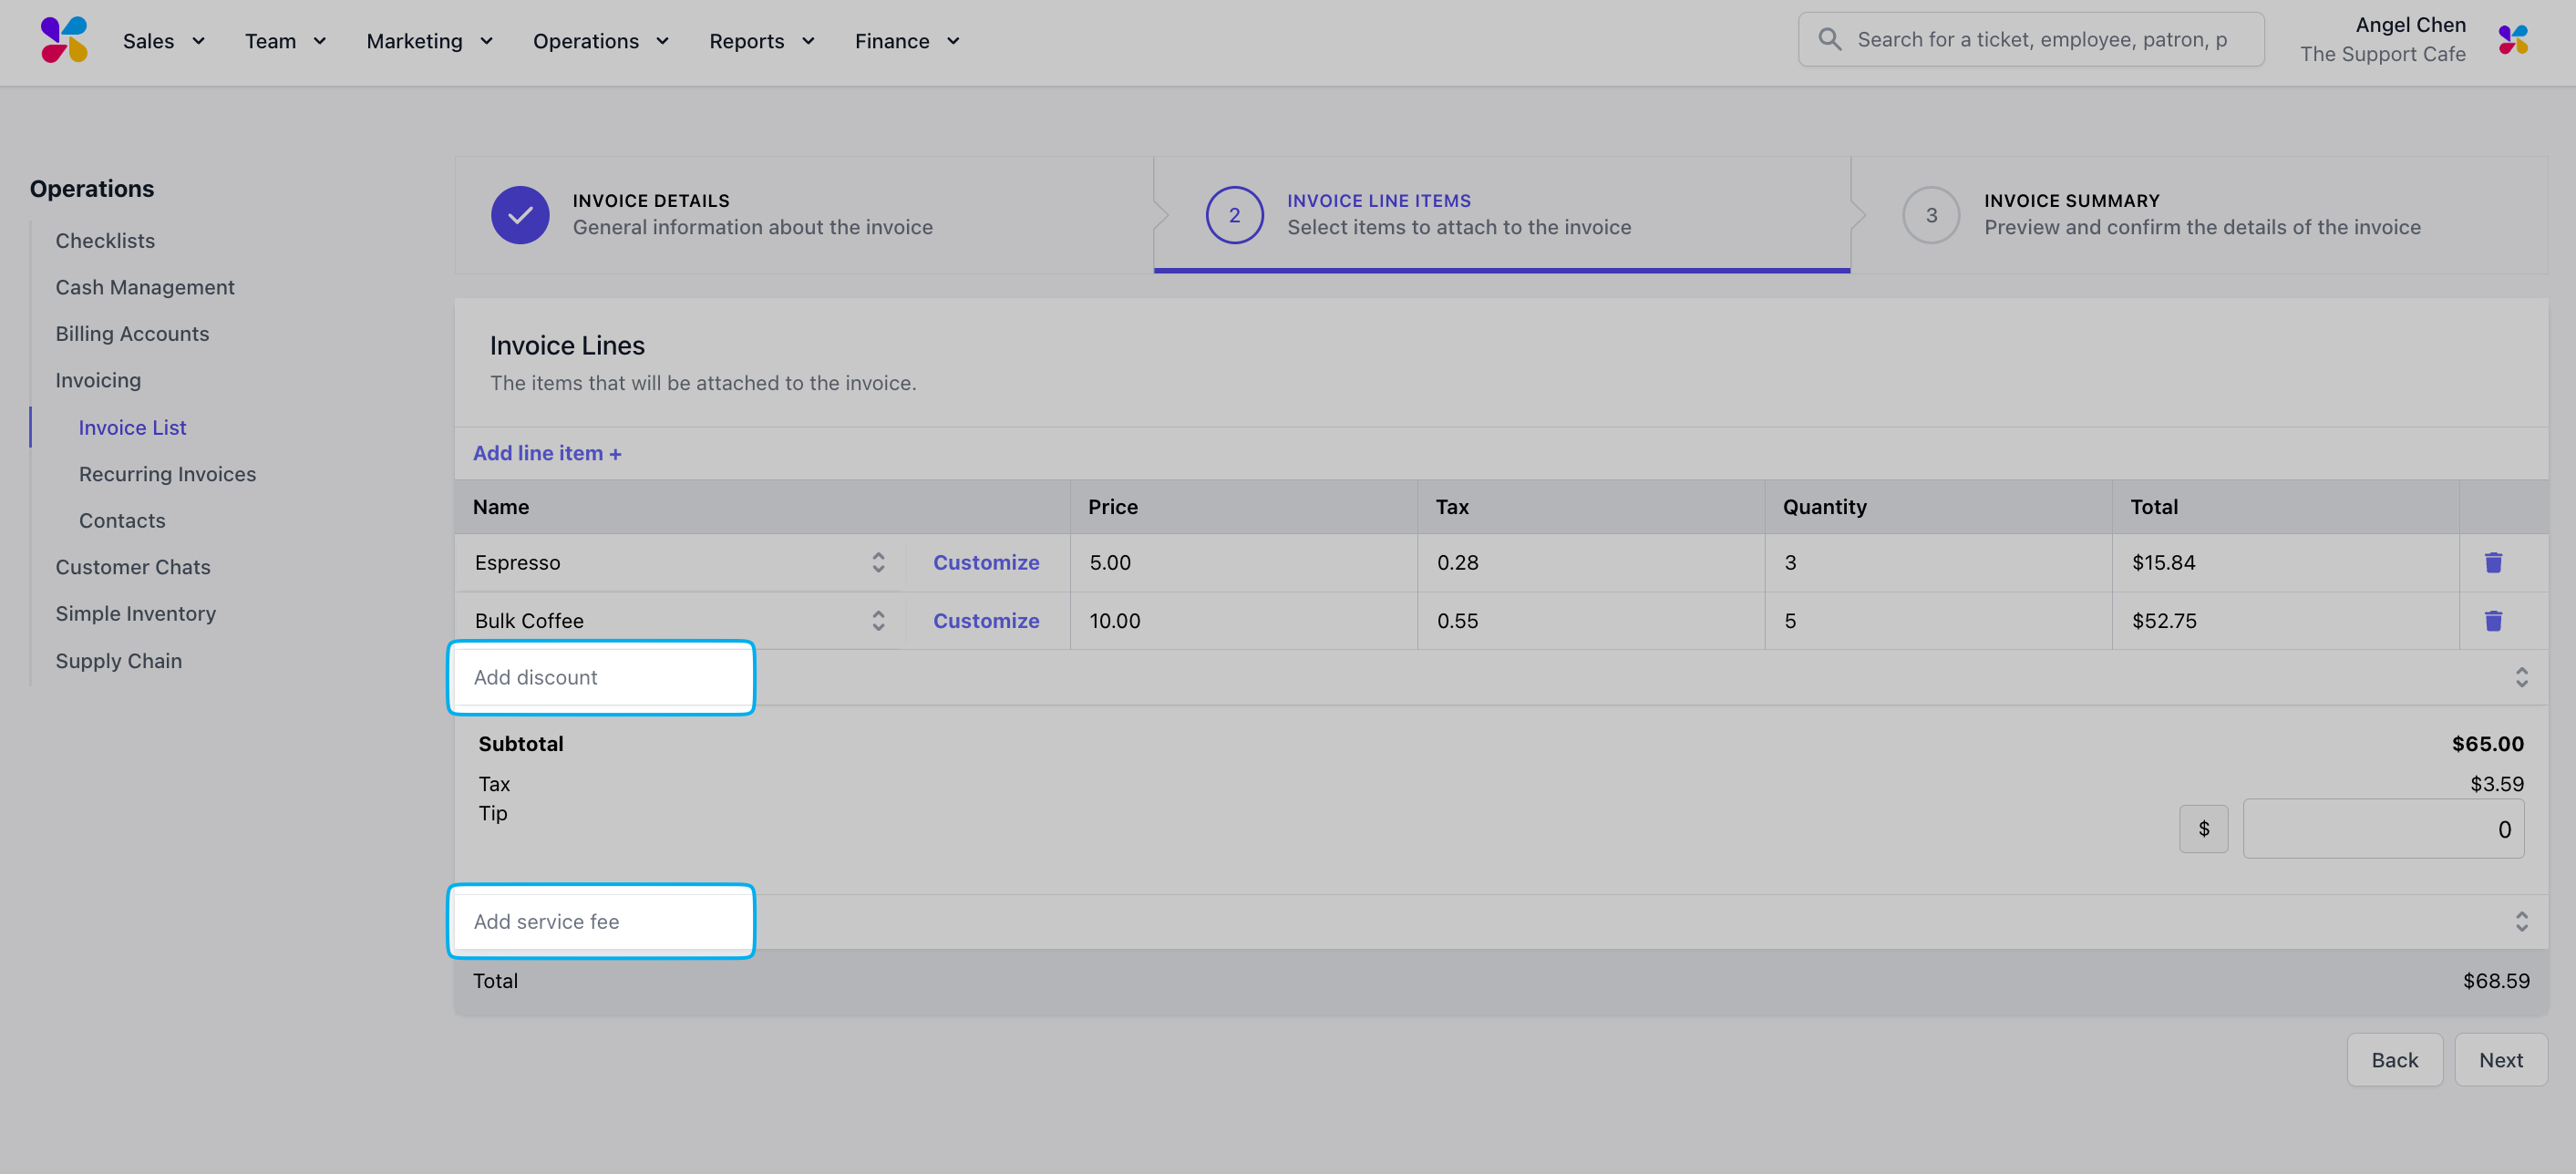
 Add a **Discount** or **Service Fee** to the invoice. Use the dropdown to select a pre-existing Discount or Service Fee.
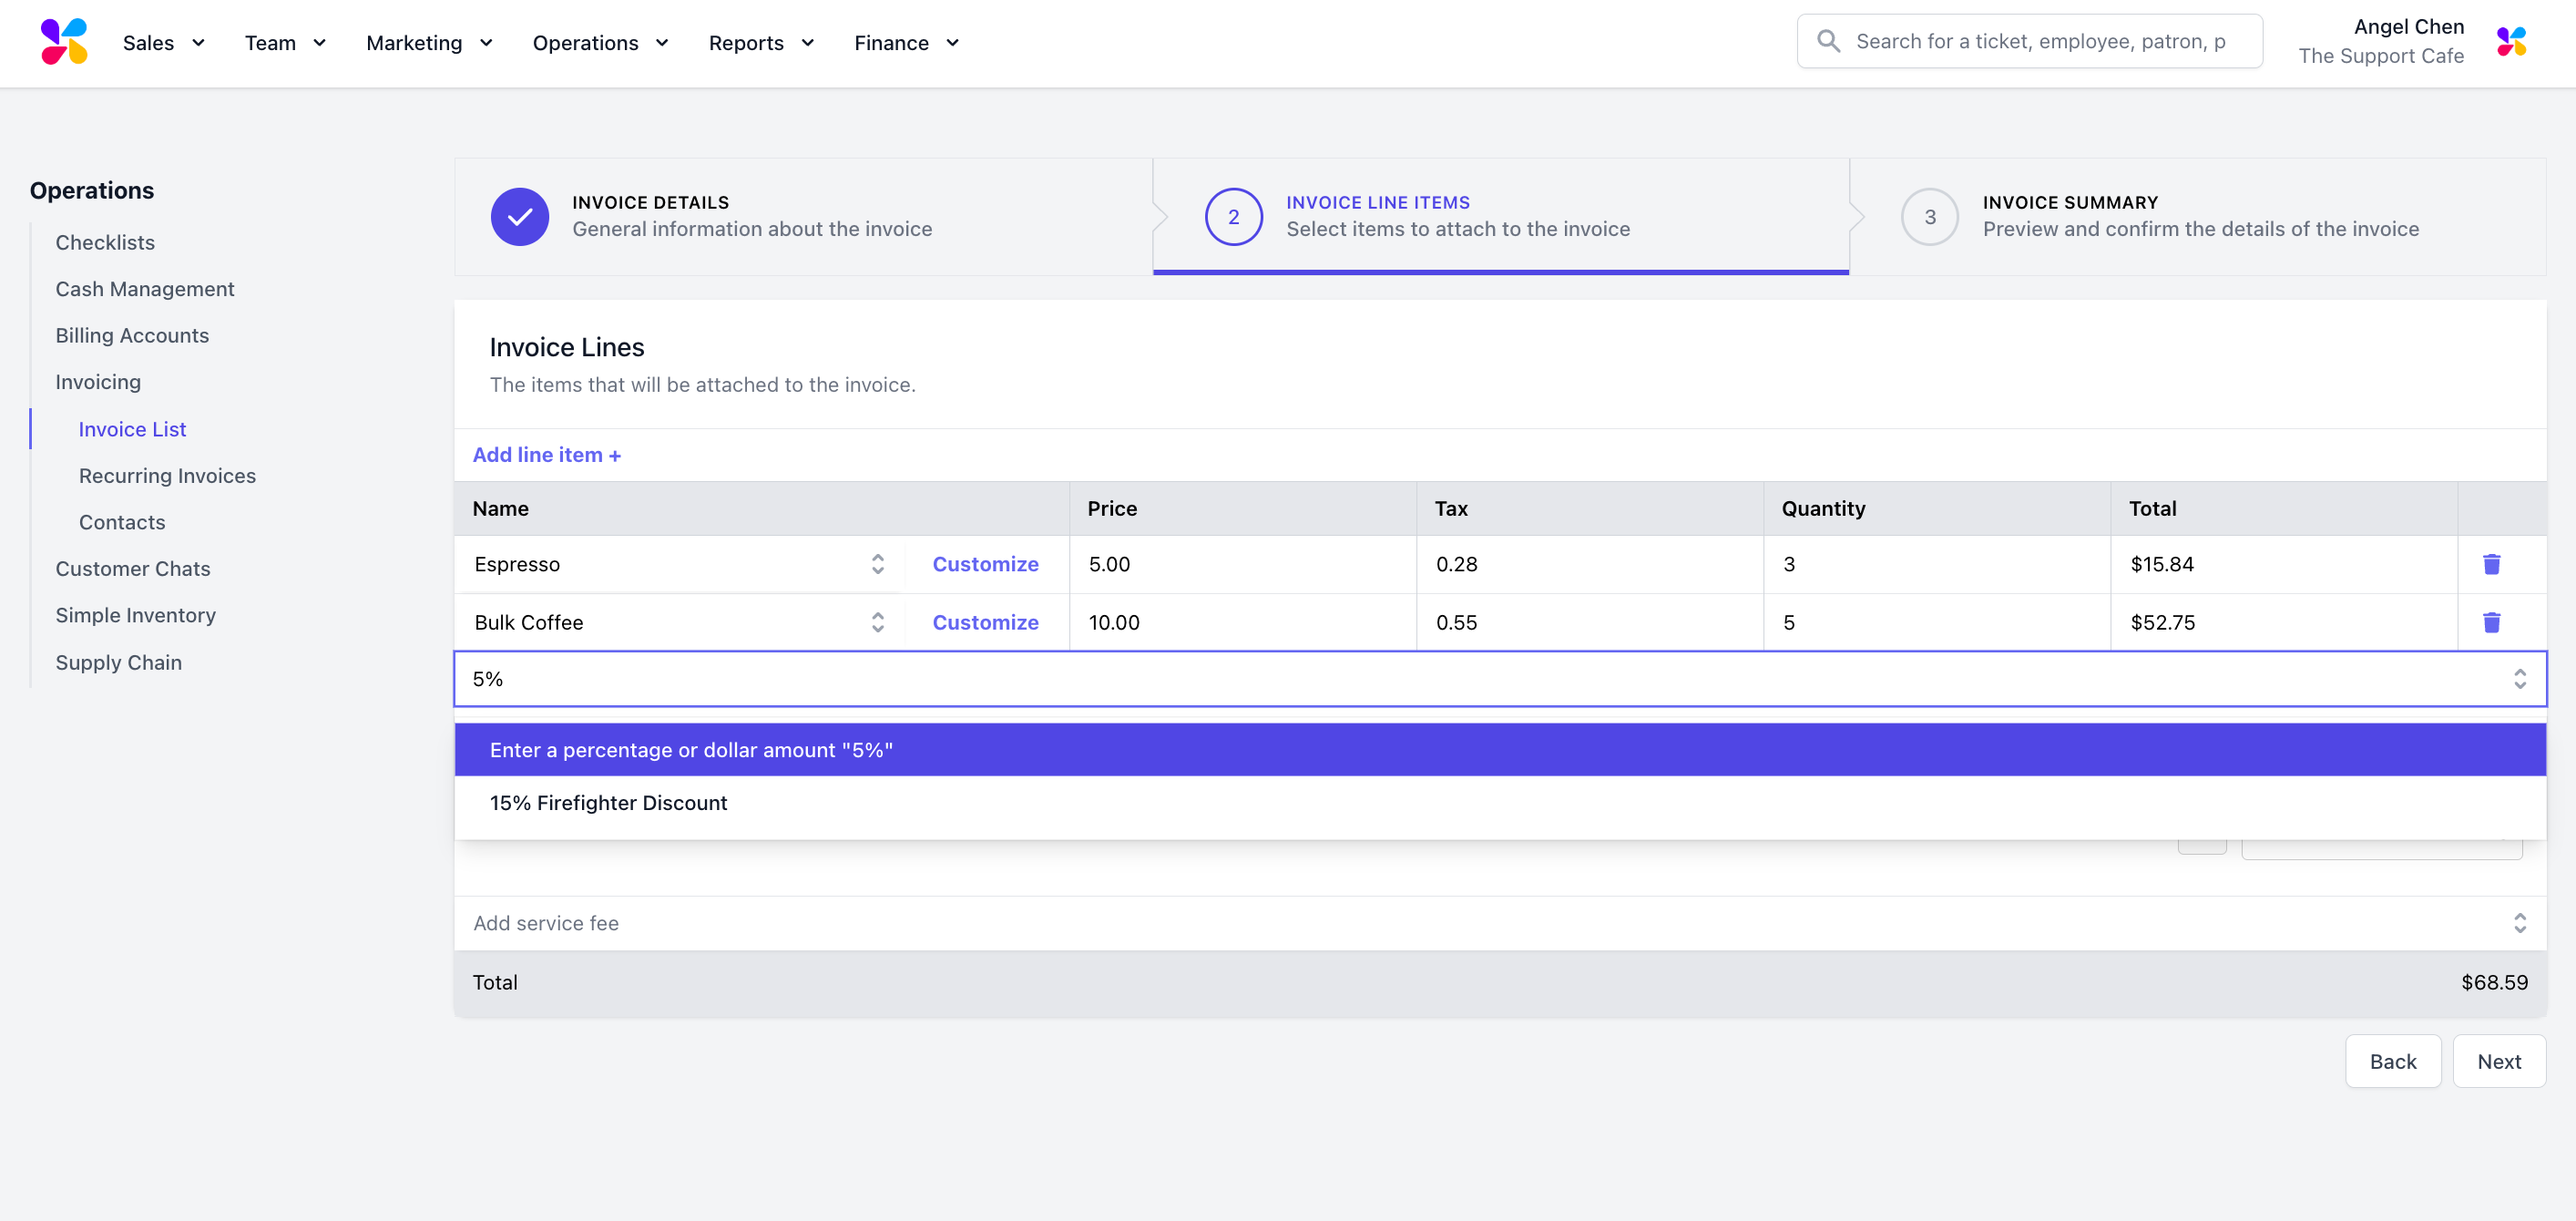
 To apply a **Custom Discount** or **Service Fee**, type in the number and use % to indicate percentage or \$ to indicate dollar amount.
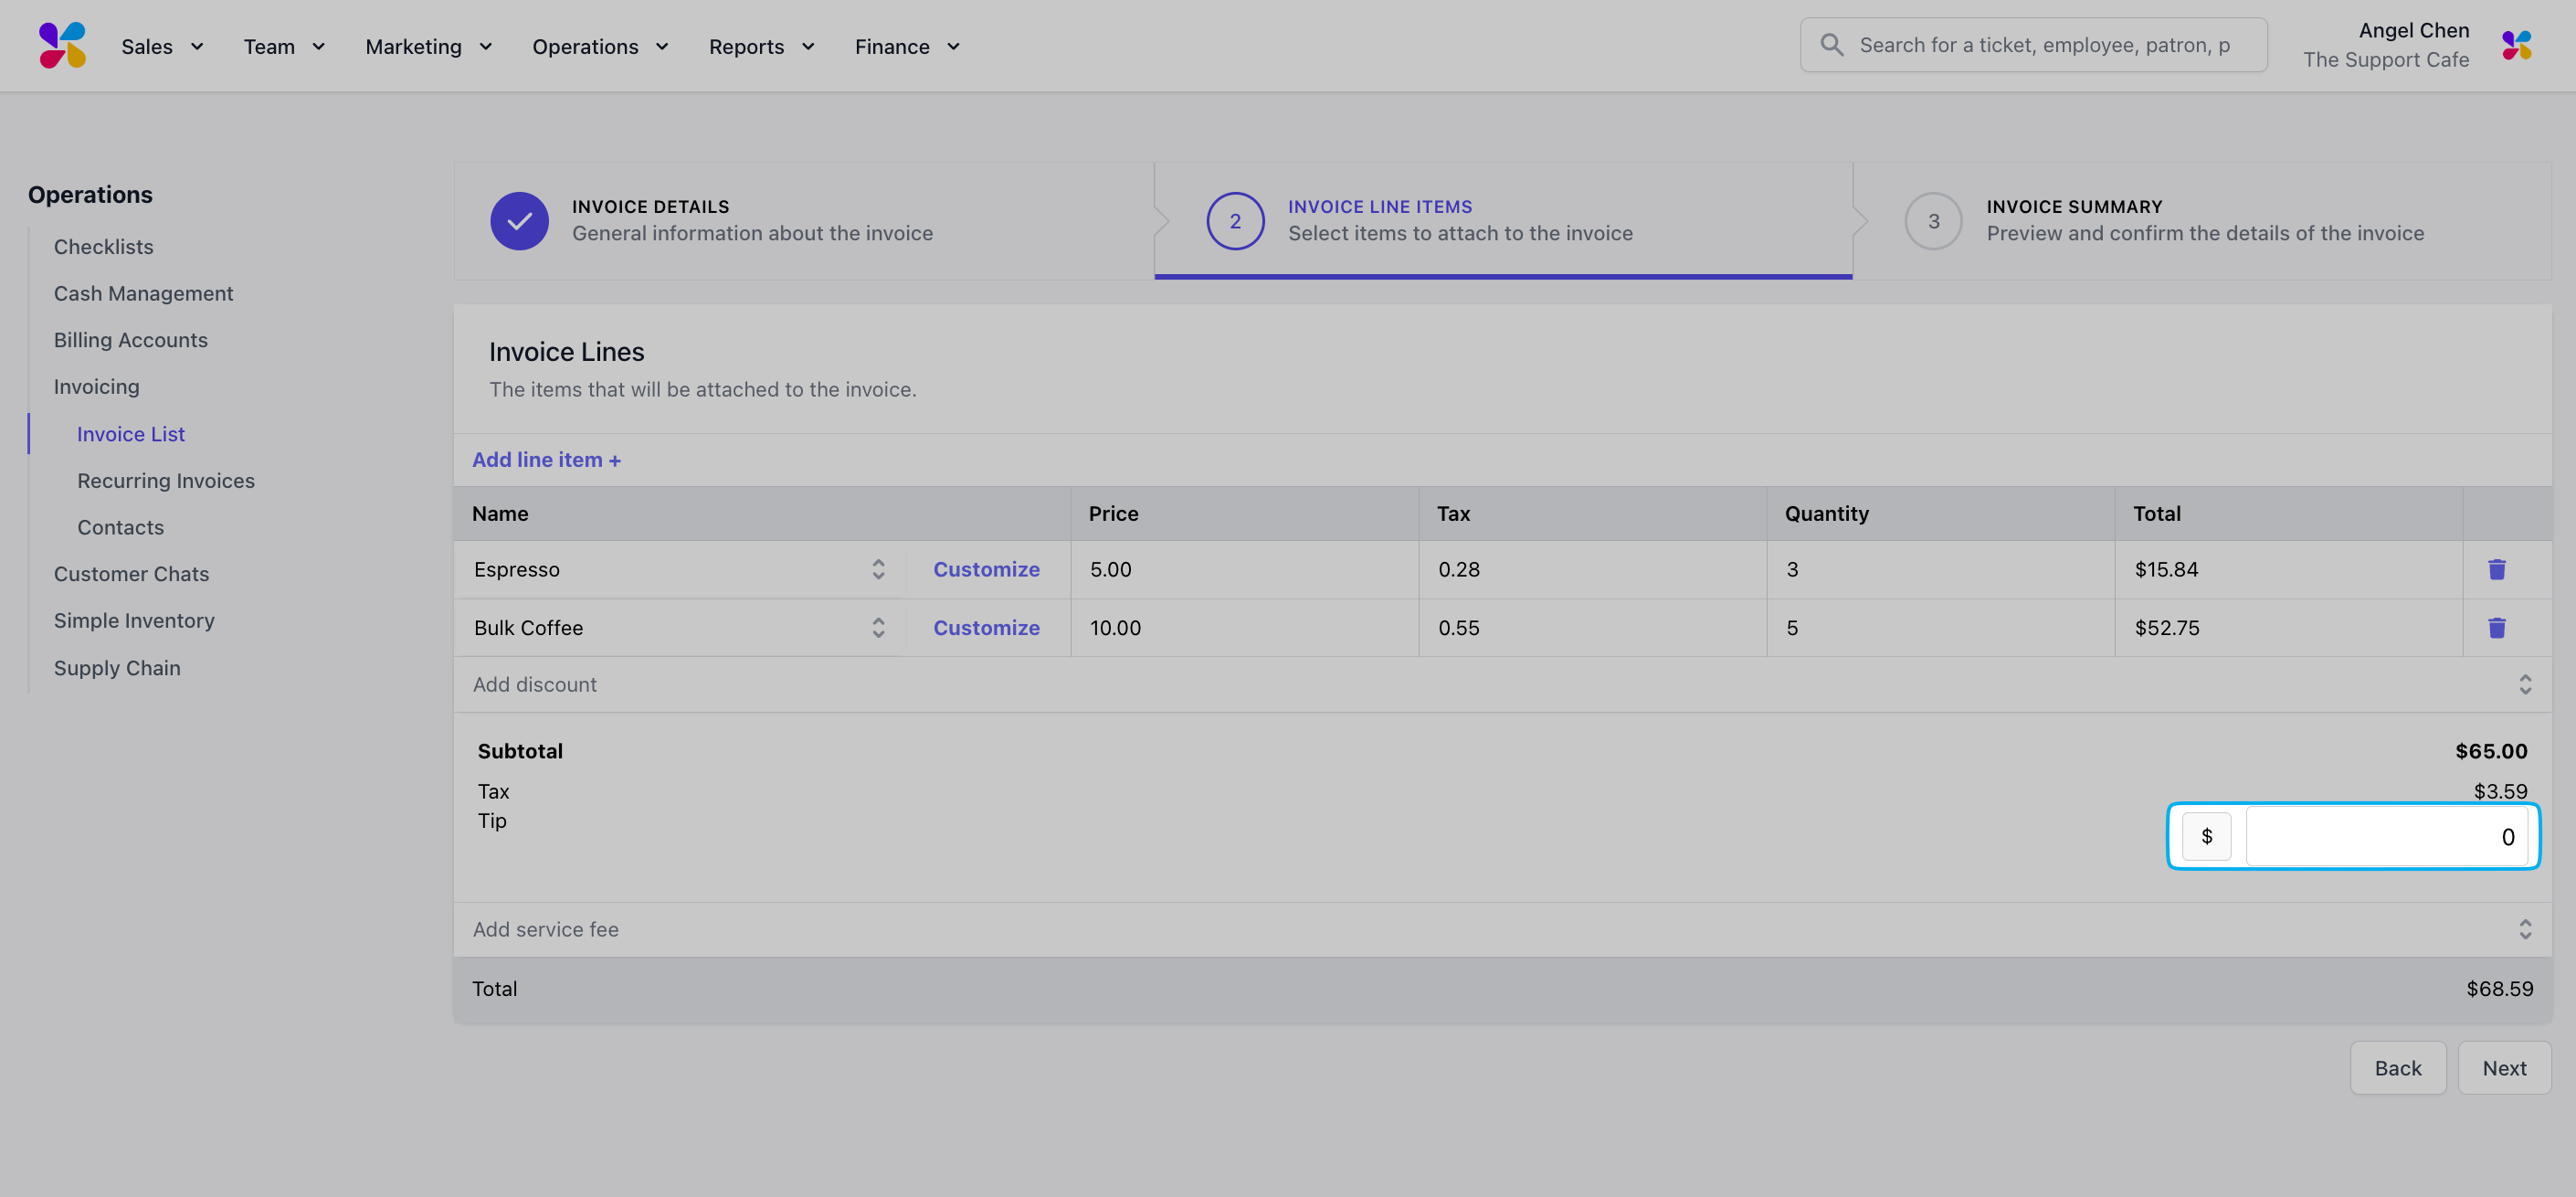
 Add a **Tip** to the invoice. Click on the **\$** button to switch between dollar or percentage and type in the corresponding amount.
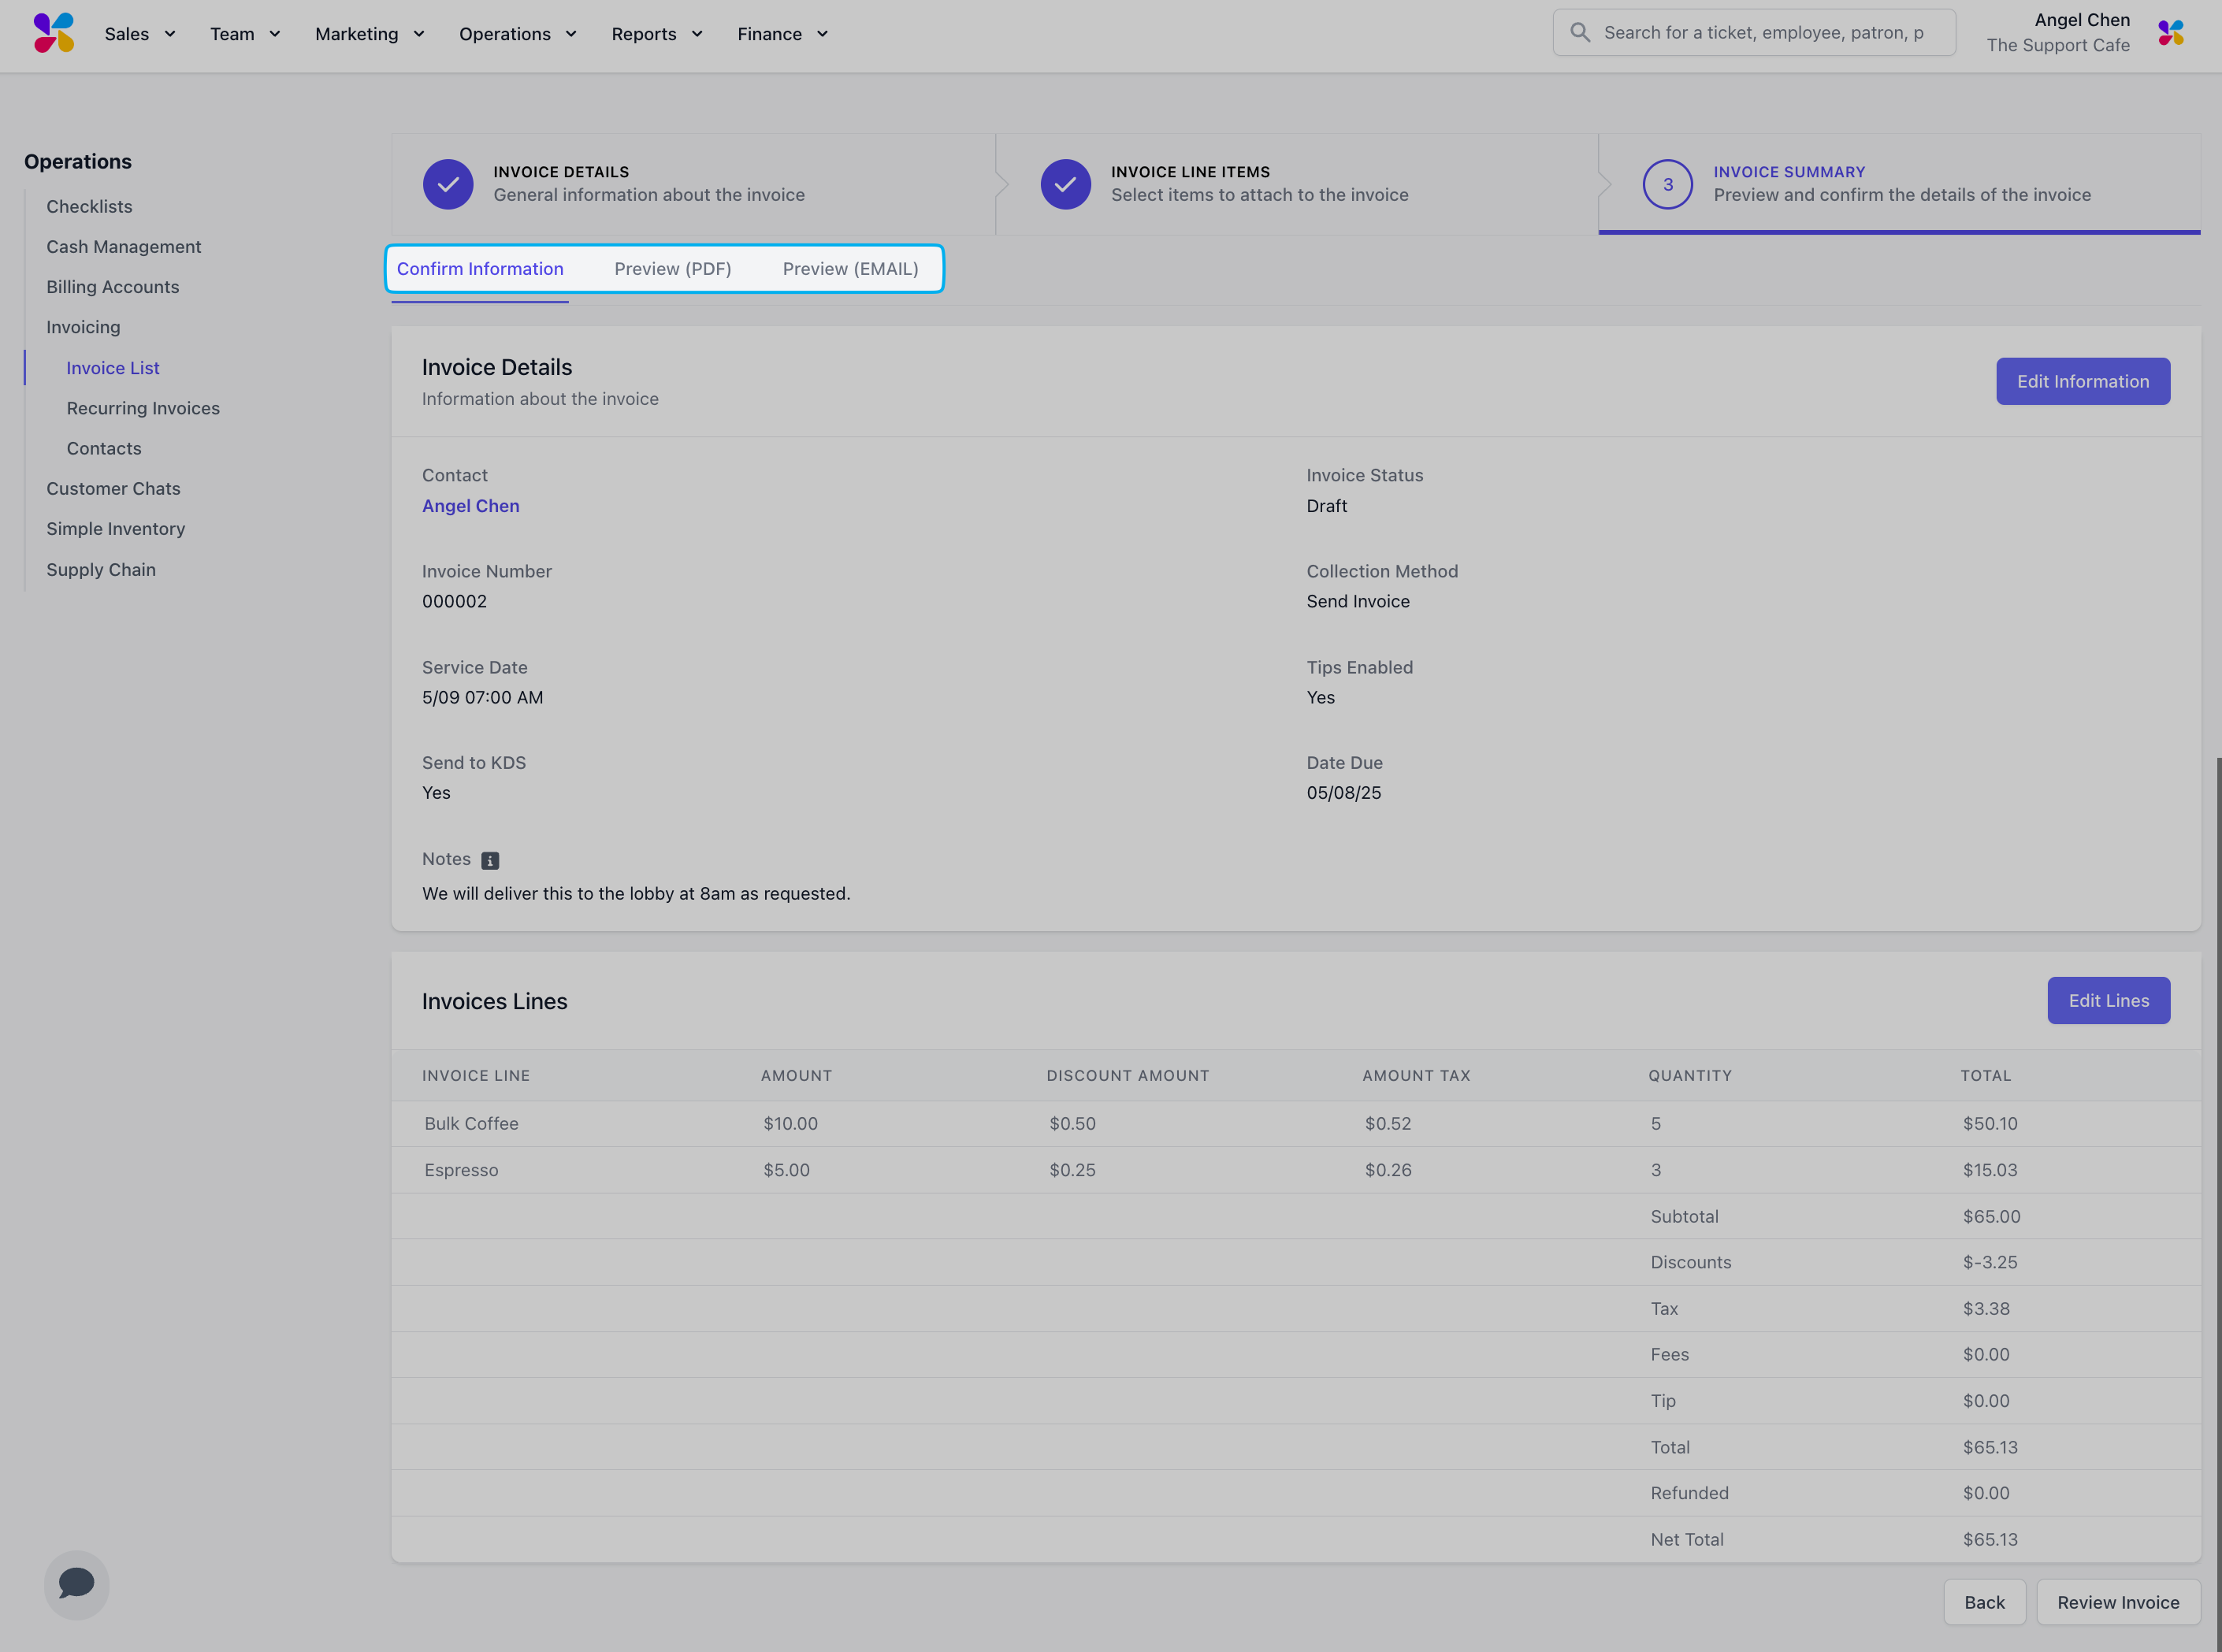
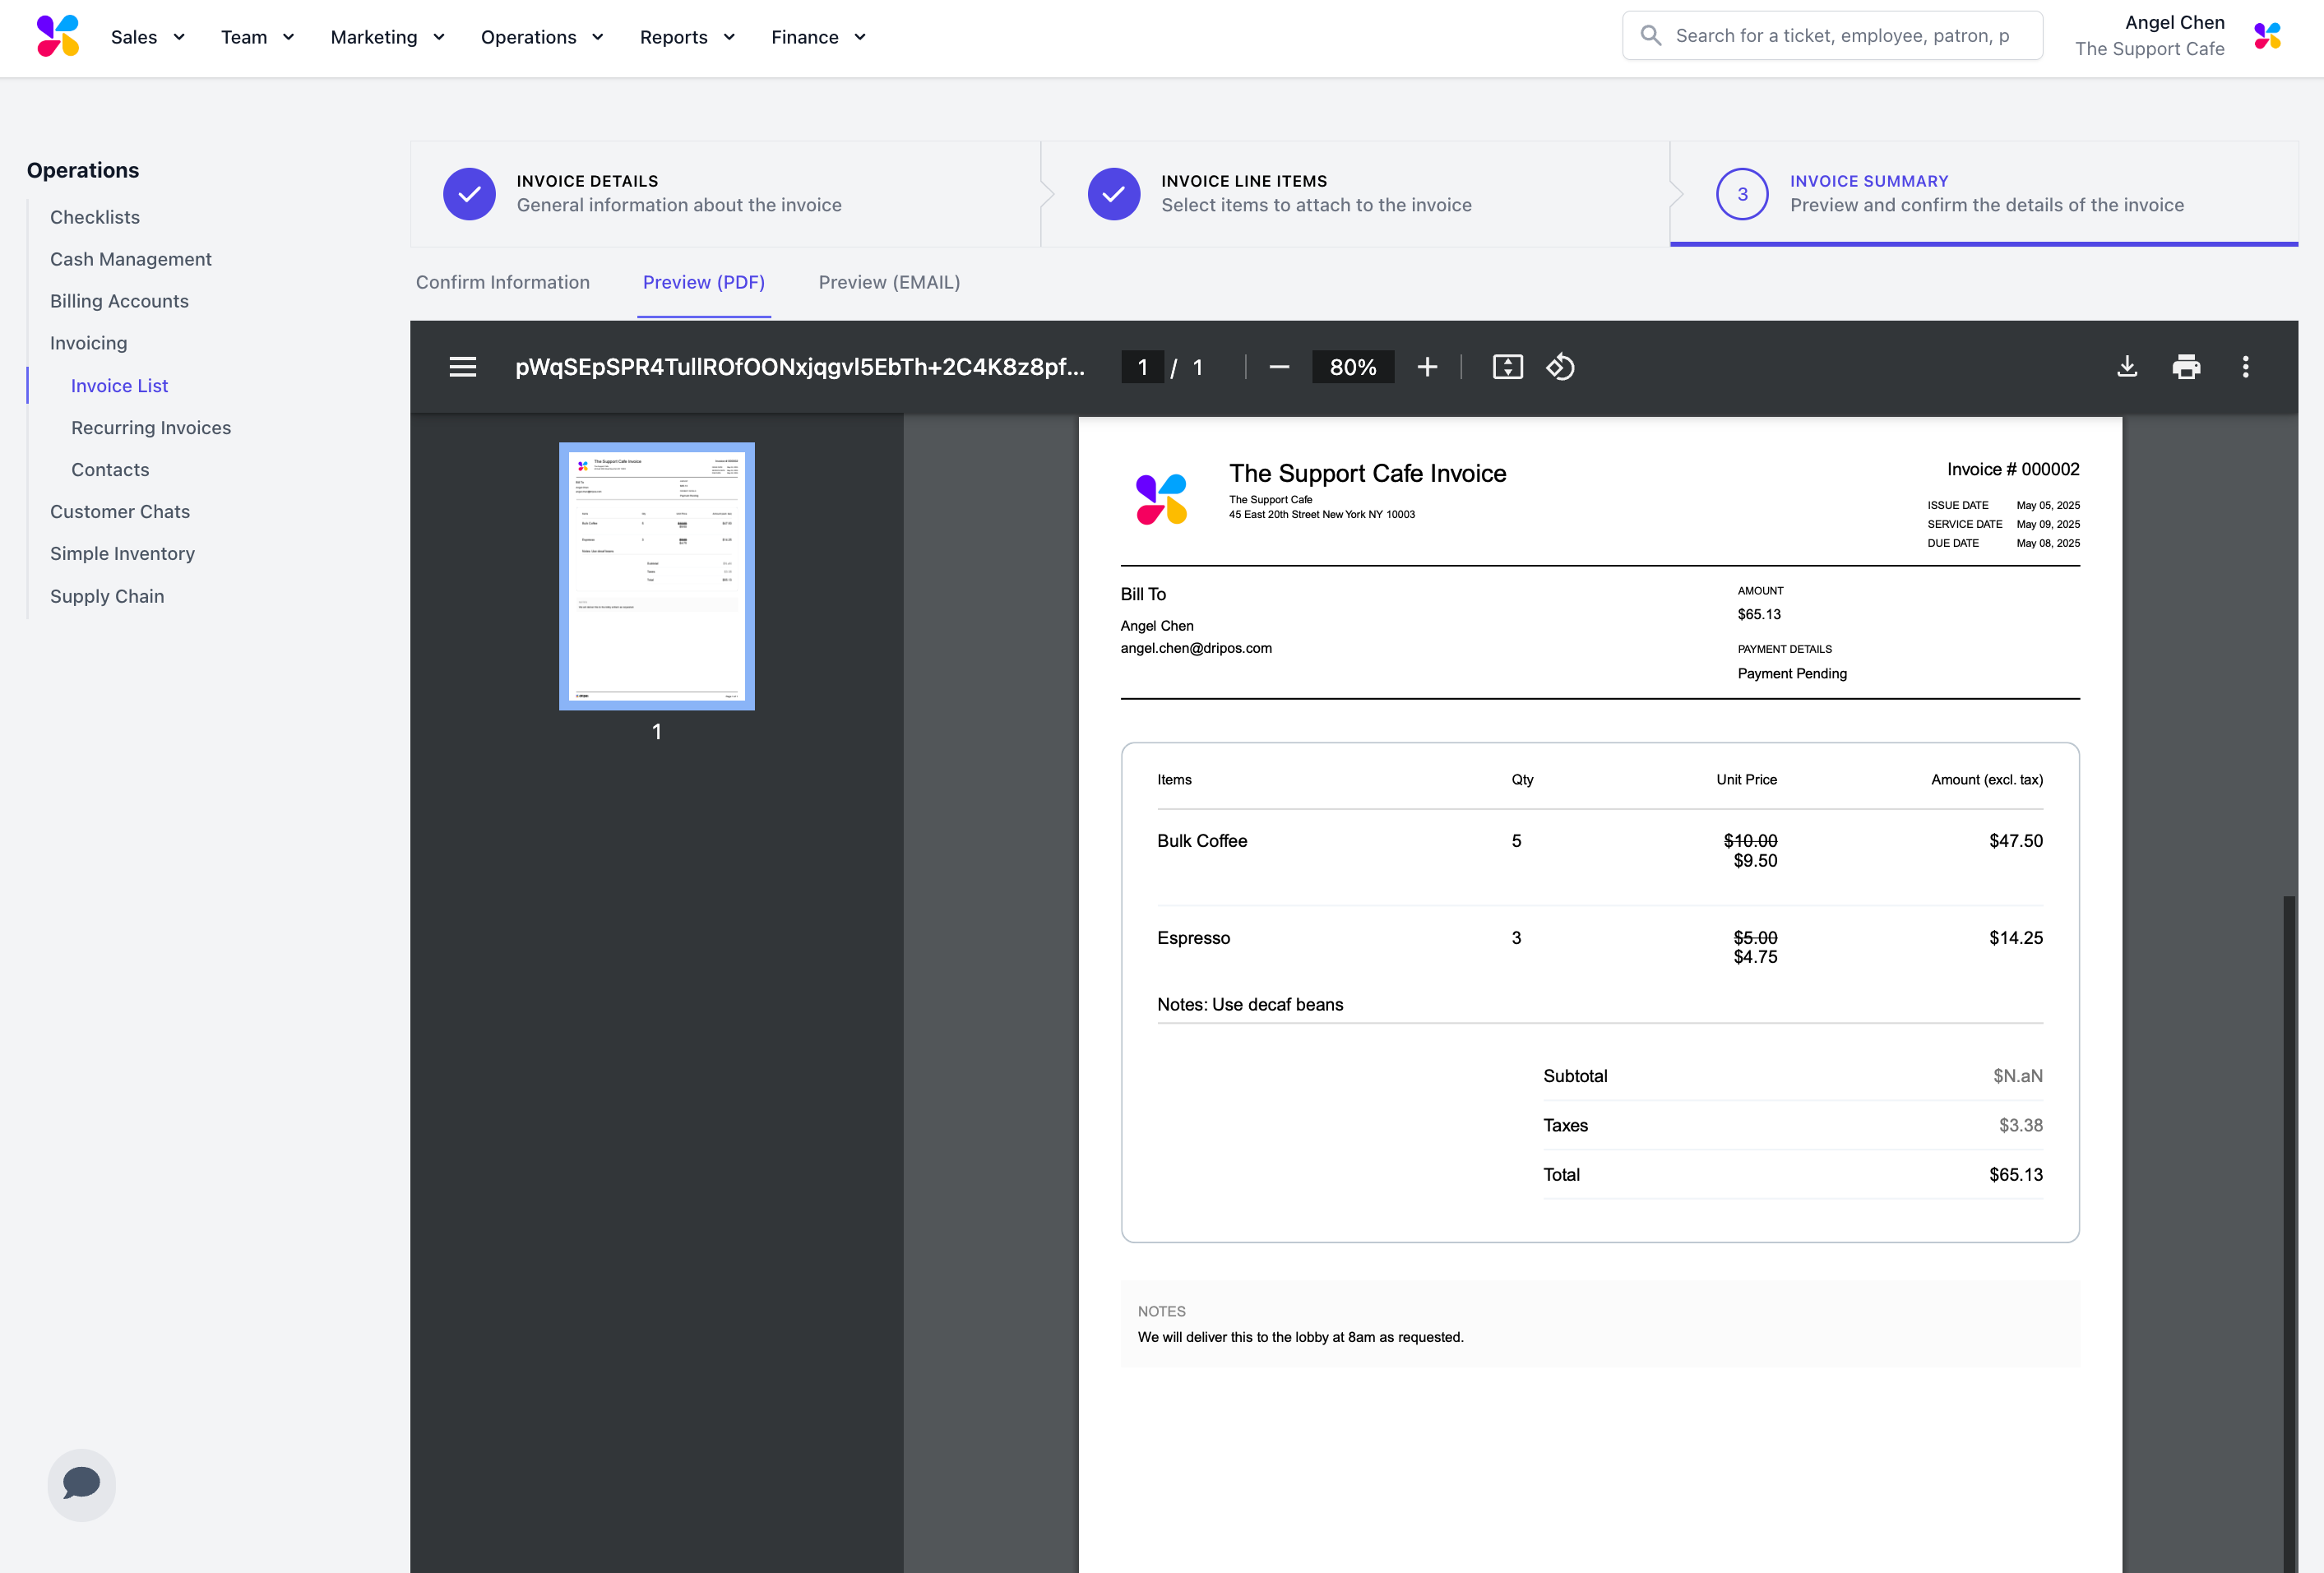
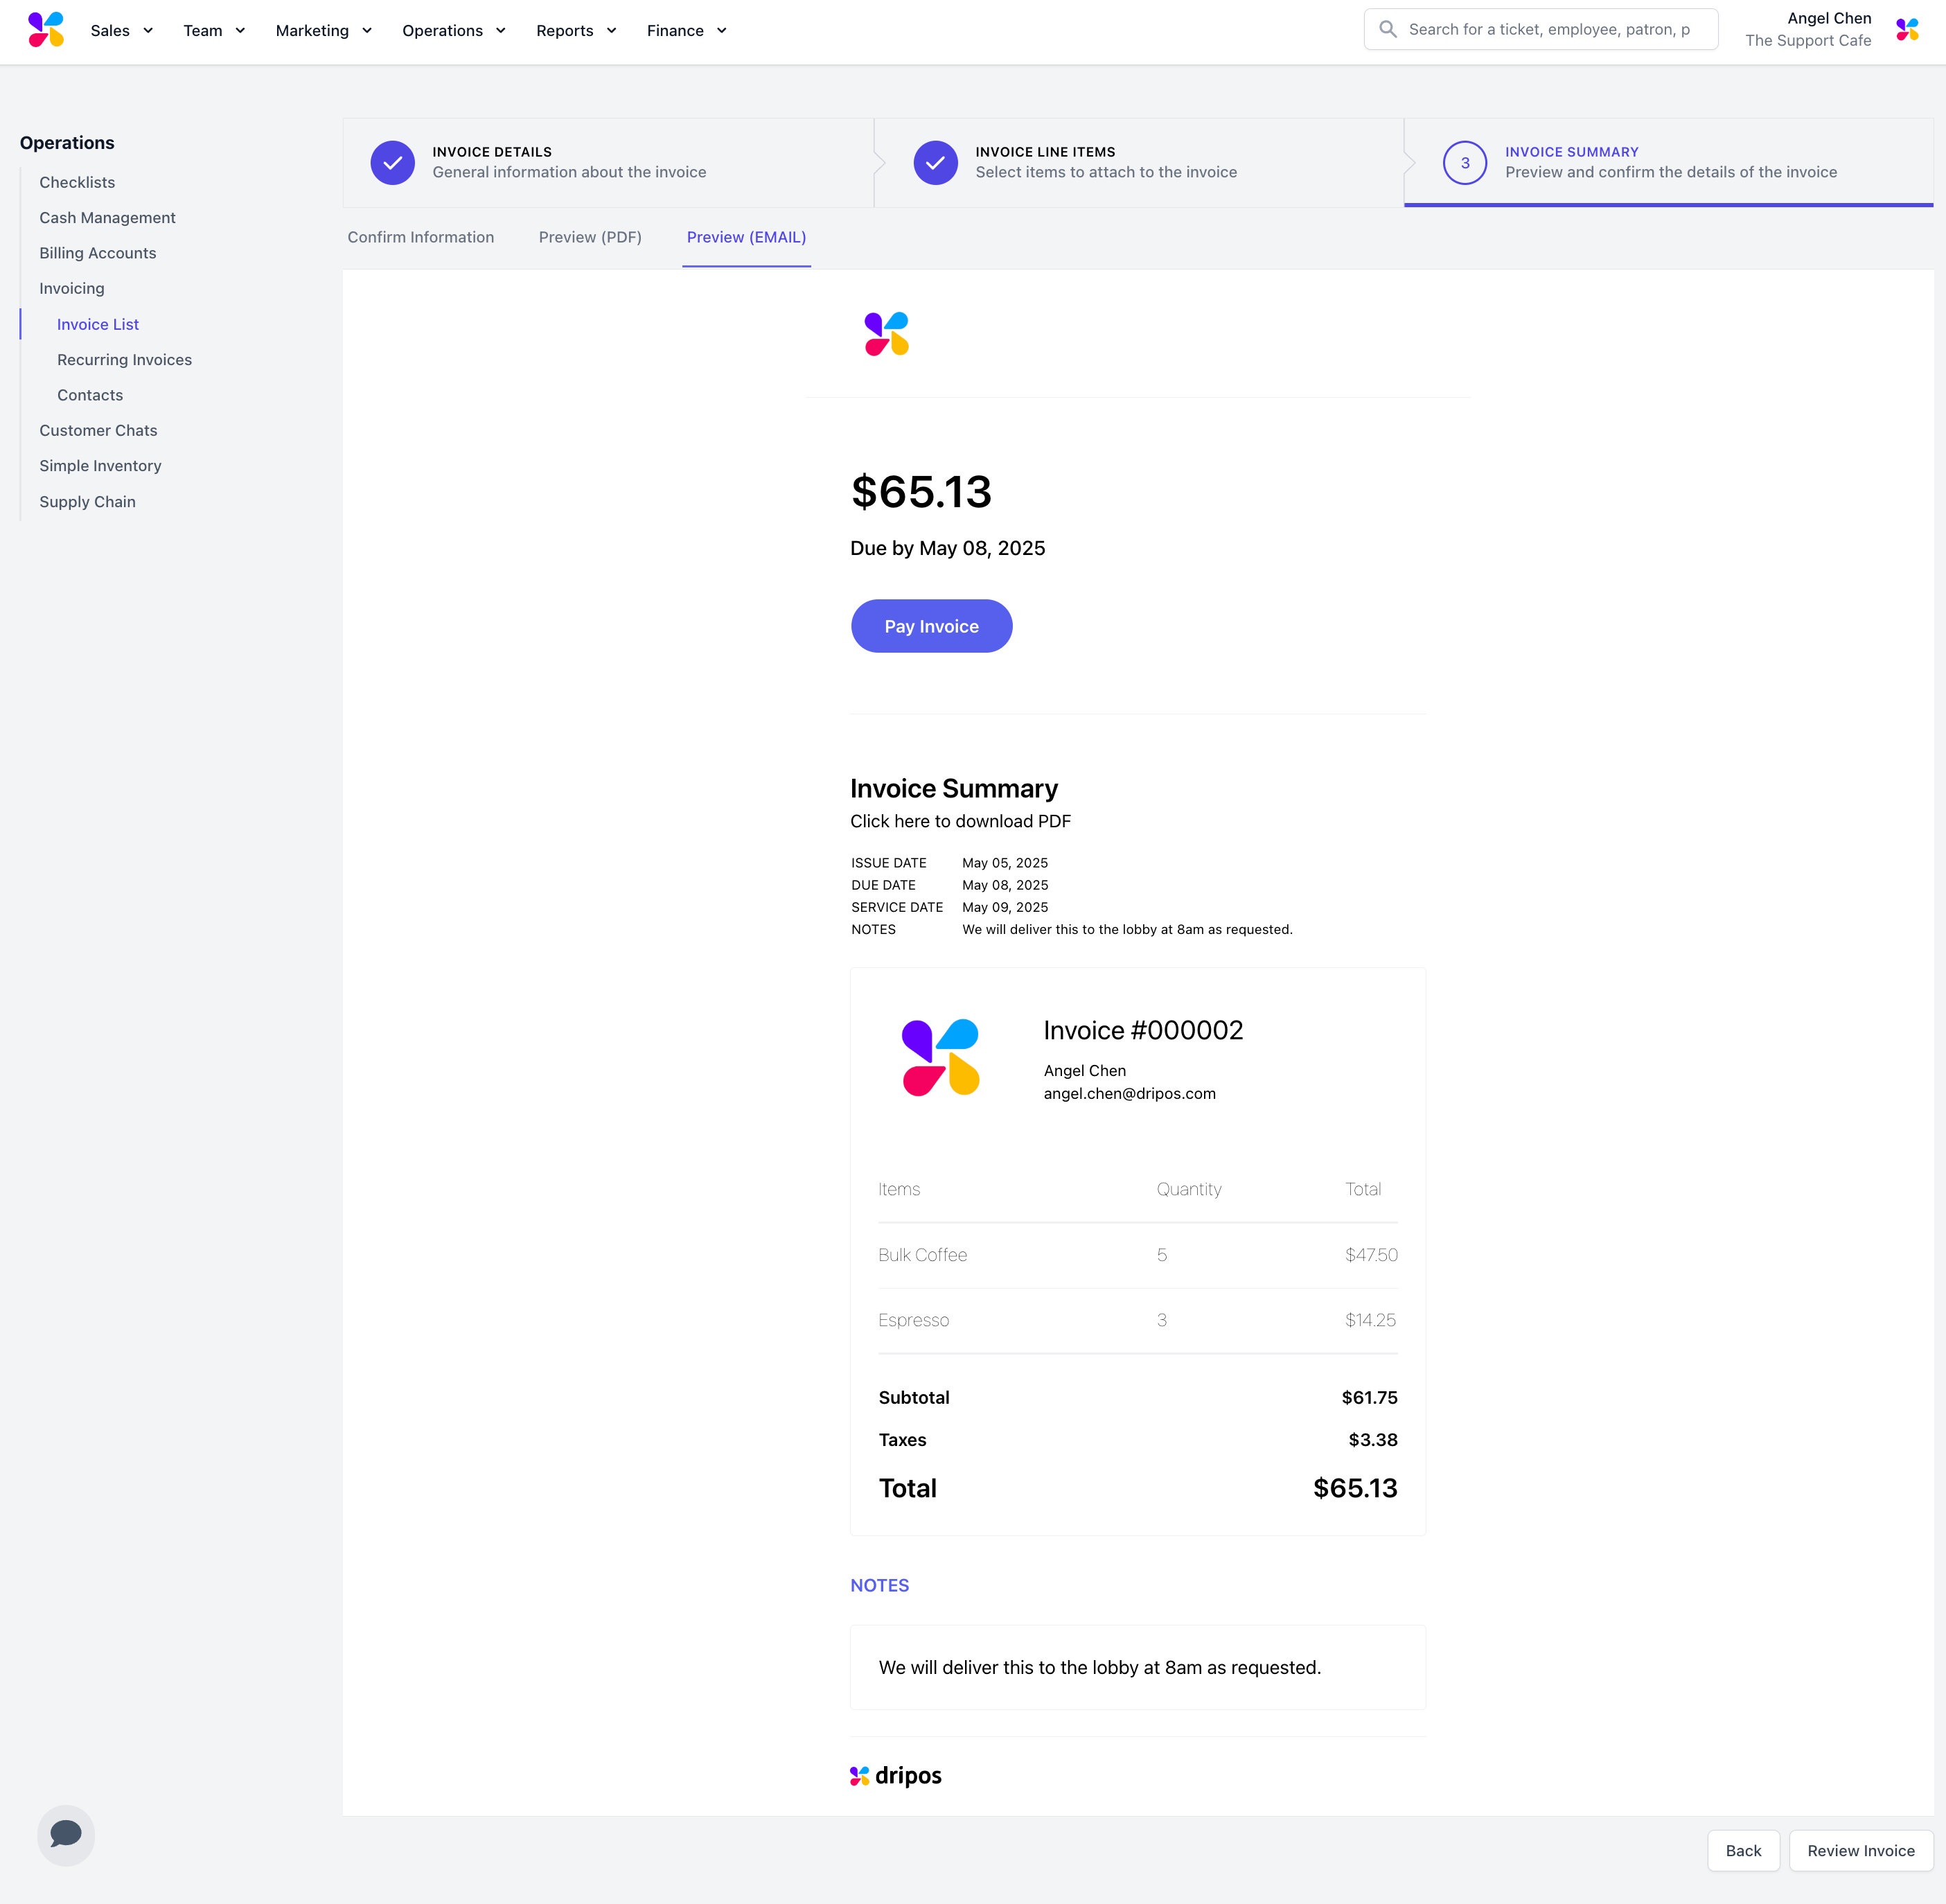
 Confirm the invoice information. Click on the **Preview (PDF)** or **Preview (EMAIL)** tab to see the exact invoice the customer will receive.
 Click **Review Invoice** and select the following action:
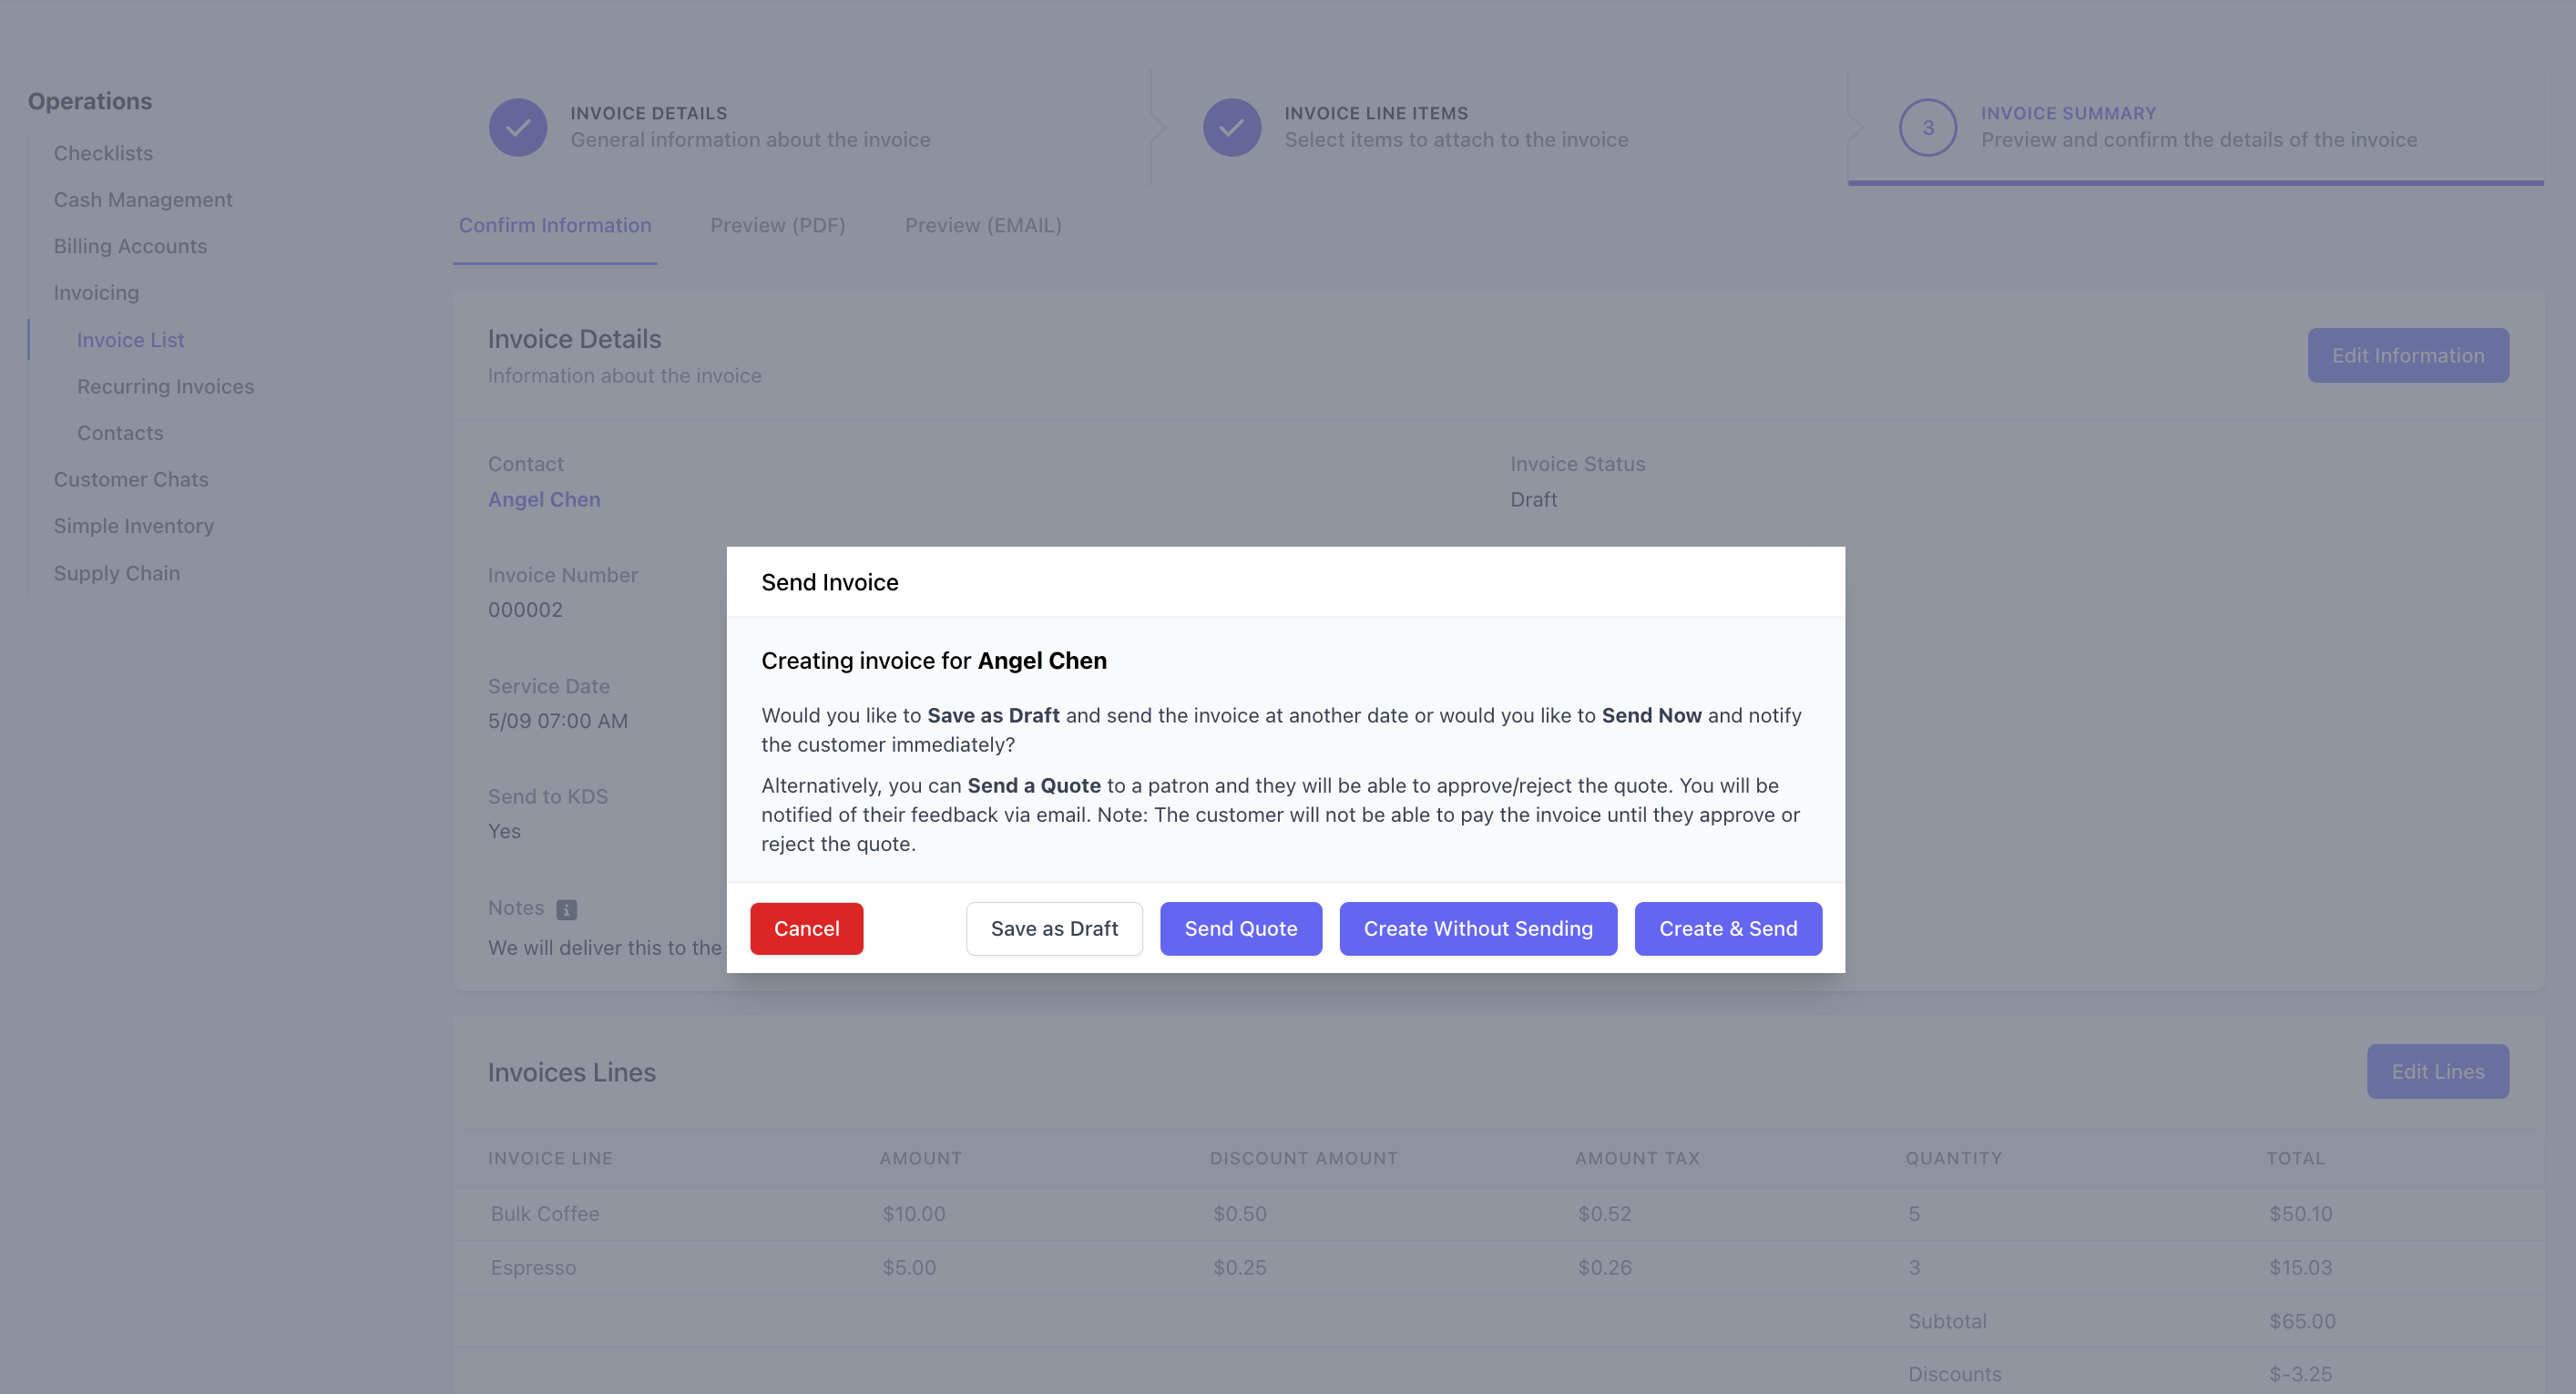 > **Save as Draft**: Save the invoice as a draft to send at another date
> **Send Quote**: Send a quote for the customer to approve or reject - you will be notified of their feedback via email
> **Create Without Sending**: Create the invoice but do not send to the customer
> **Create & Send**: Create and send the invoice to the customer
## Recurring Invoices
Log in to the Dashboard and navigate to **Orders** > **Invoicing**
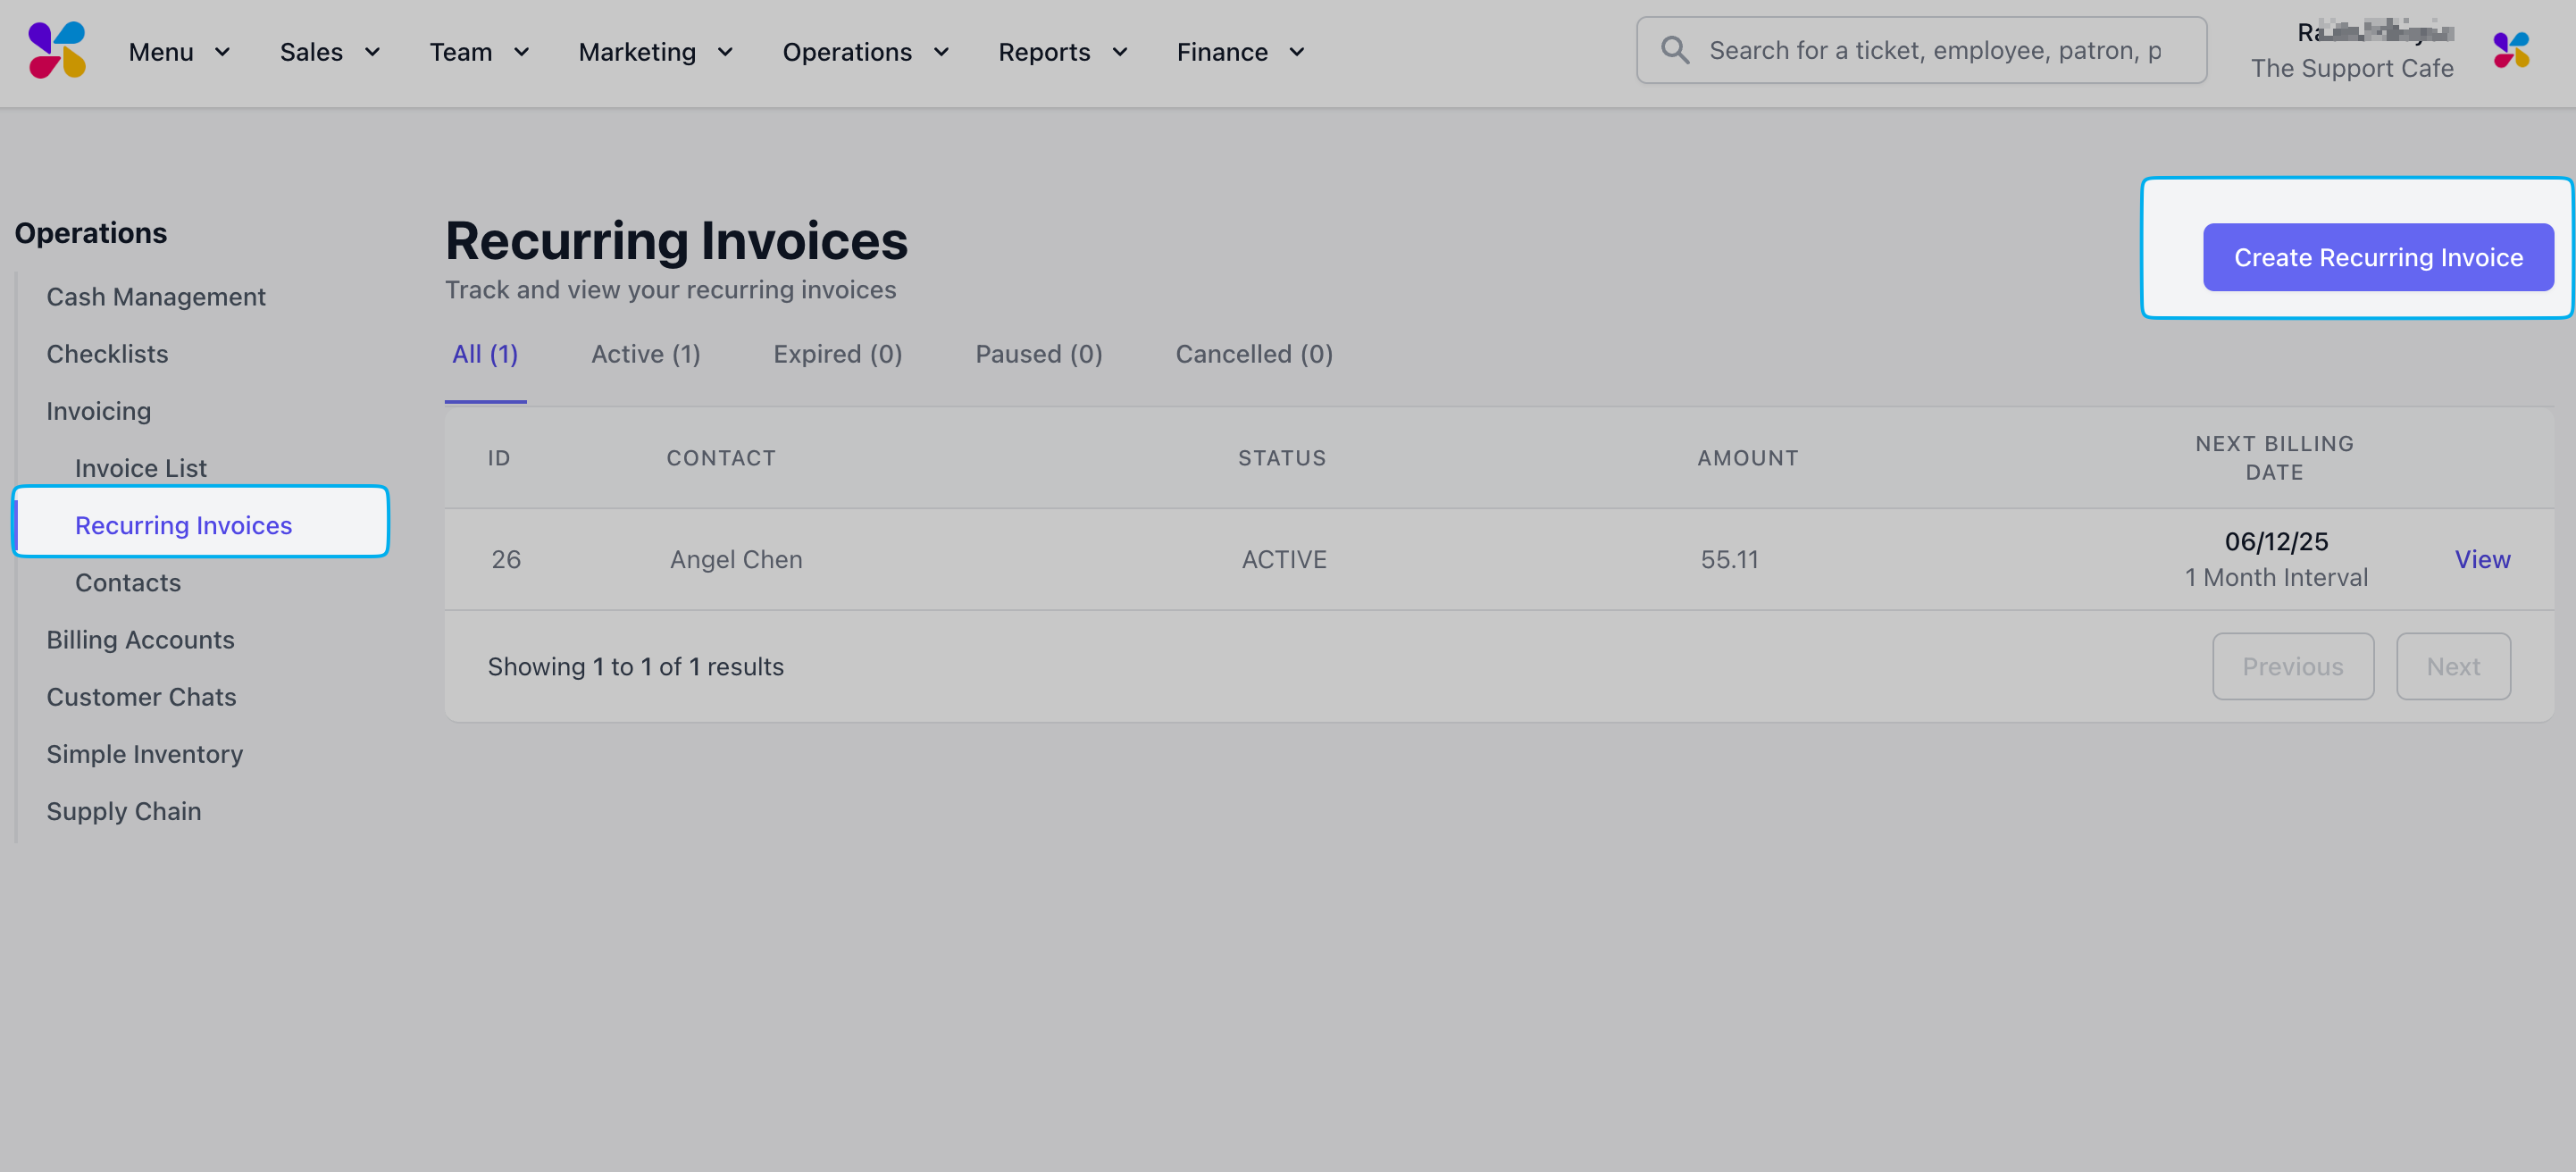
Navigate to **Recurring Invoices** and click **Create Recurring Invoice**
> **Save as Draft**: Save the invoice as a draft to send at another date
> **Send Quote**: Send a quote for the customer to approve or reject - you will be notified of their feedback via email
> **Create Without Sending**: Create the invoice but do not send to the customer
> **Create & Send**: Create and send the invoice to the customer
## Recurring Invoices
Log in to the Dashboard and navigate to **Orders** > **Invoicing**
Navigate to **Recurring Invoices** and click **Create Recurring Invoice**
 Input the invoice information
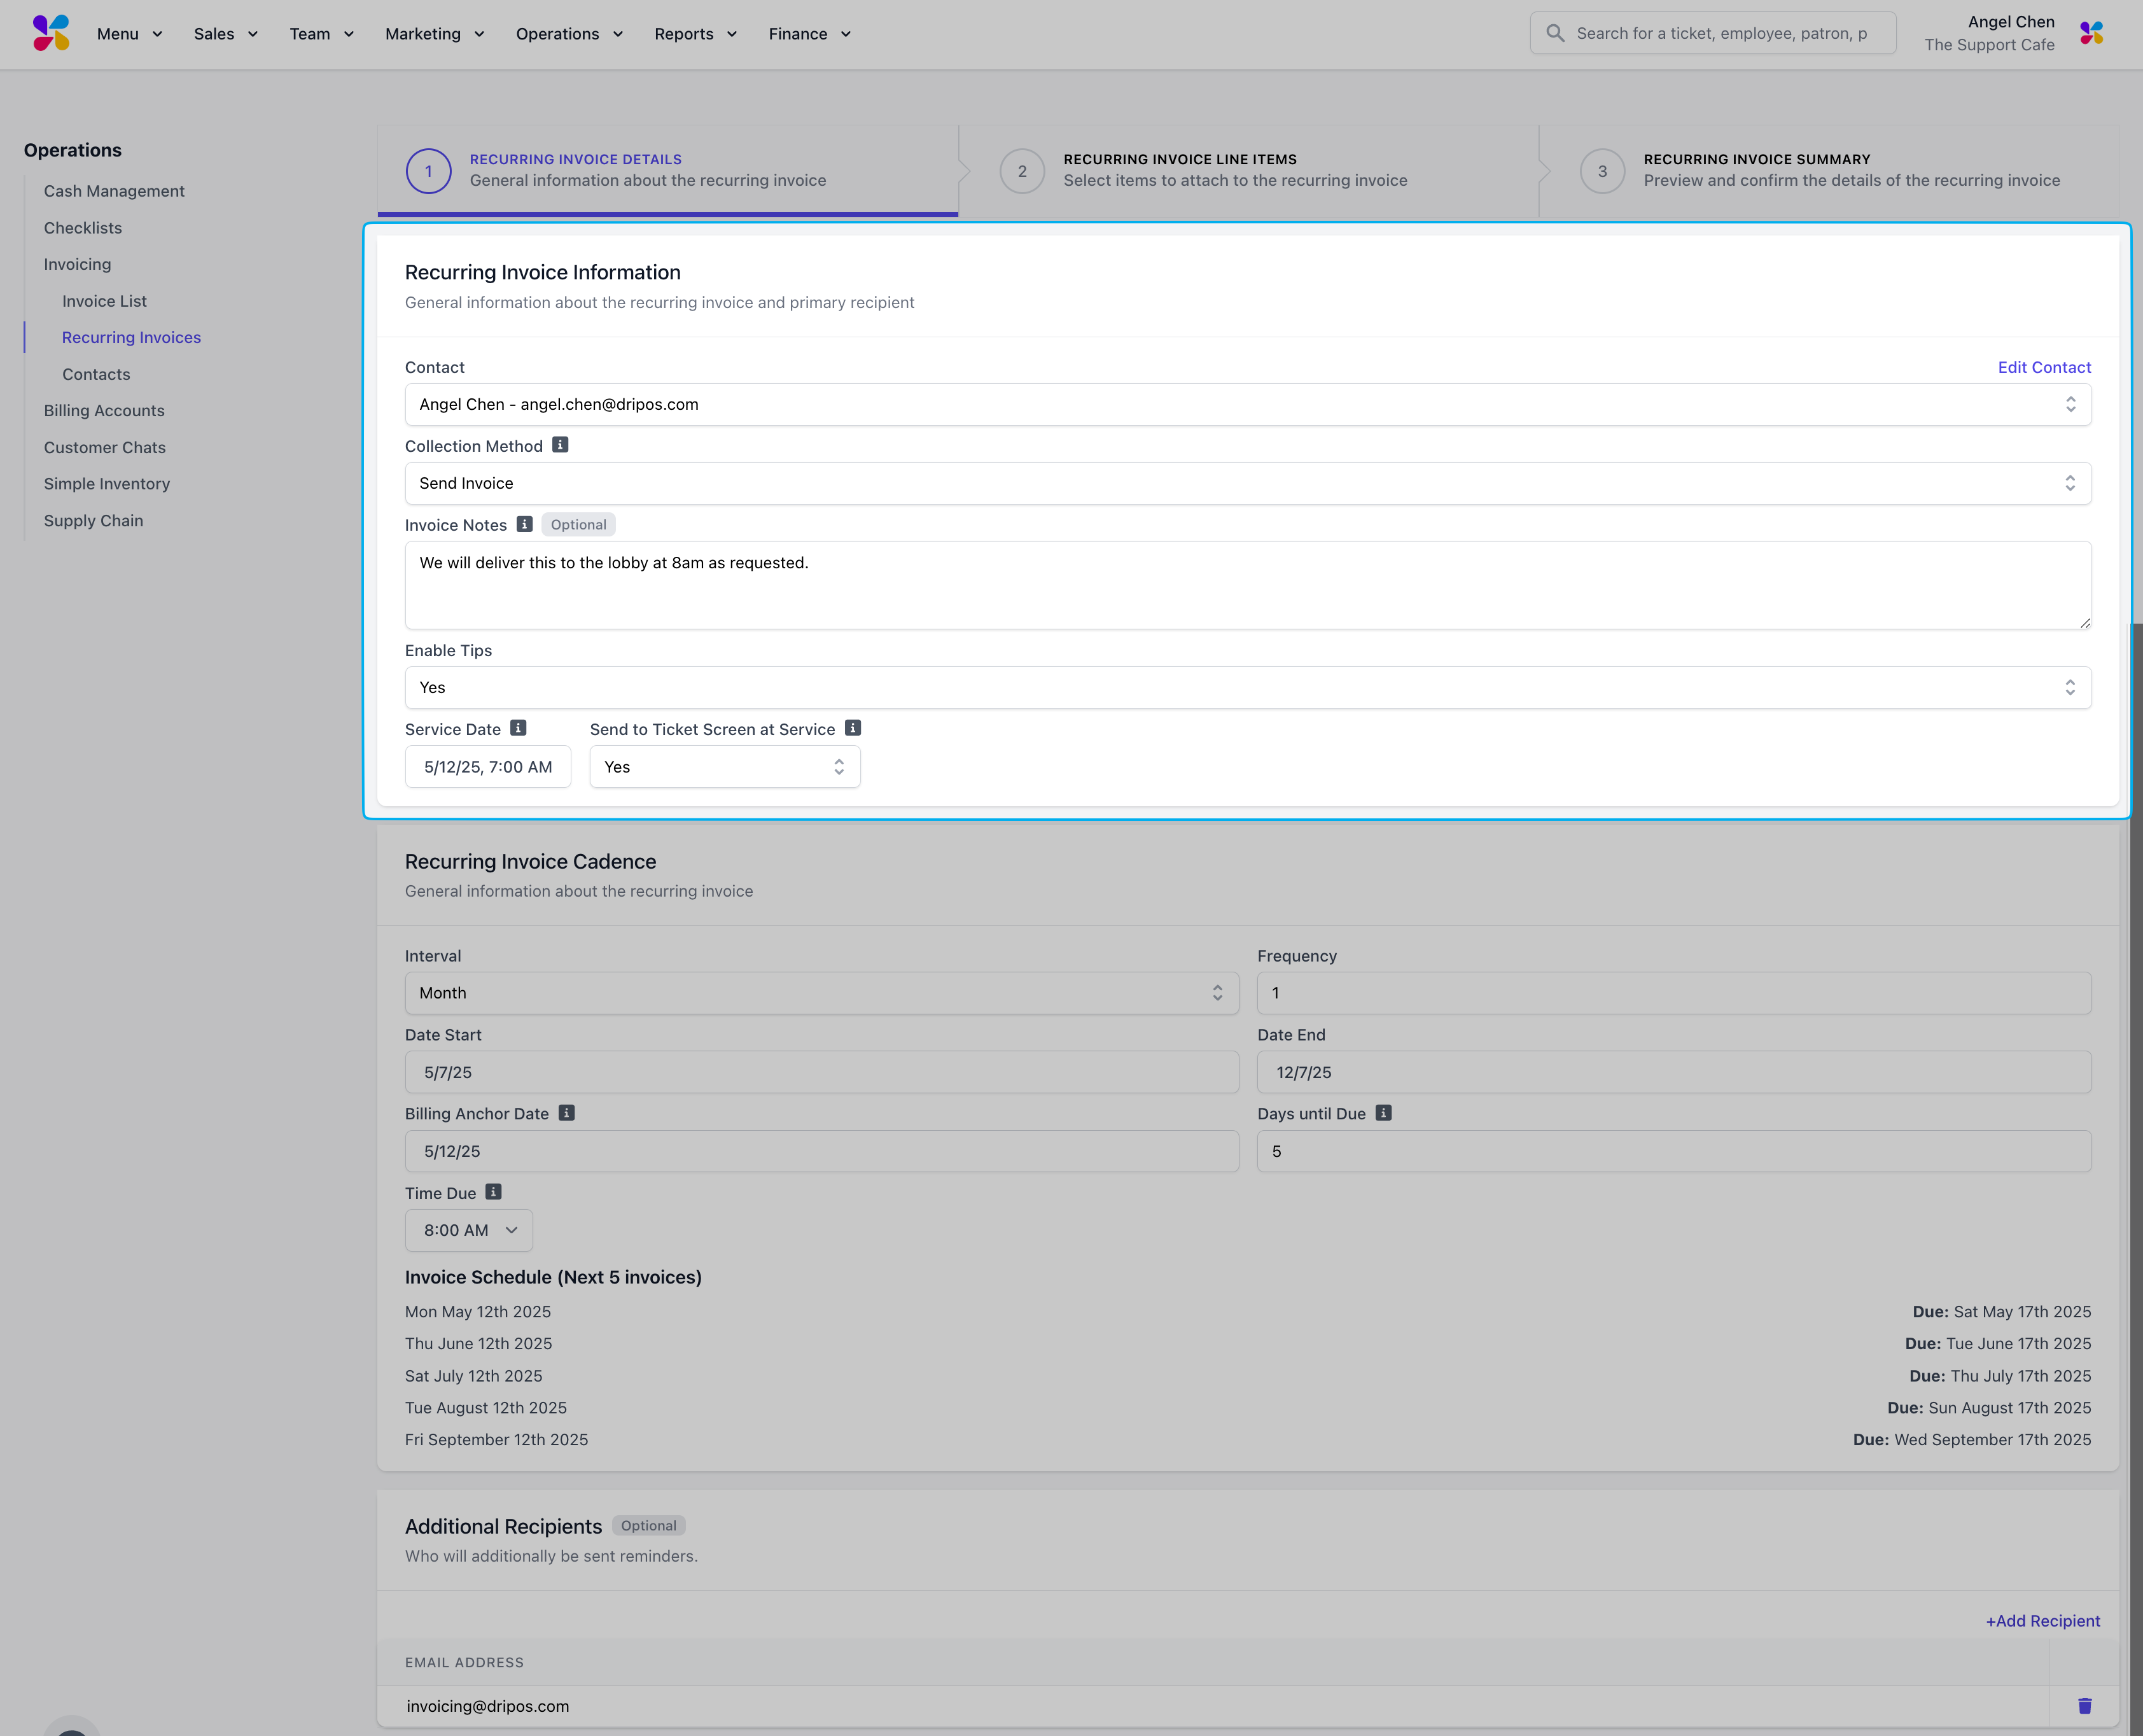 **Contact**: Click the dropdown to select an existing contact to assign this invoice. For new contacts, type in their name and select "Create Contact" to enter their information.
**Invoice Notes (Optional)**: Include any notes to include in the invoice for the customer
**Enable Tips**: If set to Yes, the invoice contact can include a tip when paying off the invoice
**Service Date**: Select the date and time this invoice should be recorded as a sale for reporting purposes
**Send to Ticket Screen at Service**: If set to Yes, the invoice line items will appear on the KDS of your POS on the selected service date
Input the recurring invoice cadence
**Contact**: Click the dropdown to select an existing contact to assign this invoice. For new contacts, type in their name and select "Create Contact" to enter their information.
**Invoice Notes (Optional)**: Include any notes to include in the invoice for the customer
**Enable Tips**: If set to Yes, the invoice contact can include a tip when paying off the invoice
**Service Date**: Select the date and time this invoice should be recorded as a sale for reporting purposes
**Send to Ticket Screen at Service**: If set to Yes, the invoice line items will appear on the KDS of your POS on the selected service date
Input the recurring invoice cadence
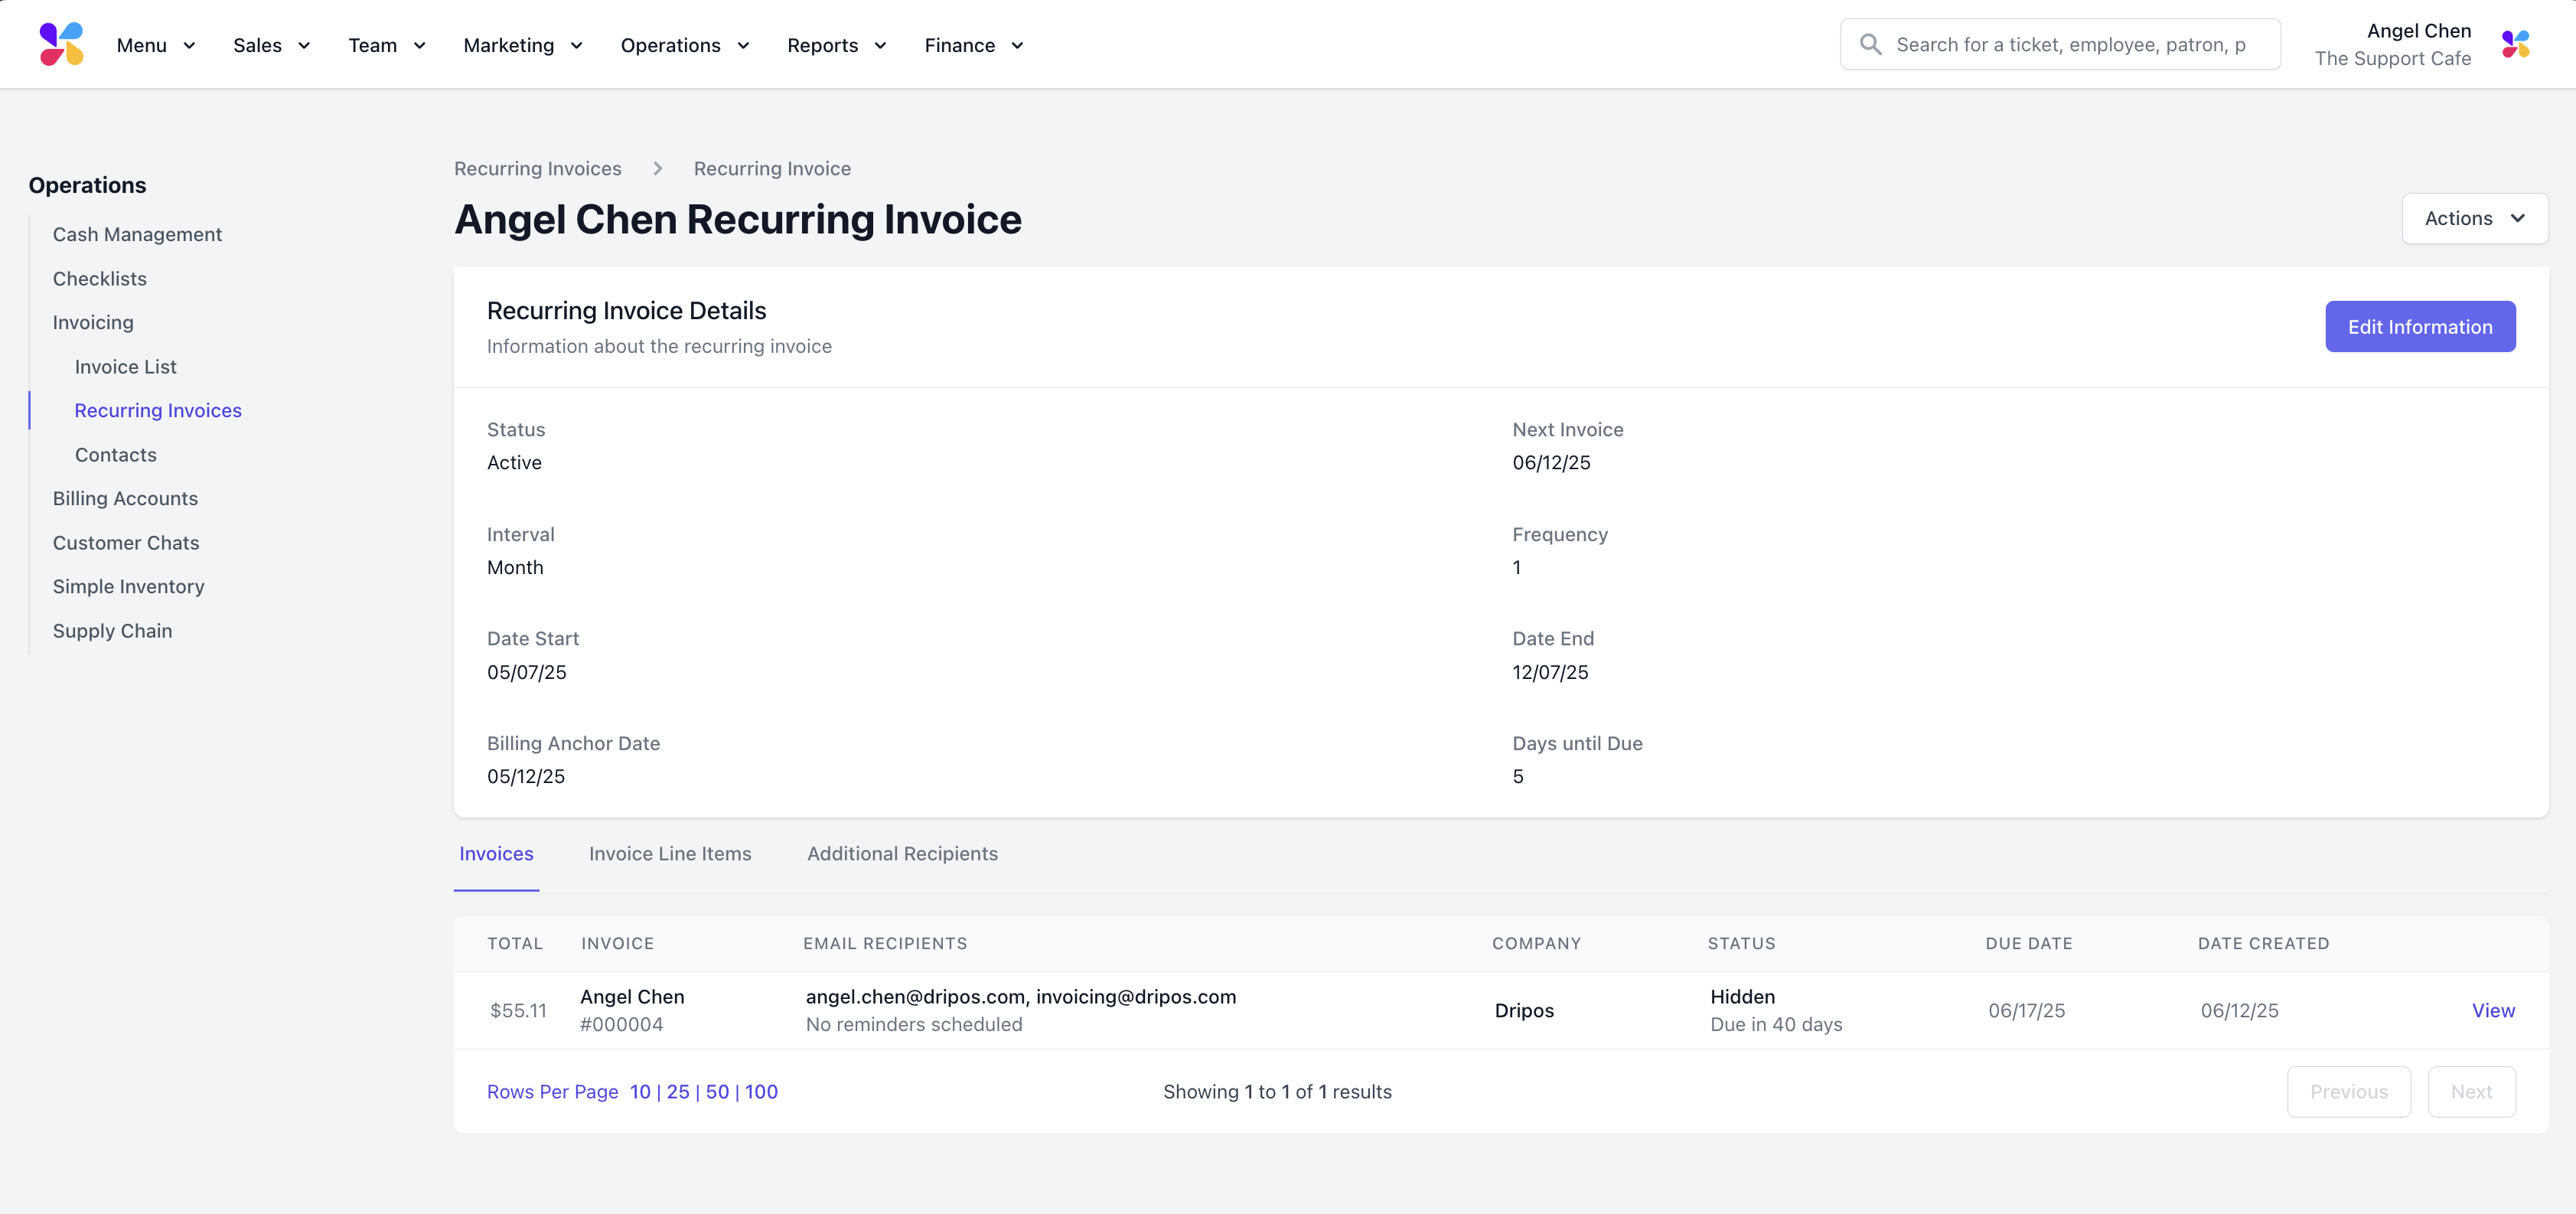
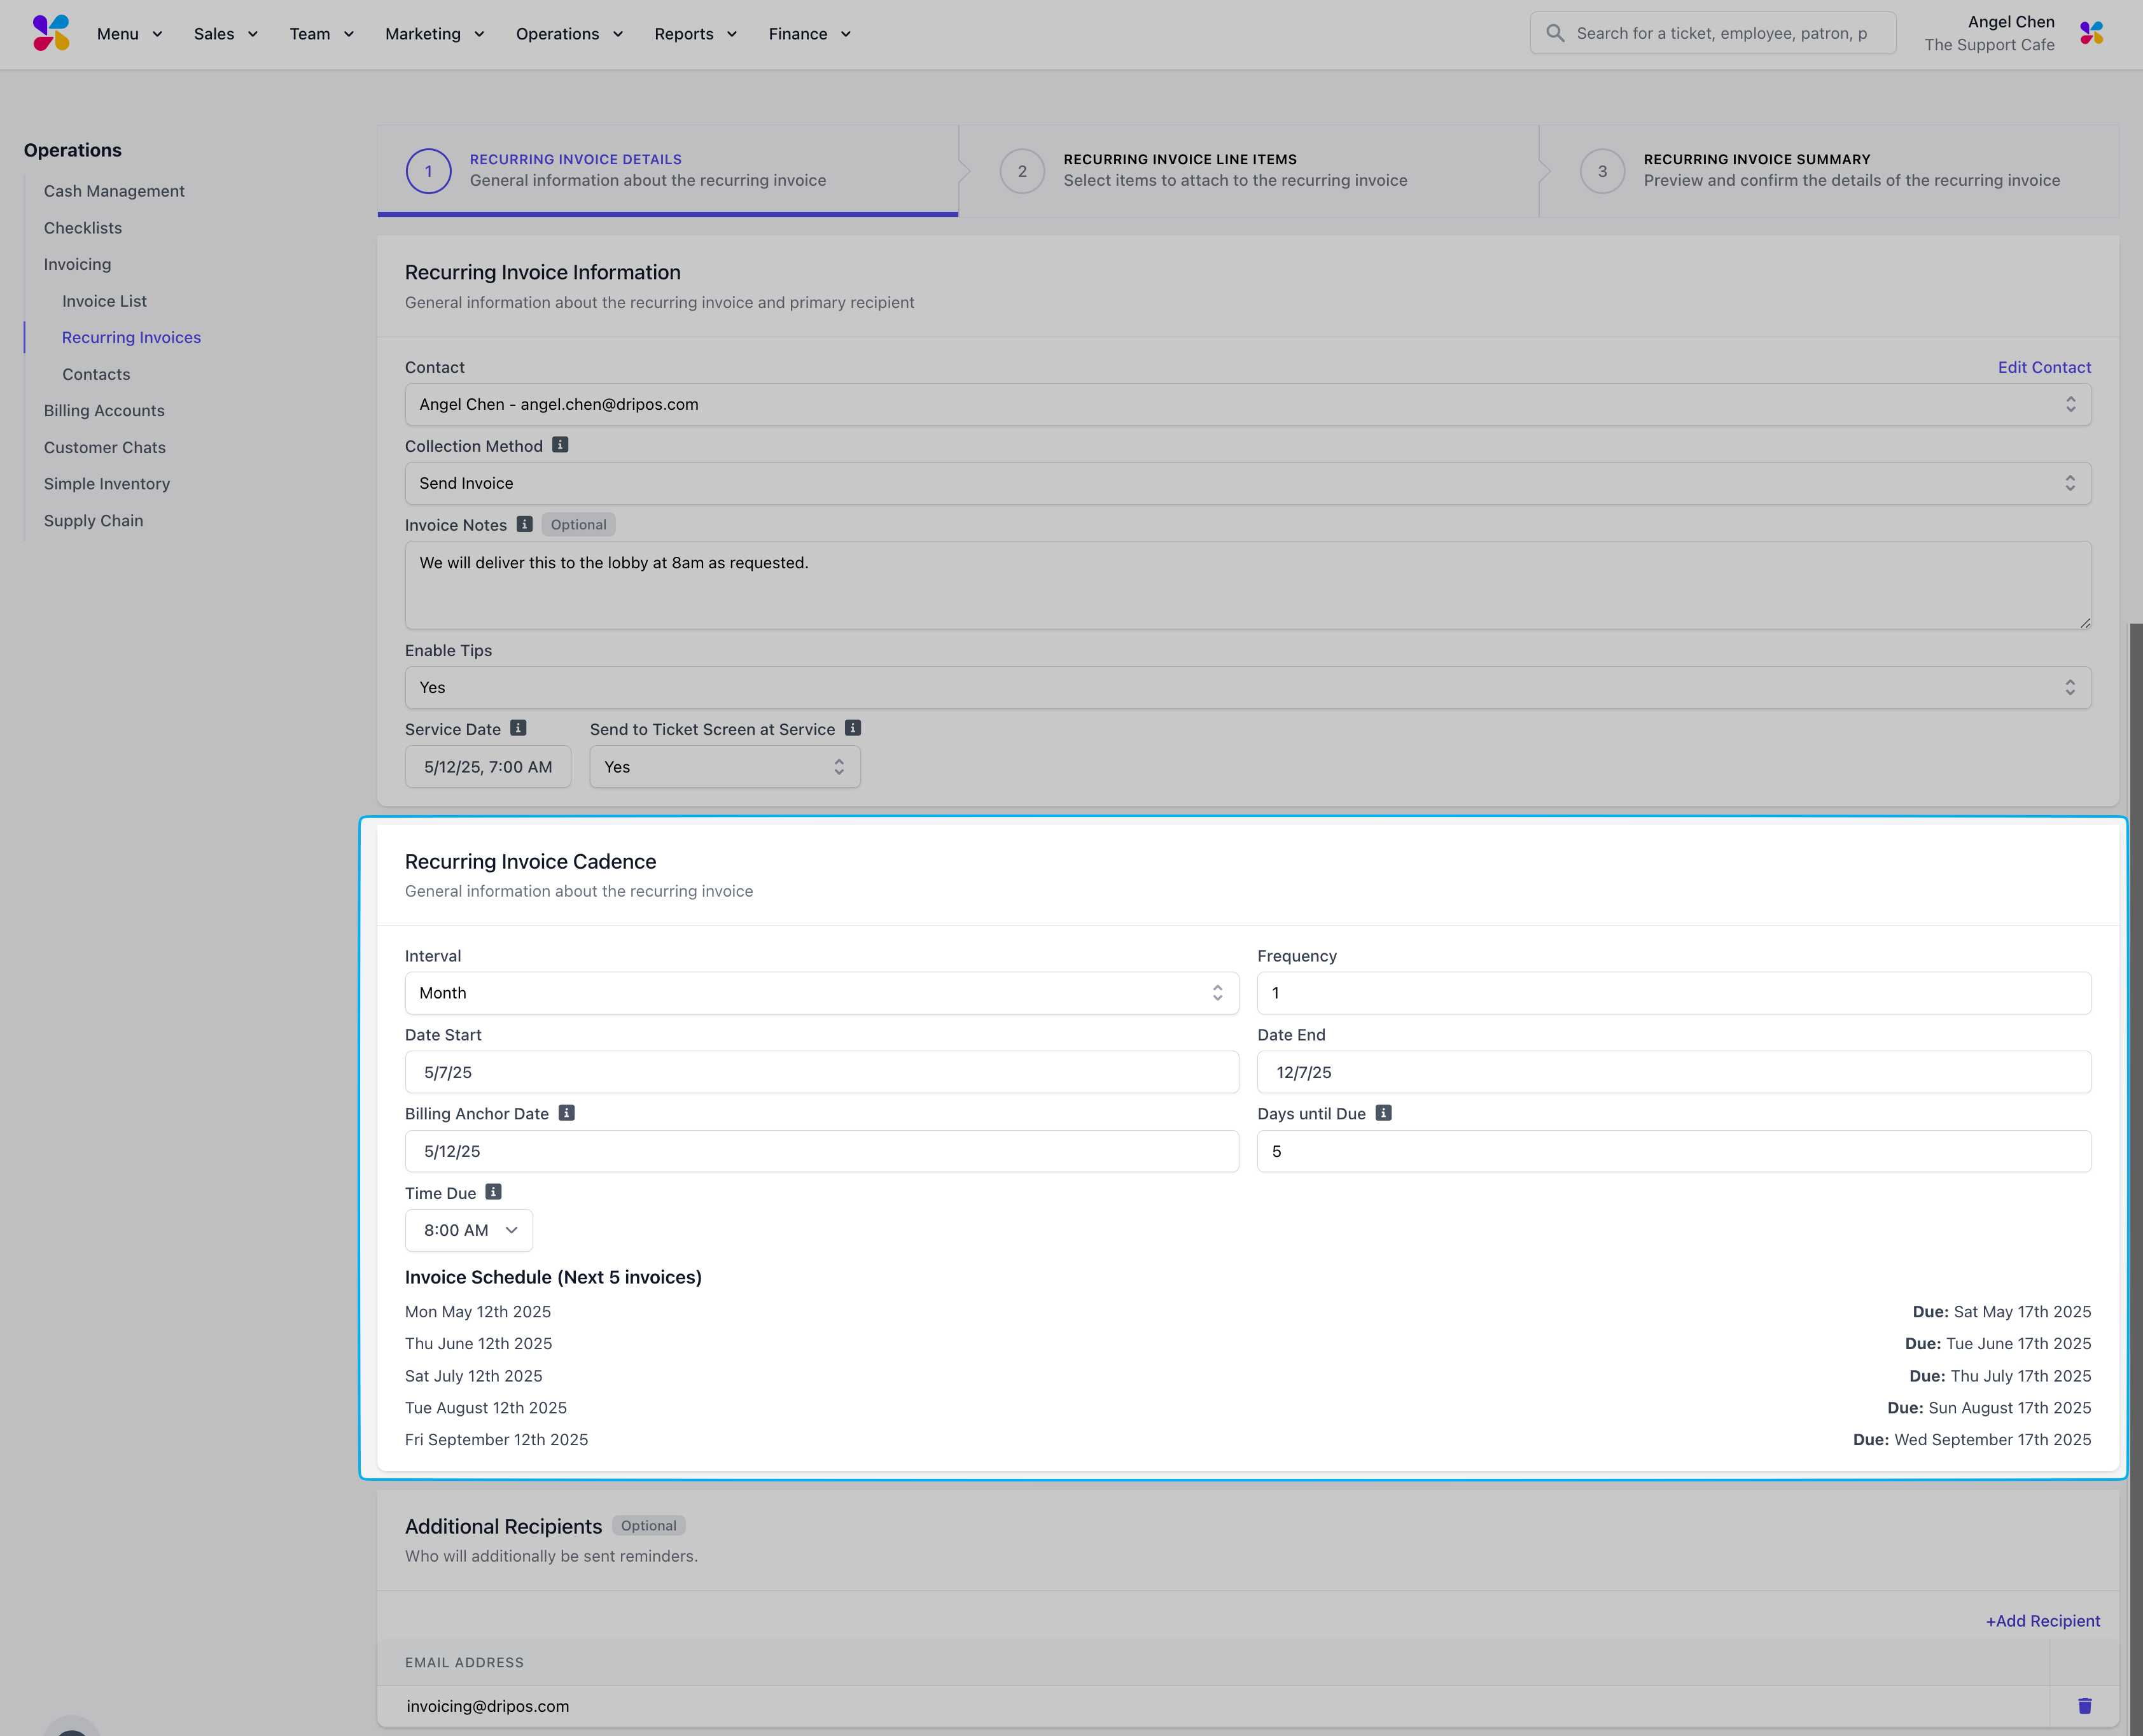 **Interval**: Set this invoice to repeat on a Day, Week, Month or Year basis
**Frequency**: Select the frequency this invoice should repeat at
For example, if the frequency is set to 3 and the interval is Week, that means the invoice will recurr every 3 weeks.
> **Date Start**: The start date for the invoice
> **Date End**: The end date for this invoice
> **Billing Anchor Date**: The first date the recurring invoice will bill on
> **Days until Due**: The number of days before the invoice is due. If there is no due date, enter 0.
> **Time Due**: If the Days until Due is input, select the time of day the invoice is due to be paid
Add additional recipients as needed
**Interval**: Set this invoice to repeat on a Day, Week, Month or Year basis
**Frequency**: Select the frequency this invoice should repeat at
For example, if the frequency is set to 3 and the interval is Week, that means the invoice will recurr every 3 weeks.
> **Date Start**: The start date for the invoice
> **Date End**: The end date for this invoice
> **Billing Anchor Date**: The first date the recurring invoice will bill on
> **Days until Due**: The number of days before the invoice is due. If there is no due date, enter 0.
> **Time Due**: If the Days until Due is input, select the time of day the invoice is due to be paid
Add additional recipients as needed
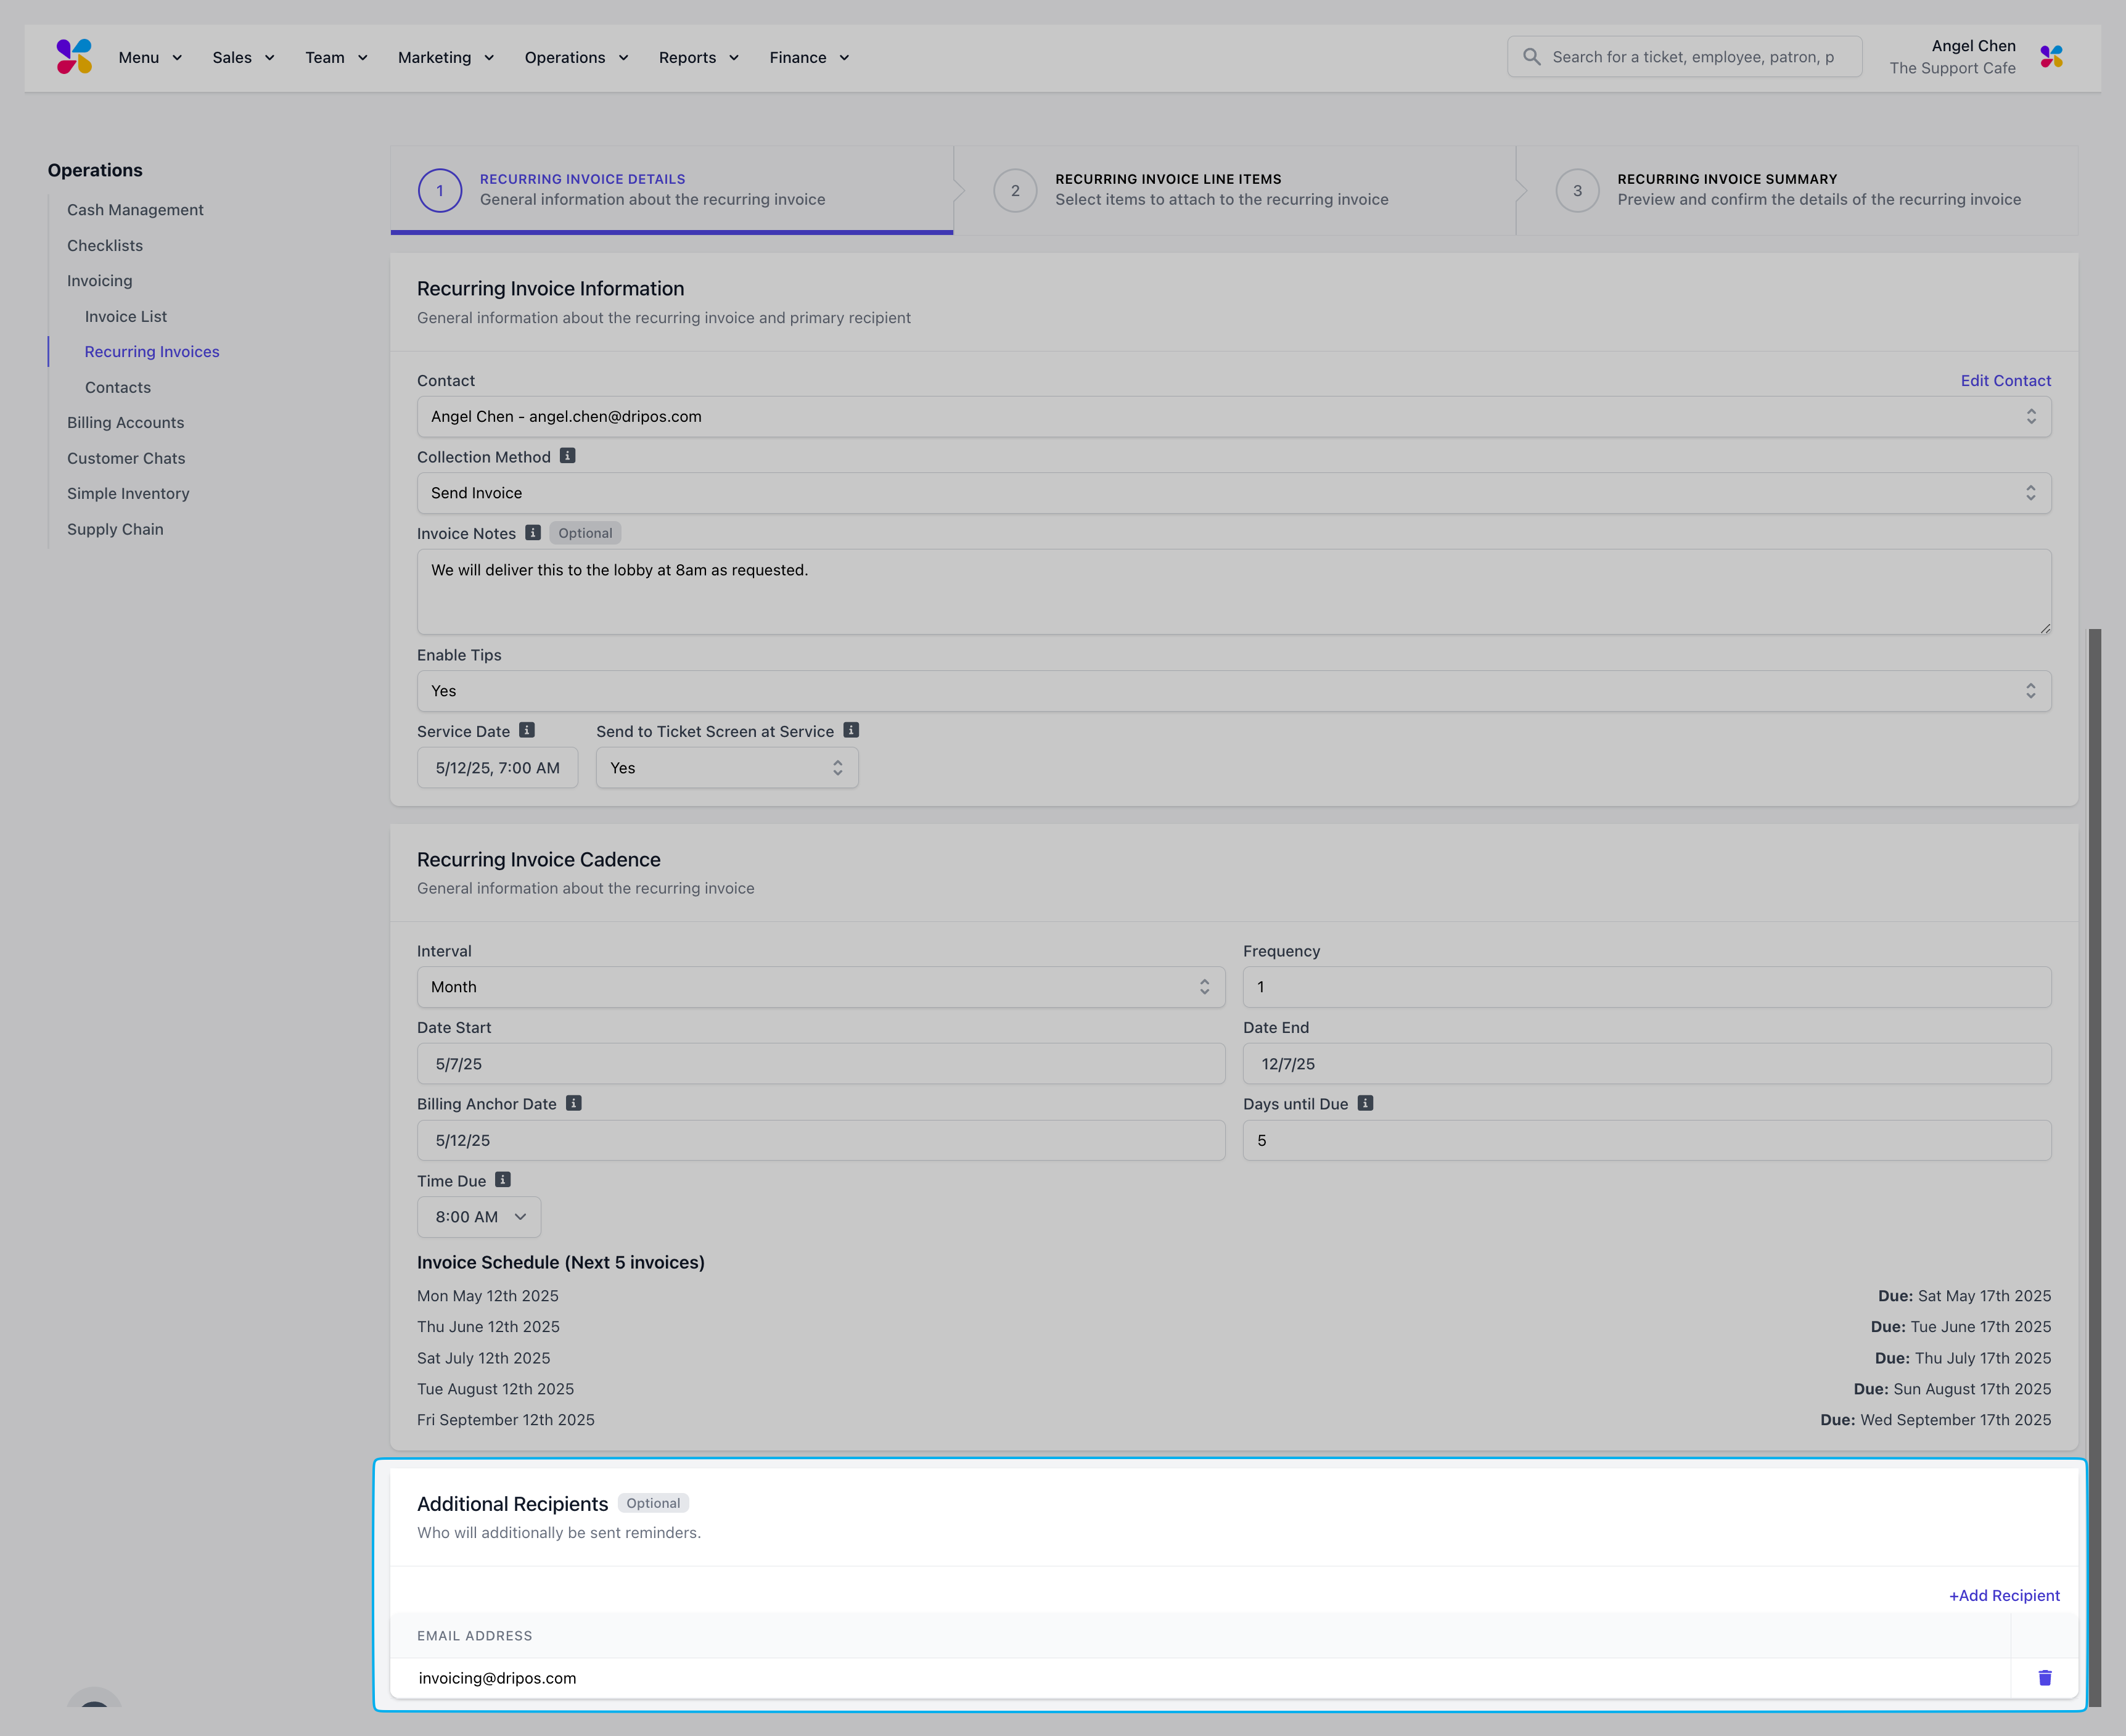 Additional Recipients: Use the +Additional Recipients button to attach other emails to send the invoice and any payment reminders
Input each invoice line item by using the Add line item + button. Add an existing menu item or create custom items for this invoice.
Additional Recipients: Use the +Additional Recipients button to attach other emails to send the invoice and any payment reminders
Input each invoice line item by using the Add line item + button. Add an existing menu item or create custom items for this invoice.
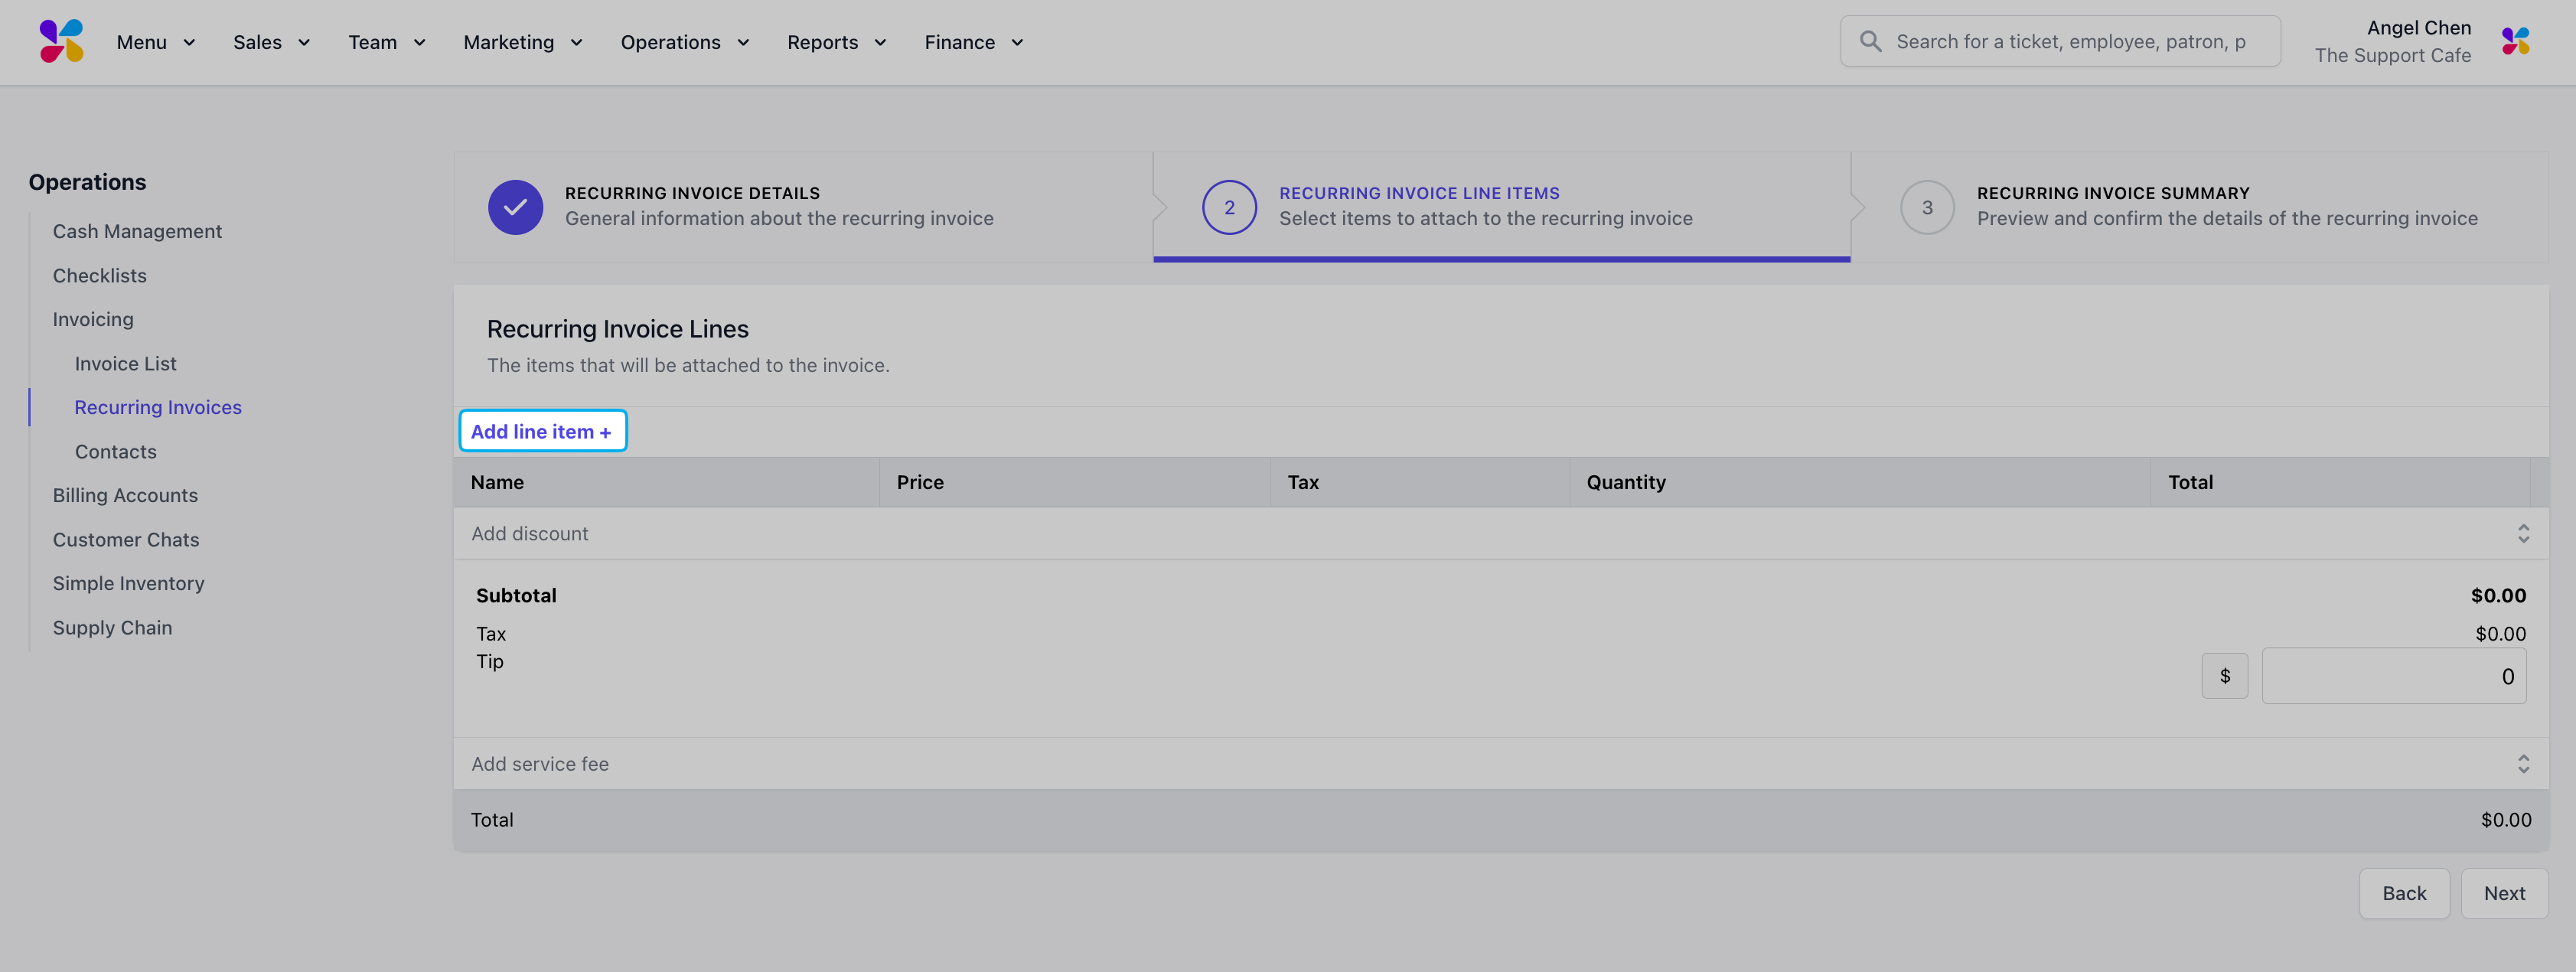 Existing menu products can be added to invoices.
Click the Add line item + button and type in the name of an existing product you would like to add. Select the corresponding product to add to the invoice.
Existing menu products can be added to invoices.
Click the Add line item + button and type in the name of an existing product you would like to add. Select the corresponding product to add to the invoice.
 Custom products can be created and added to invoices.
Click the Add line item + button and type in a name for the custom product. Select the "Create One Time Item" option to add and manually input the Price.
Custom products can be created and added to invoices.
Click the Add line item + button and type in a name for the custom product. Select the "Create One Time Item" option to add and manually input the Price.
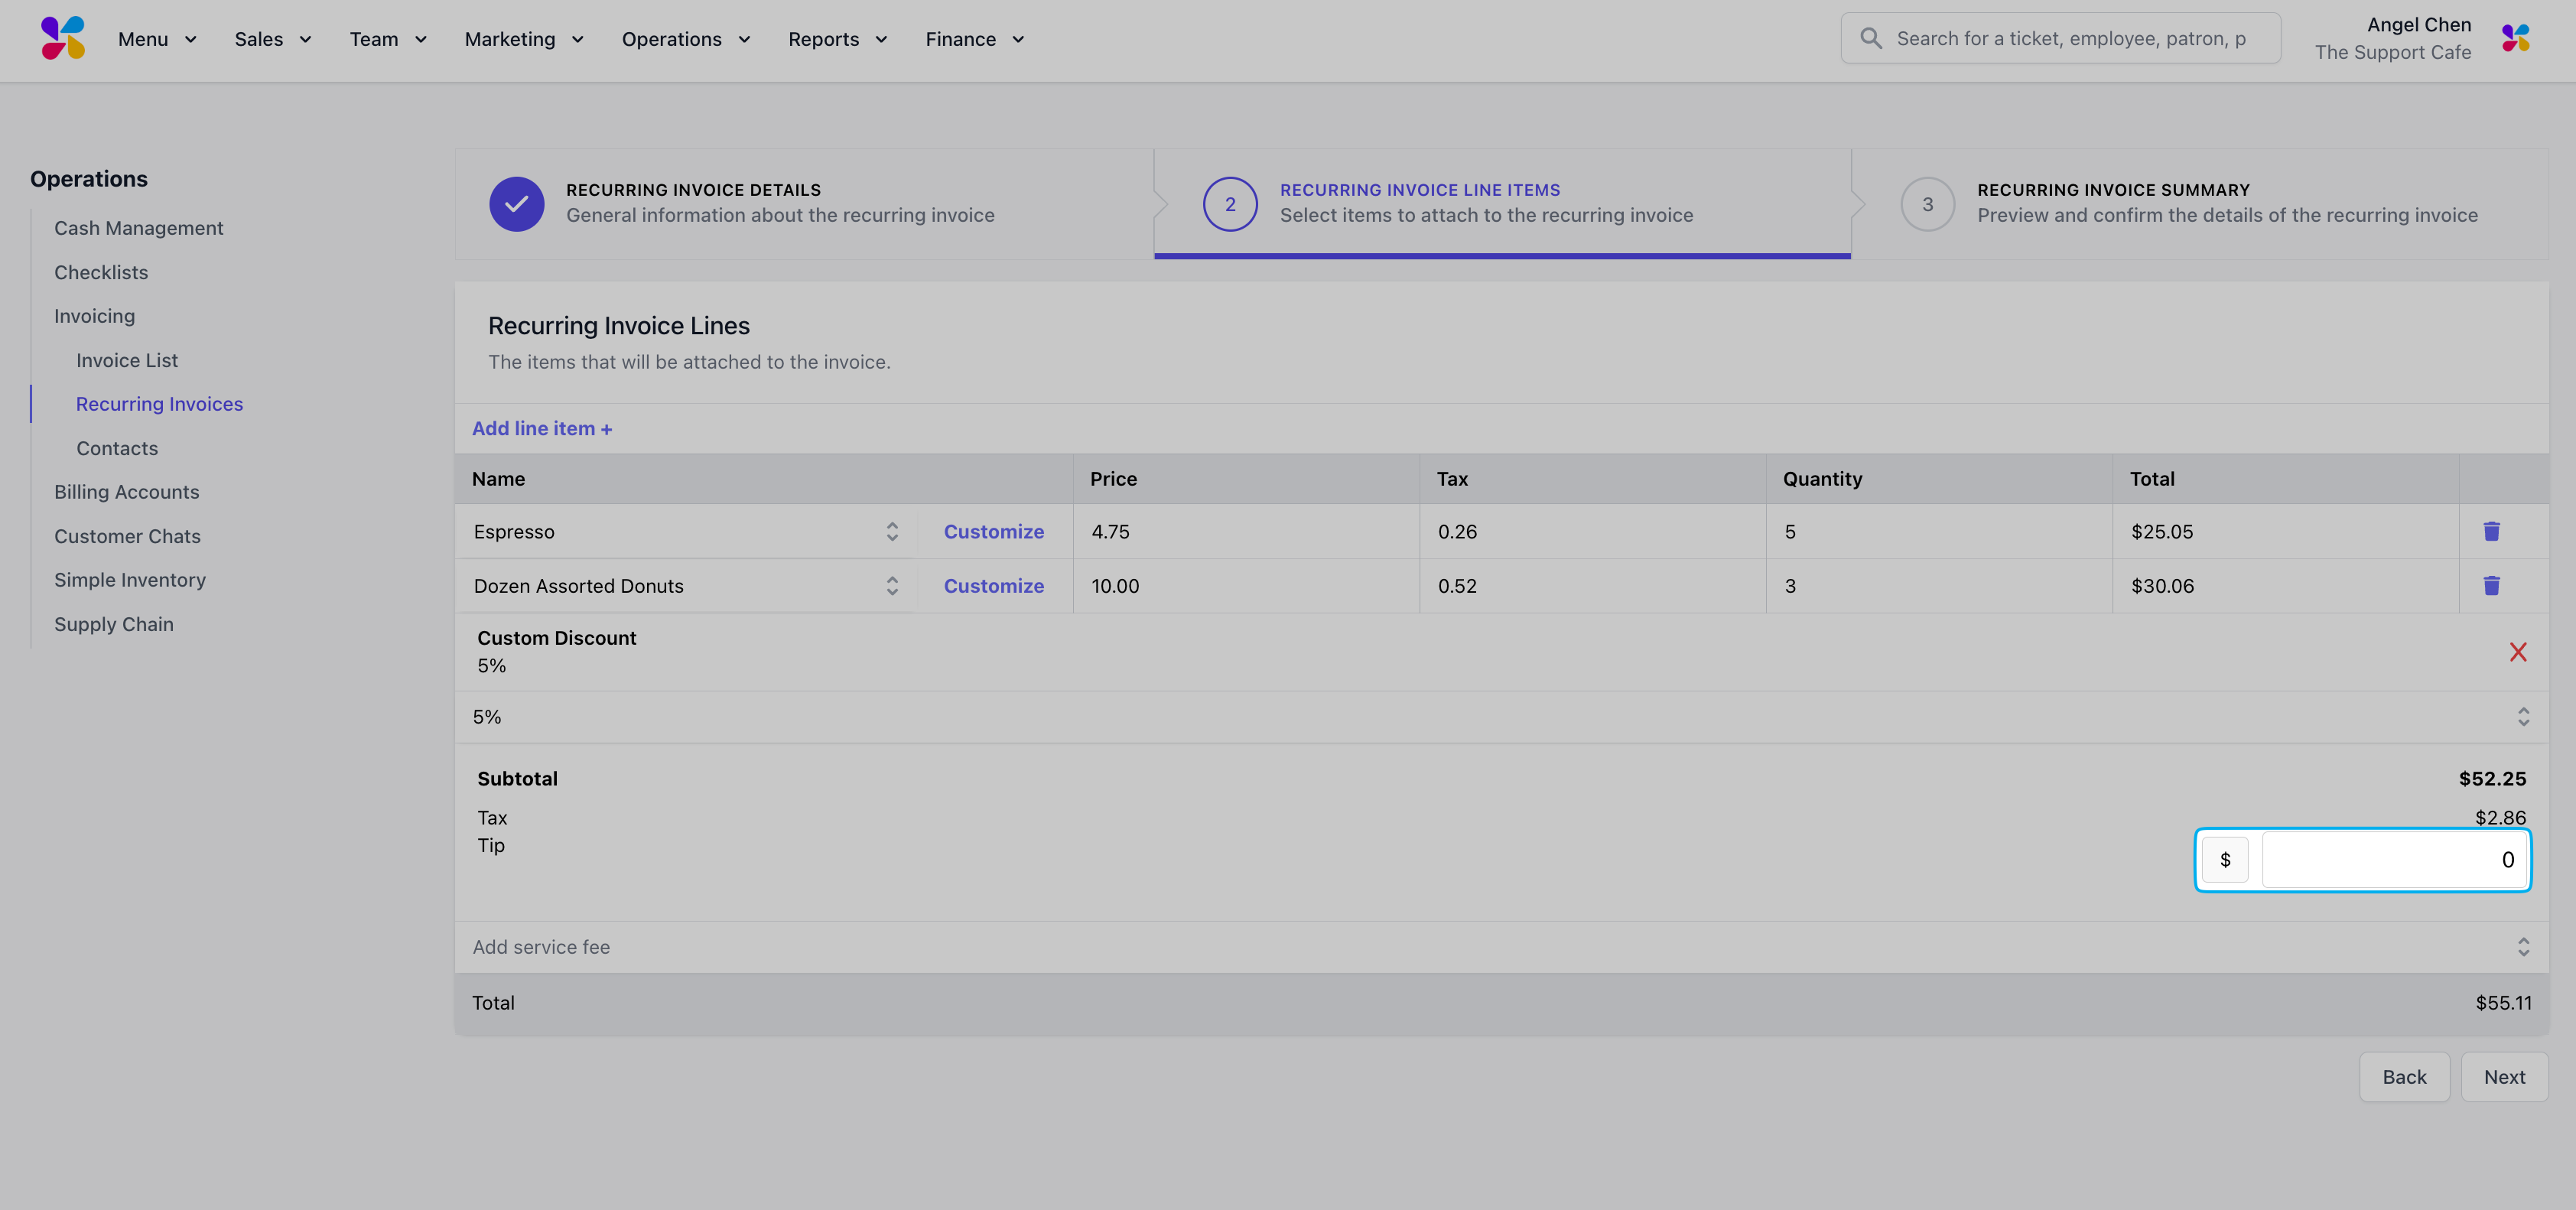
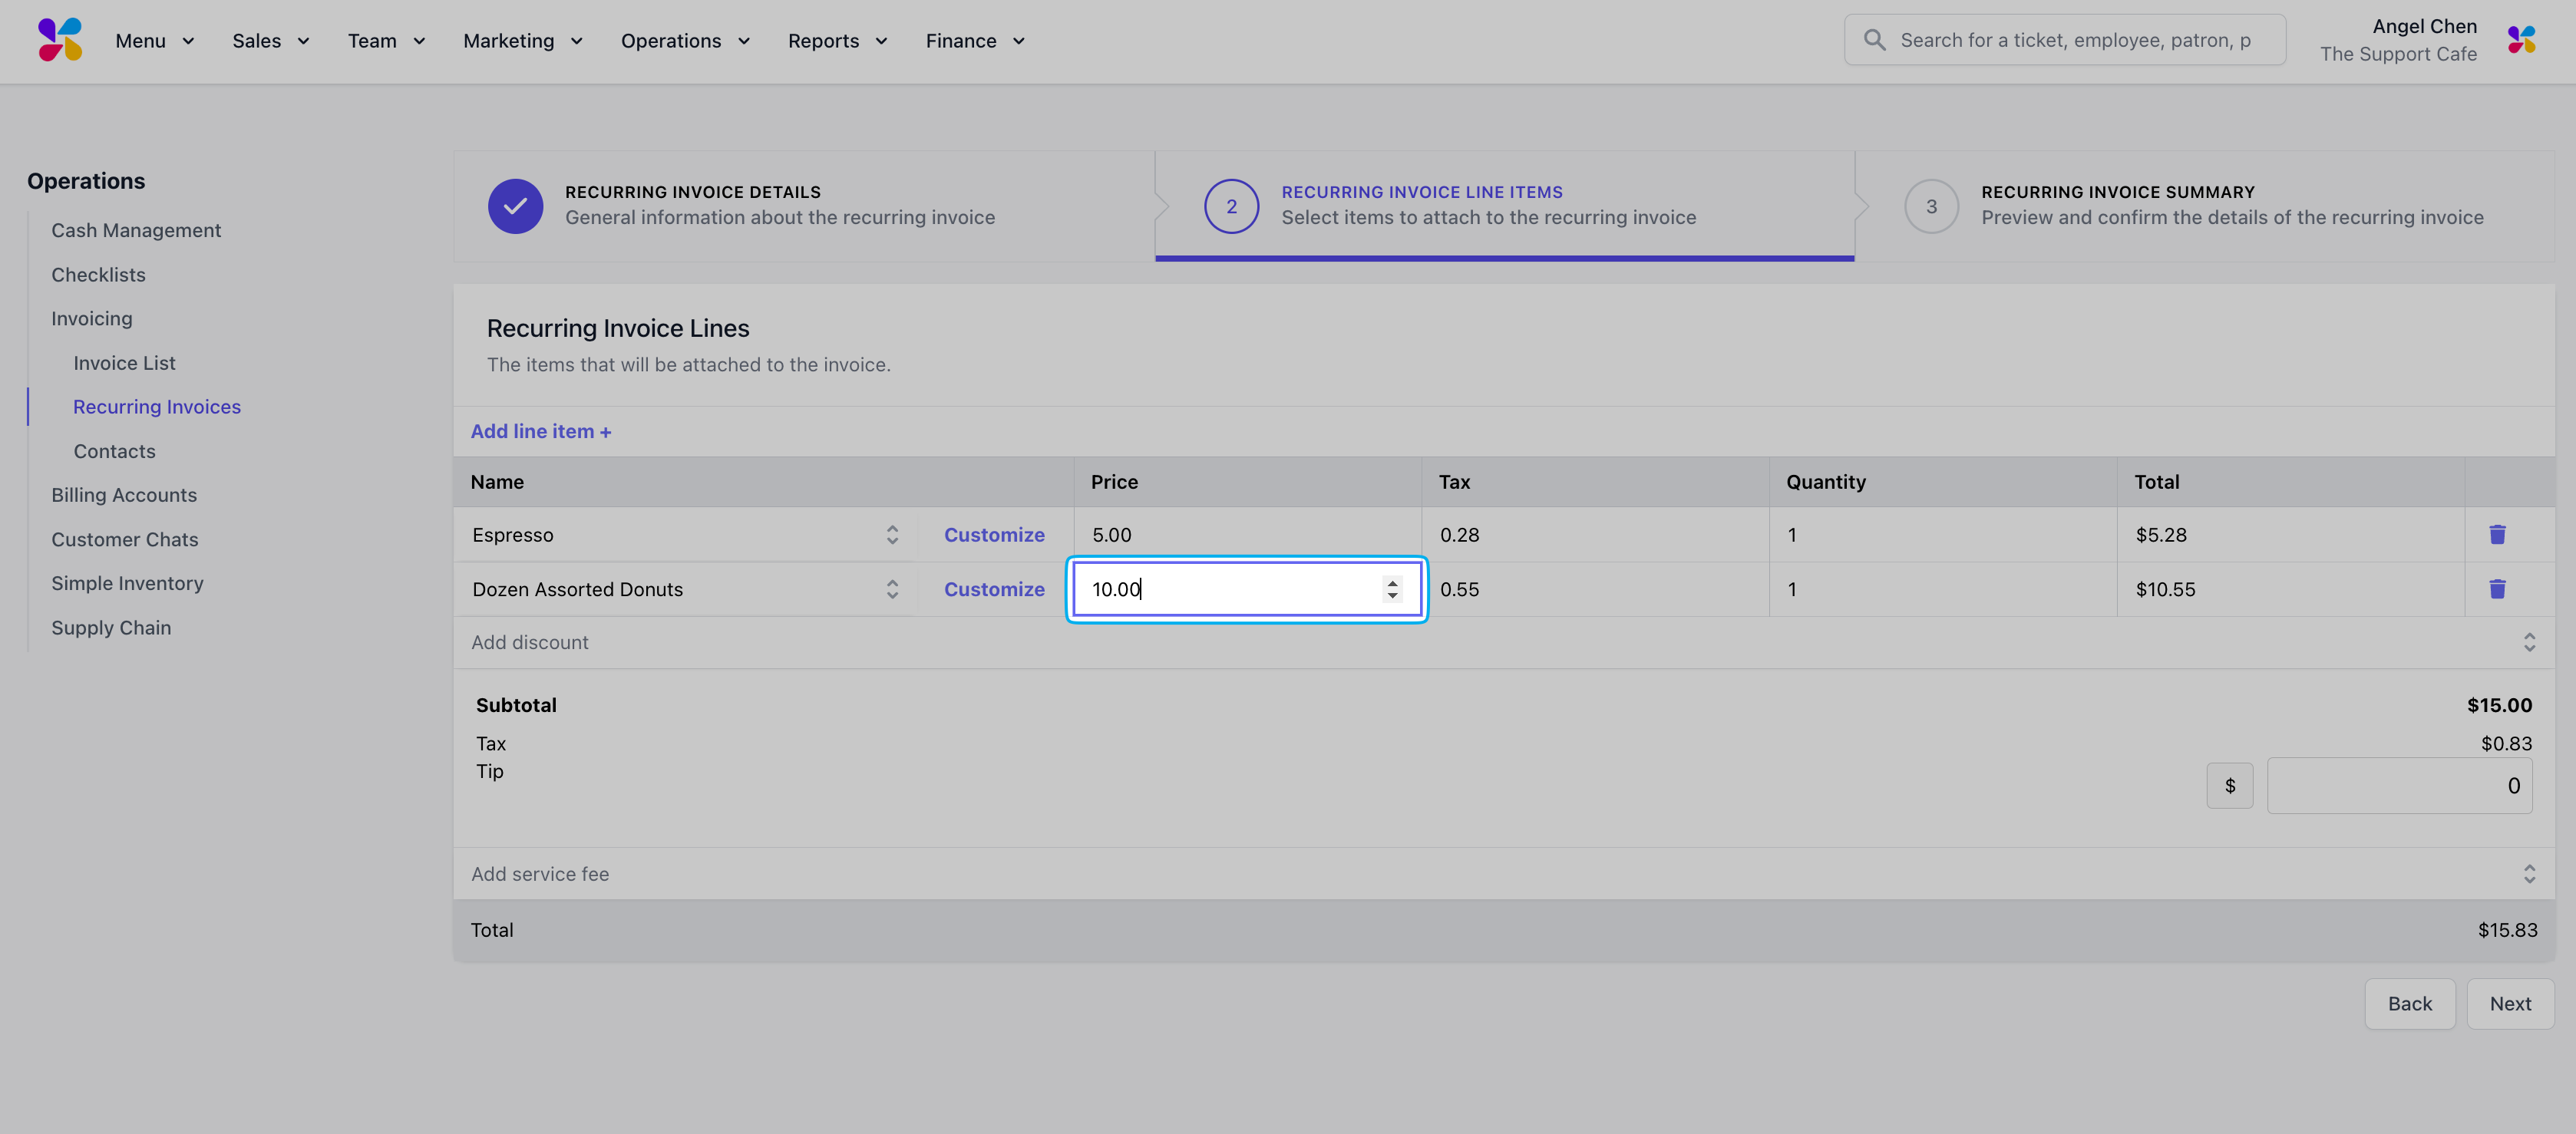 Enter the correct amount of each line item under **Quantity**.
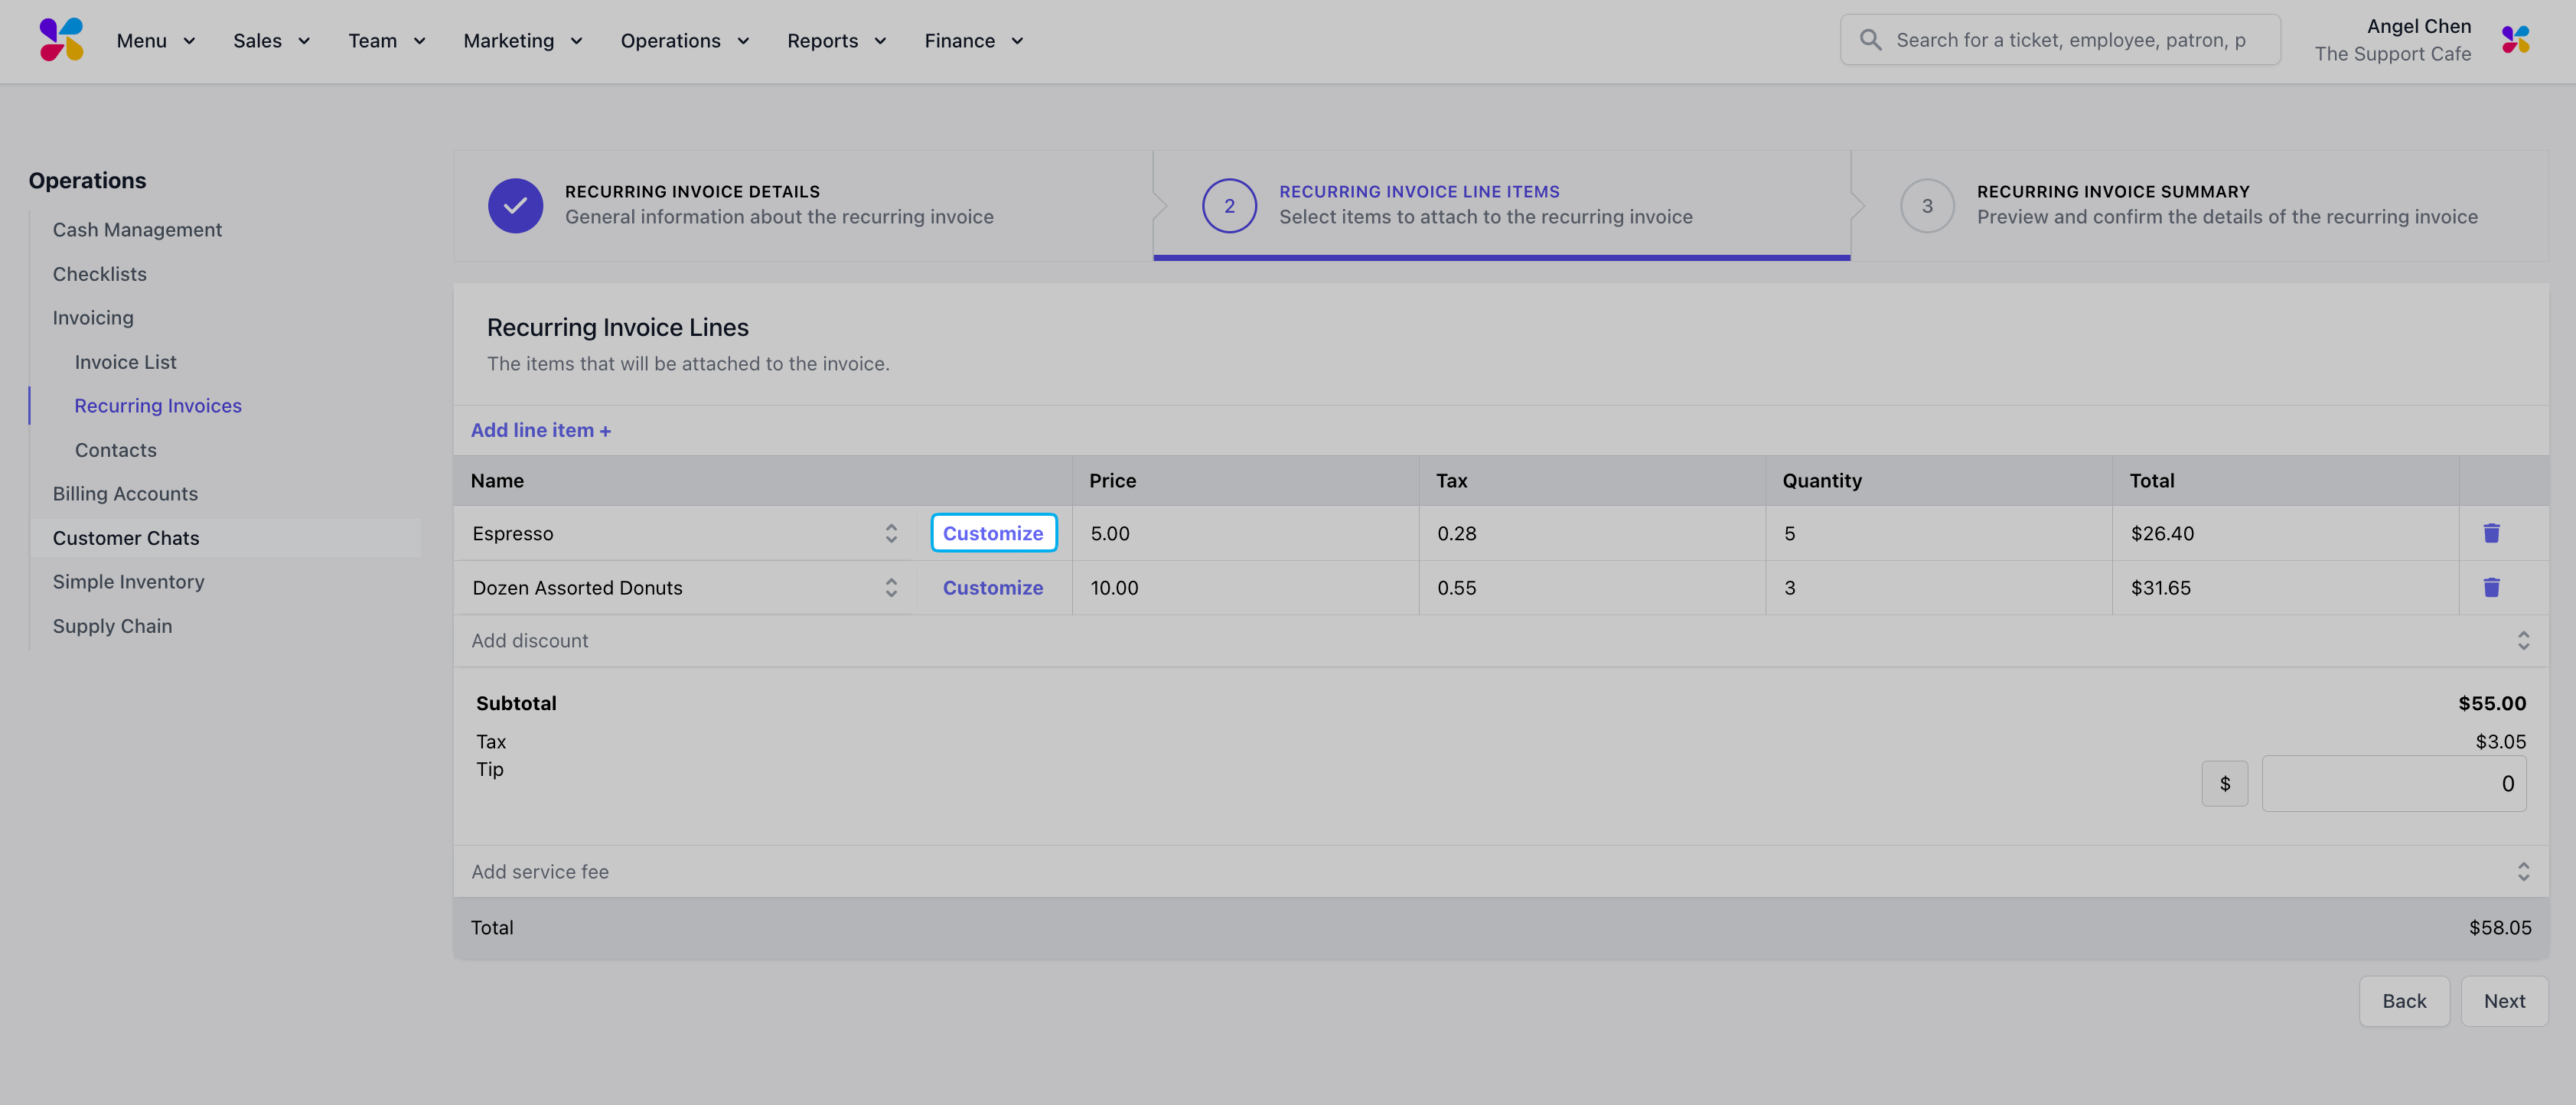
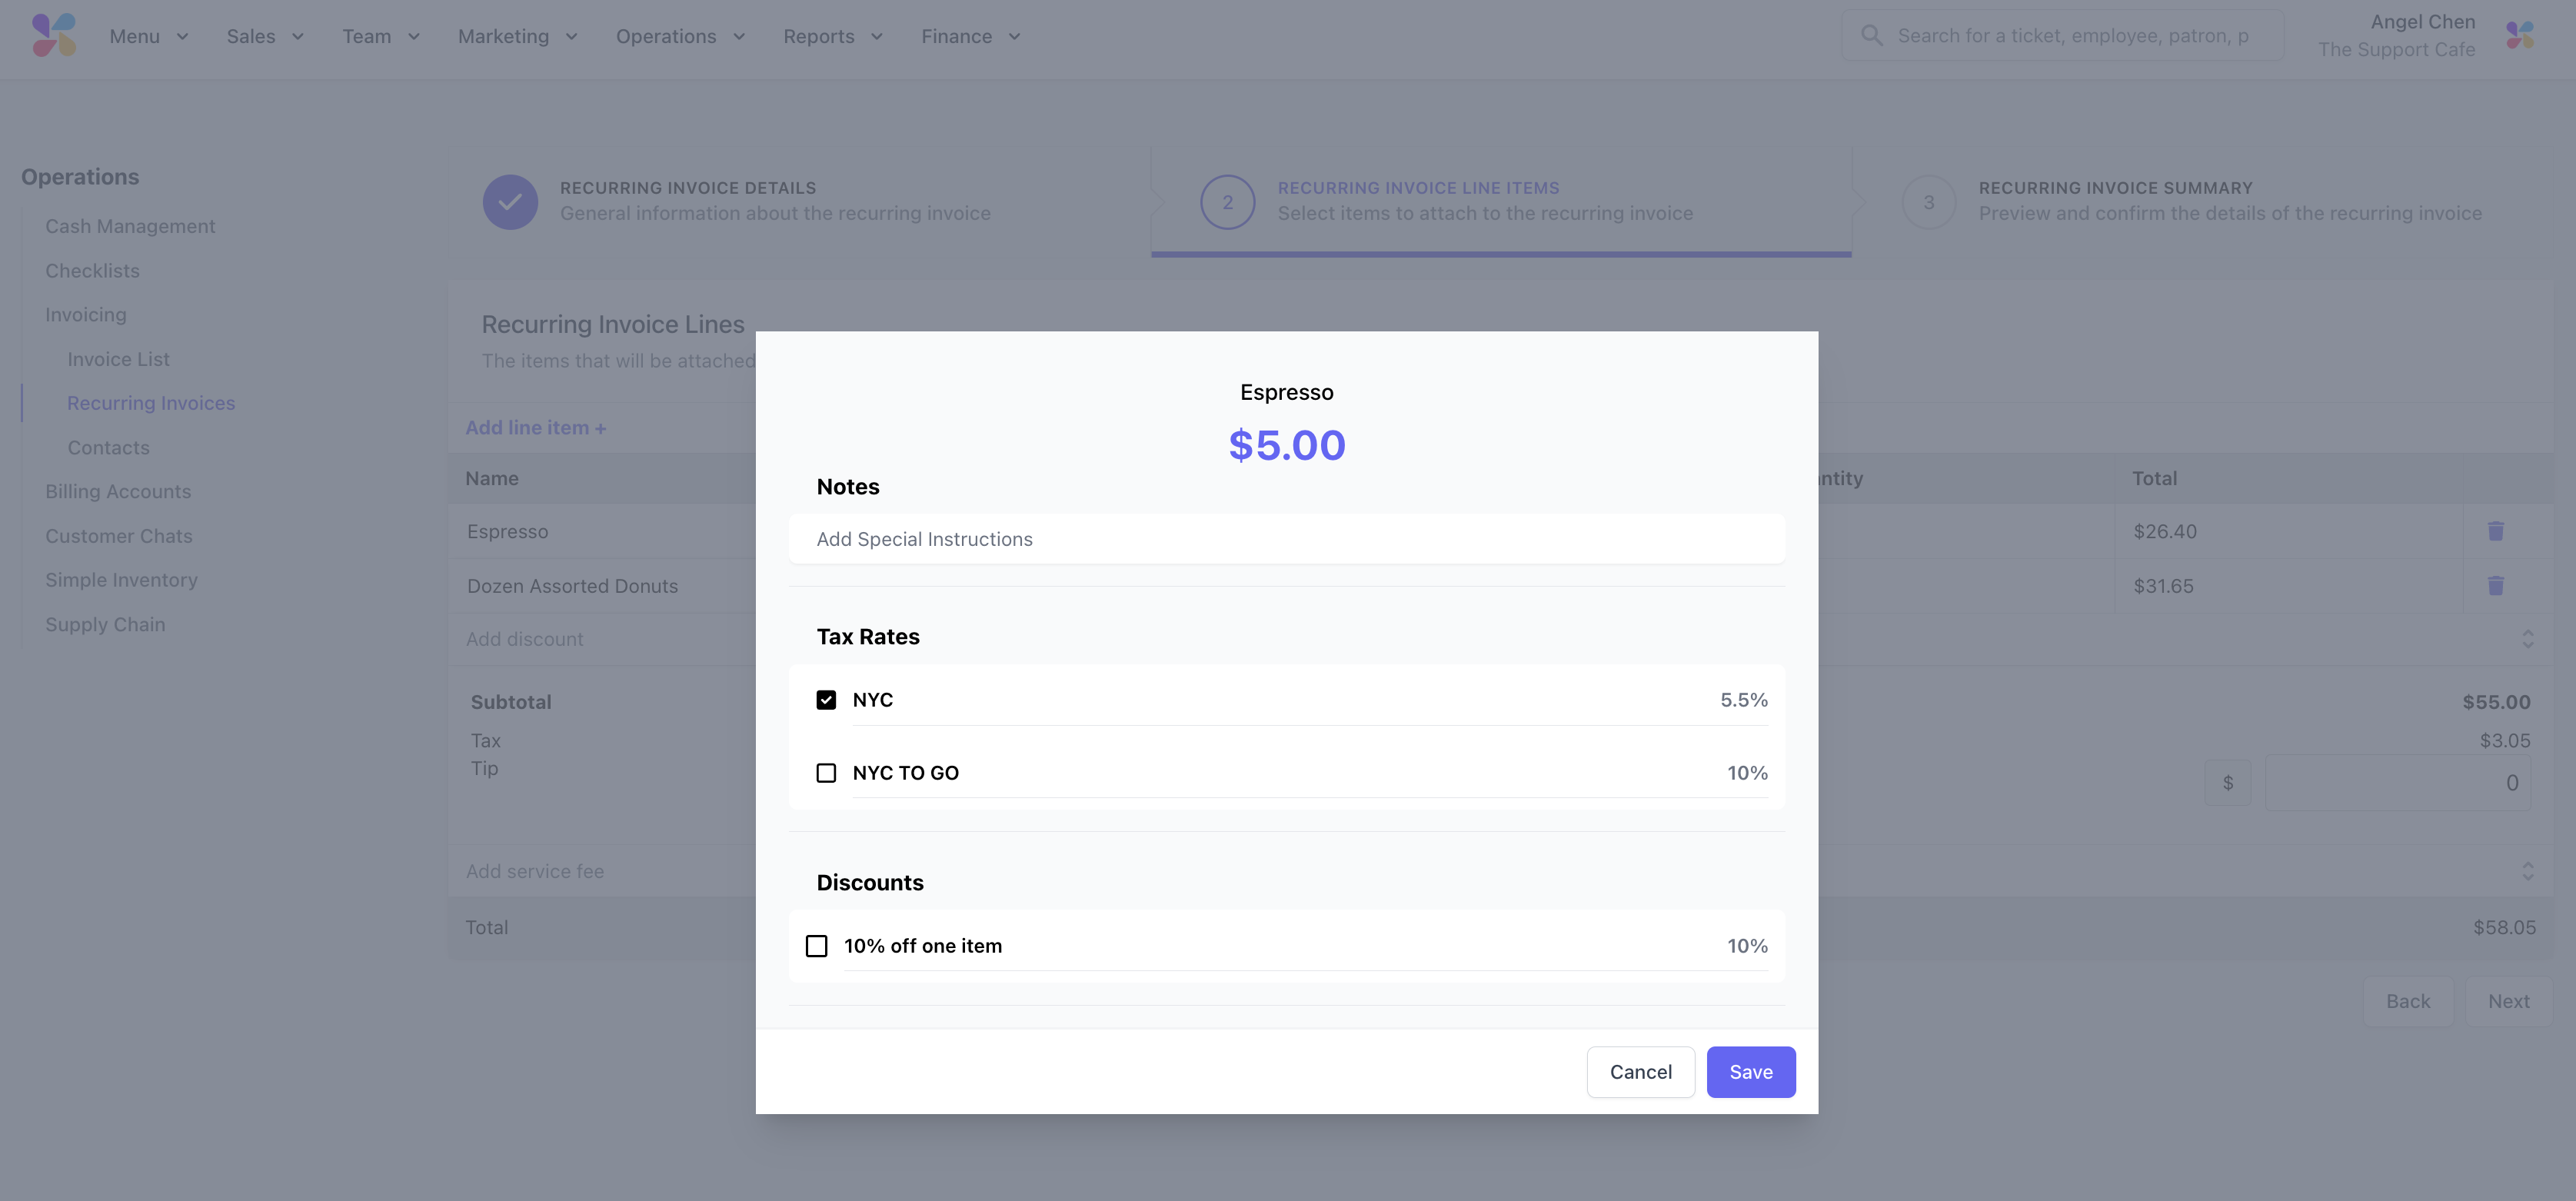
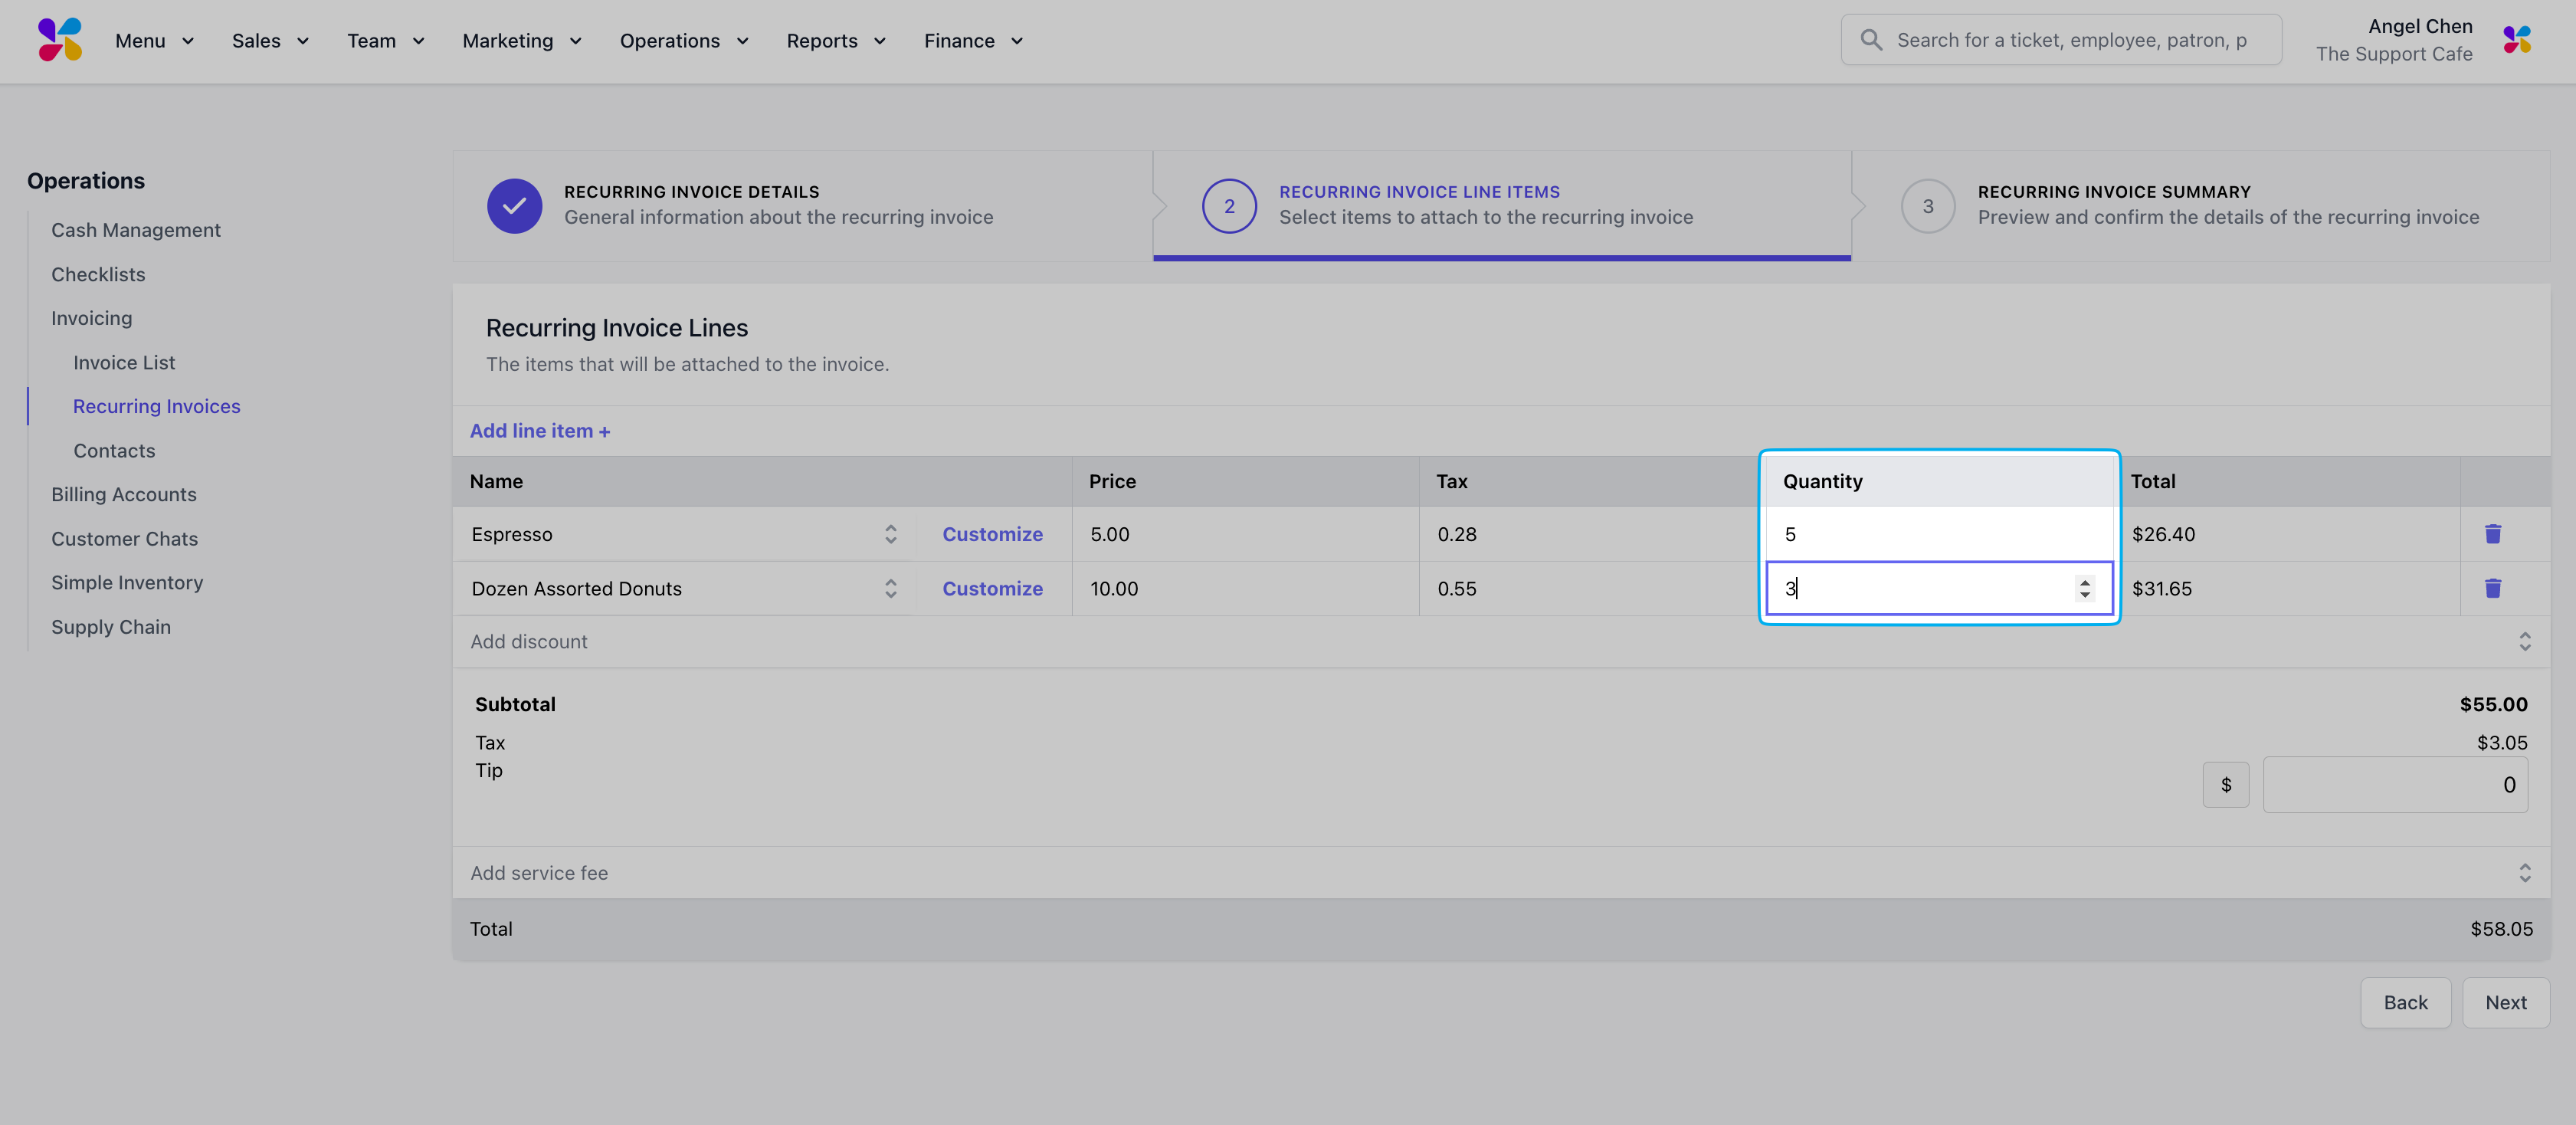 Customize products and applied tax rates, add Discounts or Service Fees, and include Tips.
Use the **Customize** button to add notes, apply product discounts, or edit tax rates for the selected line item before clicking Next.
Customize products and applied tax rates, add Discounts or Service Fees, and include Tips.
Use the **Customize** button to add notes, apply product discounts, or edit tax rates for the selected line item before clicking Next.
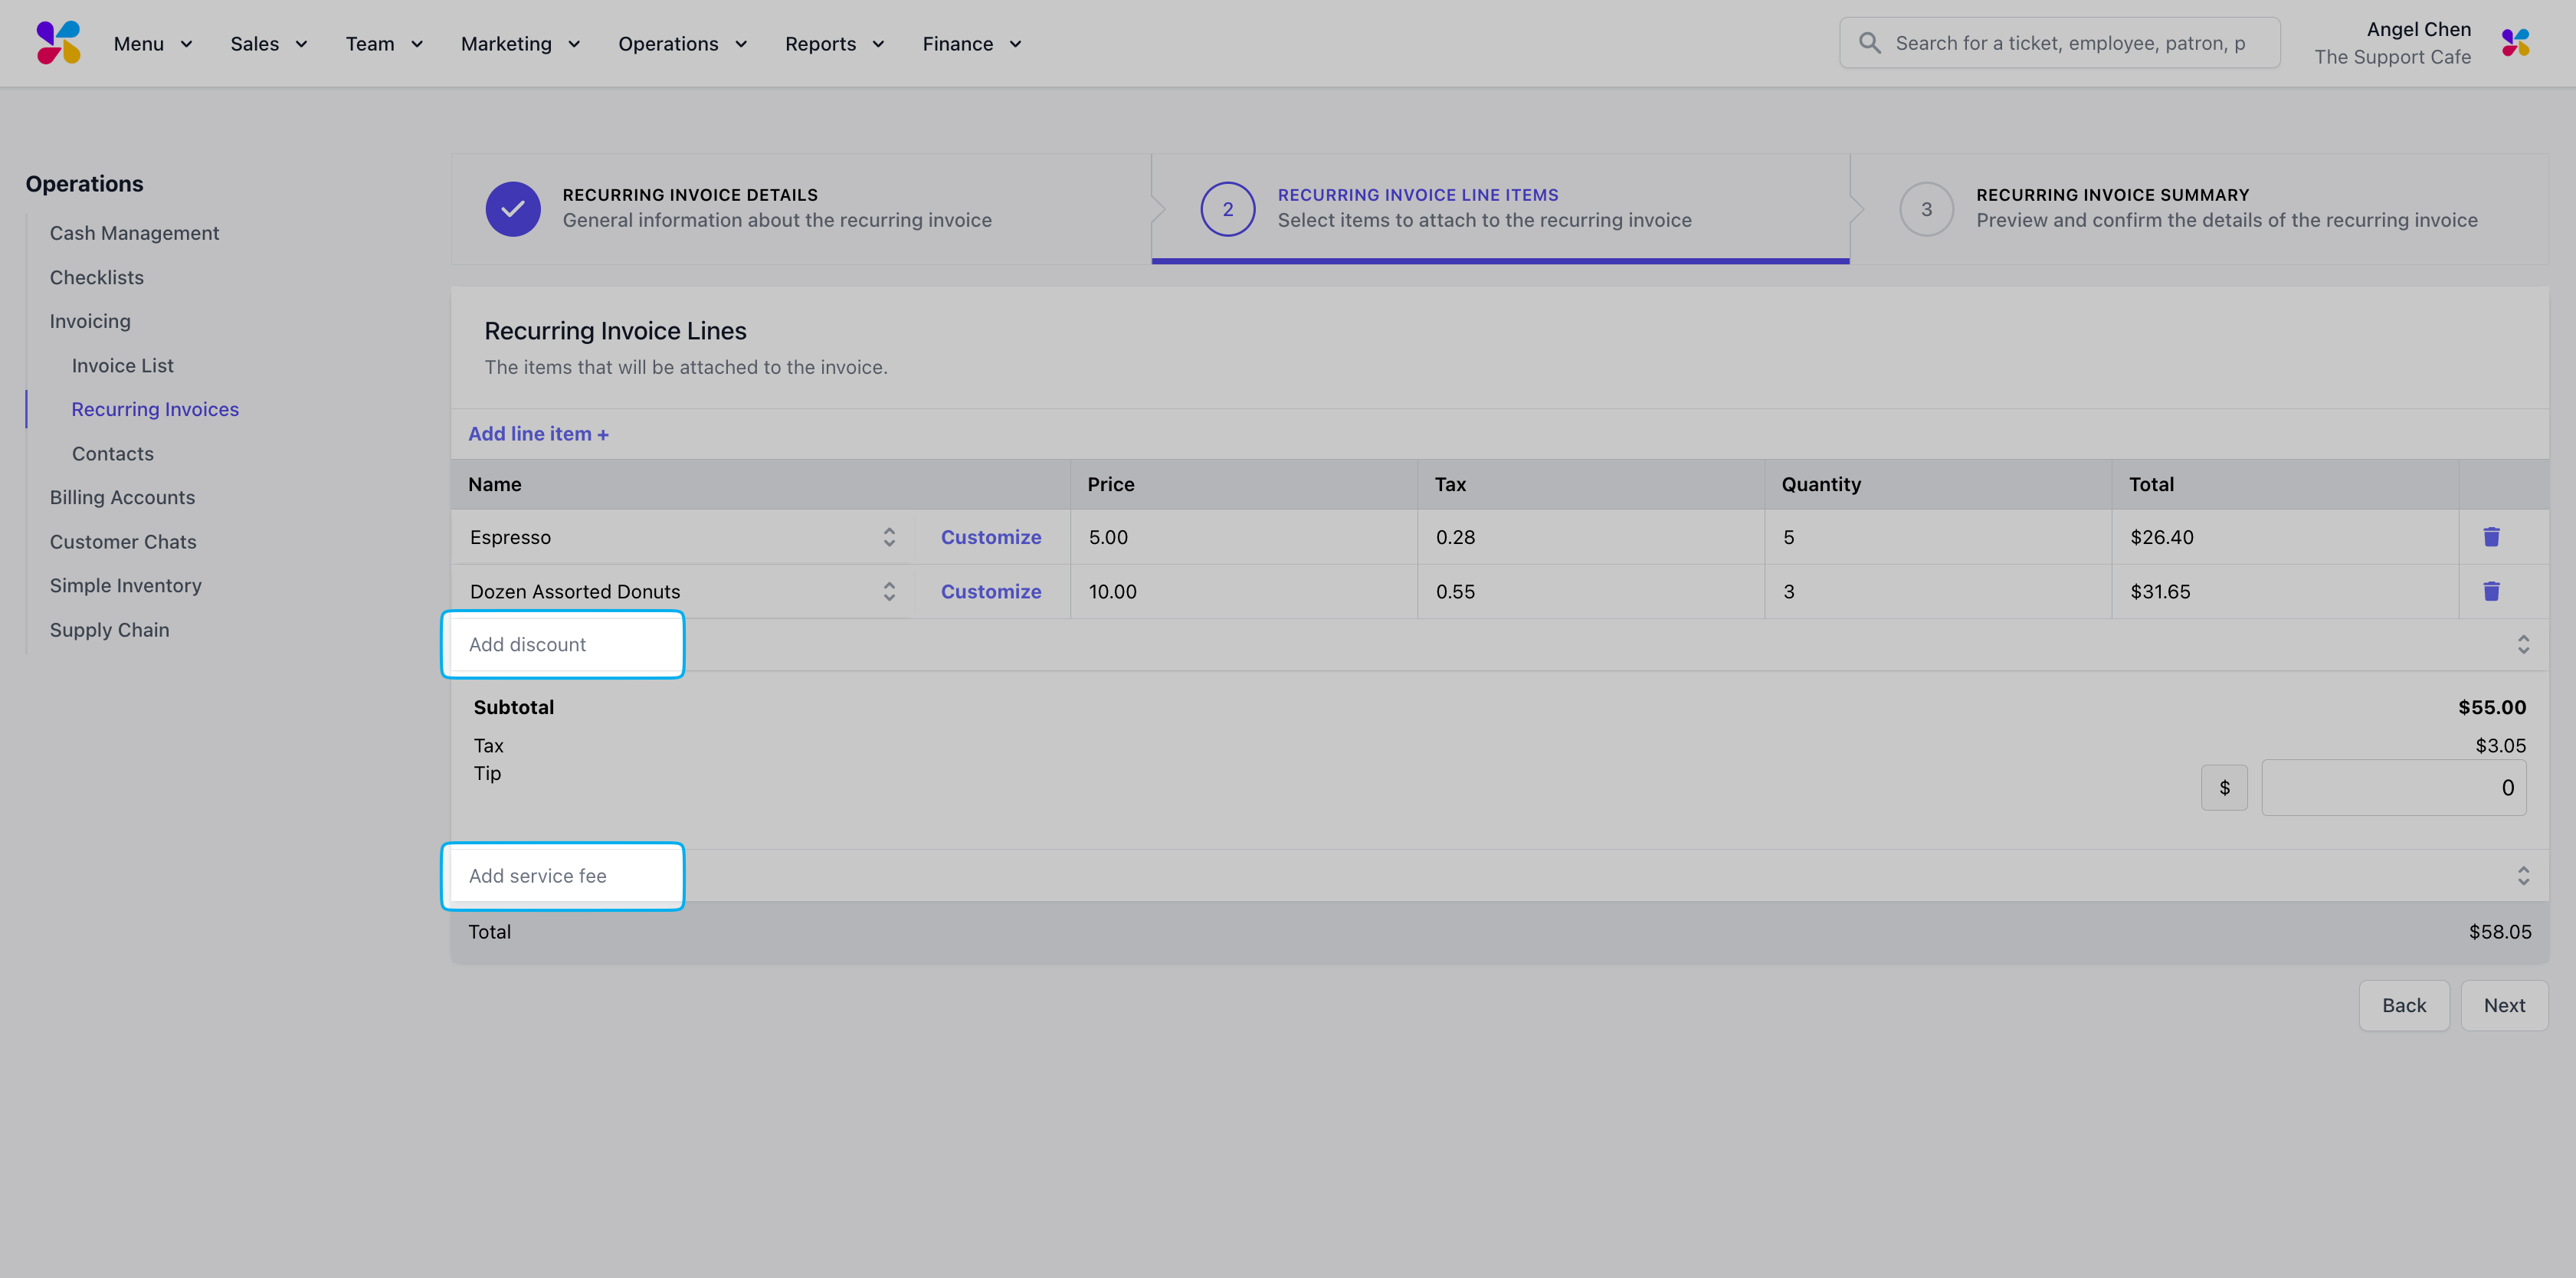
 Add a Discount or Service Fee to the invoice. Use the dropdown to select a pre-existing Discount or Service Fee.
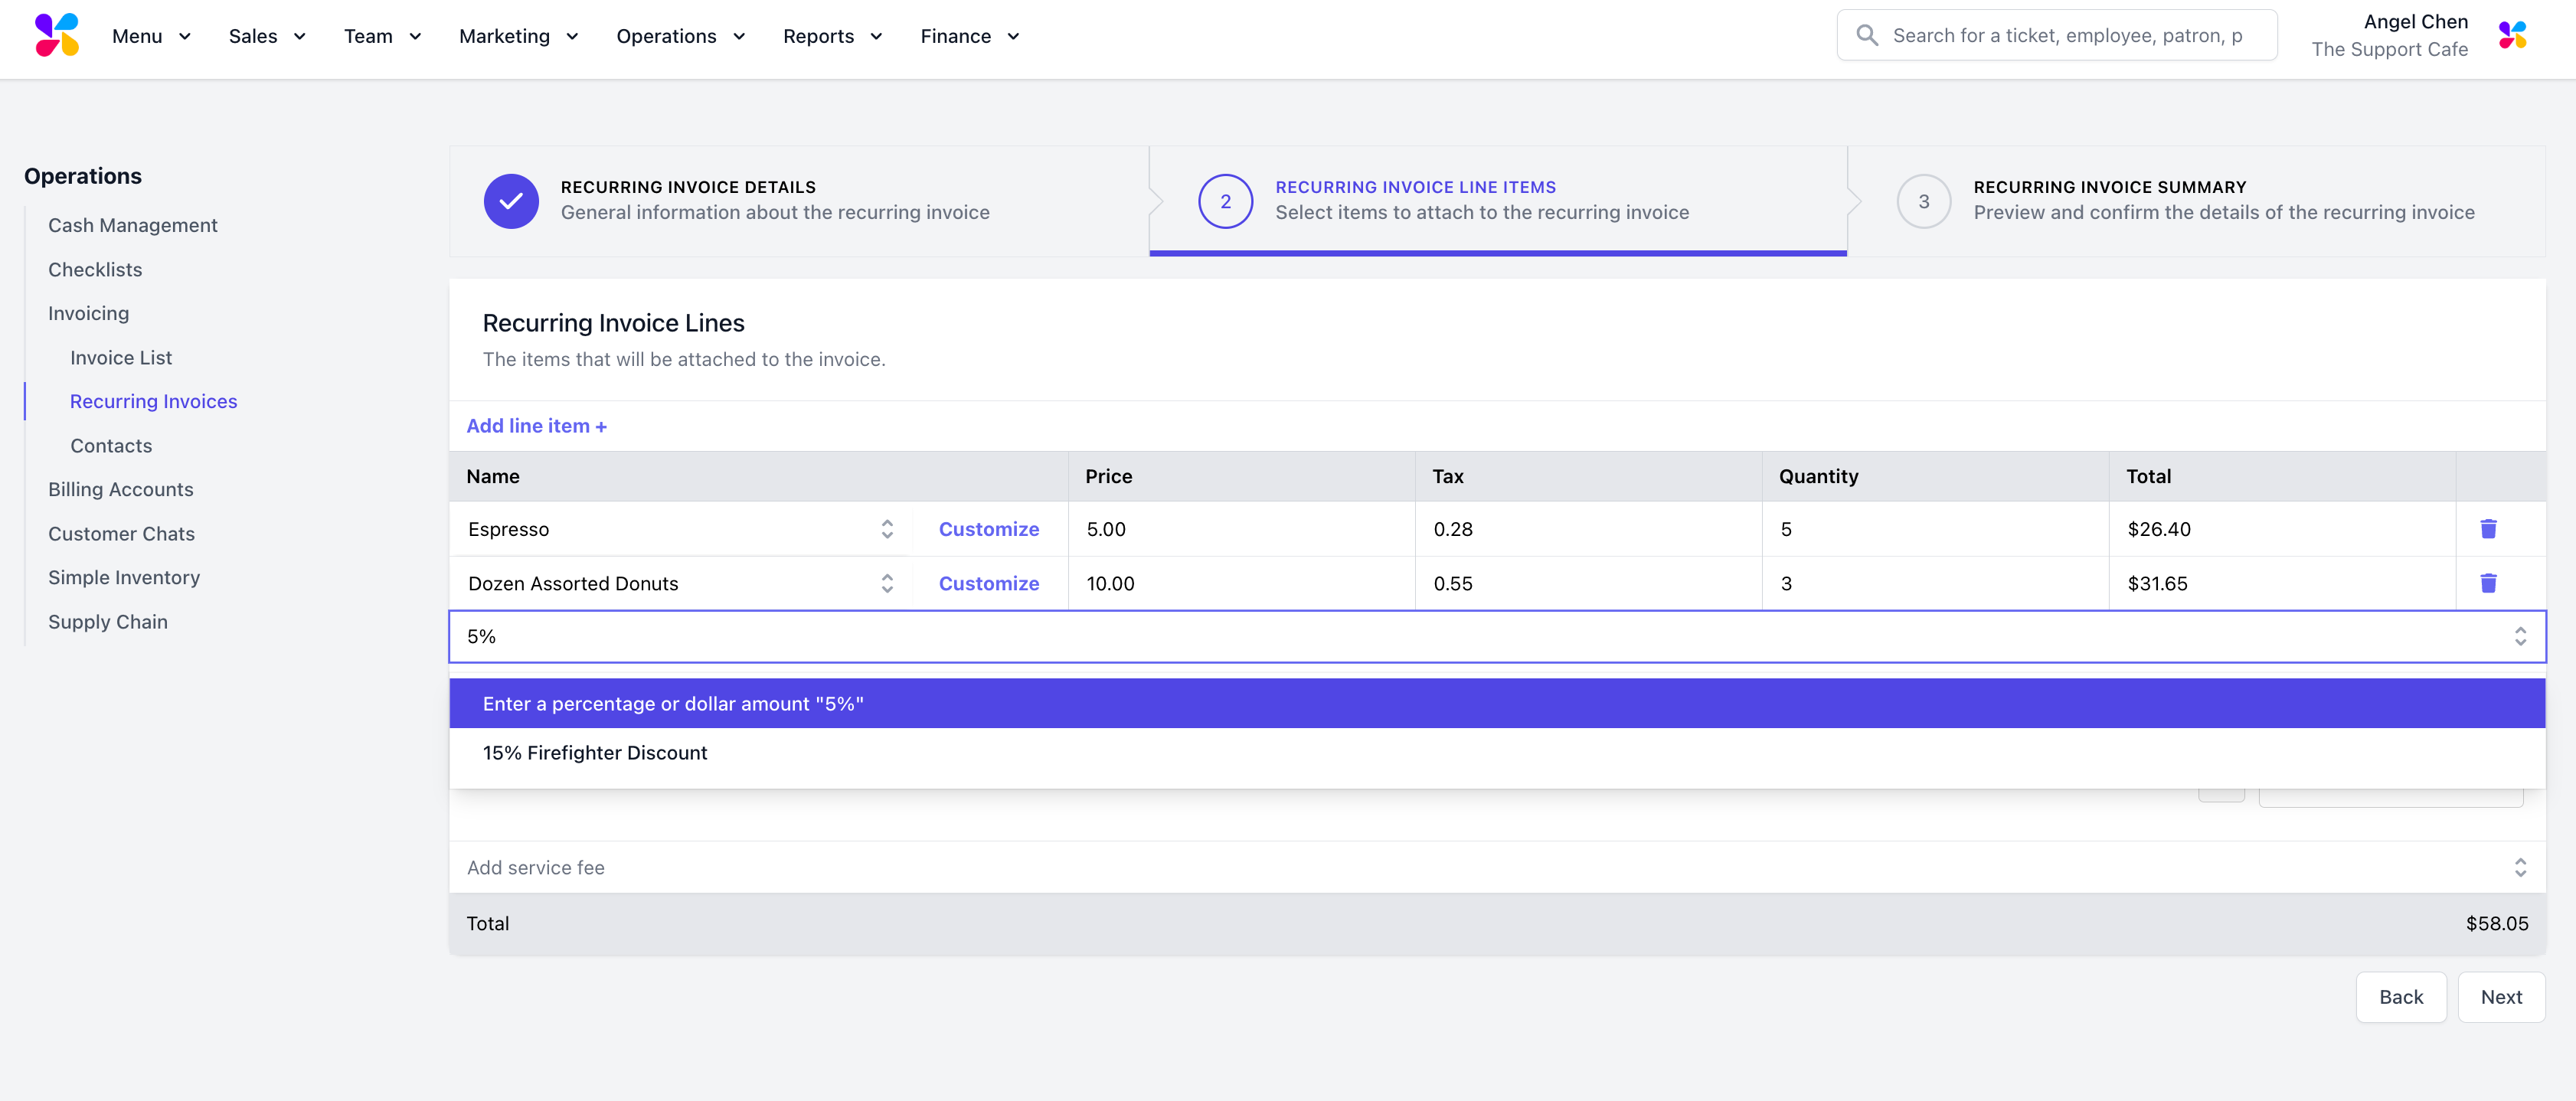
 To apply a **Custom Discount** or **Service Fee**, type in the number and use % to indicate percentage or \$ to indicate dollar amount.
 Add a **Tip** to the invoice. Click on the **\$** button to switch between dollar or percentage and type in the corresponding amount.
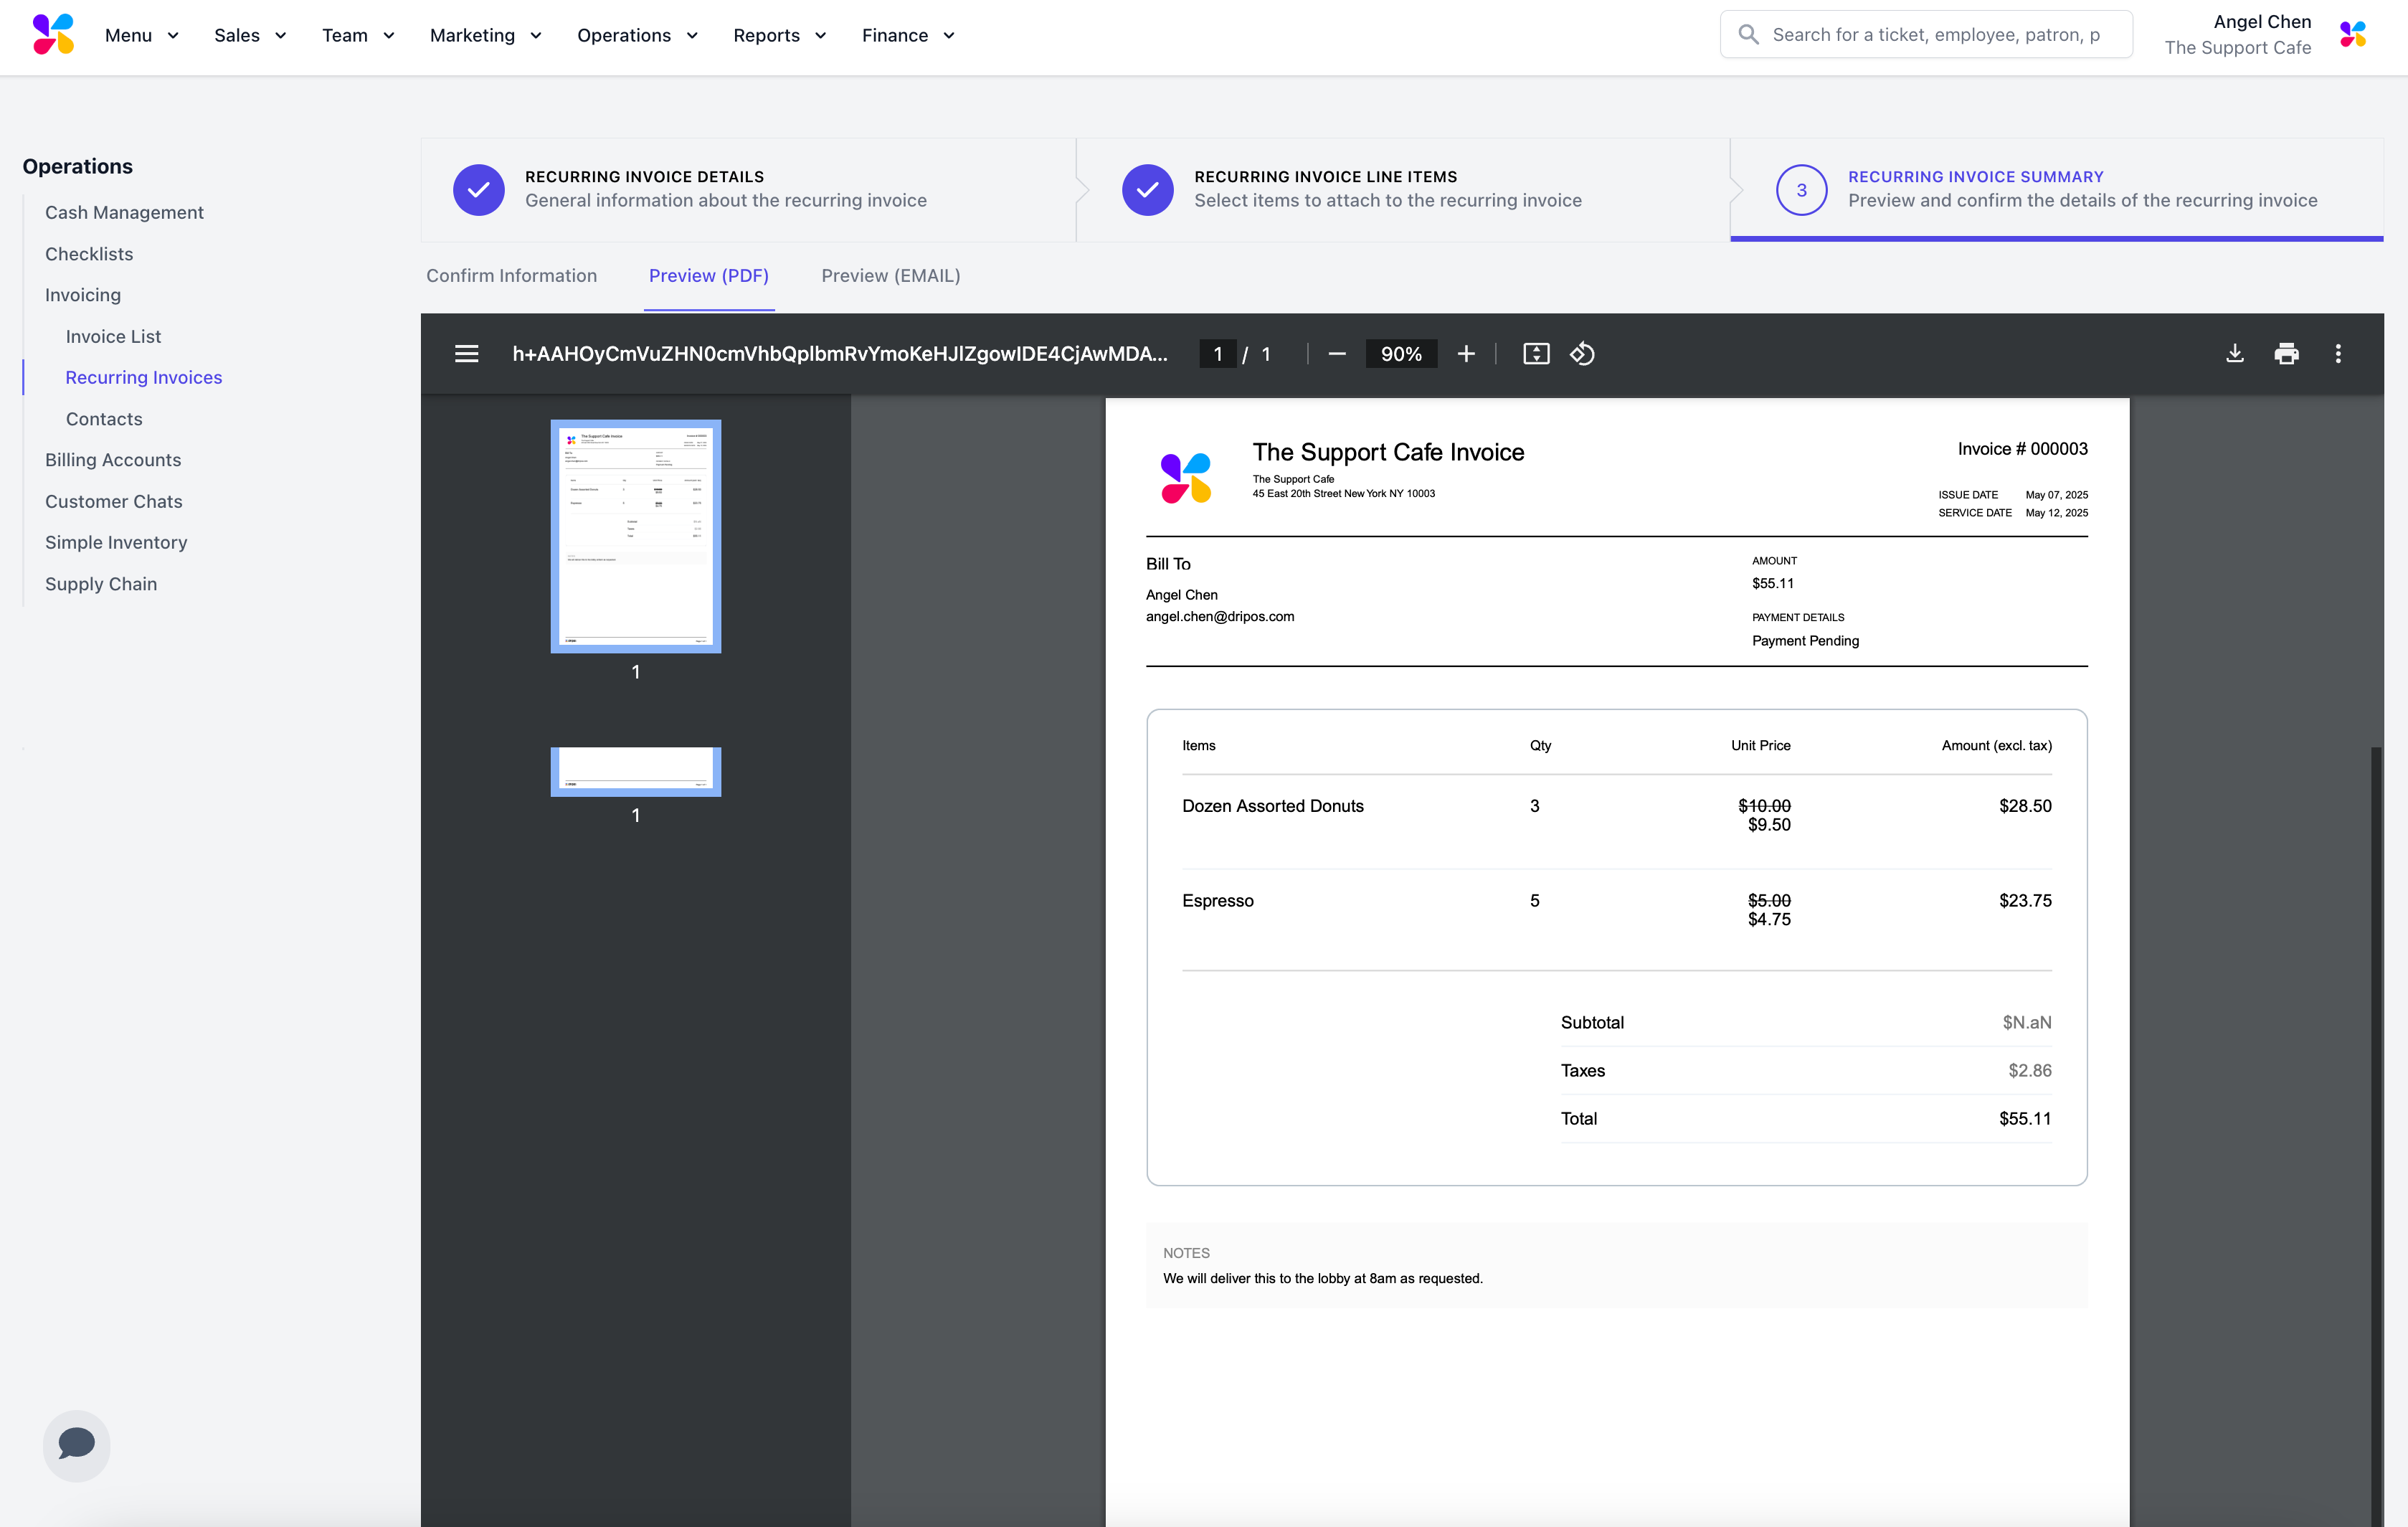
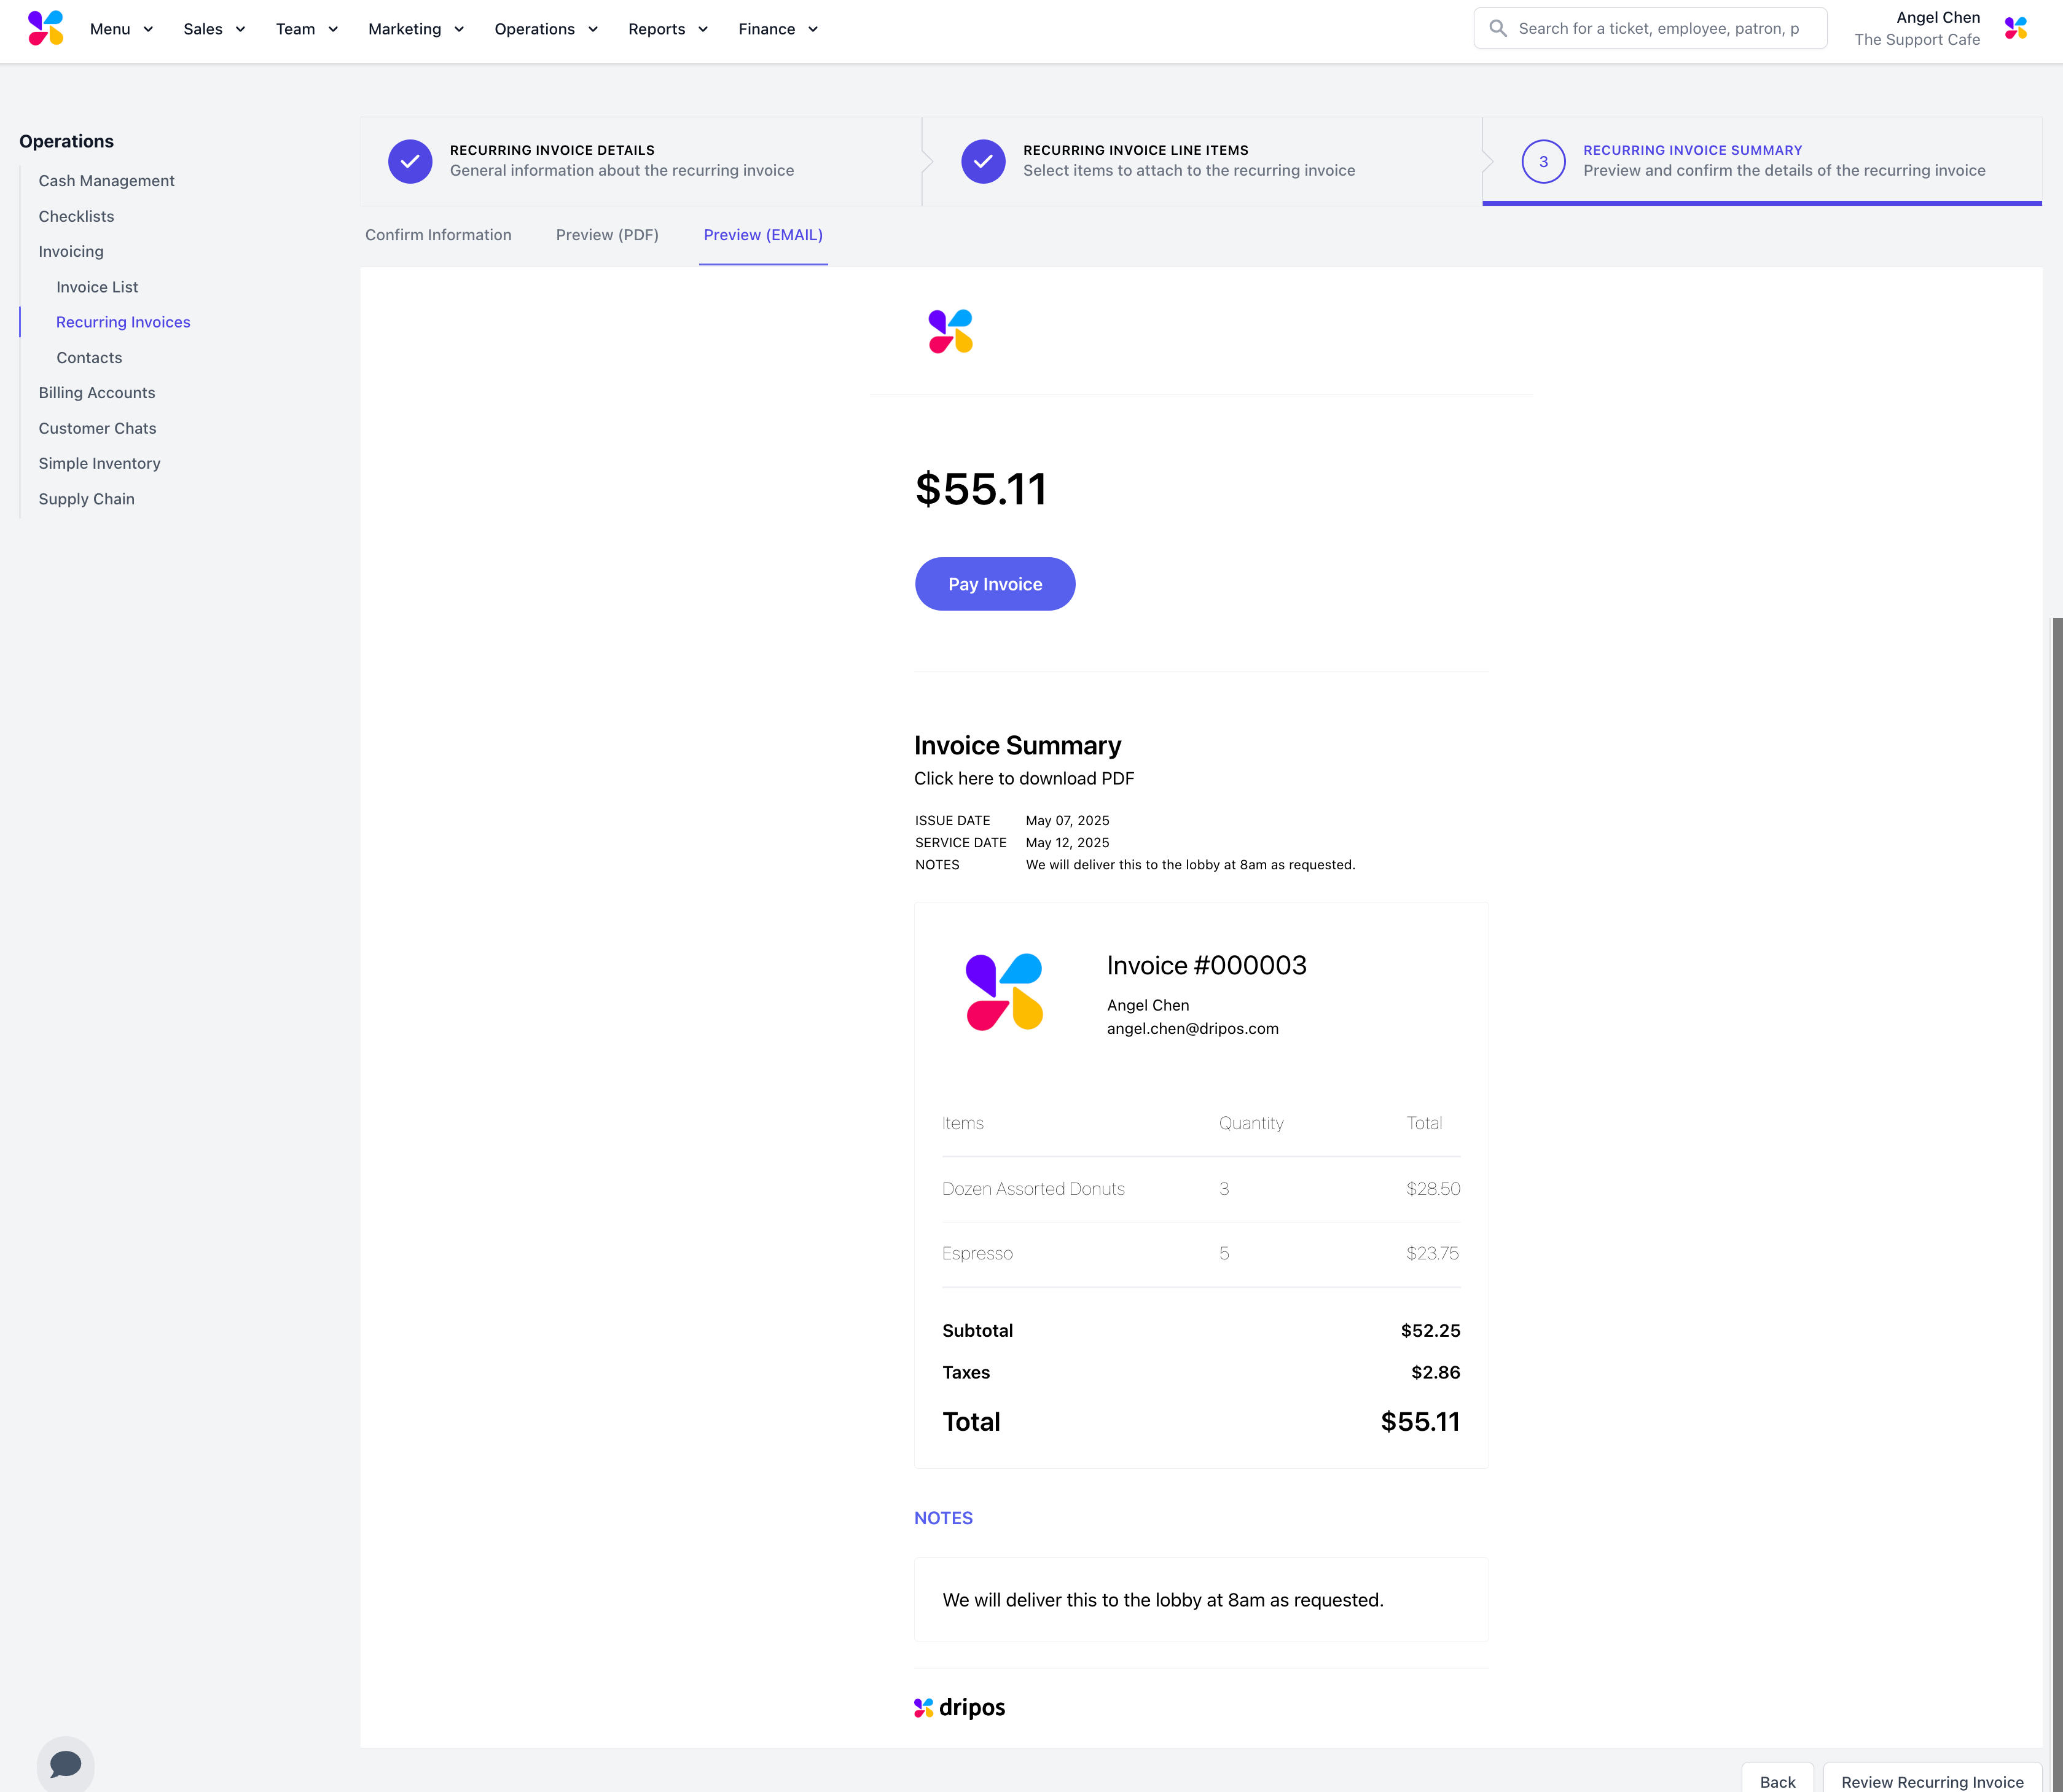
 Confirm the invoice information. Click on the **Preview (PDF)** or **Preview (EMAIL)** tab to see the exact invoice the customer will receive.
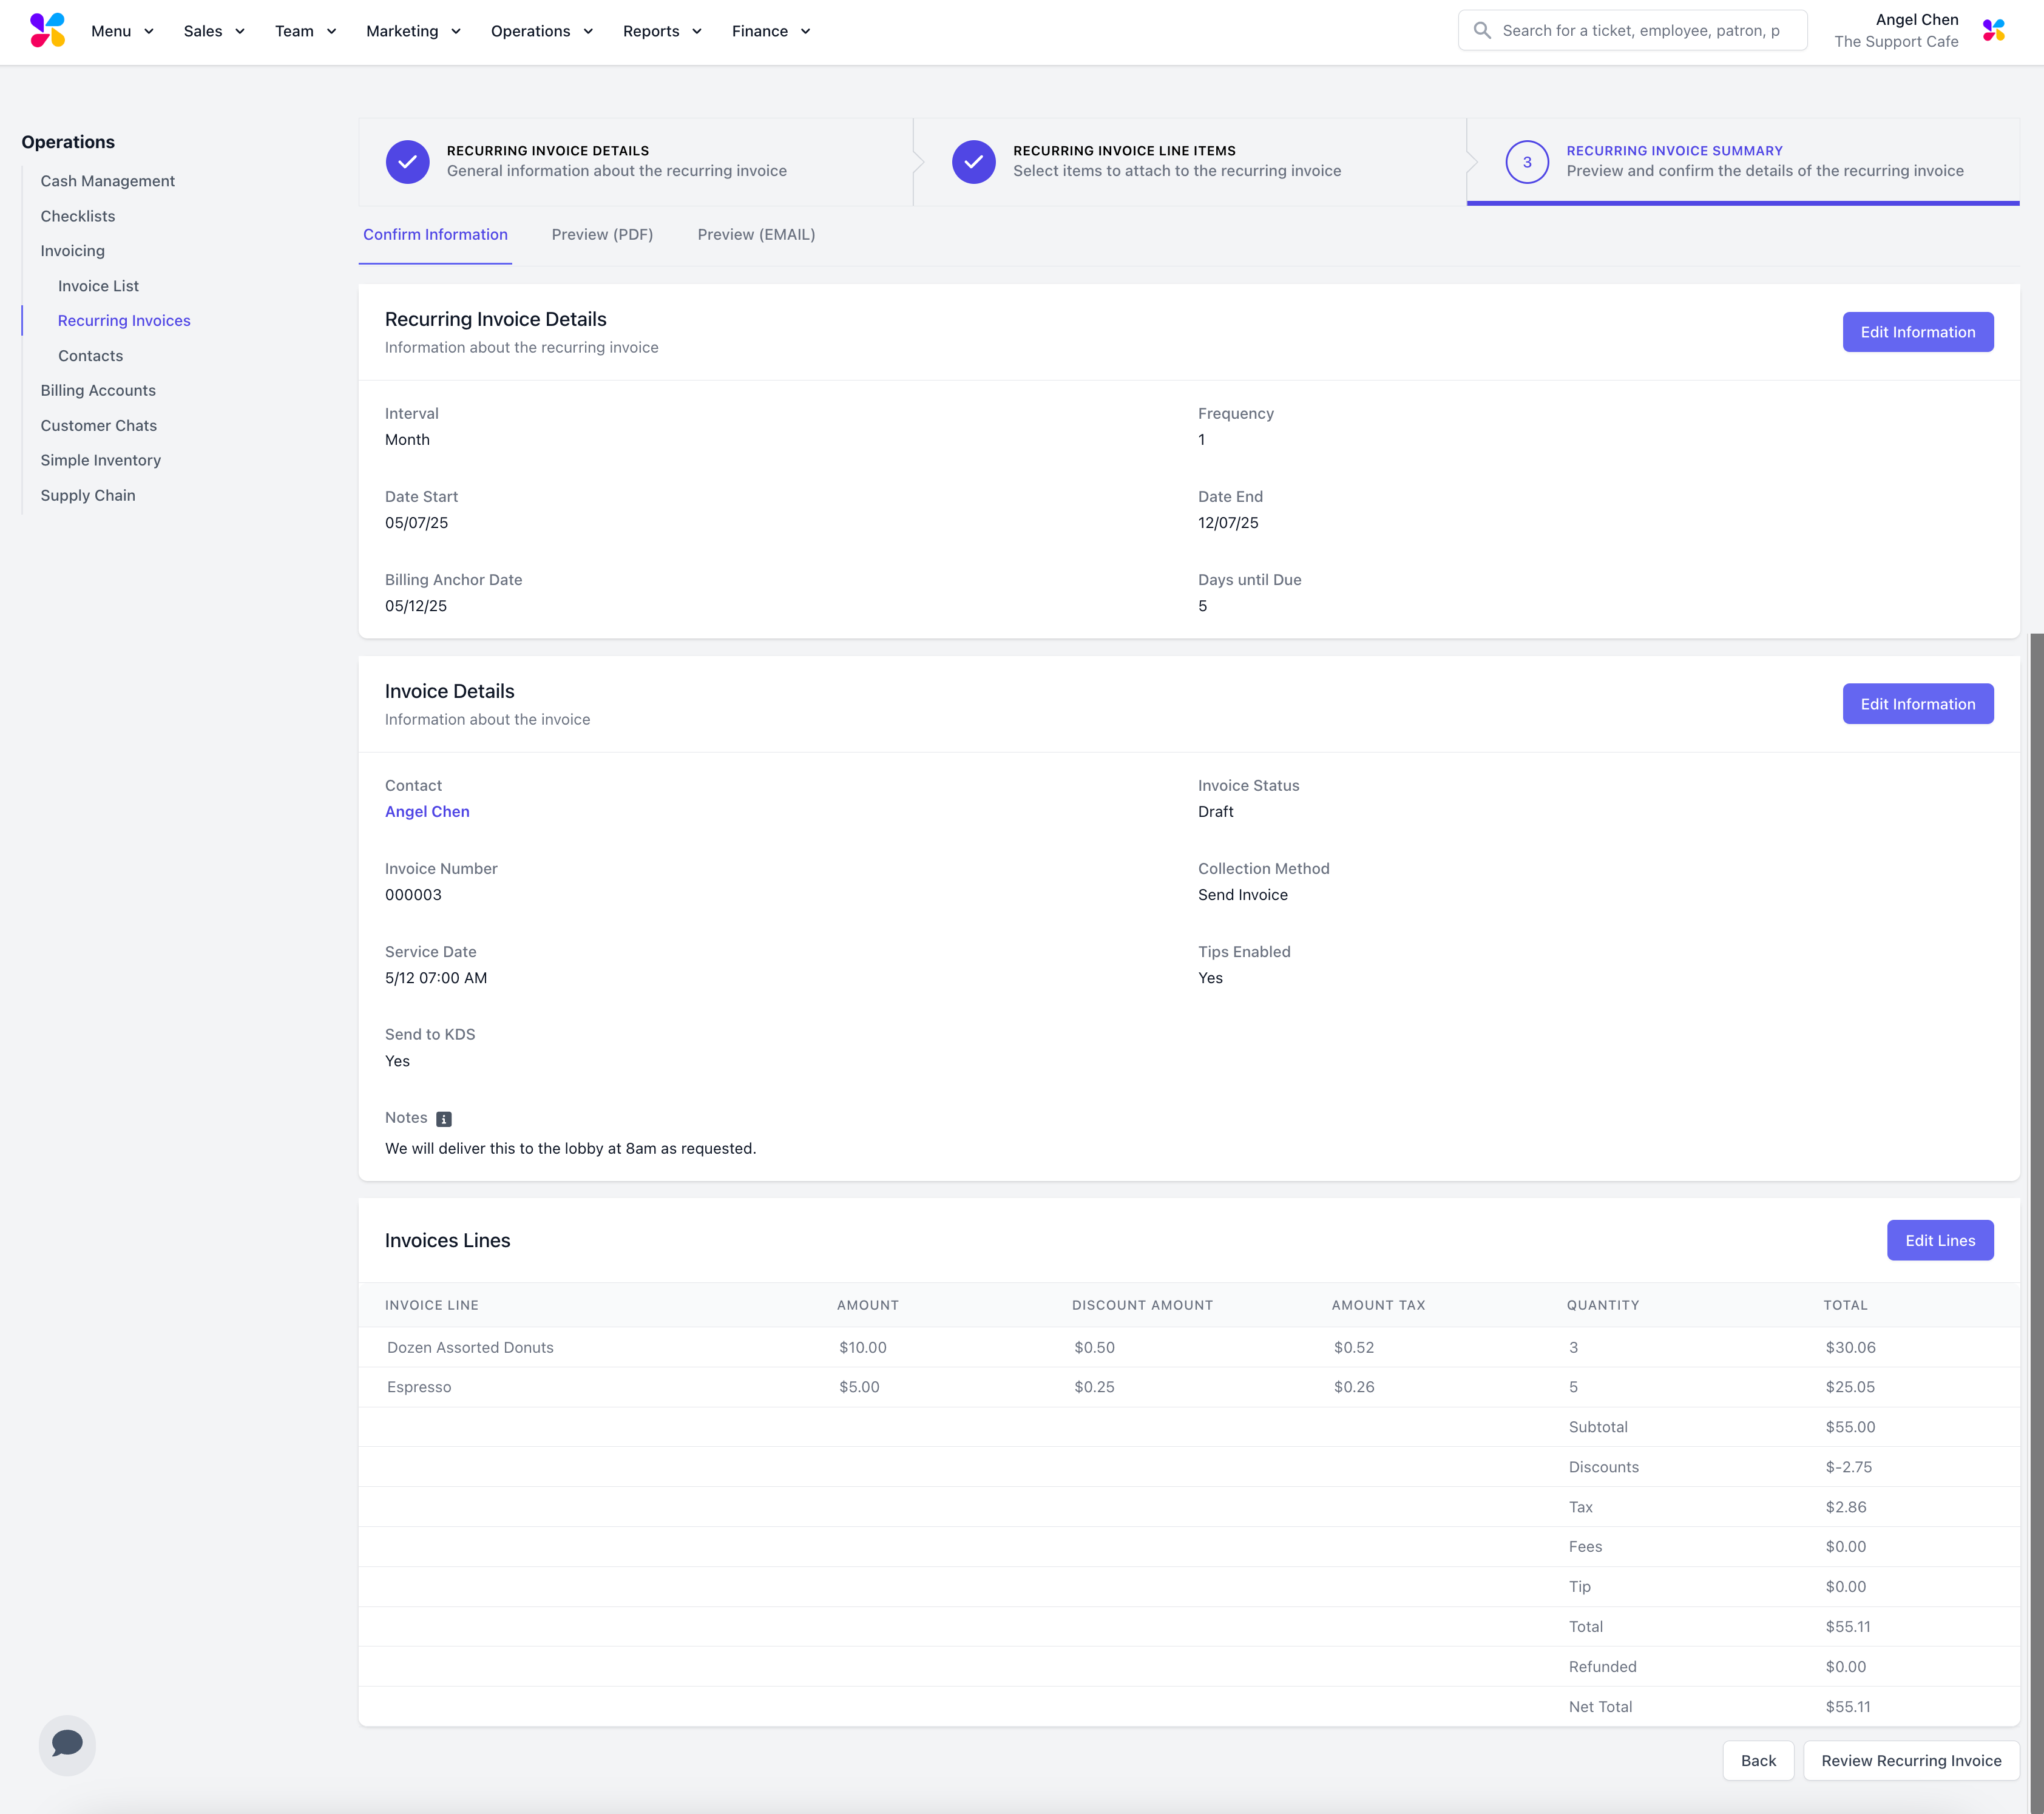
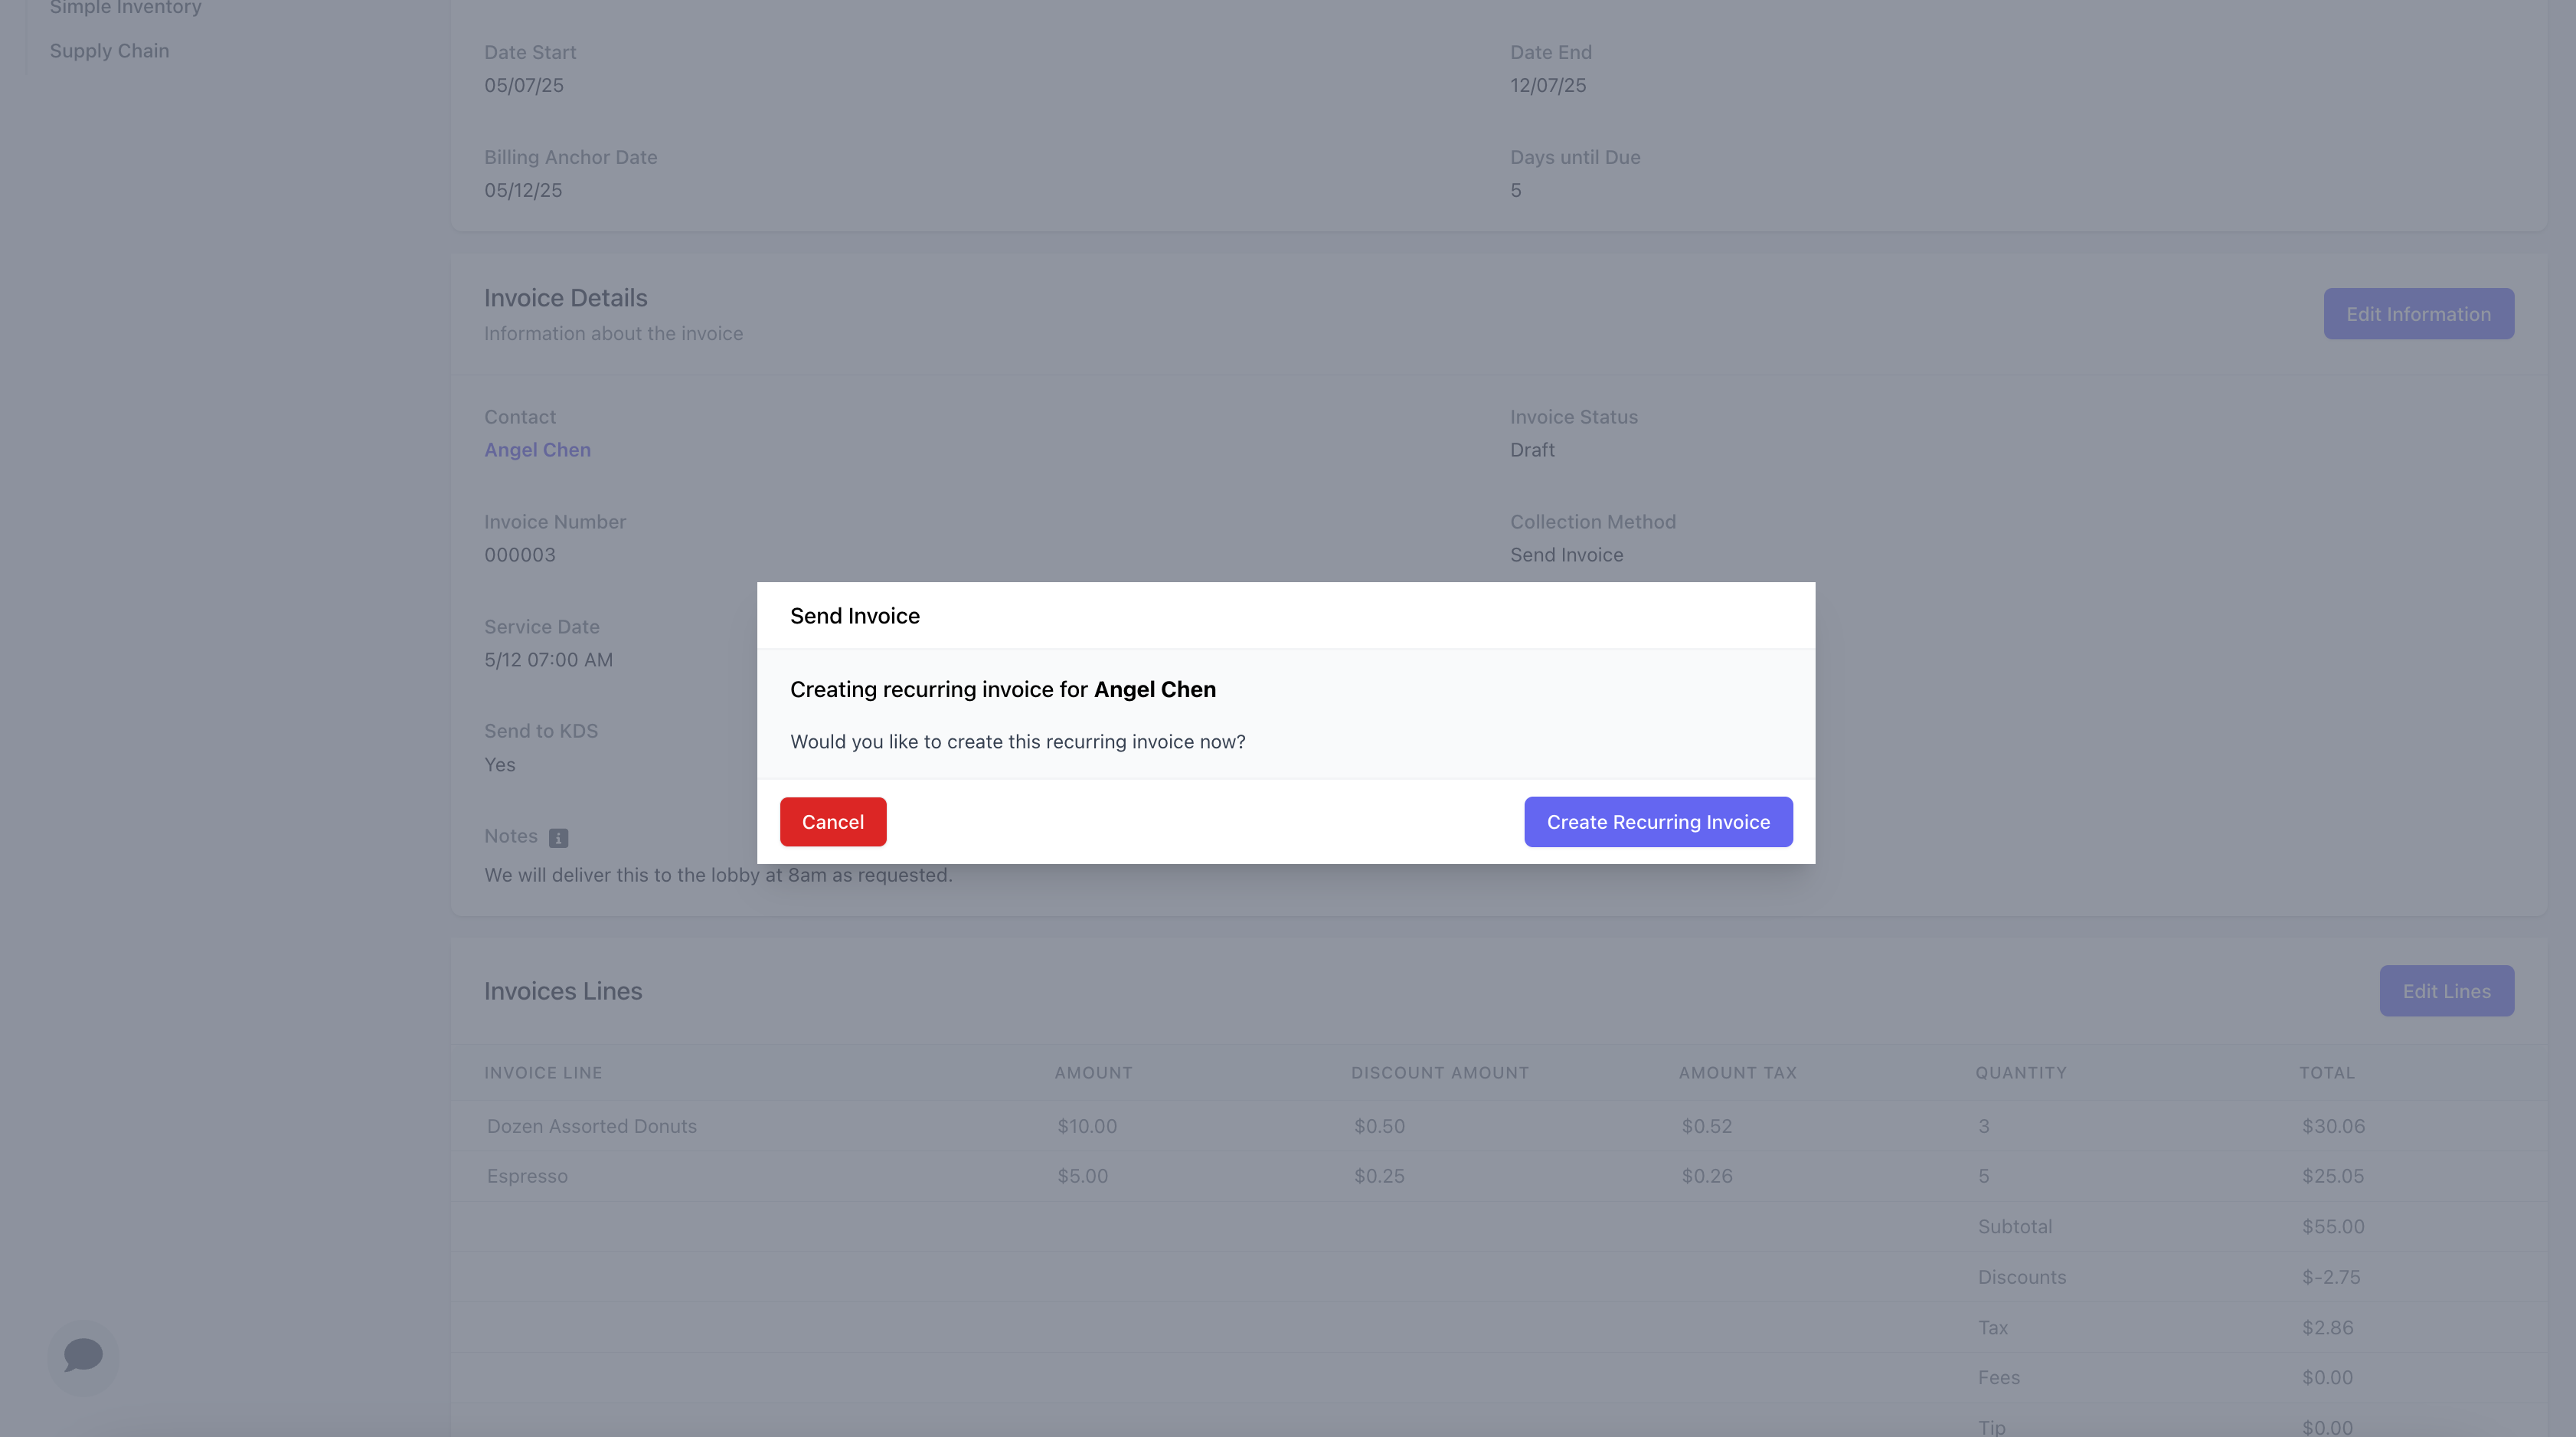
 Click **Review Invoice** and **Create Recurring Invoice**
 ***
## Manage Invoice Settings
Update relevant invoice settings in the Dashboard
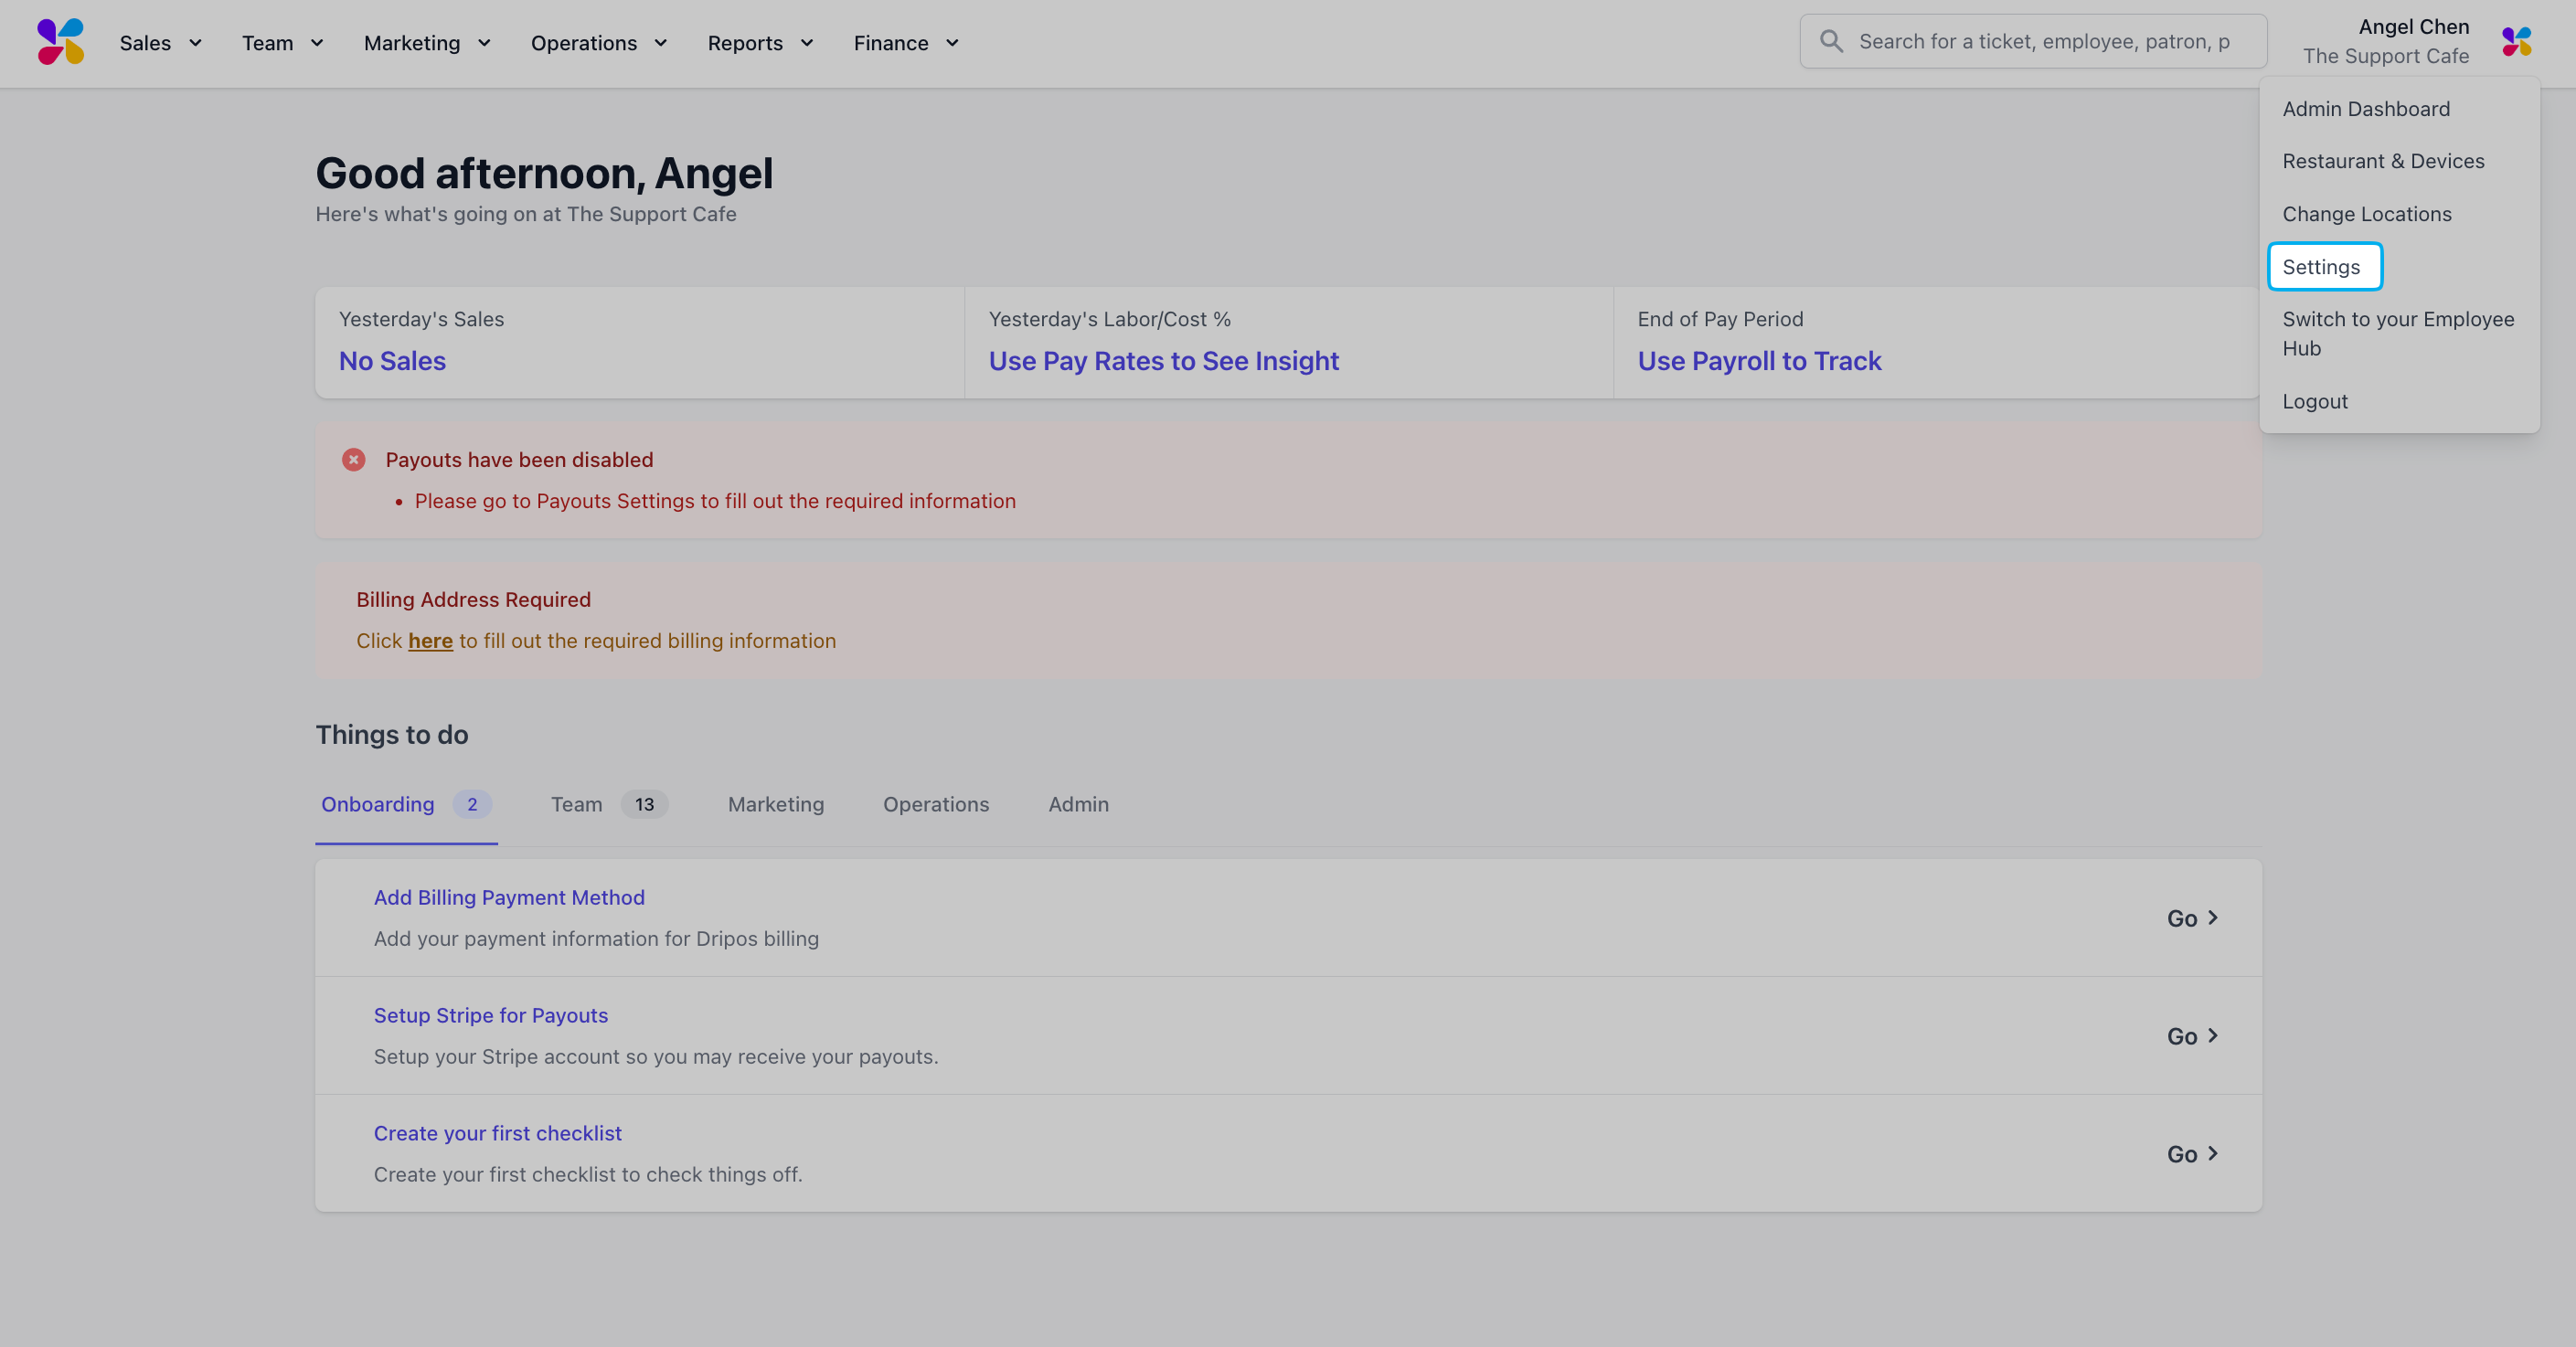
Log in to the Web Dashboard and click on the Dripos icon in the top right corner to access Settings
***
## Manage Invoice Settings
Update relevant invoice settings in the Dashboard
Log in to the Web Dashboard and click on the Dripos icon in the top right corner to access Settings
 Navigate to the Invoices tab and click Edit
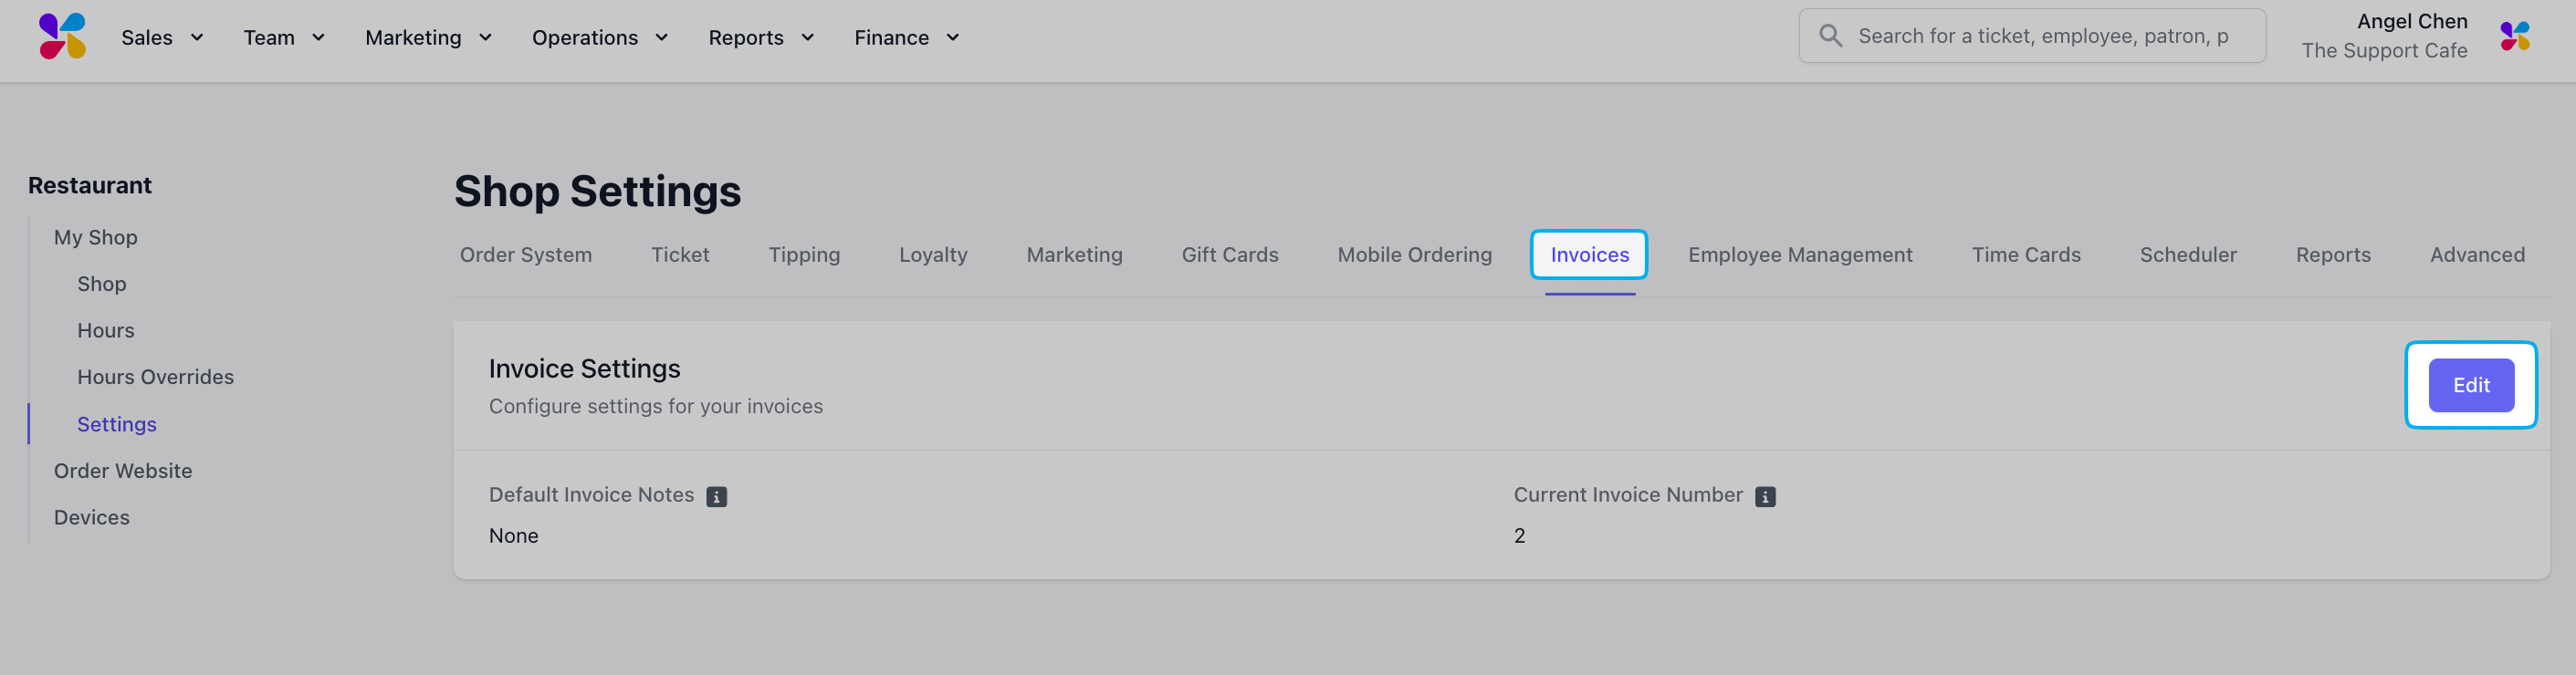 Update Invoice Settings and hit Save.
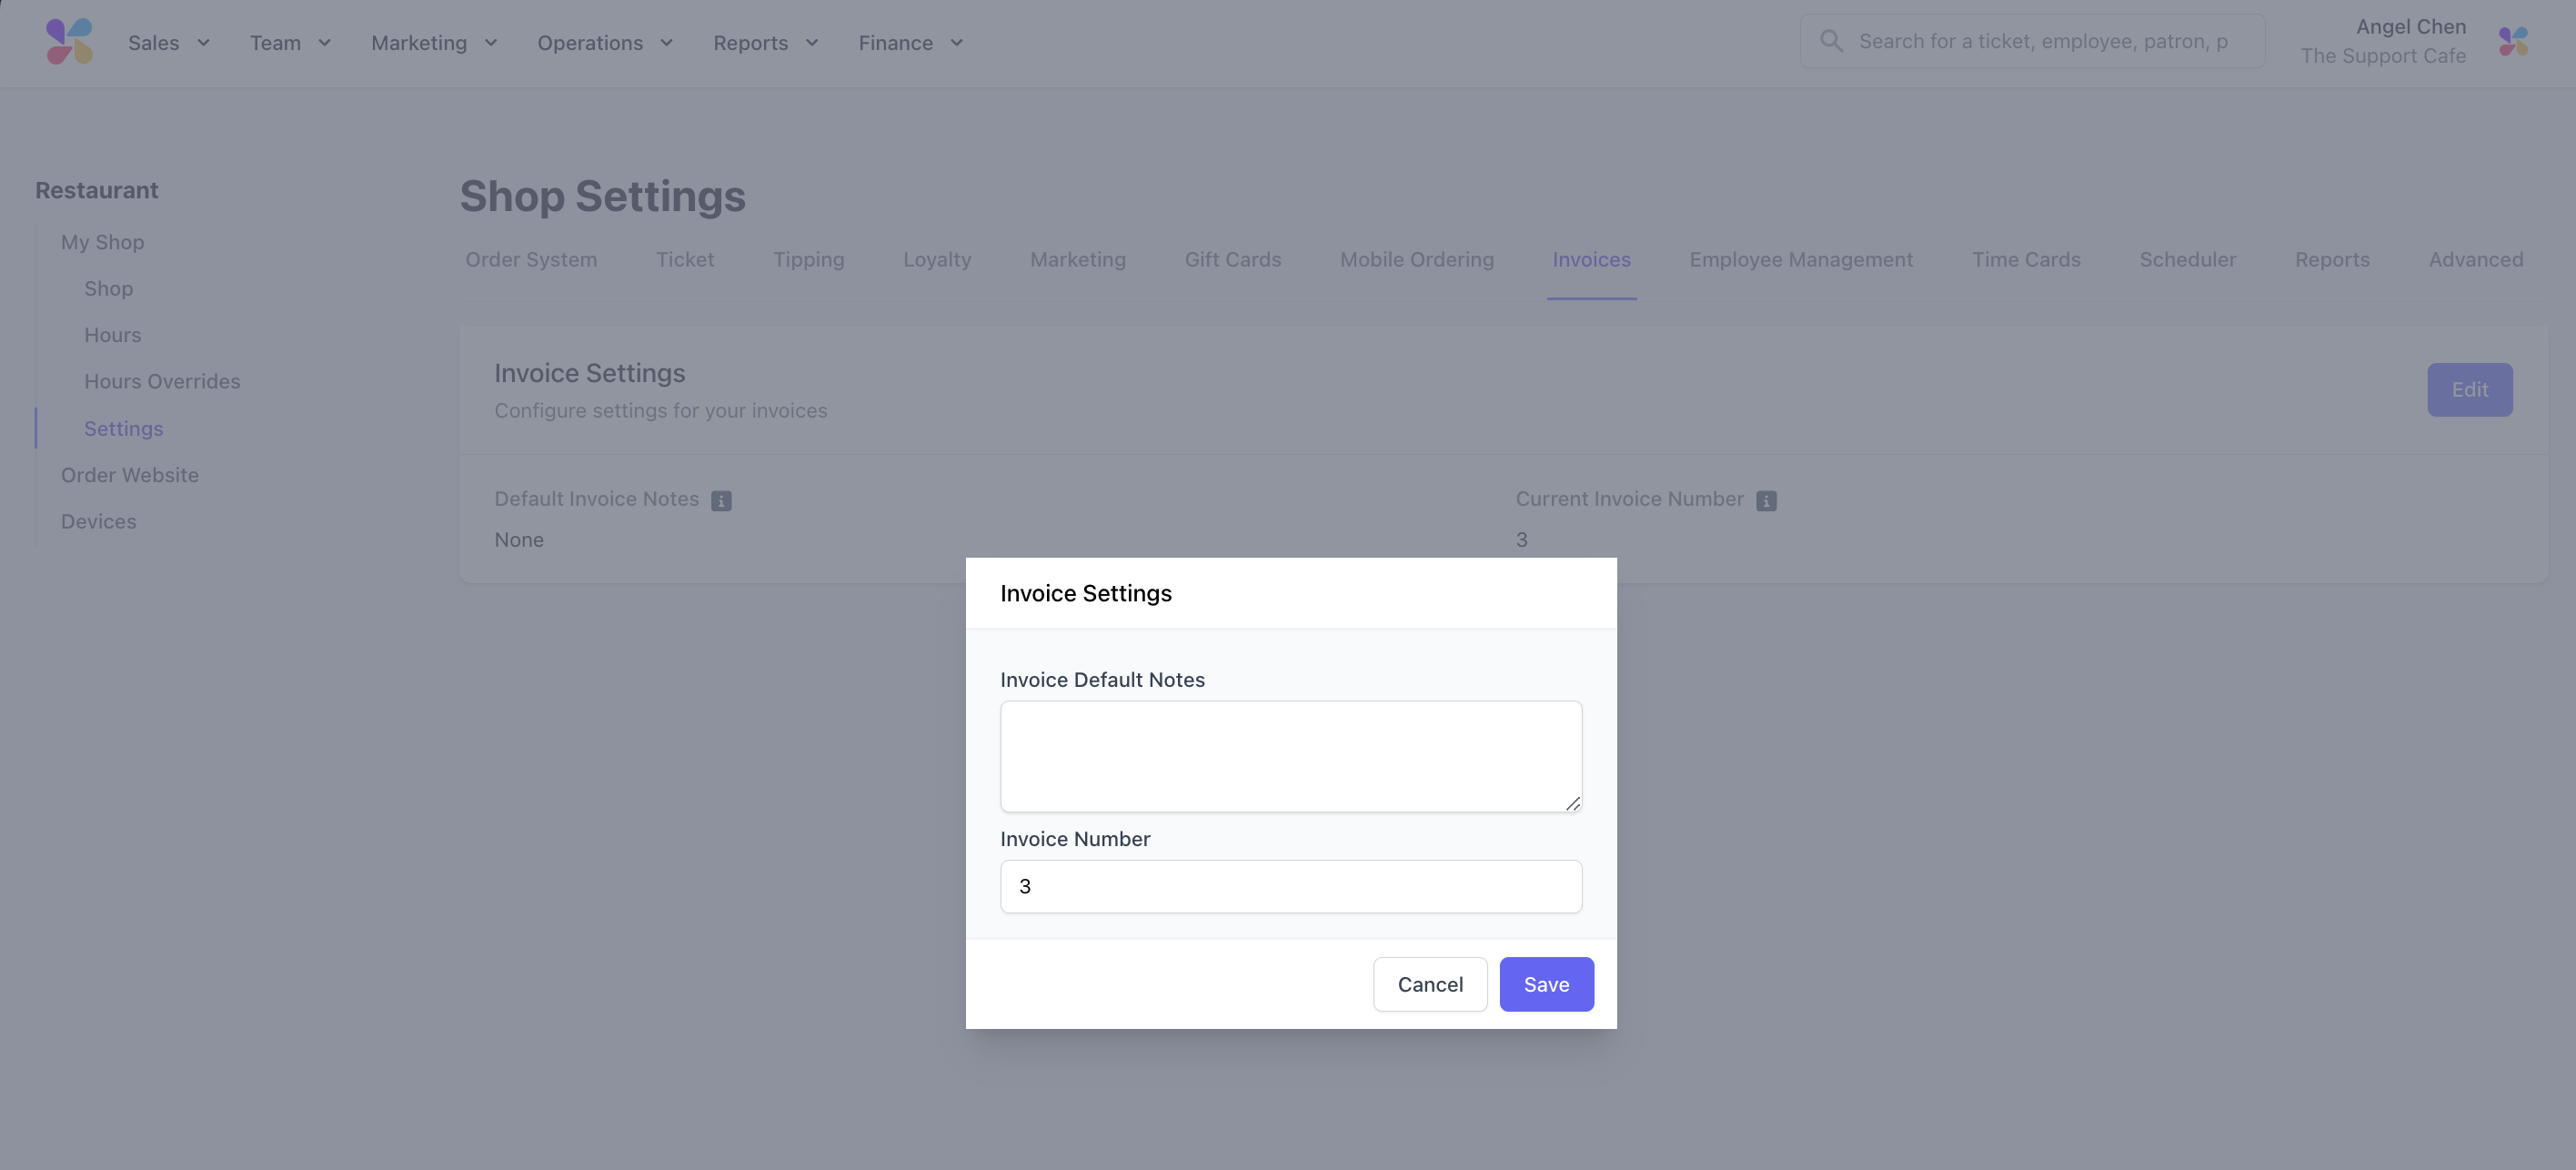 > **Default Invoice Notes**: Default note that will be autofilled for new invoices
> **Current Invoice Number**: The next invoice will be created with this number
> **Default Invoice Notes**: Default note that will be autofilled for new invoices
> **Current Invoice Number**: The next invoice will be created with this number