> ## Documentation Index
> Fetch the complete documentation index at: https://support.dripos.com/llms.txt
> Use this file to discover all available pages before exploring further.
# Saved Tickets
> Use saved tickets to extend checkout on the POS
Creating saved tickets on the Dripos Point of Sale allows you to add information to a transaction without having to check out immediately. This feature is useful for a variety of workflows, such as drive-thrus, call-in or scheduled orders, and even keeping tabs.
With saved tickets, you can initially add products to a ticket and then conveniently access the ticket to check out and pay it off whenever needed.
## Create Saved Tickets
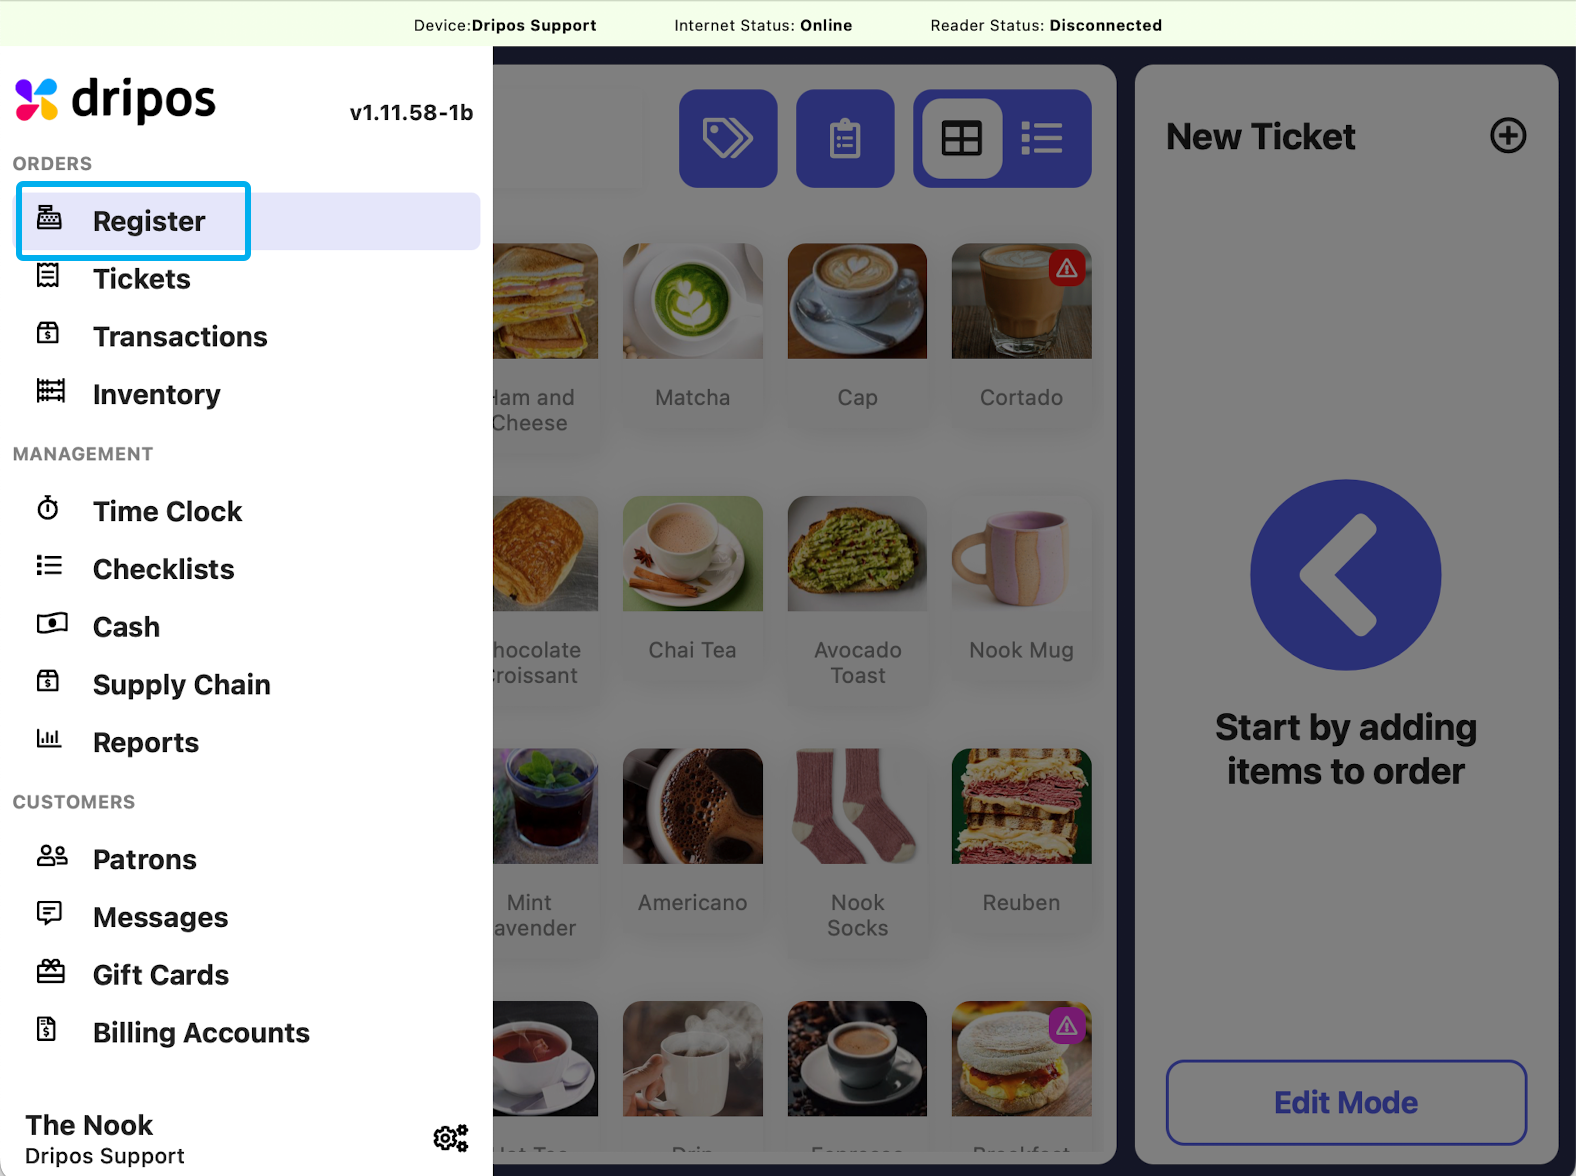
Navigate to the **POS,** press the **tribar** in the upper left hand corner and select **Register**
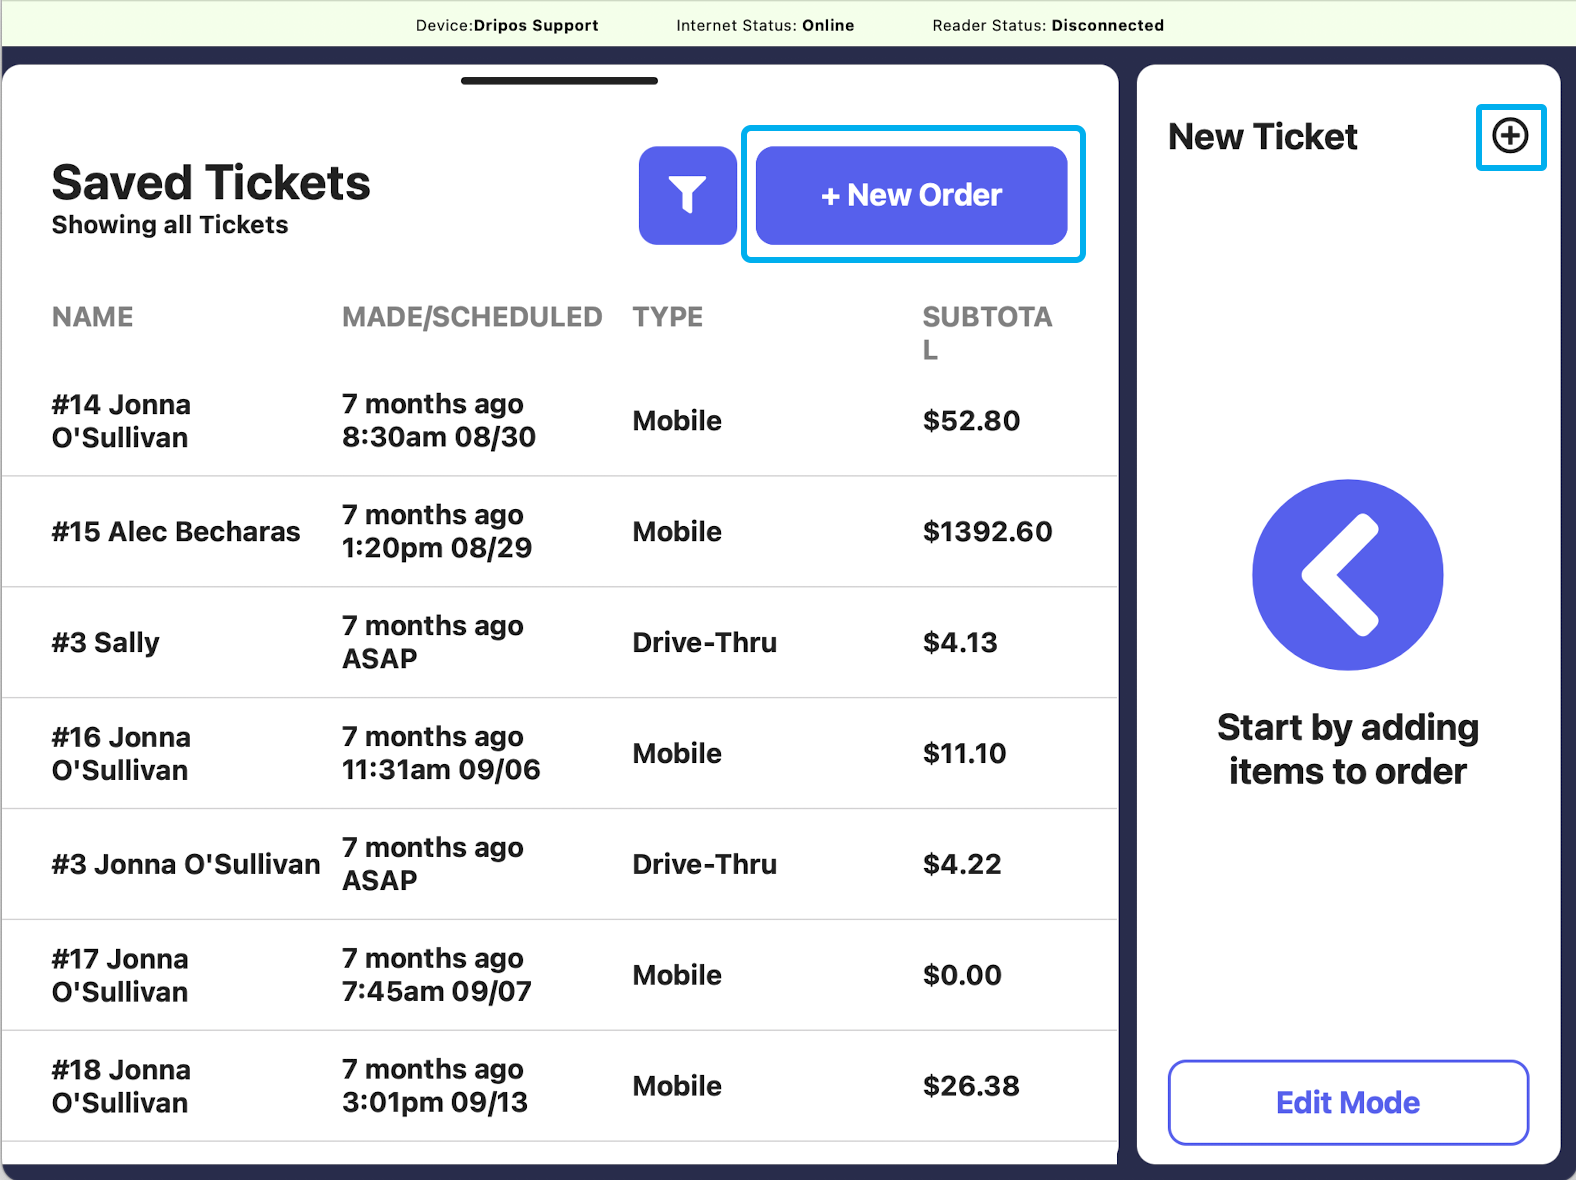
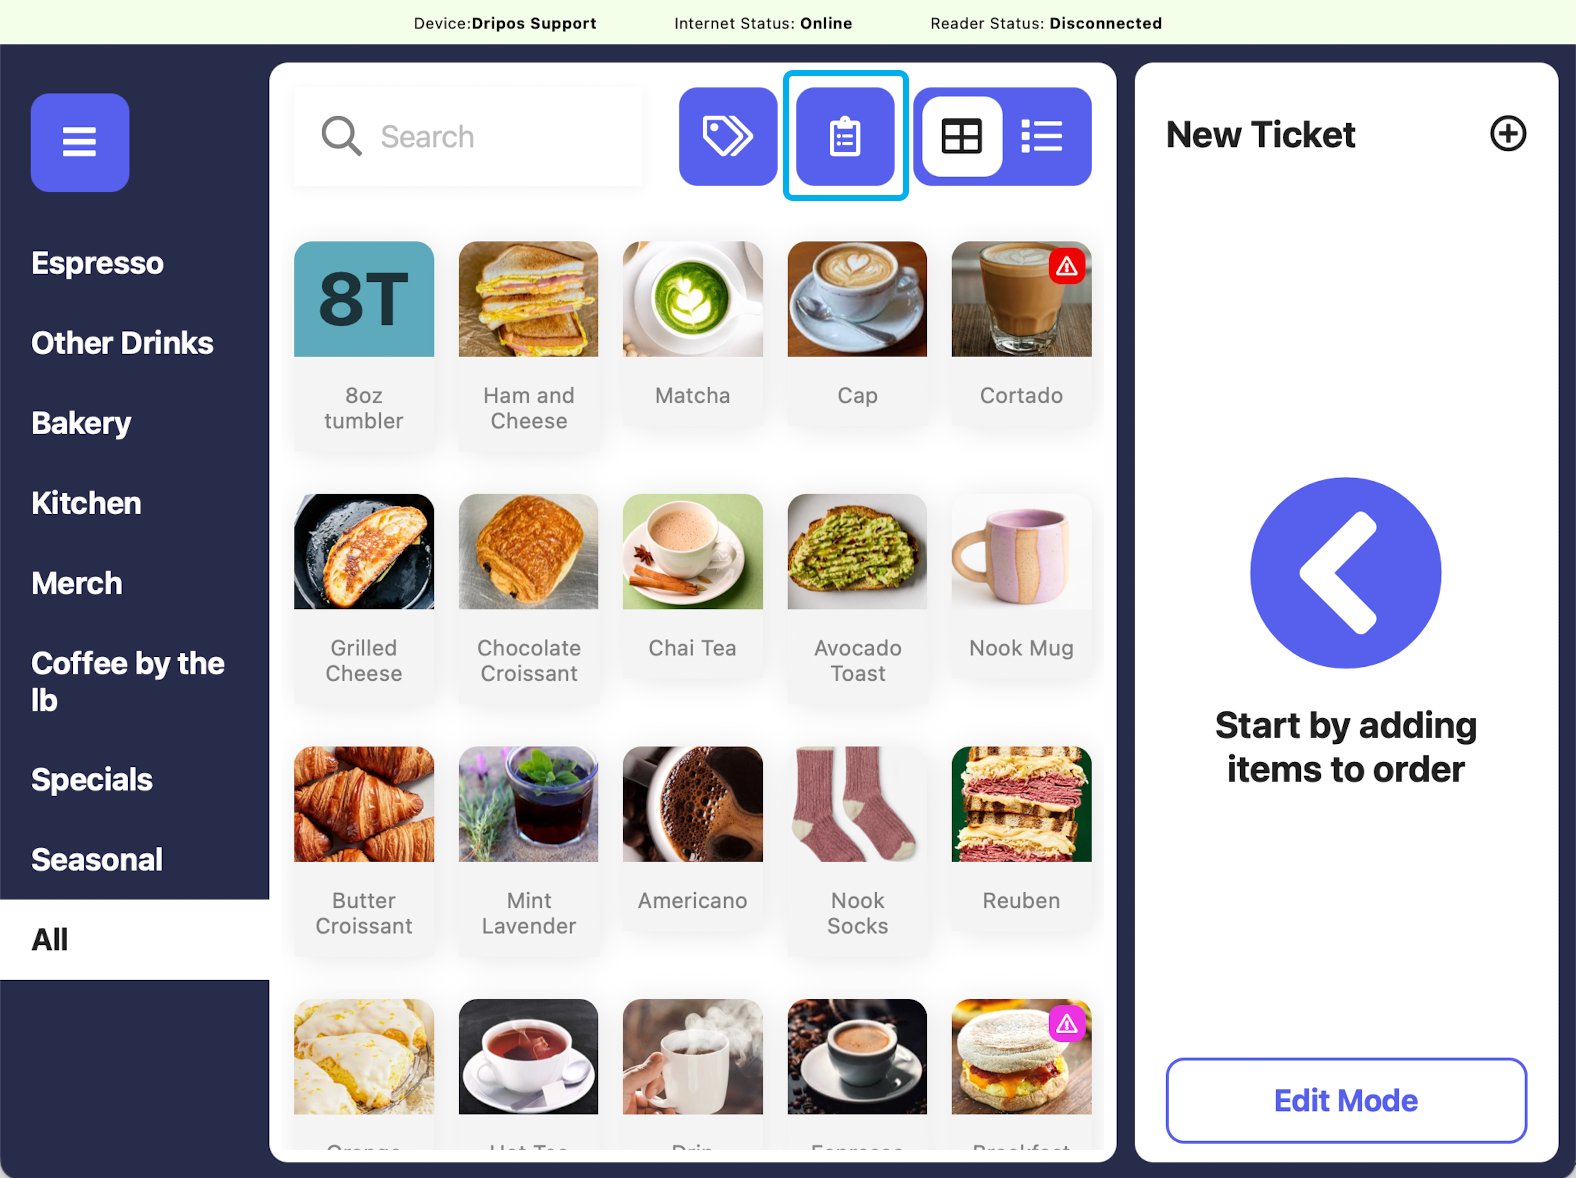
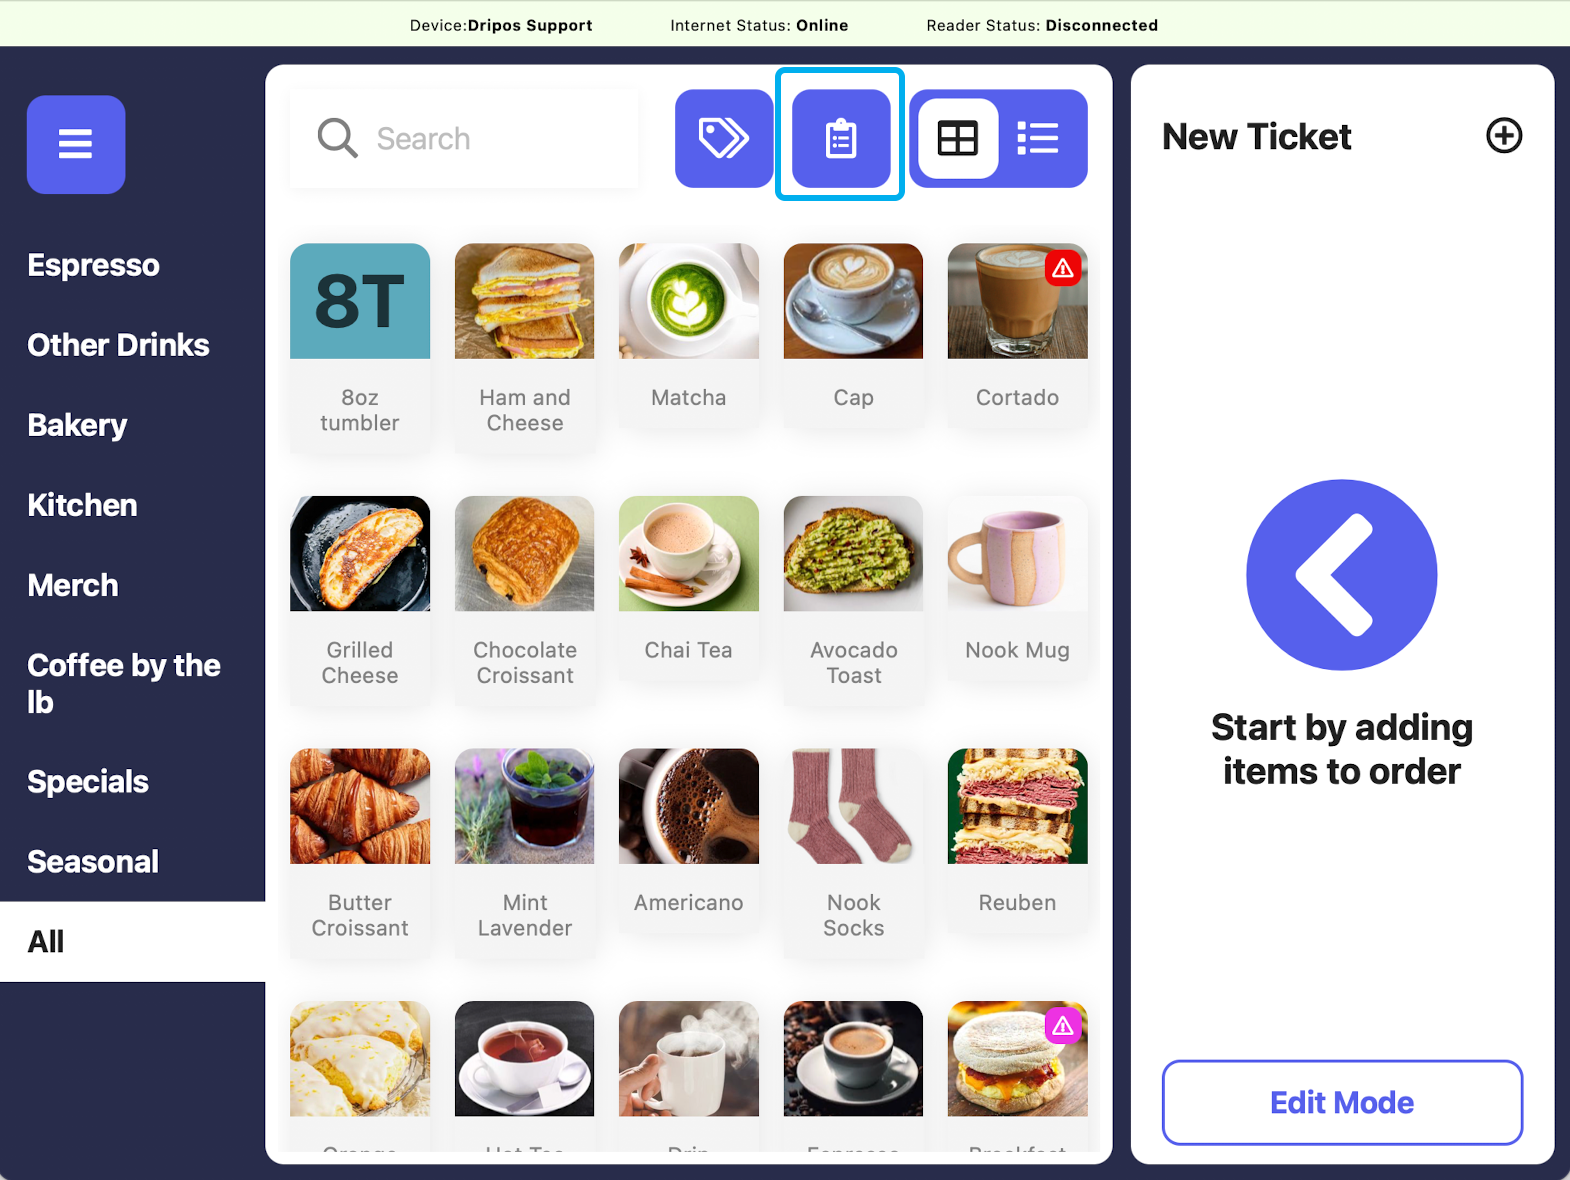
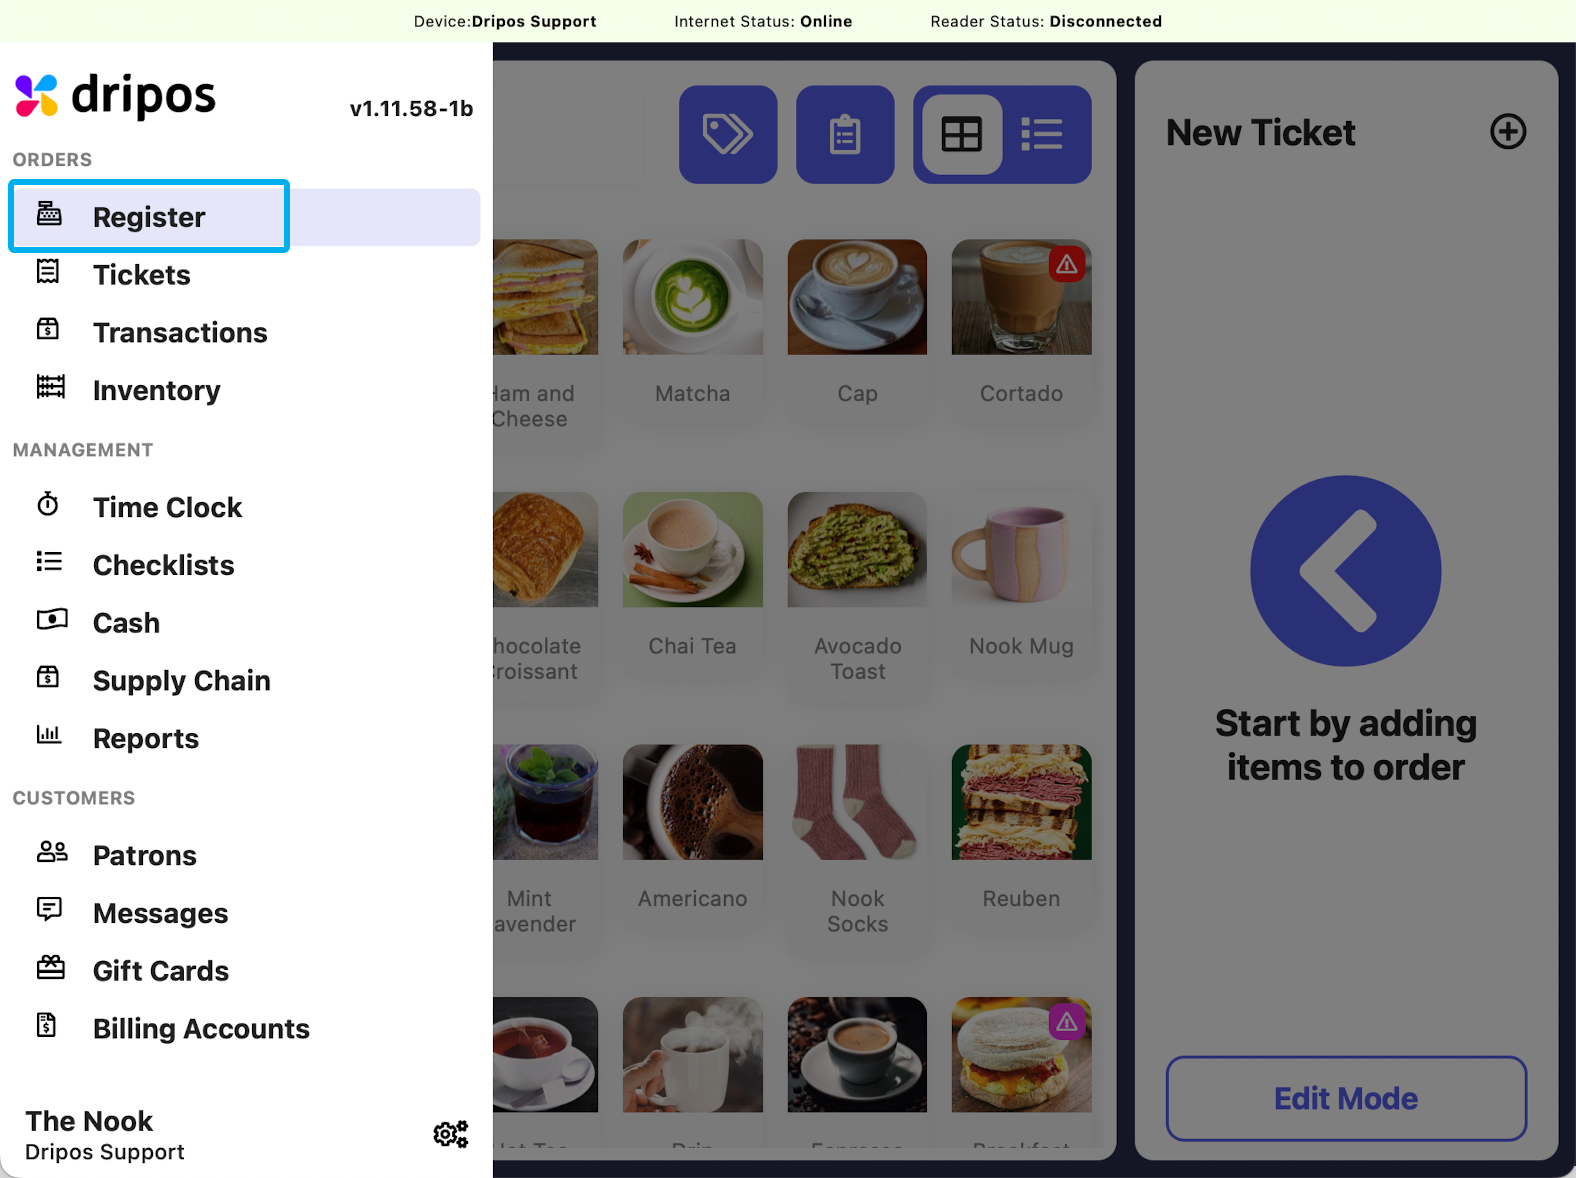 Press either the **saved tickets page icon** and then **New Order**, or press the **New Ticket +** button on the right hand side
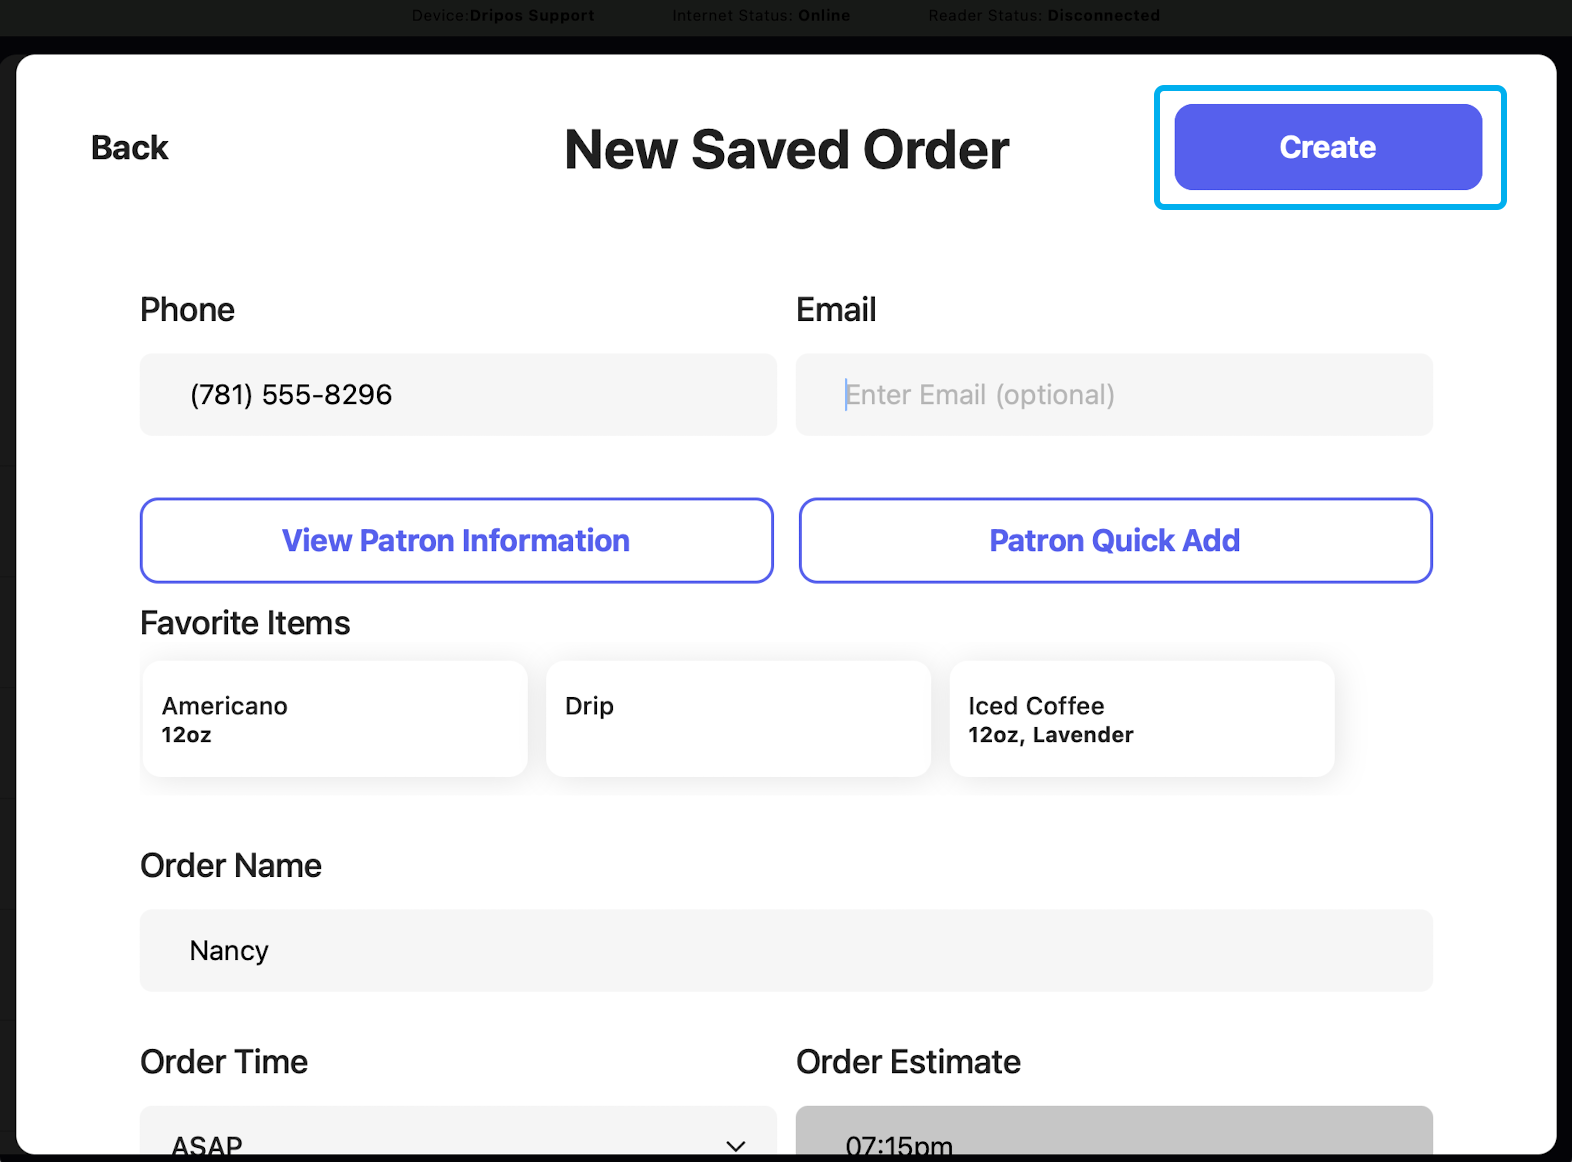
 Fill out the required fields in the ticket; all tickets require a name at minimum
You can change a variety of information on this page about the ticket, including ticket type and time ticket is scheduled. You can also pre-authorize a card for immediate payment when charged, and leave a pre- authorized tip.
Fill out the required fields in the ticket; all tickets require a name at minimum
You can change a variety of information on this page about the ticket, including ticket type and time ticket is scheduled. You can also pre-authorize a card for immediate payment when charged, and leave a pre- authorized tip.
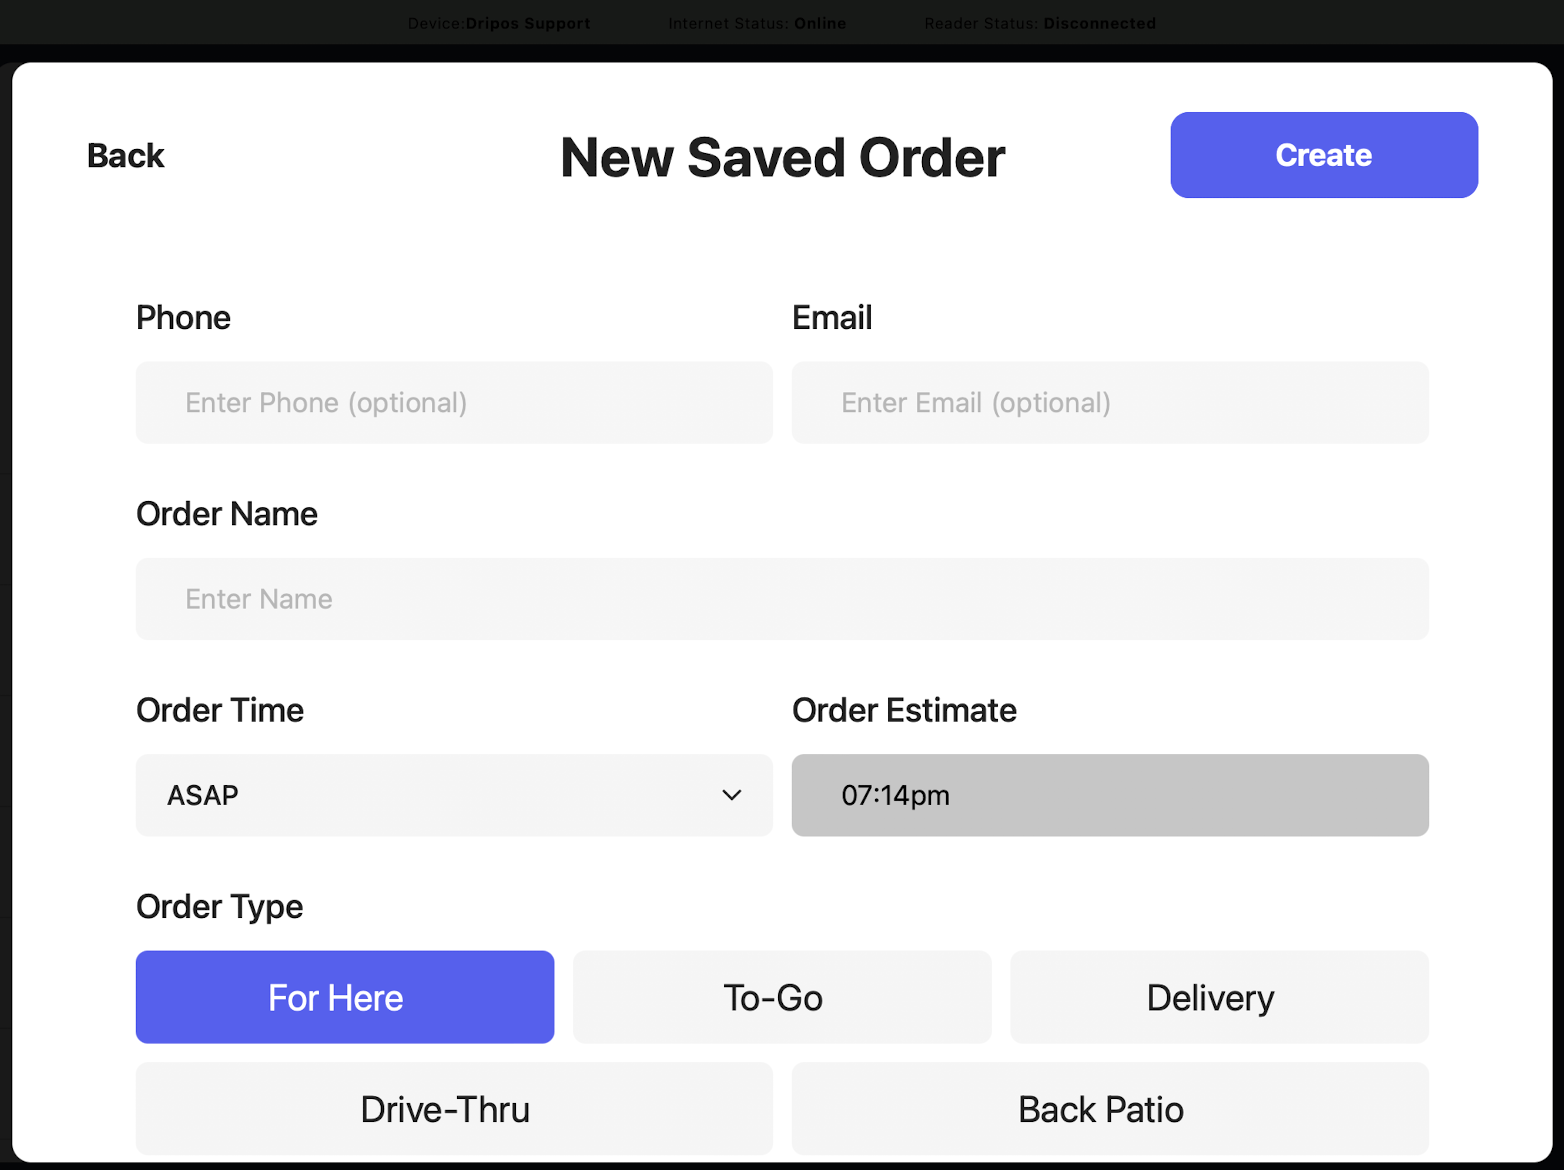 Press **Create** to save the order, then add products as normal
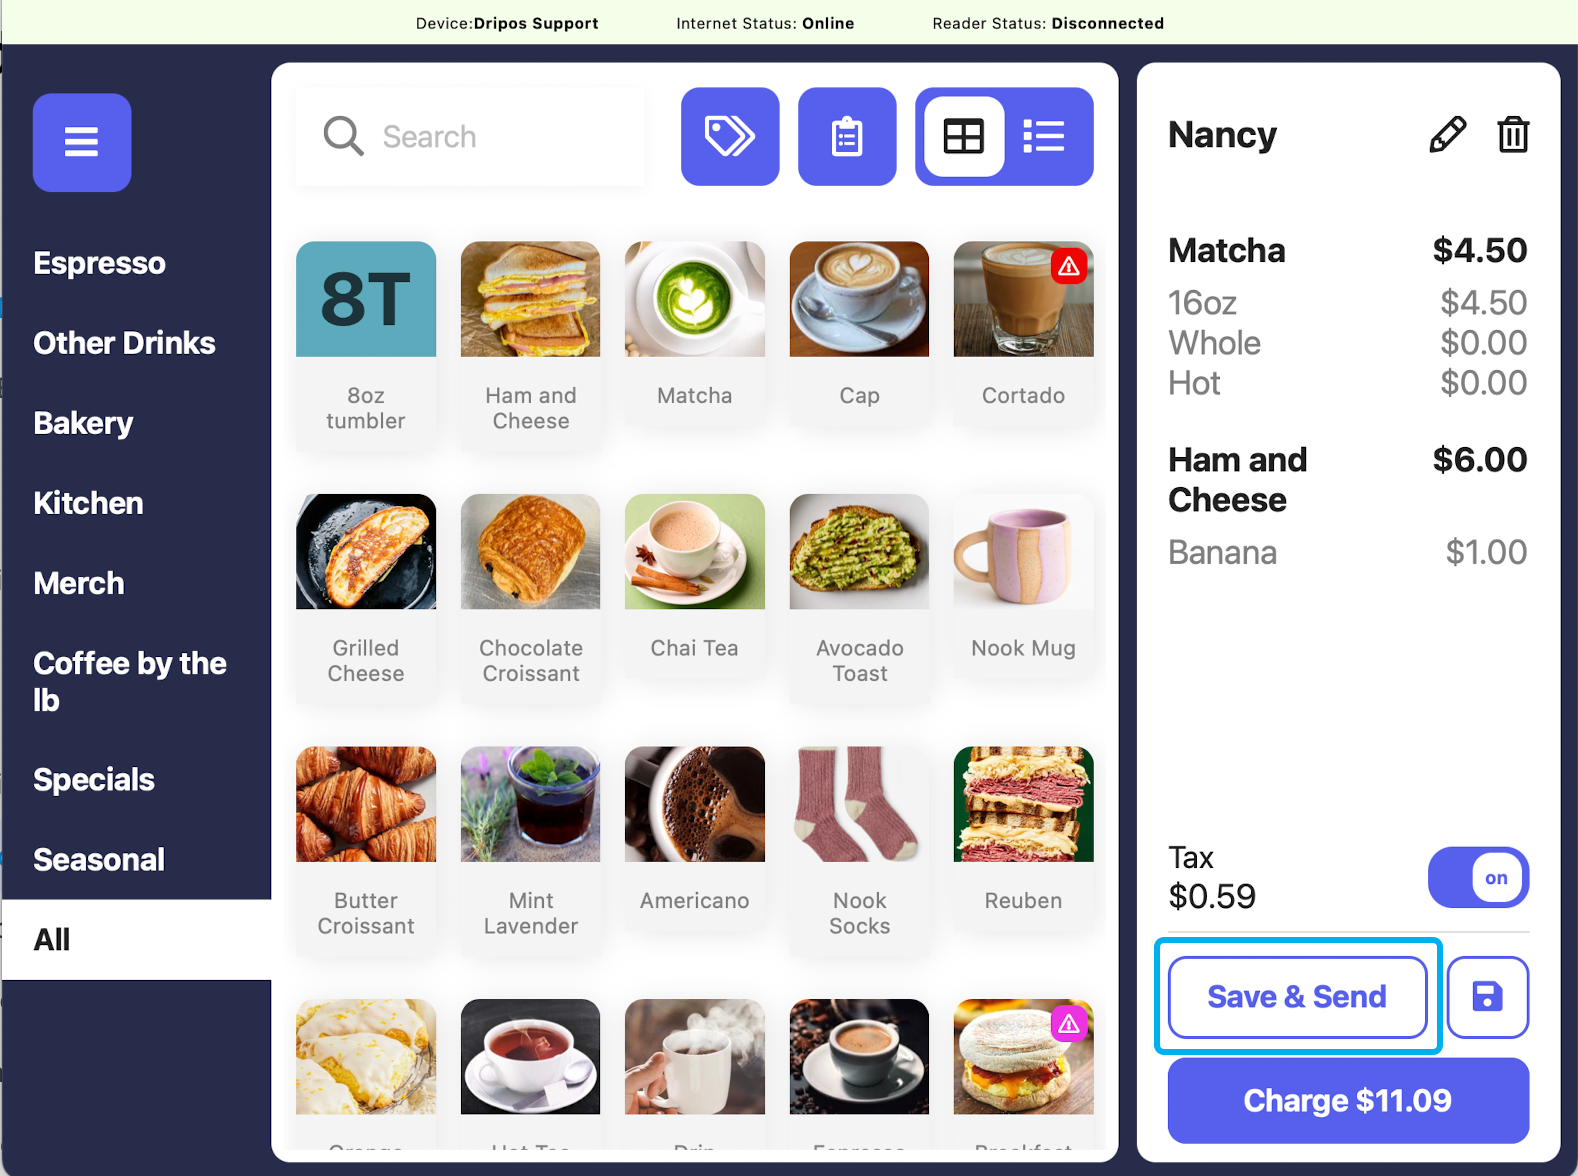
 Press **Save & Send** to save the order to charge later
By saving the **Save & Send** button, the ticket will send to any ticket screens and print if you have printer connections. If you would like to avoid printing, press the **Save Icon**
Press **Save & Send** to save the order to charge later
By saving the **Save & Send** button, the ticket will send to any ticket screens and print if you have printer connections. If you would like to avoid printing, press the **Save Icon**
 ***
## View and Manage Saved Tickets
Edit the ticket information, delete the ticket, or add more products to the ticket by following the steps below:
Navigate to the **POS** press the **tribar** in the upper left hand corner and select **Register**
***
## View and Manage Saved Tickets
Edit the ticket information, delete the ticket, or add more products to the ticket by following the steps below:
Navigate to the **POS** press the **tribar** in the upper left hand corner and select **Register**
 Press the **saved tickets page icon**
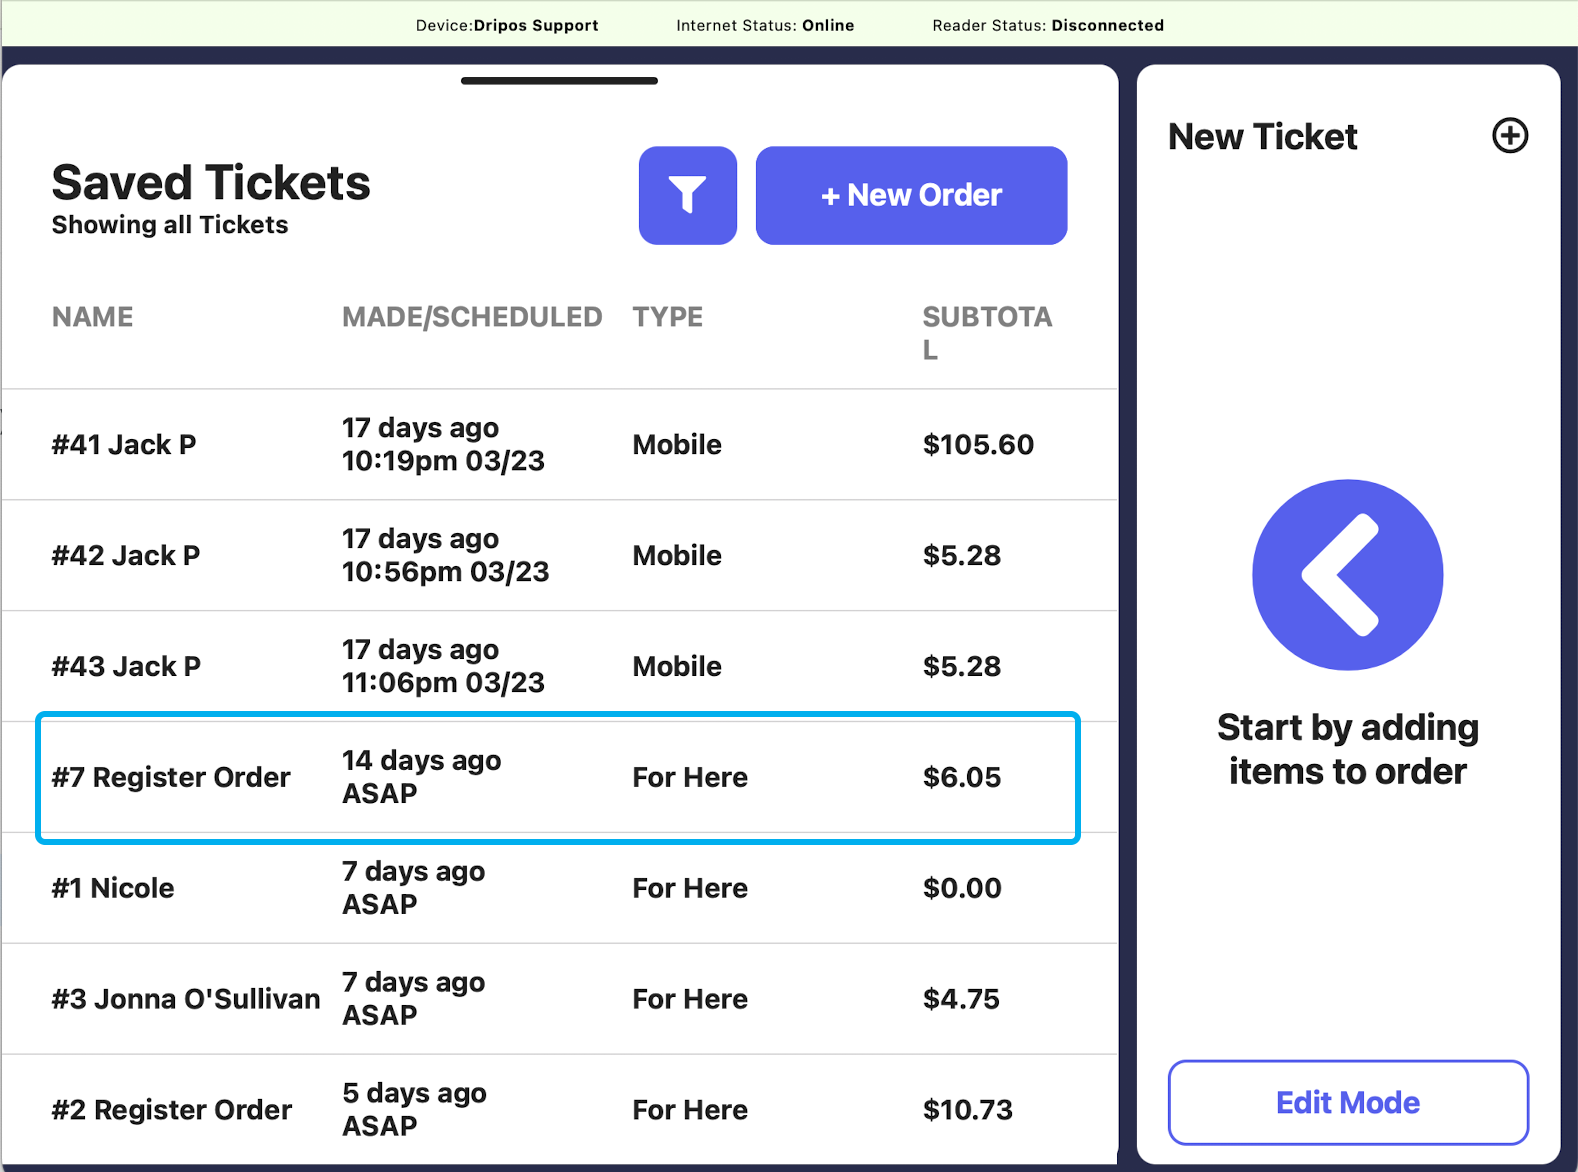
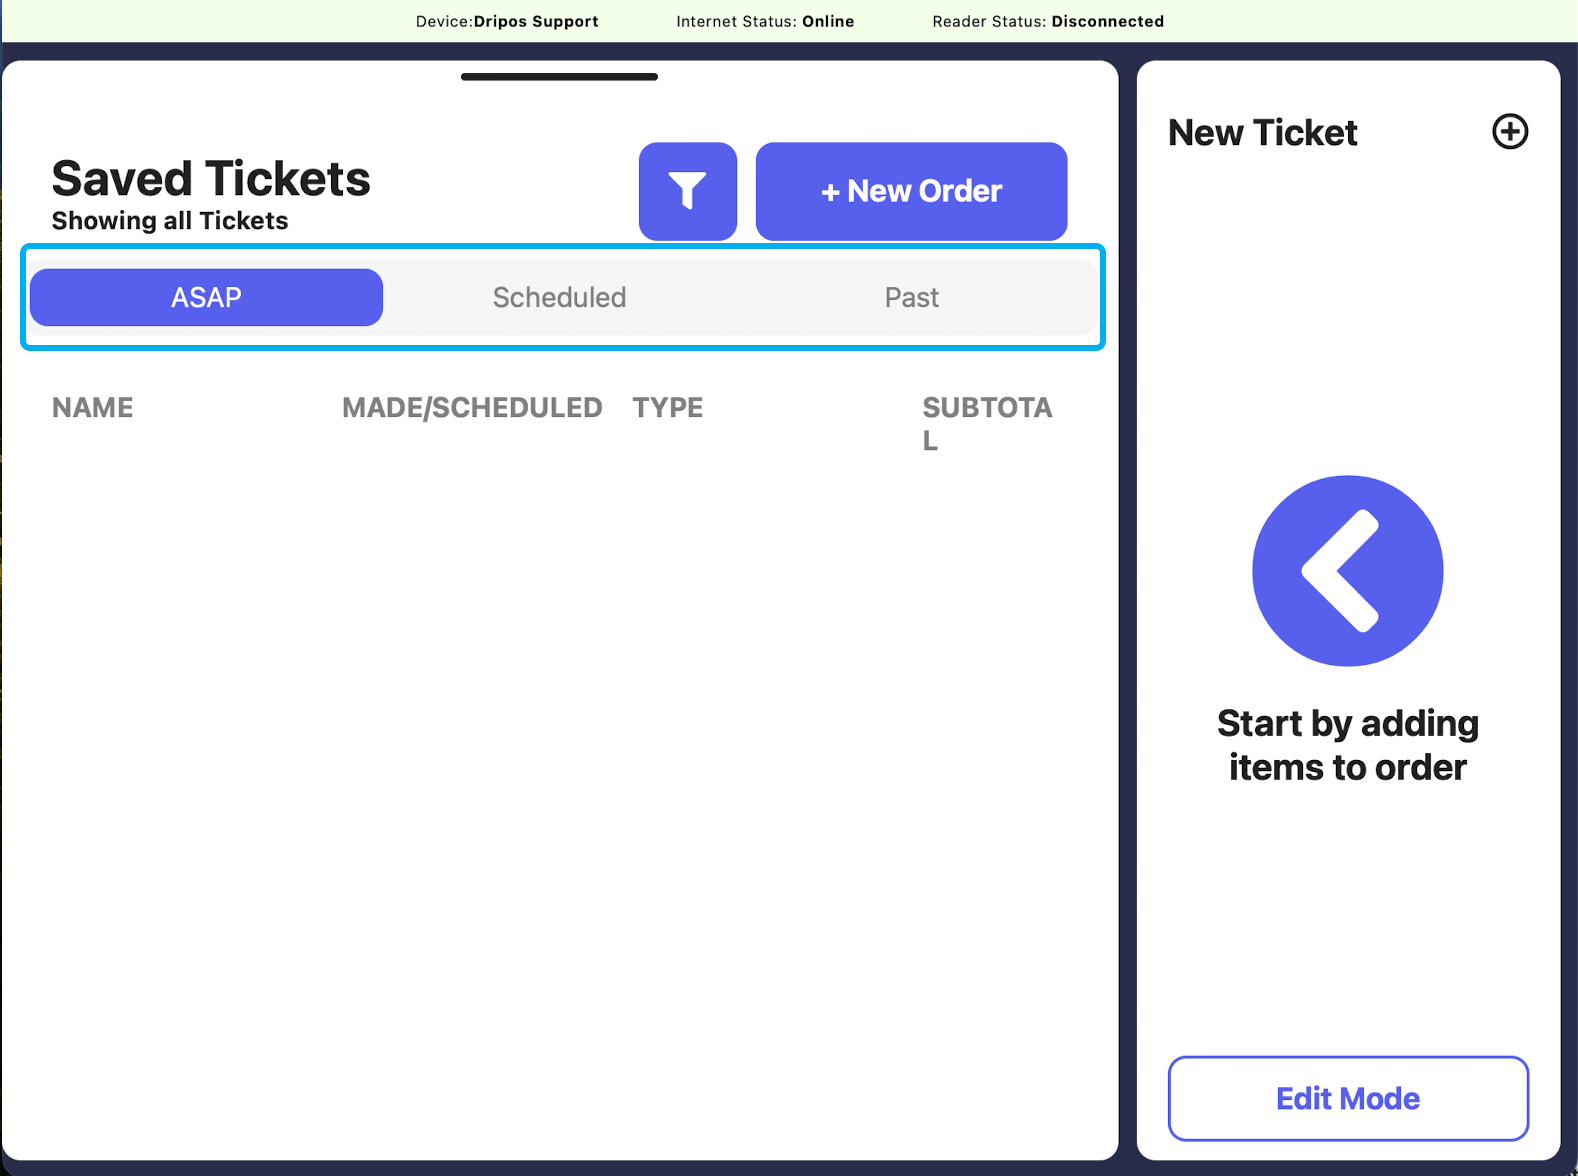
 This leads to the **Saved Tickets** screen. Saved tickets are ordered from oldest to newest.
You can filter saved tickets by the device they originated on if you have multiple devices in your shop. Press the filter icon to do this.
To edit information on a saved ticket, press any ticket from the **Saved Tickets** screen.
This leads to the **Saved Tickets** screen. Saved tickets are ordered from oldest to newest.
You can filter saved tickets by the device they originated on if you have multiple devices in your shop. Press the filter icon to do this.
To edit information on a saved ticket, press any ticket from the **Saved Tickets** screen.
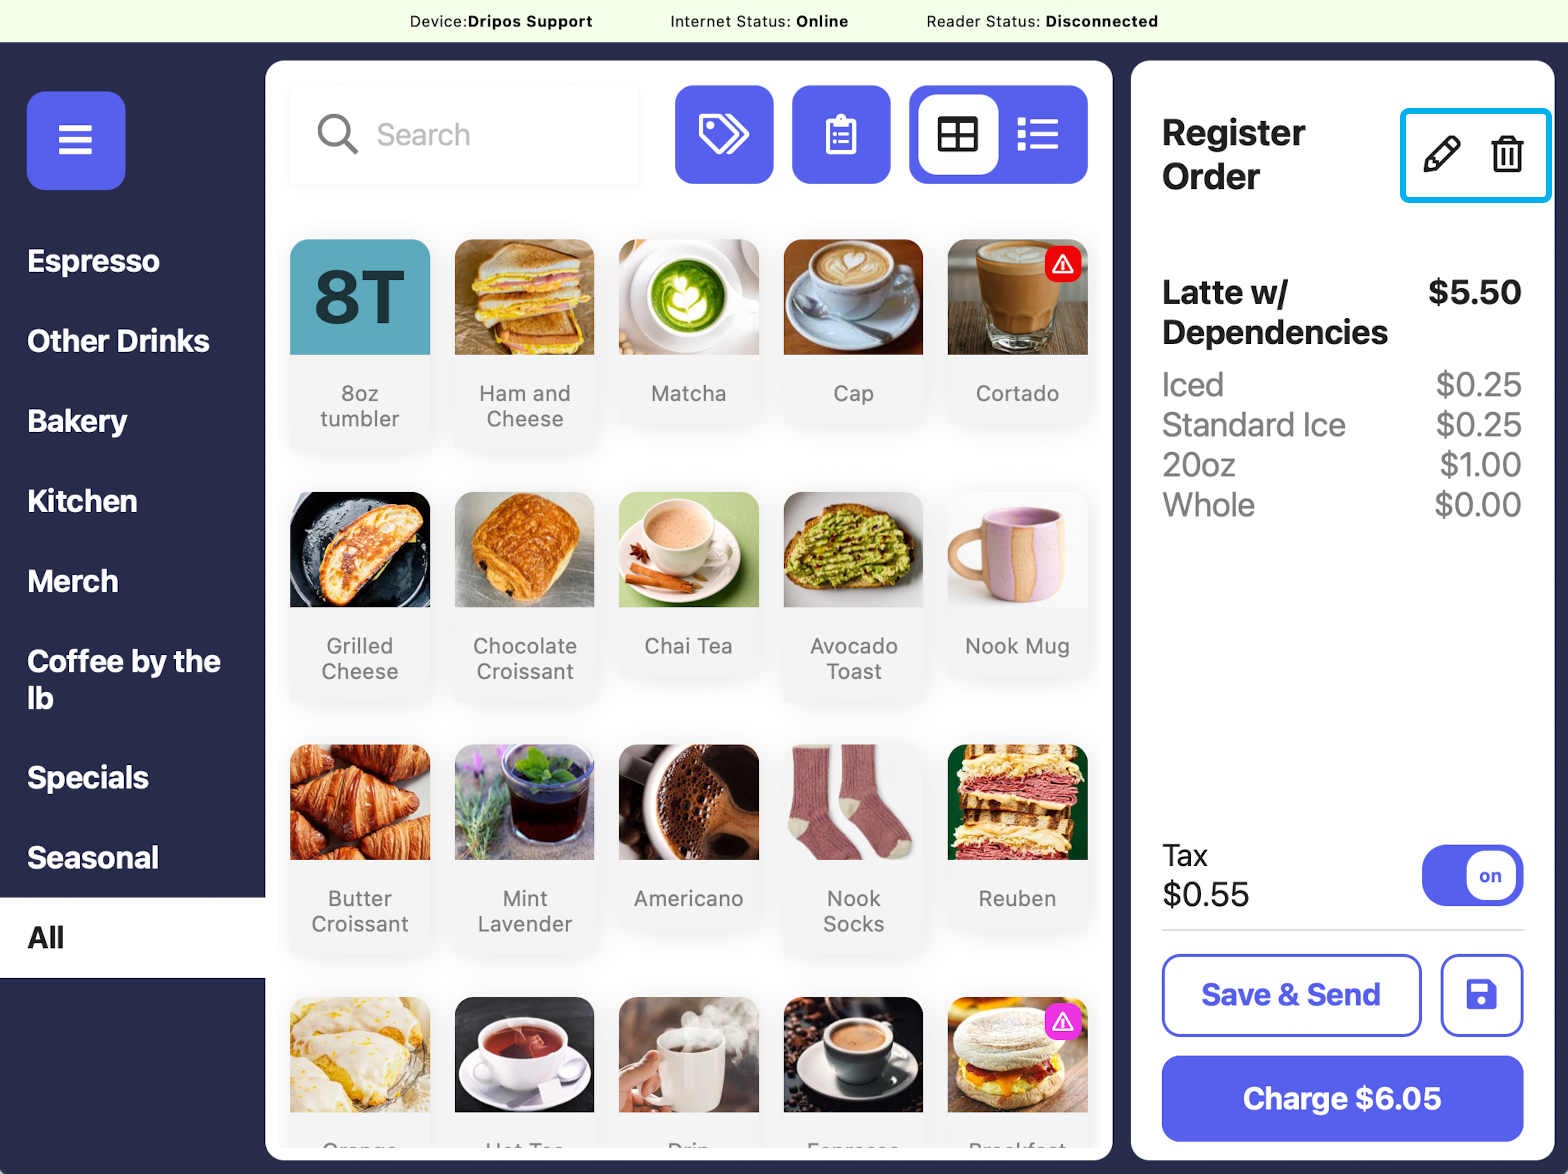
 On the right hand side, press the **pencil icon** to edit the ticket information.
Press the **trash icon** to delete the order.
Any paid or partially paid orders cannot be deleted.
Add more products to the saved ticket by adding to cart as usual and then pressing **Save and Send** or **Save**.
On the right hand side, press the **pencil icon** to edit the ticket information.
Press the **trash icon** to delete the order.
Any paid or partially paid orders cannot be deleted.
Add more products to the saved ticket by adding to cart as usual and then pressing **Save and Send** or **Save**.
 If editing, edit any information you would like (ticket type, name, phone number, etc.), and save again.
 ***
## Check Out Saved Tickets
Navigate to the **POS,** press the **tribar** in the upper left hand corner and select **Register**
***
## Check Out Saved Tickets
Navigate to the **POS,** press the **tribar** in the upper left hand corner and select **Register**
 Press the **saved tickets page icon**
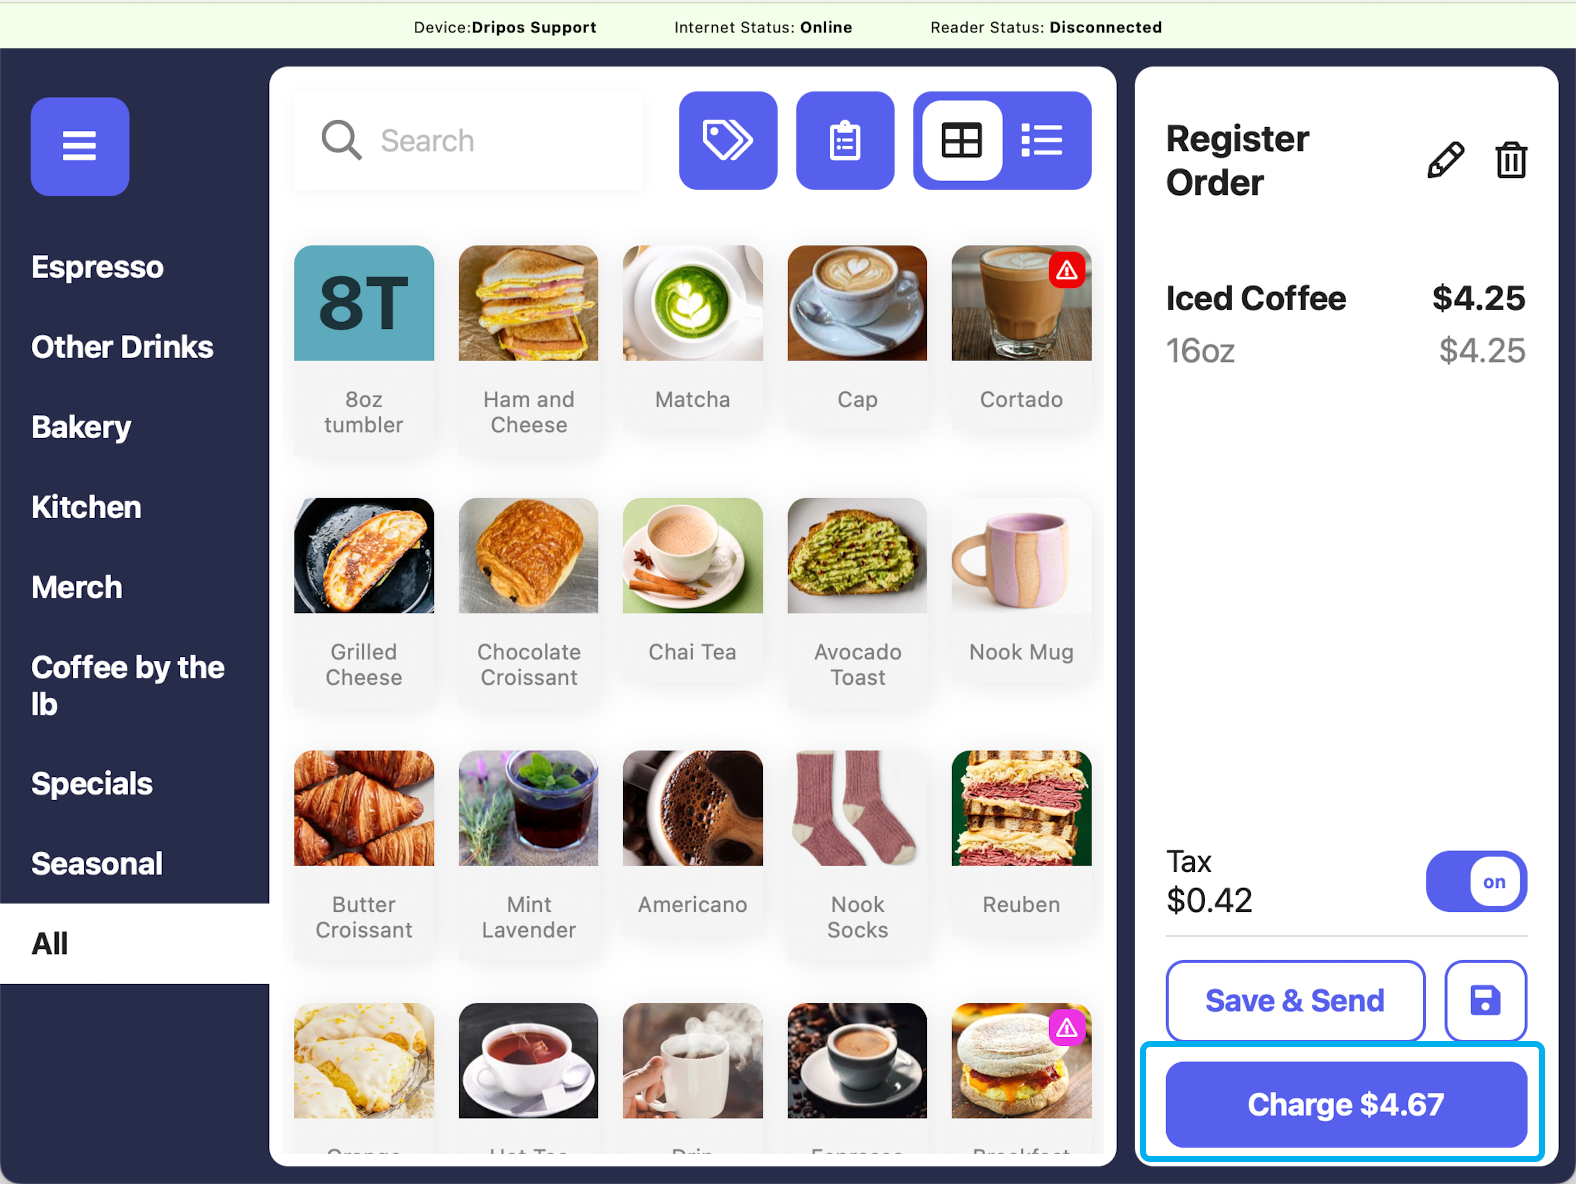
 From the **Saved Tickets** screen, select the ticket you would like to charge
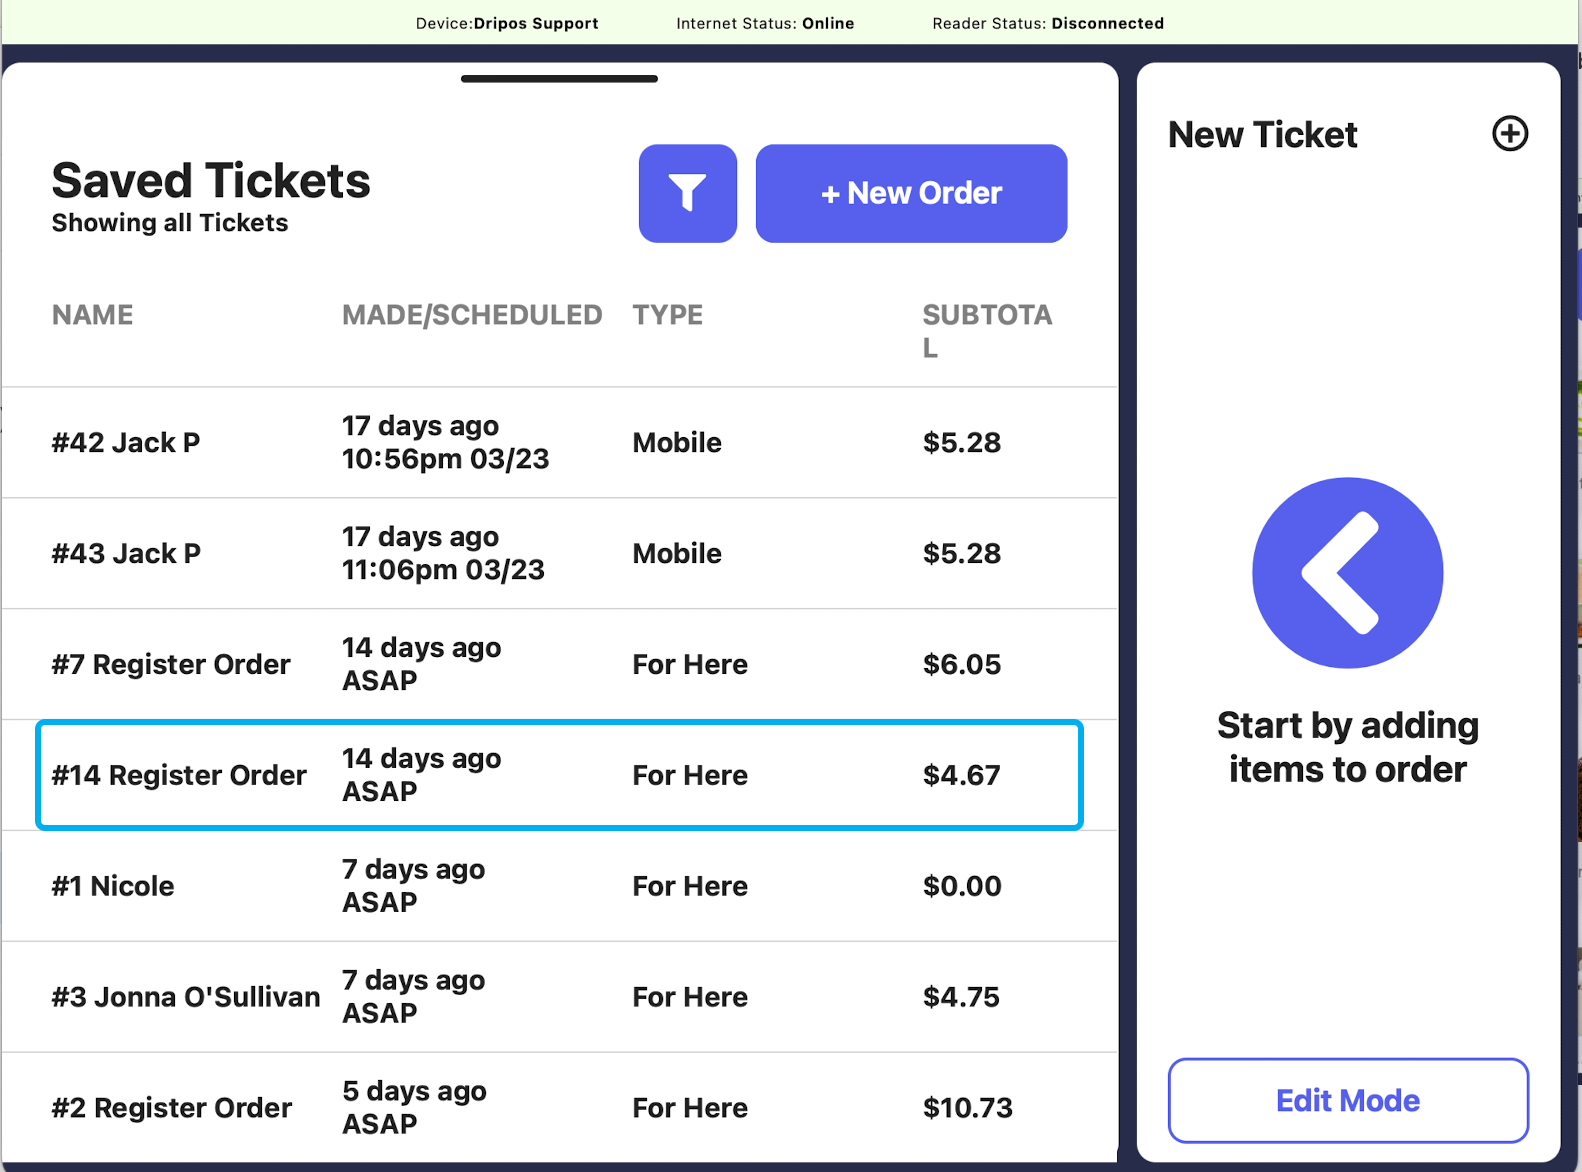 Press the **Charge** button in the lower right hand corner
 Proceed through checkout flow as normal
***
## Saved Ticket Settings
There are multiple setting that change how saved tickets can be used at the POS:
If **Breakdown Saved Tickets** is on, the saved tickets screen will be sorted into **ASAP, Scheduled, and Past:**
Proceed through checkout flow as normal
***
## Saved Ticket Settings
There are multiple setting that change how saved tickets can be used at the POS:
If **Breakdown Saved Tickets** is on, the saved tickets screen will be sorted into **ASAP, Scheduled, and Past:**
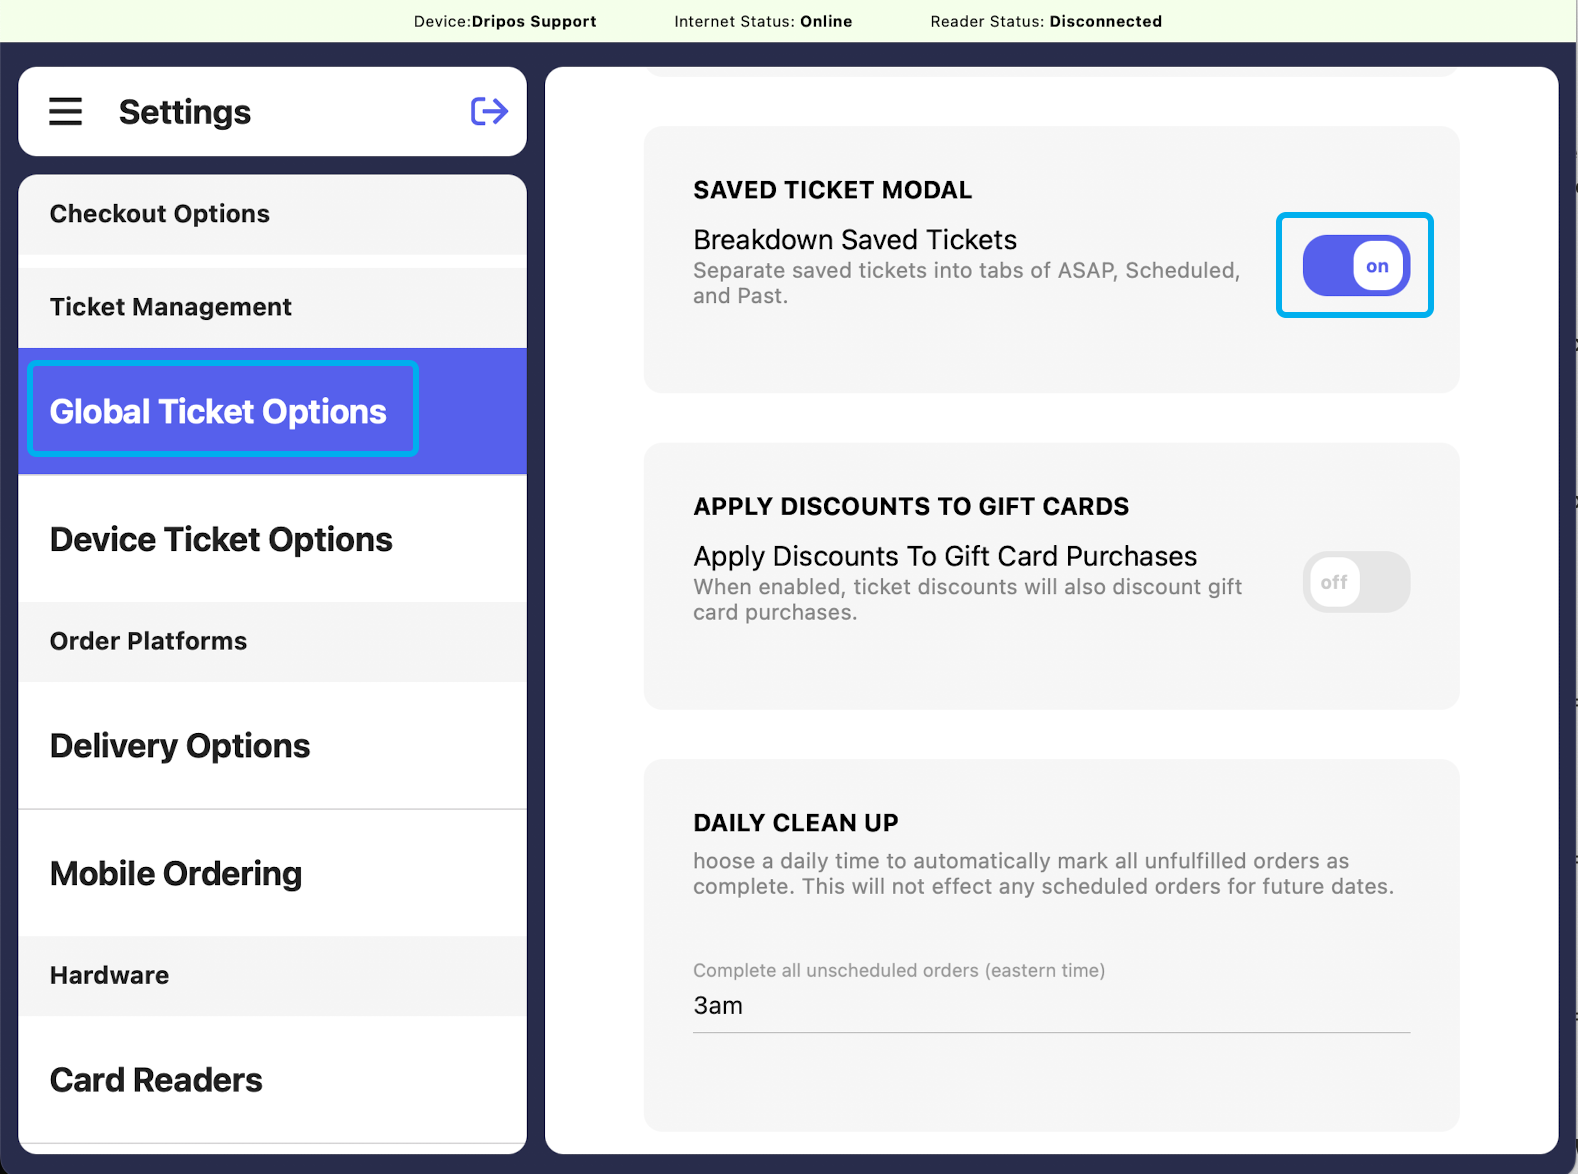
 To turn on:
On the POS, press the **tribar icon** in the upper left hand corner and select the **settings icon** at the bottom of the screen
Press **Global Ticket Options**
Toggle **Break down saved tickets** on
To turn on:
On the POS, press the **tribar icon** in the upper left hand corner and select the **settings icon** at the bottom of the screen
Press **Global Ticket Options**
Toggle **Break down saved tickets** on
 If **Default to Saved Ticket Screen** is on, a blank saved order will appear after the last order is checked out. This may be helpful if you only used saved tickets in your workflow:
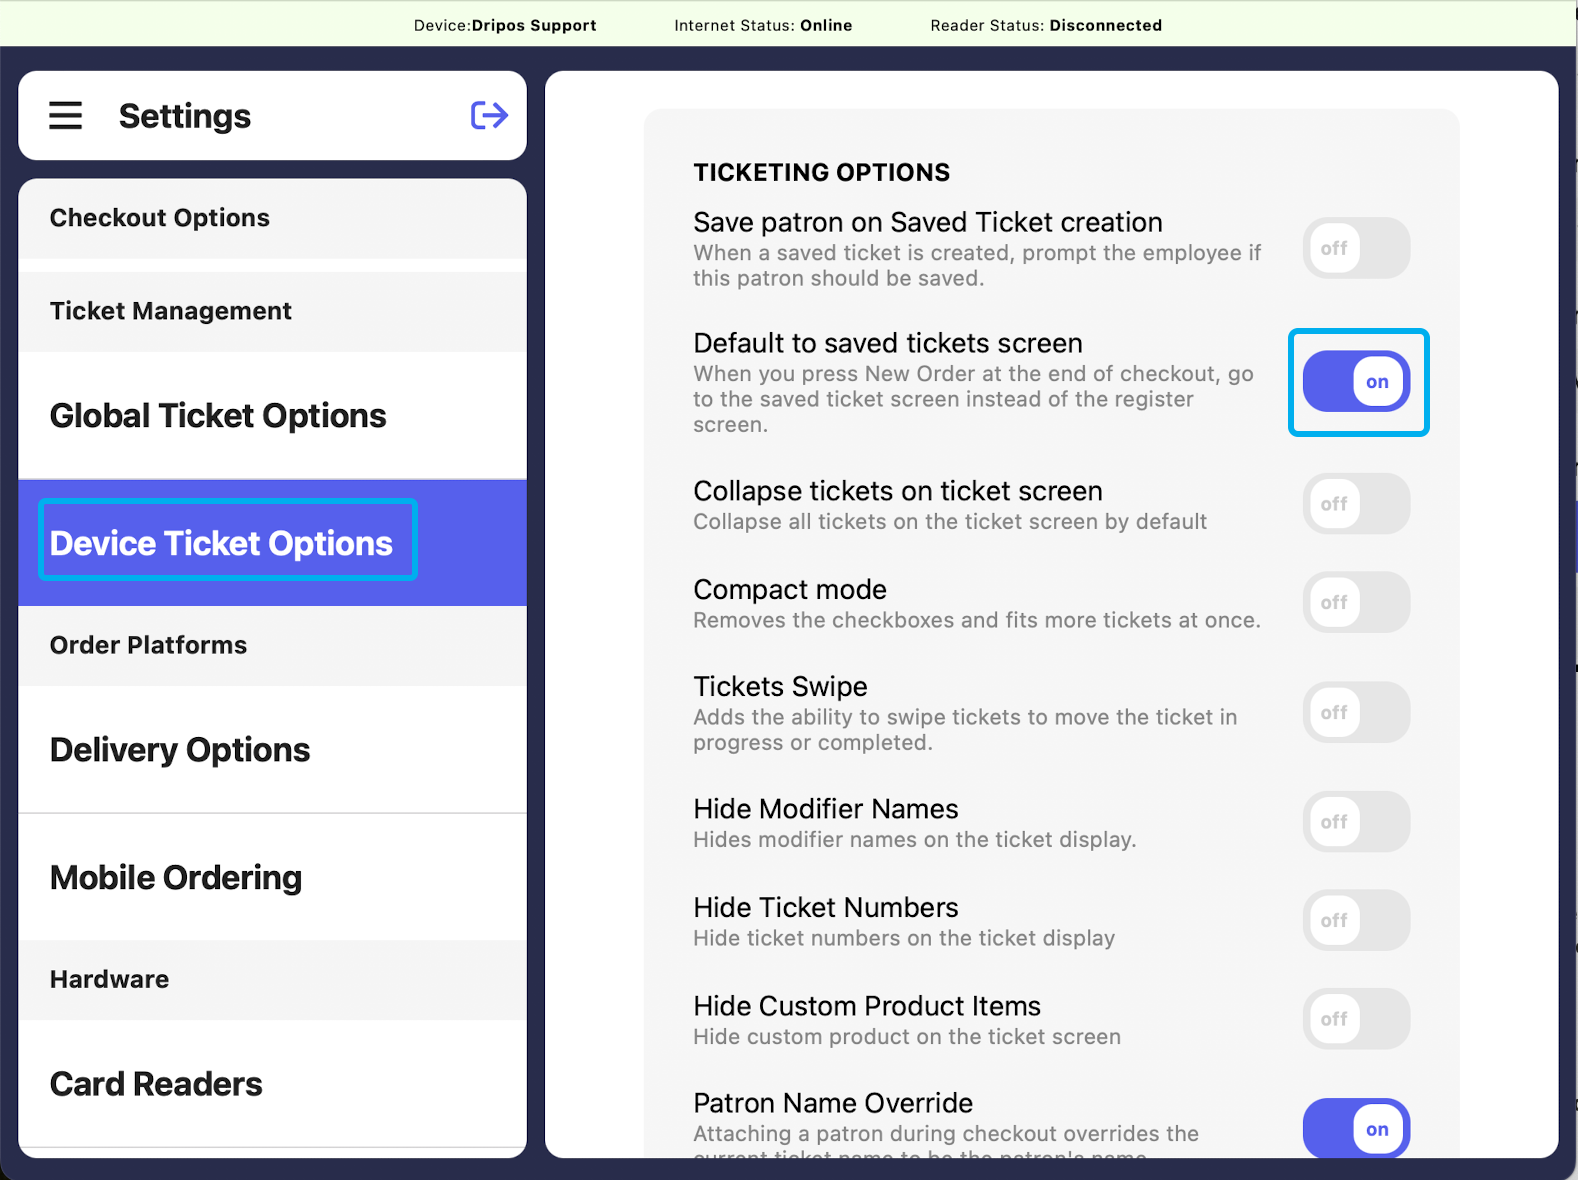
 To turn on:
On the POS, press the **tribar icon** in the upper left hand corner and select the **settings icon** at the bottom of the screen
Press **Device Ticket Options**
Toggle **Default to saved tickets screen** on
To turn on:
On the POS, press the **tribar icon** in the upper left hand corner and select the **settings icon** at the bottom of the screen
Press **Device Ticket Options**
Toggle **Default to saved tickets screen** on
 If **Save Patron when Creating a Saved Ticket** is on, if a phone number isn’t recognized is entered in a saved ticket, the POS will prompt to save the patron.
To turn on:
On the POS, press the **tribar icon** in the upper left hand corner and select the **settings icon** at the bottom of the screen
Press **Device Ticket Options**
Toggle **Save patron on Saved Ticket creation** on
If **Save Patron when Creating a Saved Ticket** is on, if a phone number isn’t recognized is entered in a saved ticket, the POS will prompt to save the patron.
To turn on:
On the POS, press the **tribar icon** in the upper left hand corner and select the **settings icon** at the bottom of the screen
Press **Device Ticket Options**
Toggle **Save patron on Saved Ticket creation** on
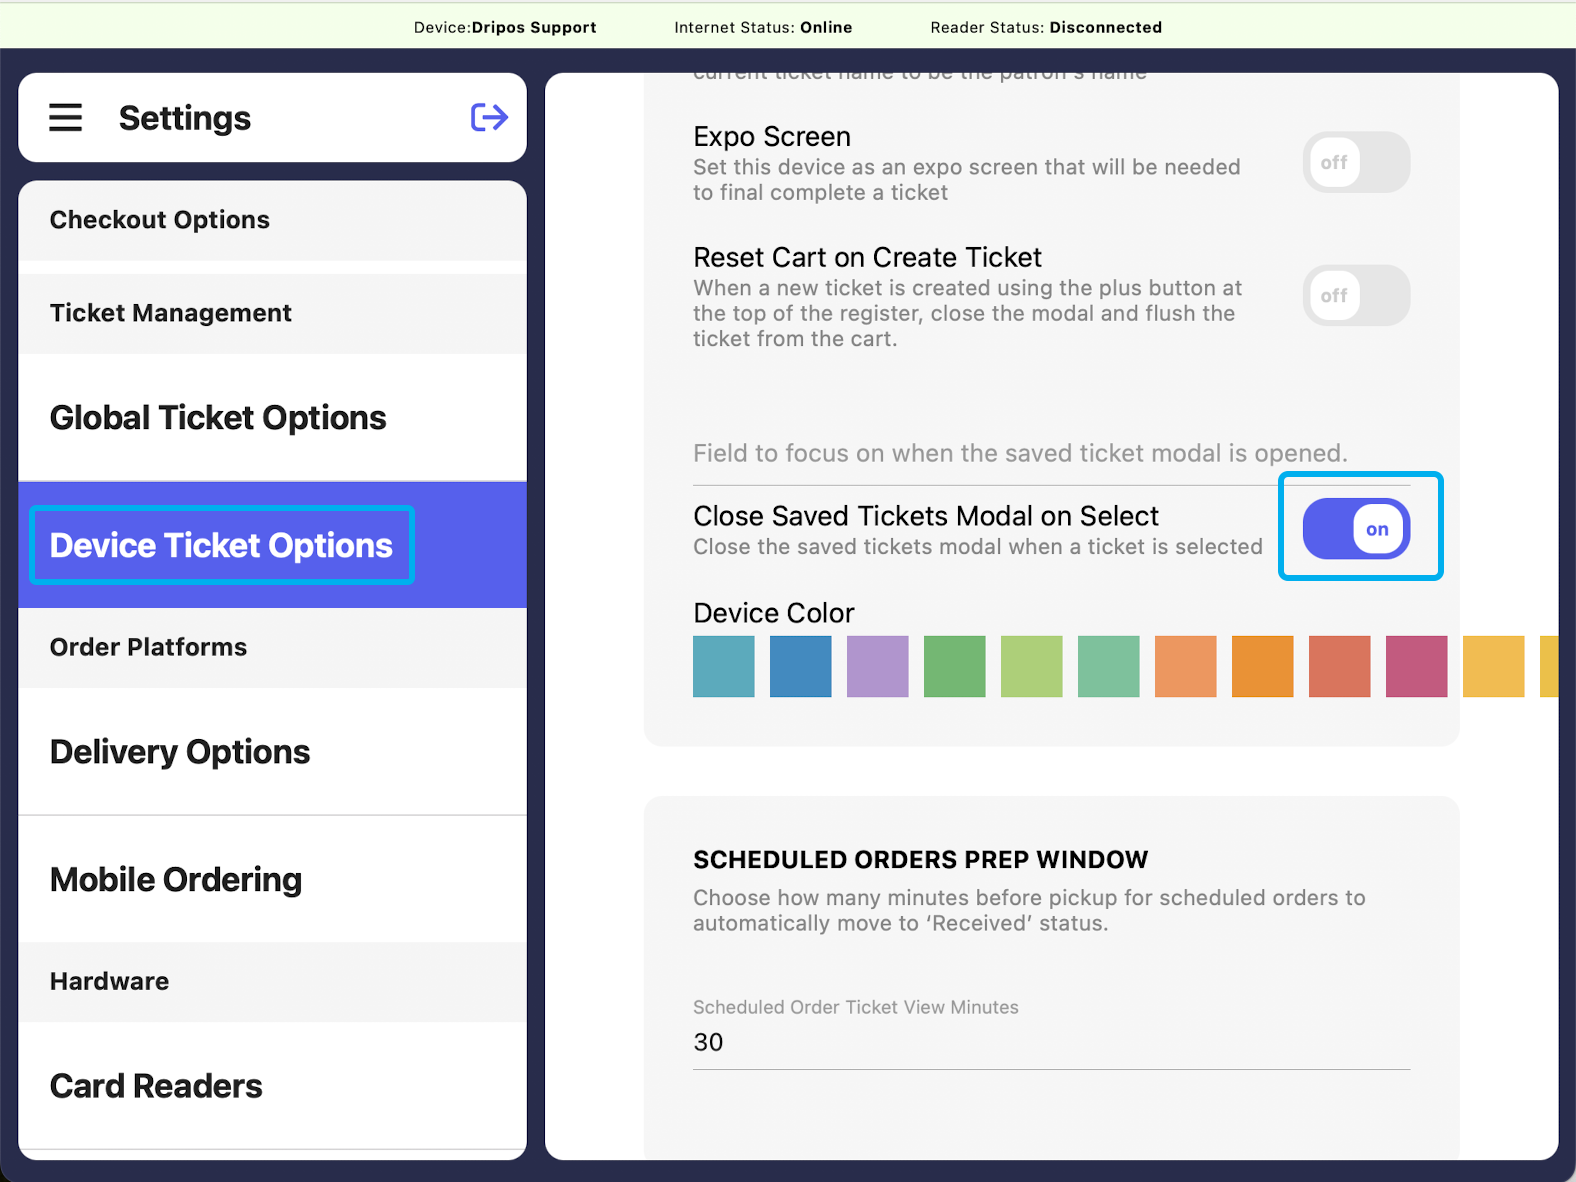
 If **Close Saved Tickets Model on Select** is on, the saved tickets screen will close once a saved ticket is selected.
To turn on:
On the POS, press the **tribar icon** in the upper left hand corner and select the **settings icon** at the bottom of the screen
Press **Device Ticket Options**
Toggle **Close Saved Tickets Modal on Select** on
If **Close Saved Tickets Model on Select** is on, the saved tickets screen will close once a saved ticket is selected.
To turn on:
On the POS, press the **tribar icon** in the upper left hand corner and select the **settings icon** at the bottom of the screen
Press **Device Ticket Options**
Toggle **Close Saved Tickets Modal on Select** on