> ## Documentation Index
> Fetch the complete documentation index at: https://support.dripos.com/llms.txt
> Use this file to discover all available pages before exploring further.
# Create and Manage Menu Products
> Create menu products and allocate them to a respective menu category.
## Create a Product
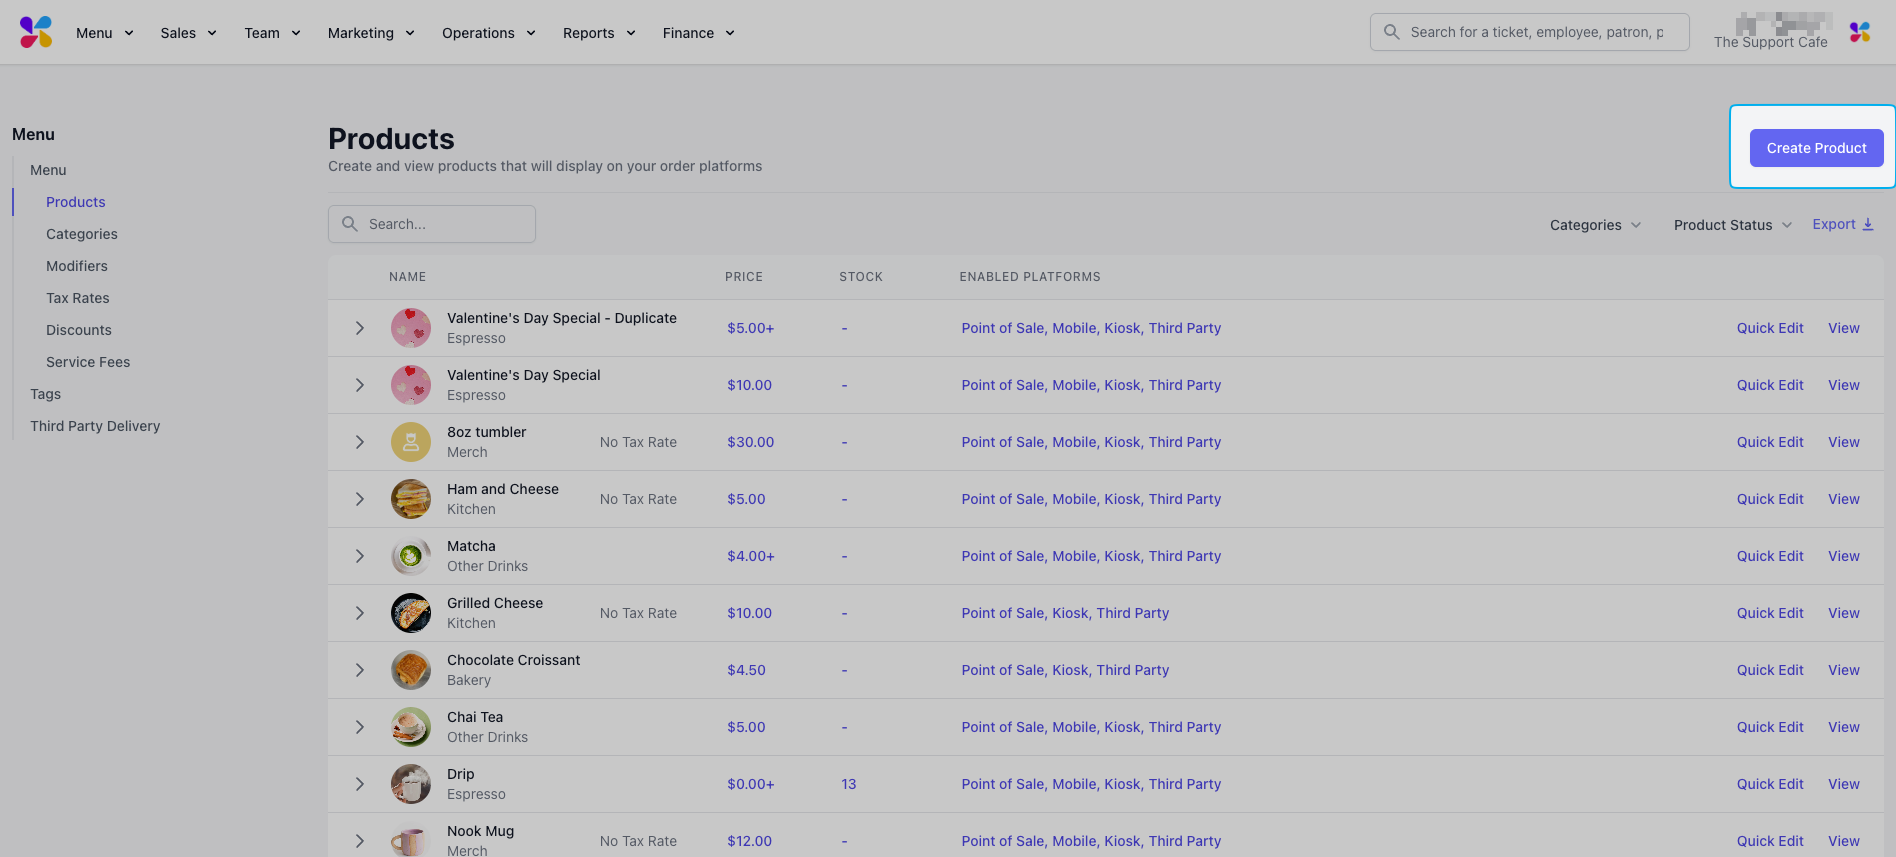
On the **Dashboard**, select **Menu** > **Products** > **Create Product**
 * **Product Name**
* **Product Category**
* **Product Description**
* **Product Image:** Upload an image of the product that will display on all ordering platforms
* **Preset Image:** Select a preset image that will display next to the product on all ordering platforms
* **Platforms:** Select which of your ordering platforms you want the product to be enabled on for ordering
- **Tax Disabled:** If set to **yes**, this product will not be taxed.
- **Tax Override:** If set to **yes**, taxes will be applied to this product even if ordered with a tax disabled order type
* **One Click:** If set to **yes**, selecting this item on the POS will automatically add it to the cart.
* **Auto Complete Product:** If set to **yes**, the product will be automatically completed upon purchase, and will not appear on the ticket screen.
* **Icon Color for the POS:** Select a background color for the optional icon that will display on the register screen of the POS
* **Abbreviation for the POS:** Select up to a four-letter abbreviation of the product.
* **Require Advanced Notice:** If set to **yes**, the product will require advanced notice when ordering. You will then need to specify the number of days notice be given to order this product in the box below.
* **Minimum Quantity:** Optionally input a minimum quantity of this product that must be ordered for mobile orders. This does not impact POS orders.
* **Maximum Quantity:** Optionally input a maximum quantity of this product that can be purchased in a mobile order. This does not impact POS orders.
* **Preparation Instructions:** Optionally attach preparation instructions for the cooks / baristas to view when making the product. These instructions will be displayed on printed Make Tickets printed with the Legacy Printing mode.
* **Is Alcohol:** If set to **yes**, this indicates that the product contains alcohol
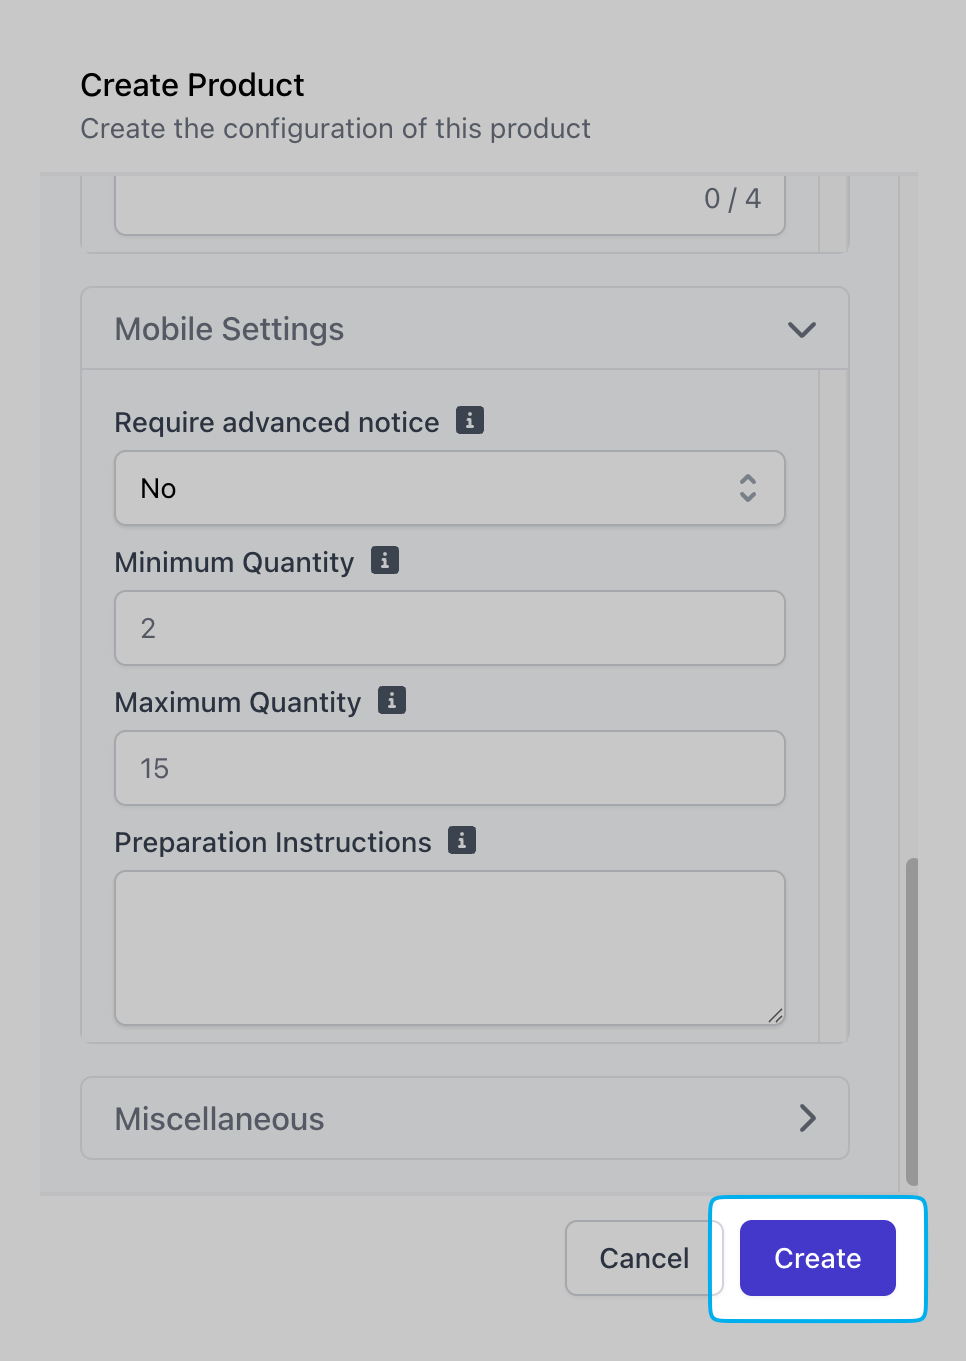
Click **Create** in the bottom right corner. The product will then be added into the system and will display at the top of your product list.
* **Product Name**
* **Product Category**
* **Product Description**
* **Product Image:** Upload an image of the product that will display on all ordering platforms
* **Preset Image:** Select a preset image that will display next to the product on all ordering platforms
* **Platforms:** Select which of your ordering platforms you want the product to be enabled on for ordering
- **Tax Disabled:** If set to **yes**, this product will not be taxed.
- **Tax Override:** If set to **yes**, taxes will be applied to this product even if ordered with a tax disabled order type
* **One Click:** If set to **yes**, selecting this item on the POS will automatically add it to the cart.
* **Auto Complete Product:** If set to **yes**, the product will be automatically completed upon purchase, and will not appear on the ticket screen.
* **Icon Color for the POS:** Select a background color for the optional icon that will display on the register screen of the POS
* **Abbreviation for the POS:** Select up to a four-letter abbreviation of the product.
* **Require Advanced Notice:** If set to **yes**, the product will require advanced notice when ordering. You will then need to specify the number of days notice be given to order this product in the box below.
* **Minimum Quantity:** Optionally input a minimum quantity of this product that must be ordered for mobile orders. This does not impact POS orders.
* **Maximum Quantity:** Optionally input a maximum quantity of this product that can be purchased in a mobile order. This does not impact POS orders.
* **Preparation Instructions:** Optionally attach preparation instructions for the cooks / baristas to view when making the product. These instructions will be displayed on printed Make Tickets printed with the Legacy Printing mode.
* **Is Alcohol:** If set to **yes**, this indicates that the product contains alcohol
Click **Create** in the bottom right corner. The product will then be added into the system and will display at the top of your product list.
 ## Product Pricing
There a multiple ways in which a product can be priced.
To add pricing to a product,
* Go to product's page on the **Dashboard** (**Menu** > **Products** > **View Product**)
* Scroll down to the bottom of the product's page
* Click the **Pricing** tab
## Product Pricing
There a multiple ways in which a product can be priced.
To add pricing to a product,
* Go to product's page on the **Dashboard** (**Menu** > **Products** > **View Product**)
* Scroll down to the bottom of the product's page
* Click the **Pricing** tab
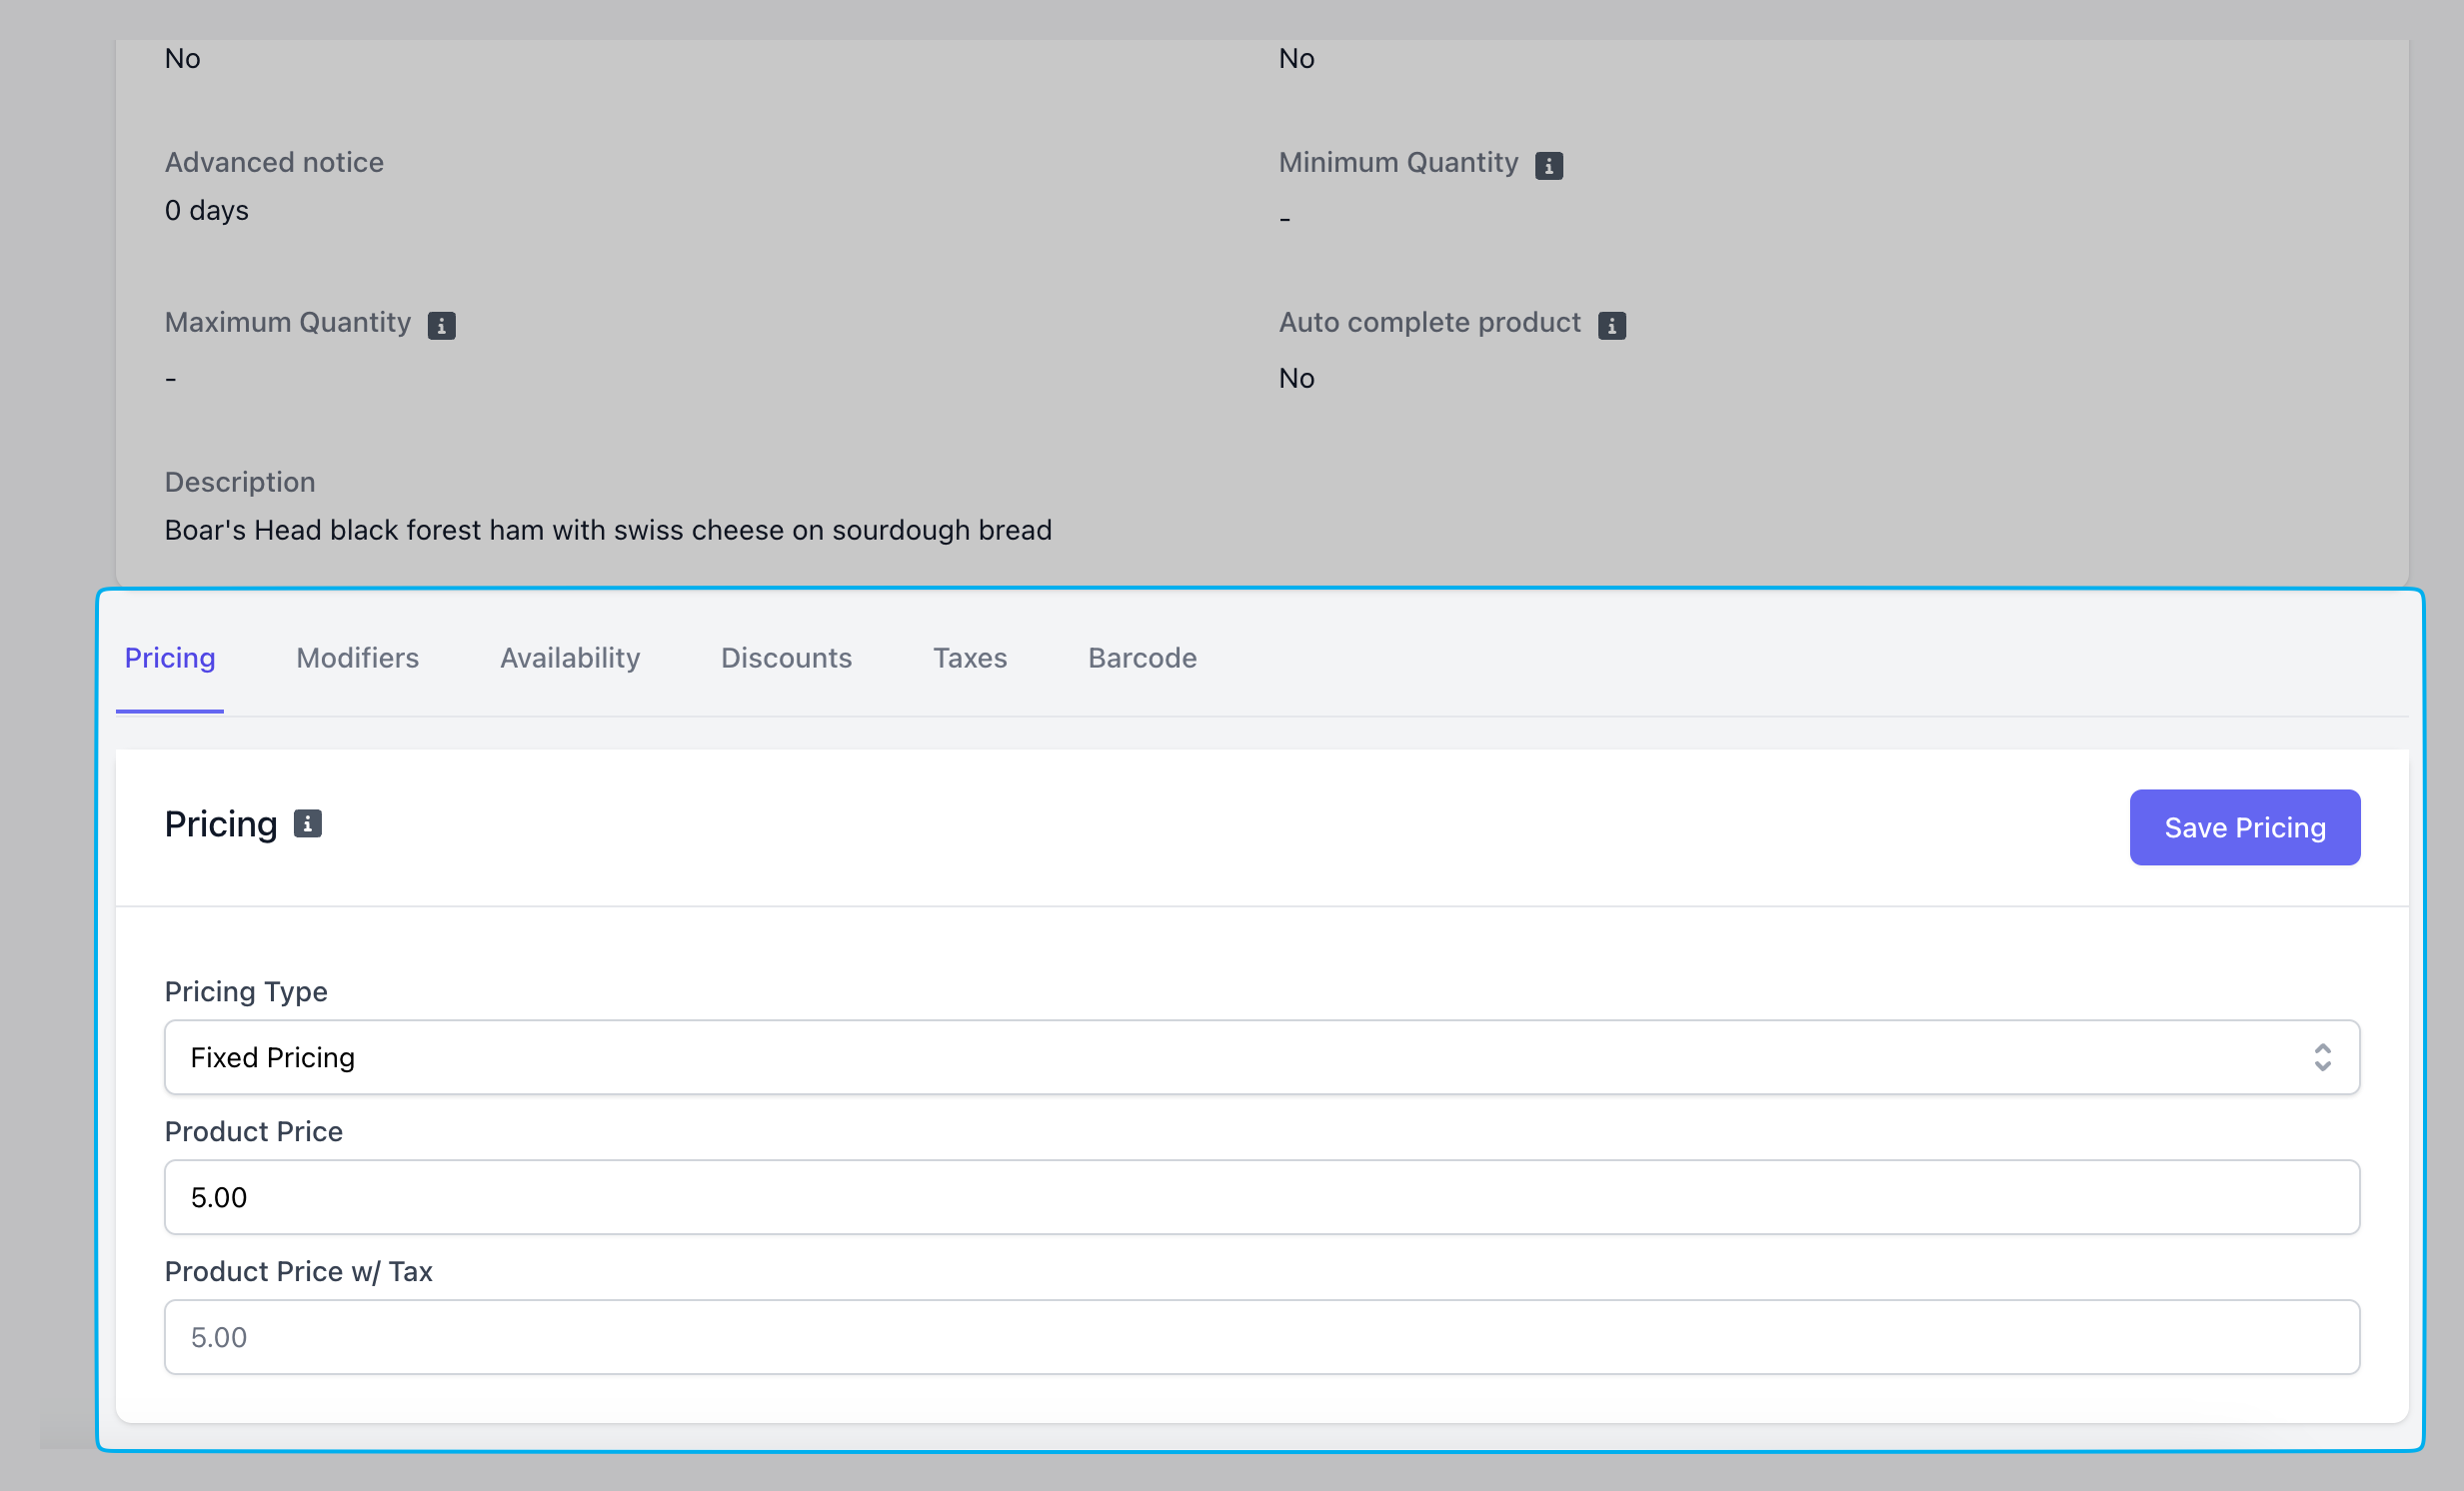 The product's base price will be one fixed cost *(i.e., a \$3 muffin, a \$5 one-sized cold brew)*
Modifiers can be added on to the base price to increase the product's total cost at checkout.
The product's base price will be one fixed cost *(i.e., a \$3 muffin, a \$5 one-sized cold brew)*
Modifiers can be added on to the base price to increase the product's total cost at checkout.
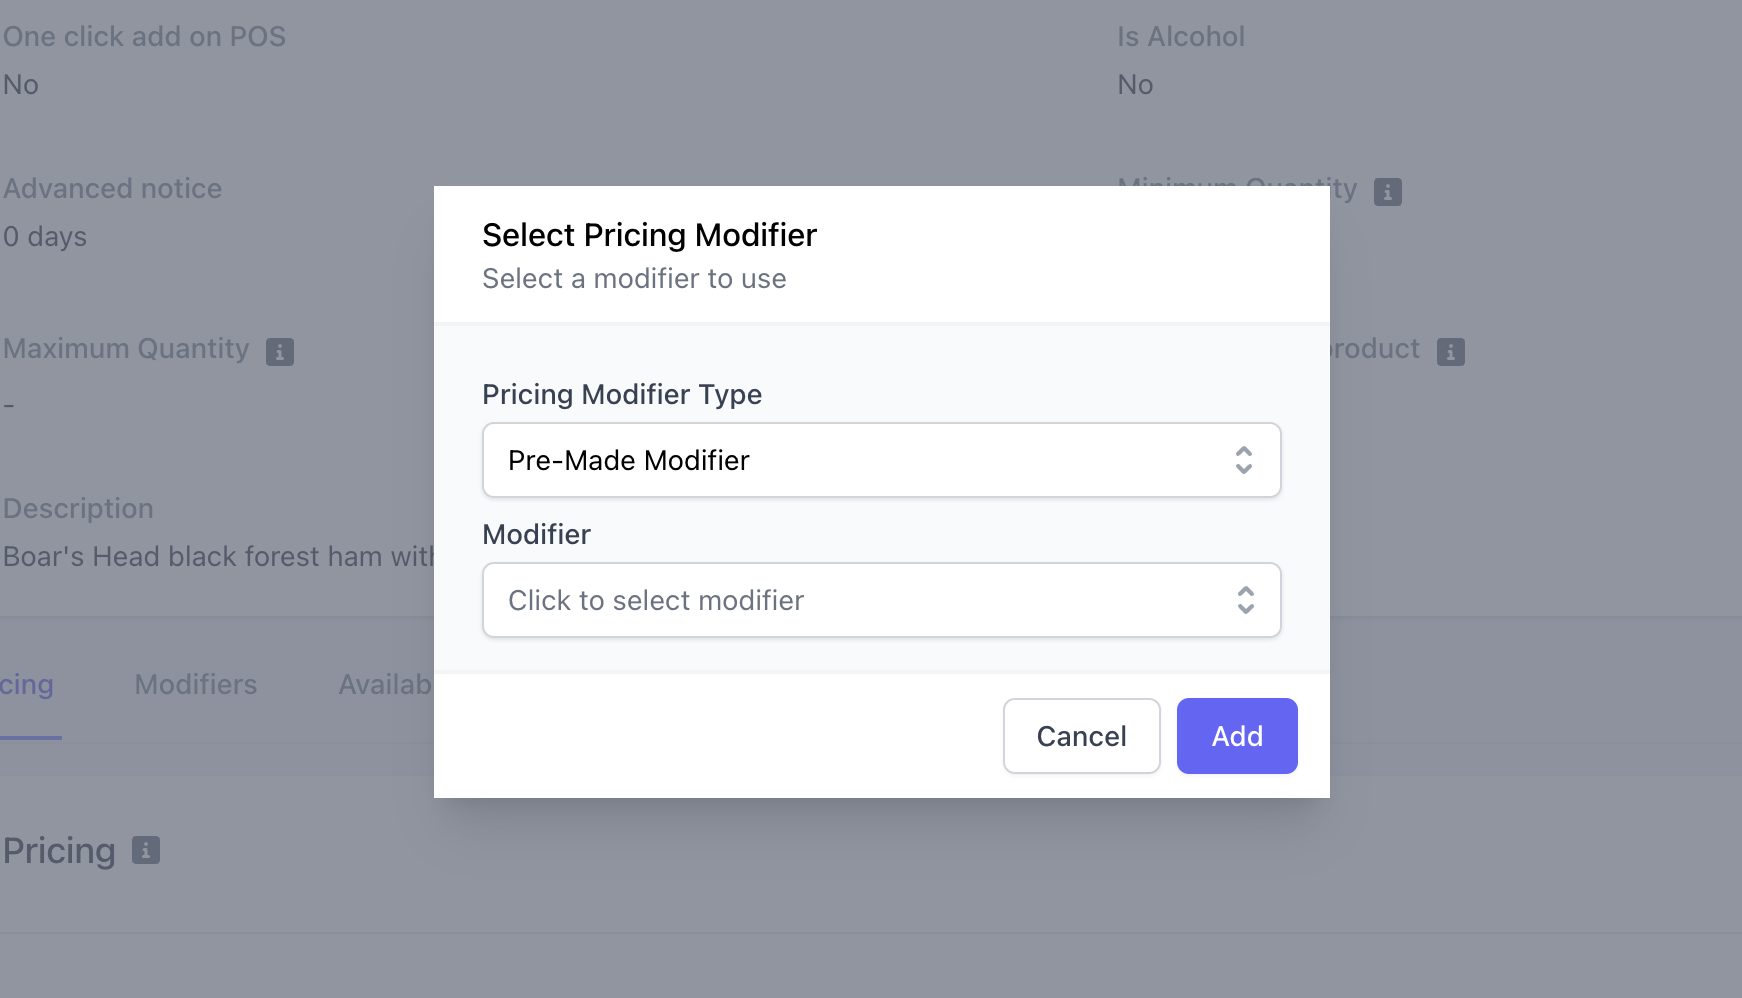 This is a global pricing modifier that can be used across multiple products.
Learn how to create a global pricing modifier [here](orders/menu/modifiers/modifiers-basics#global-modifiers).
Global pricing modifiers are especially useful if multiple menu products will use the same sizes and pricing.
Create a specific tiered pricing for this product and it's unique sizes.
This is a global pricing modifier that can be used across multiple products.
Learn how to create a global pricing modifier [here](orders/menu/modifiers/modifiers-basics#global-modifiers).
Global pricing modifiers are especially useful if multiple menu products will use the same sizes and pricing.
Create a specific tiered pricing for this product and it's unique sizes.
 Click **Add** and complete the fields below:
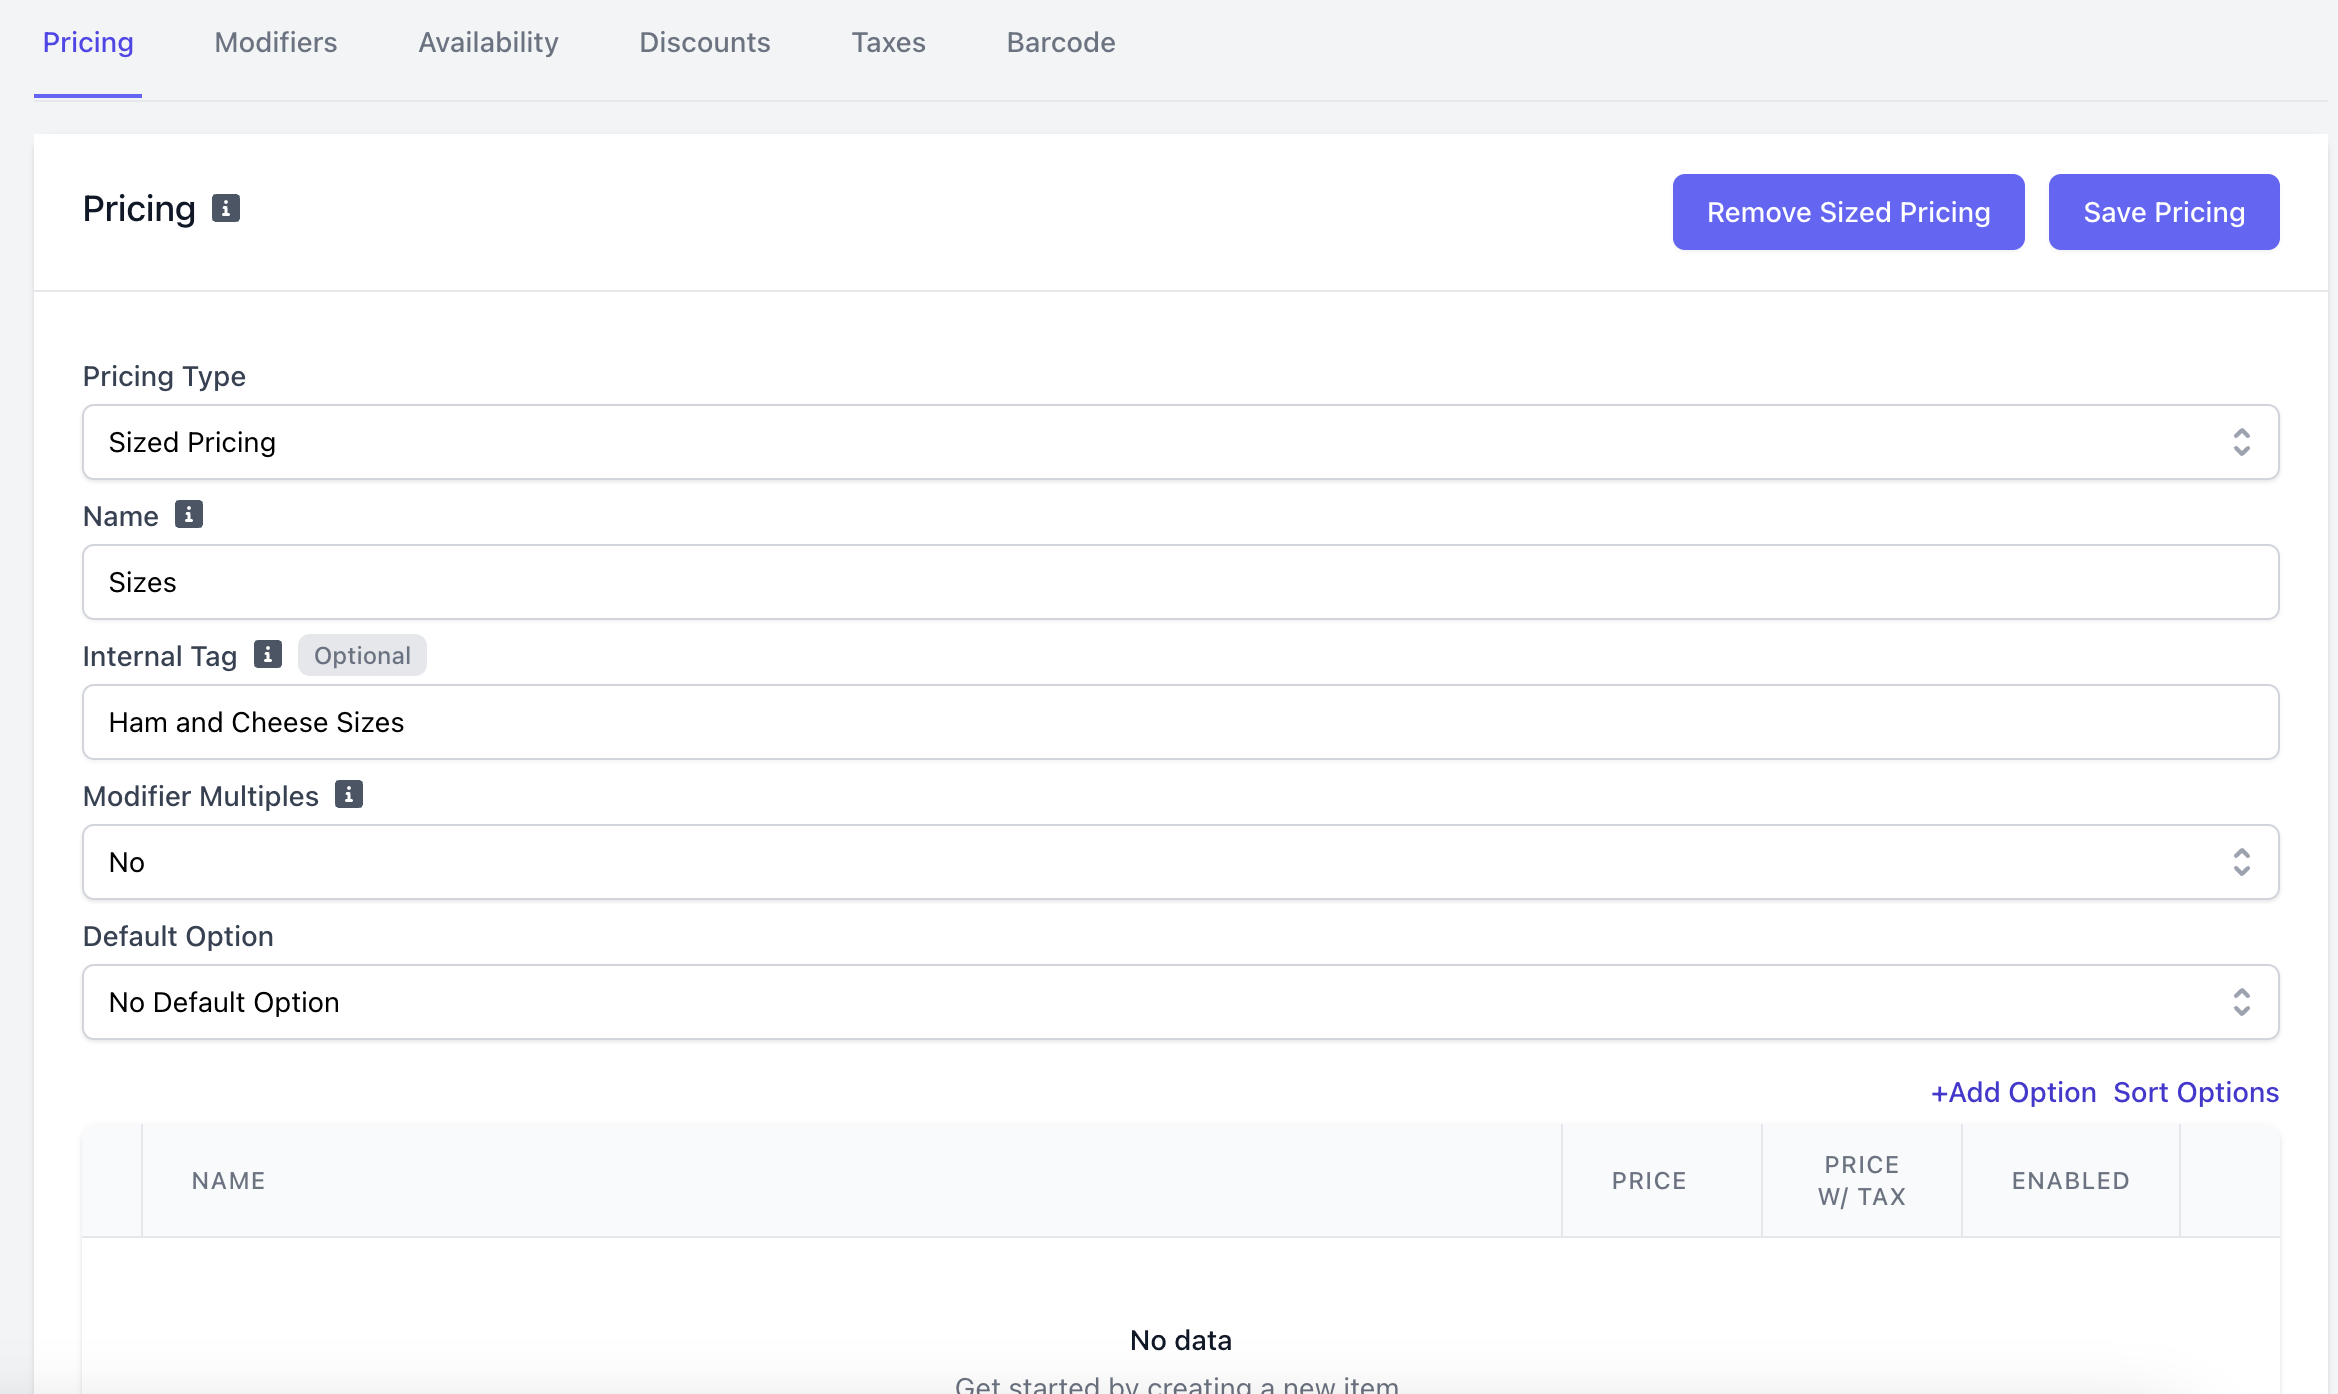 * **Name**
* **Internal Tag**: If two modifiers have the same name, this is used to uniquely identify them. This name is not displayed on the POS, but is useful in reporting.
* **Modifier Multiples**: If set to **yes**,
* **Default Option**: The size to automatically be selected upon adding product to cart before any adjustments are made (must create size options first)
Click **Add Option** to add different sizes and prices for this product
* **Placeholder Name**: i.e. 12oz, Small, Half Dozen, etc.
* **Price**
* **Enabled**: If **yes**, this size option will be available for ordering
Price will be set at checkout on the Point of Sale. Set a base price and adjust the product total price upon checkout.
Should not be used for mobile products.
* **Name**
* **Internal Tag**: If two modifiers have the same name, this is used to uniquely identify them. This name is not displayed on the POS, but is useful in reporting.
* **Modifier Multiples**: If set to **yes**,
* **Default Option**: The size to automatically be selected upon adding product to cart before any adjustments are made (must create size options first)
Click **Add Option** to add different sizes and prices for this product
* **Placeholder Name**: i.e. 12oz, Small, Half Dozen, etc.
* **Price**
* **Enabled**: If **yes**, this size option will be available for ordering
Price will be set at checkout on the Point of Sale. Set a base price and adjust the product total price upon checkout.
Should not be used for mobile products.
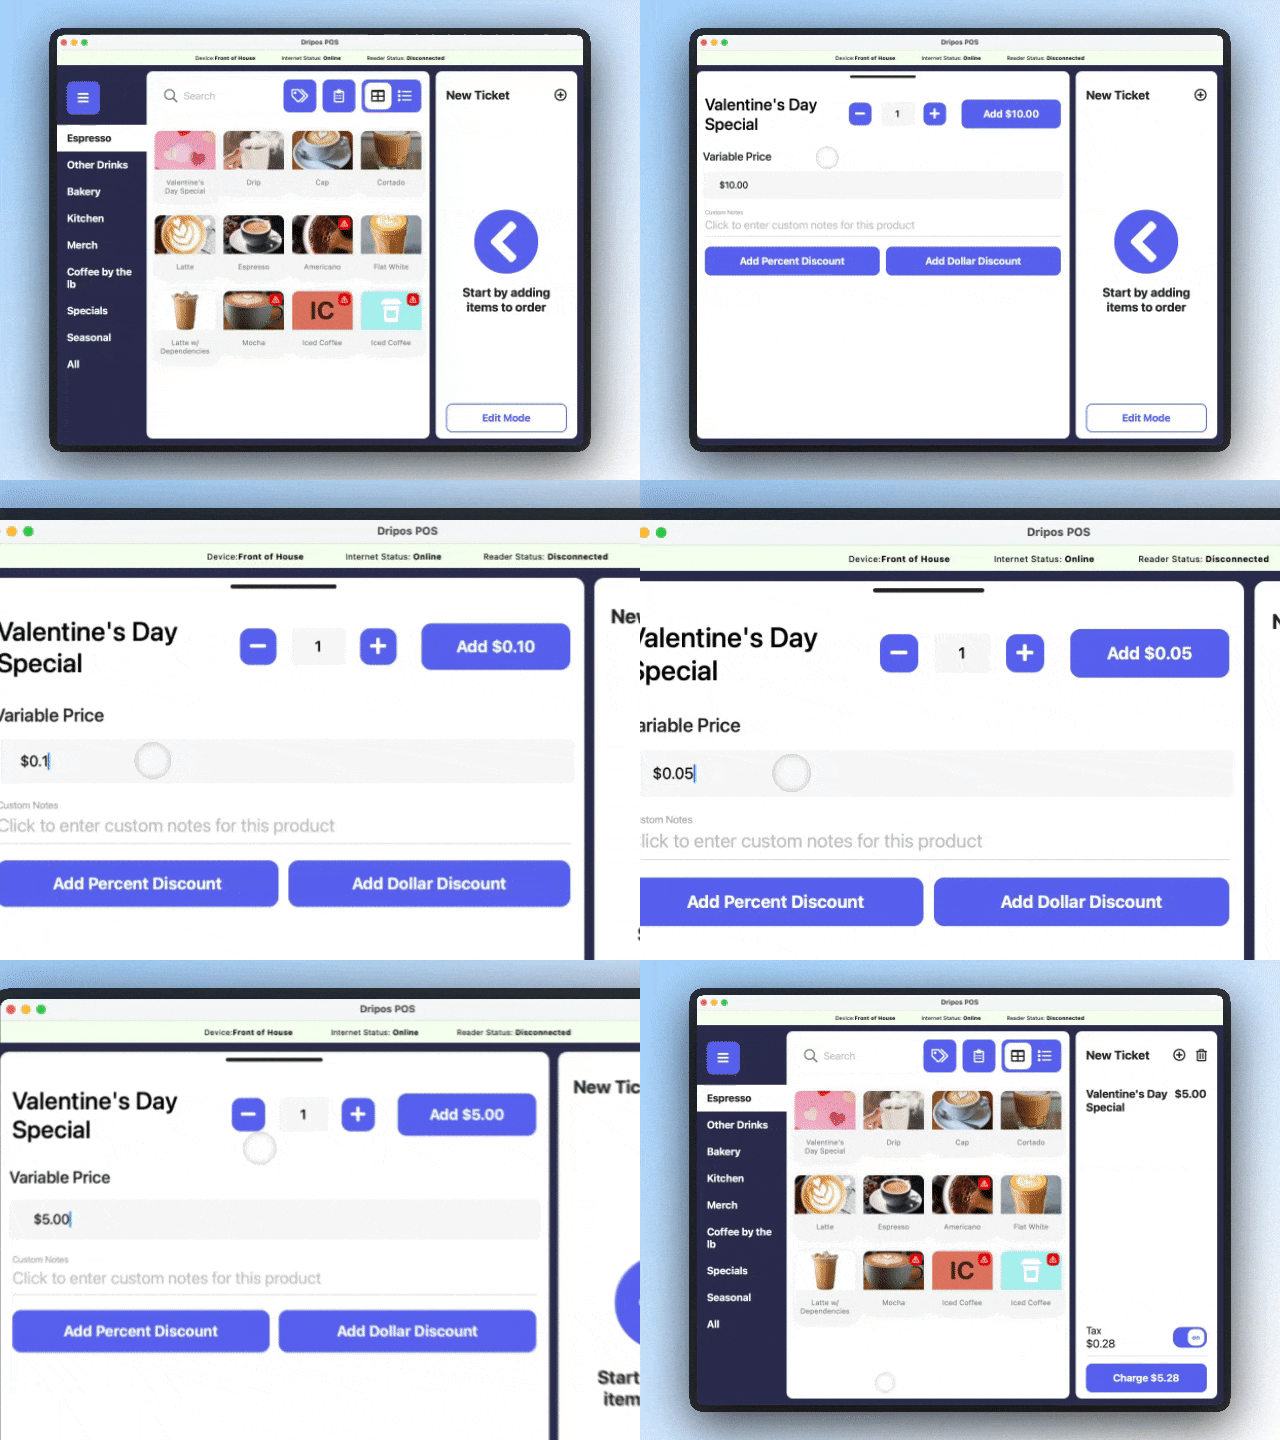 The price of the product will depend on its weight. Set a base price and adjust the product total price upon checkout.
## Manage Products
Learn how to create modifiers for products [here](orders/menu/modifiers/modifiers-basics).
Determine the days and time for which this product will be available for ordering on all Dripos platforms.
On the **Dashboard** under **Menu** > **Products** > **View** a product > see **Availability** at the bottom of the page > **Add Availability**
The price of the product will depend on its weight. Set a base price and adjust the product total price upon checkout.
## Manage Products
Learn how to create modifiers for products [here](orders/menu/modifiers/modifiers-basics).
Determine the days and time for which this product will be available for ordering on all Dripos platforms.
On the **Dashboard** under **Menu** > **Products** > **View** a product > see **Availability** at the bottom of the page > **Add Availability**
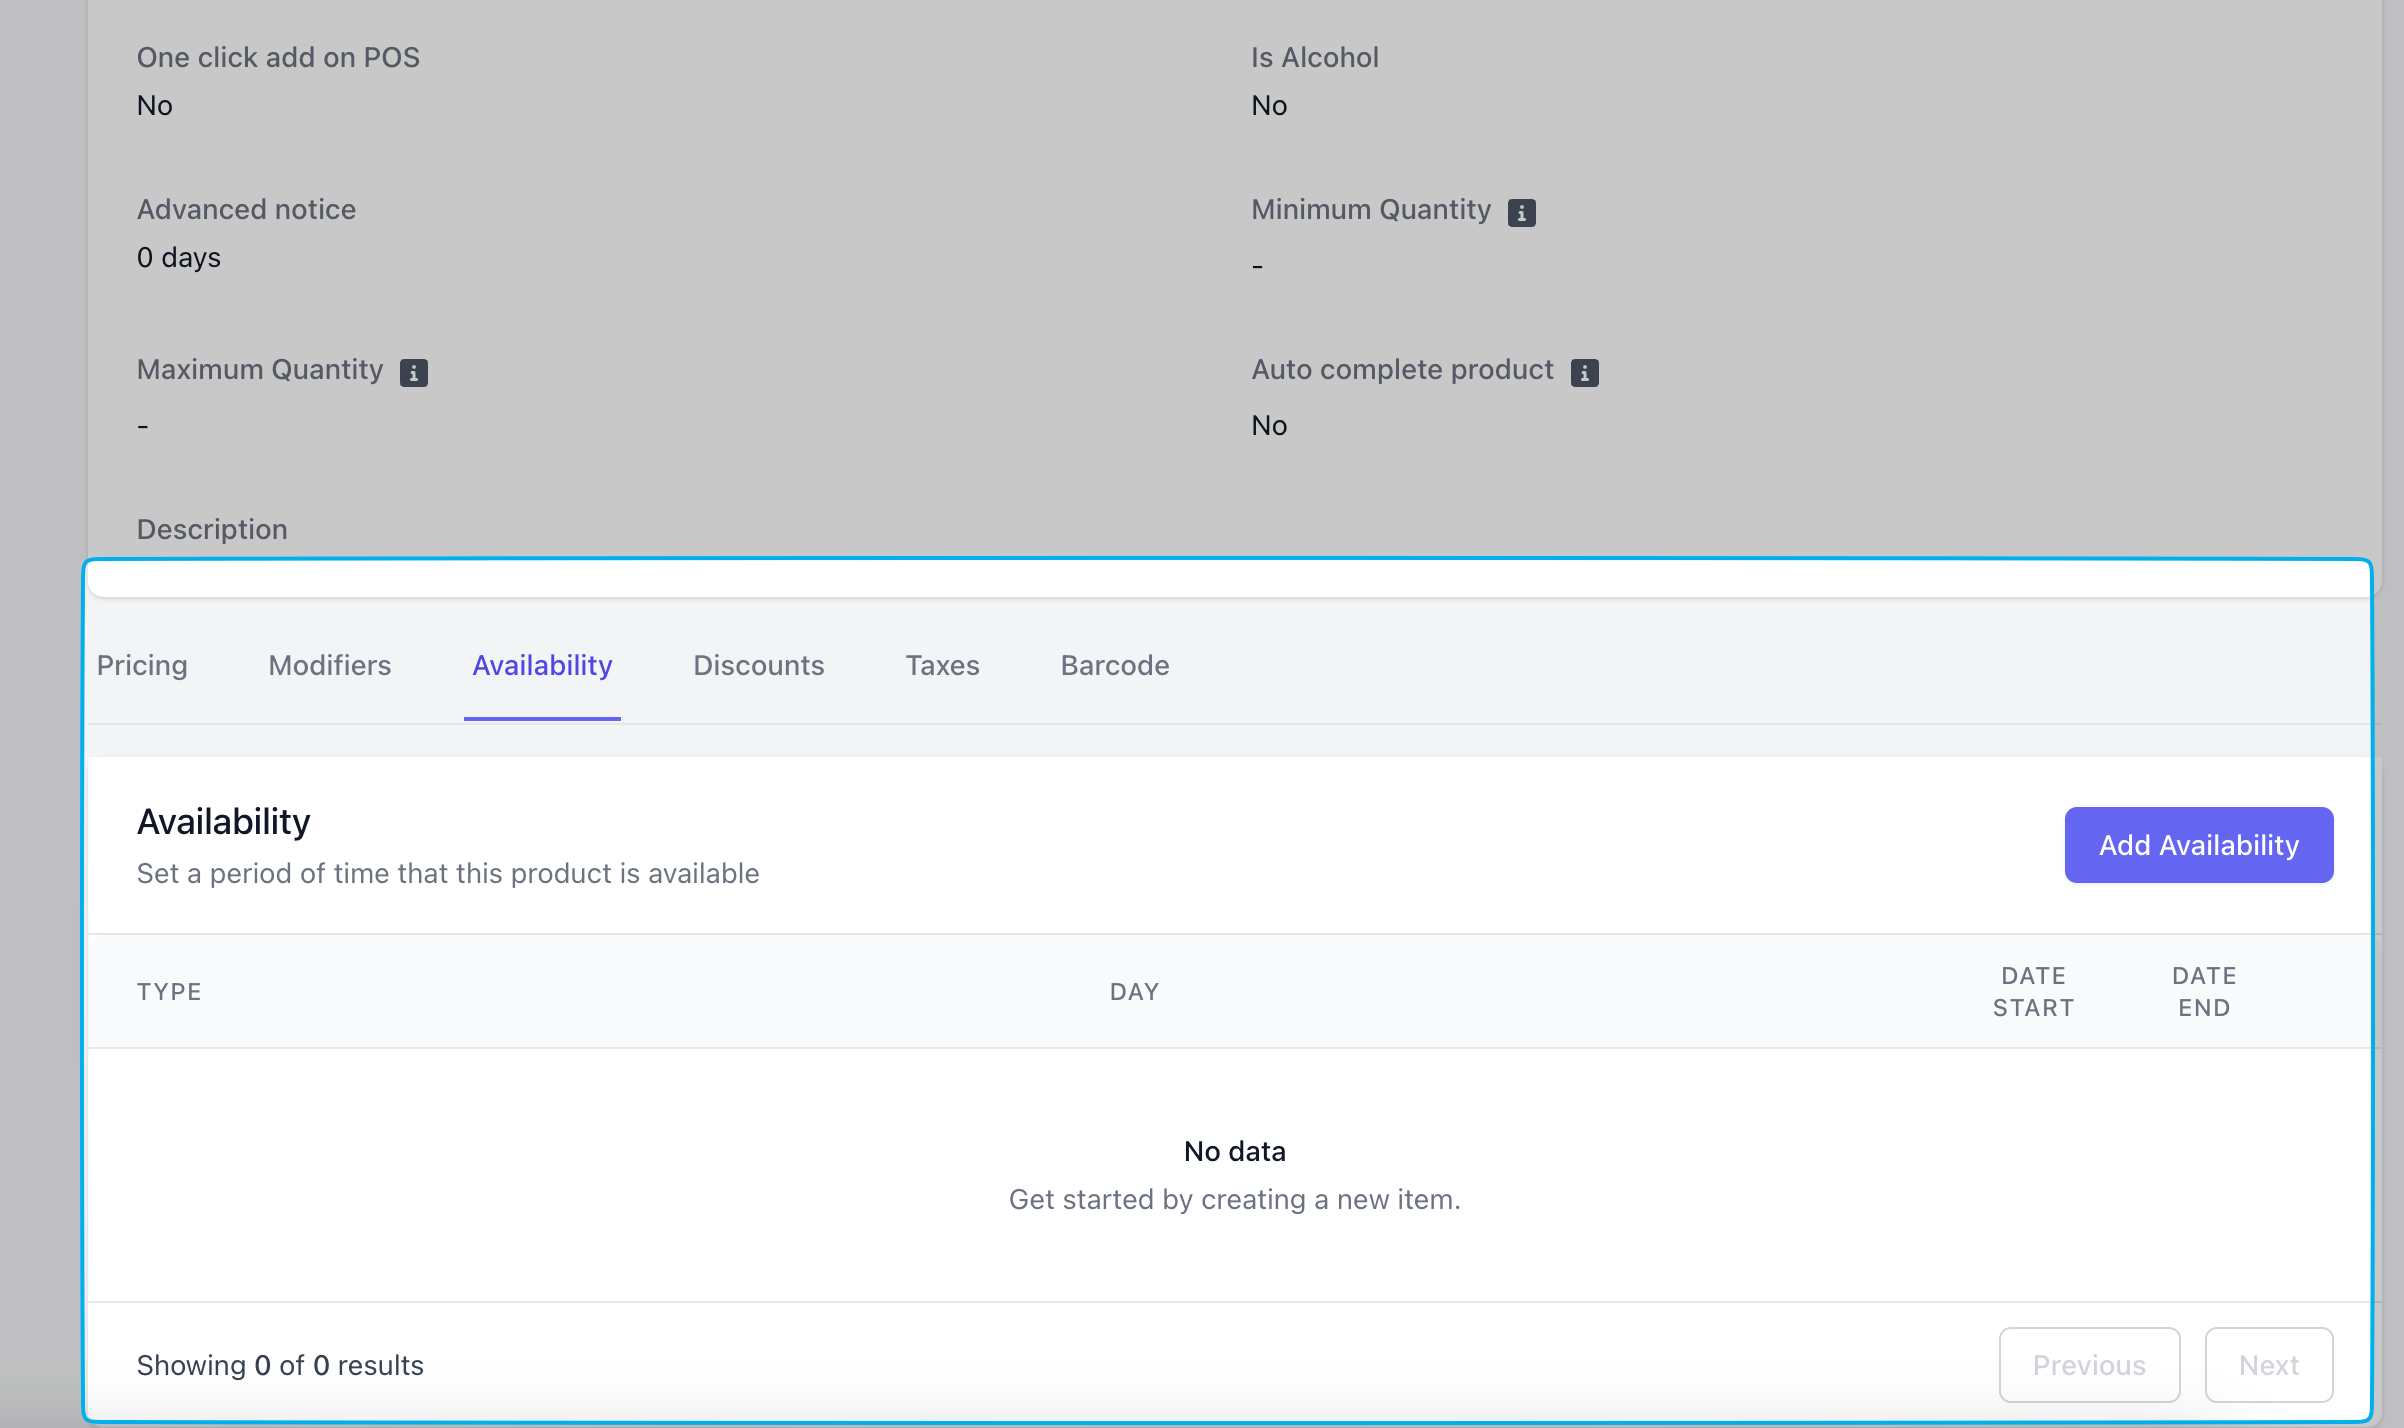 Select a date range for when this order can be available.
If **Hide item when unavailable** is set to **Yes**, customers will be able schedule an order ahead of time for pickup on the available date range
*i.e., February 14th 8:00AM to February 15th 5:00PM, if item is not hidden a customer may place an order on February 8th for pickup on February 14th at 10AM*
Select one day of the week and a respective time period during that day a product is available for ordering.
Repeat this step for every day of the week you'd like to schedule availability for.
If **Hide item when unavailable** is set to **Yes**, customers will be able schedule an order ahead of time for pickup on the available date range.
*i.e., Mondays from 8AM-10AM, if item is not hidden a customer may place an order ahead of time on Monday at 7AM for pickup the same day at 8:30AM.*
*i.e., Tuesdays from 11AM-1PM, if an item is hidden a customer can only add the item to cart on Tuesdays from 11AM-1PM.*
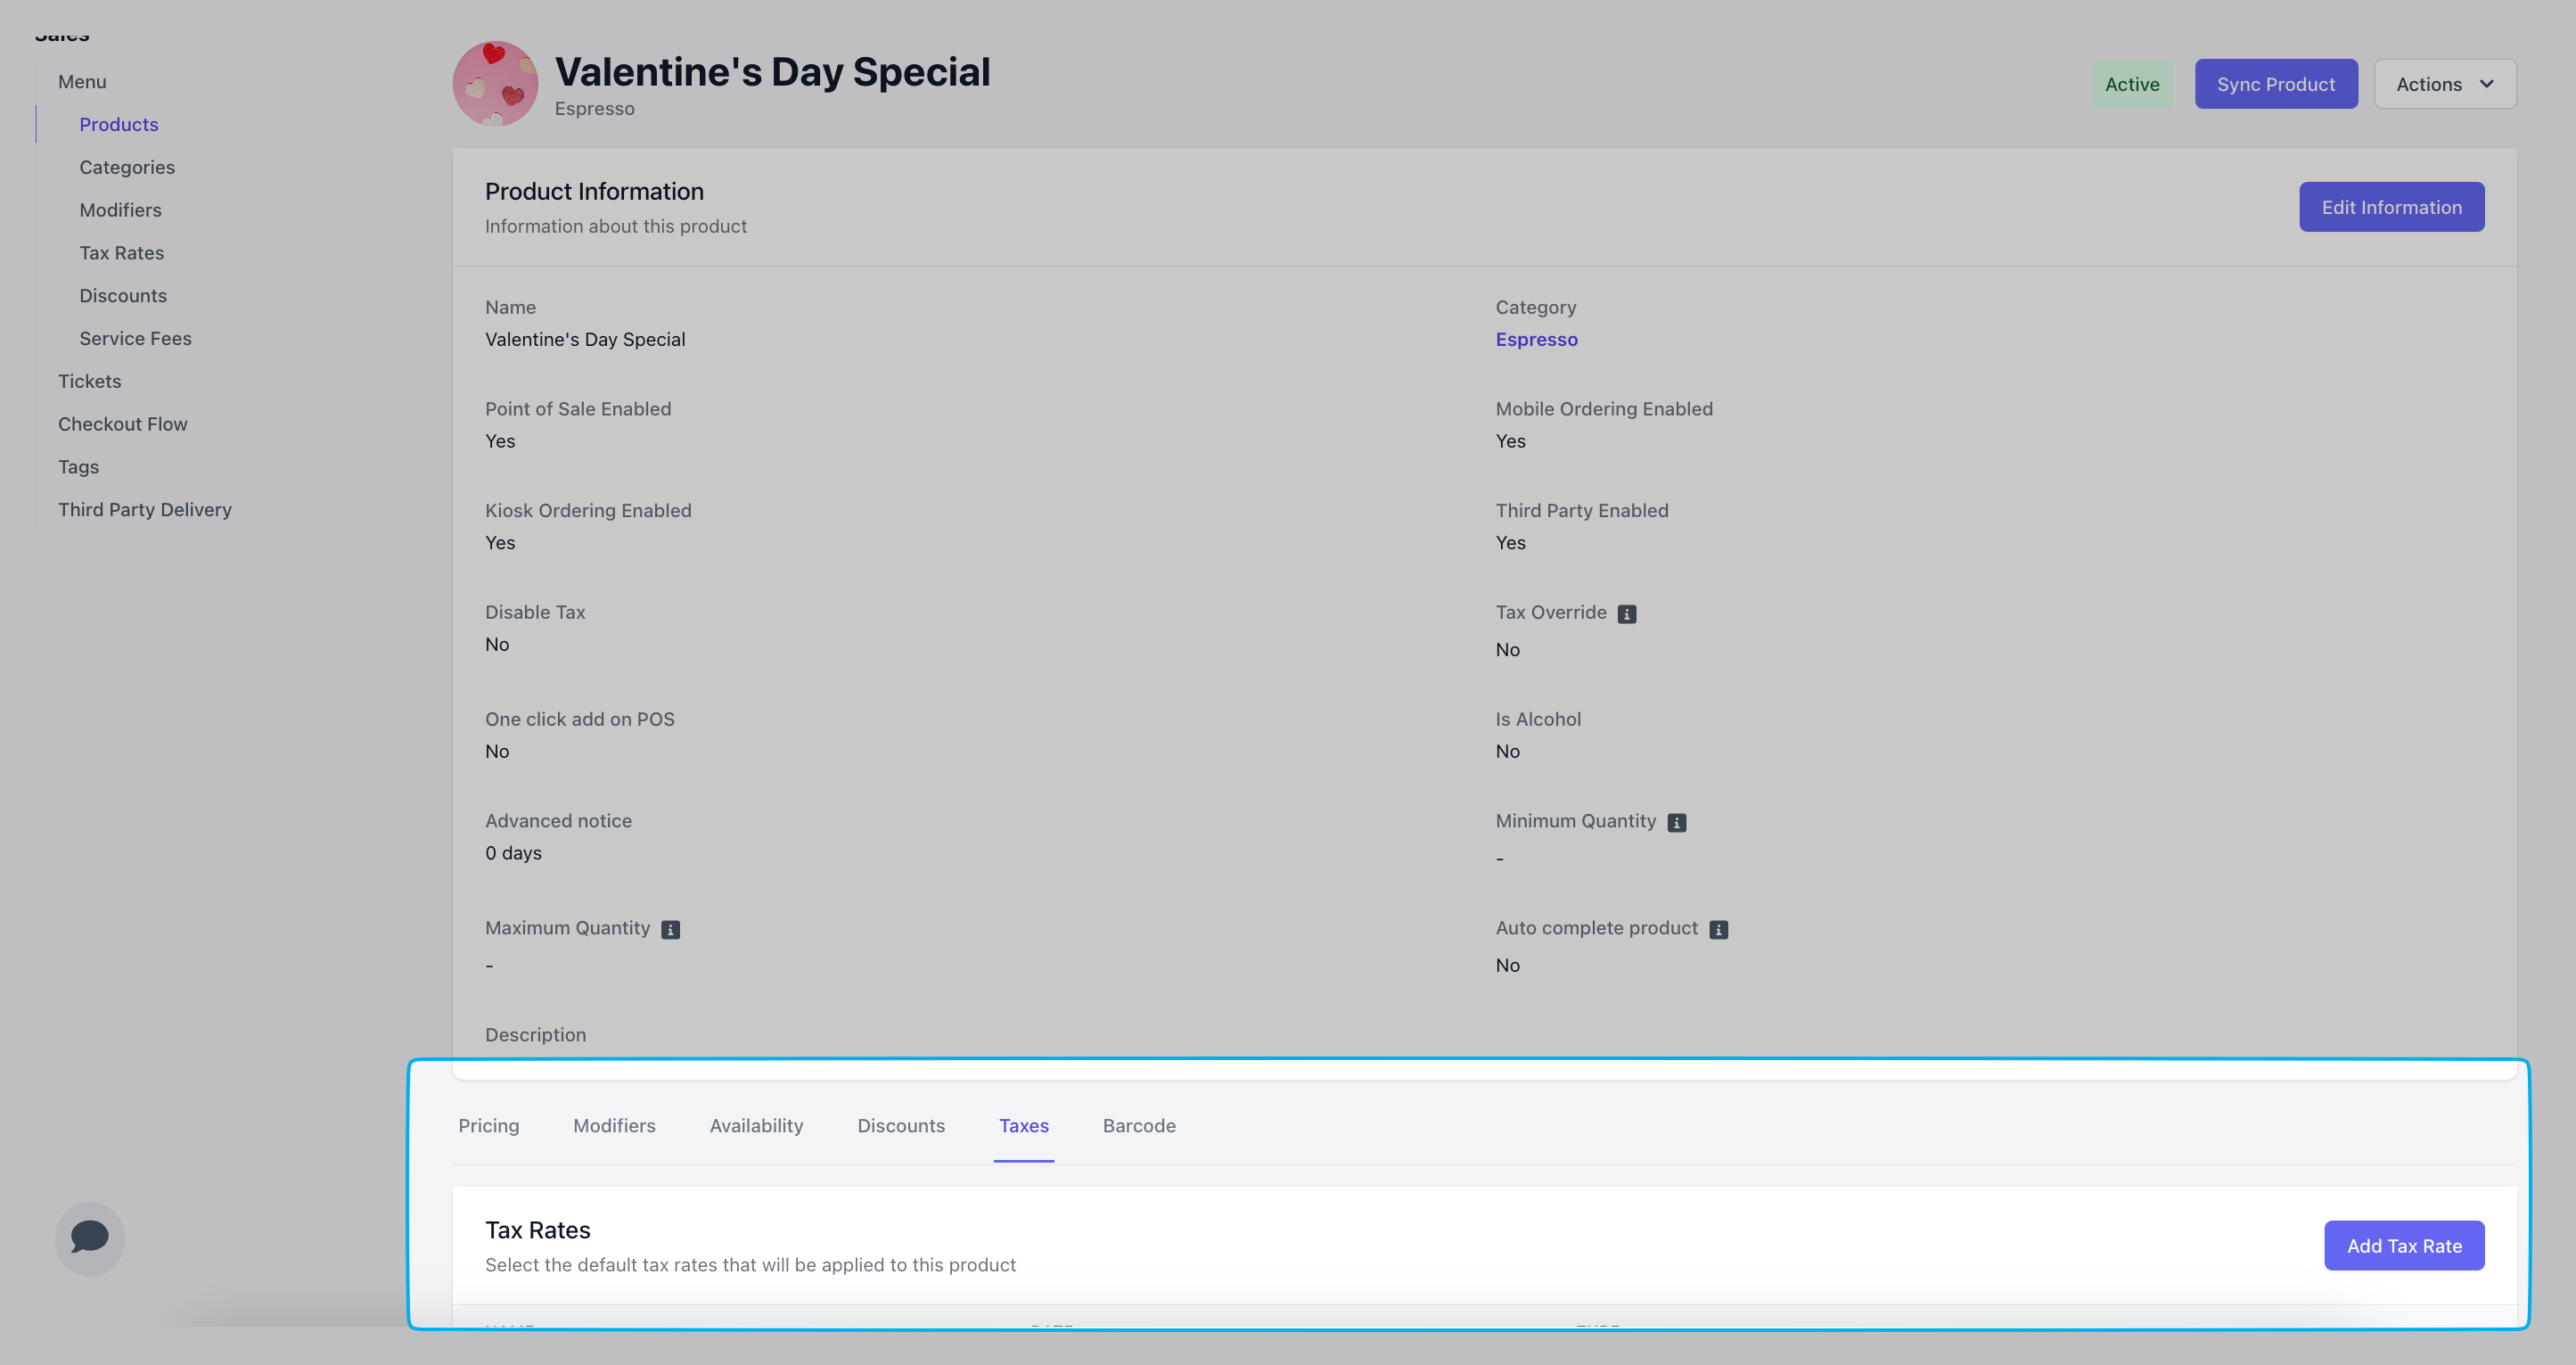
Add tax rates to a product at the very bottom of the product's page.
Additionally, if the product's category has a tax rate applied to it that tax rate will automatically be applied to the product.
Select a date range for when this order can be available.
If **Hide item when unavailable** is set to **Yes**, customers will be able schedule an order ahead of time for pickup on the available date range
*i.e., February 14th 8:00AM to February 15th 5:00PM, if item is not hidden a customer may place an order on February 8th for pickup on February 14th at 10AM*
Select one day of the week and a respective time period during that day a product is available for ordering.
Repeat this step for every day of the week you'd like to schedule availability for.
If **Hide item when unavailable** is set to **Yes**, customers will be able schedule an order ahead of time for pickup on the available date range.
*i.e., Mondays from 8AM-10AM, if item is not hidden a customer may place an order ahead of time on Monday at 7AM for pickup the same day at 8:30AM.*
*i.e., Tuesdays from 11AM-1PM, if an item is hidden a customer can only add the item to cart on Tuesdays from 11AM-1PM.*
Add tax rates to a product at the very bottom of the product's page.
Additionally, if the product's category has a tax rate applied to it that tax rate will automatically be applied to the product.
 Explore the various types of discounts to apply to products [here](/orders/discounts/discounts-basics)
***
## Duplicate a Product
Duplicate a product in it's entirety onto your menu
***
## Custom Products
Create a one time product off the menu during checkout on the Point of Sale
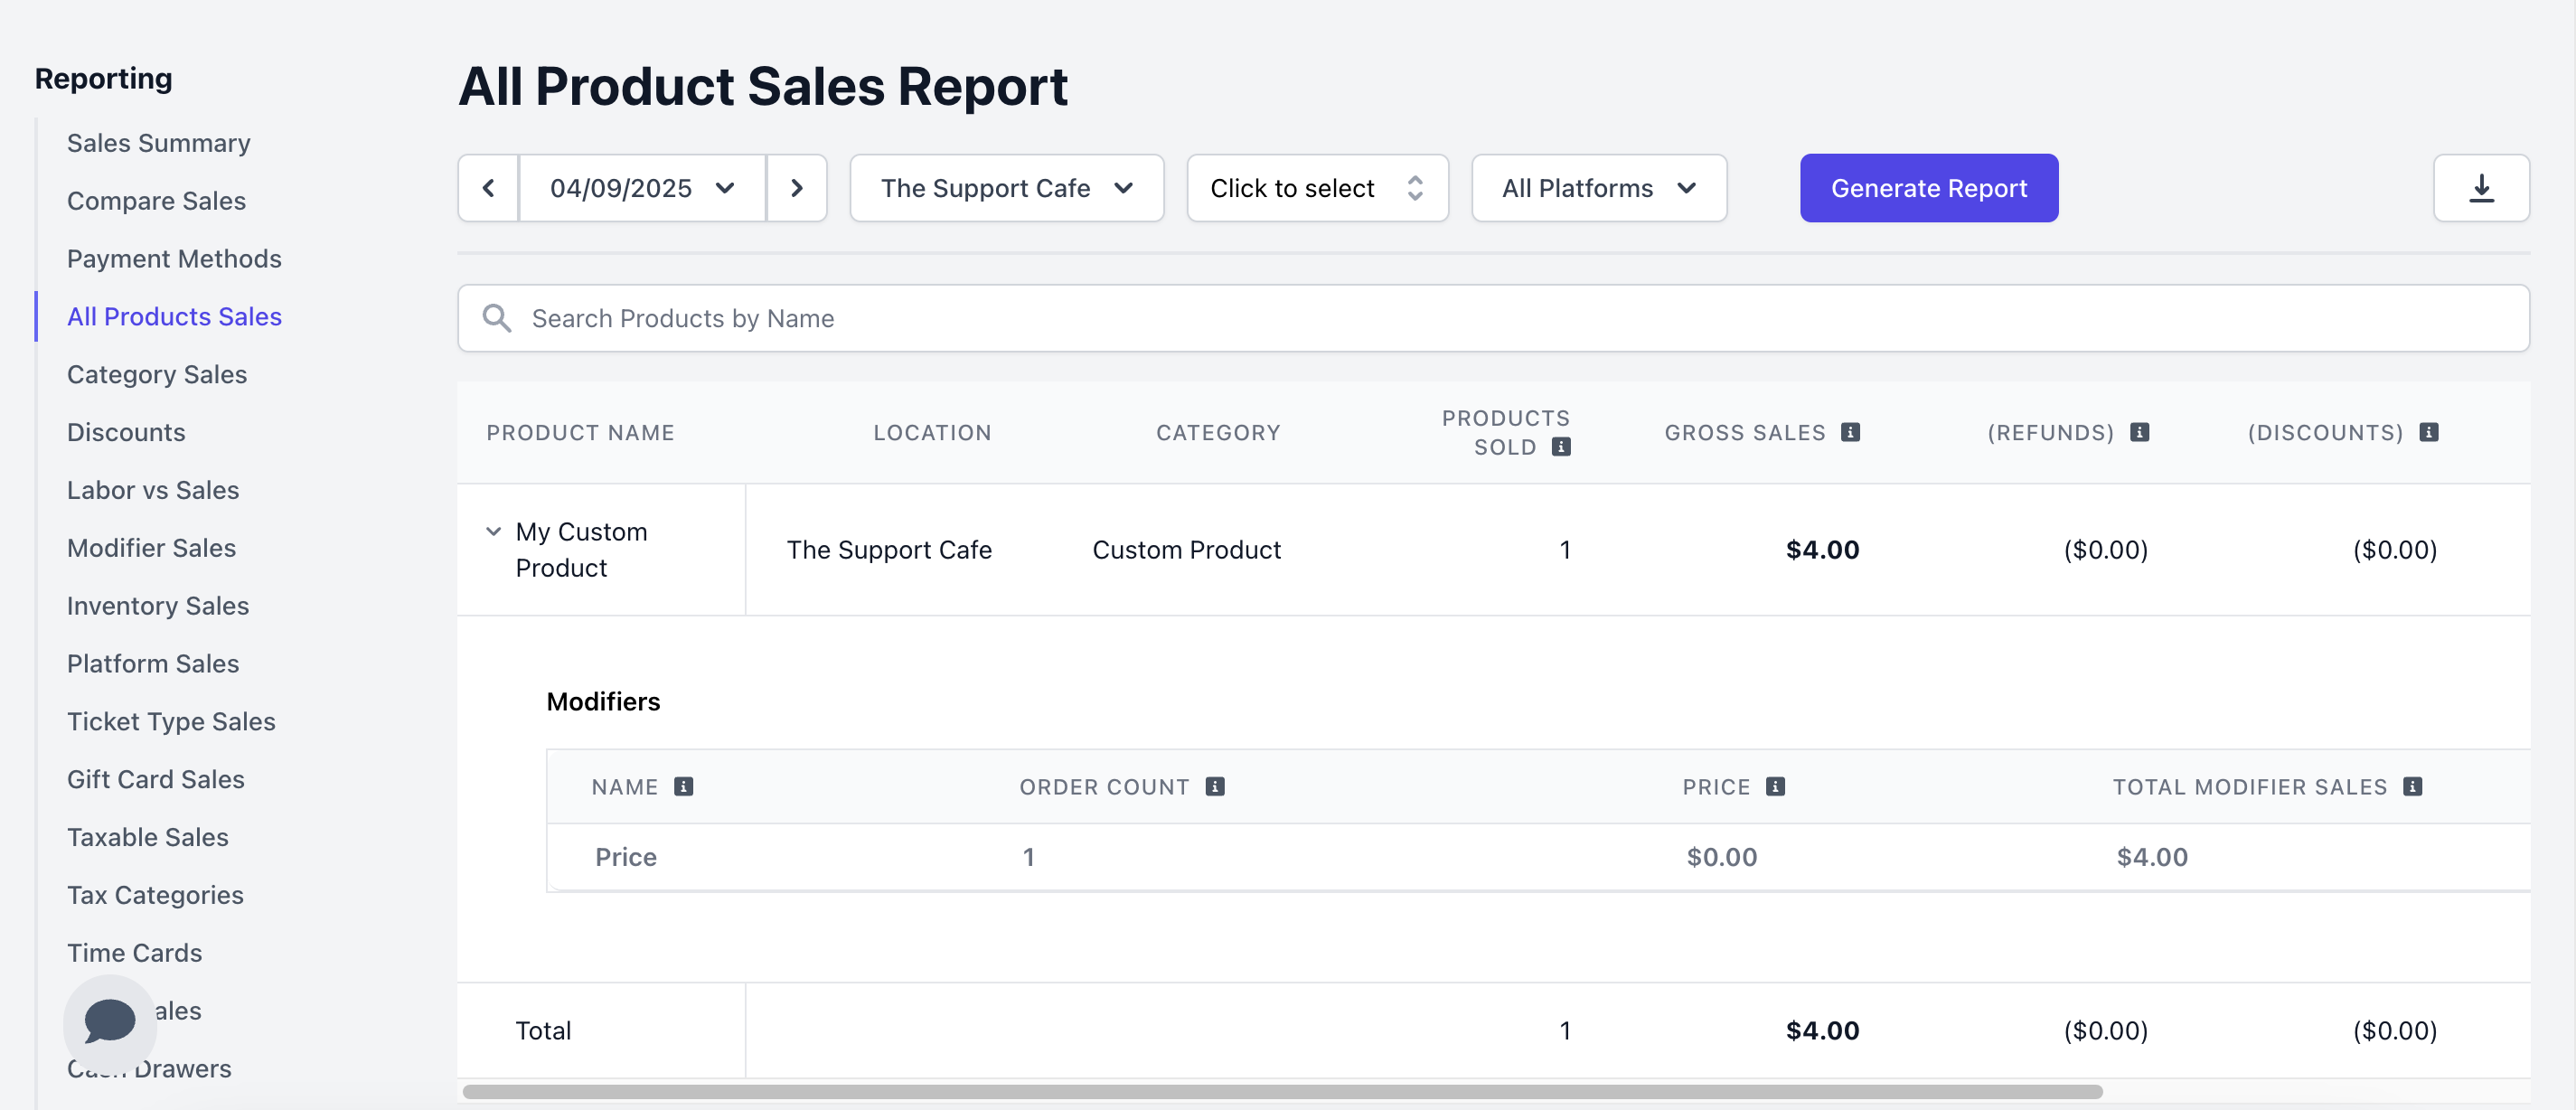
View custom product sales on the Web Dashboard under **Reports** > **[All Product Sales](https://dashboard.dripos.com/reports/all-products-sales)**
Explore the various types of discounts to apply to products [here](/orders/discounts/discounts-basics)
***
## Duplicate a Product
Duplicate a product in it's entirety onto your menu
***
## Custom Products
Create a one time product off the menu during checkout on the Point of Sale
View custom product sales on the Web Dashboard under **Reports** > **[All Product Sales](https://dashboard.dripos.com/reports/all-products-sales)**