> ## Documentation Index
> Fetch the complete documentation index at: https://support.dripos.com/llms.txt
> Use this file to discover all available pages before exploring further.
# Employee Breaks
> Use Dripos to keep track of employee paid or unpaid breaks
If your state requires employees to take breaks during shifts—or if you’d like more accurate time tracking—Dripos offers built-in break management features to help you stay compliant and organized.
**What Are Break Types?**
Break types in Dripos let you define specific break durations that employees can select during their shifts. You can create:
**Paid breaks**: The employee remains on the clock during the break.
**Unpaid breaks**: The employee is temporarily clocked out.
These break types can be customized to fit your business’s policies or legal requirements.
***
## Create Break Type
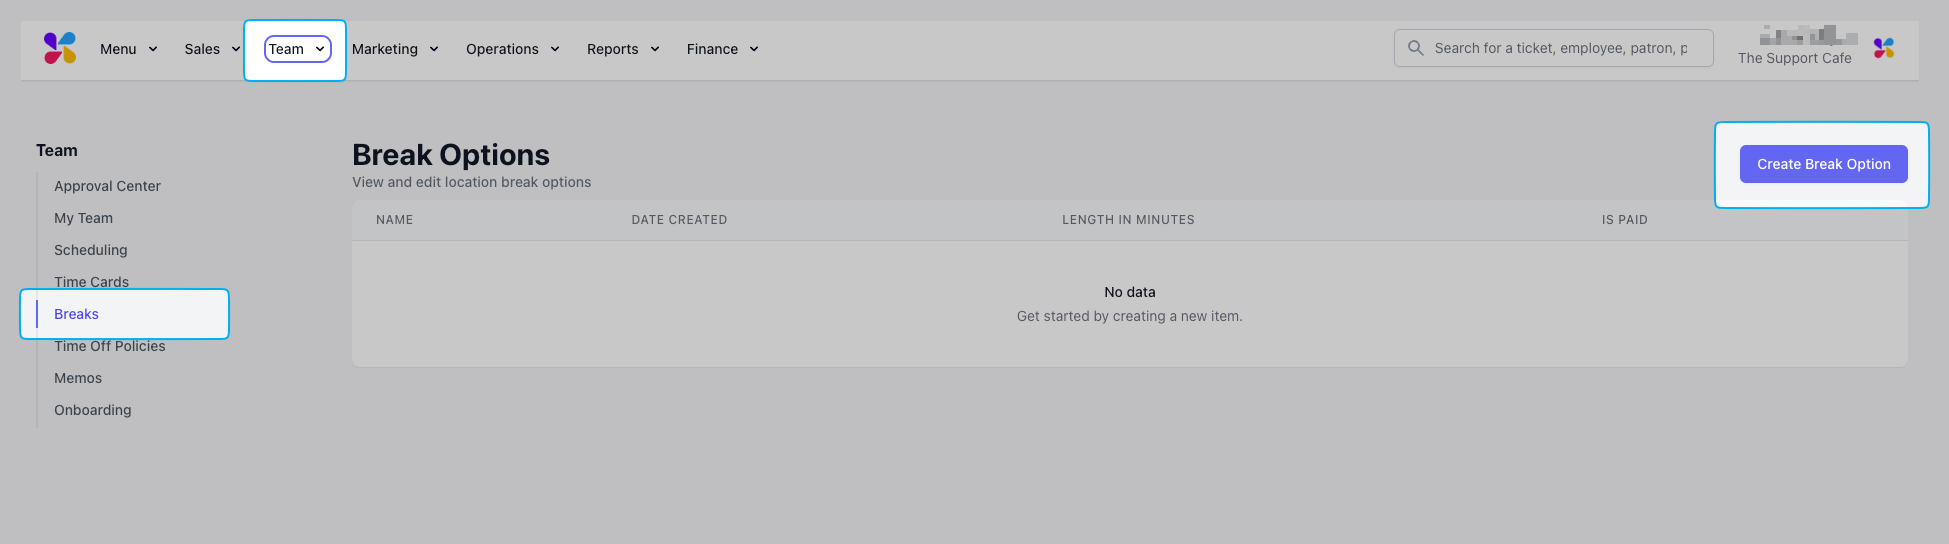
To enable employees to start a break using the Dripos time clock, you’ll first need to create at least one break type in the system.
On the **Dashboard** navigate to **Team** > **Breaks** > **Create Break Option**
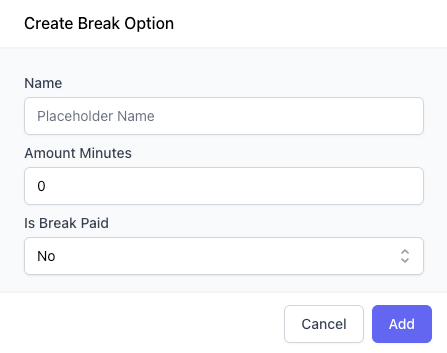
 Enter the break time, the duration of the break in minutes, and indicate if the break is to be paid. Press the **Add** button to save.
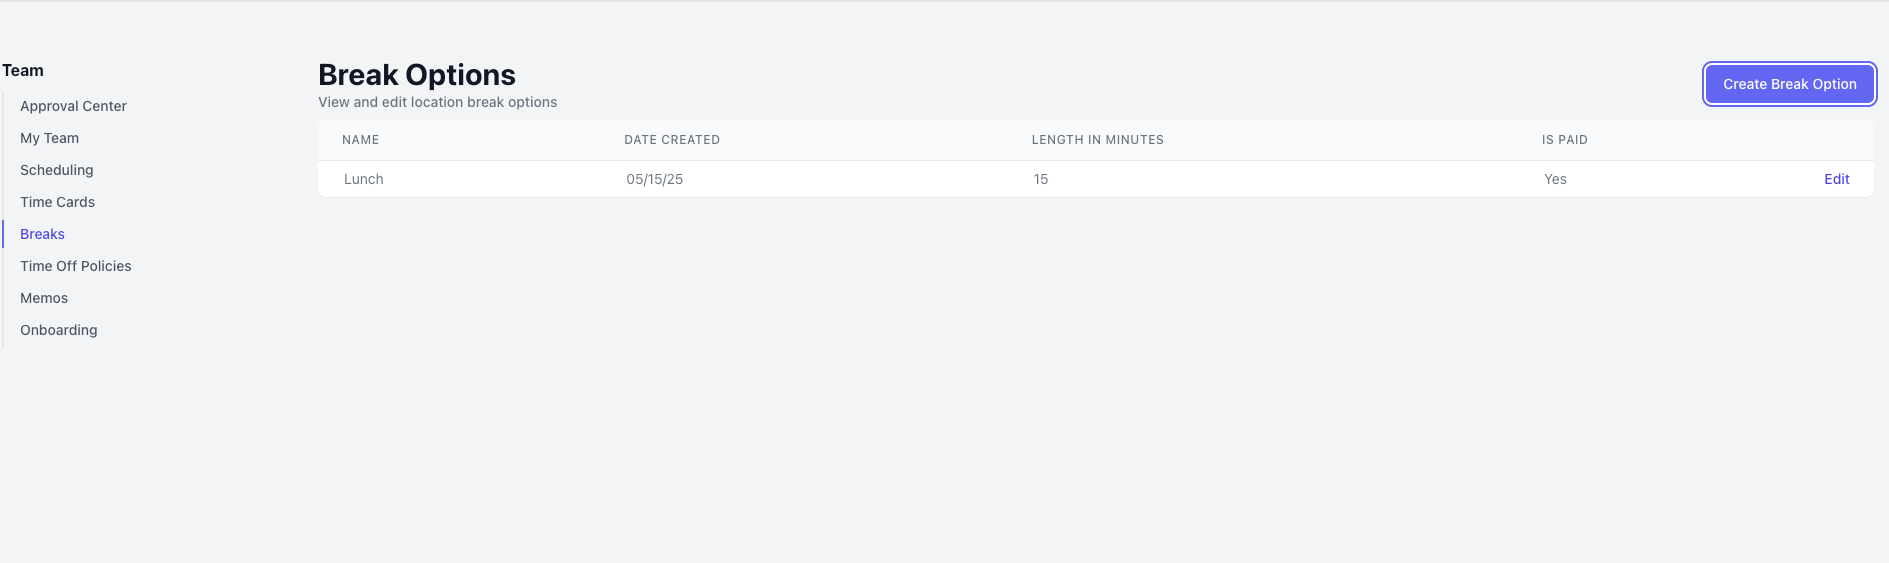
 View and edit existing breaks on this page. Any break listed here can now be used with the **Time Clock**.
 ***
## Start & End Breaks
Start and end an employee break in real time from the **Point of Sale**.
Employees must be clocked in to be able to start and end a shift break.
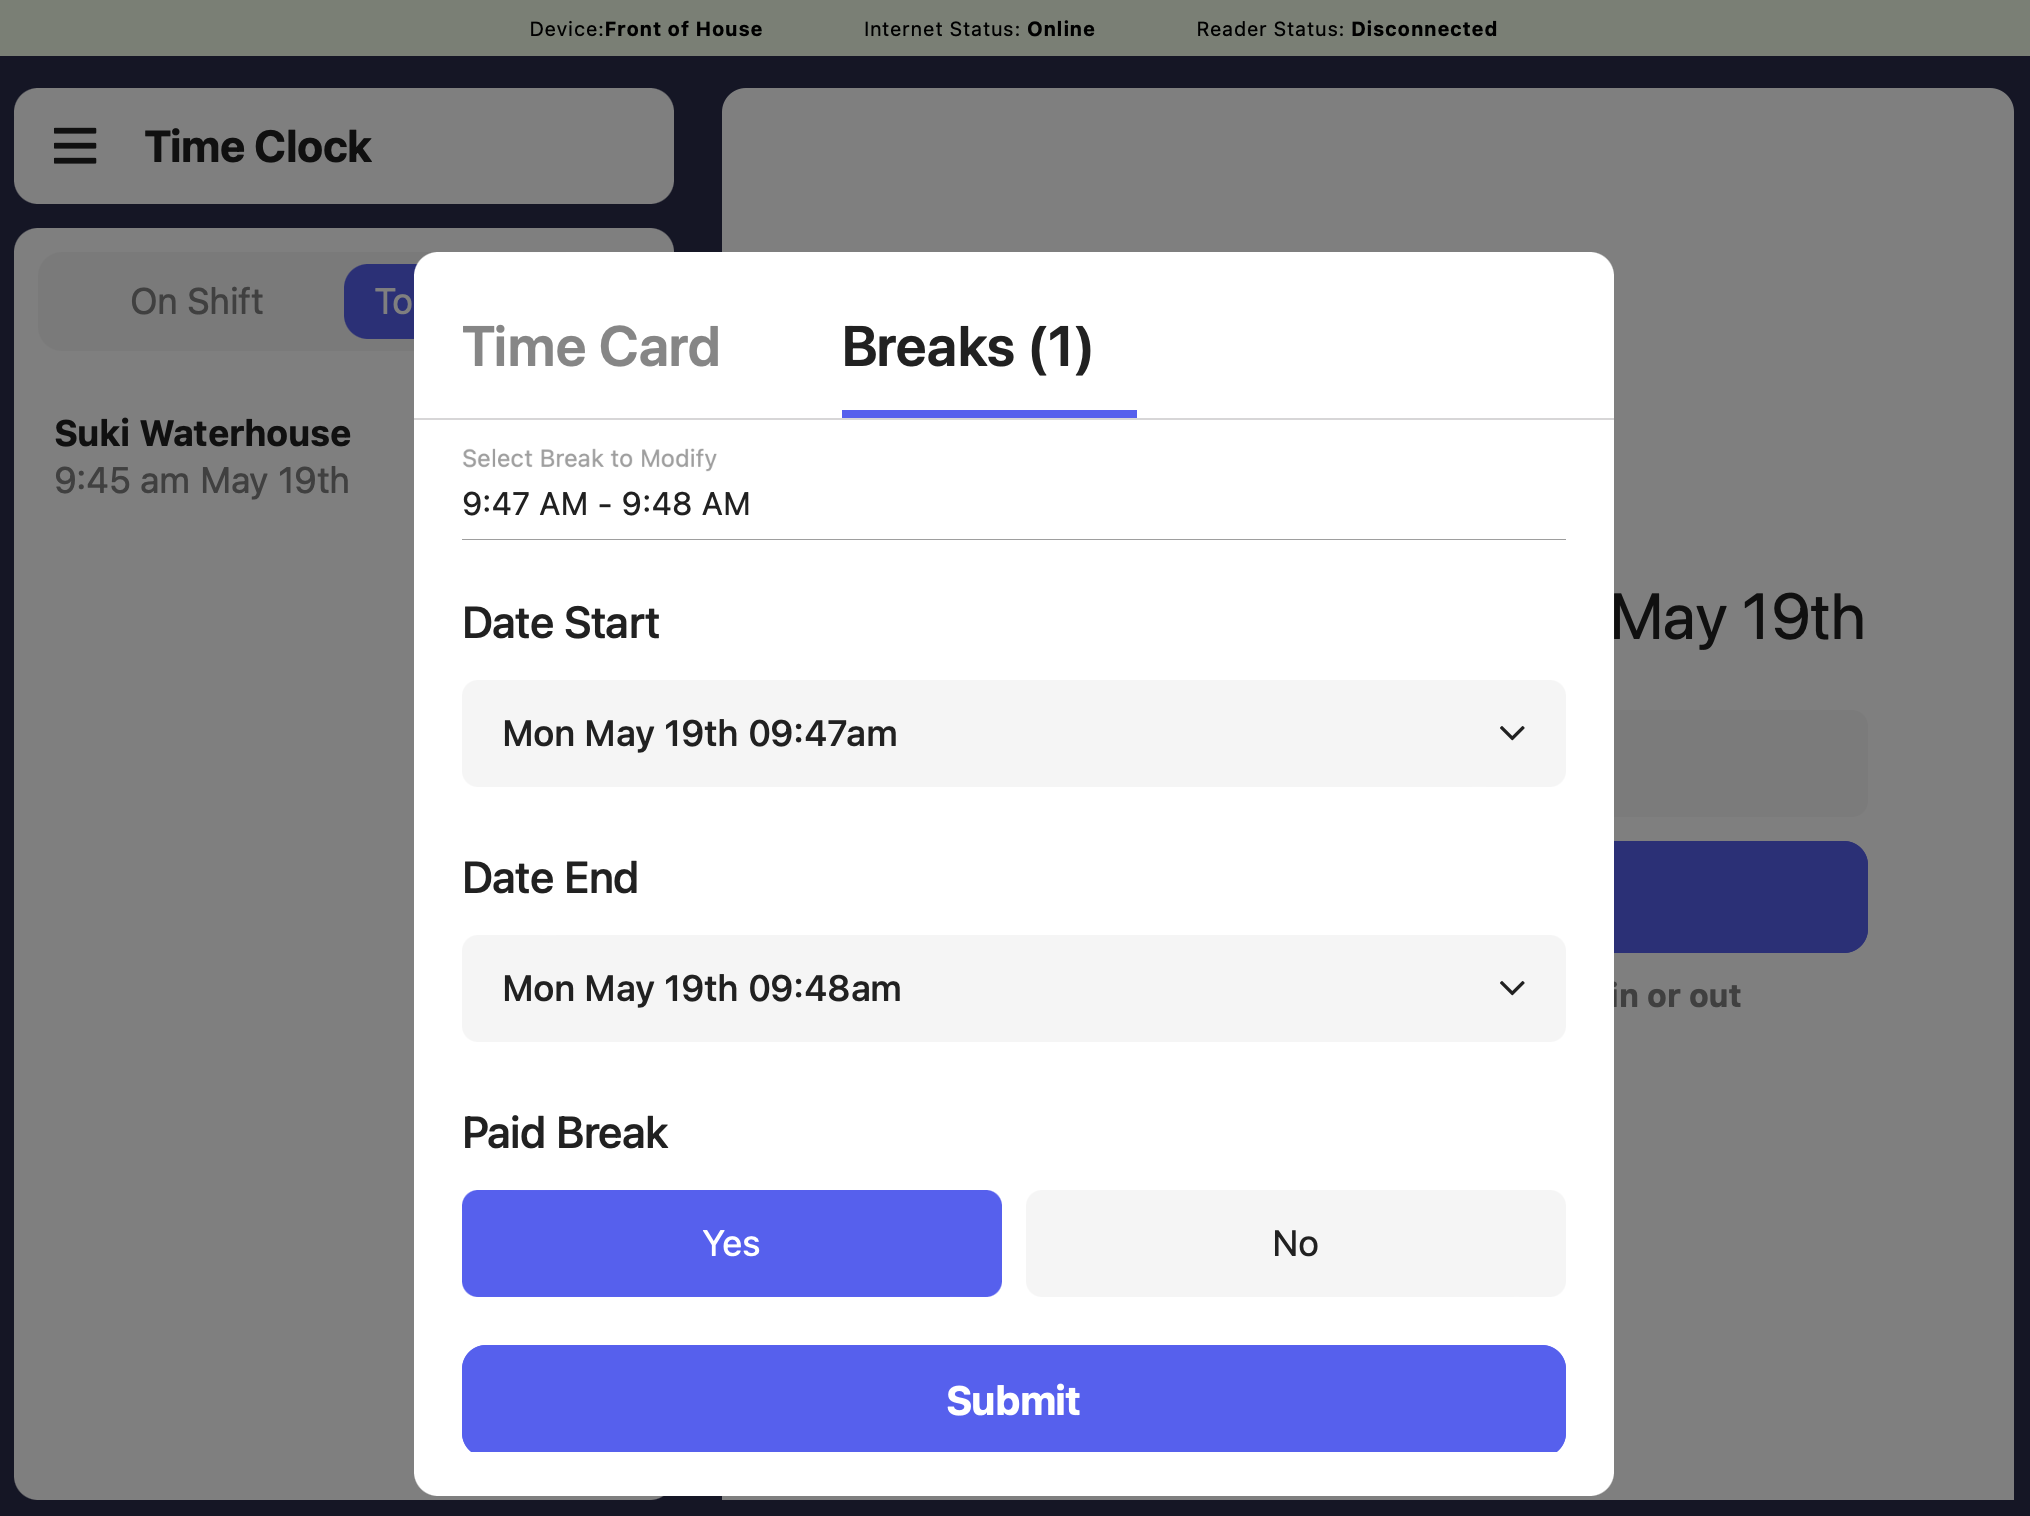
View and edit the employee break directly from their completed time card on the Point of Sale.
***
## Start & End Breaks
Start and end an employee break in real time from the **Point of Sale**.
Employees must be clocked in to be able to start and end a shift break.
View and edit the employee break directly from their completed time card on the Point of Sale.
 ***
## Add and Edit Breaks on Existing Time Cards
Did an employee forget to start and/or end their break in real time? Not a problem - add and edit breaks on existing time cards from the **Dashboard**.
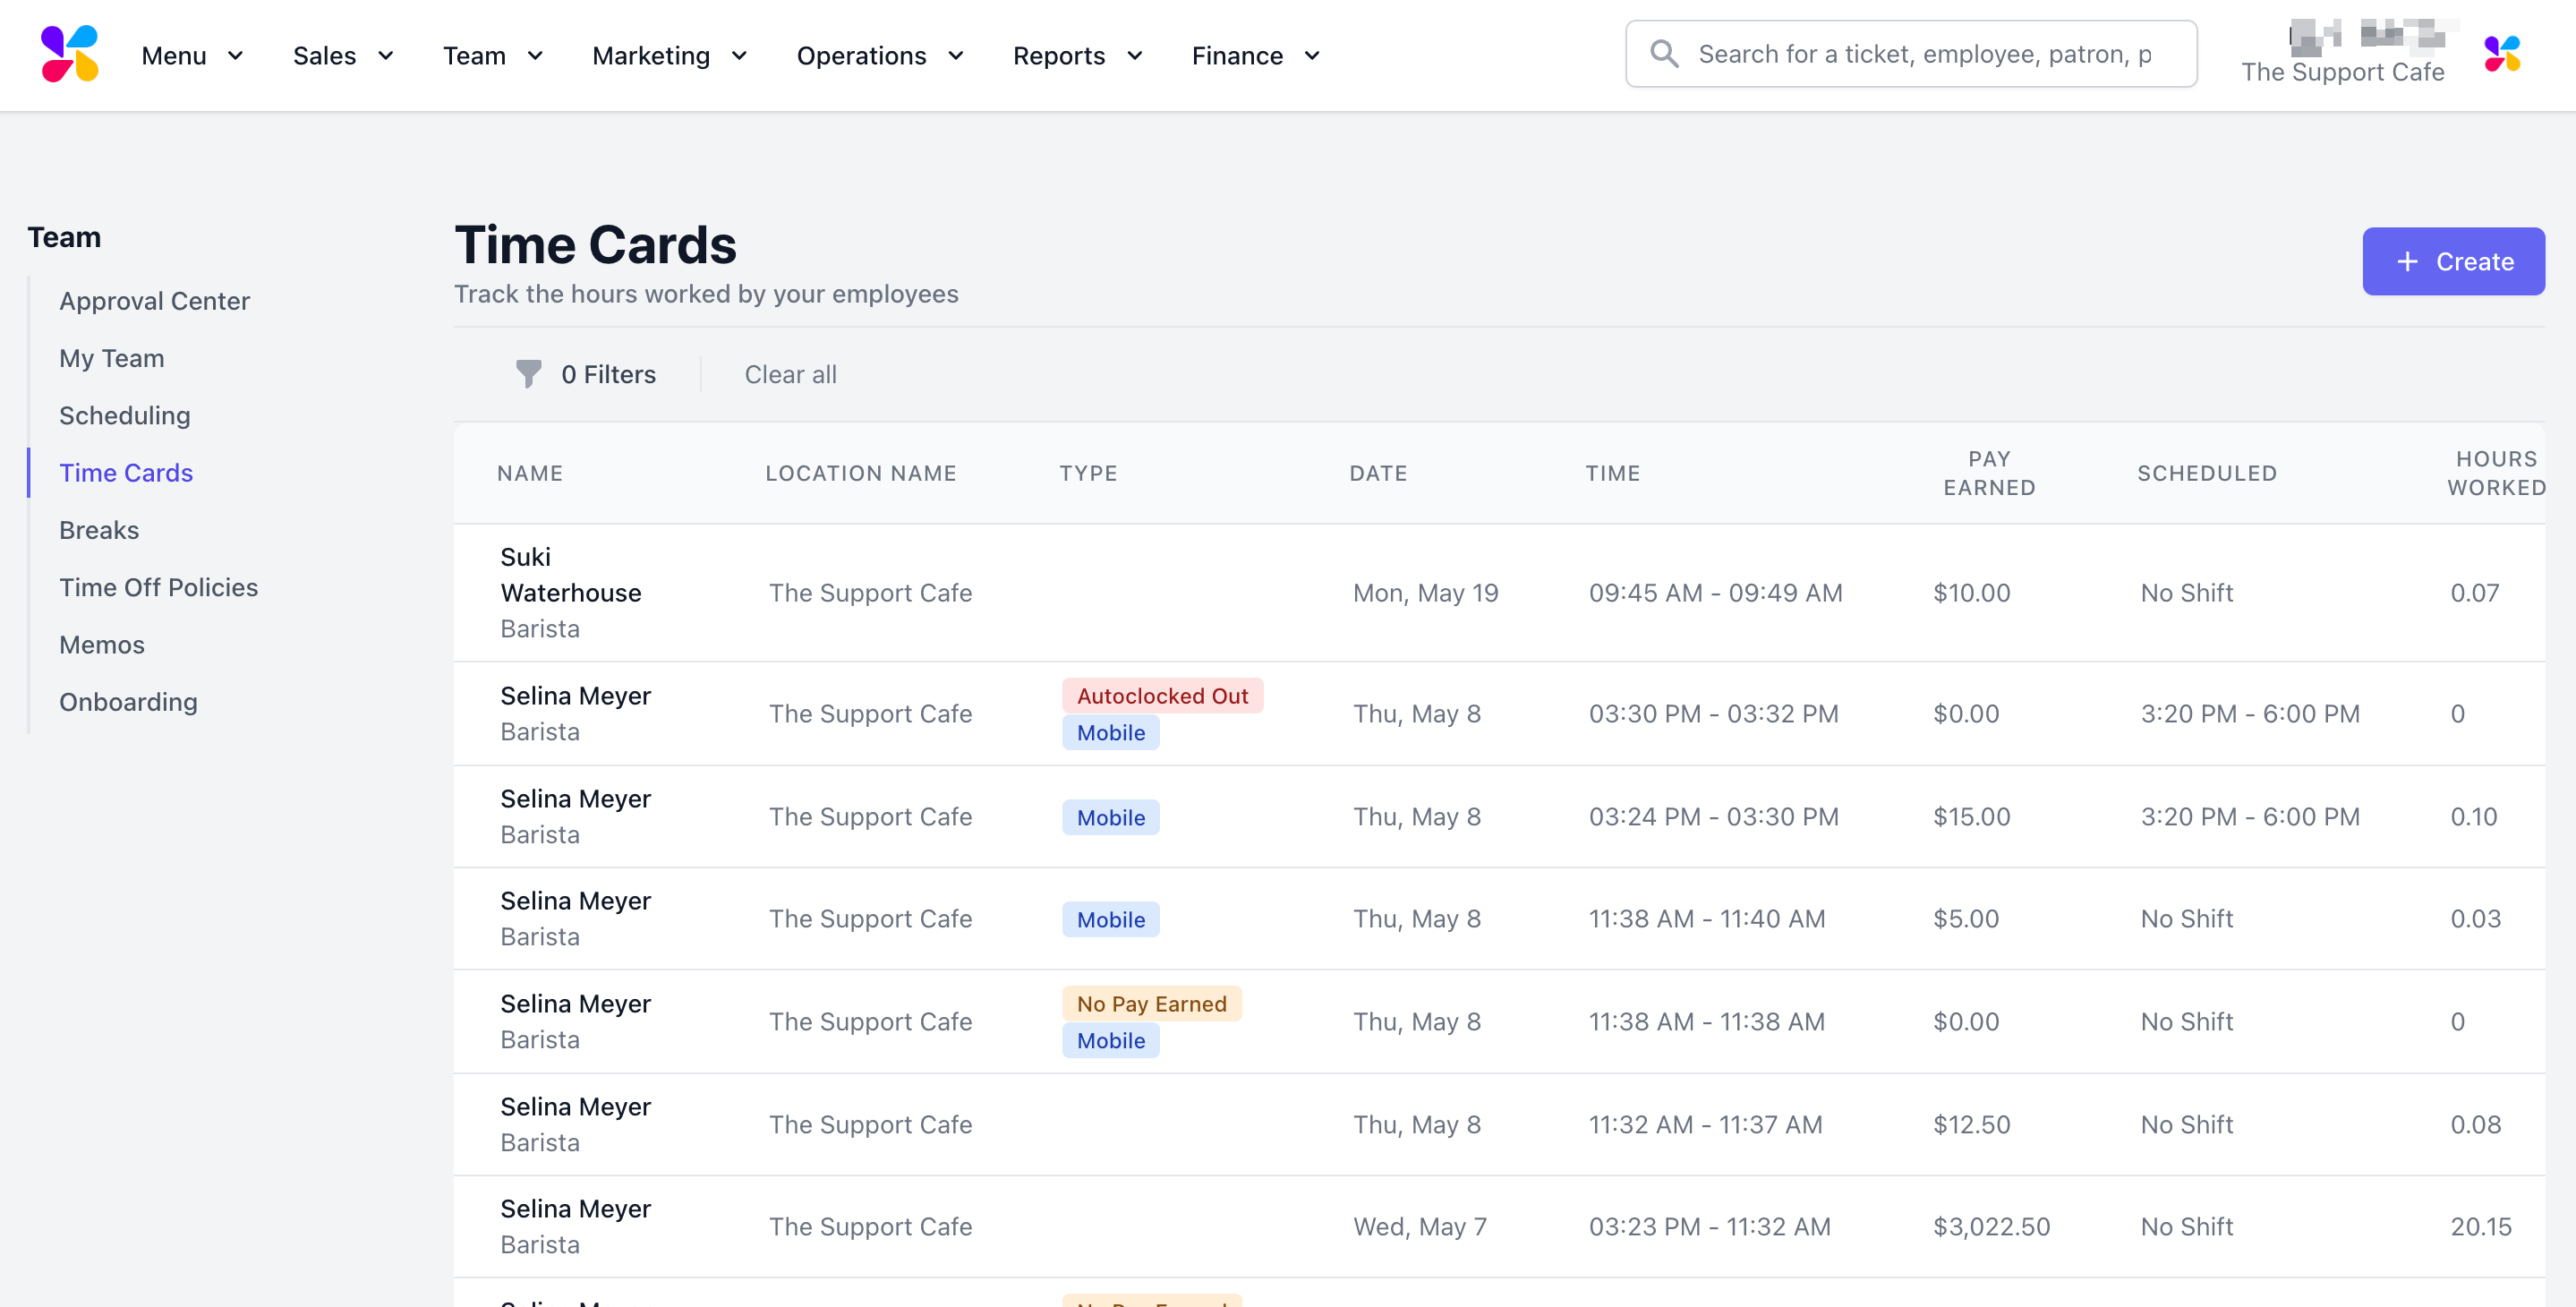
Navigate on the **Dashboard** to **Team** > **Time Cards** > click on any time card line to edit.
***
## Add and Edit Breaks on Existing Time Cards
Did an employee forget to start and/or end their break in real time? Not a problem - add and edit breaks on existing time cards from the **Dashboard**.
Navigate on the **Dashboard** to **Team** > **Time Cards** > click on any time card line to edit.
 Edit existing break times and types at the bottom of the time card, or press the red **X** to delete the break.
Click **Add Break** to add a new break to the existing time card.
Edit existing break times and types at the bottom of the time card, or press the red **X** to delete the break.
Click **Add Break** to add a new break to the existing time card.
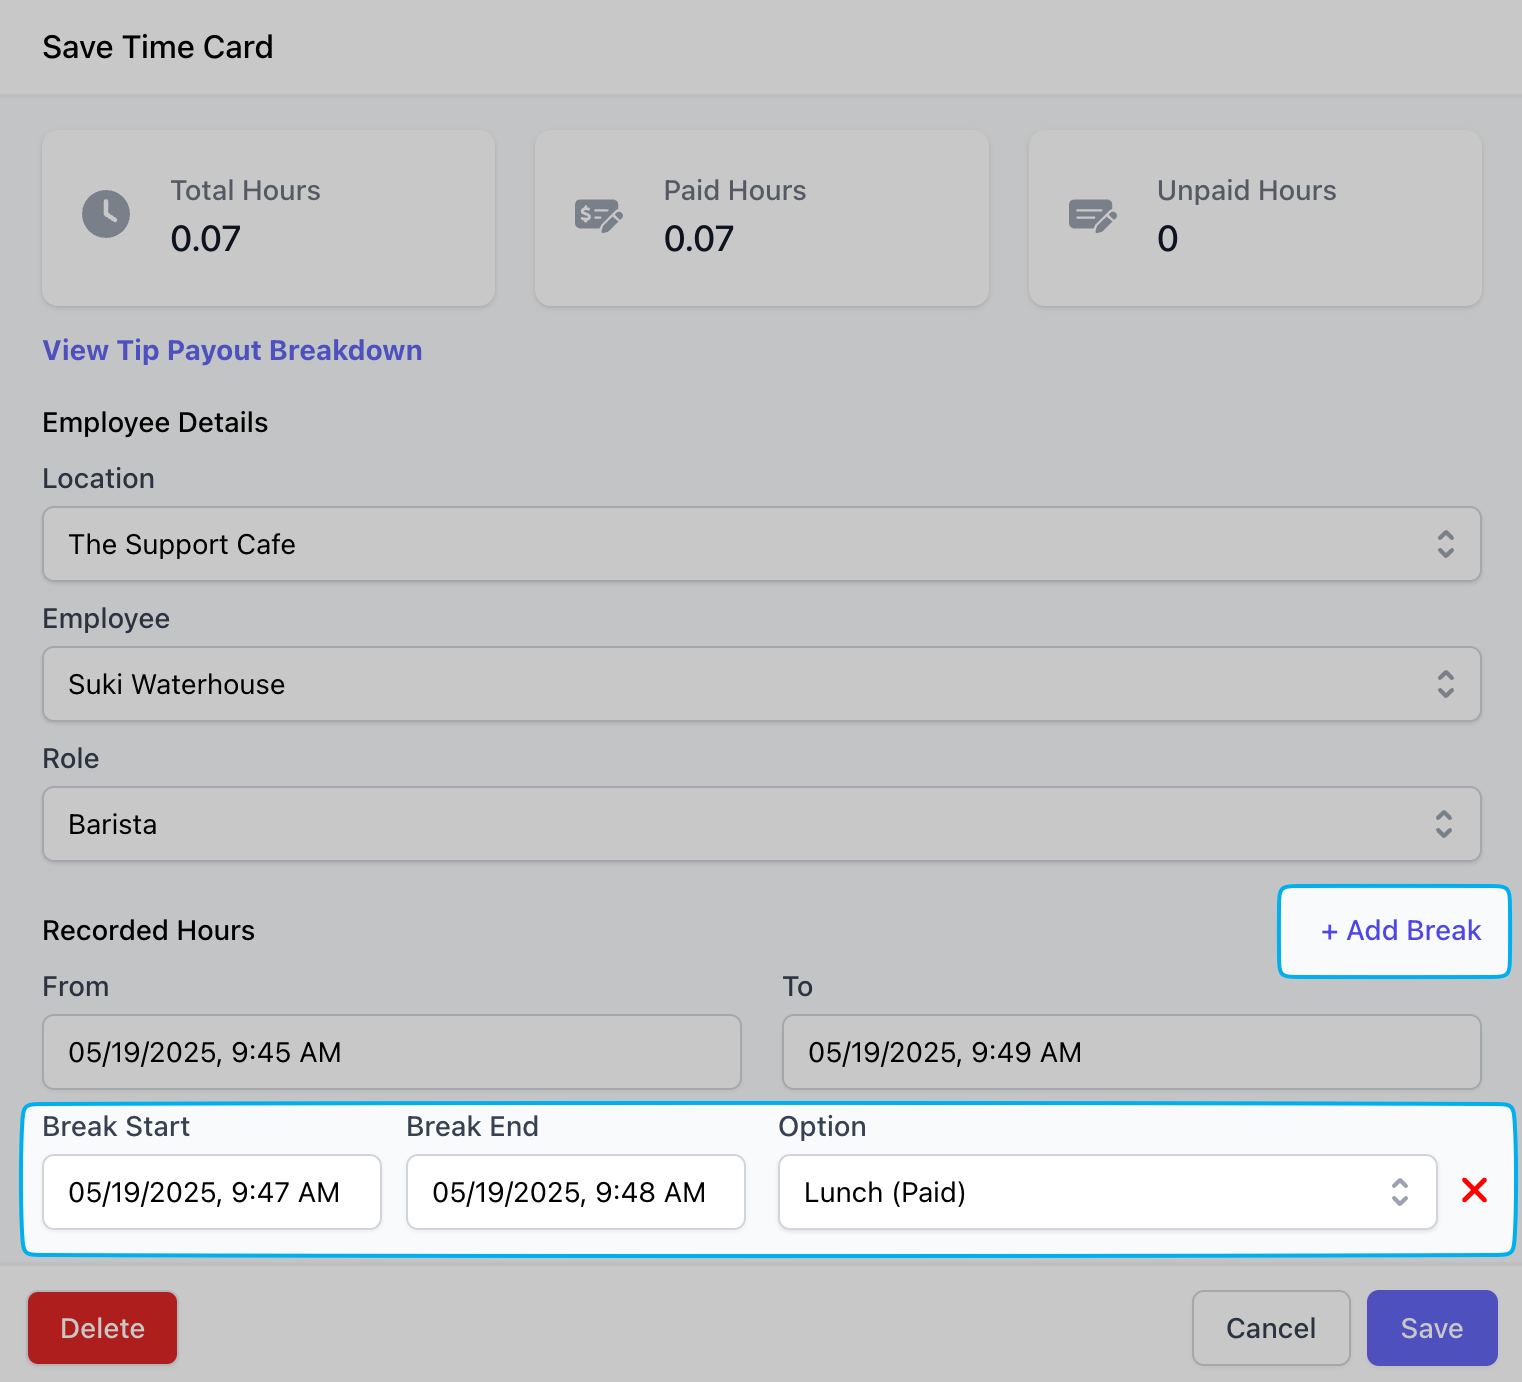 Click **Save** to confirm changes made.