Adding Roles and Employees
Adding Roles and Employees
Article Summary
Share feedback
Thanks for sharing your feedback!
How to Add Roles and Employees
Why does this matter?
You cannot create employees until you have created roles to put them into first. Different roles can access different parts of Dripos using a PIN.
Creating a Barista Role
The most common role created is a barista role, we've listed out the commonly seen ways to set this role up.
- Go to your web dashboard > Team > My Team > Roles
- Enter the preliminary information

Keep the Default Settings
Notify of trade and time-off request: You likely don't want every barista to receive a text whenever another barista requests time off.
Notify of late clock-in: Most baristas don't need to be notified if someone else clocks in late.
- Select permissions for what a barista can access/see

Permissions Aren't Necessary, But Recommended
Many of the permission options apply only to the web dashboard, which won't be used often (if at all) by a barista.
If you keep all of the permissions defaulted to "None" the barista will still have access to the basics of performing their duties.
- Optional: Turn on the following popular permissions
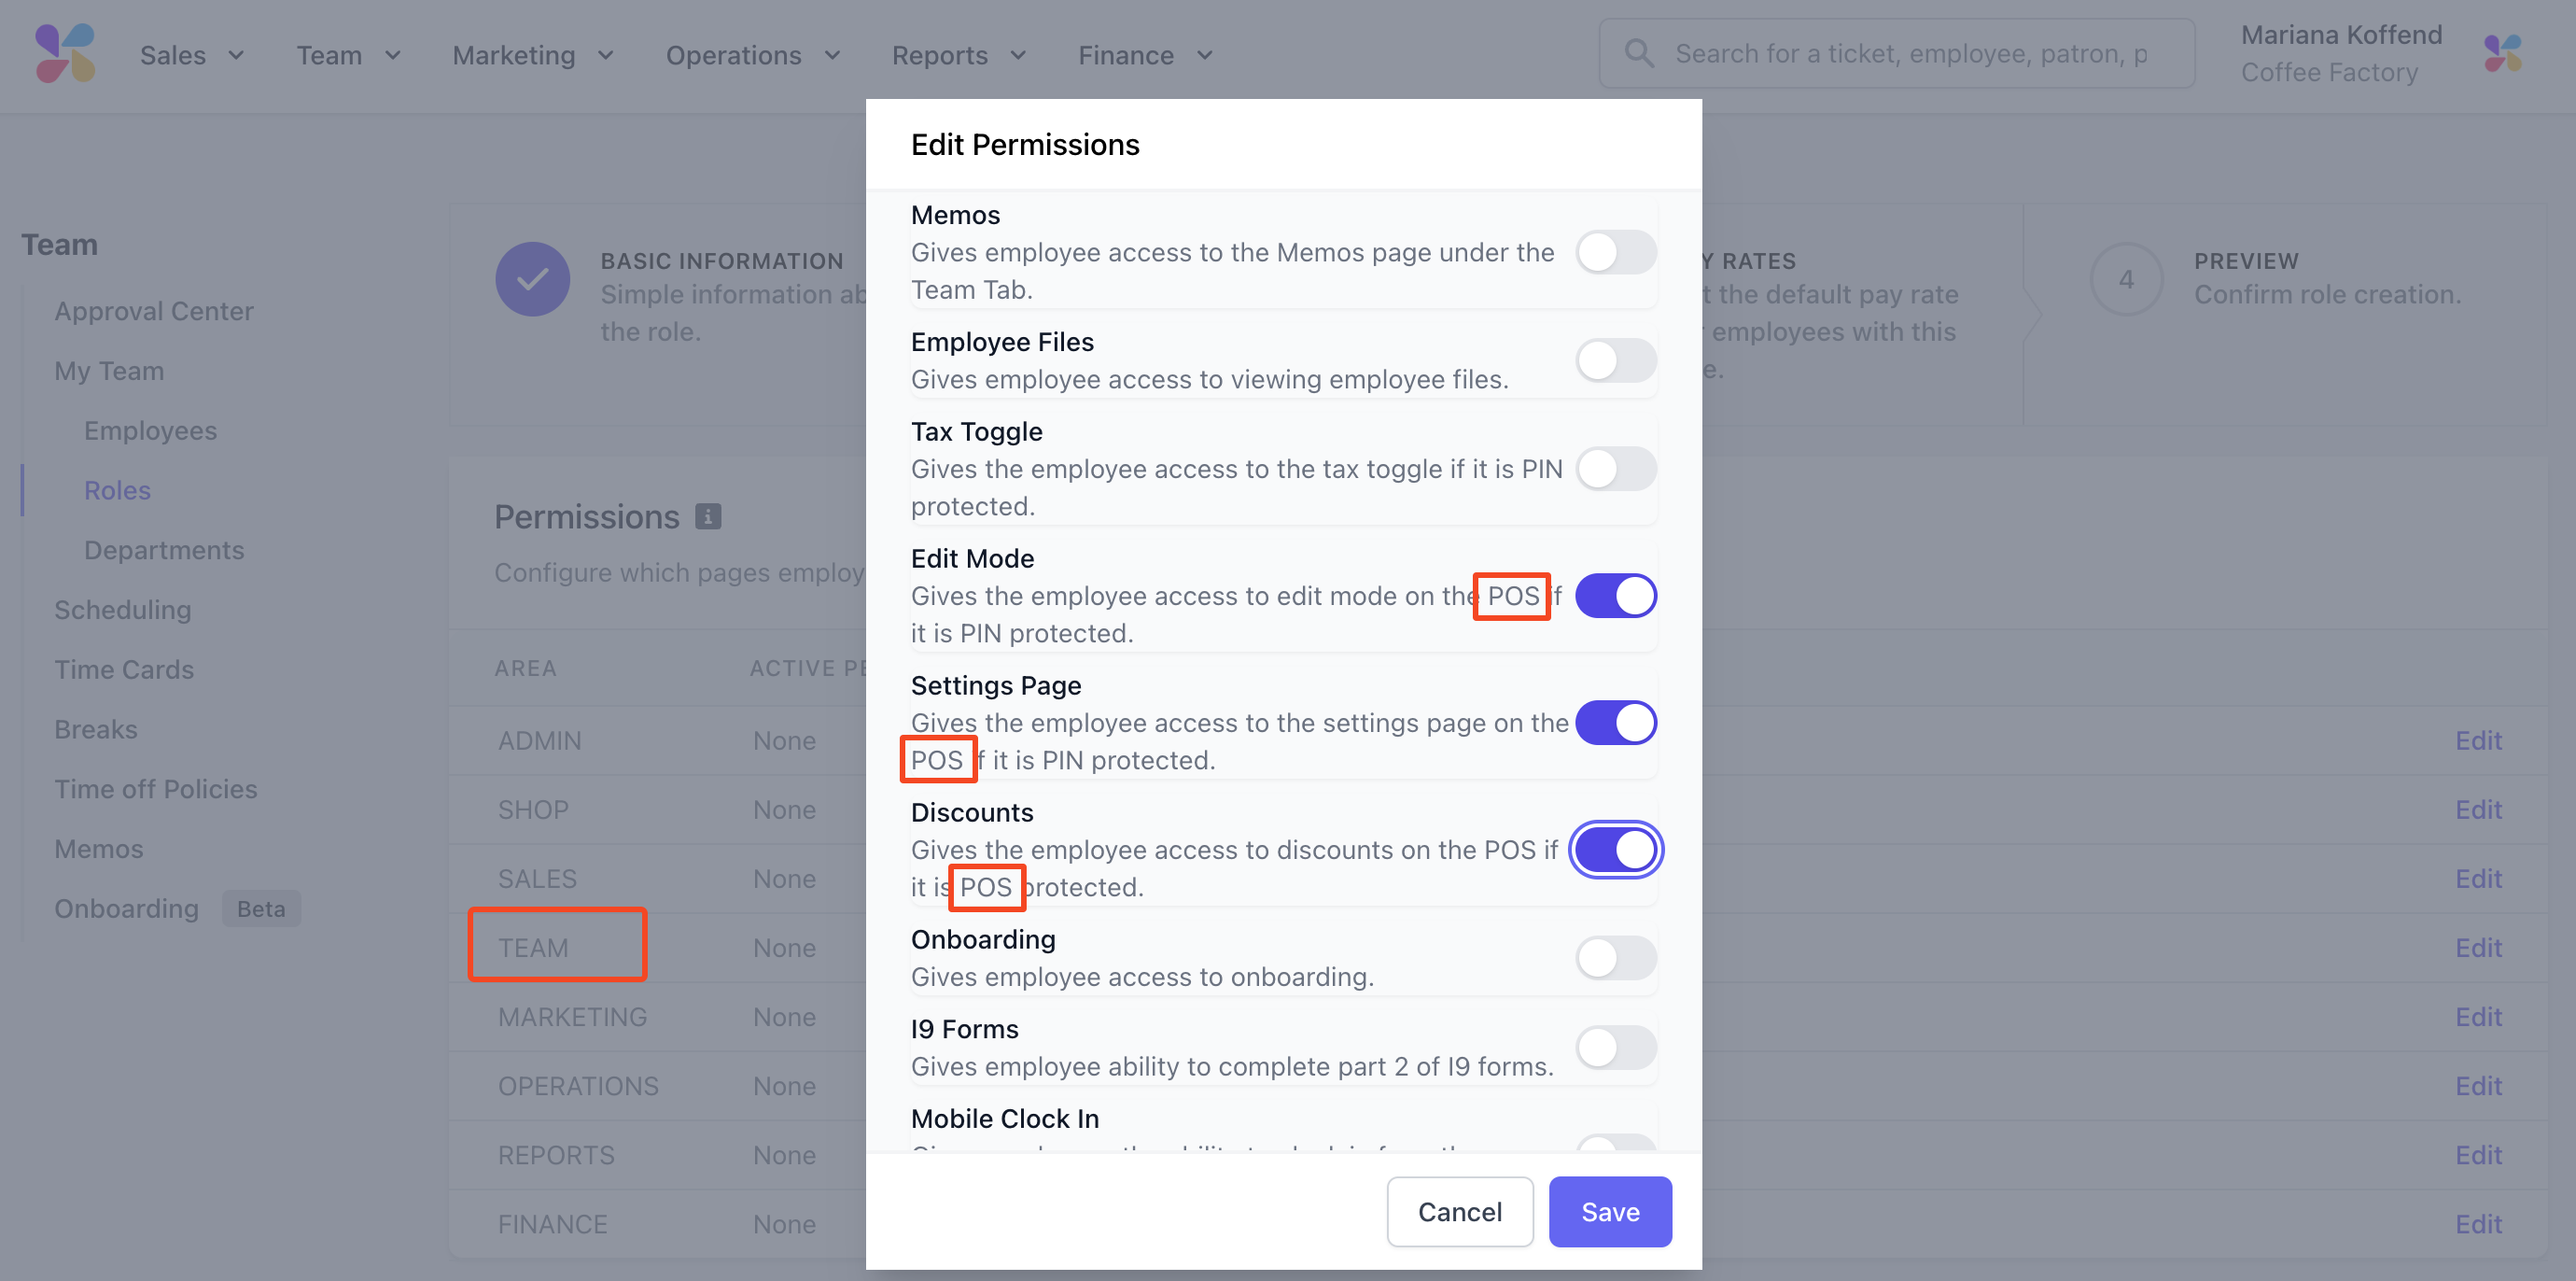

The above permissions apply directly to the POS only
- It may be beneficial to allow baristas to edit products on the POS in case a product needs to be disabled/unavailable.
- Baristas might need to access settings to repair the card reader or troubleshoot with Support regarding hardware.
- You'd likely want baristas to apply discounts to products and tickets for customers.
- Add pay rates specific to this role, or skip this step
- Review and Submit
Create Employees
Even though owners already have full admin access to their dashboards, you should still make yourself as an employee. This gives you a number PIN that may be needed in the future.
- Go to web dashboard > Team > My Team > Employees
- Enter all of the required information
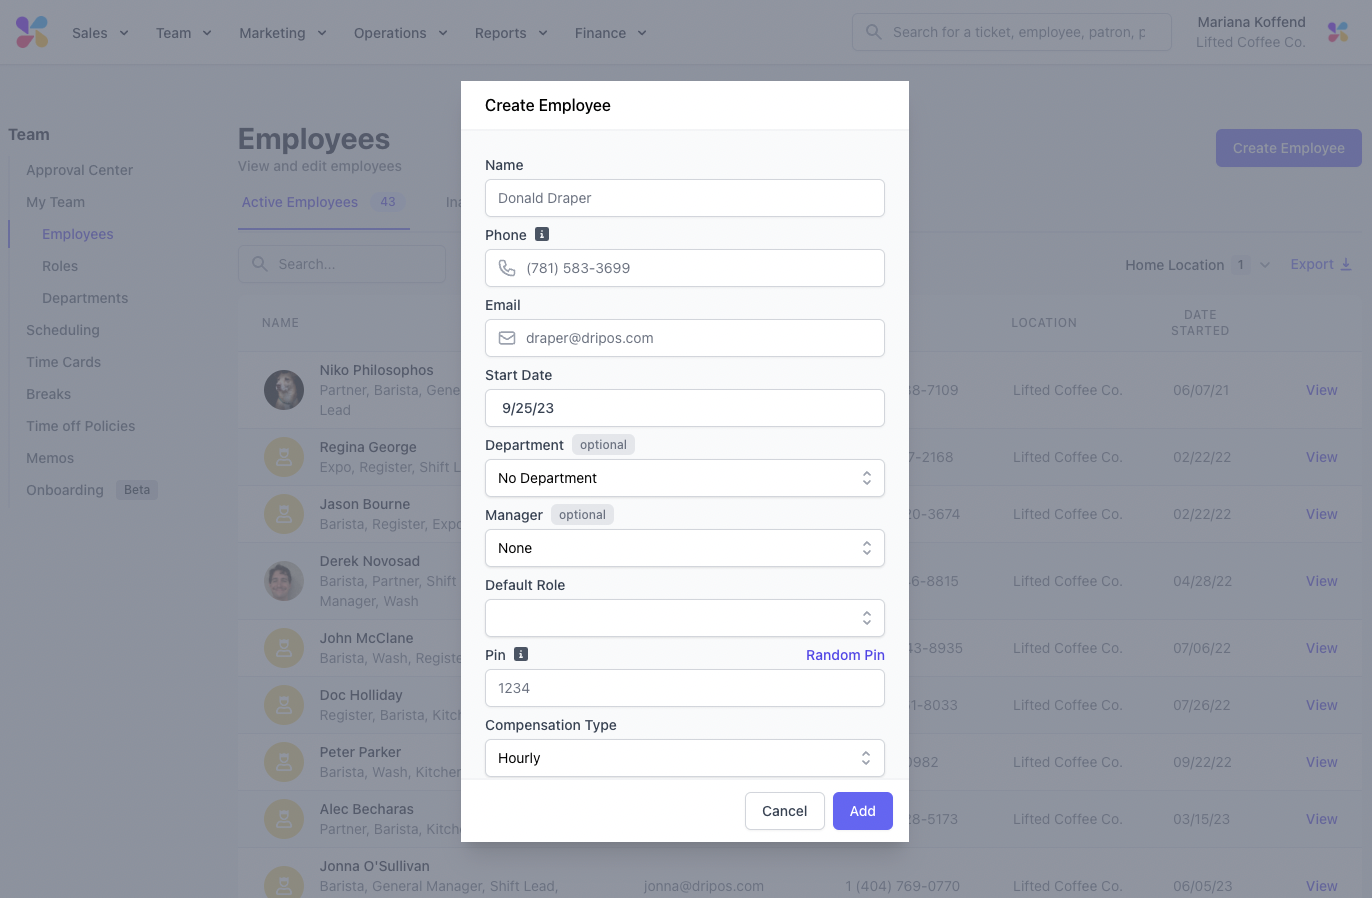

Now that the employee is created, they can download the Dripos Hub app and login via their phone number.
Only Support can Edit Phone Numbers
Email or text support if you need an employee's phone number changed.
Need More Help?
Was this article helpful?