Create and Publish Shifts
Create and Publish Shifts
Article Summary
Share feedback
Thanks for sharing your feedback!
Learn the fundamentals of making your schedule.
You are able to create and publish shifts through both the Dripos {{glossary.Web Dashboard}} and {{glossary.Hub App}}.
Once you have published shifts, you will be able to send your schedule out to employees.
Create a Schedule on the Web Dashboard
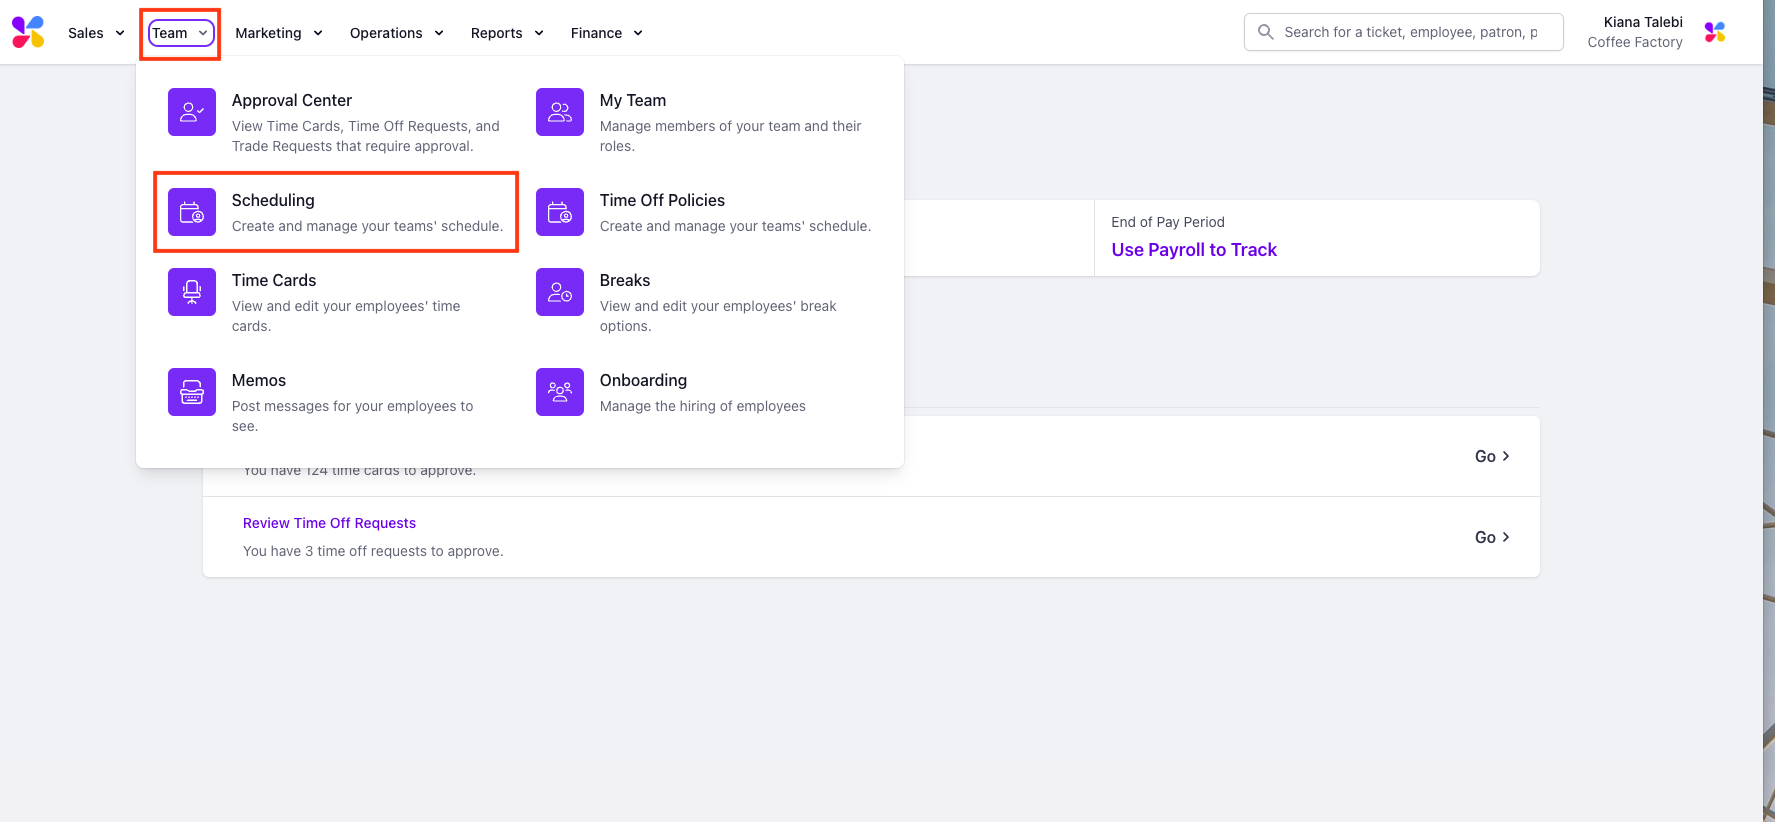
Log on to the Web Dashboard. Once signed in, select Team > Scheduling:
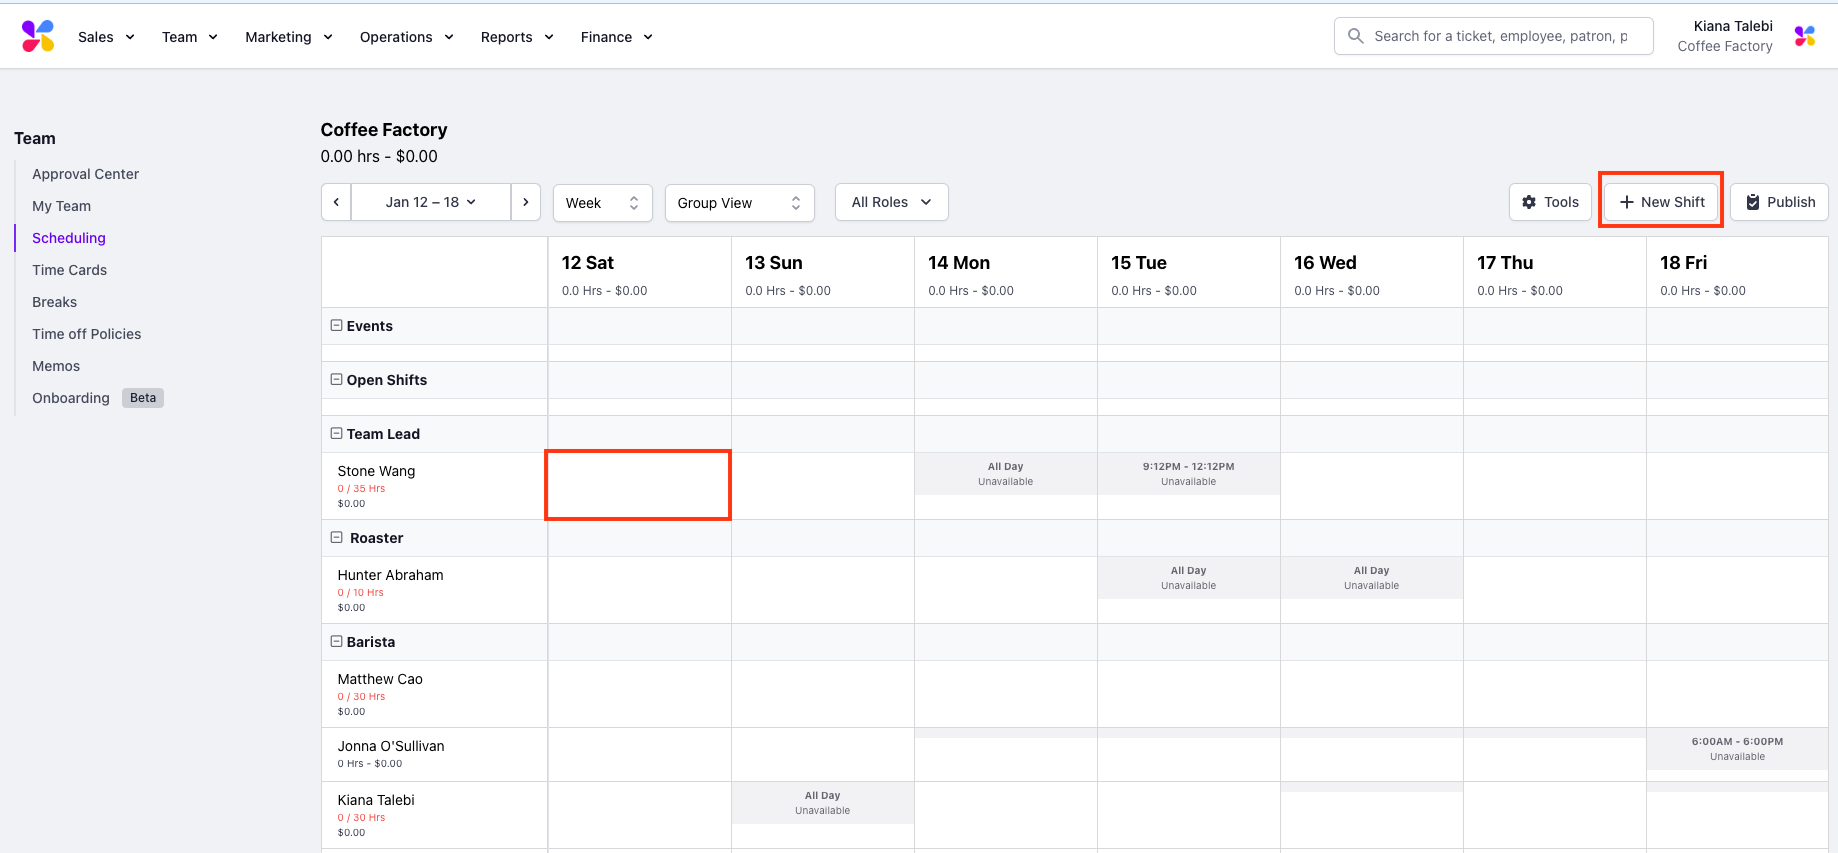
Click into any empty box on the scheduler or press the + New Shift button to begin creating a new shift:
This will prompt a pop up to appear where you will need to fill in the following information:
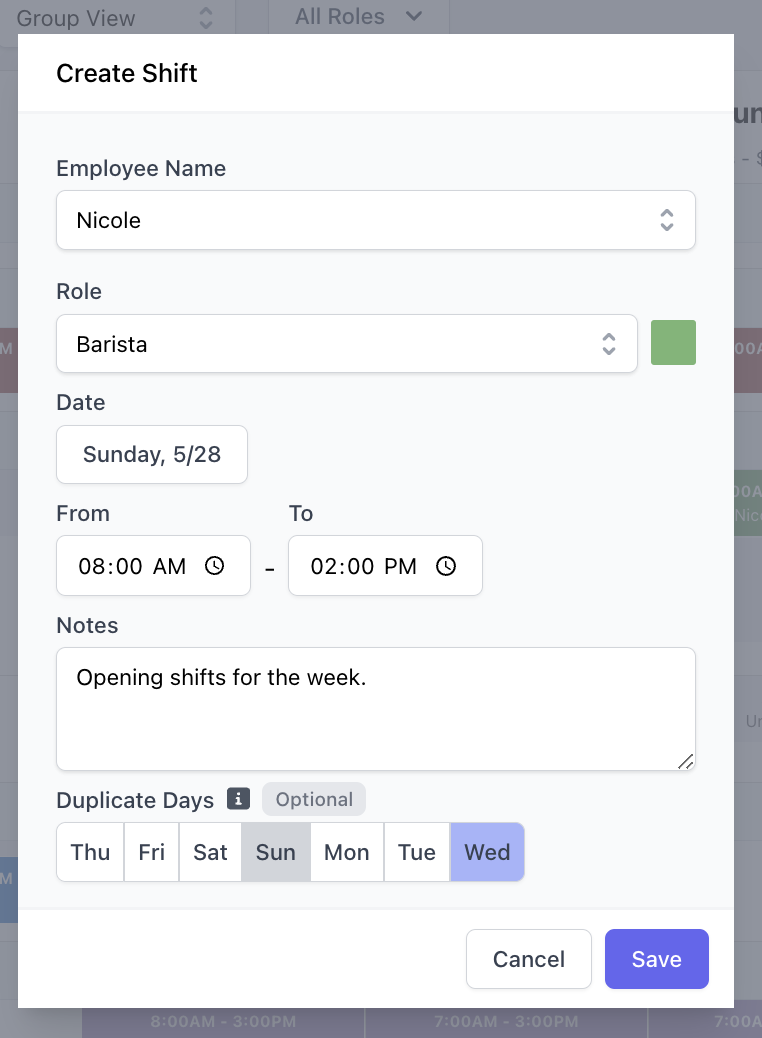


Employee Name: Select the employee you are creating a shift for from the dropdown.
Role: Select which of the employee's roles the shift is for from the dropdown.
Date: Select the day you want to schedule the shift on.
From/To: Select the start and end times of the shift.
Notes (Optional): Here, you have the option to attach any notes to the shift. The employee will be able to view these notes on their Hub App once the shift has been published.
Duplicate Days (Optional): Here, you have the option to select days that the shift should be duplicated to.
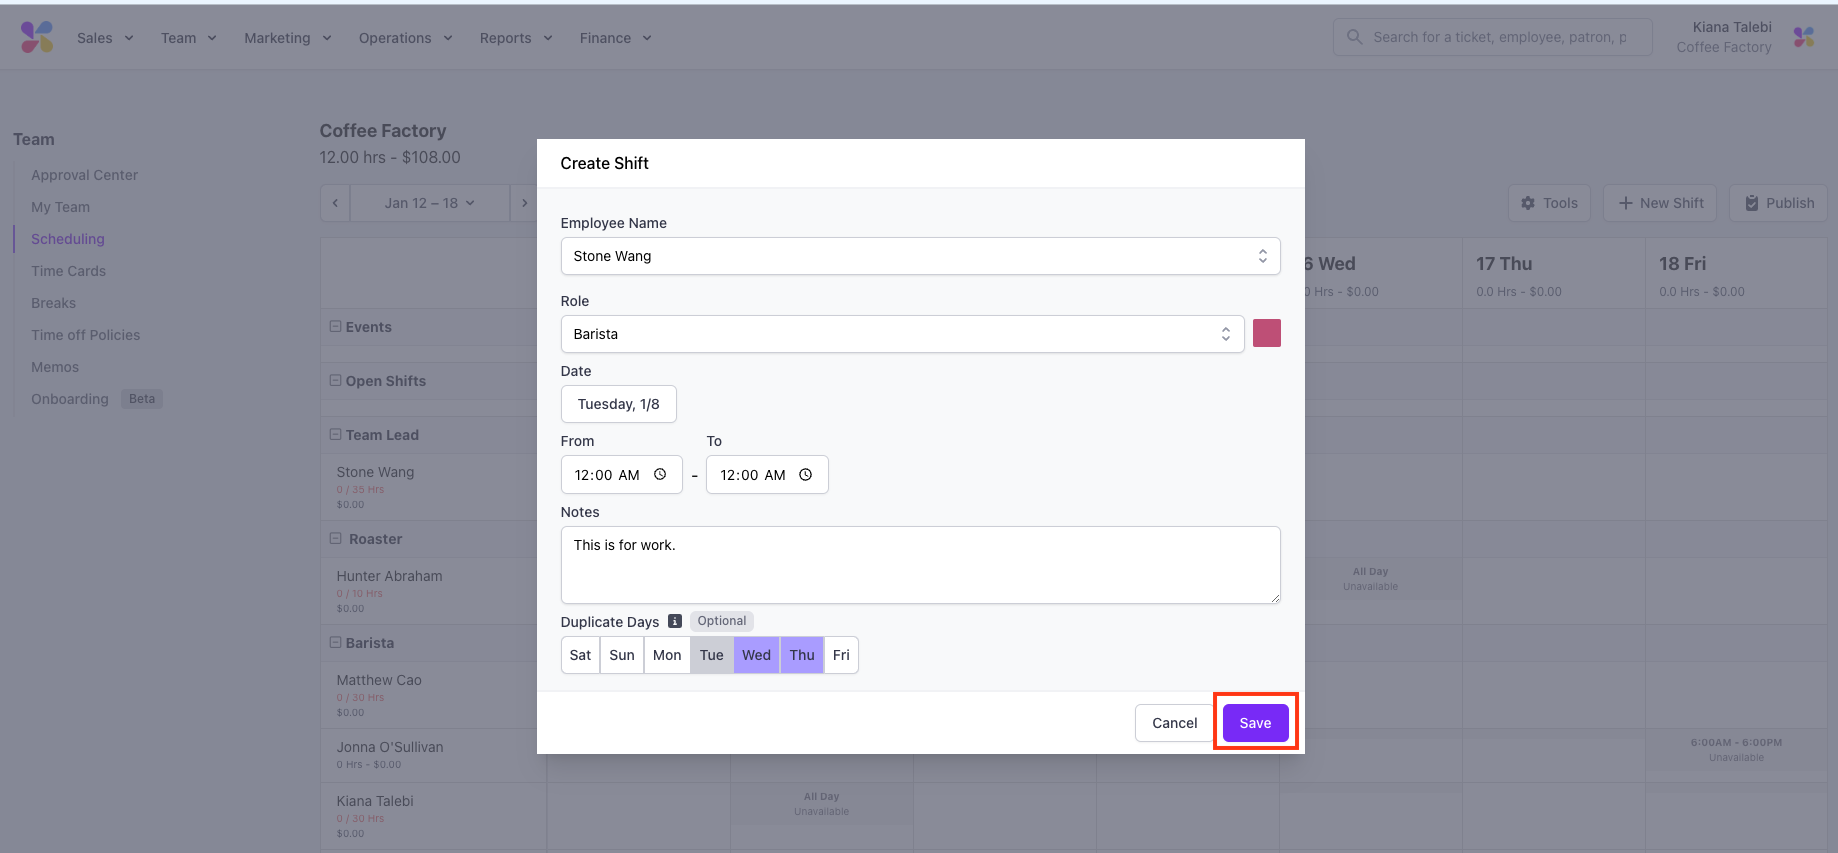
Once you have filled in the required information, click Save:

The shift will then appear on the scheduler as a draft:

Repeat the steps above untill you are ready to publish the draft schedule you've created.
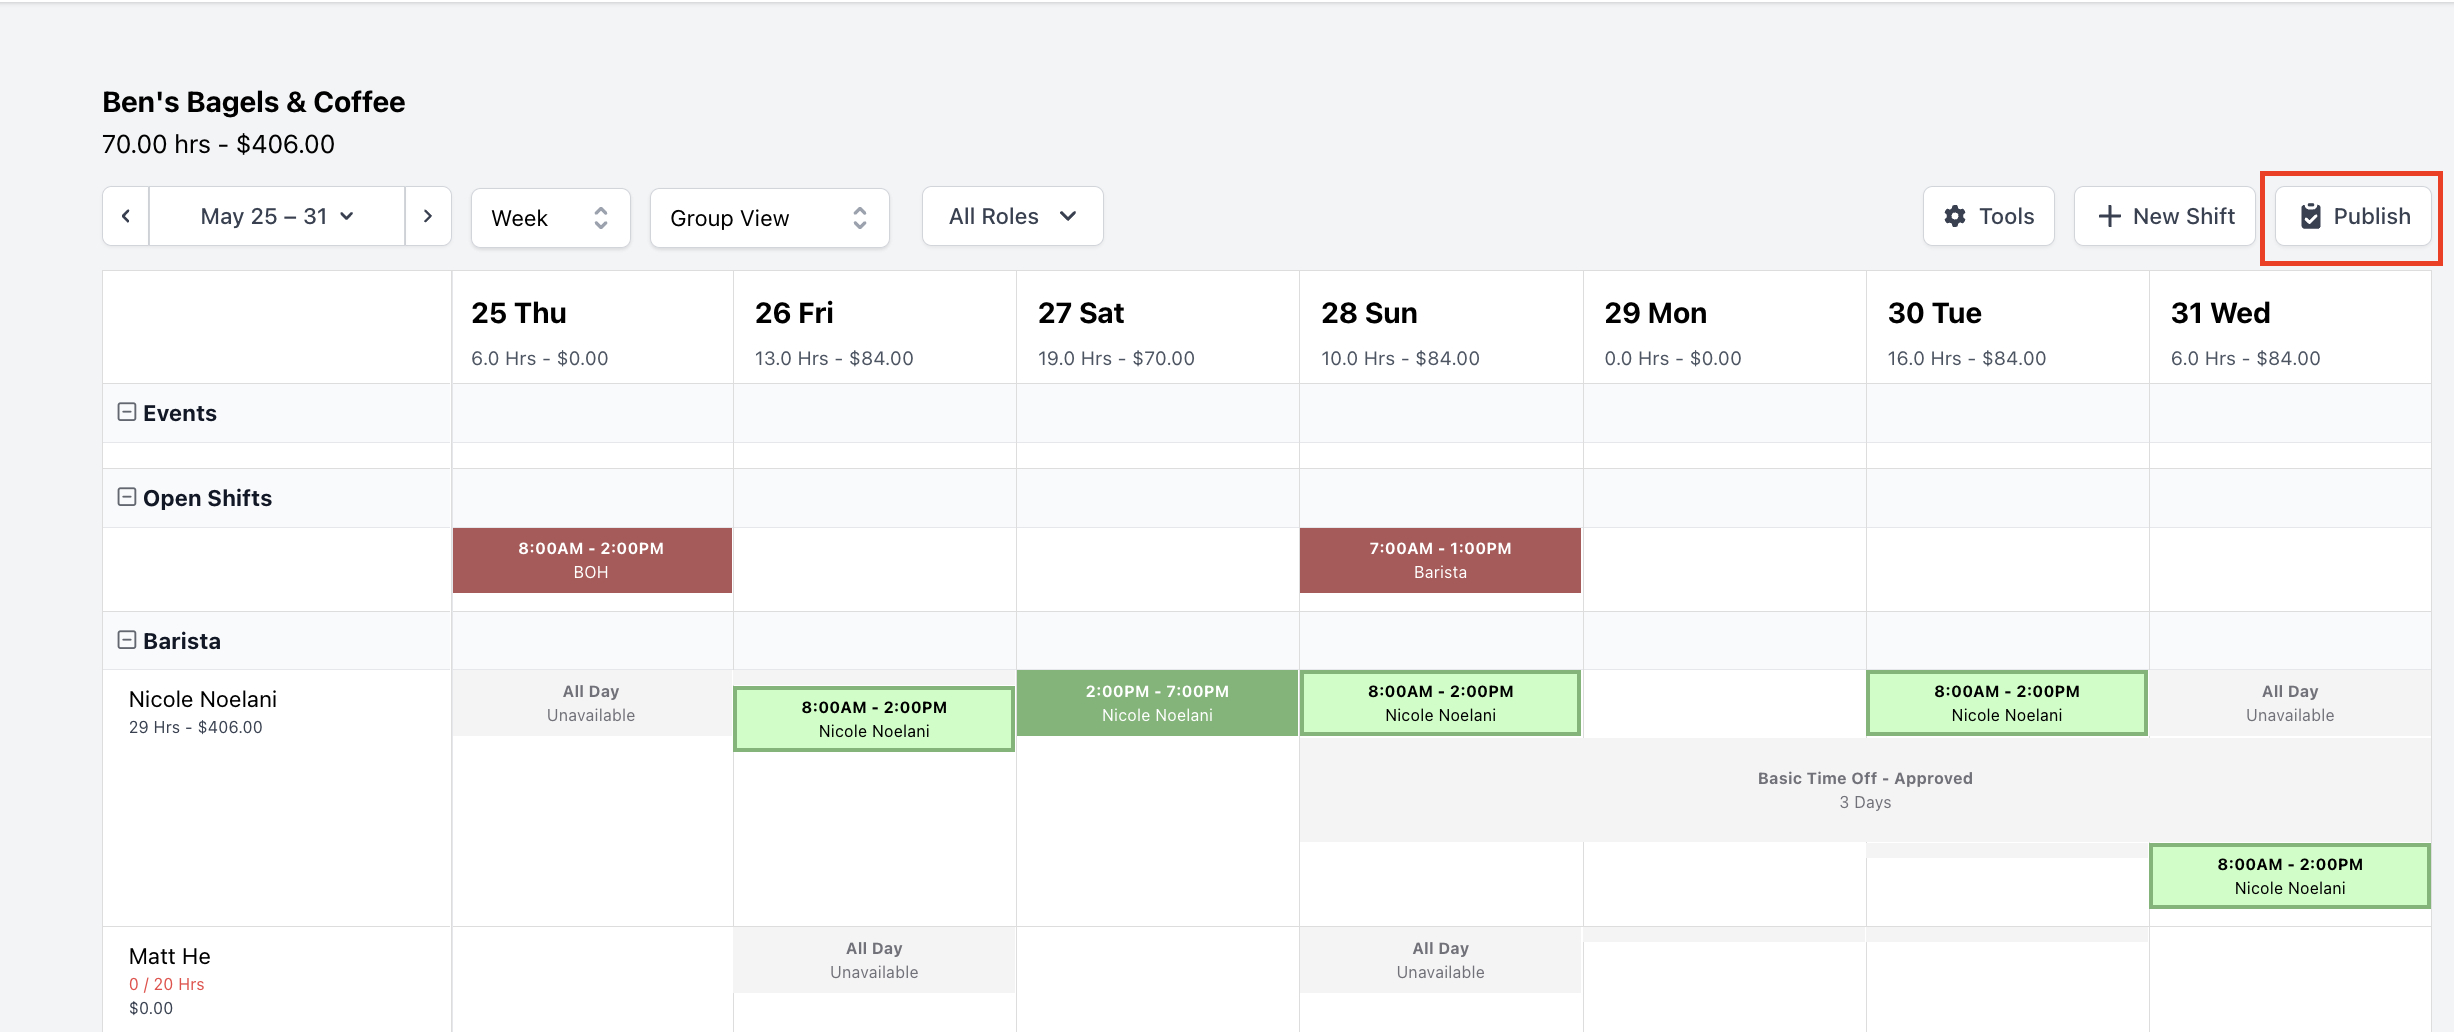
Once you are ready to publish your draft shifts, click the Publish button in the top right:
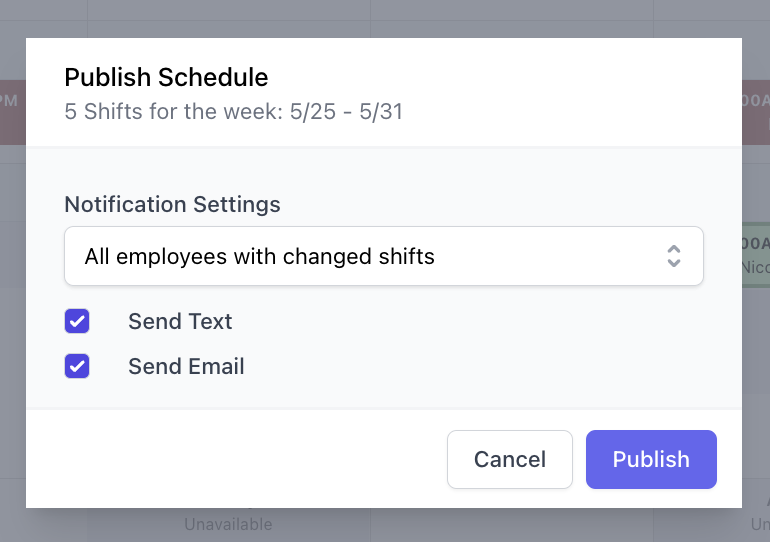
This will prompt a pop up to appear, where you will need to select a notification preference for the shifts you are about to publish from the dropdown. You can also choose to notify your employees either by text or email:
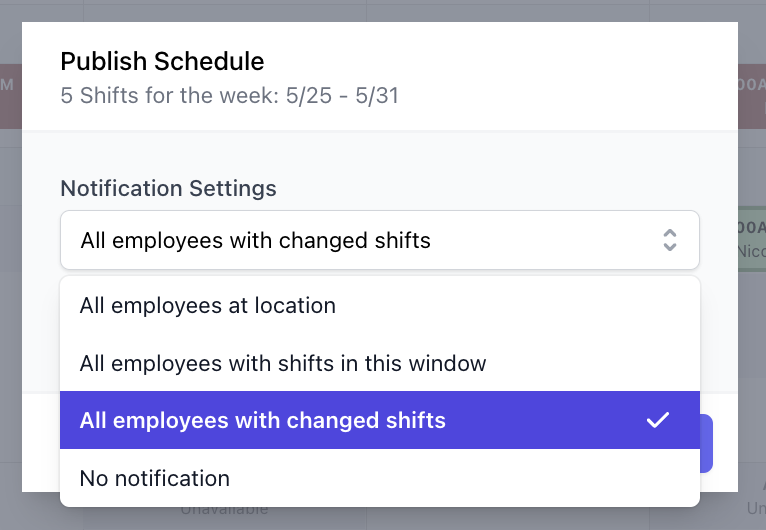


In choosing who you'd like to notify that there are new shifts on the schedule, you have several options:
All employees at location: This option will notify all of your employees at the location, regardless of if they have been scheduled for a shift in this window.
All employees with shifts in this window: This option will only notify your employees with shifts scheduled for the window of time you drafted.
All employees with changed shifts: This option will notify all employees whose shifts have been either newly created or edited within this window.
This is a helpful option if you're making edits to a schedule that was previously published and don't want to re-notify everybody.
No notification: No notification will be sent to your employees.
Once you have finished, click Publish to finalize.
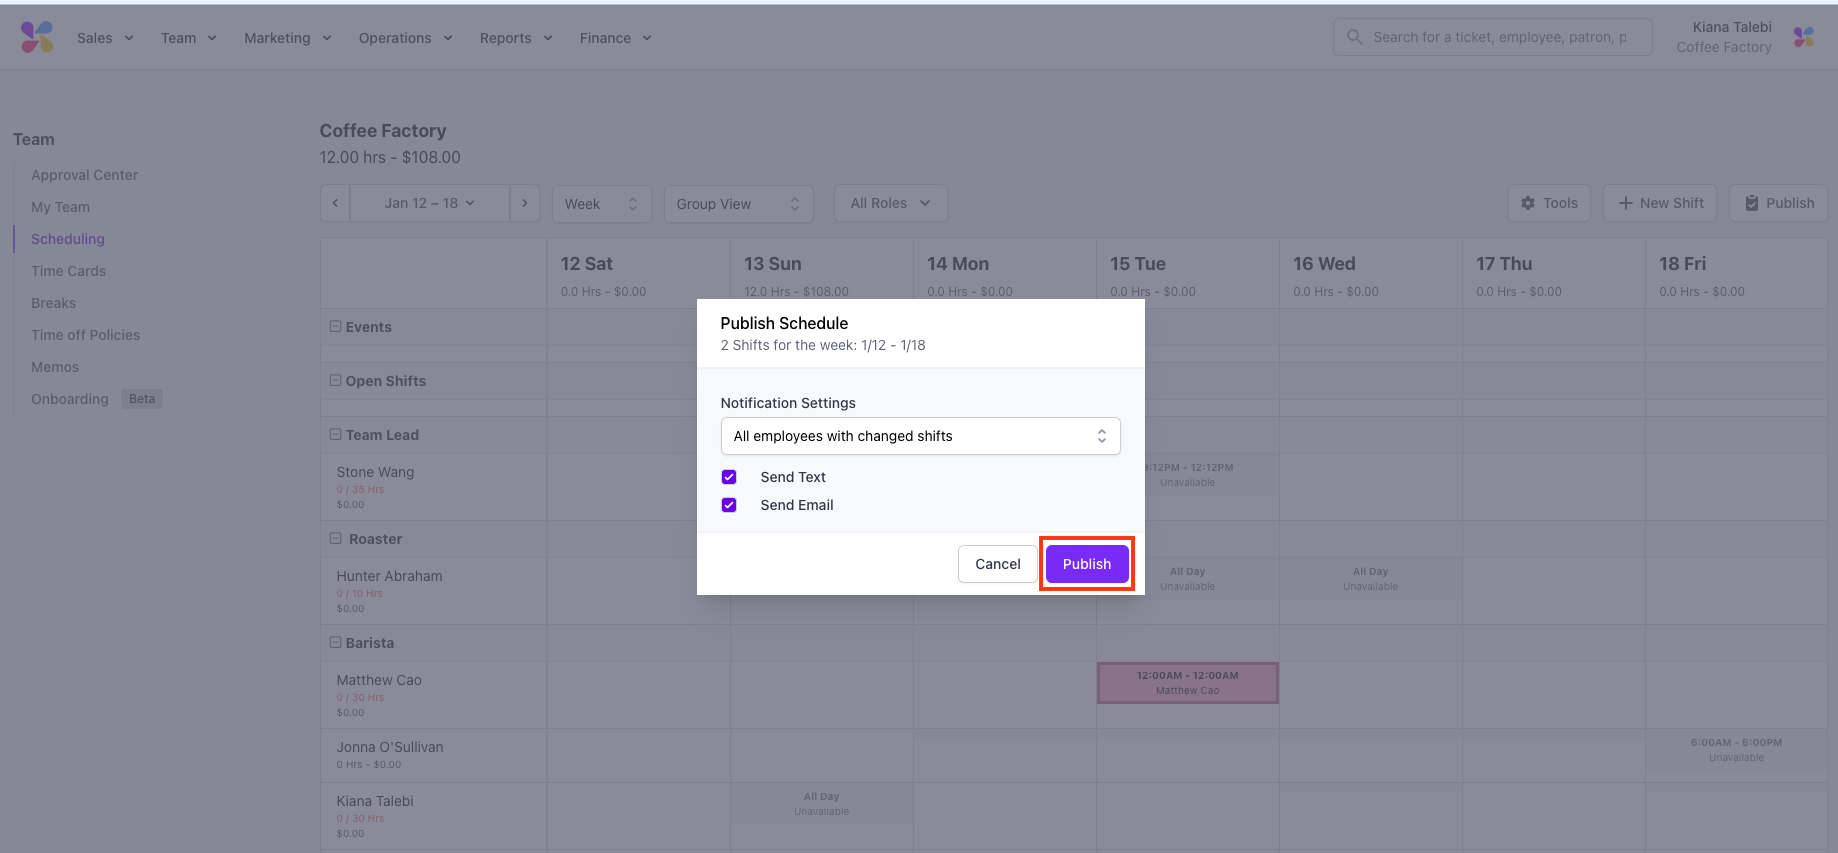

Your employees will then receive a notification saying 'new shifts have been released at [your location].'
Create a Schedule on the Employee Hub App
We recommend using the Web Dashboard to create your schedule, as it has more robust functionality and viewing capabilities.
However, you can still create and publish shifts on the go using the Hub App.
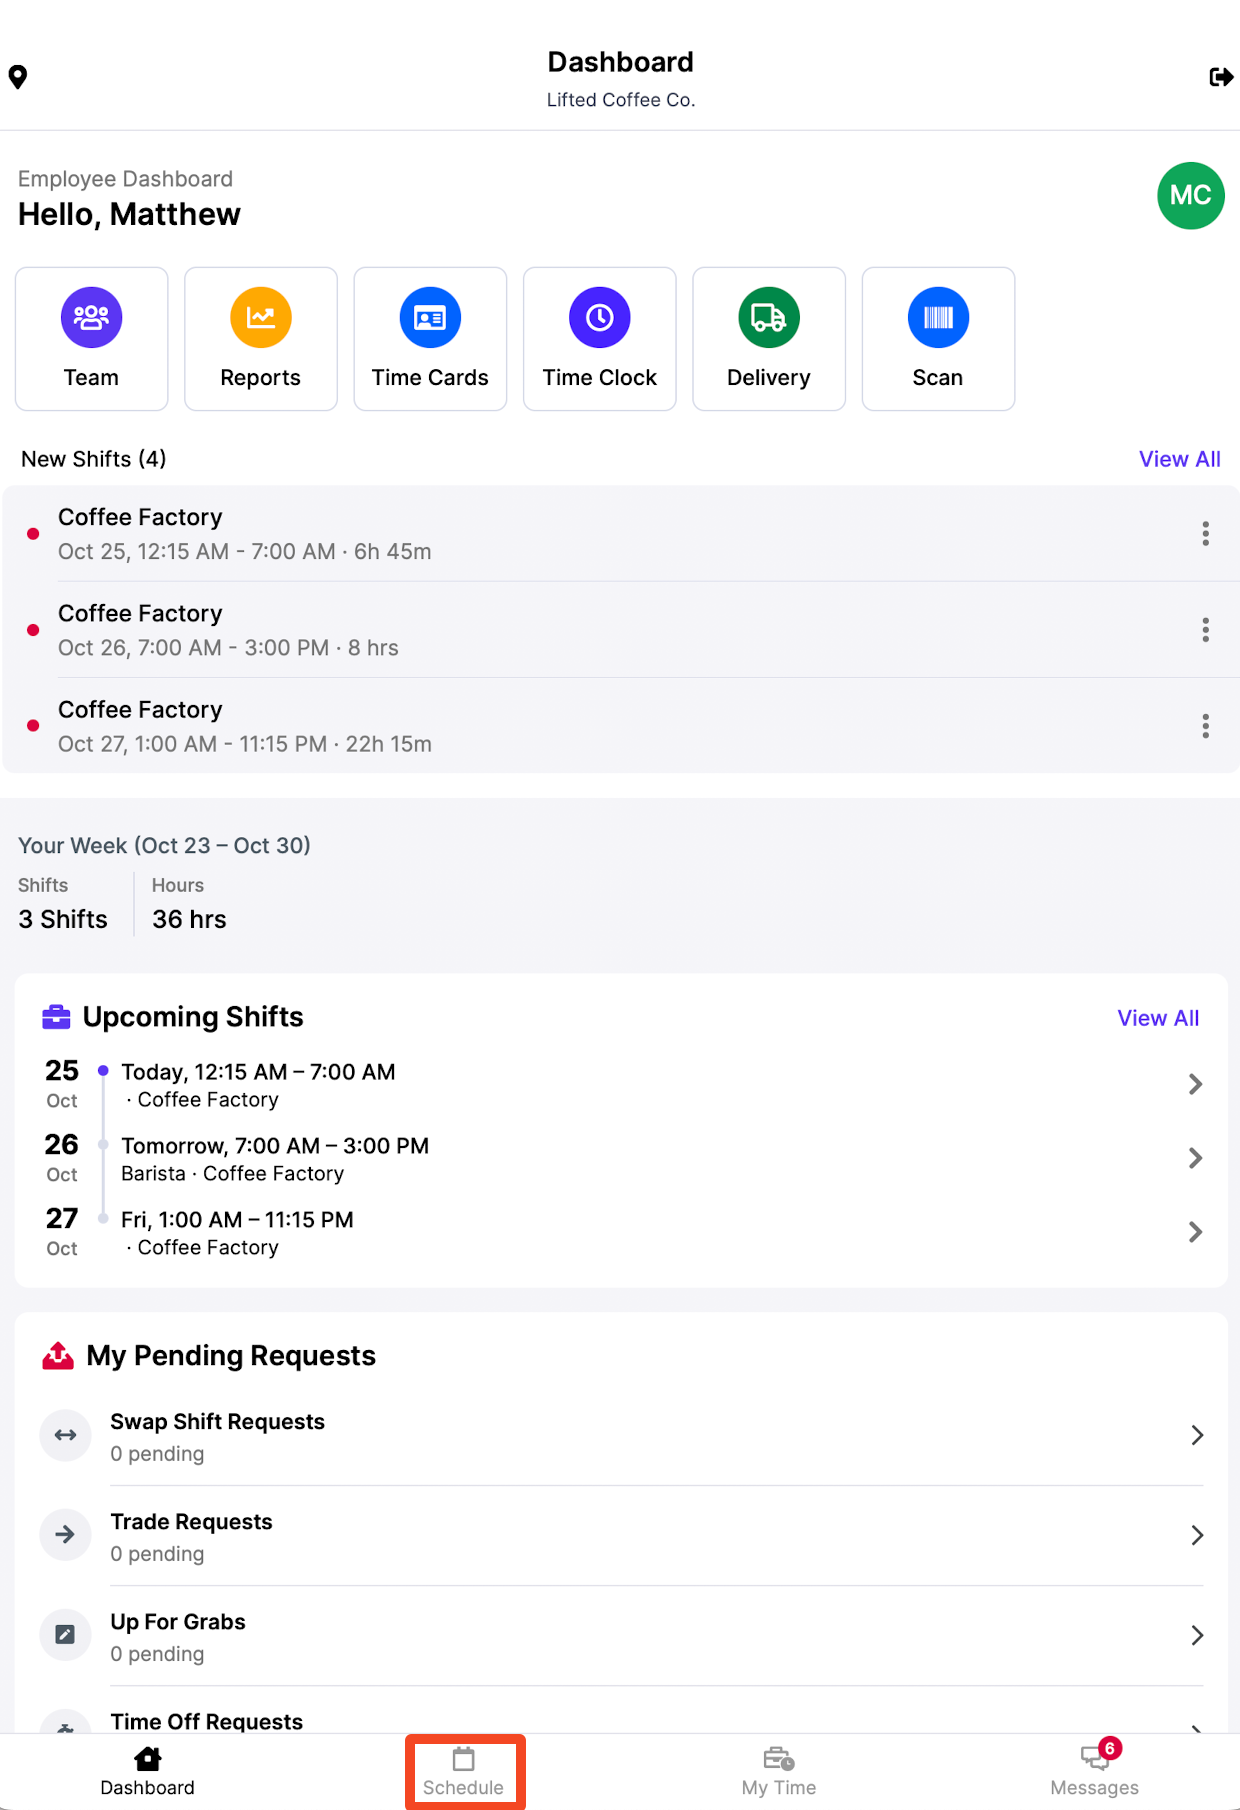
Access the Schedule page on your Hub app from the bottom tab:
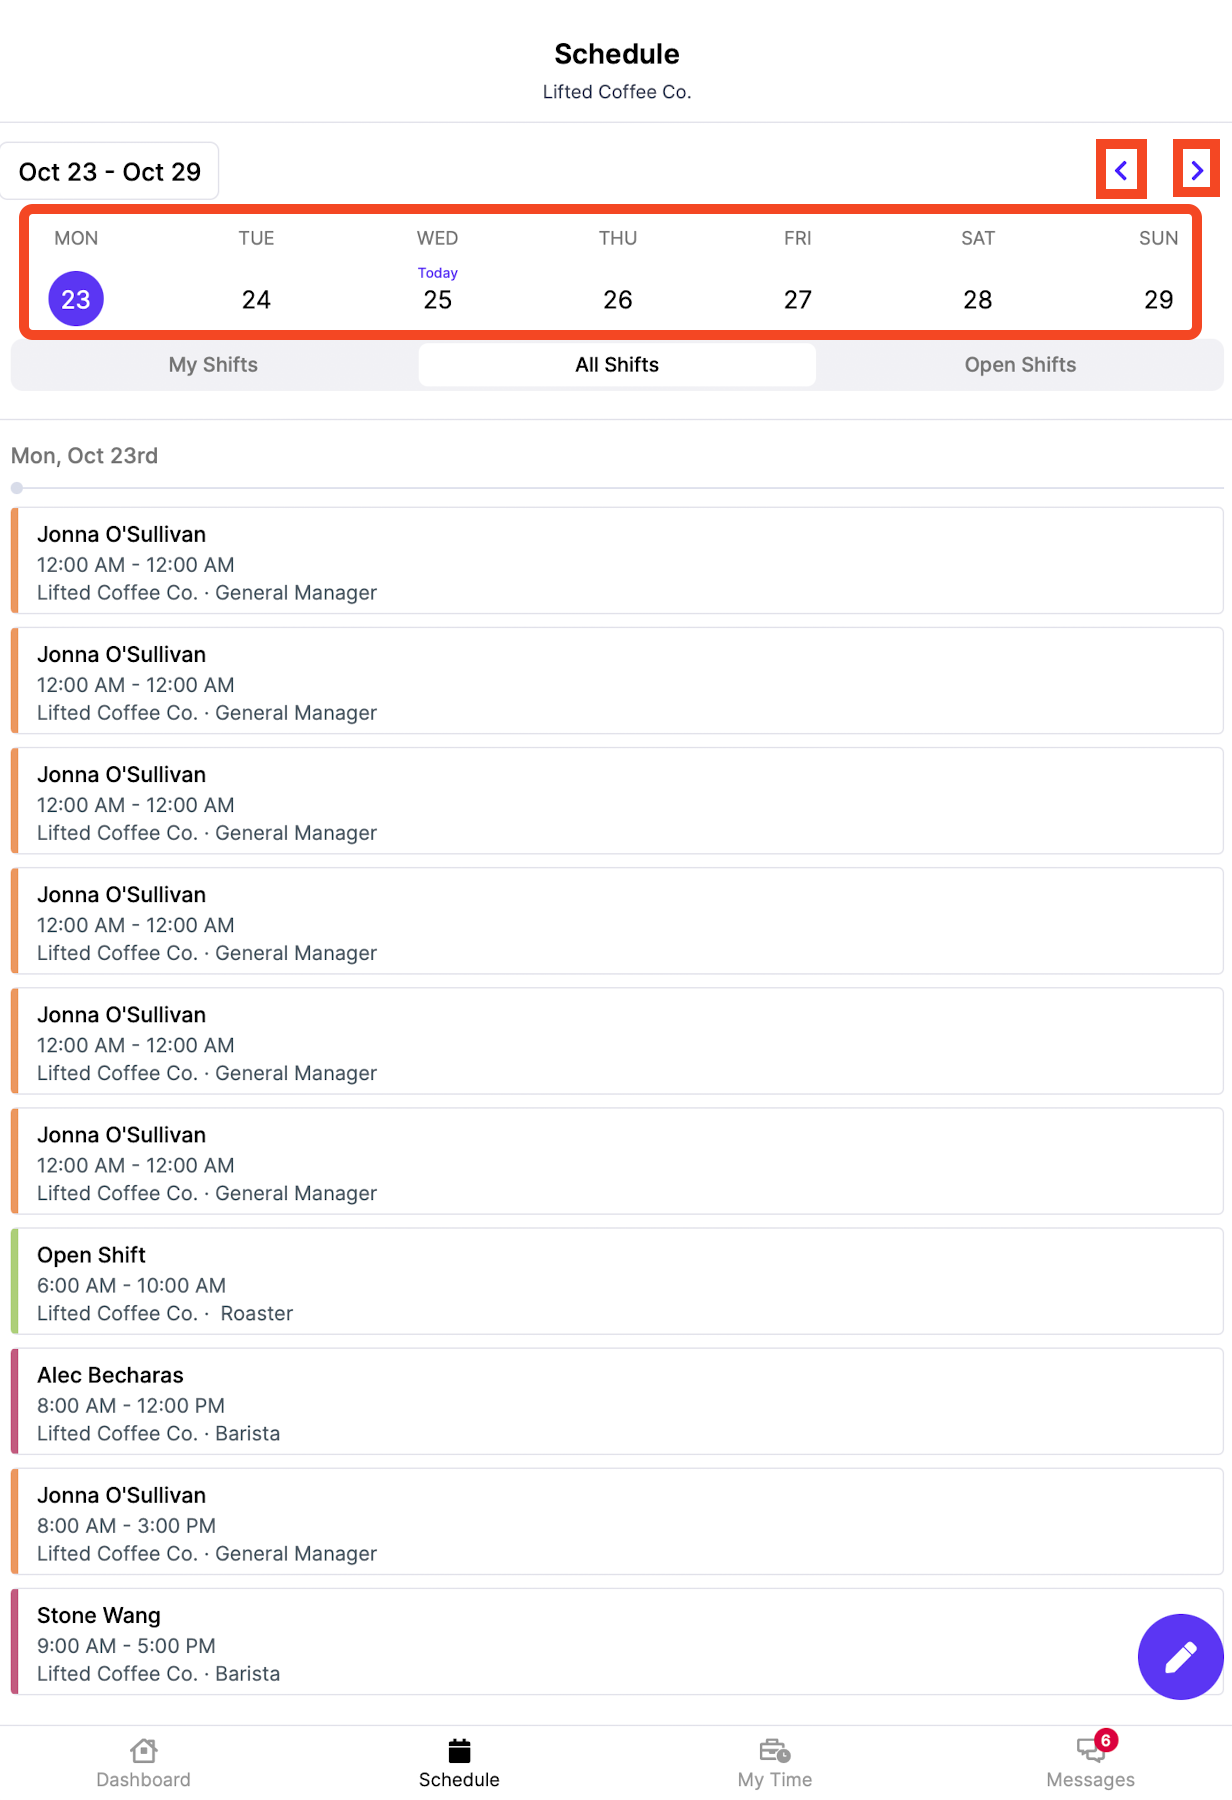
Navigate to the week you'd like to schedule shifts using the arrow buttons at the top of the screen and select a date to view:
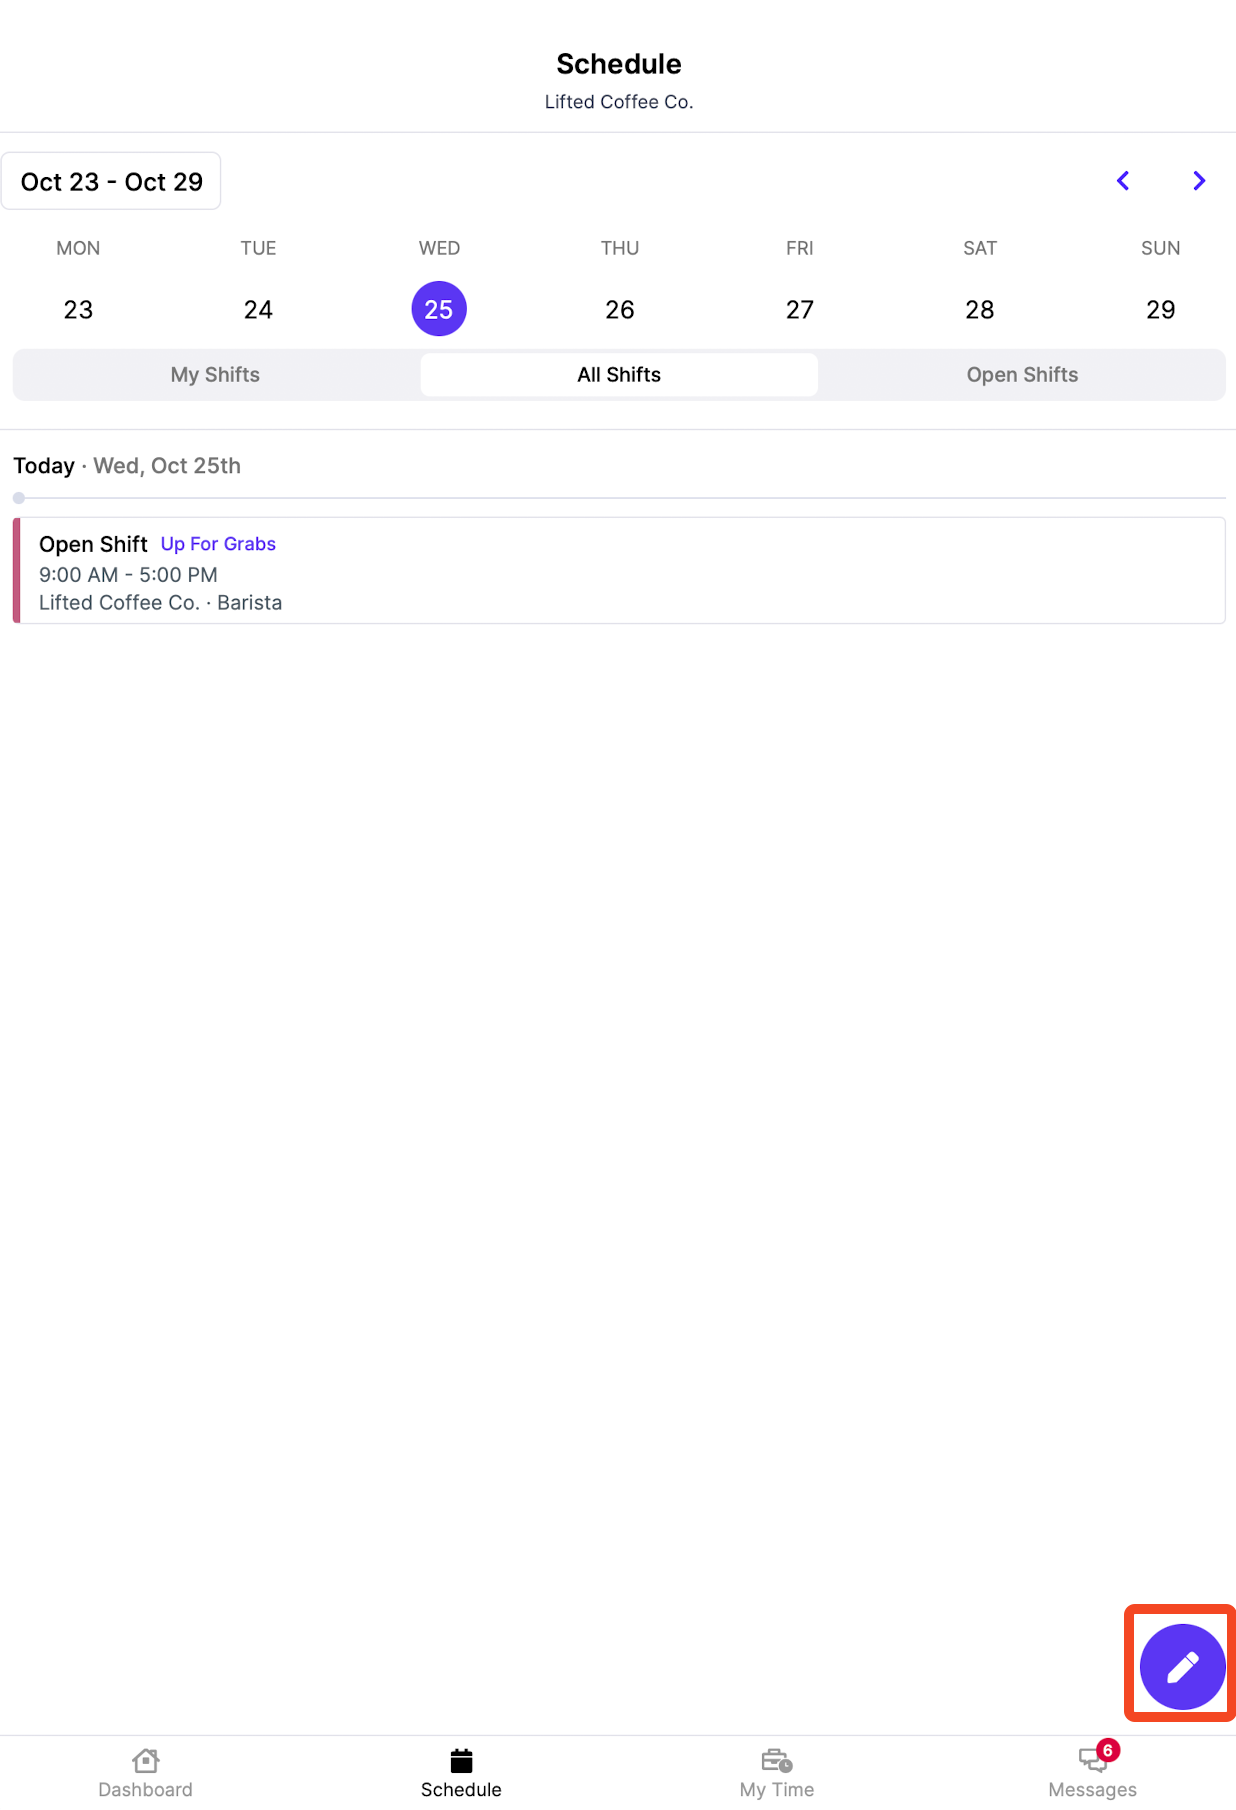
Select the Pencil button in the bottom right corner:
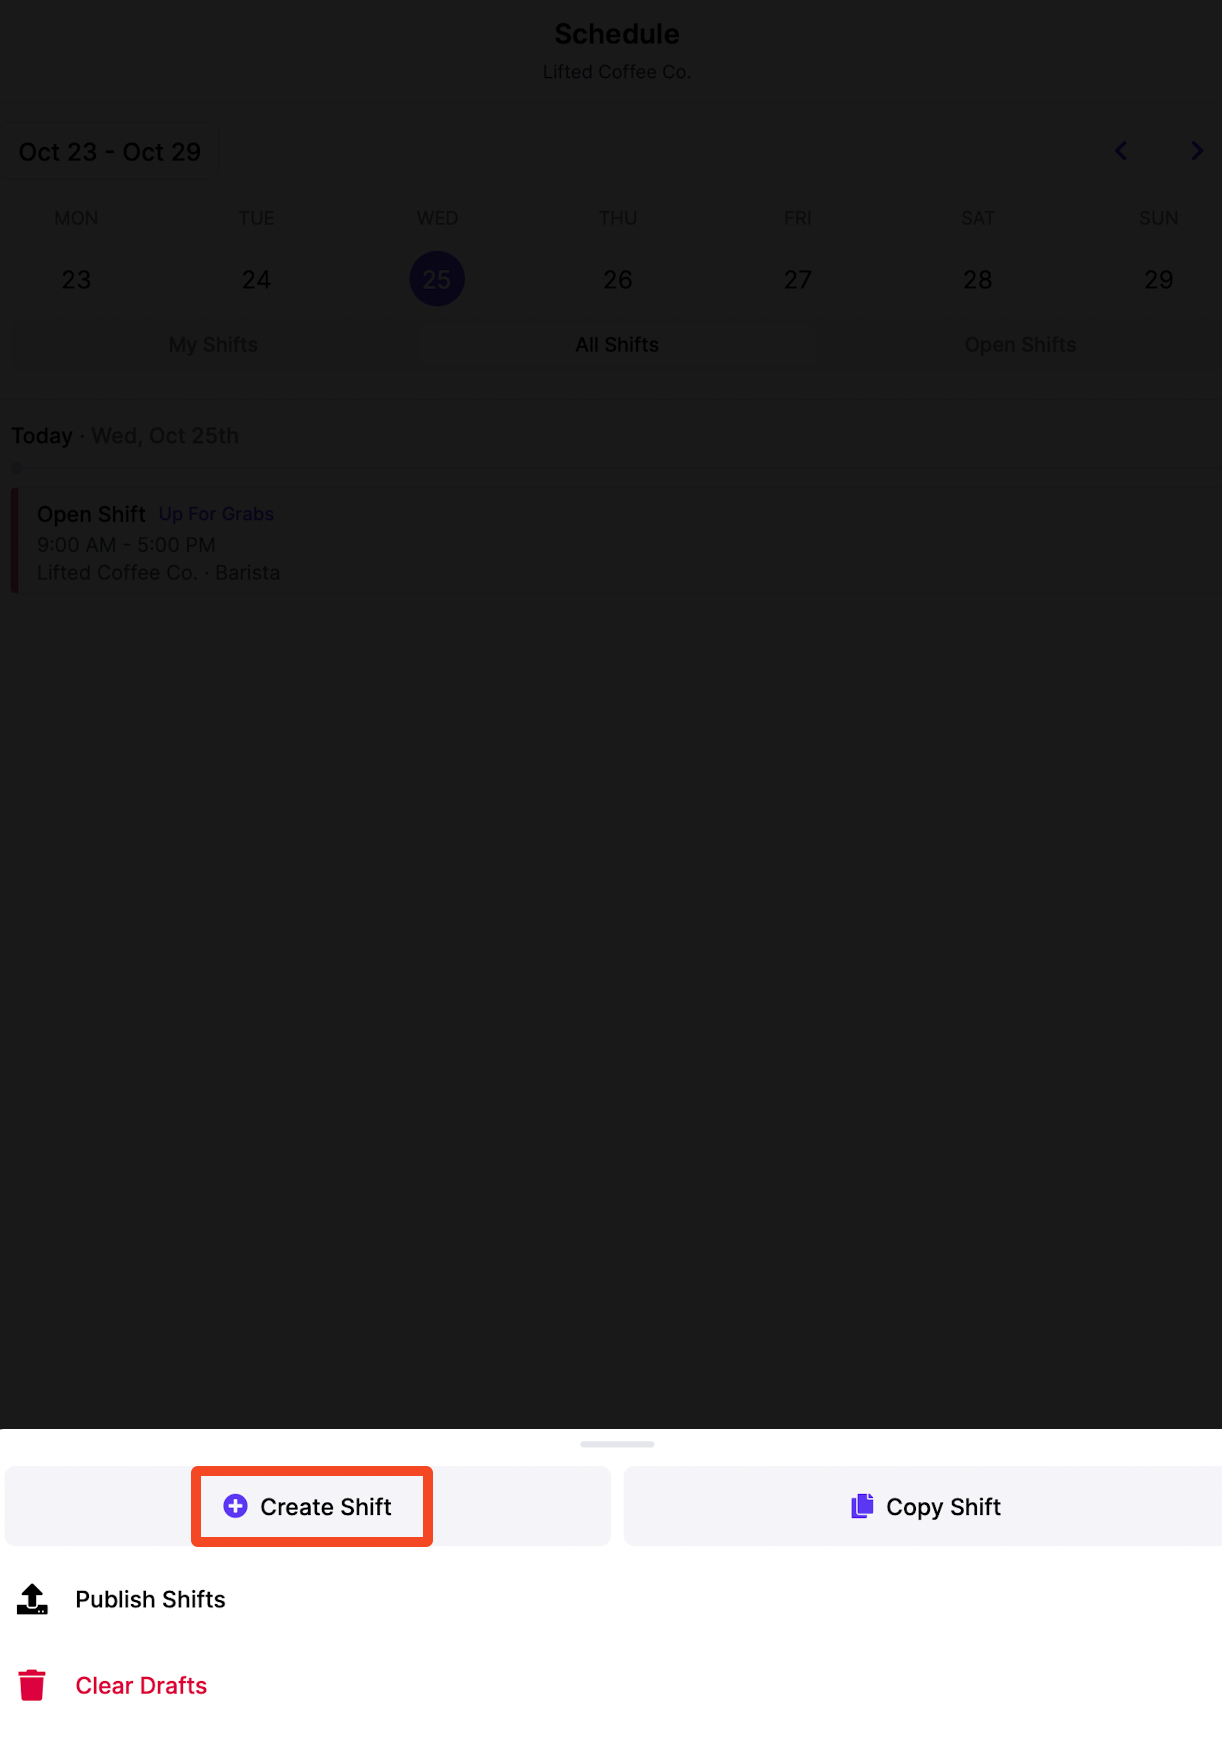
Select the Create Shift button:
This will prompt a pop up to appear where you will need to select the employee, start/end times, and role for the shift. You also have the option to attach any desired notes to the shift:
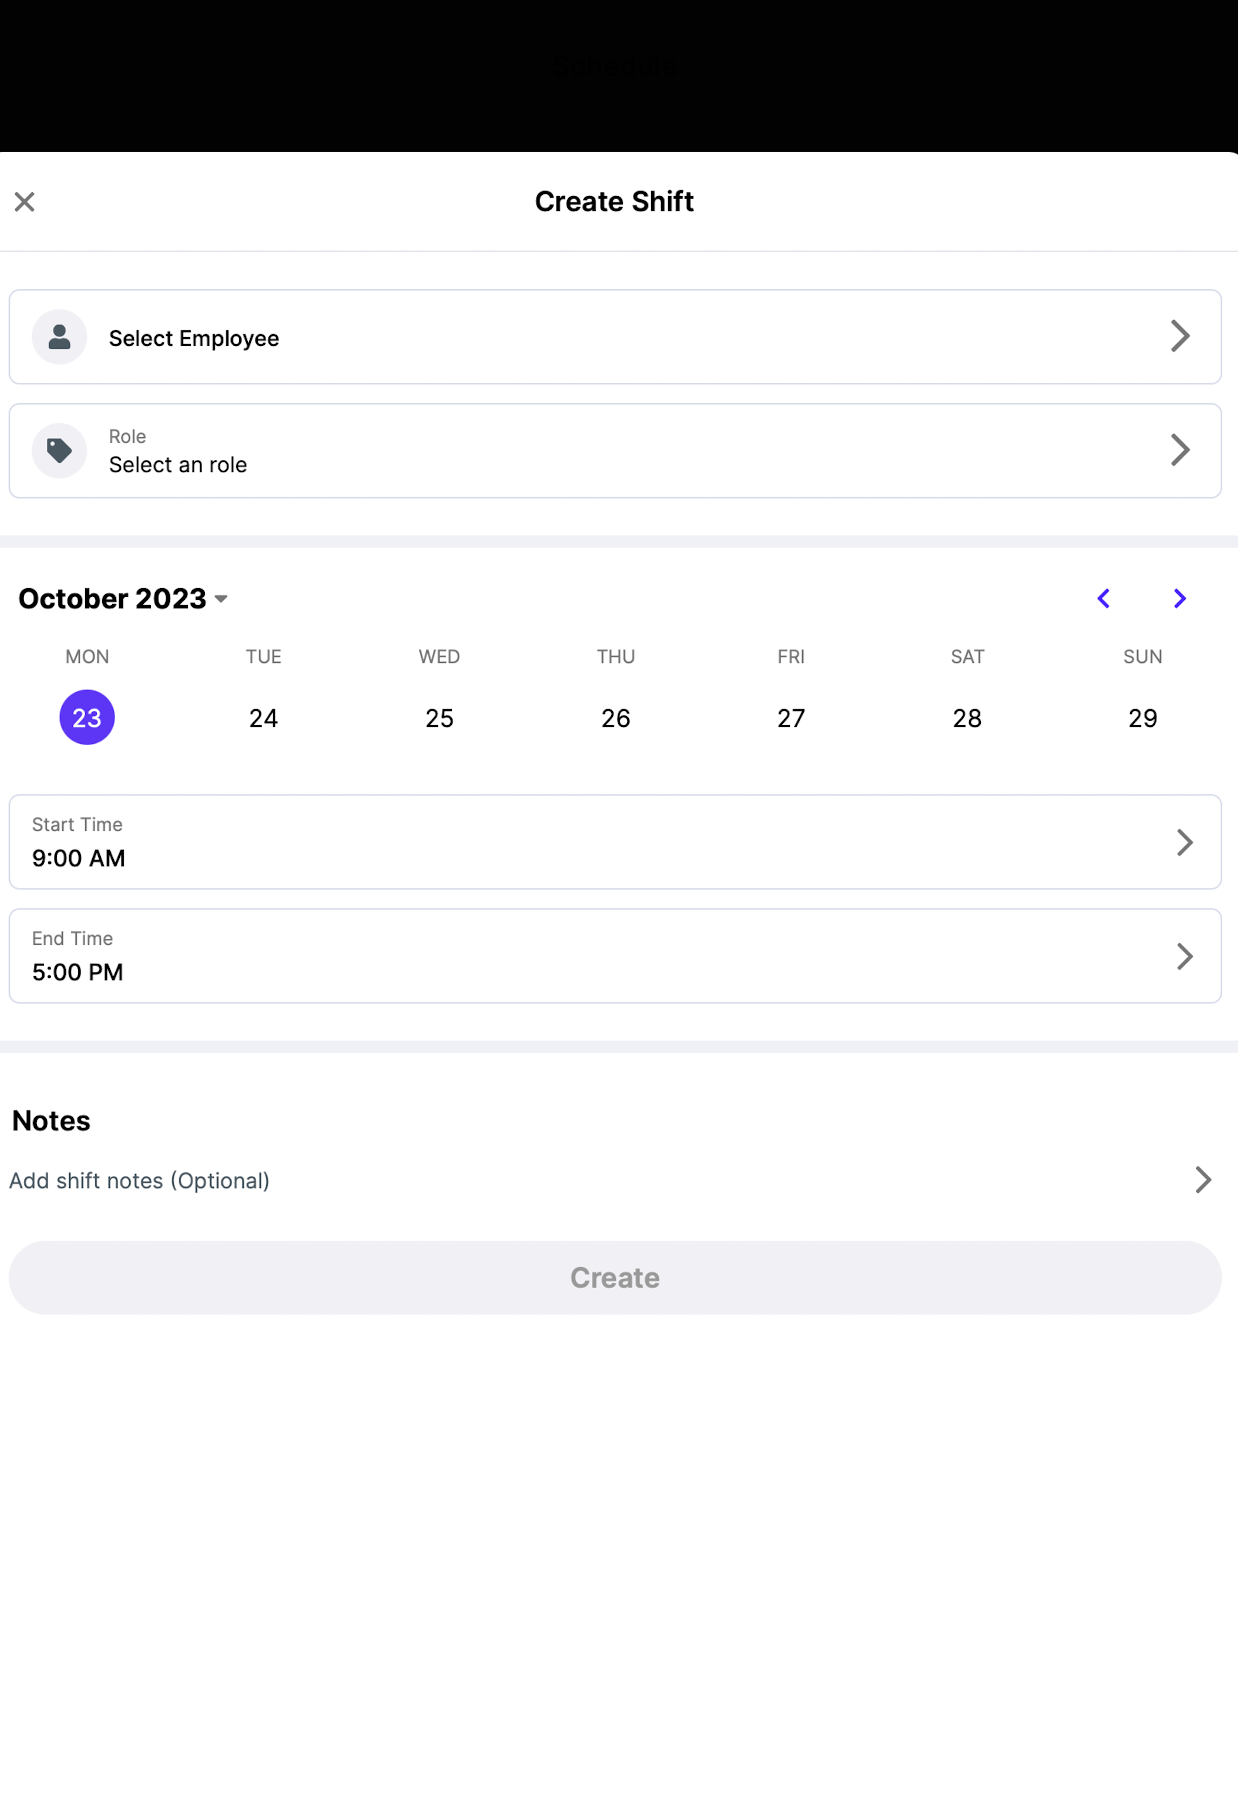


Note:
You can have the shift apply to multiple days by selecting your desired days at the top of the pop up.
If you select a day that the employee has shift preferences on, they will appear in blue.
- Once you have finished, click Create to finalize. The shift will then appear with a Draft tag attached:

Repeat the steps above untill you are ready to publish the draft schedule you've created.
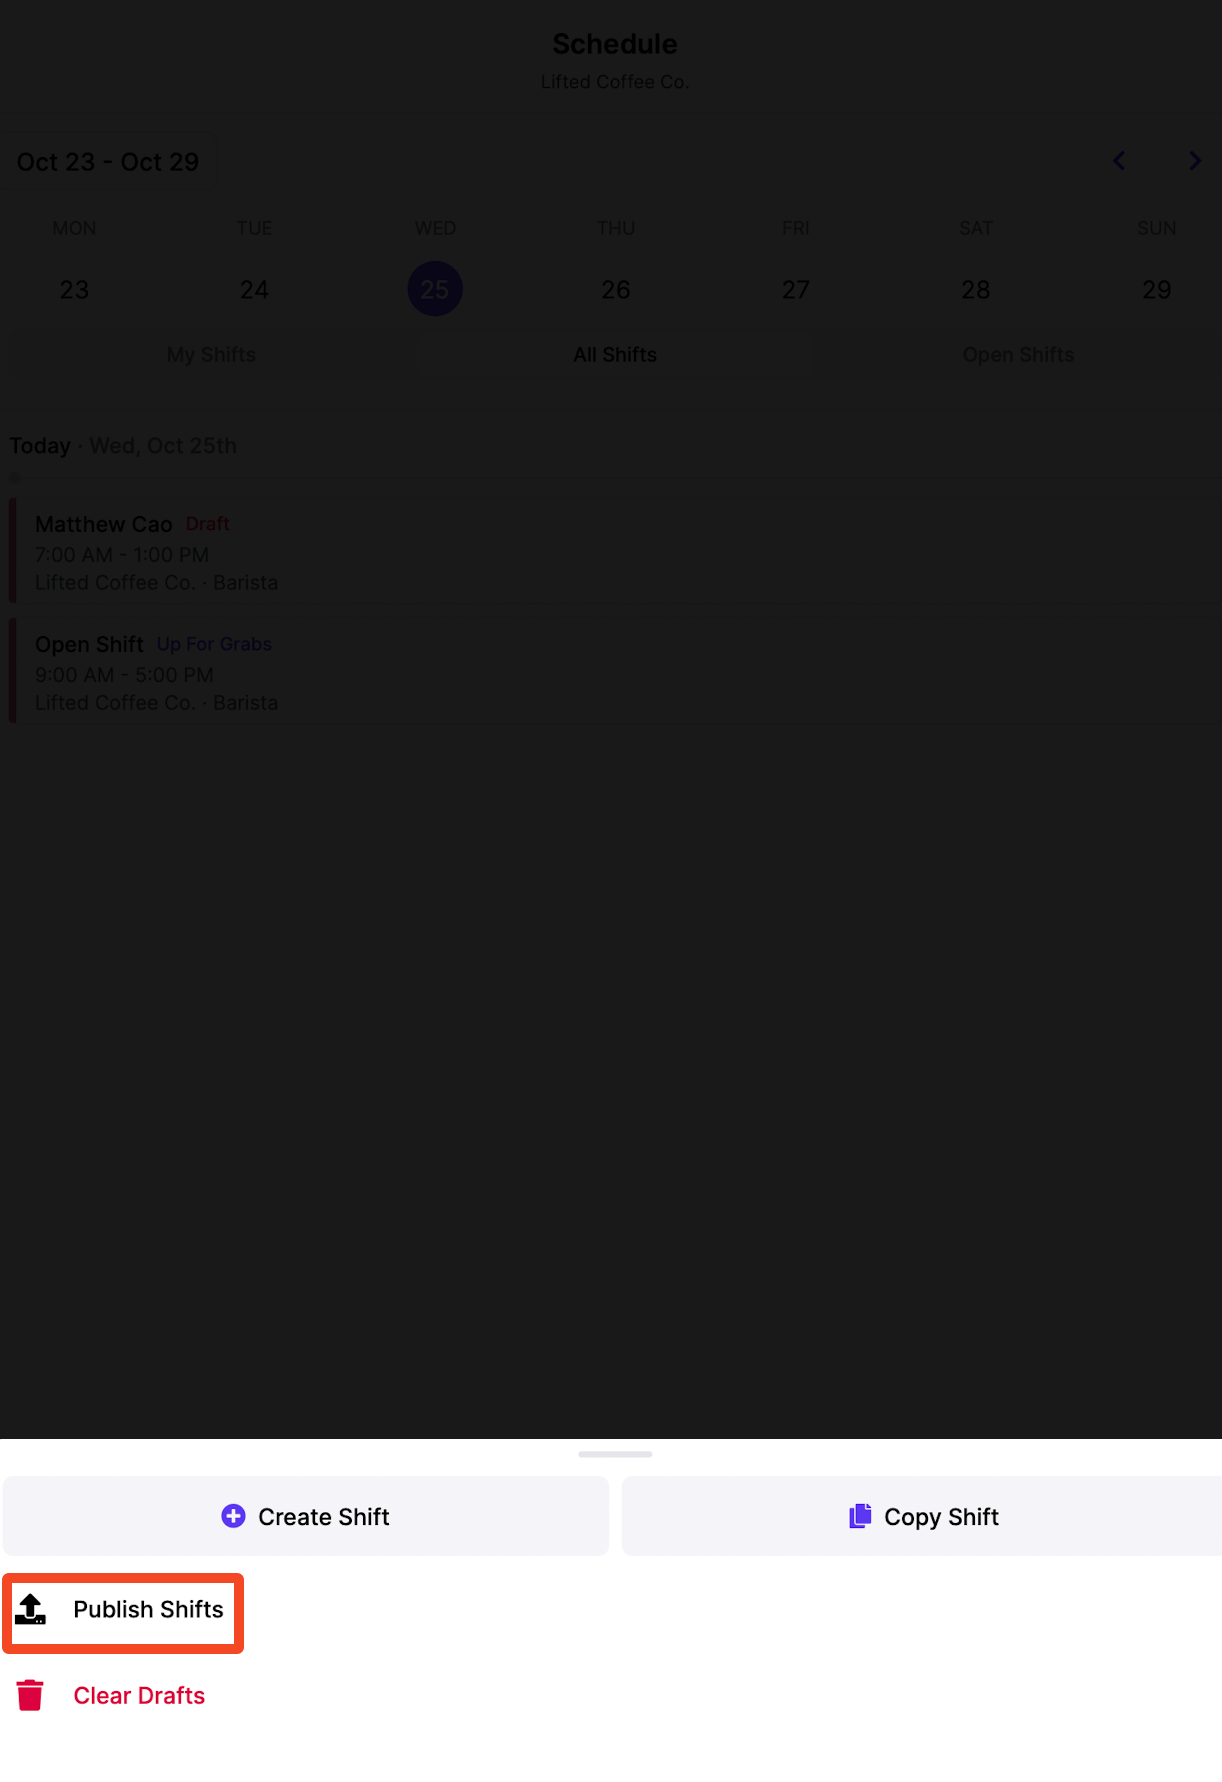
Once you are ready to publish your draft shifts, click the Pencil button at the bottom of the page again and then hit Publish
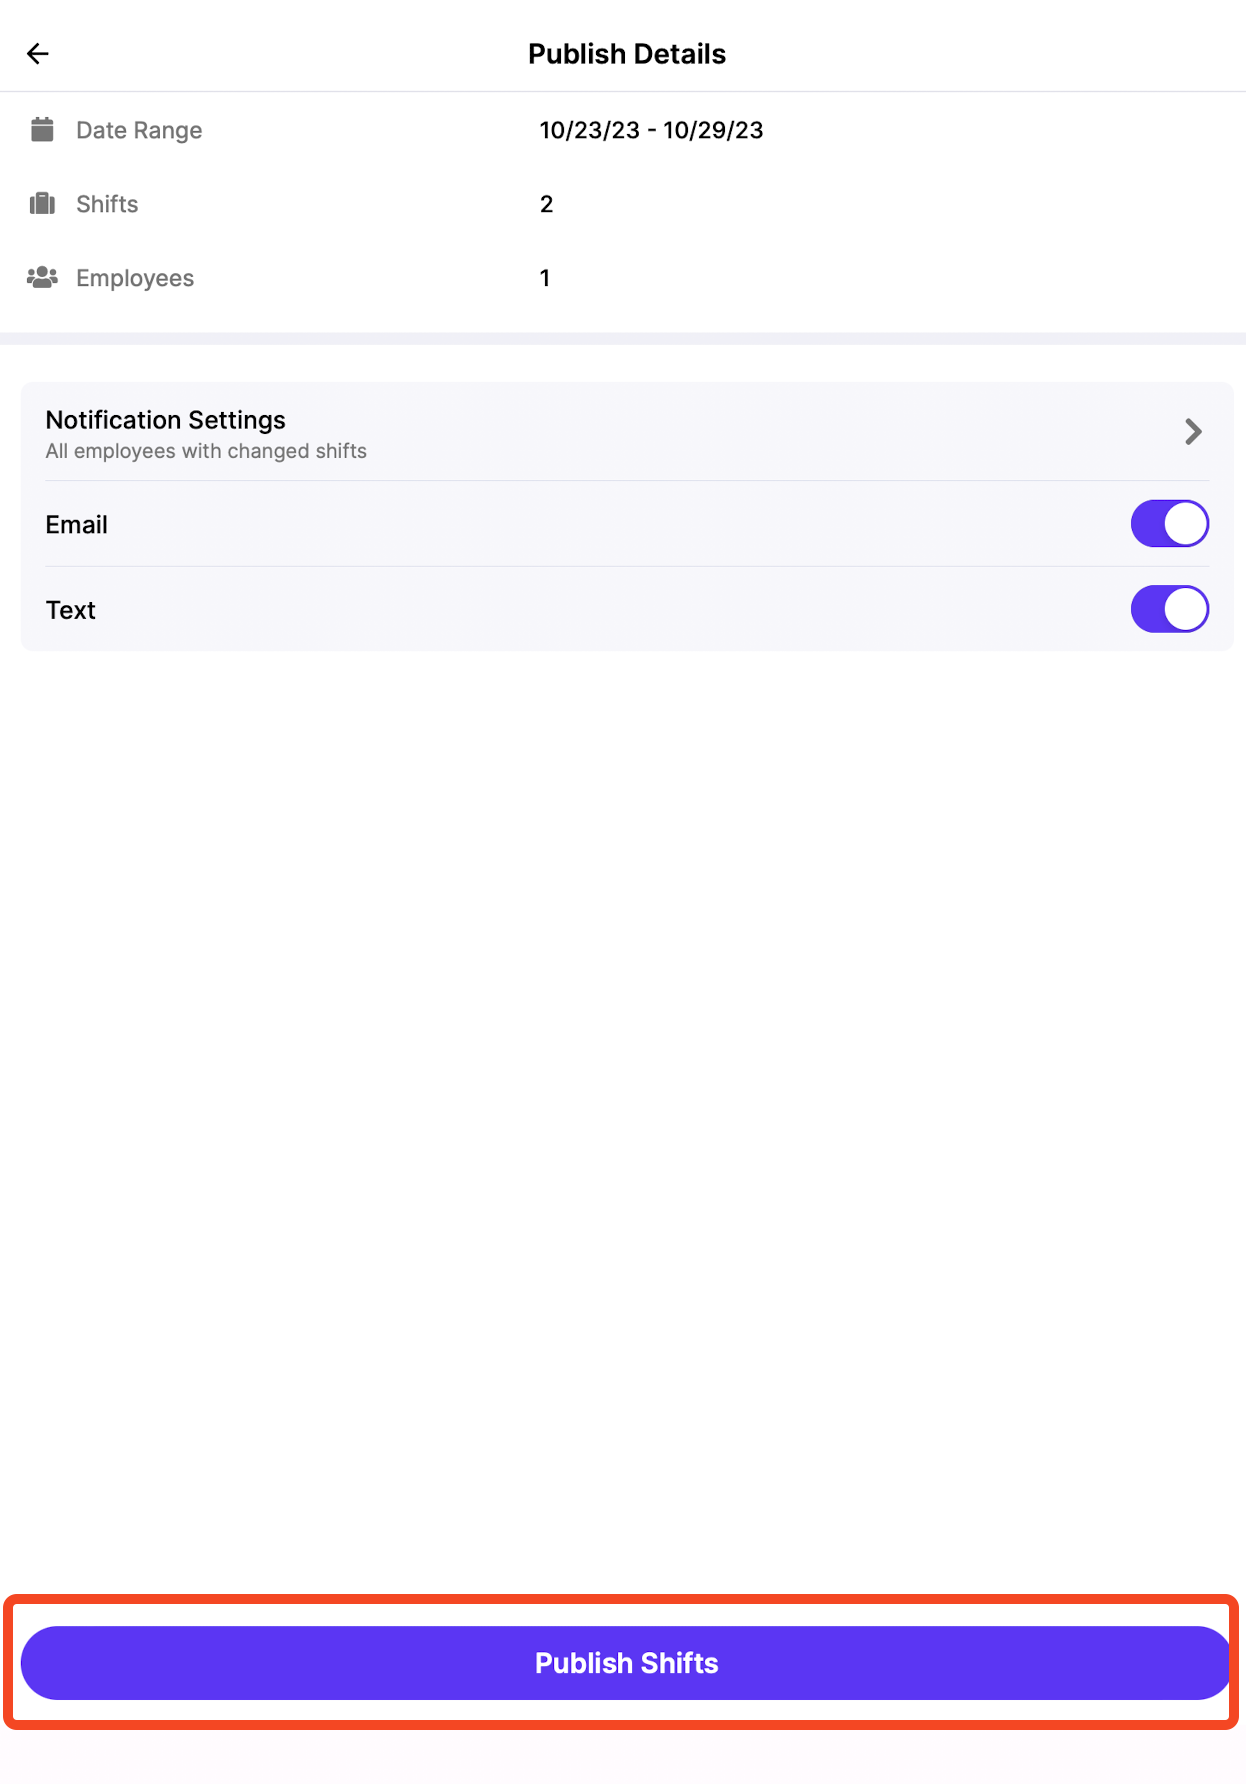
This will prompt a pop up to appear where you can review details of the shifts you're about to publish. Here, click on the Notification Settings field to select which employees you'd like to notify:
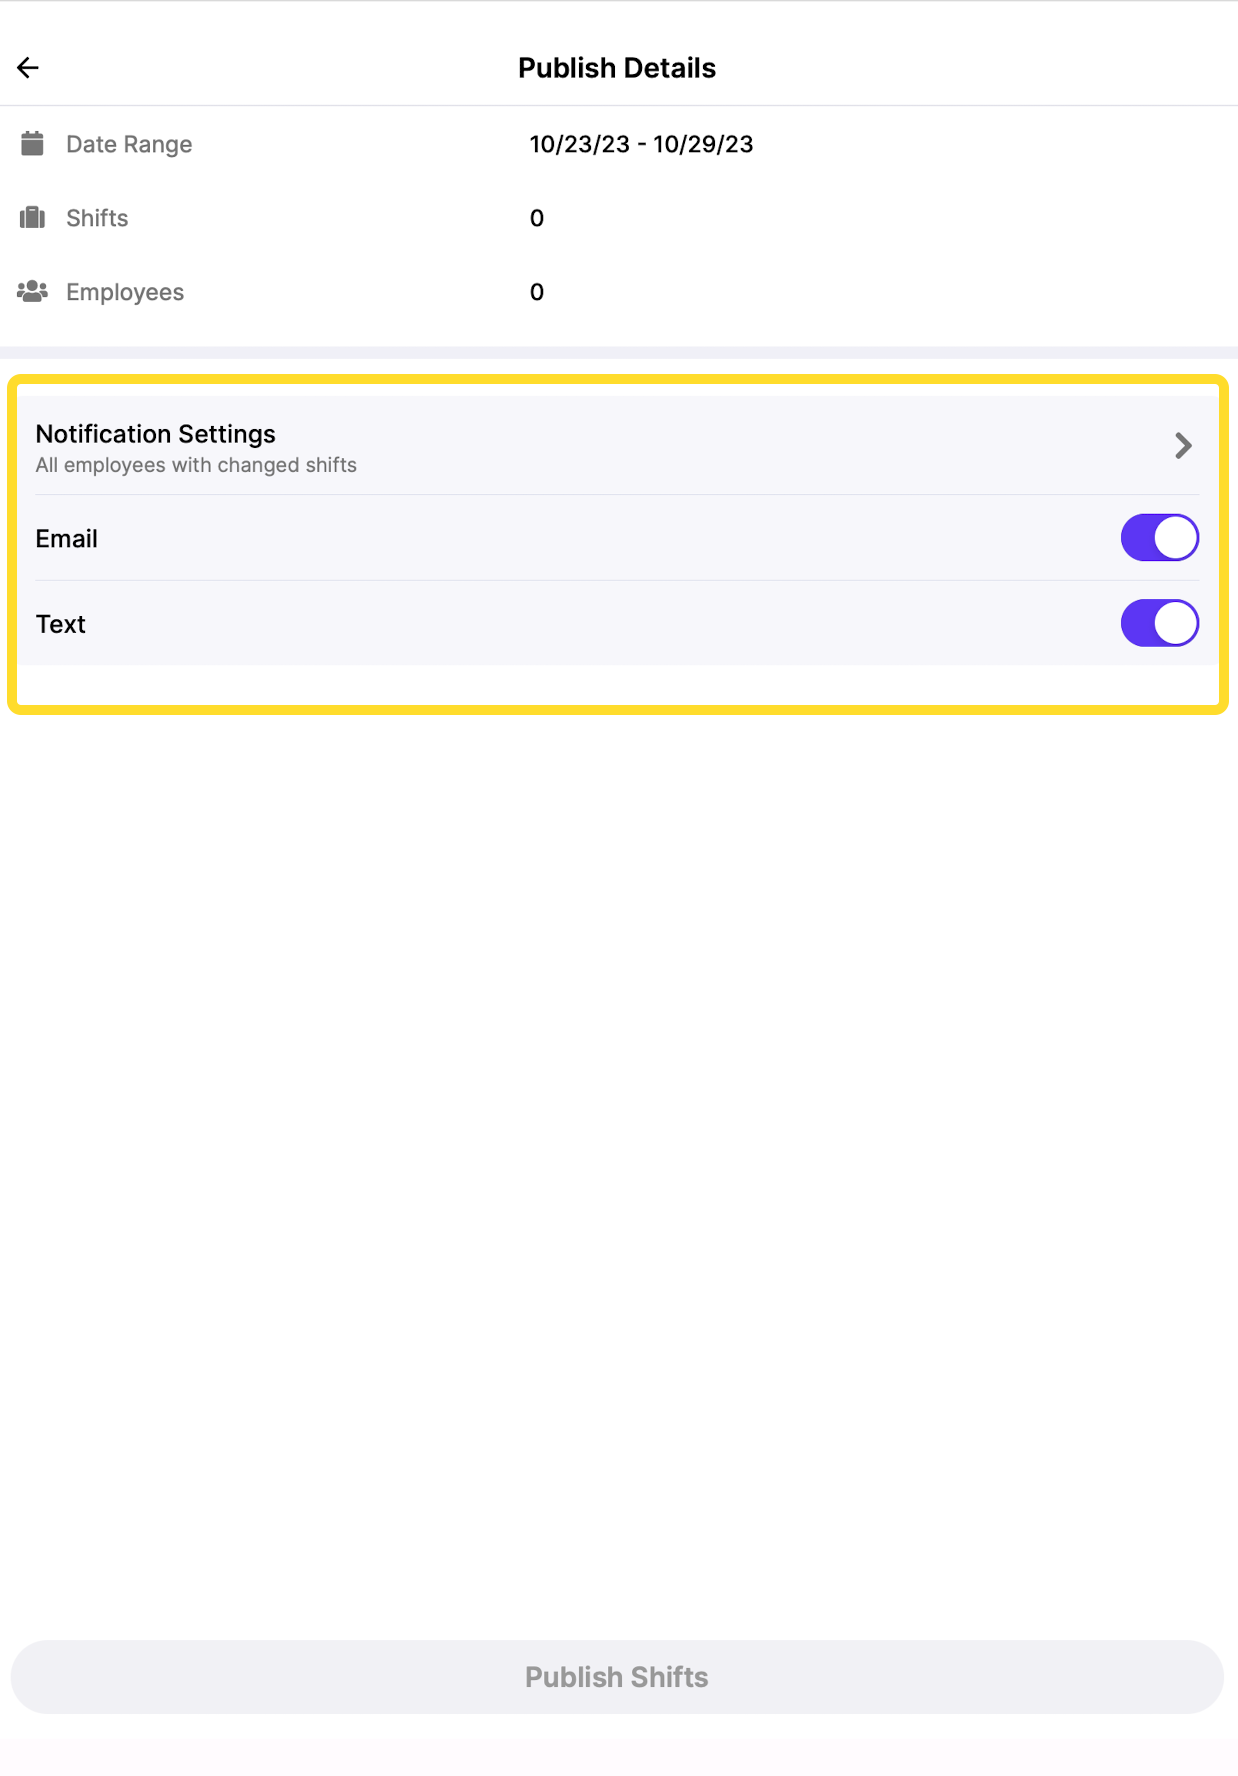
Toggle on either the by Text or by Email button, depending on how you want to notify your employees.
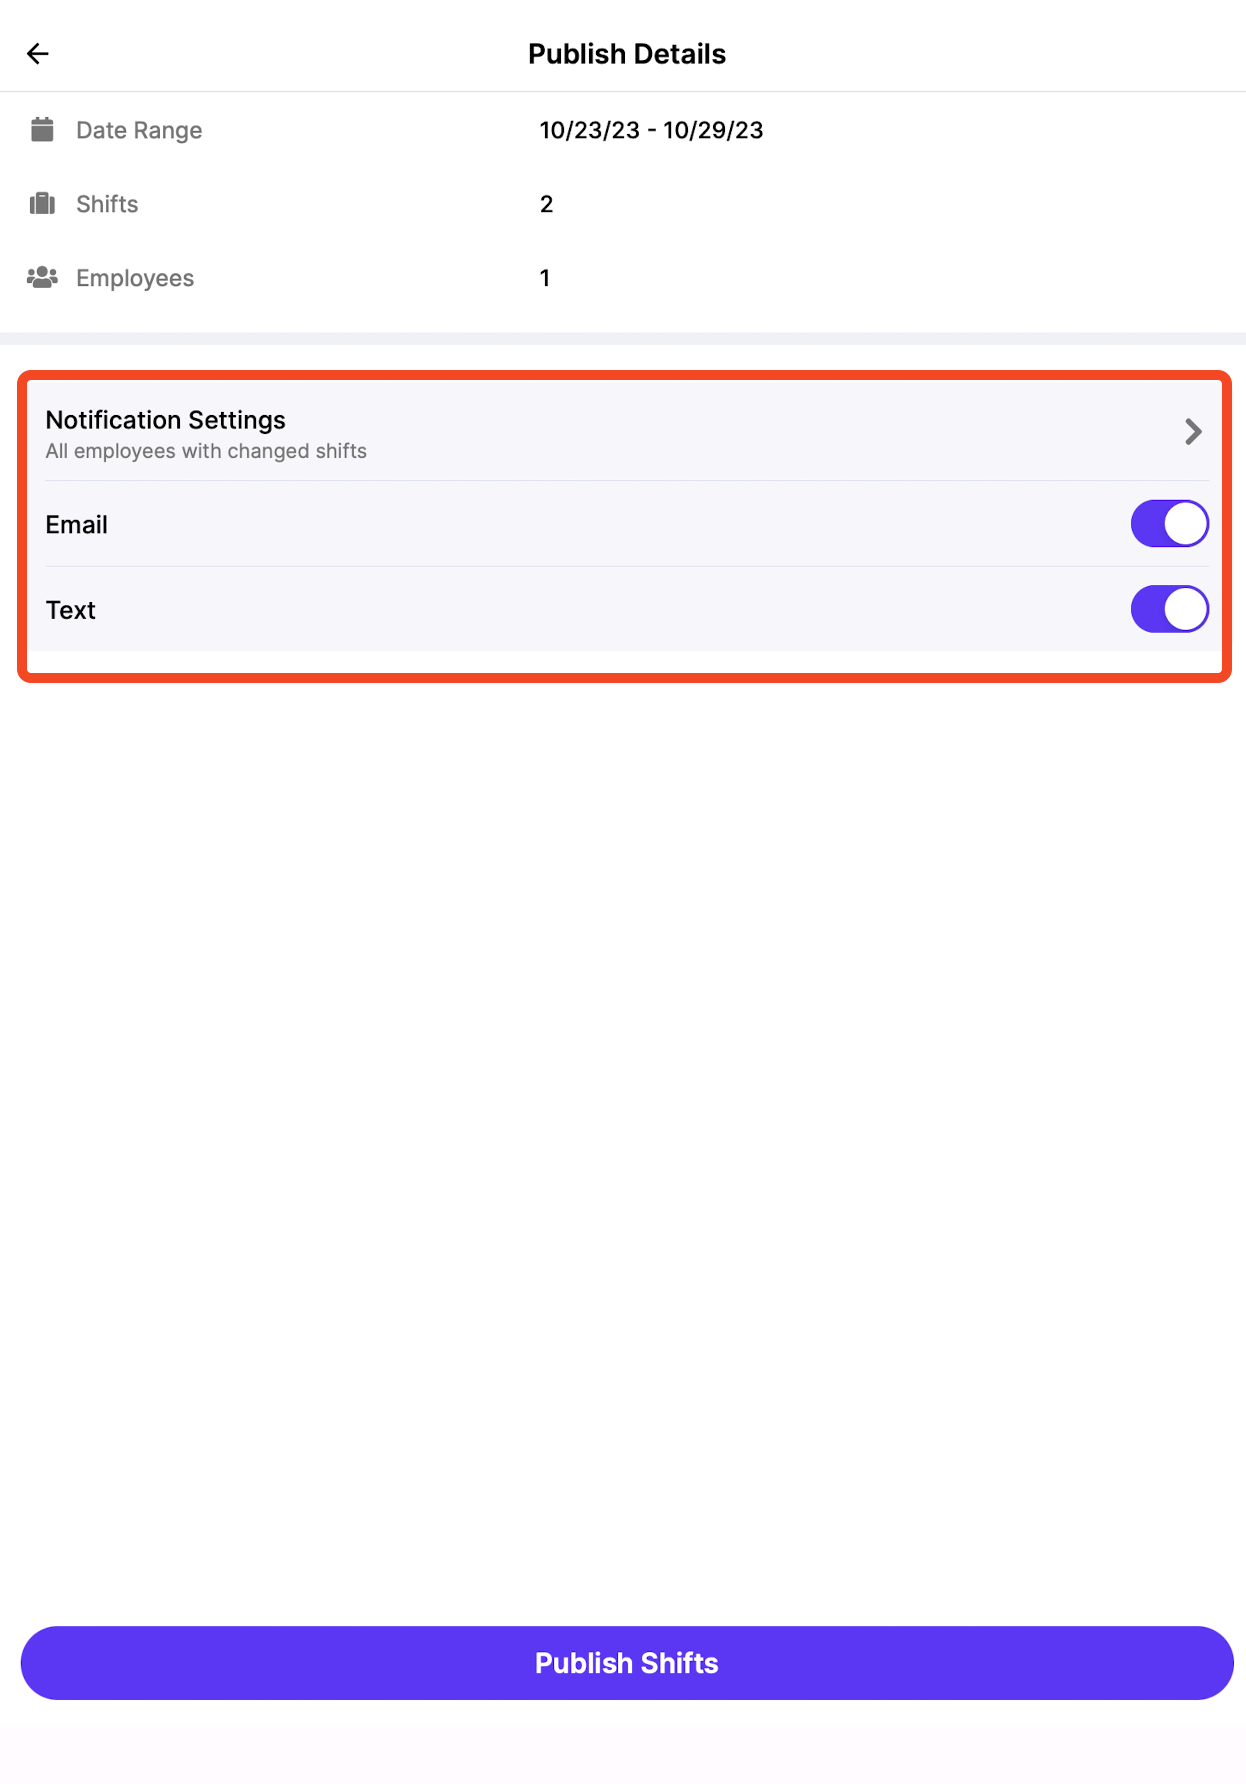
Once you have finished, click Publish to finalize:


Was this article helpful?