Customize your Ticket Screen Settings
Customize your Ticket Screen Settings
Article Summary
Share feedback
Thanks for sharing your feedback!
Learn about ticket screen management and settings.
You are able to view and customize both your global and device-specific ticket screen settings directly from the Dripos Point of Sale.
Customize your Global Ticket Options on the POS
Global Ticket Options are settings that affect the way tickets and products are displayed on ticket screens across all of your shop's Point of Sale devices.
Continue reading to learn how to customize your global ticket options.
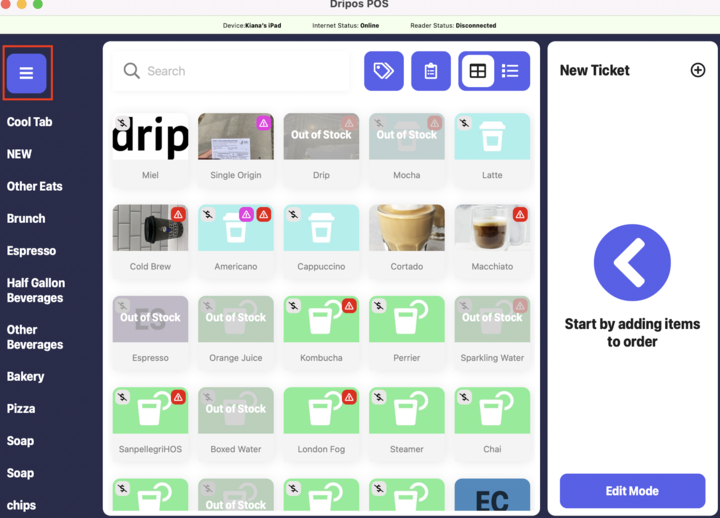
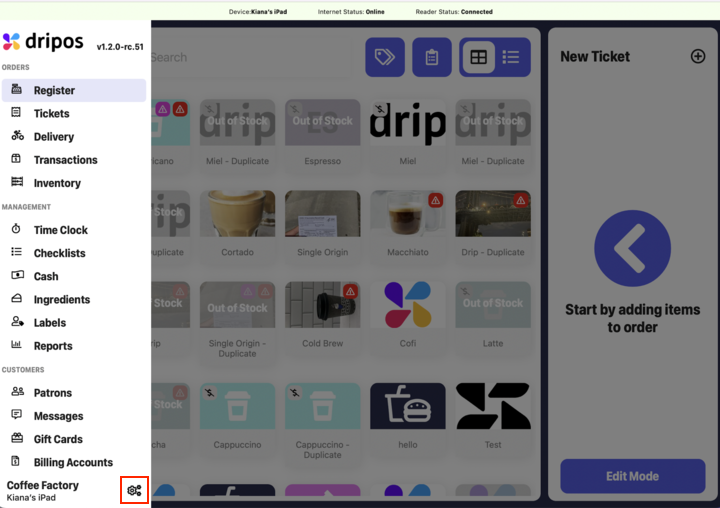
Log on to the Point of Sale. Once signed in, click on the 3 line icon at the top left of the screen > select the gear icon in the bottom right corner:
Click on the Global Ticket Options tab:
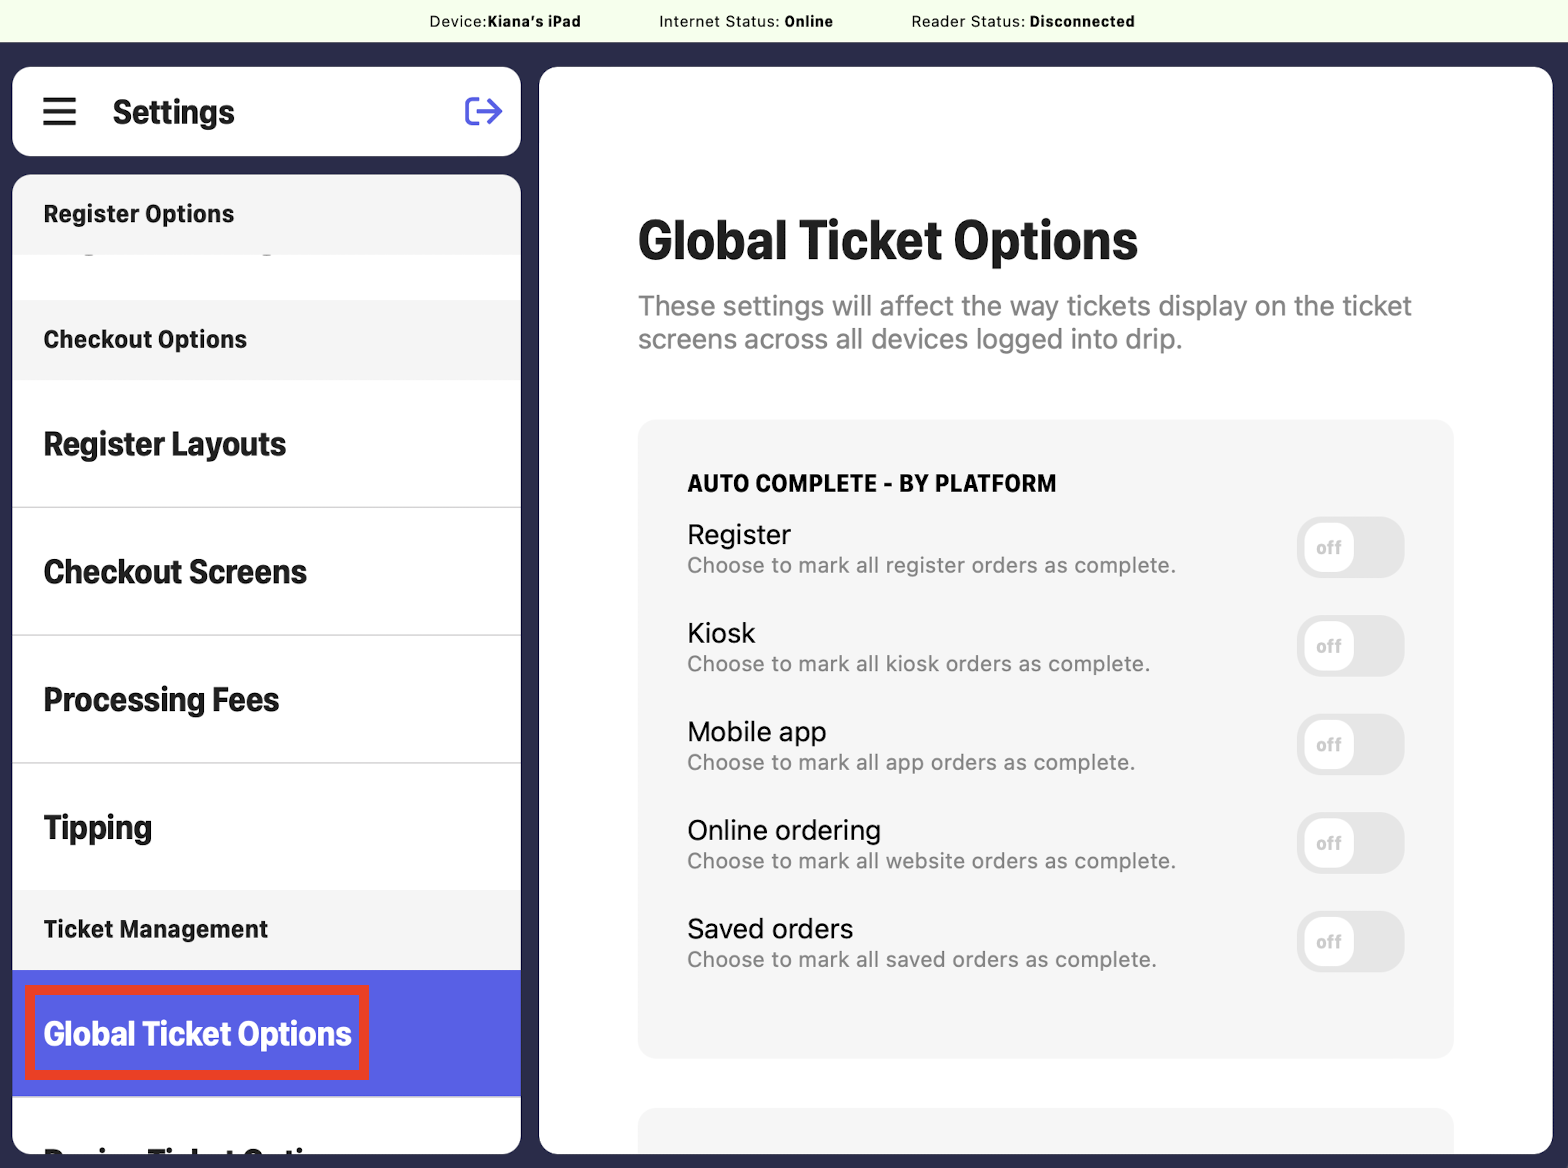
Once on this page, you will be able to view and modify the following global ticket options:


Auto Complete by Platform: To automatically complete orders that originate from either the Register, Kiosk, Mobile App, Online Ordering, or Saved Orders, turn their respective toggles on:

Note:
The autocomplete function ensures that once a ticket or product is submitted, it will be automatically processed without appearing on the ticket screen.
This results in immediate fulfillment and marking of the tickets or items as completed.
Auto Complete by Item Type: If the Custom Products toggle is on, all custom products will automatically be completed and not show up on the ticket screen:

Ignore Ticket Completion Confirmation: If this toggle is on, you can complete orders on the ticket screen without having a confirmation screen pop up. If this toggle is off, the following pop up will appear after each order is completed:

Highlight Unviewed Mobile Ticket: If this toggle is on, new mobile or web orders will be highlighted with a bright border until clicked on:

Daily Cleanup: Select what time you want all uncompleted orders to be marked as completed each day.
To change the daily cleanup time or set it to not clean up tickets, click under where it says Complete All Unscheduled Orders > select a time between 12am - 5am EST from the dropdown or select Don't if you want tickets from the previous day to remain on the screen:


Customize your Device Ticket Options on the POS
Device Ticket Options are settings that exclusively impact the display of tickets and products on the ticket screen of the specific device that you are on.
Continue reading to learn how to customize your device ticket options.
Log on to the Point of Sale. Once signed in, click on the 3 line icon at the top left of the screen > select the gear icon in the bottom right corner:
Click on the Device Ticket Options tab:
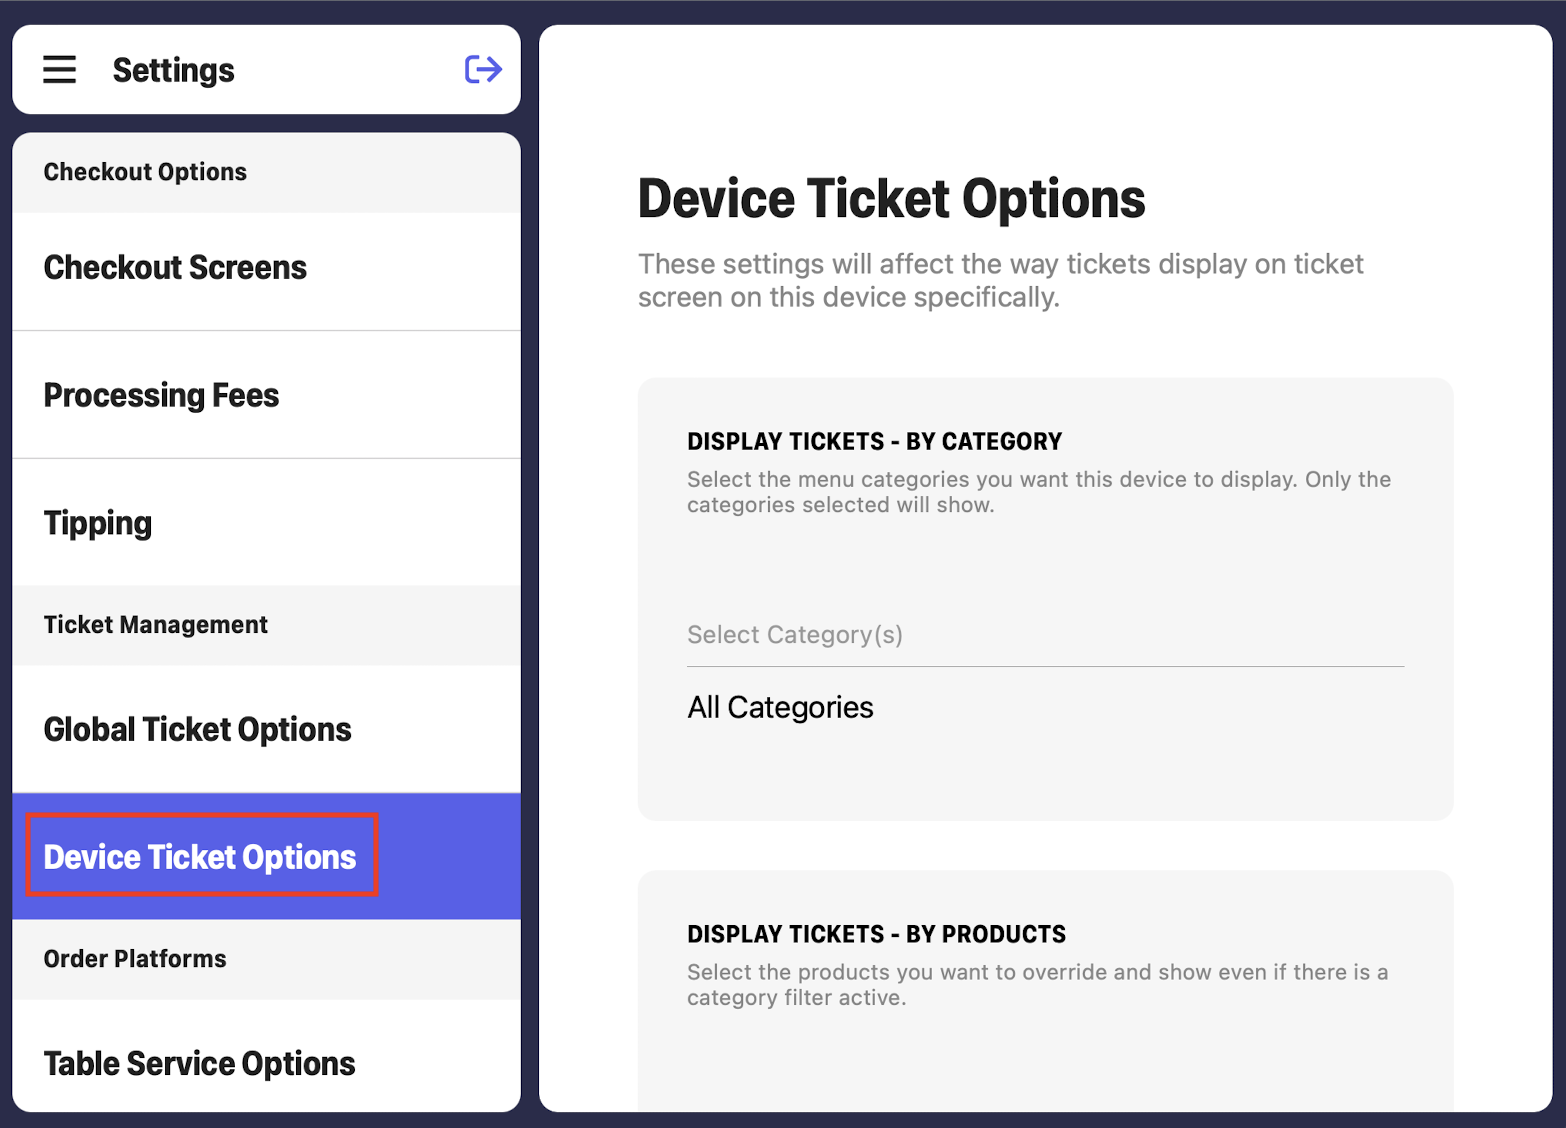
Once on this page, you will be able to view and modify the following device ticket options:
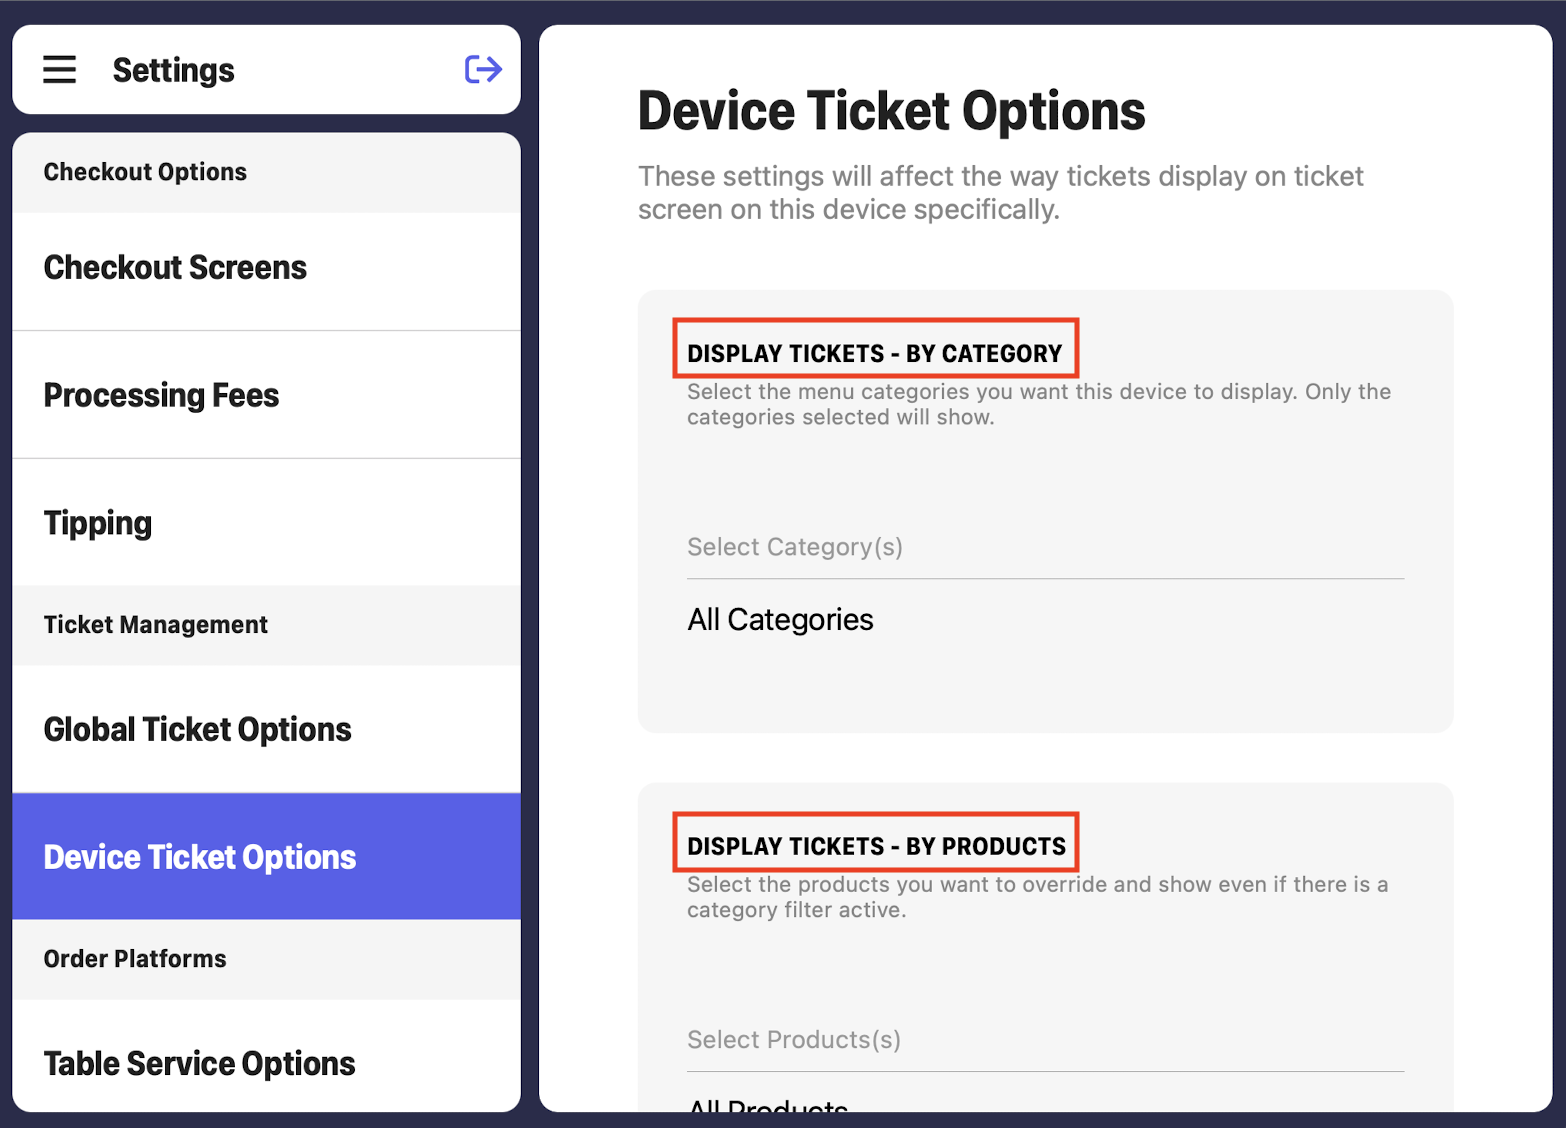


Display Tickets by Category: If any categories are selected, only products in those categories will be displayed on that specific device's ticket screen.
Note:
This filter can be helpful in setting up prep stations based on categories.
- For example, some shops may have an Espresso Bar KDS device that only displays Espresso Drinks, and a Kitchen KDS that only displays prepared food categories.
Display Tickets by Products: If any products are selected, only those specific products will be displayed on that specific device's ticket screen:

Note:
You can also override category filters and select individual products that you'd like to be displayed if there is a category filter active.
Display Tickets by Device: If any devices are selected, only orders that originated from those devices will be displayed on that specific device's ticket screen.
Display Tickets by Type: If any order types are selected, only orders placed under those specific order types will be displayed on that specific device's ticket screen.
Note:
To remove selections for any of the above filters, click the X. Removing all selections will default to all categories/products/devices/types:


Fire Tickets when Named: If this toggle is on, tickets will display on the ticket screen of that device as soon as they are named, prior to collecting a payment.
Fire Tickets on Payment Click: If this toggle is on, tickets will display on the ticket screen of that device as soon as a payment method is selected during checkout, prior to the transaction reaching the confirmation or receipt page.
Collapse Tickets by Default: If this toggle is on, tickets on the ticket screen of that device will automatically appear collapsed.
These can then be expanded by clicking the Caret icon at the top right of each ticket:

Sound on New Ticket: If this toggle is on, the device will make a sound after each new ticket is created.
Only Sound when Ticket is Mobile or Web: If the Sound on New Ticket toggle is on for the device, the sound will only play for mobile and web orders.
Compact Mode: If this toggle is on, tickets on the ticket screen of that device will not have checkboxes displayed next to included products, allowing for more tickets to appear on the screen:

Tickets Swipe If this toggle is on, you will be able to swipe tickets to move them between received, in-progress, and completed.
Hide Modifier Names: If this toggle is on, tickets on the ticket screen of that device will not feature any modifier names:

Hide Ticket Numbers: If this toggle is on, tickets on the ticket screen of that device will not display the order number:

Hide Custom Product Items: If this toggle is on, tickets on the ticket screen of that device will not include any custom product items.
Expo Screen: If this toggle is on, the device will be designated as an expo screen.
Note:
An expo screen is the final screen where tickets will be completed.
This can be useful if you have two ticket screens set up for different prep stations, filtering by categories or products.
Once those tickets have been completed on those ticket screens, the expo screen will still display the ticket under in-progress, and will only be marked as complete once it has been completed on the expo screen.
Scheduled Orders Prep Window: Here, select the number of minutes that you want scheduled orders to move from the scheduled orders tab to the received tickets column. Once you have made your selection, click return on your tablet keyboard to save any changes:

Display Ticket Timer: If this toggle is on, a ticket timer will count up from when a ticket was created in the top right of the ticket:

Ticket Timer Warning: Once the time hits this threshold, the time turns orange to warn staff that the first warning has beeen hit. To edit this, enter the new threshold time, in seconds, and click return on your tablet keyboard:

Ticket Timer Error: Once the time hits this threshold, the time turns red to warn staff that the second warning has beeen hit. To edit this, enter the new threshold time, in seconds, and click return on your tablet keyboard:

Was this article helpful?