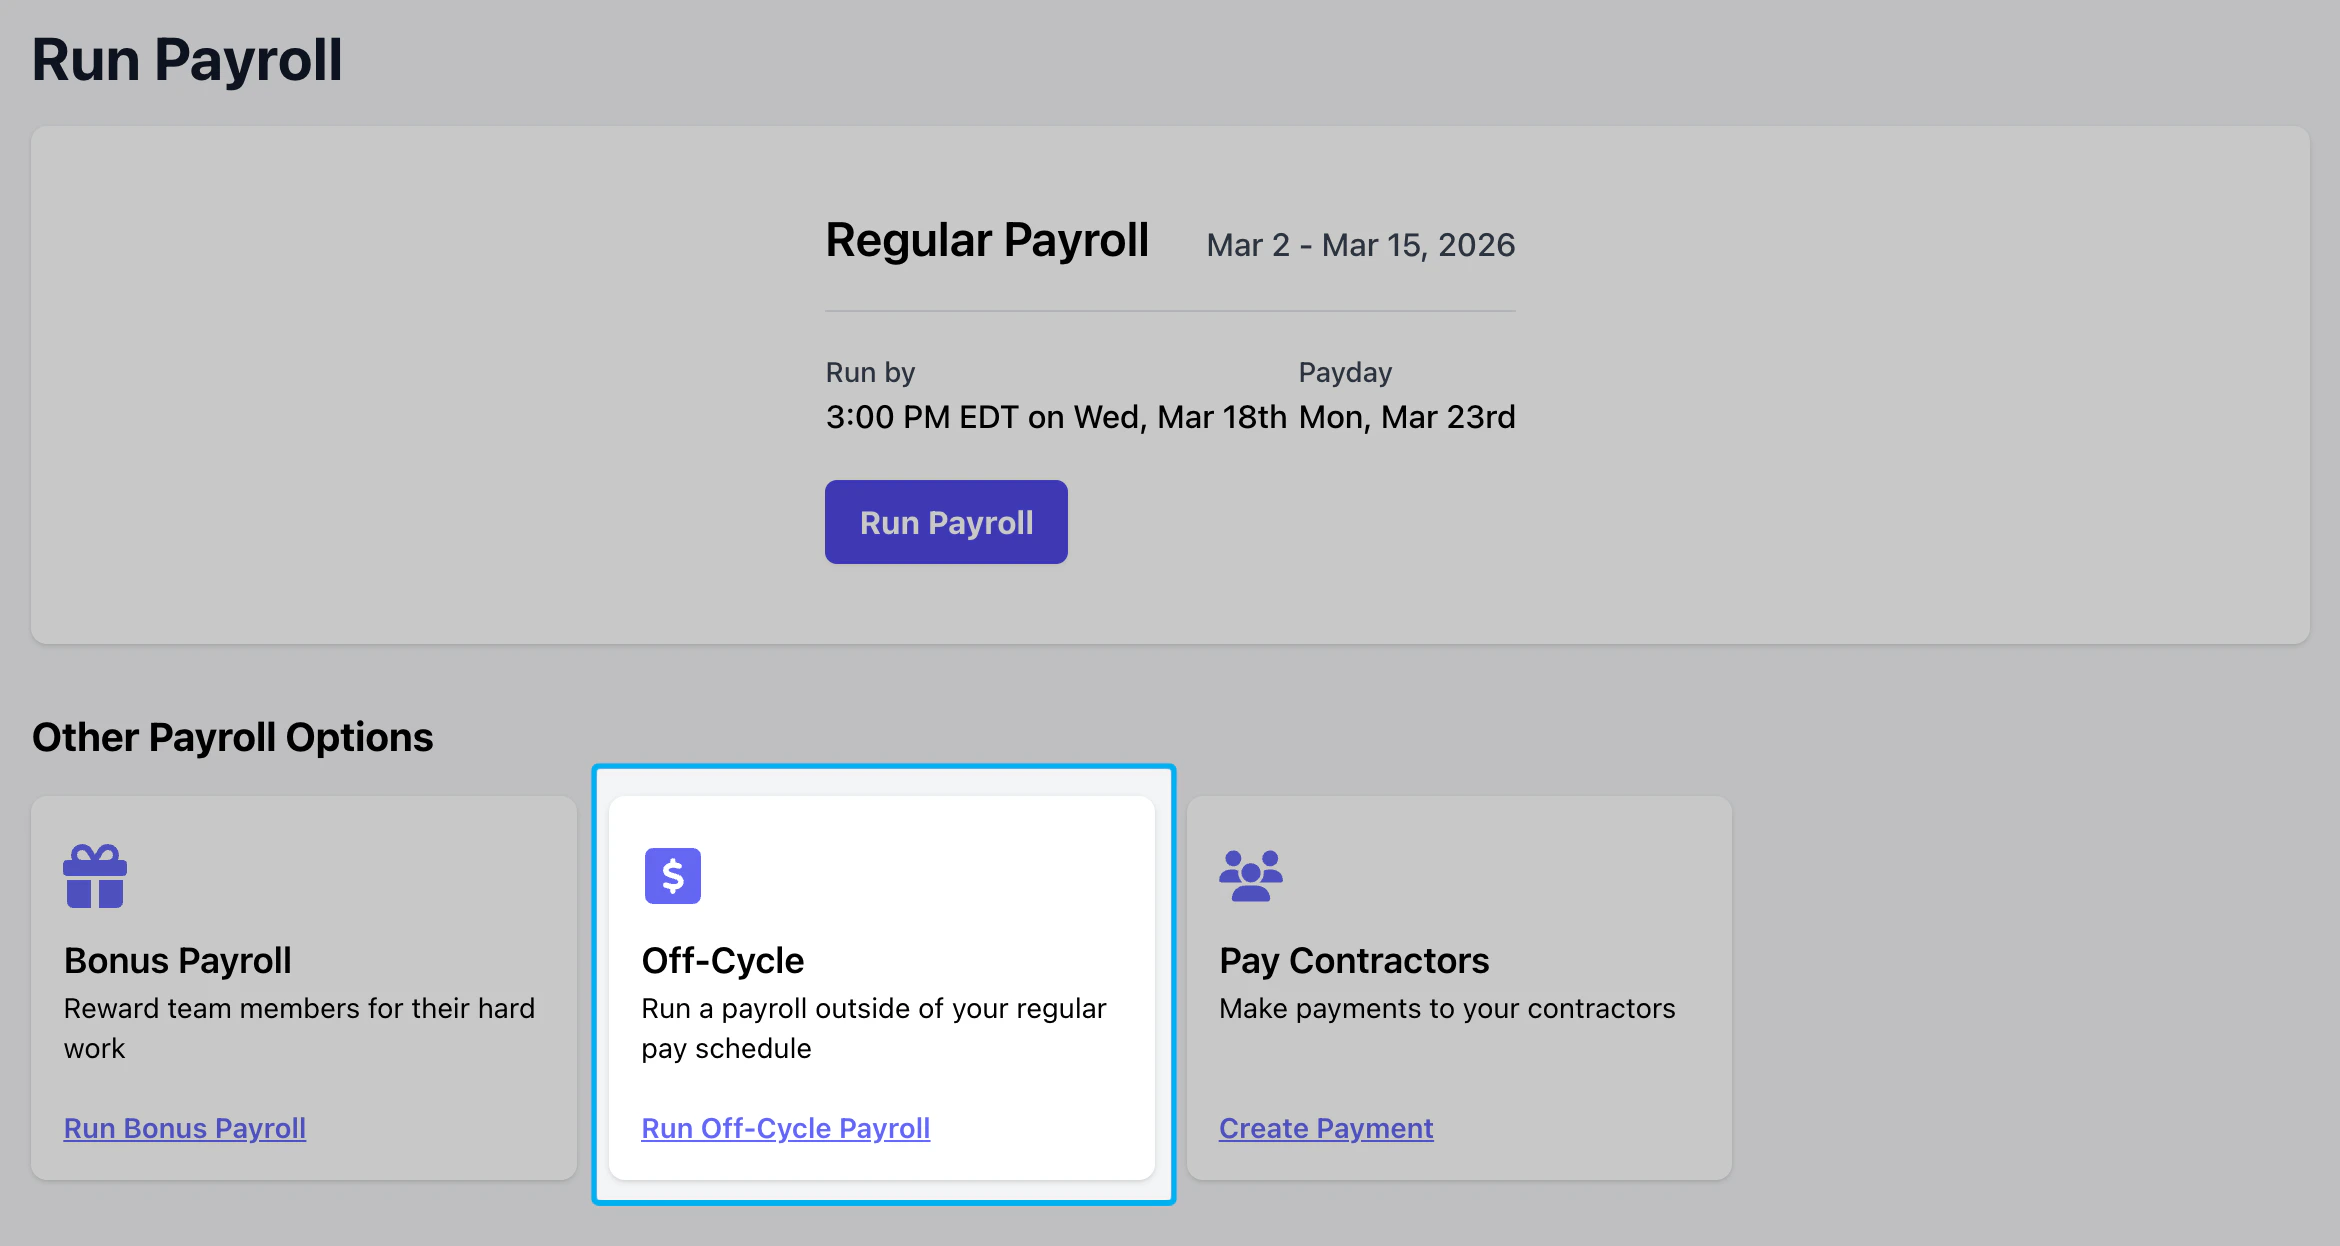
Regular Payroll
Run on regular weekly or bi-weekly pay cycles
Off-Cycle Payroll
Process payrolls outside of your regular pay schedule
Bonus Payroll
Pay one-time bonuses to employees
Processing Timelines
Your processing timeline is how long it takes for Dripos to process your payroll and pay your employees via direct deposit.3-Day
Most Dripos Payroll users will start with a 3-day processing timeline for Regular payroll.
For a Monday through Sunday pay schedule, payrolls must be run by Tuesday for a Friday payday.
For a Monday through Sunday pay schedule, payrolls must be run by Tuesday for a Friday payday.
2-Day
Dripos Payroll users that successfully complete 10 regular payruns may be upgraded to 2-day processing.
For a Monday through Sunday pay schedule, payrolls must be run by Wednesday for a Friday payday.
For a Monday through Sunday pay schedule, payrolls must be run by Wednesday for a Friday payday.
Funding Requirements
Failed fundings will result in a penalty fee of $150 to remedy the failed funding with our payroll partner.
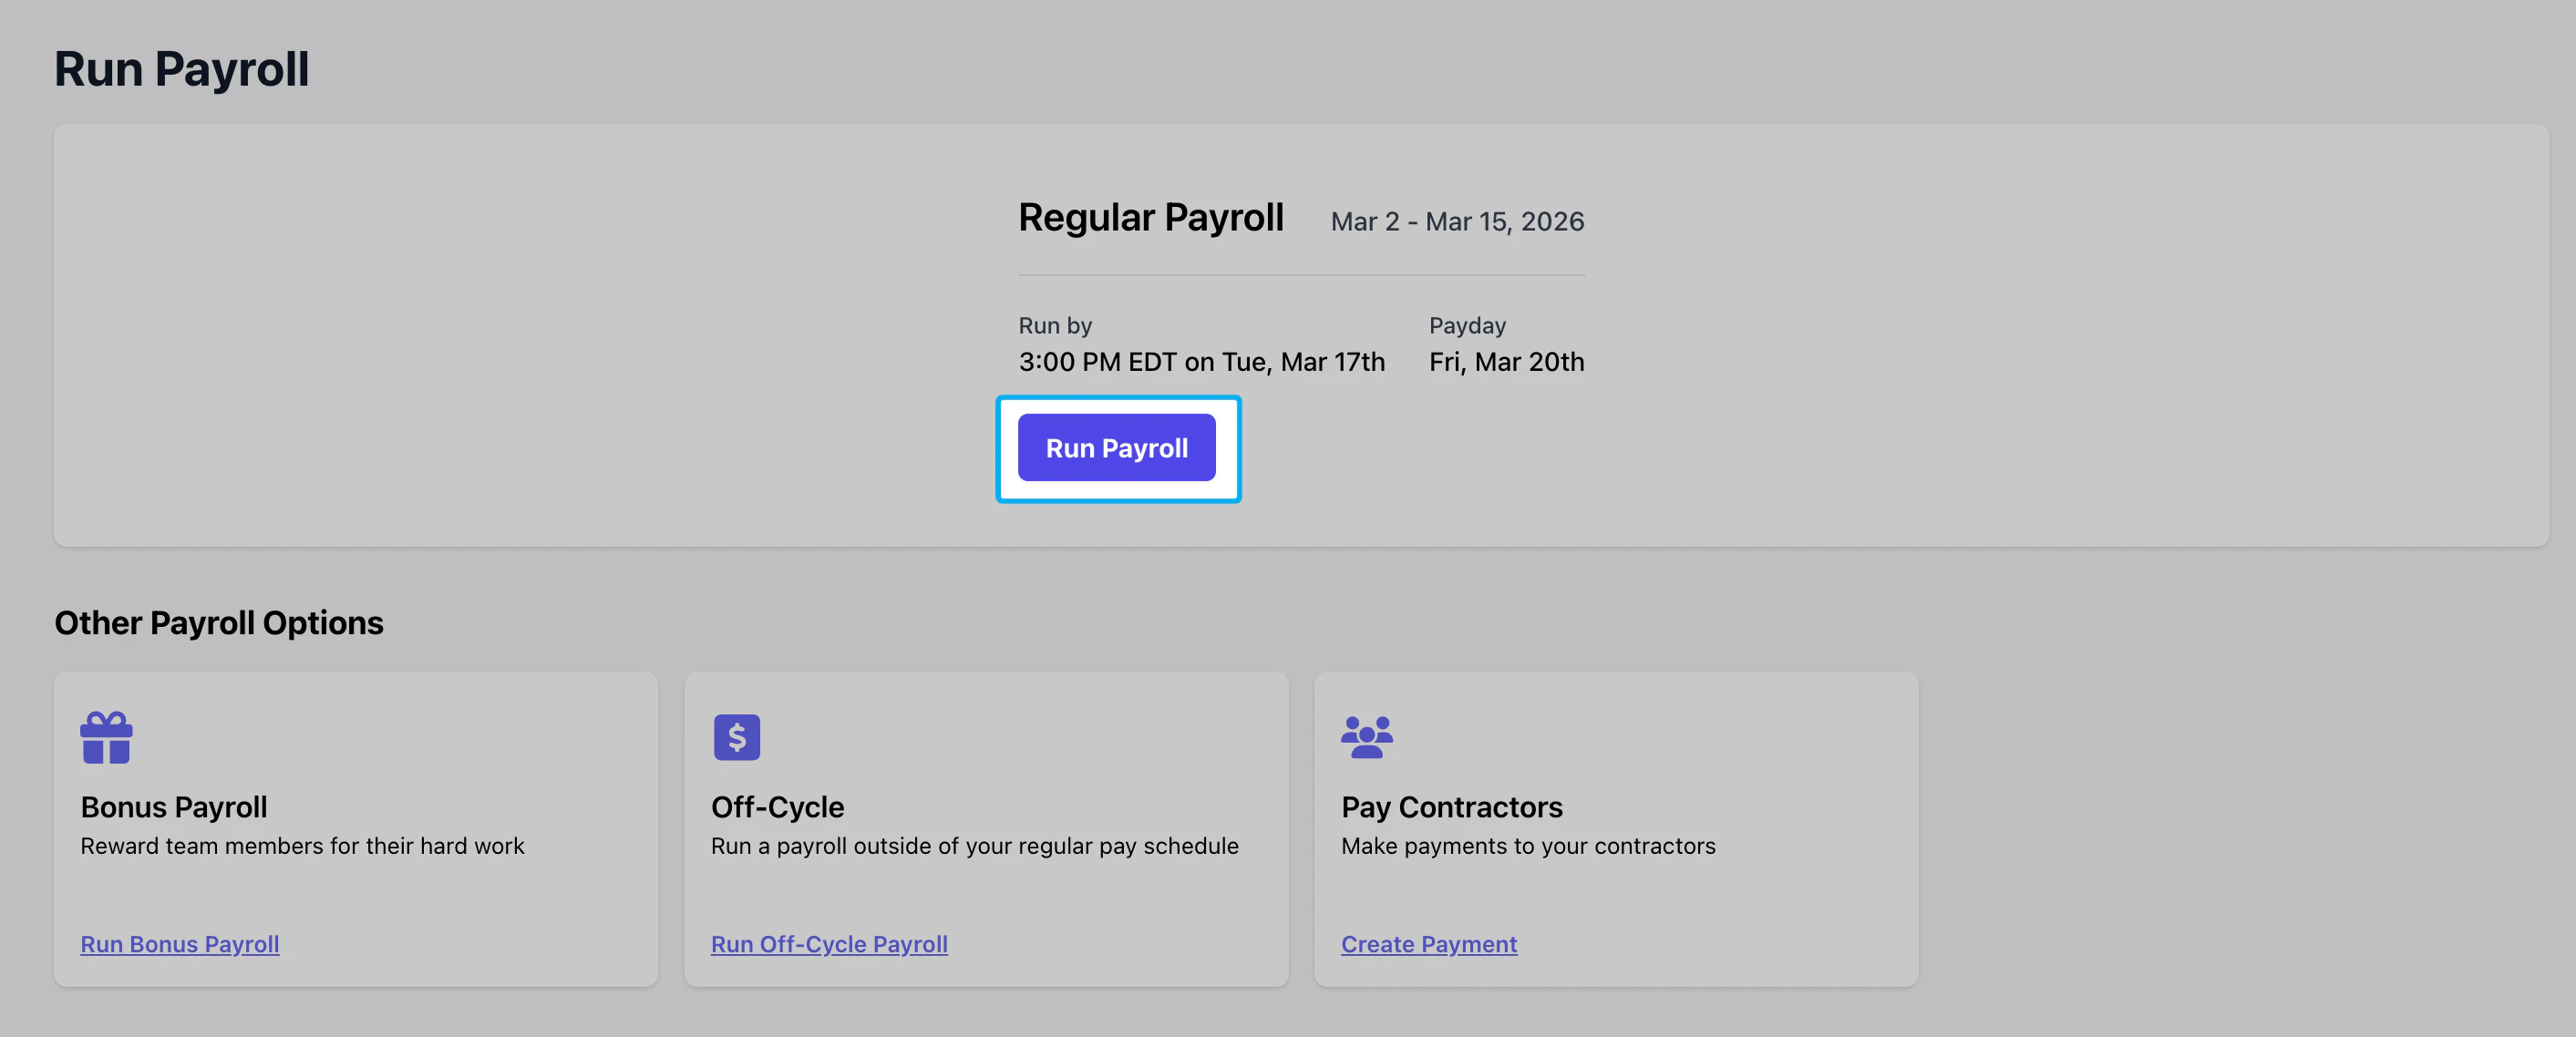
Payroll Dashboard
Navigate to your Payroll Dashboard to view your historical Payroll Liability, in addition to Quick Info on past and upcoming payroll dates.
Run Payroll
A Run Payroll button will appear when it is time to run your Regular payroll.
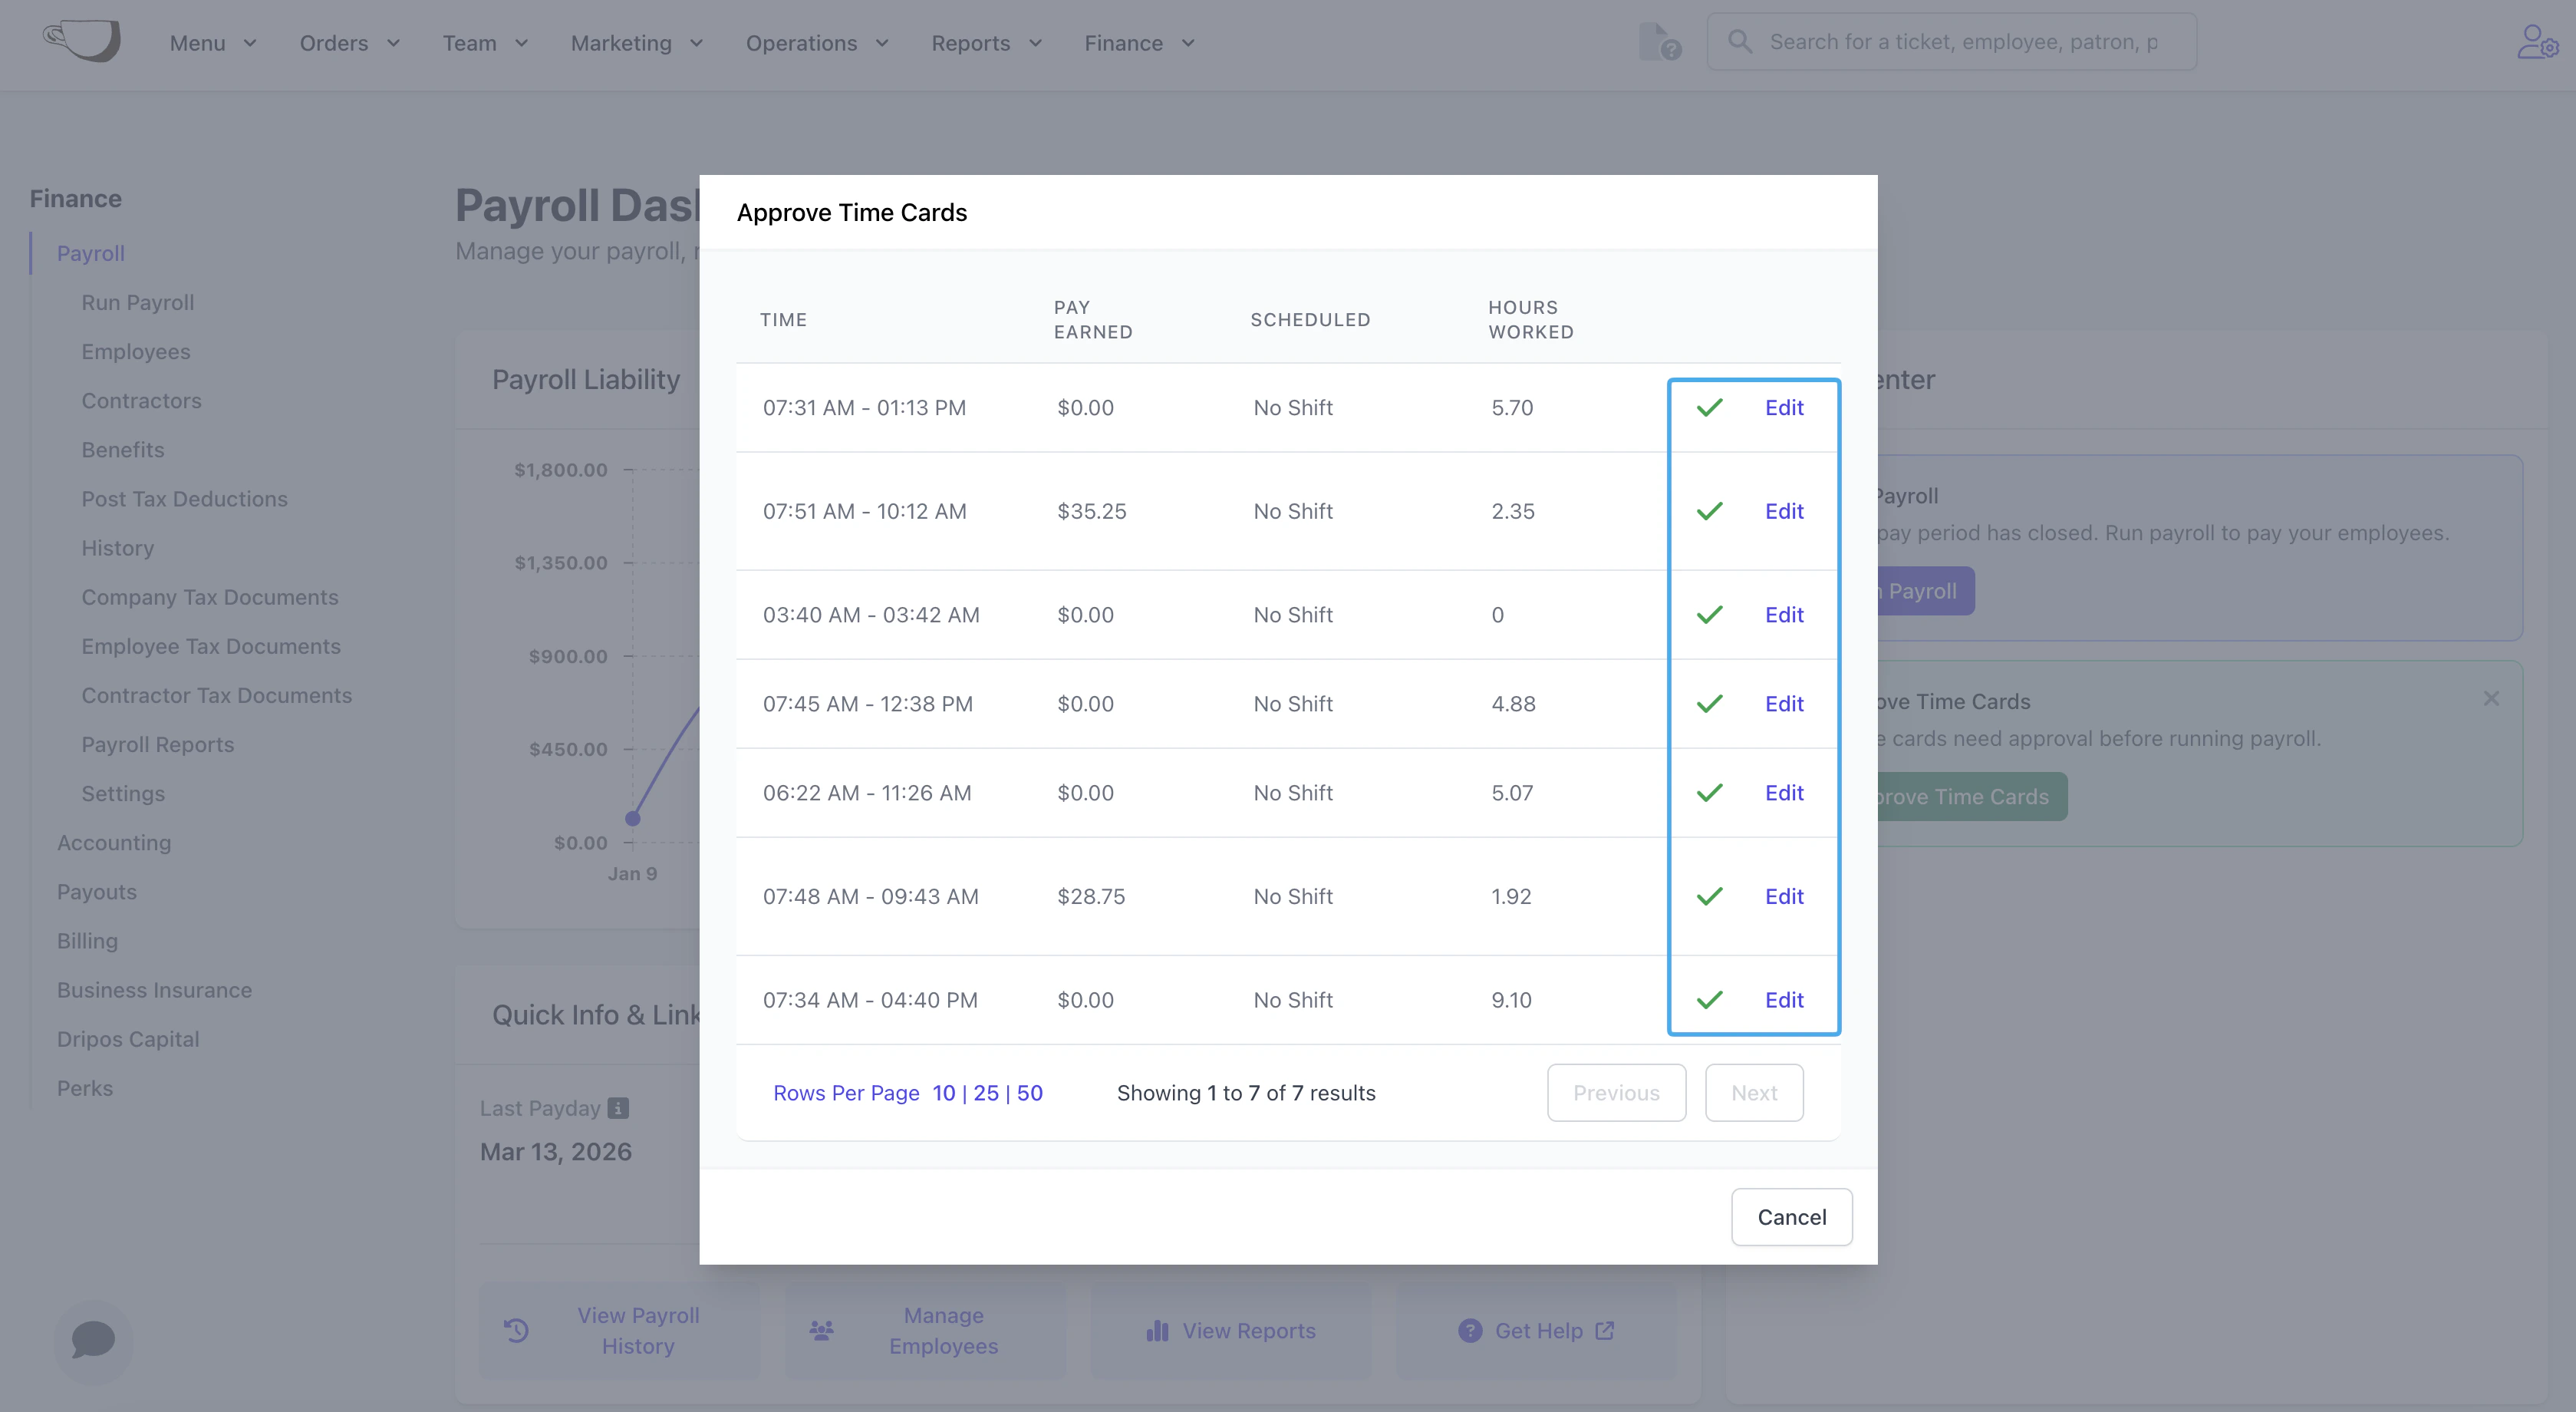
Approve Time Cards
Edit and approve time cards before running your Regular payroll.
View Payroll History
Review your historical payroll information.
Manage Employees
Add employees to payroll and check their onboarding status.
View Reports
Download Payroll Journal, Payroll Summary, Tax Deposit Breakdown, and other payroll files.
Get Help
Reference helpful payroll guides.
Regular Payroll
Regular payroll refers to a standard weekly or biweekly pay schedule for paying employees.When onboarding onto Dripos Payroll, your onboarding specialist will set your preferred pay schedule to weekly or biweekly.
Step 1 - Approve Time Cards
Step 1 - Approve Time Cards
If you have not reviewed and approved the time cards for this payroll, click Approve Time Cards on the Payroll Dashboard.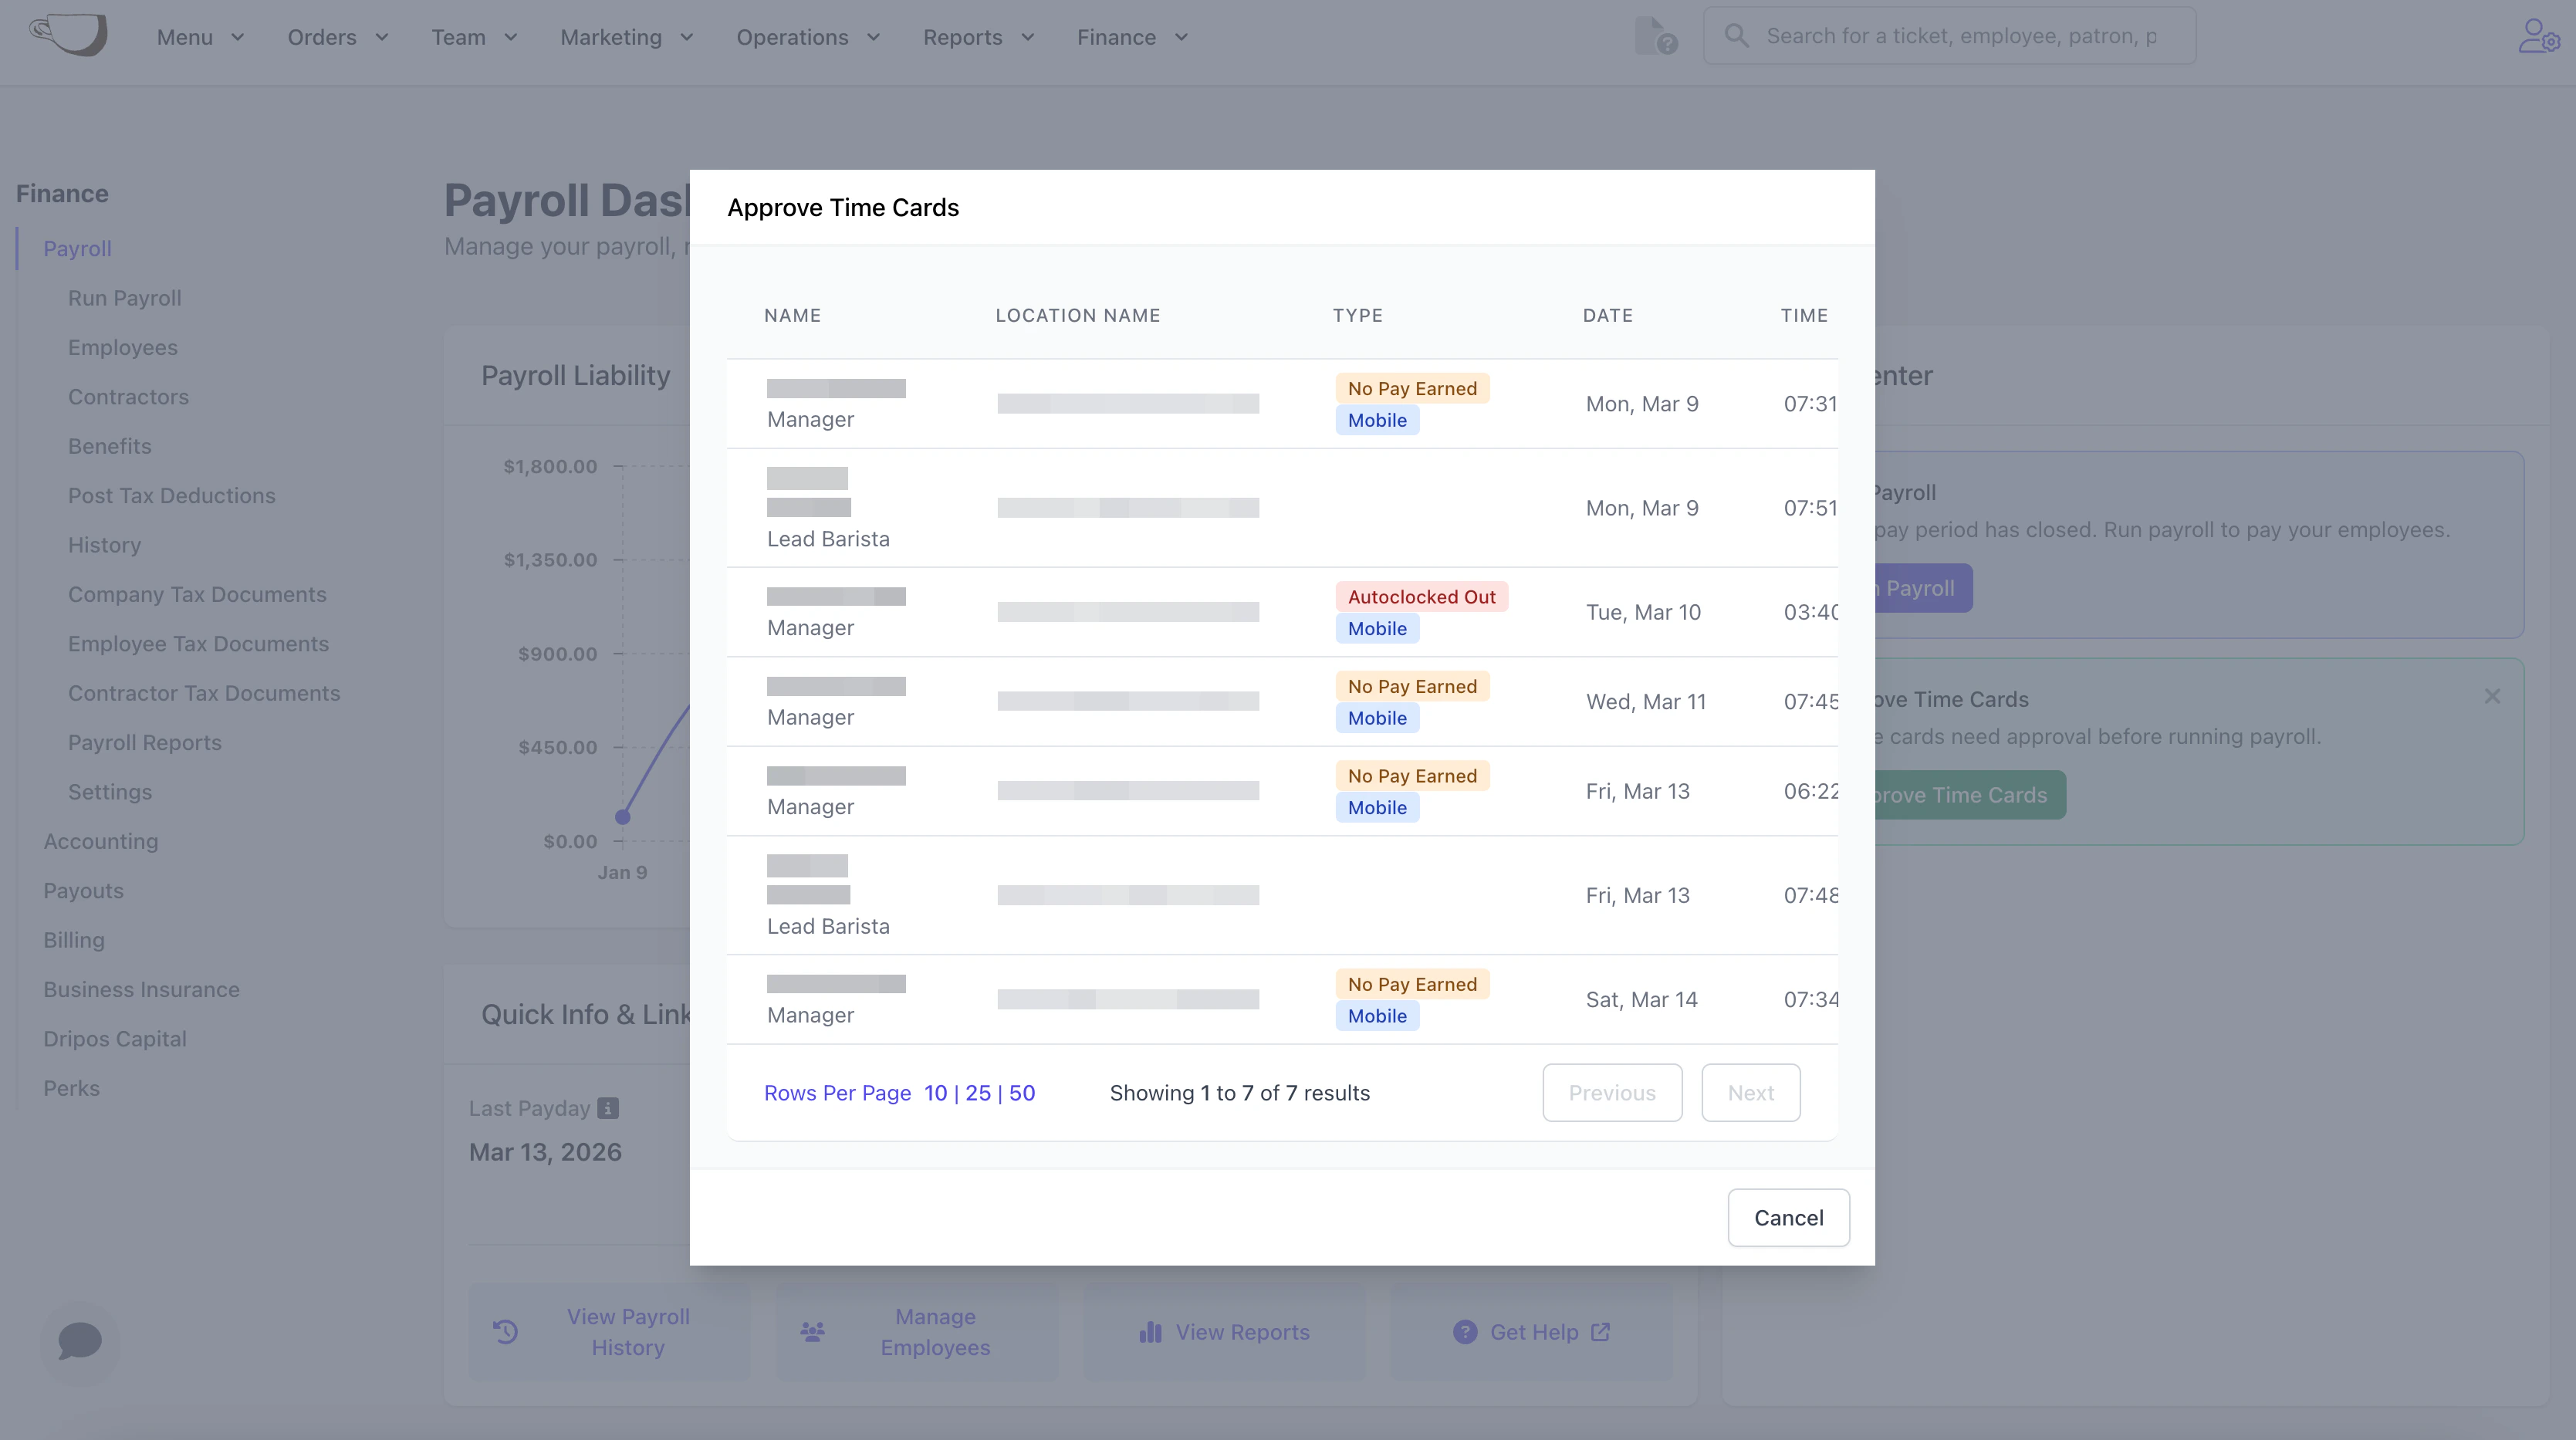
Step 2 - Run Payroll
Step 2 - Run Payroll
Click Run Payroll on your Payroll Dashboard or select Run Payroll from the left sidebar menu.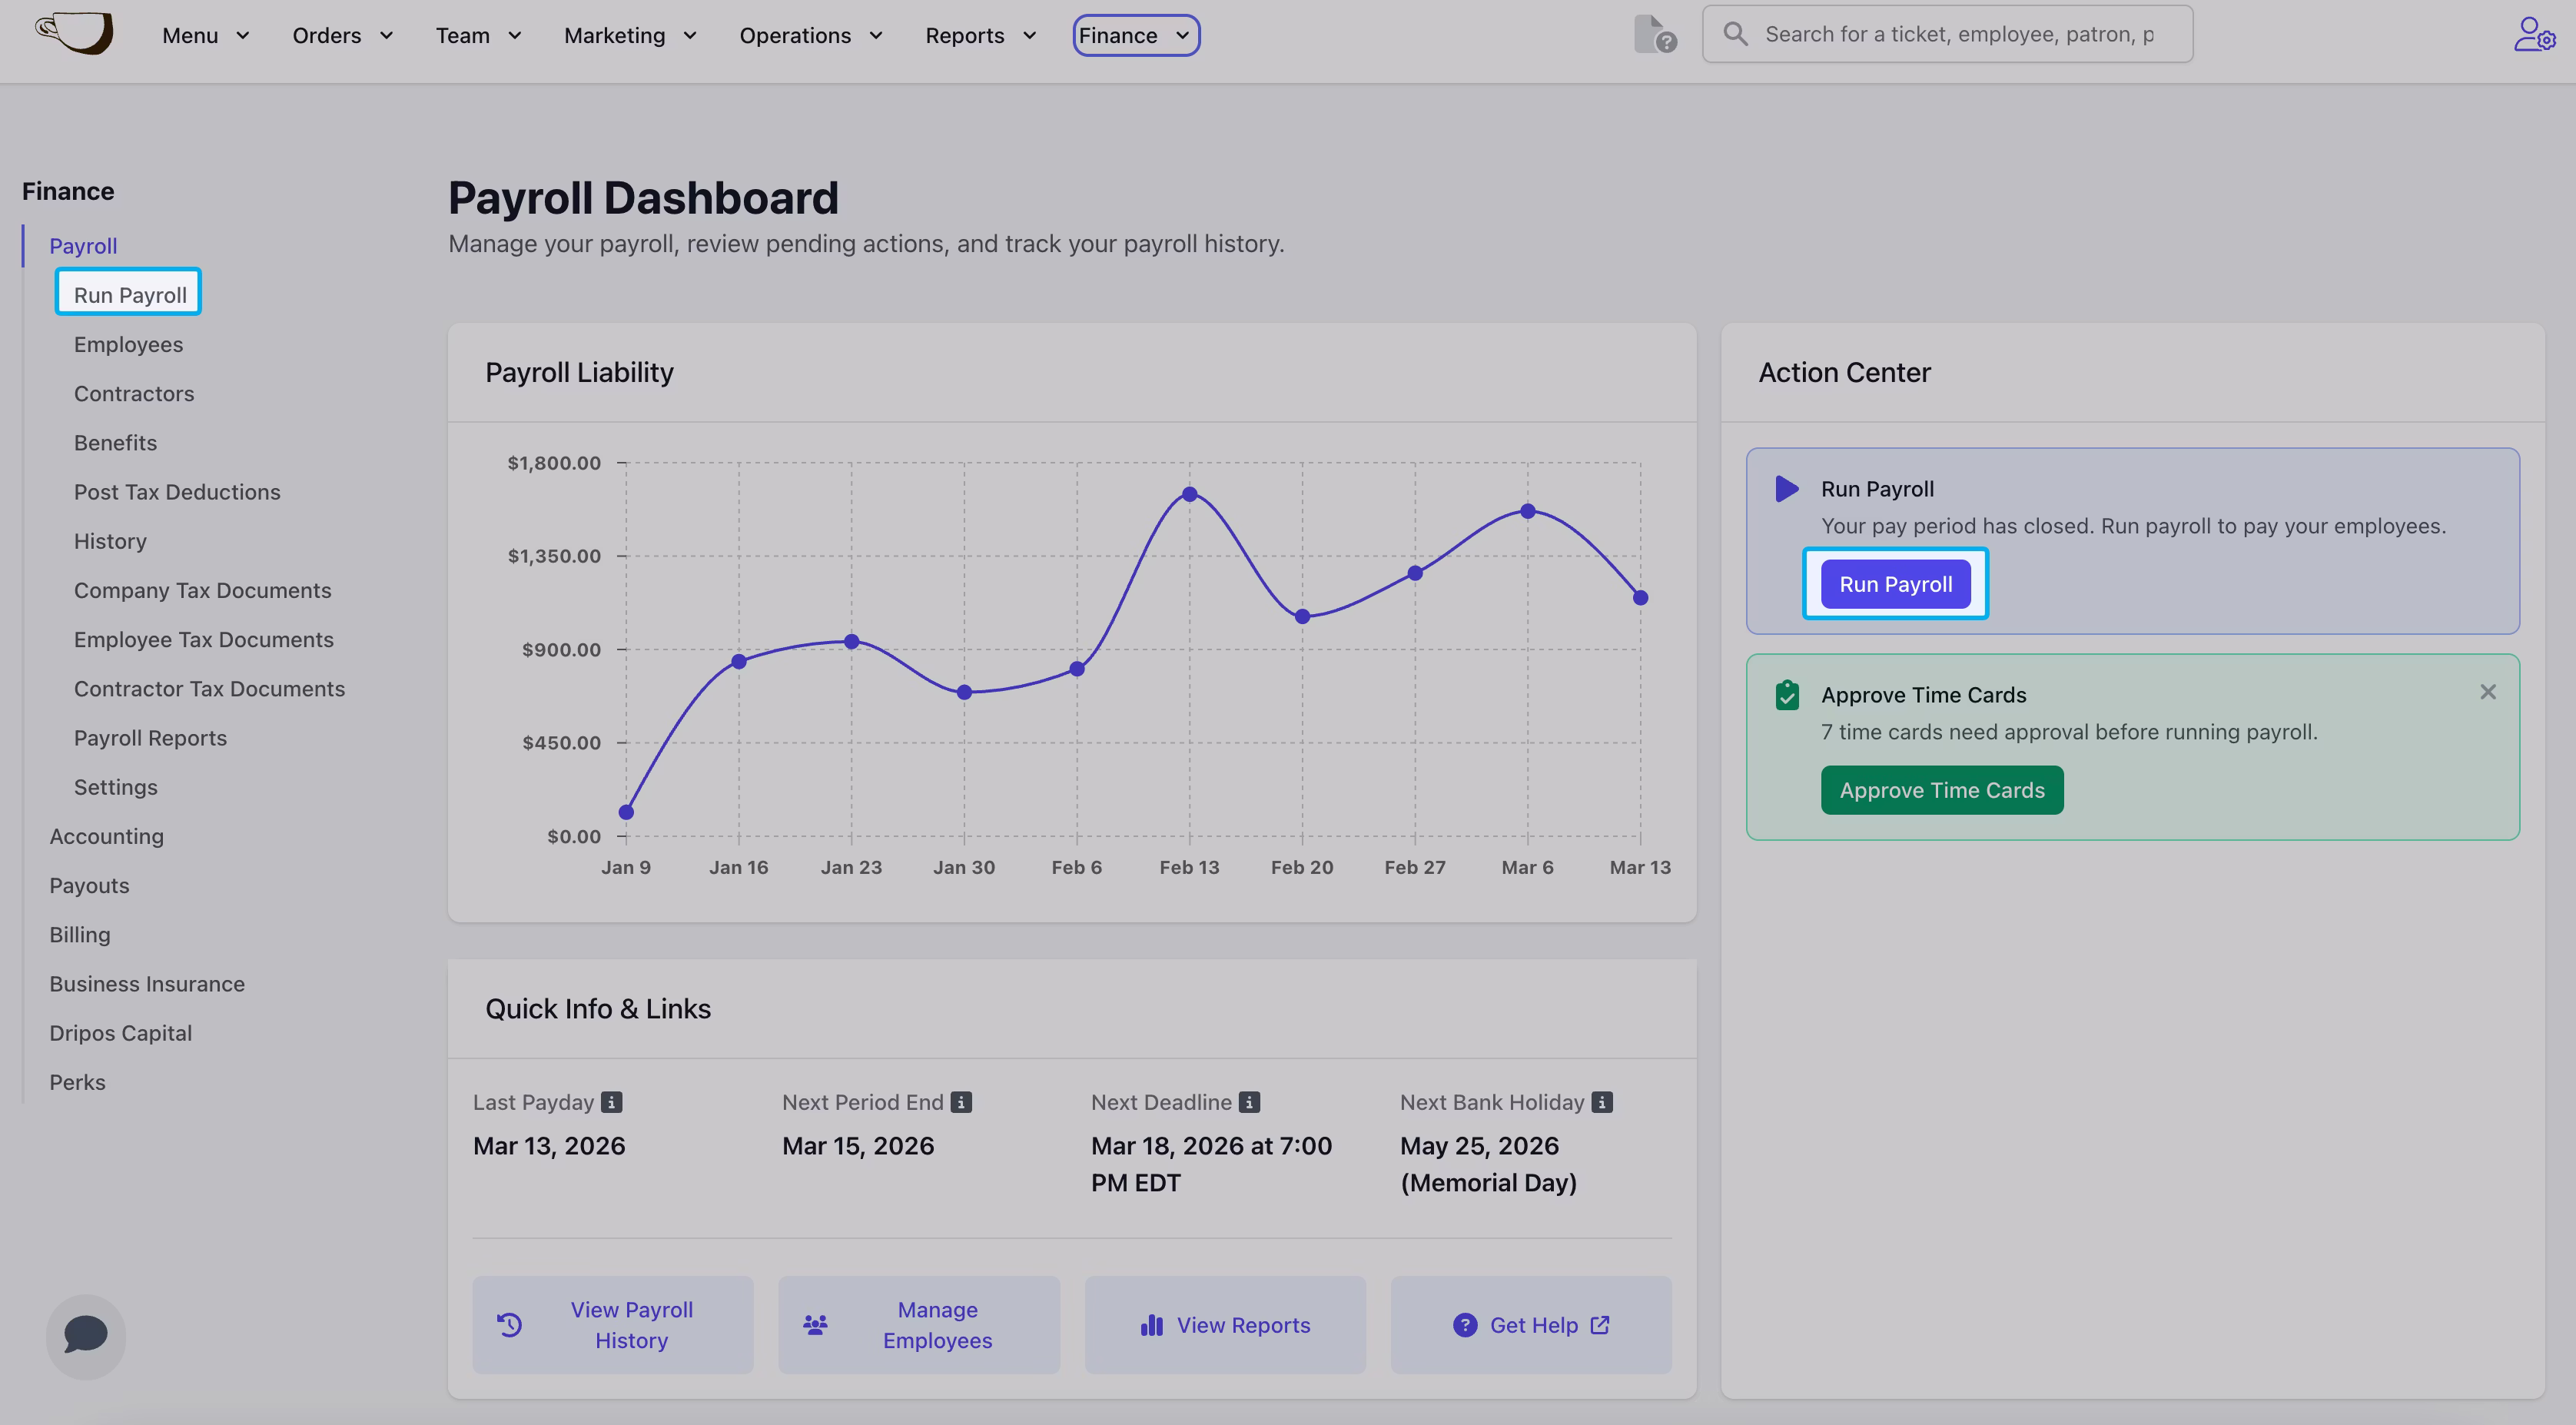
Step 3 - Hours & Pay
Step 3 - Hours & Pay
Confirm the hours and pay for each employee.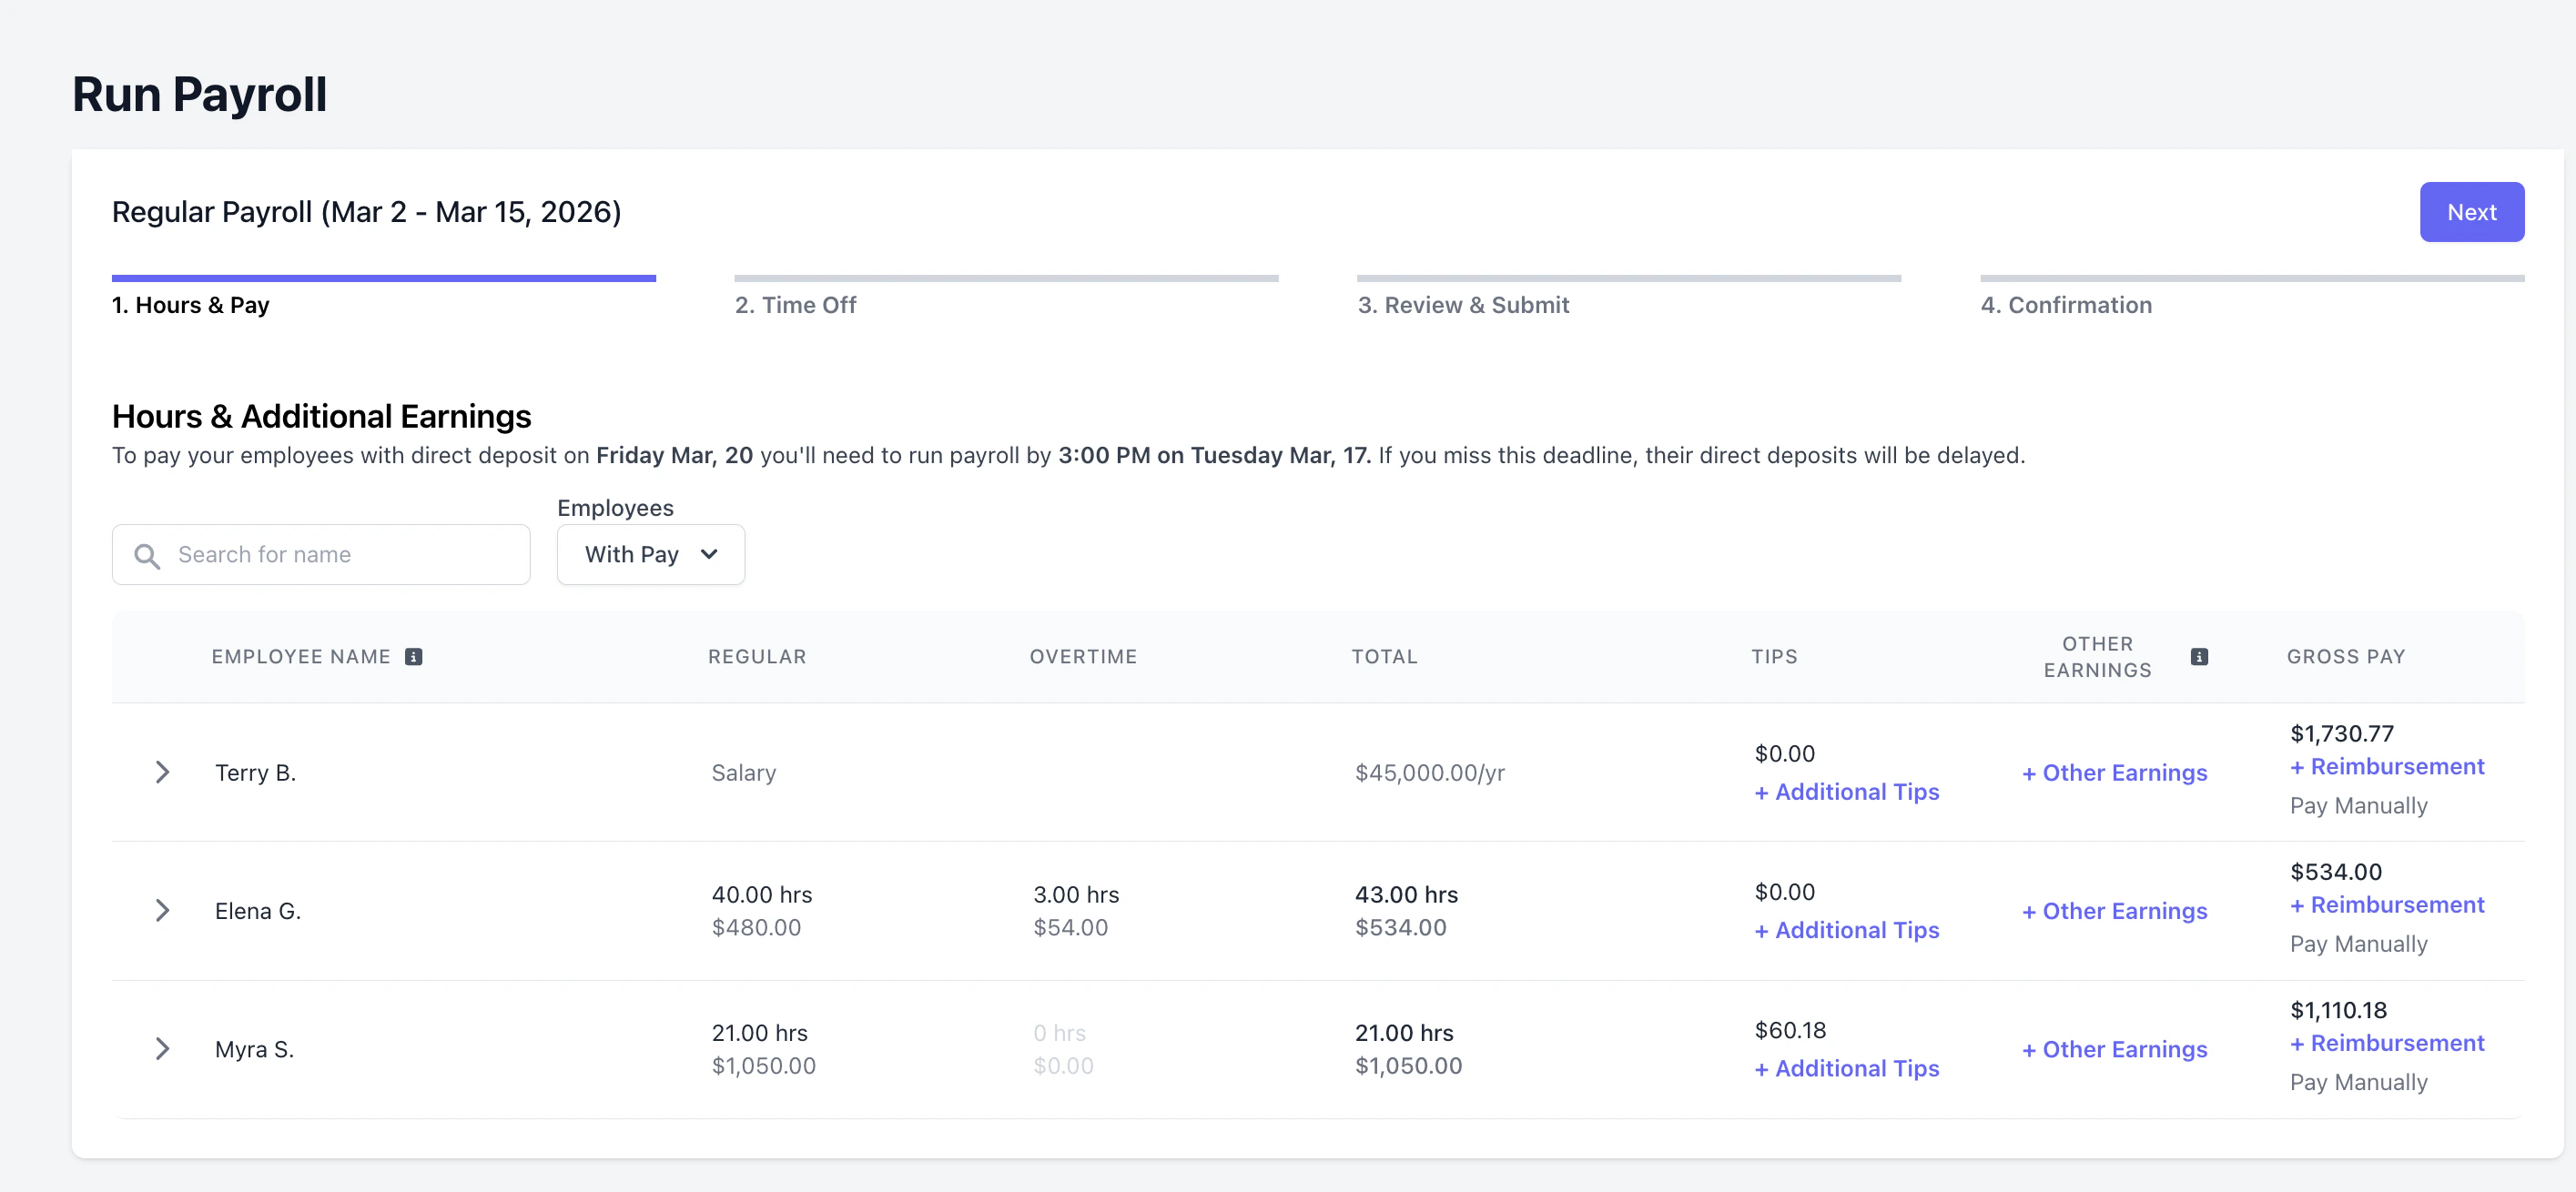
Use + Additional Tips to add Paycheck Tips or record Cash Tips.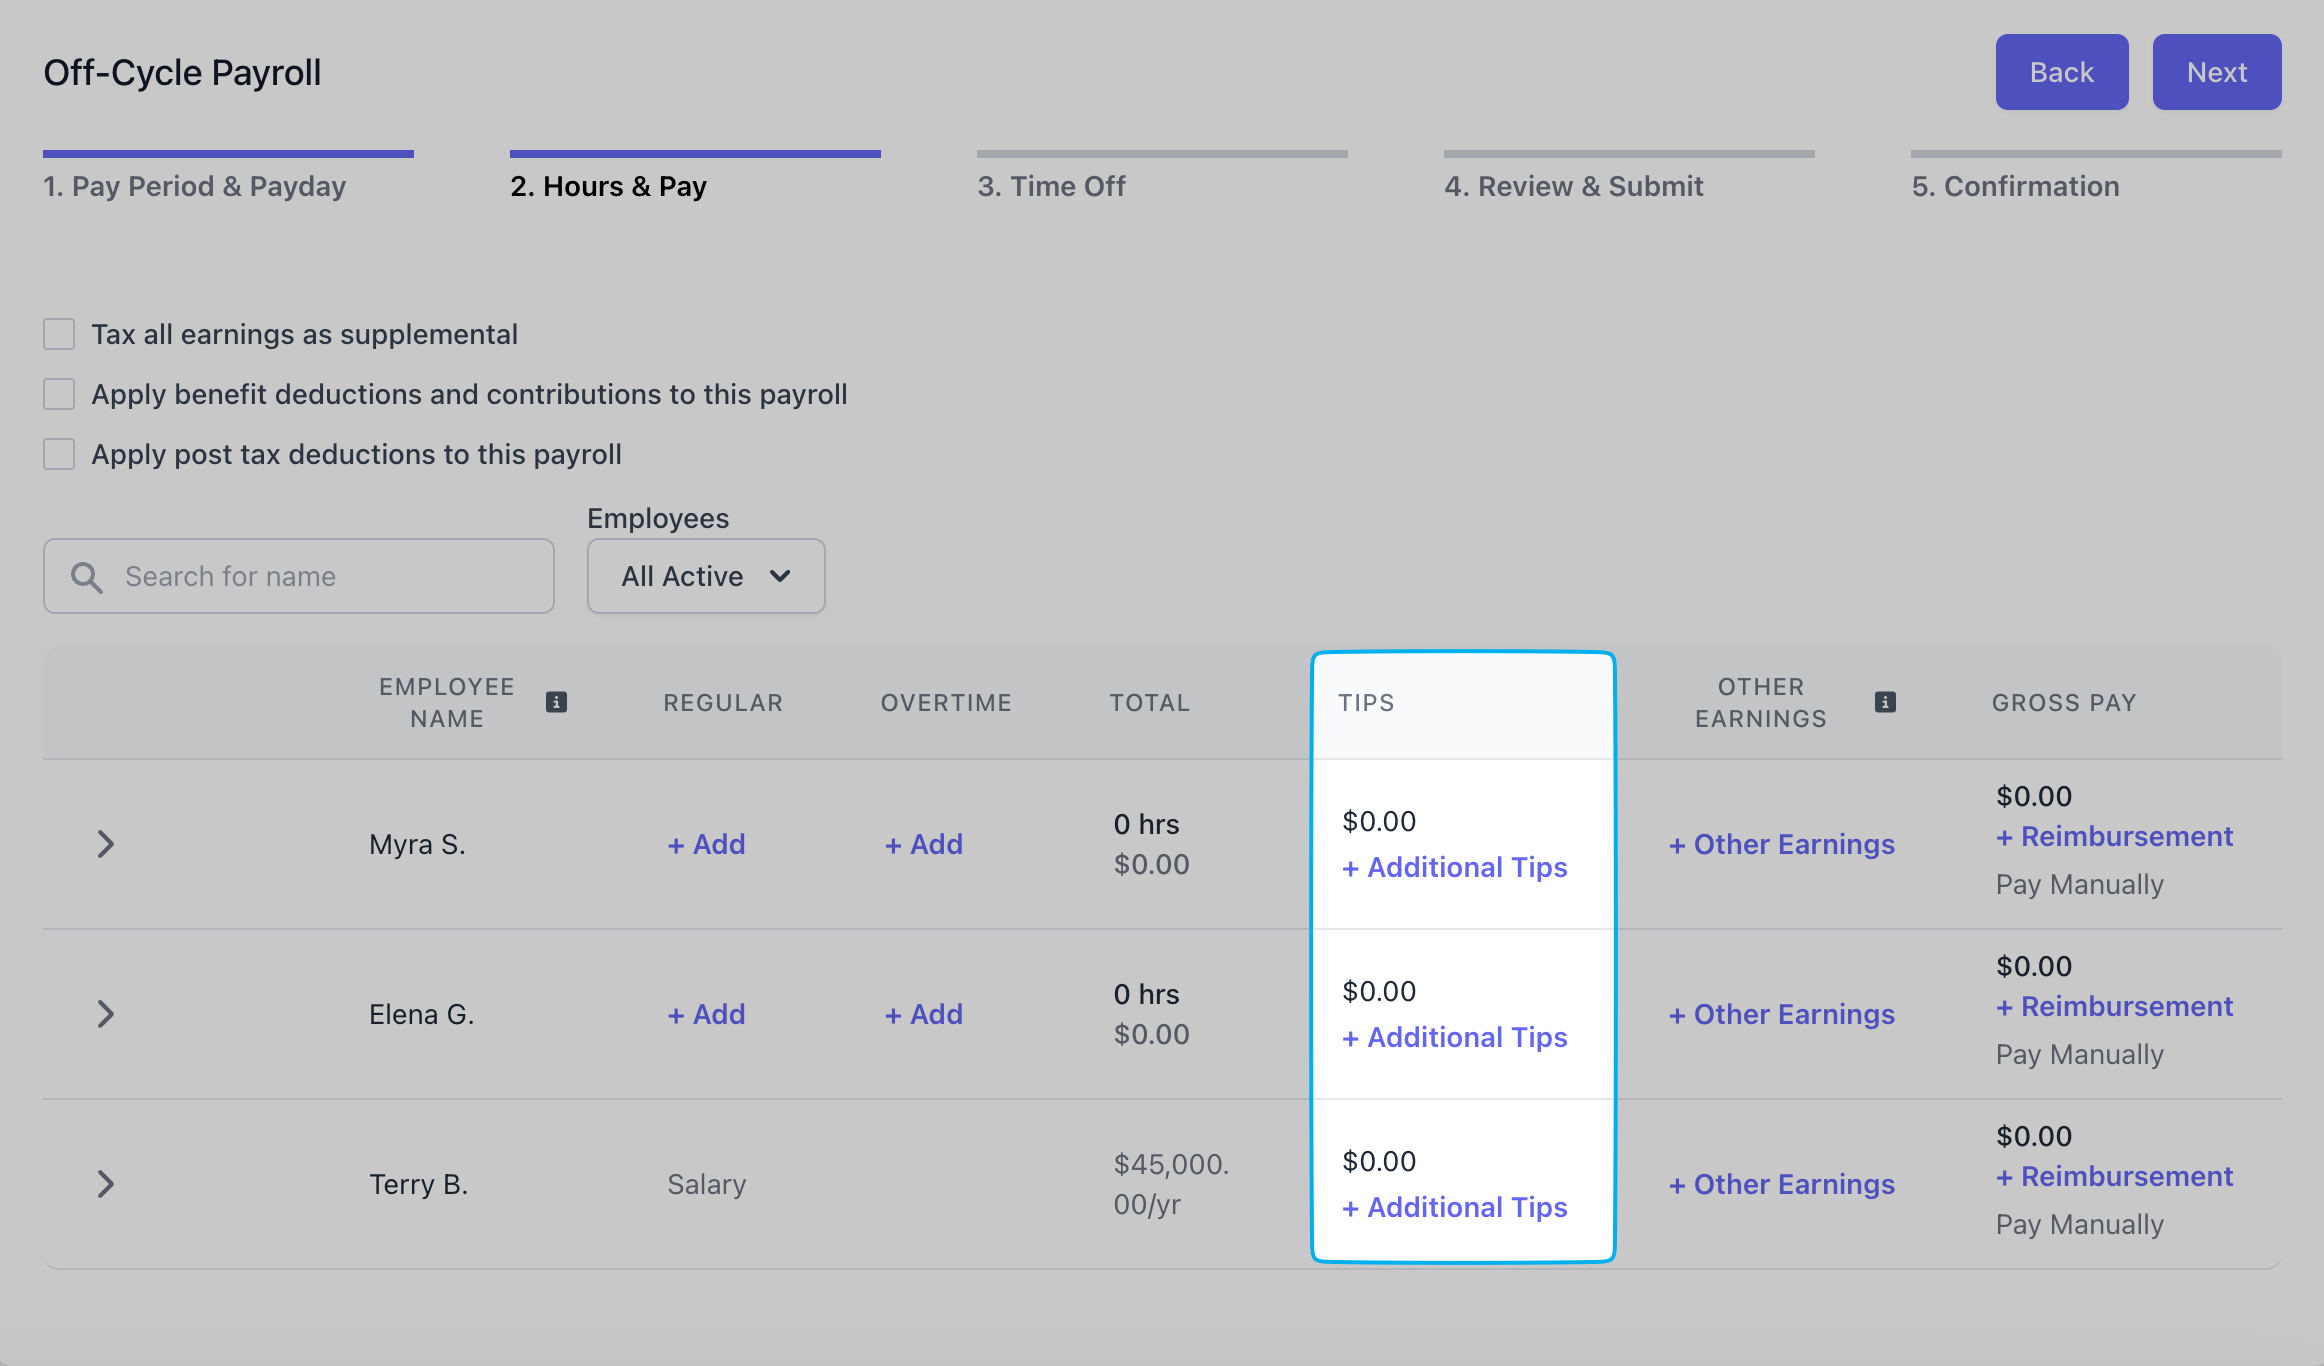
Review each employee to ensure their time cards and pay rates are accurate. To correct a payroll that is already processing, learn more here.
Use the dropdown arrow next to each employee’s name to view detailed time cards and pay rate information for this payroll.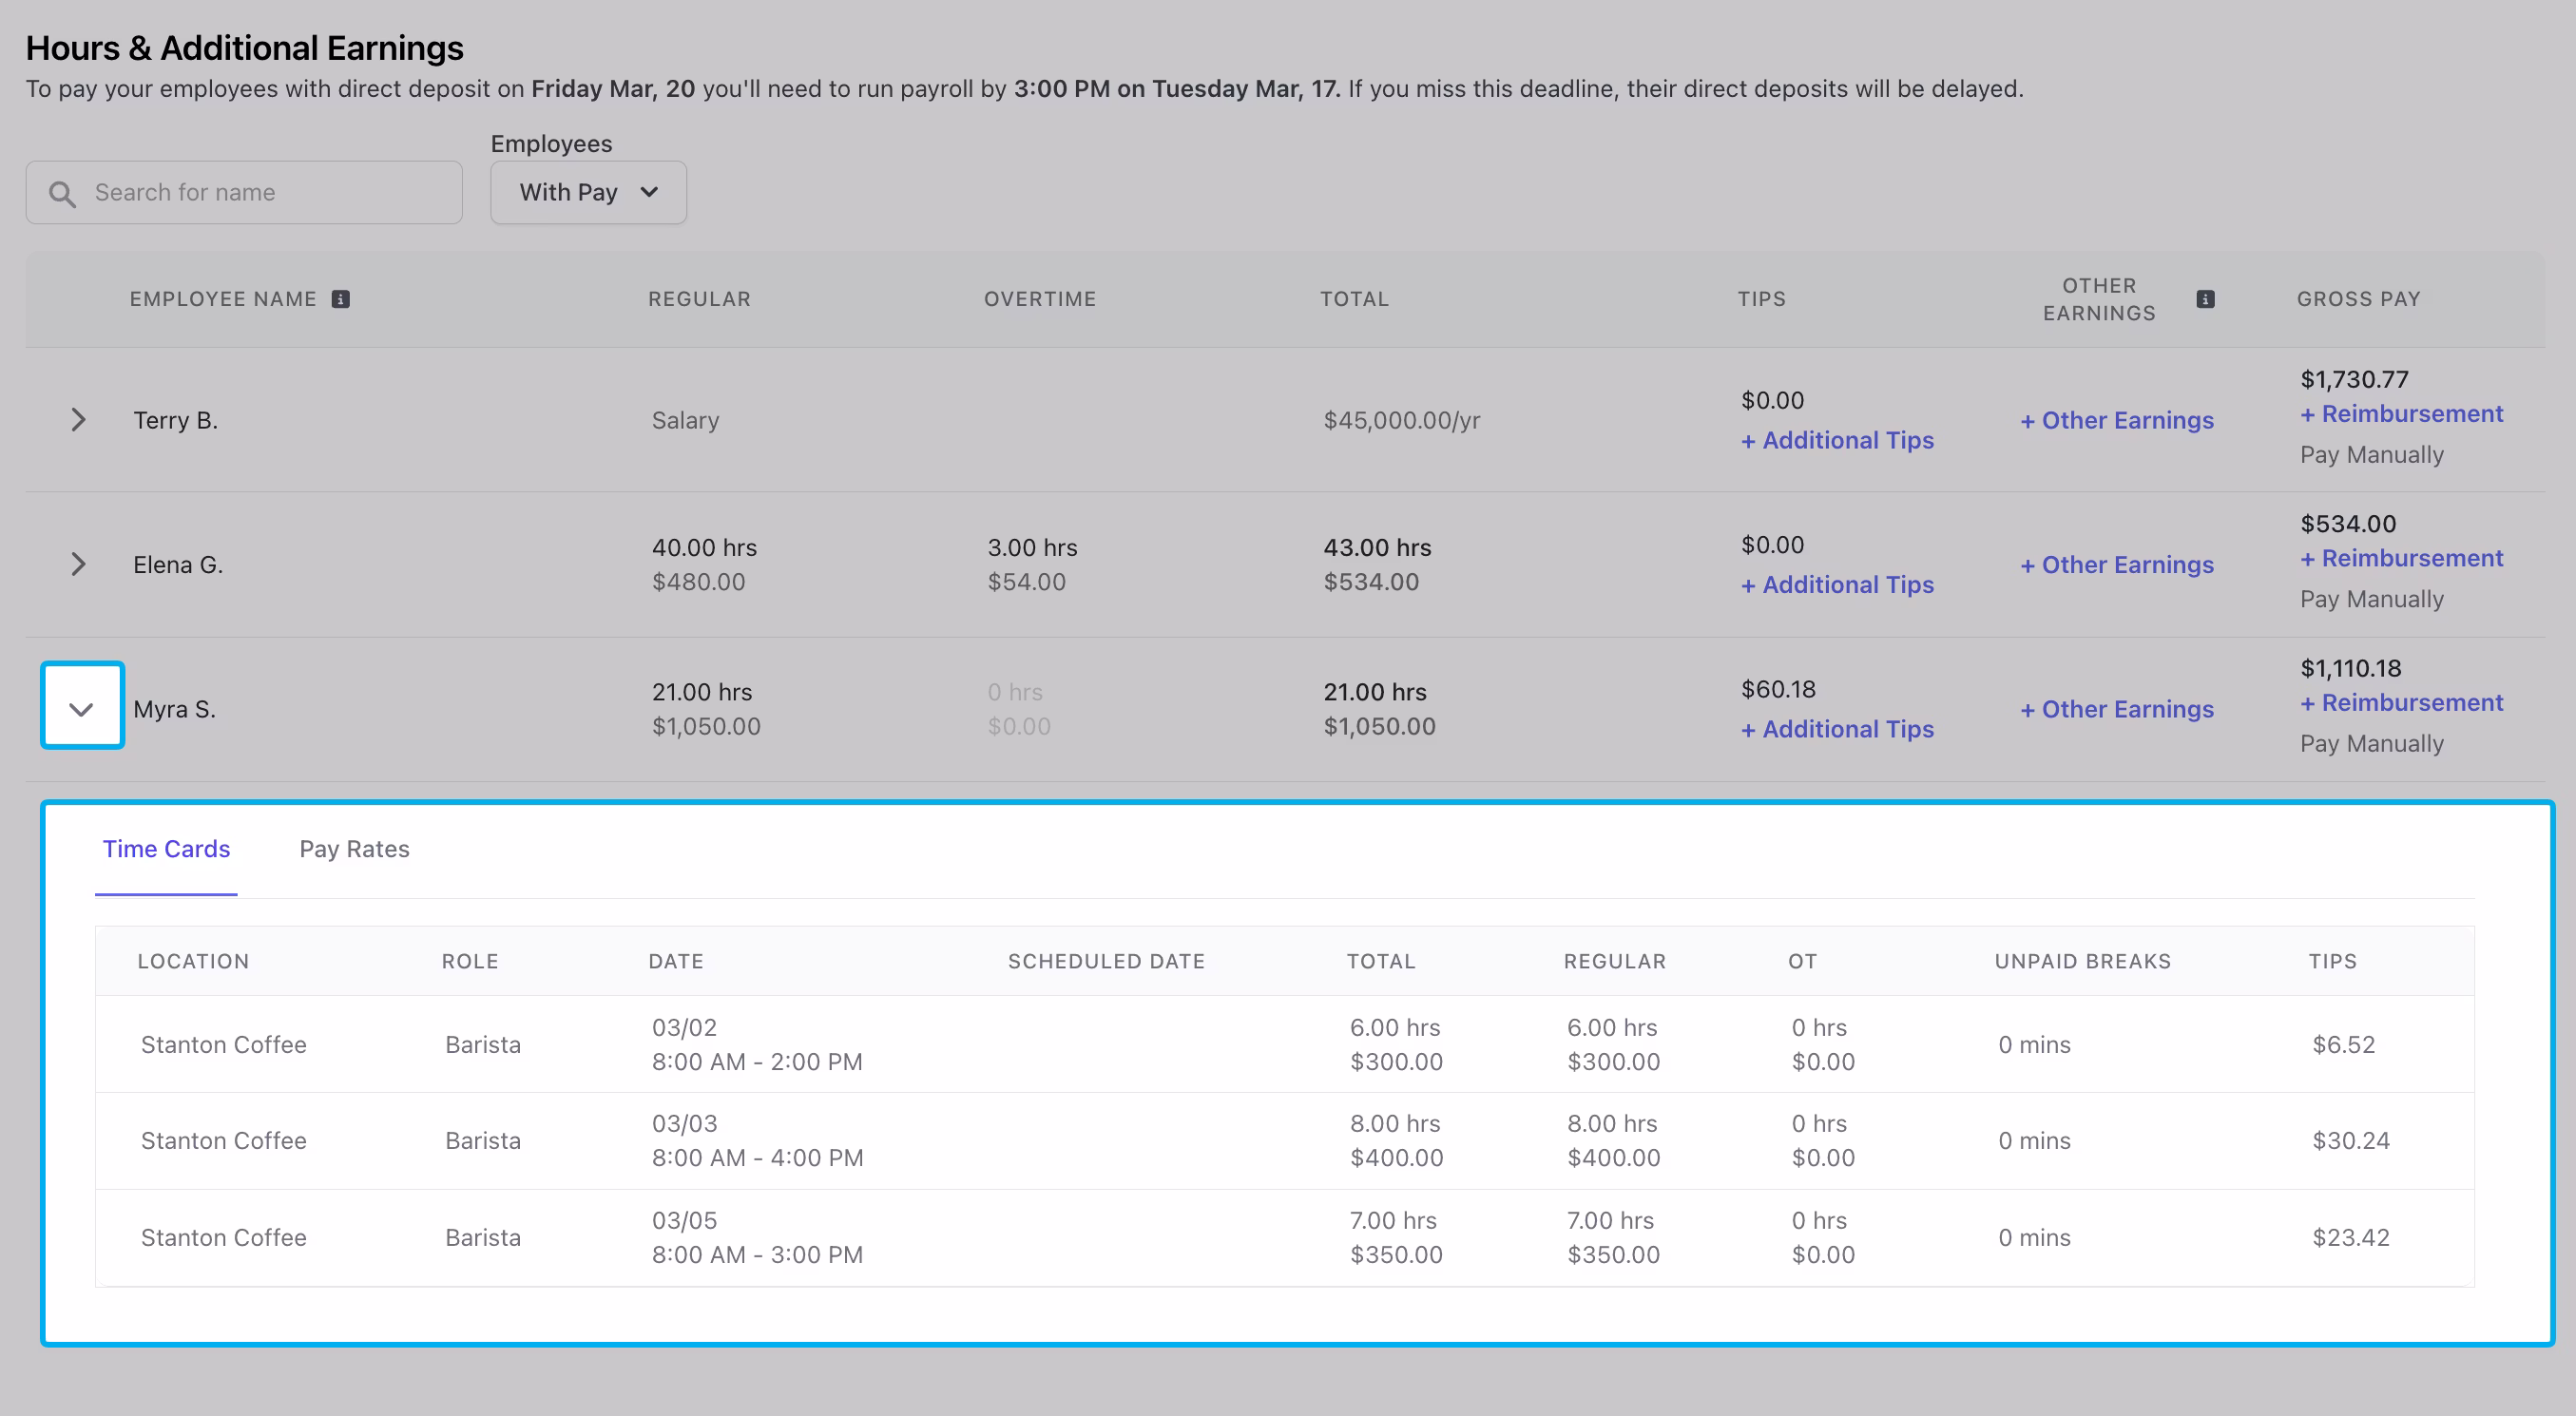
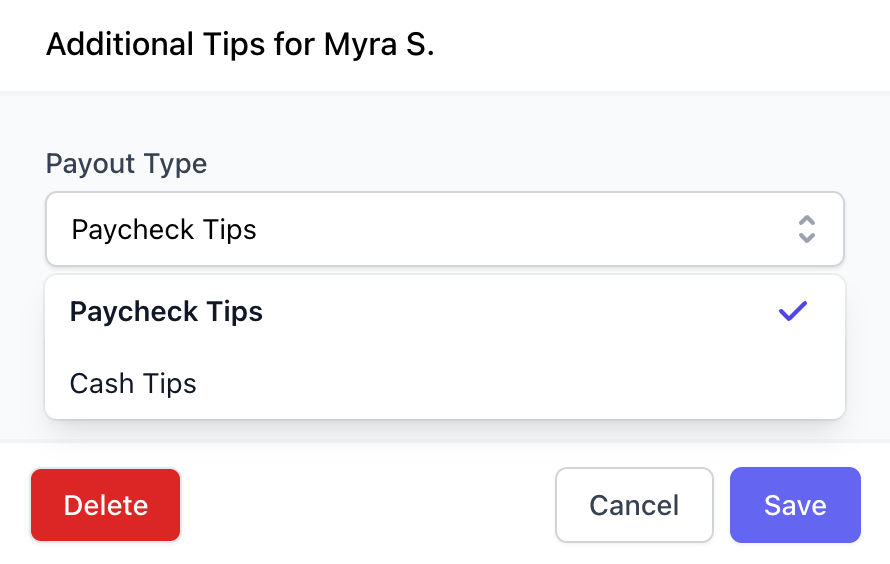
Use + Additional Tips to add Paycheck Tips or record Cash Tips.
- Paycheck Tips: Tips to be paid out to this employee via payroll
- Cash Tips: Tips that have already been paid out in cash and are only being reported on payroll for tax purposes. Adding cash tips does not pay your employee additional tips through payroll.
Click + Additional Tips
Select Paycheck or Cash Tips
- Bonus: Extra compensation given on top of regular wages
- Commission: Pay earned based on the amount of sales or performance achieved
- Group Term Life: Employer-provided life insurance that offers coverage to employees for a set term
- Severance: Payment given to an employee when they are laid off or let go, typically based on tenure
- Non Hourly Regular: Additional fixed amount paid to an employee, regardless of hours worked
- Other Imputed: Other imputed pay added to an employee’s gross taxable income (but not their actual take-home pay)
- Tip Credit Adjustment: The difference between an employee’s tips and the minimum wage they must receive
- Meal Period Premium Pay: Supplemental, specifically categorized compensation required by California law when an employer fails to provide an employee with a compliant meal period
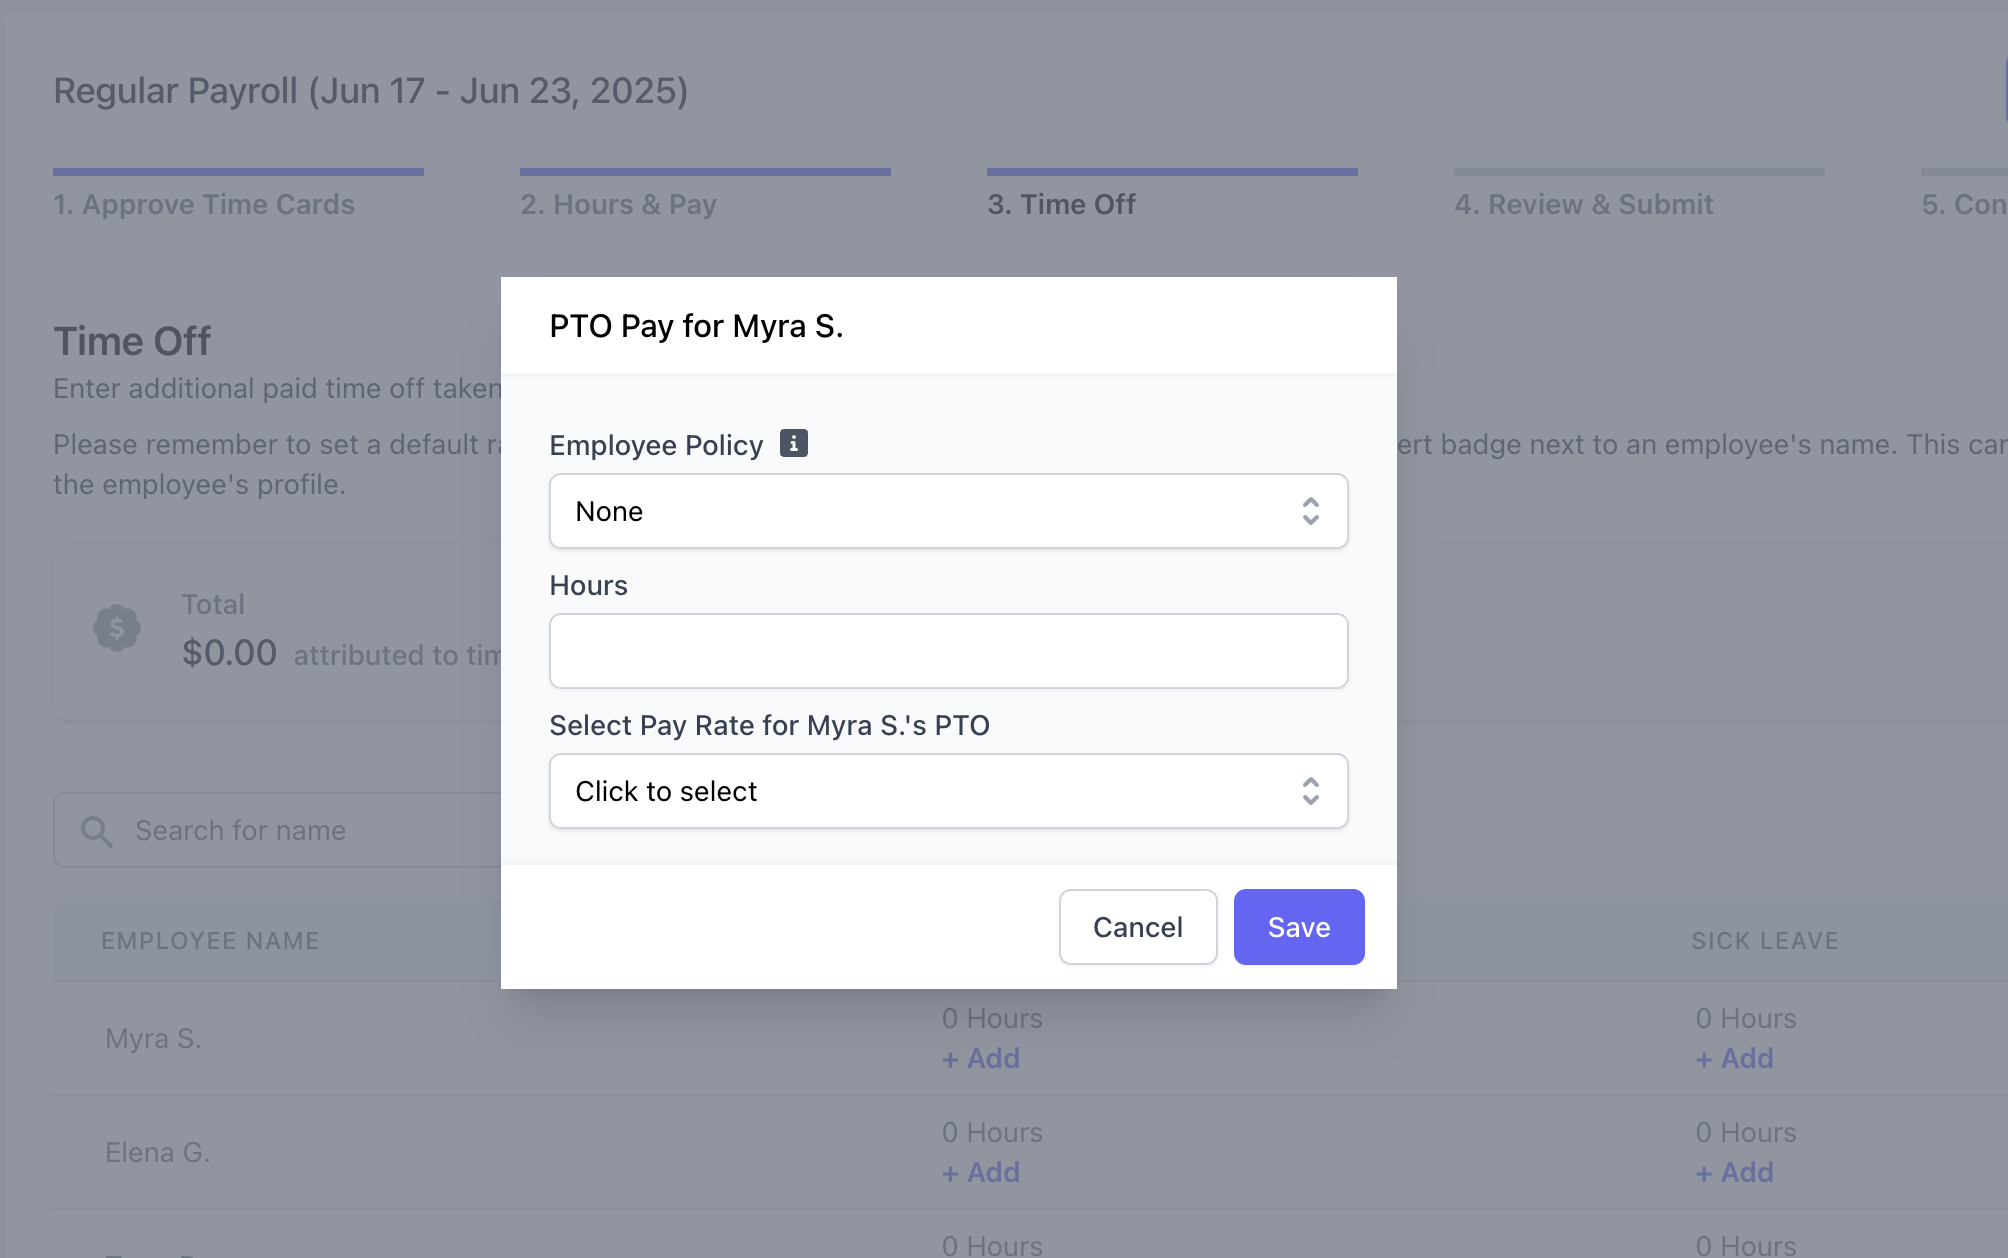
Step 4 - Time Off
Step 4 - Time Off
Time off requests that have been approved will automatically display here. For any additional Paid Time Off or Sick Leave hours, click + Add.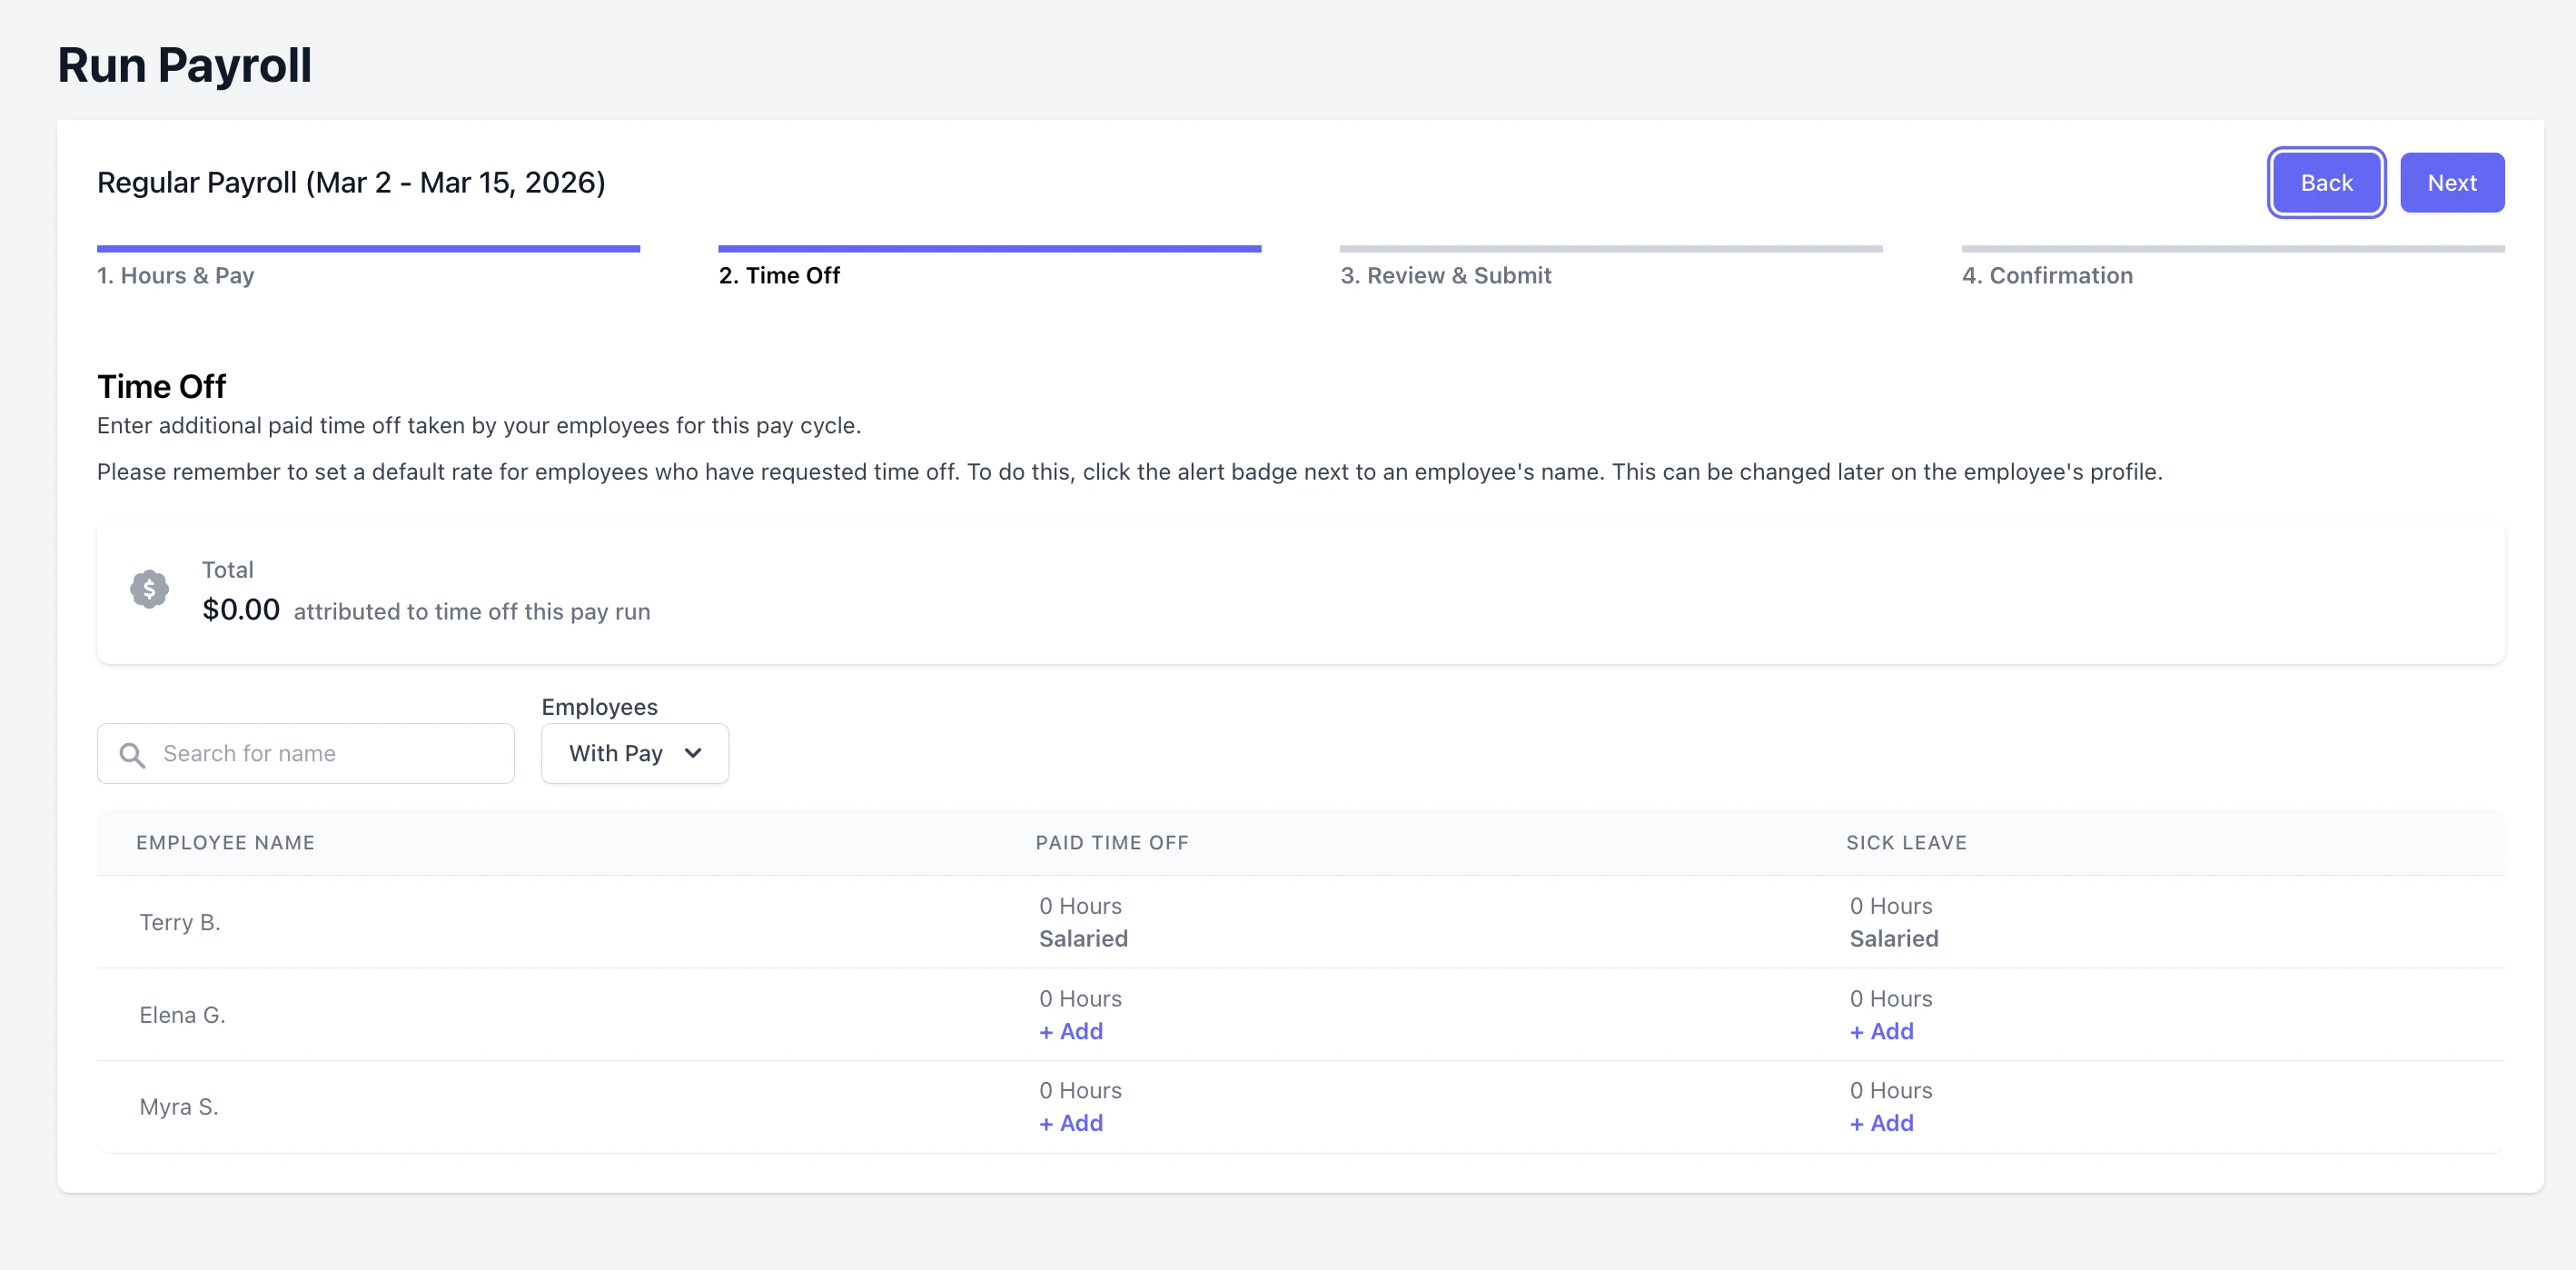

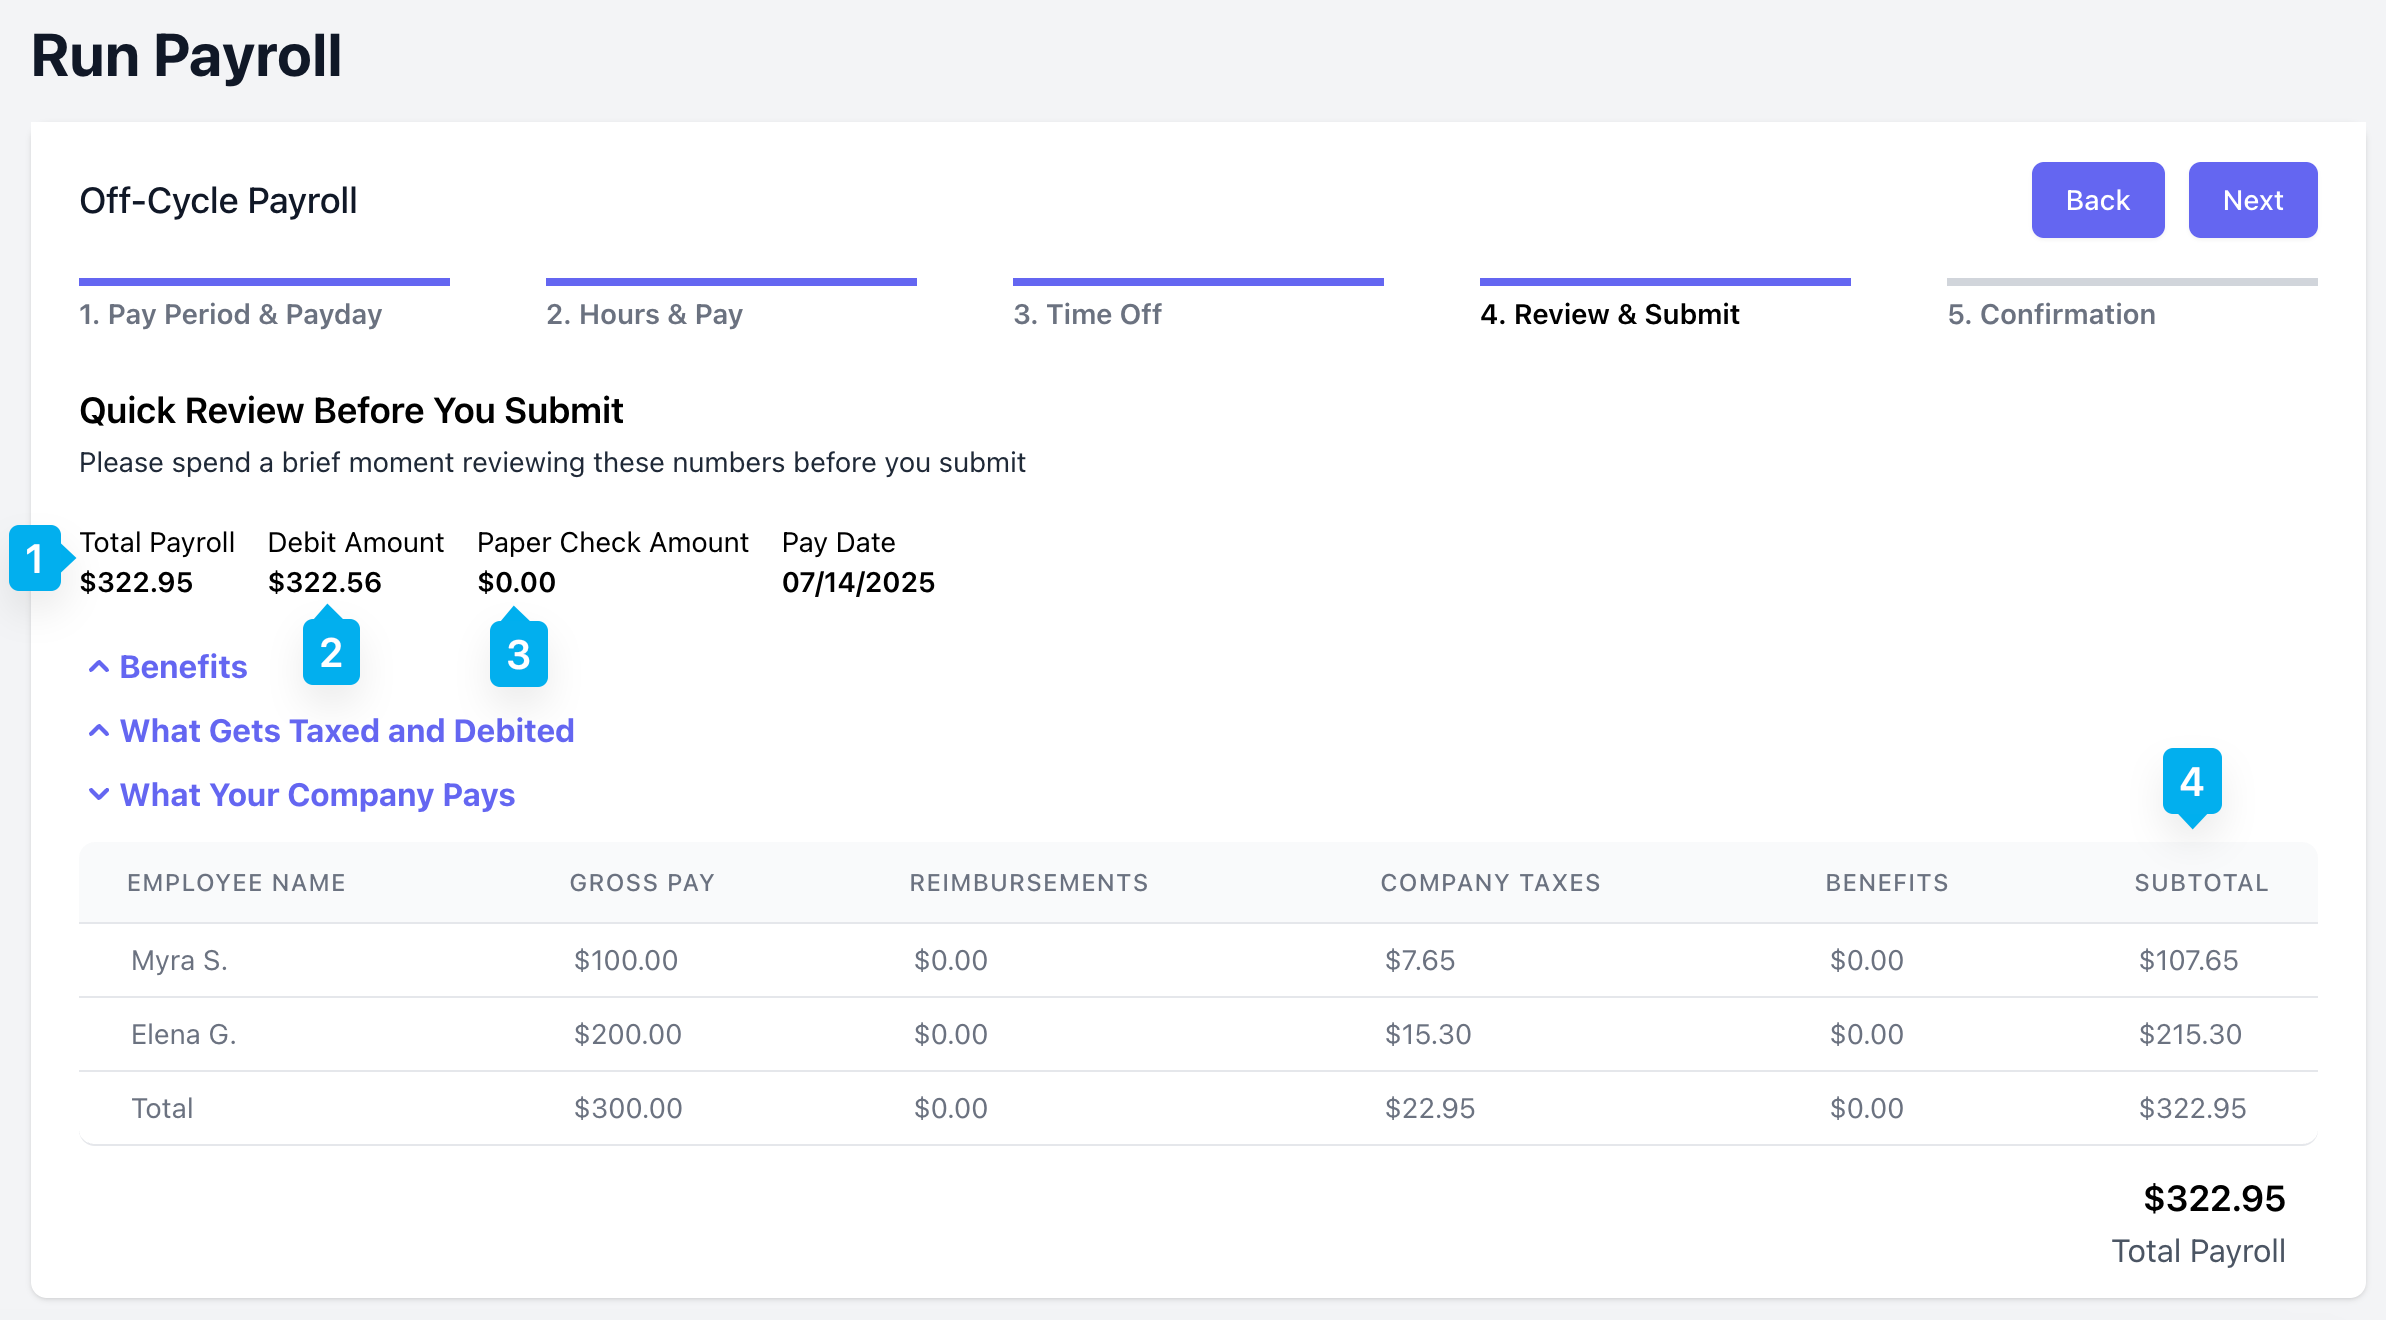
Step 5 - Review & Submit
Step 5 - Review & Submit
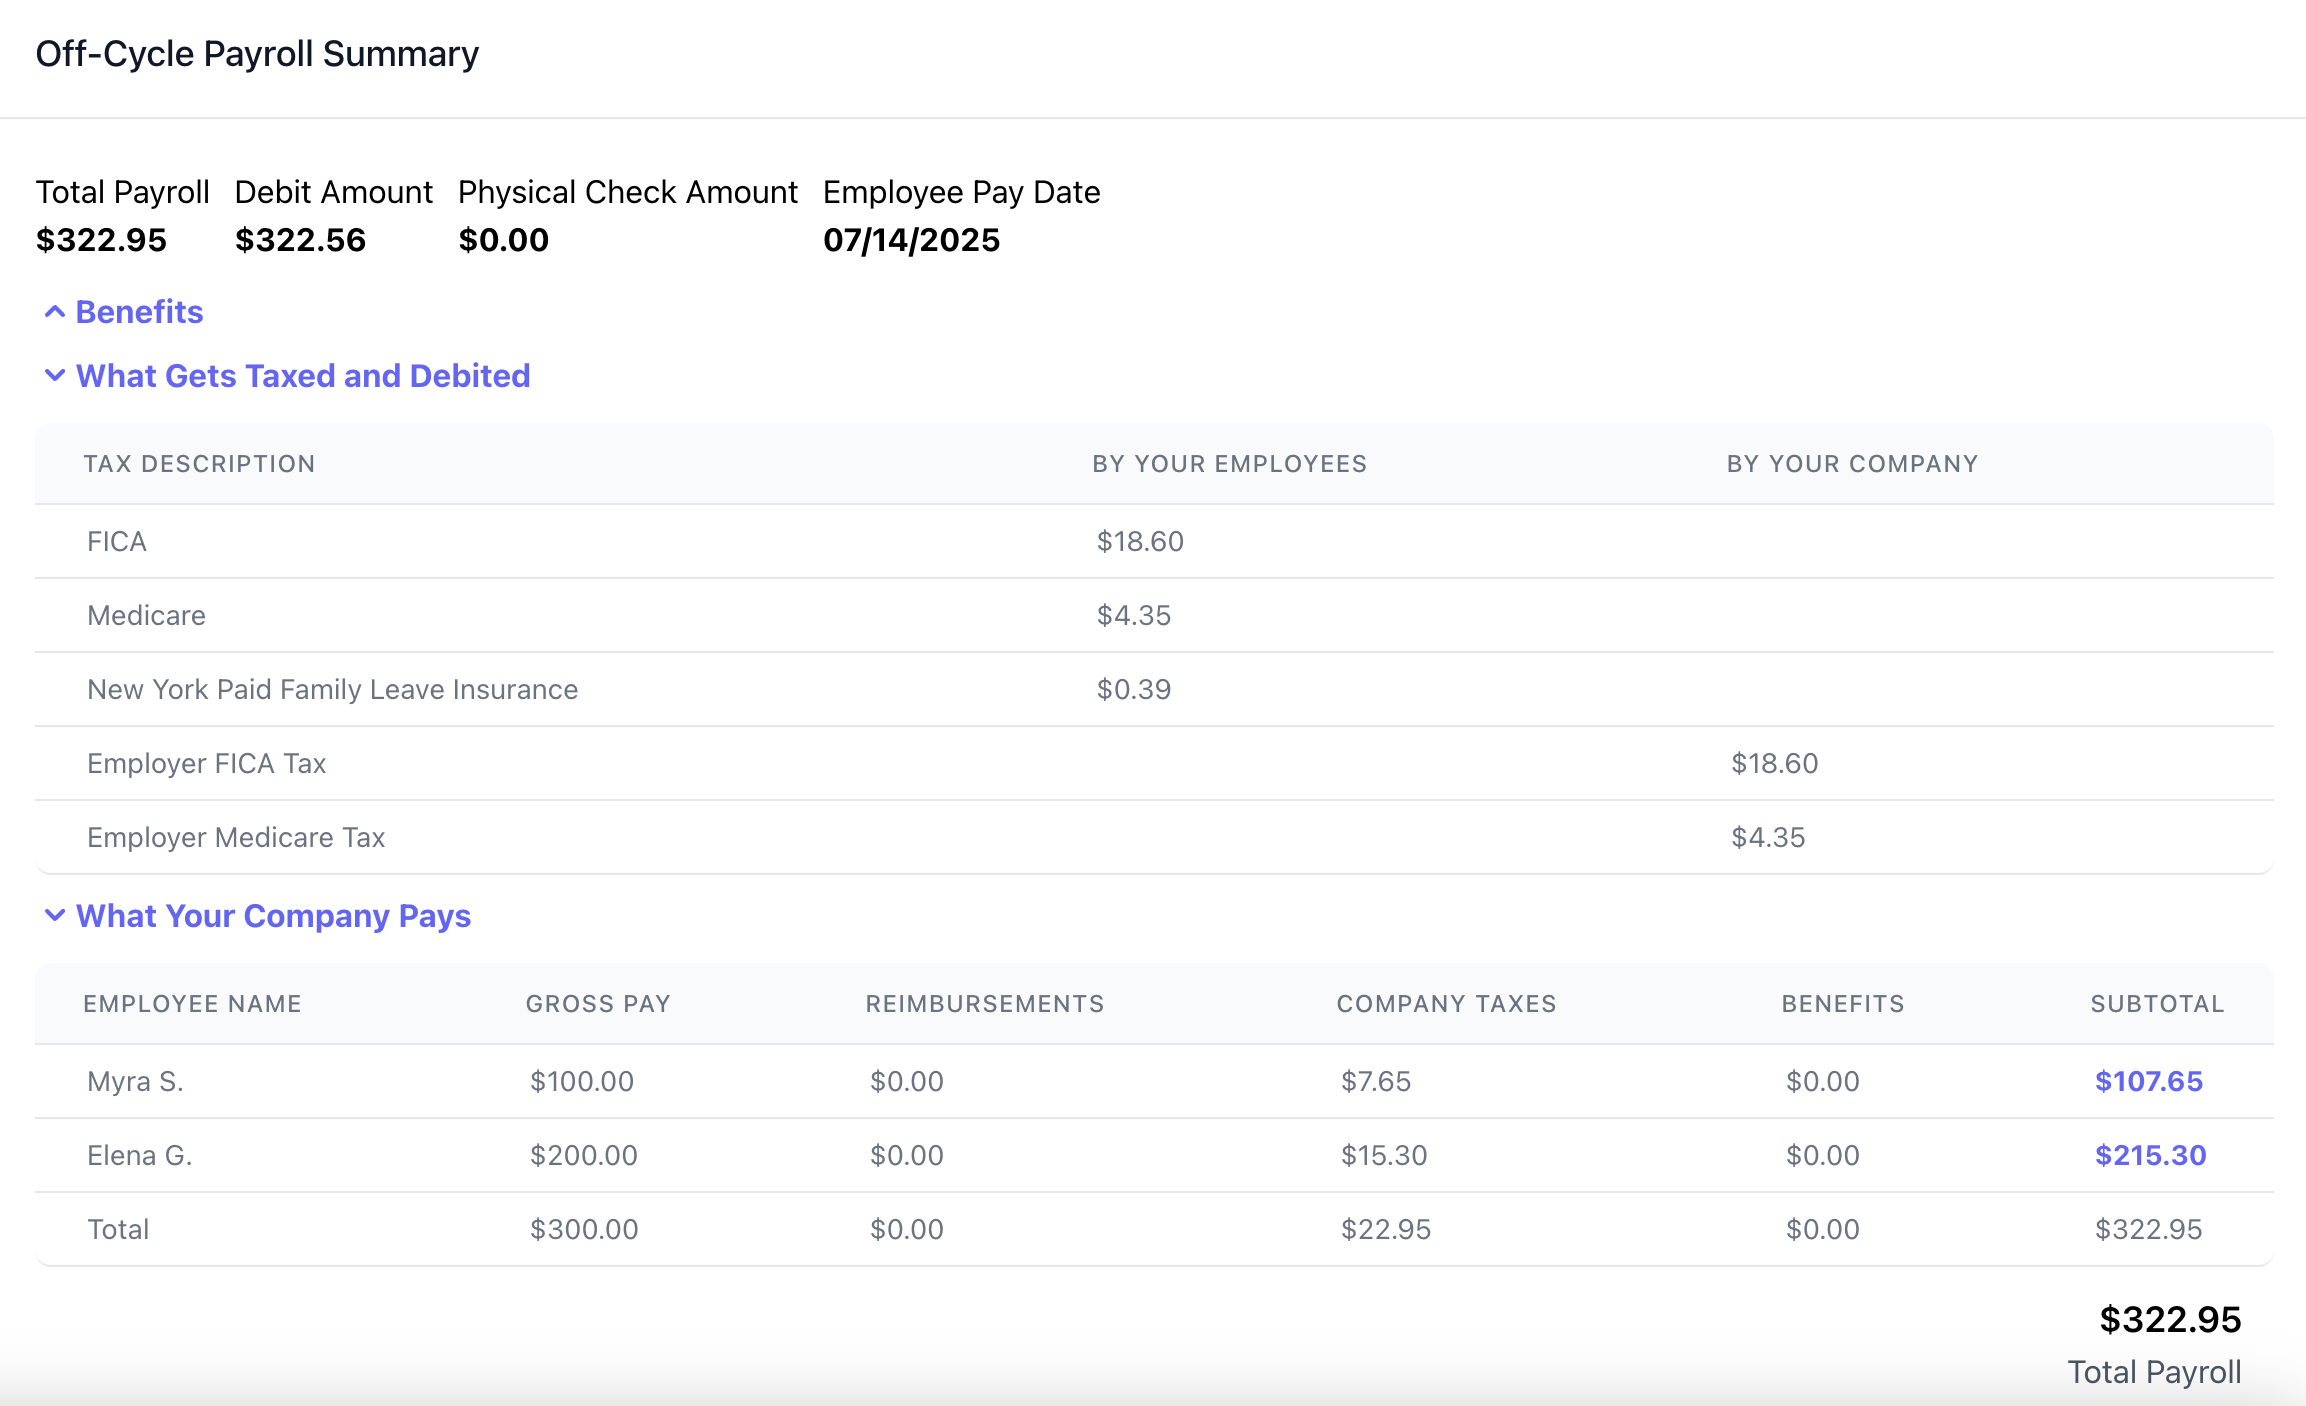
Review the following information before clicking Submit.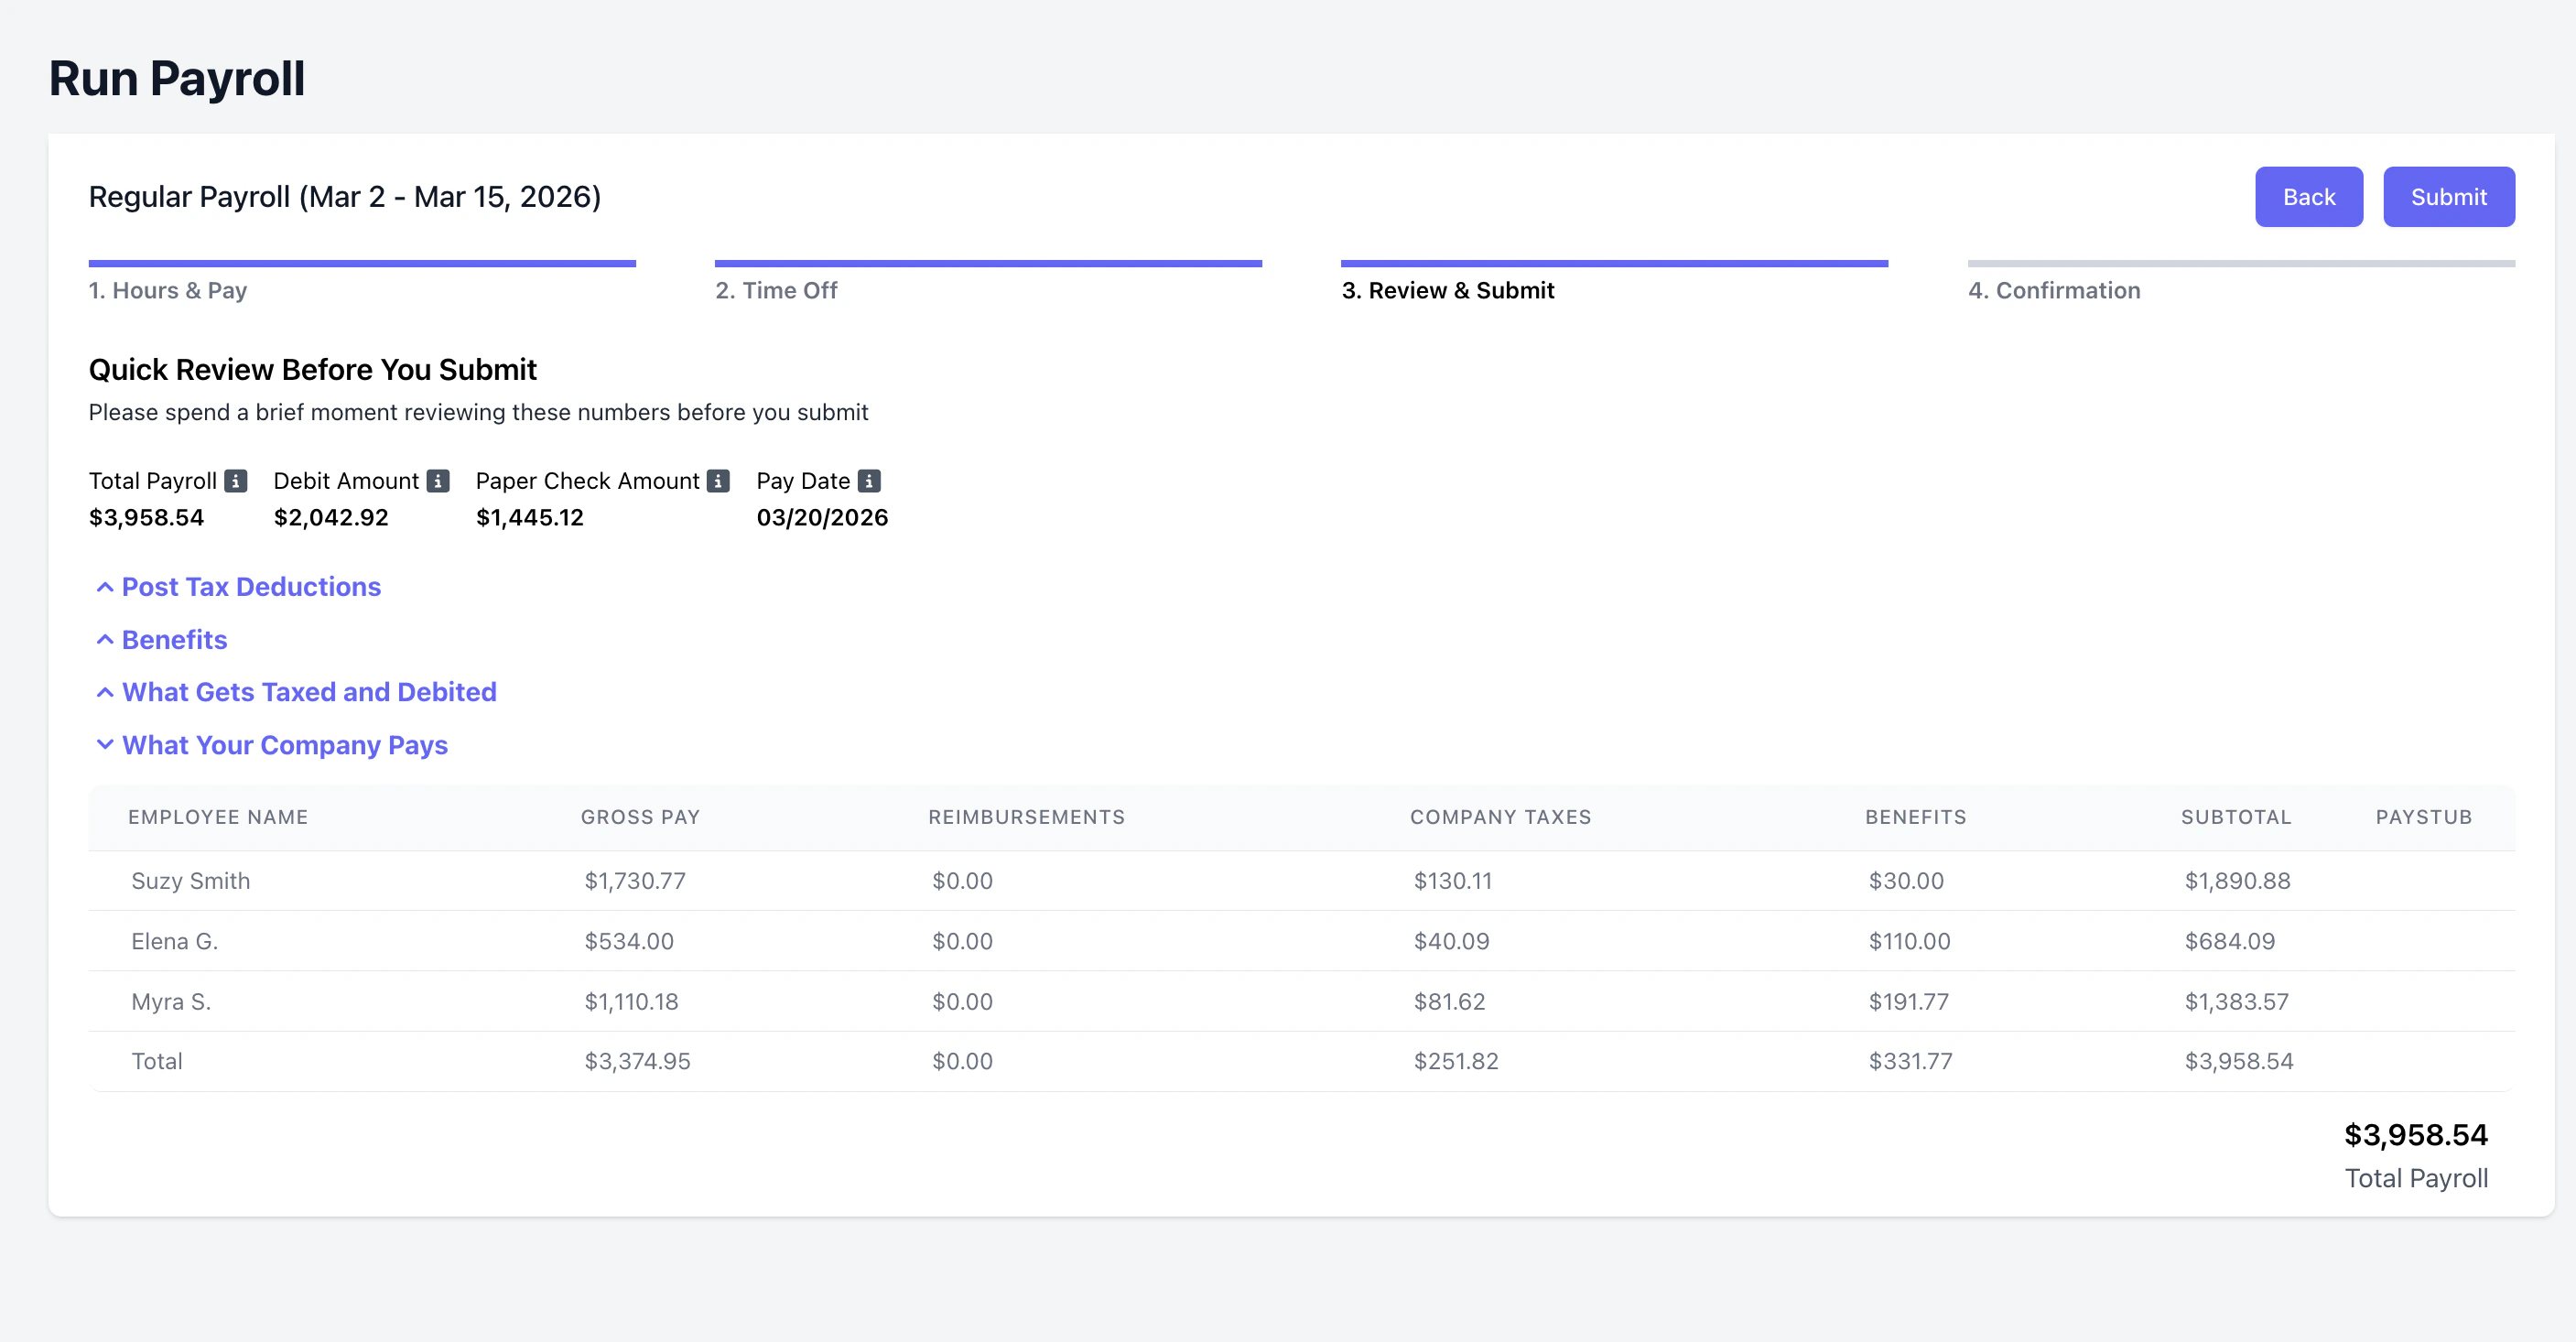
- Total Payroll: Total cost of payroll for the employer
- Debit Amount: Amount of funds that will be debited from your bank account to fund this payroll
- Paper Check Amount: Amount to pay employees via paper check, if any
- Subtotal: Subtotal that the employee is paying for each employee - this is not the employee’s next pay
- Benefits: Any benefits applied to an employee. Learn more about employee benefits here
- What Gets Taxed and Debited: Total amount of taxes that will be withheld from employee paychecks. Total amount of taxes to be paid by the company.
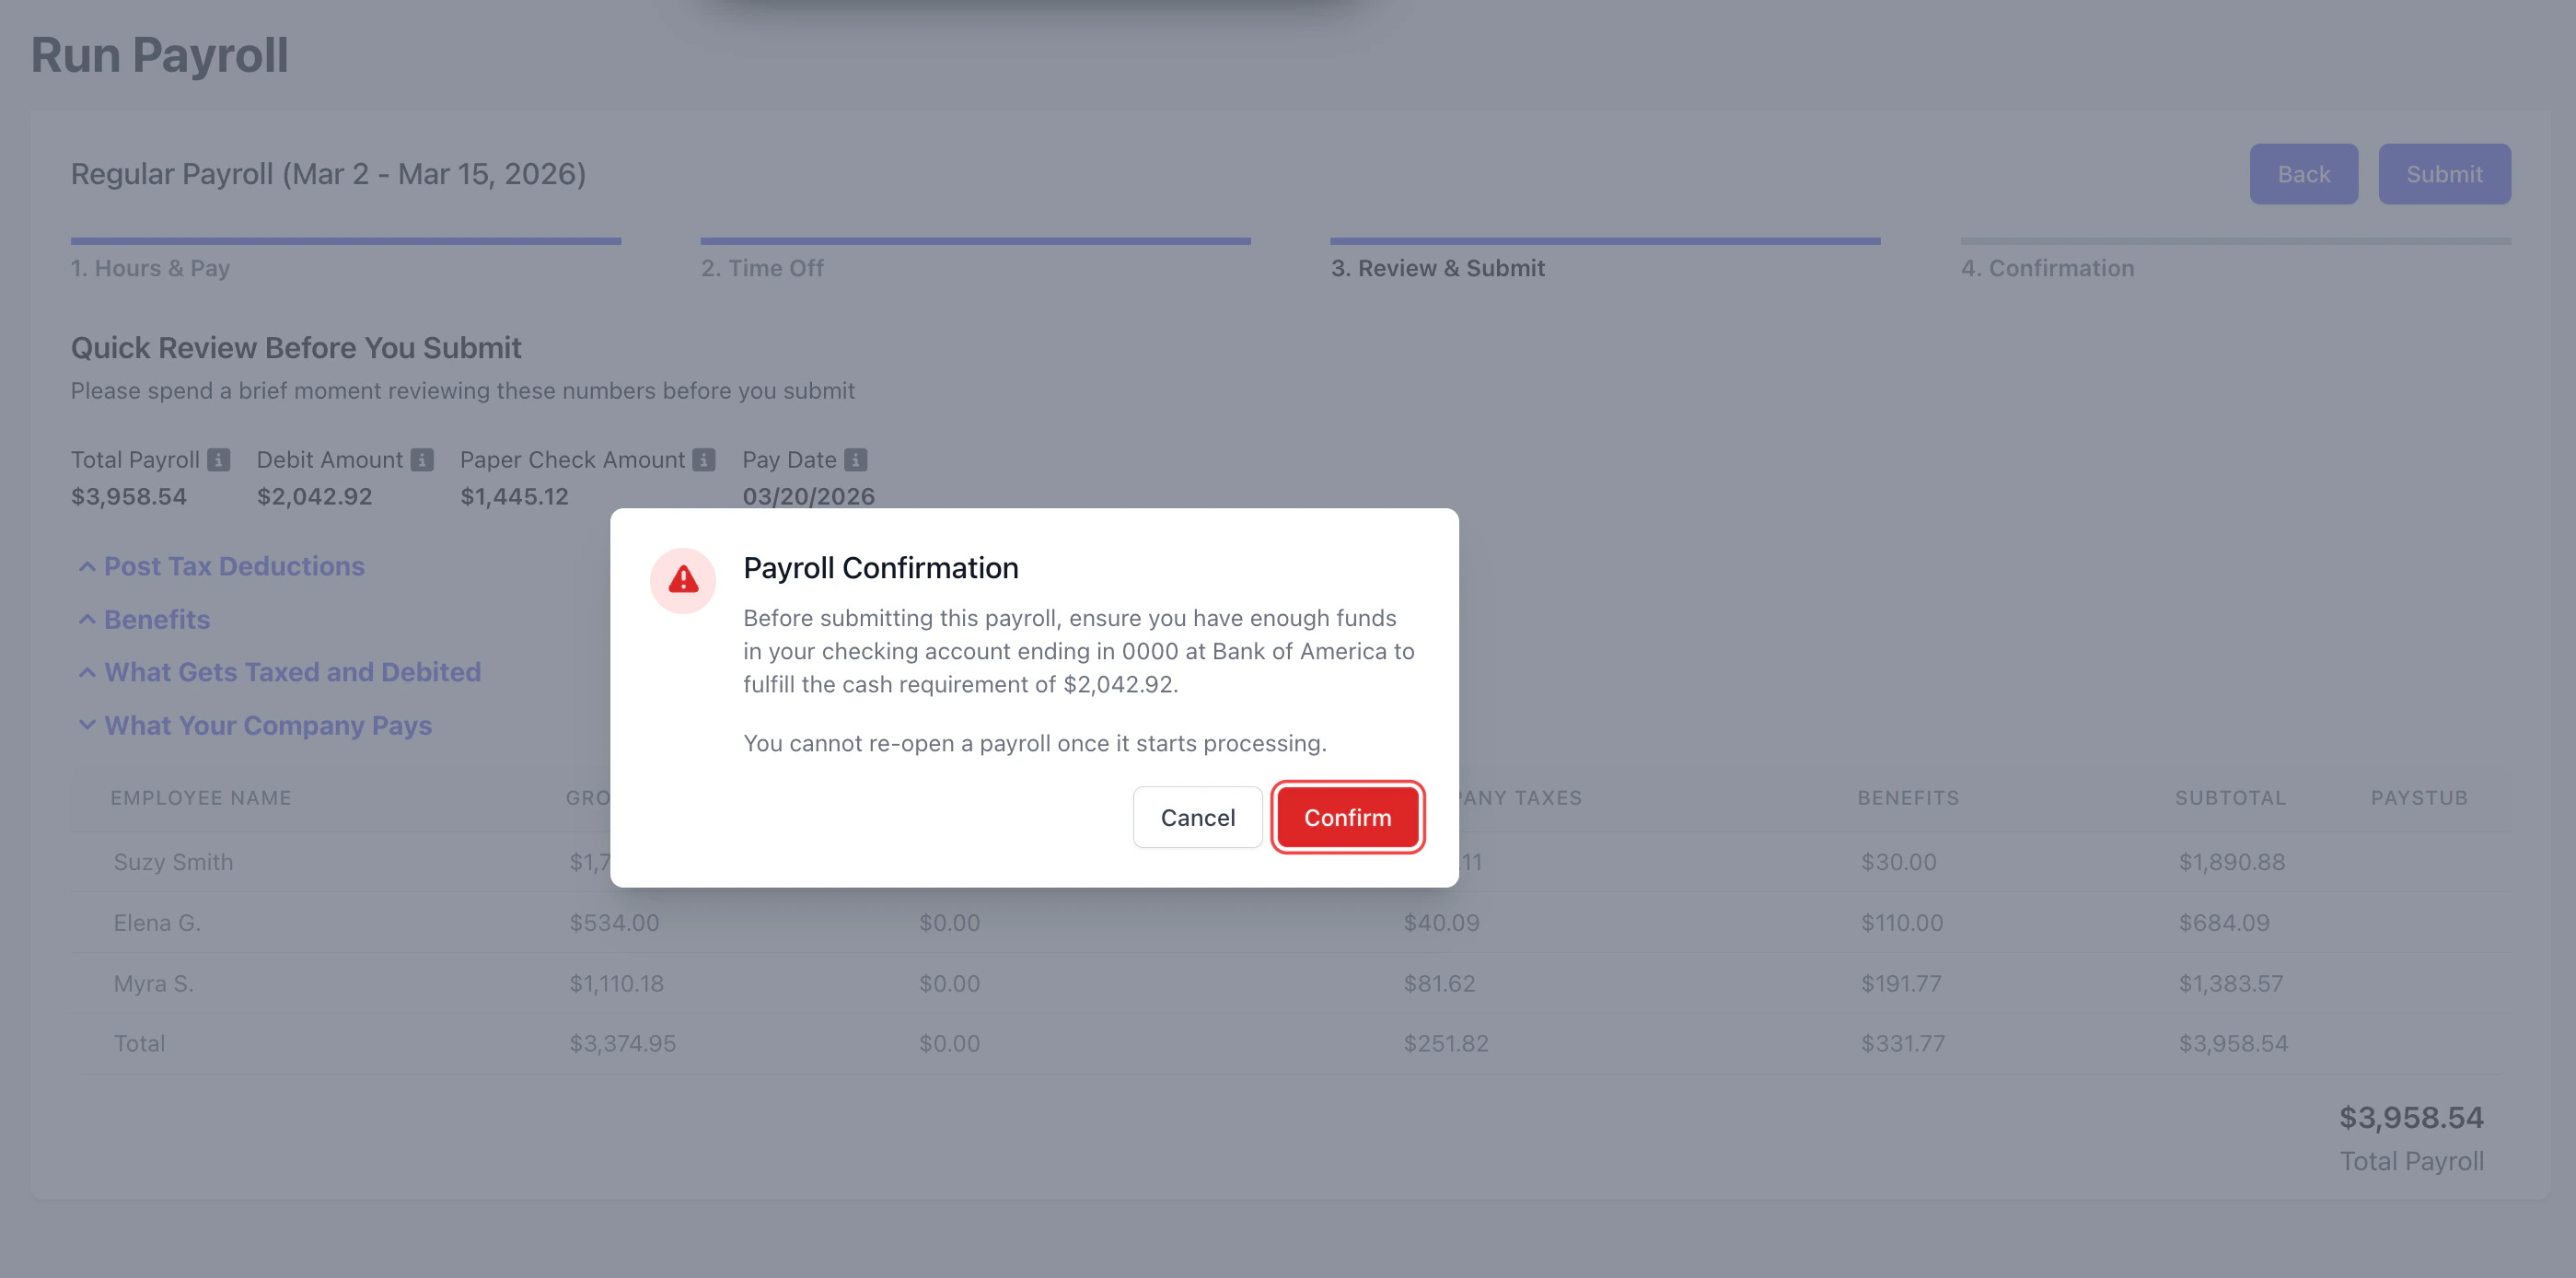
If a payroll fails to fund, your account will be charged a $150 failed funding fee and receive a penalty.
Accounts that reach six penalties will be permanently removed from Dripos Payroll.
Step 6 - Confirmation
Step 6 - Confirmation
A final confirmation page will appear after successfully running payroll.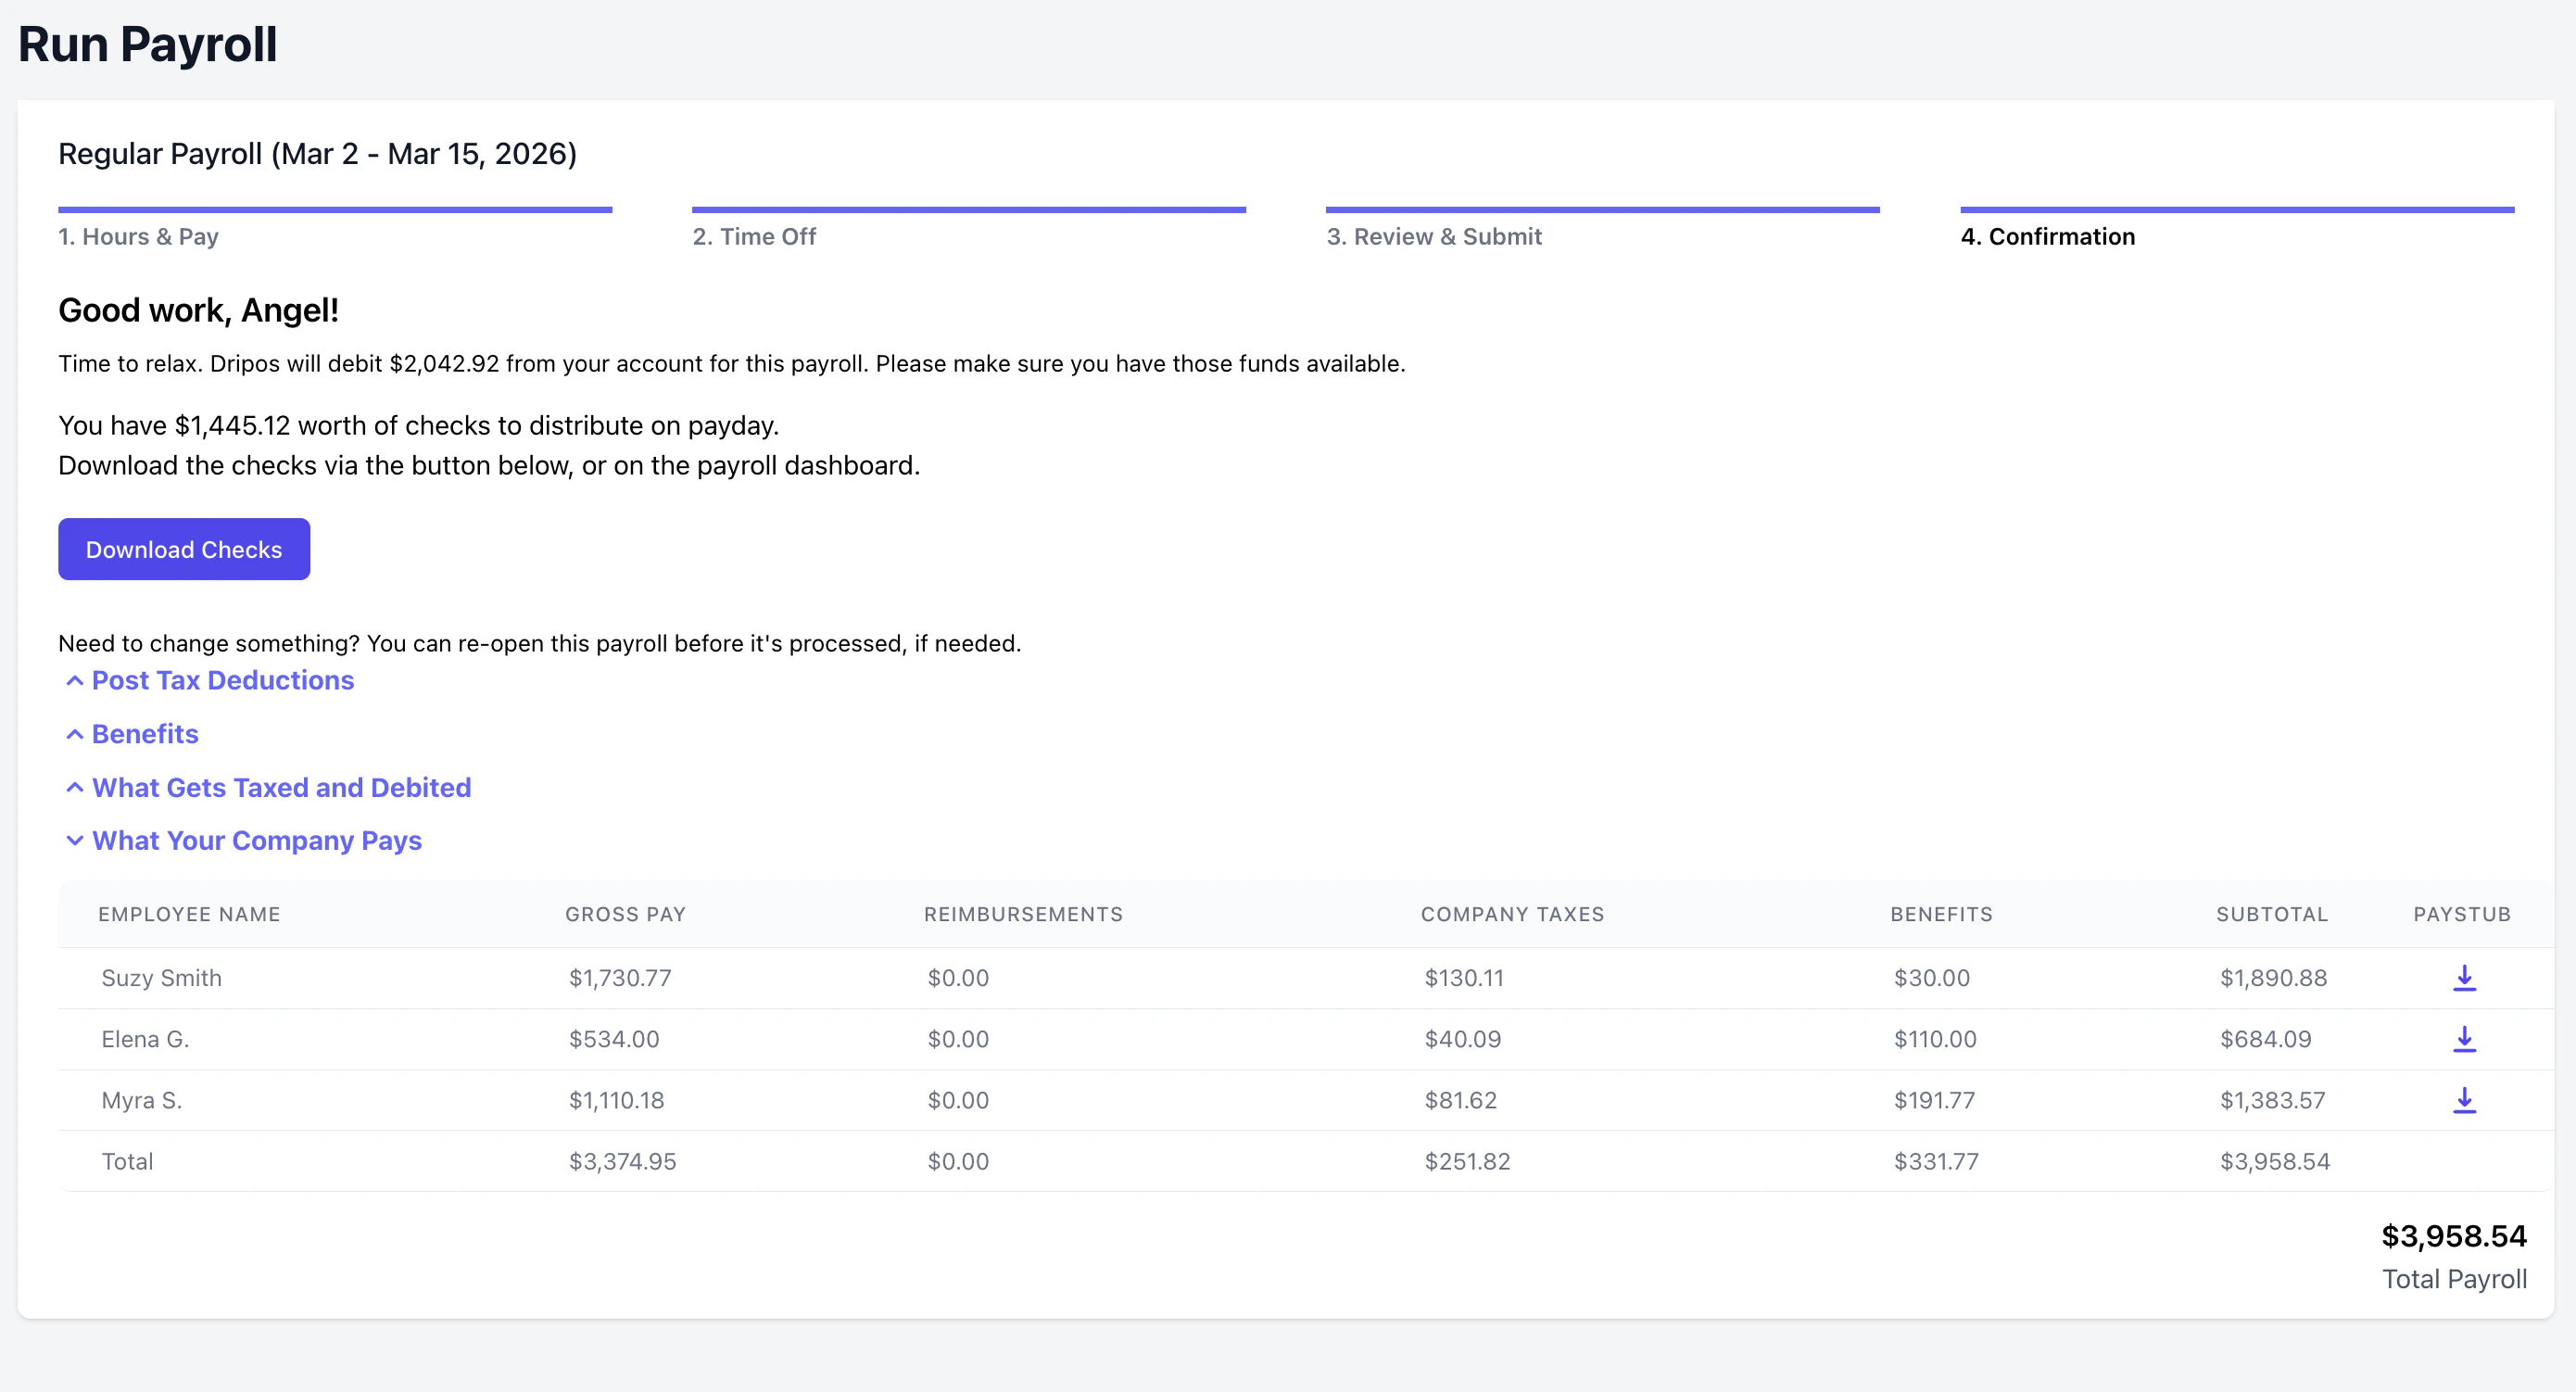
Off-Cycle Payroll
Off-cycle payrolls can be run at anytime from your Payroll Dashboard.Off-Cycle Payroll Use Cases
Off-Cycle Payroll Use Cases
Various off-cycle payroll uses cases include:
- Missed pay: An employee was not included in a regular payroll run
- New hire start: A new employee started after the regular payroll was processed
- Termination payout: A final paycheck is due upon an employee’s departure
- Bonus or commission: Paying discretionary or performance-based earnings separately
- Correction: Fixing payroll errors from a previous run (e.g. wrong hours, incorrect pay rate)
- Reimbursement: Issuing business expense reimbursements quickly
- Manual adjustment: Adjusting for a retroactive raise or change in withholdings
- State requirements: Some states may require faster payouts after termination
- Holiday conflicts: Payroll needs to be moved due to bank or office closures
- Tip payouts: Issuing tips more frequently than the regular pay schedule
Step 1 - Run Off-Cycle Payroll
Step 1 - Run Off-Cycle Payroll
On your Payroll Dashboard, click Run Payroll from the left sidebar. Select Off-Cycle from Other Payroll Options.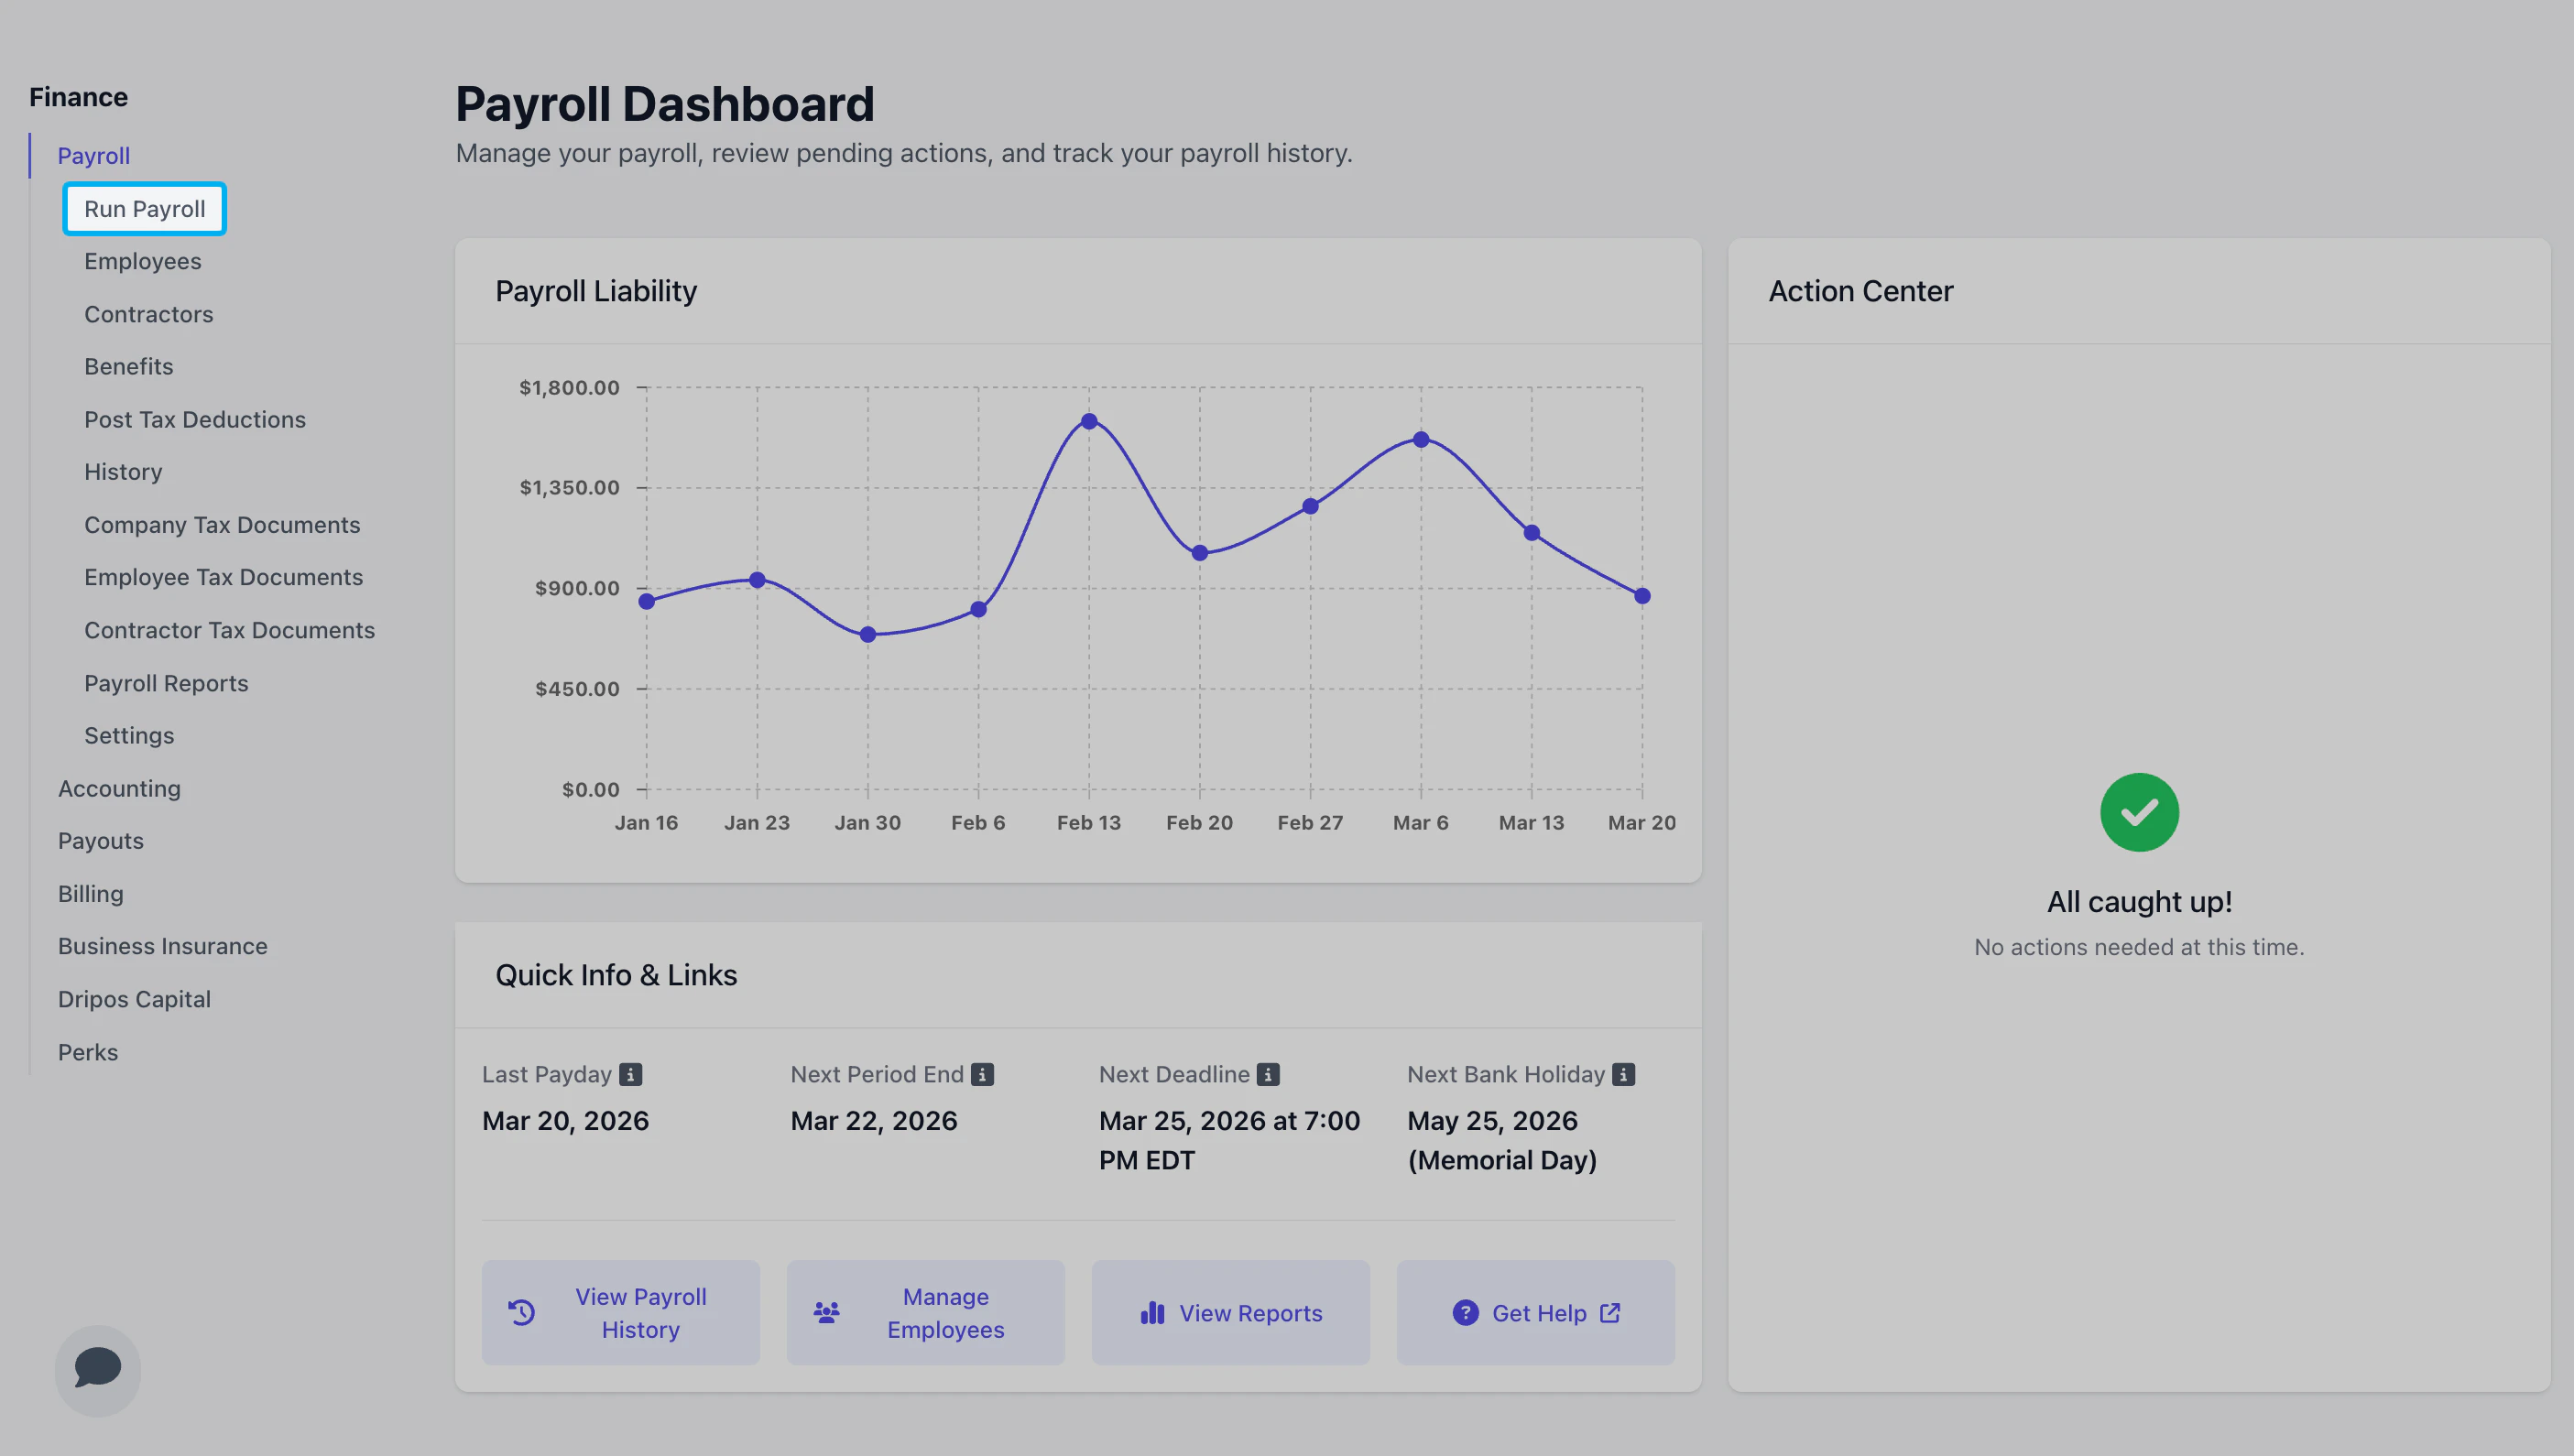
Step 2 - Pay Period & Payday
Step 2 - Pay Period & Payday
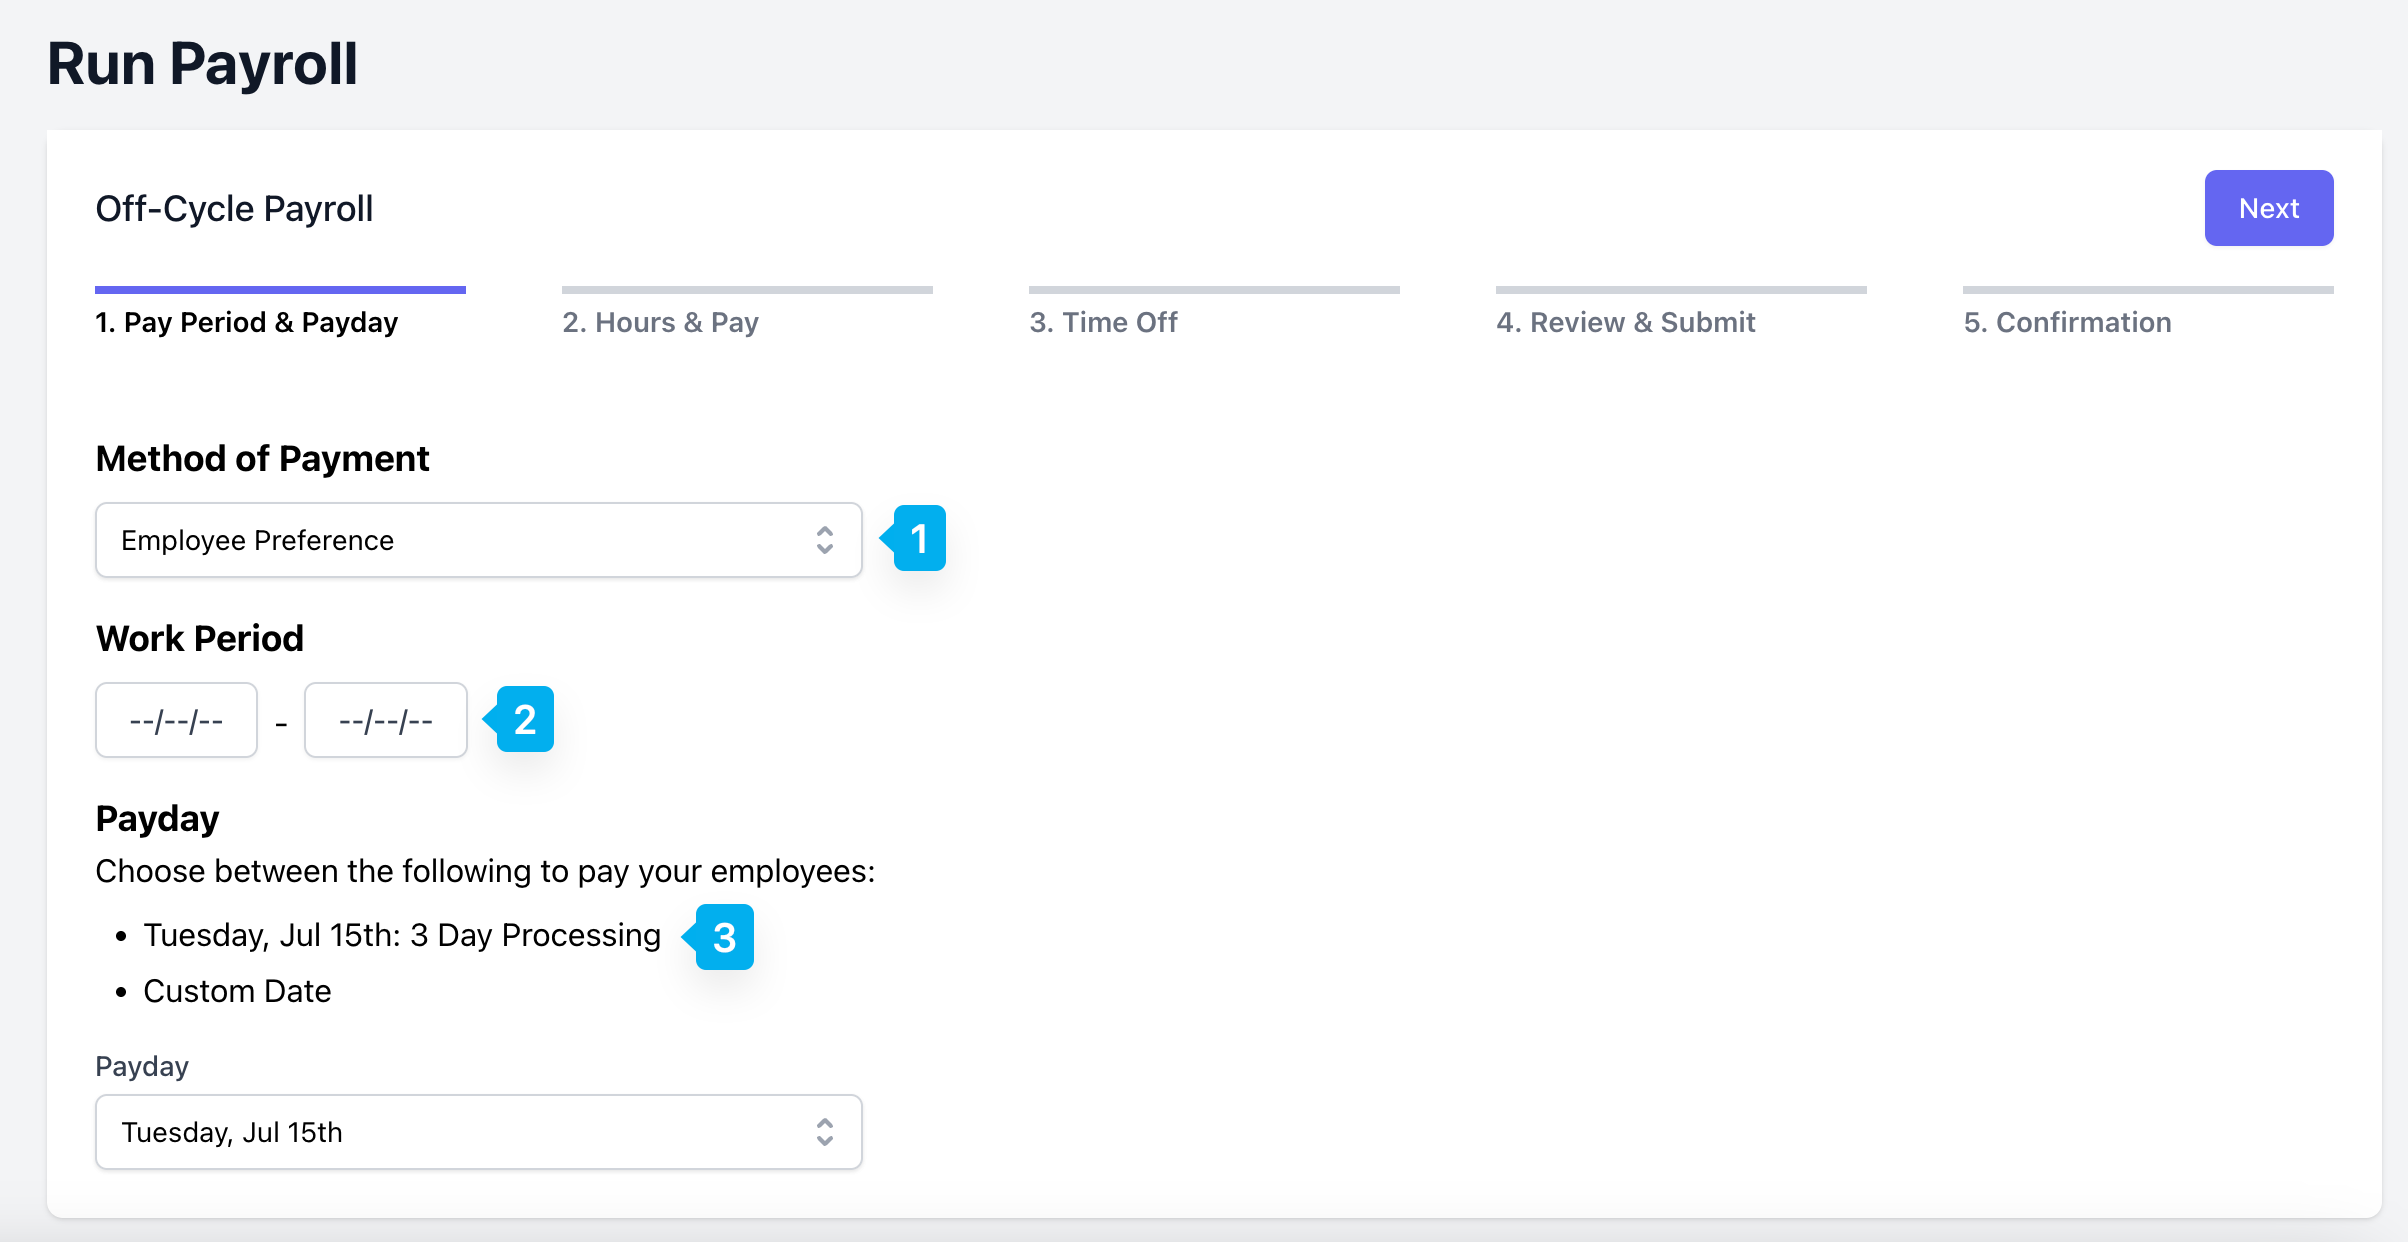
- Employee Preference: Employees will be paid using their chosen payment method (direct deposit or manual pay).
- Manual: Employees will be paid manually. The employer is responsible for paying employees directly.
Step 3 - Hours & Pay
Step 3 - Hours & Pay
Unpaid time cards for the selected Work Period will appear under Employees - With Pay.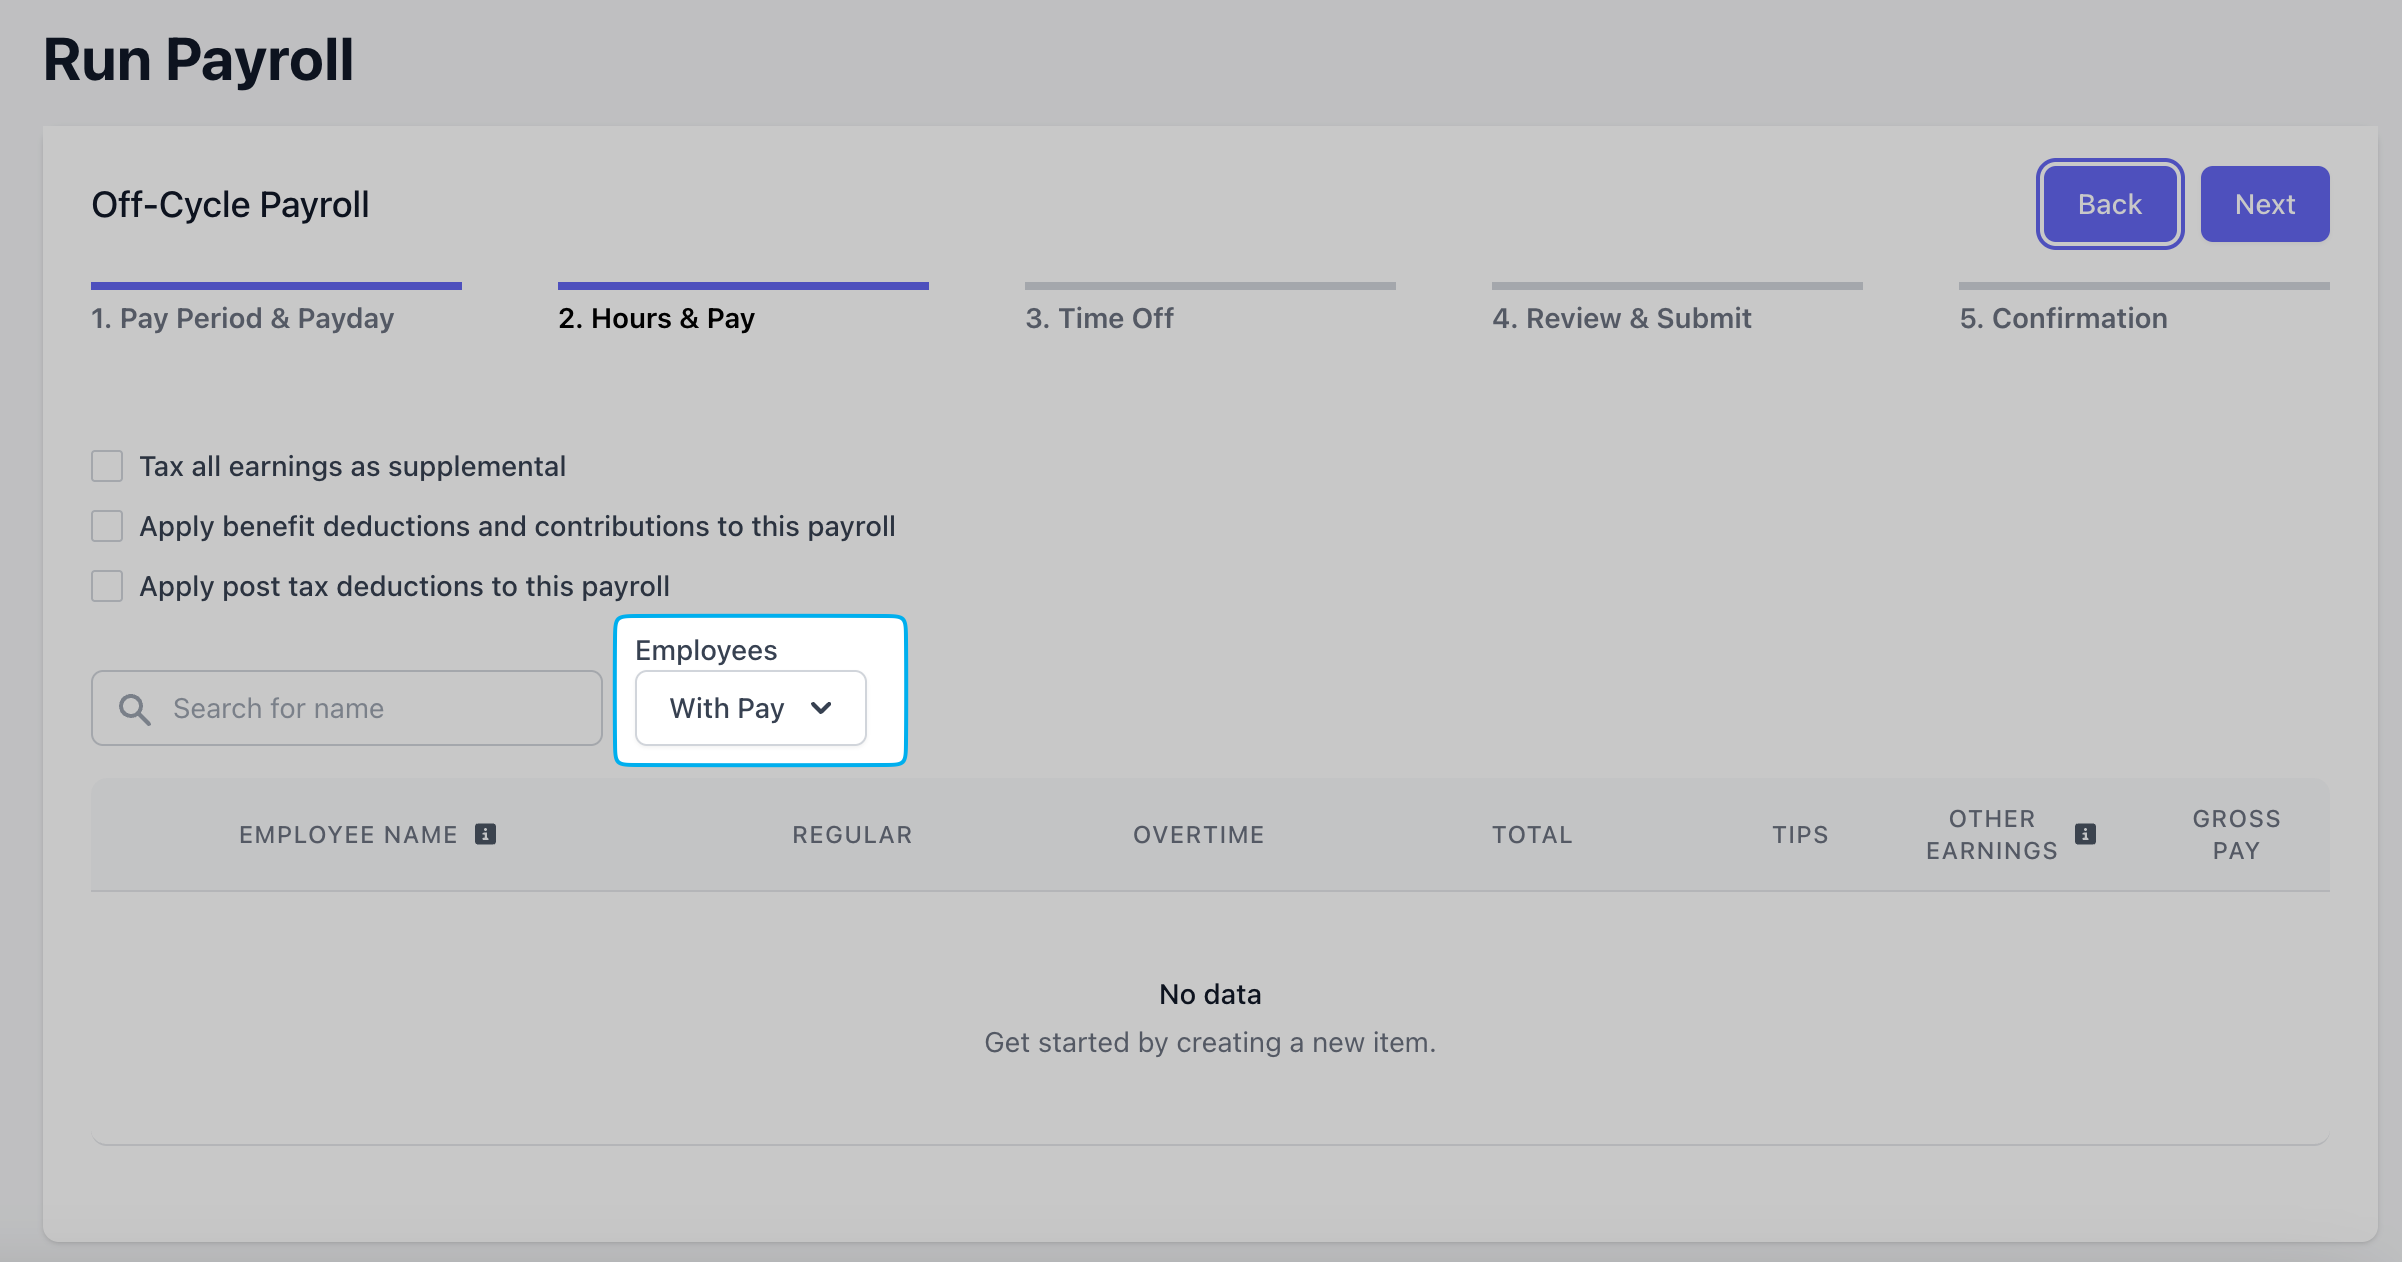
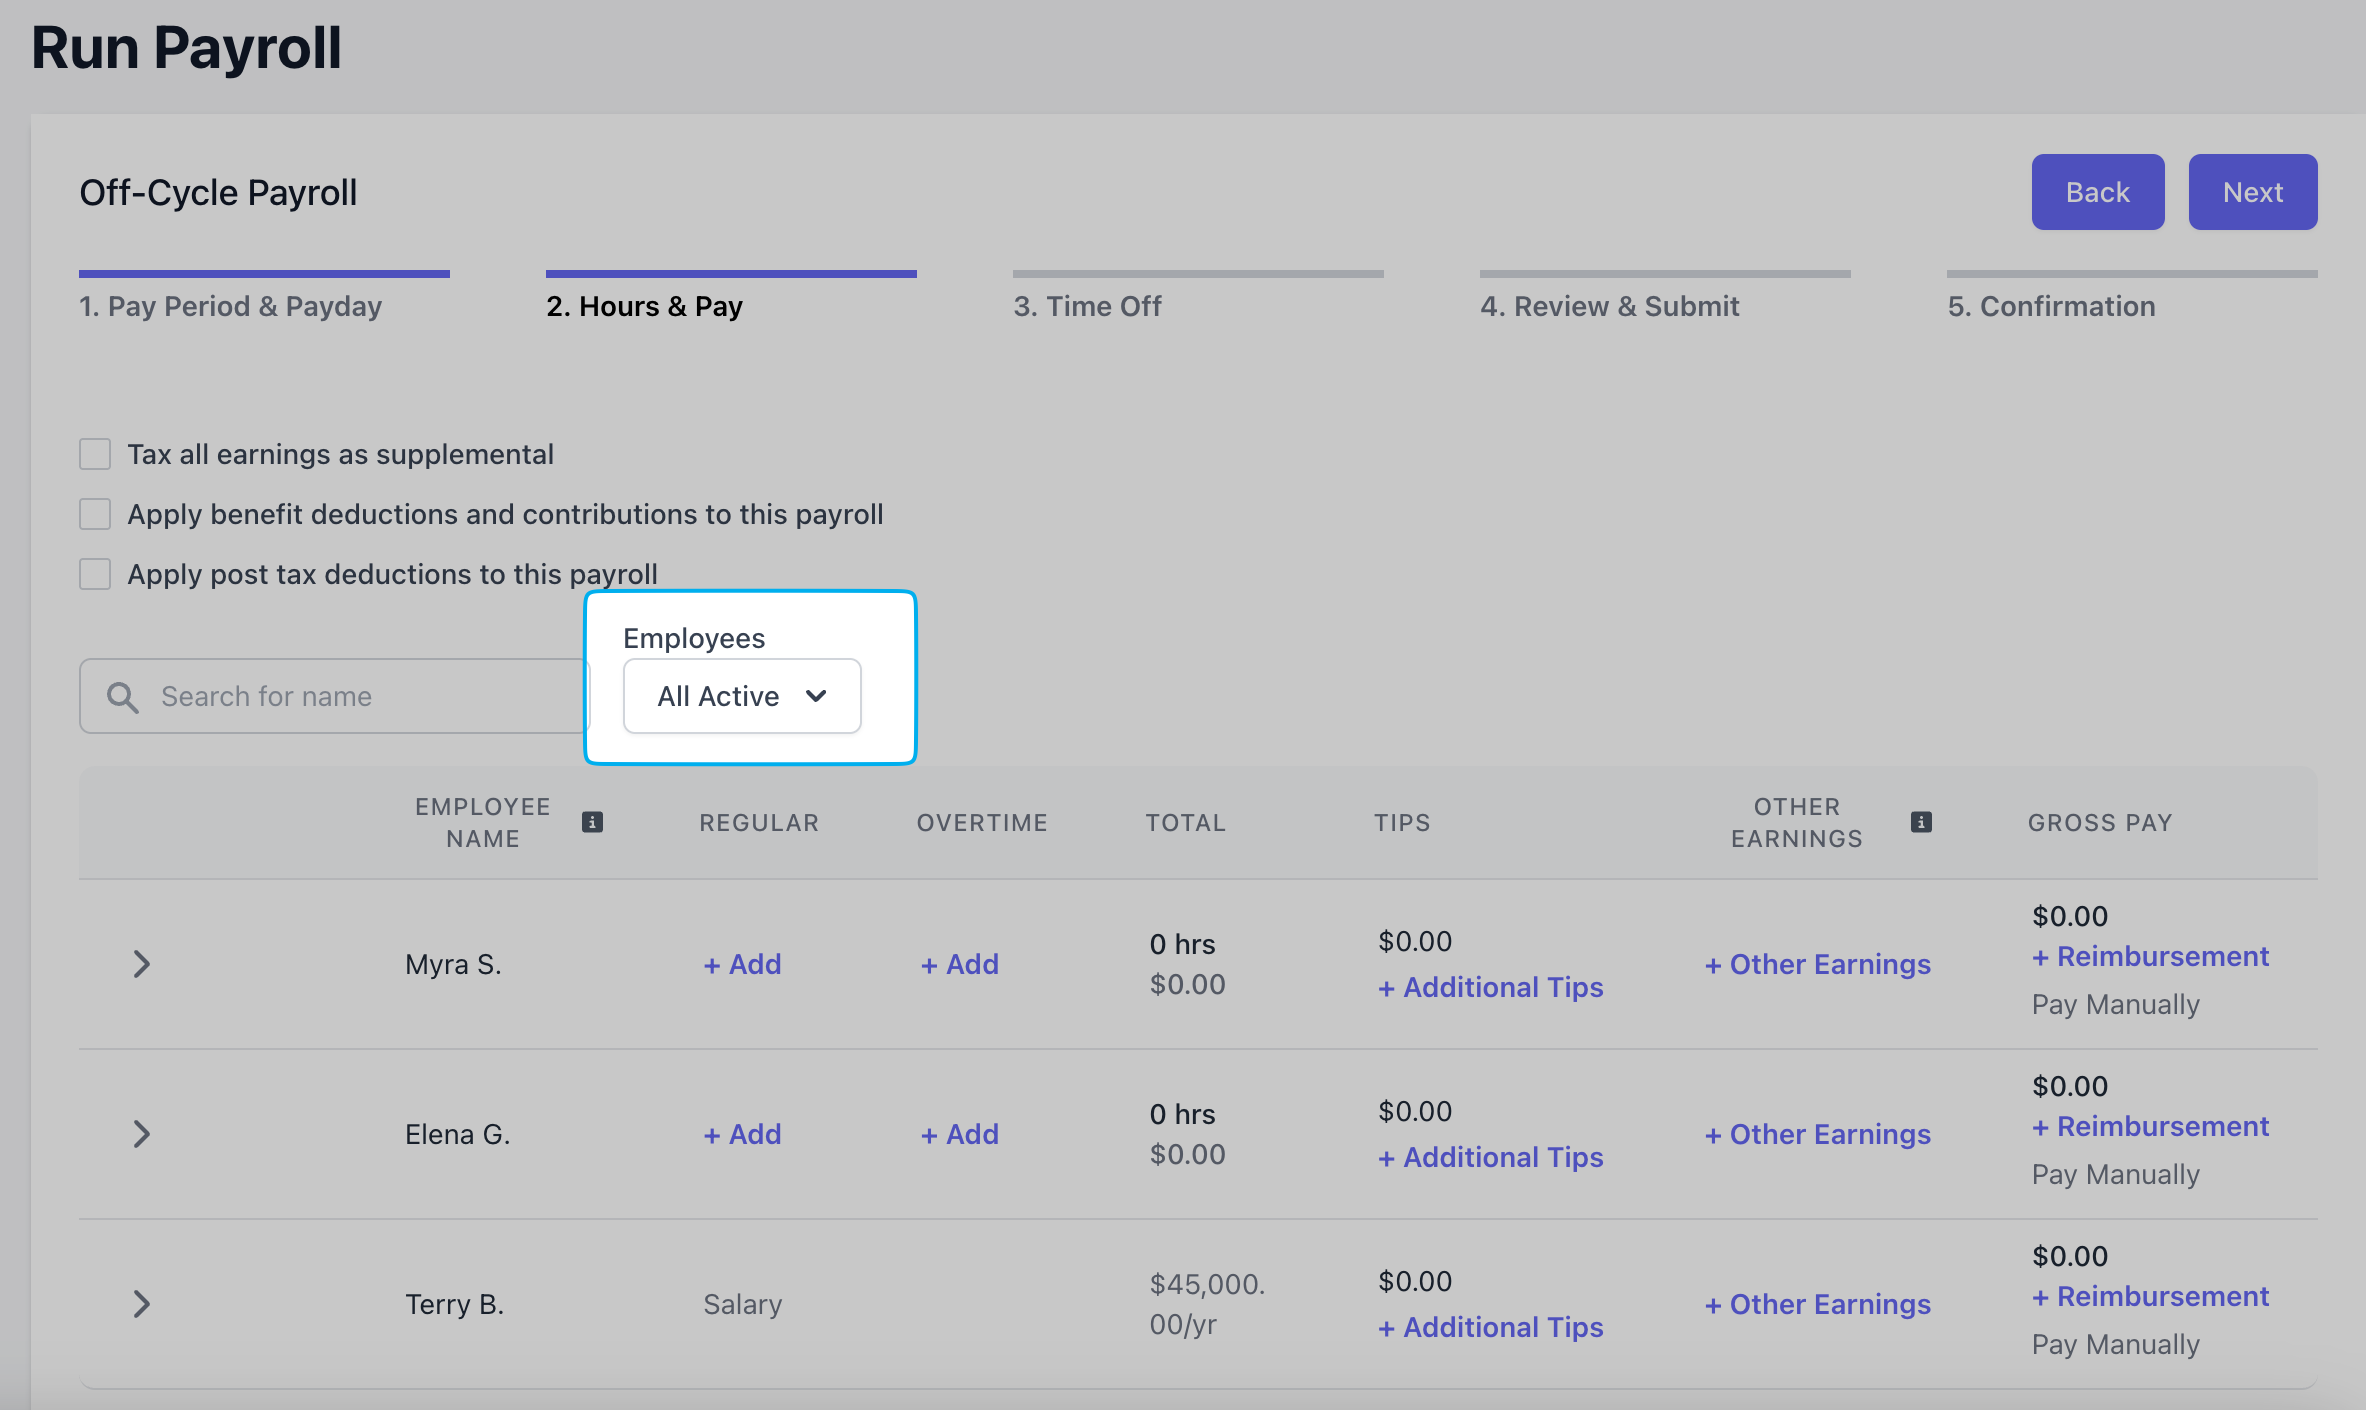
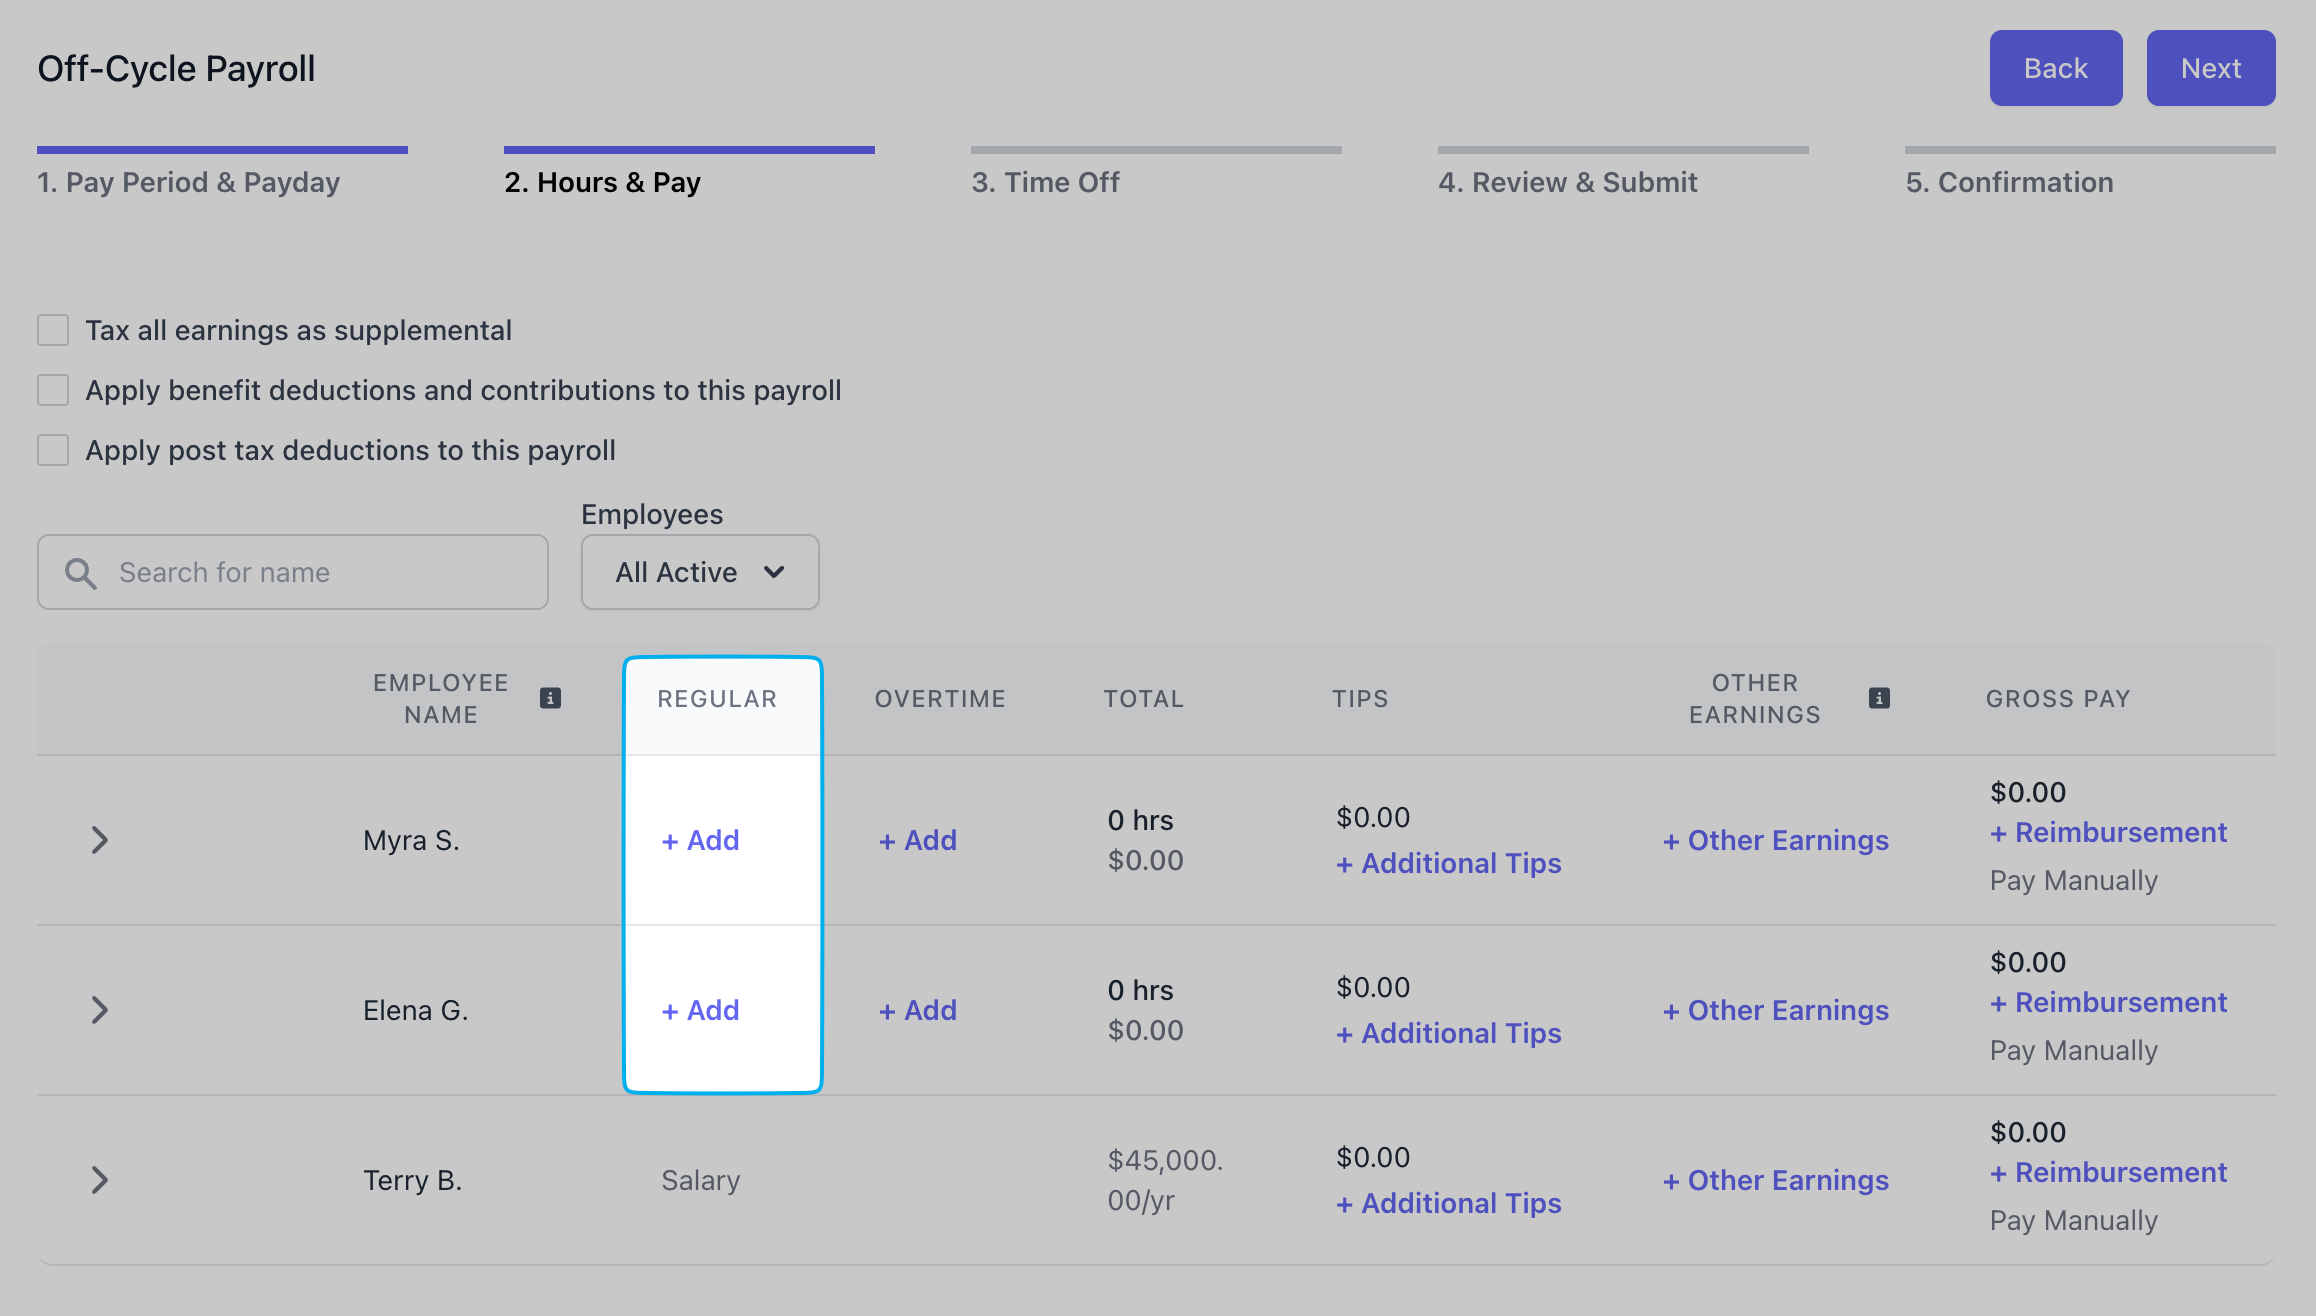
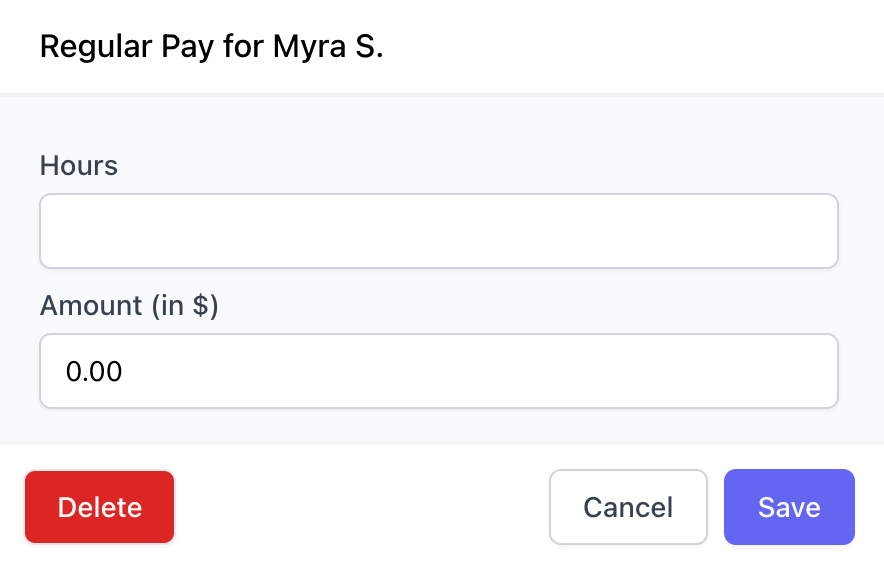
Click + Add
Input Hours and Amount
- Paycheck Tips: Tips to be paid out to this employee via payroll
- Cash Tips: Tips that have already been paid out in cash and are only being reported on payroll for tax purposes. Adding cash tips does not pay your employee additional tips through payroll.
Click + Additional Tips
Select Paycheck or Cash Tips
- Bonus: Extra compensation given on top of regular wages
- Commission: Pay earned based on the amount of sales or performance achieved
- Group Term Life: Employer-provided life insurance that offers coverage to employees for a set term
- Severance: Payment given to an employee when they are laid off or let go, typically based on tenure
- Non Hourly Regular: Additional fixed amount paid to an employee, regardless of hours worked
- Other Imputed: Other imputed pay added to an employee’s gross taxable income (but not their actual take-home pay)
- Tip Credit Adjustment: The difference between an employee’s tips and the minimum wage they must receive
- Meal Period Premium Pay: Supplemental, specifically categorized compensation required by California law when an employer fails to provide an employee with a compliant meal period
Step 4 - Time Off
Step 4 - Time Off
Time off requests that have been approved will automatically display here. For any additional Paid Time Off or Sick Leave hours, click + Add.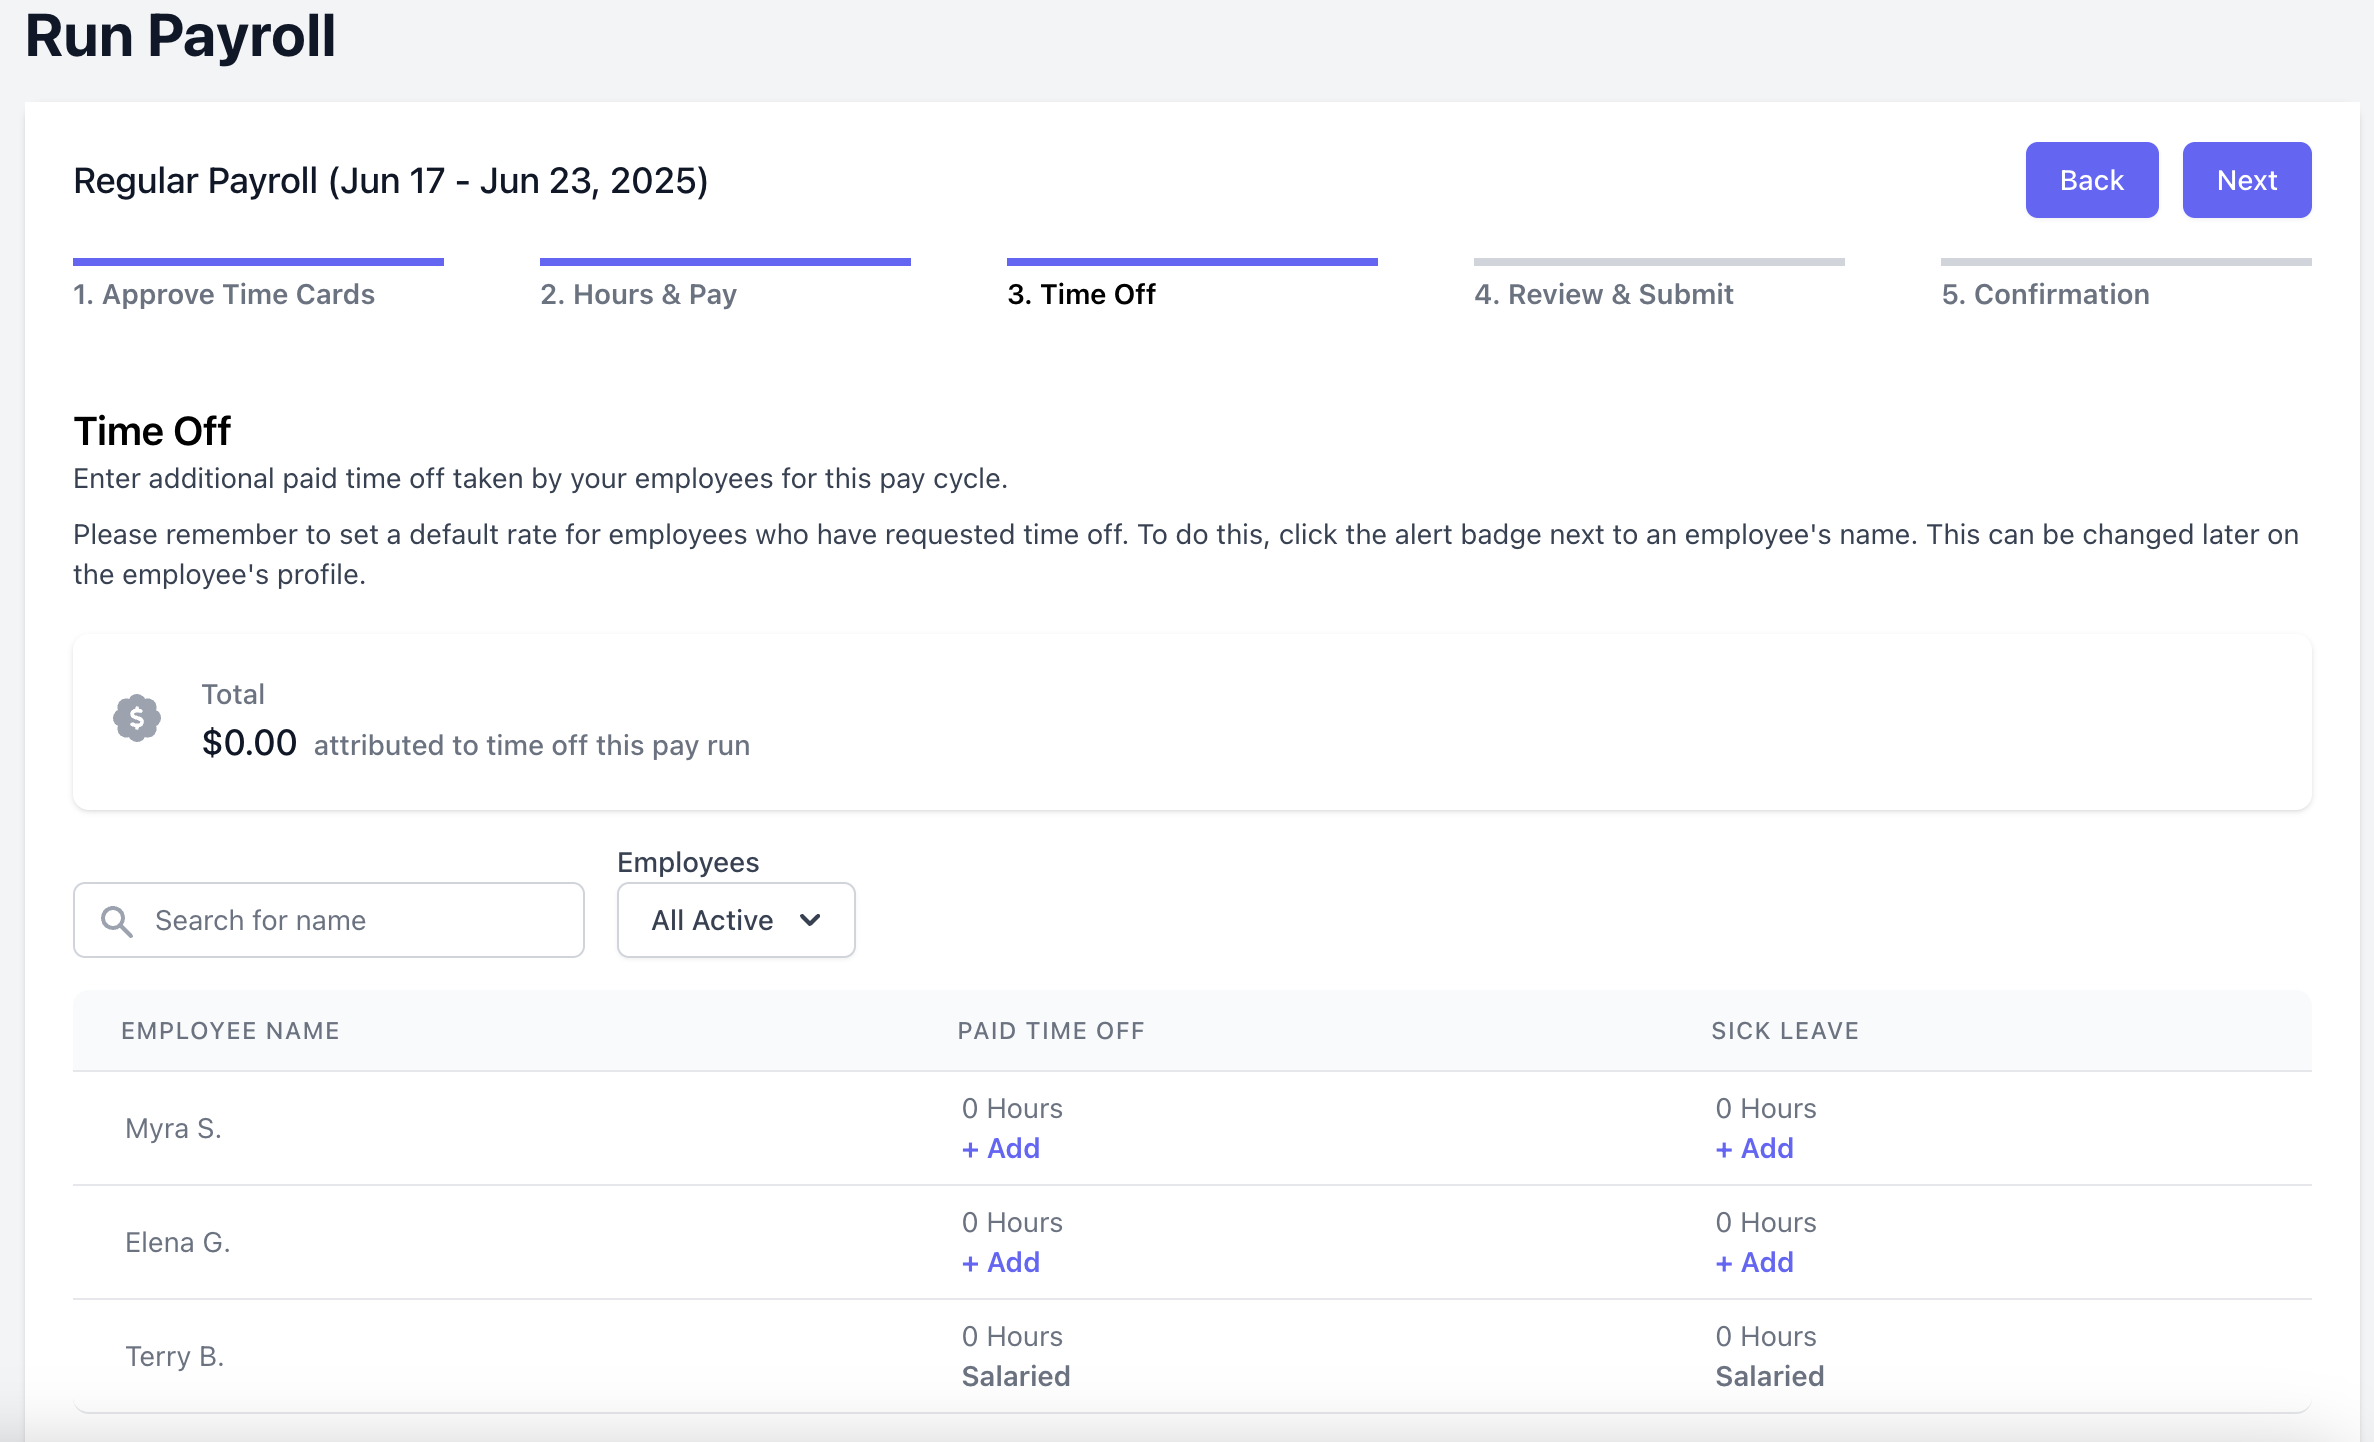
Step 5 - Review & Submit
Step 5 - Review & Submit
- Total Payroll: Total cost of payroll for the employer
- Debit Amount: Amount of funds that will be debited from your bank account to fund this payroll
- Paper Check Amount: Amount to pay employees via paper check, if any
- Subtotal: Subtotal that the employee is paying for each employee - this is not the employee’s next pay
- Benefits: Any benefits applied to an employee. Learn more about employee benefits here
- What Gets Taxed and Debited: Total amount of taxes that will be withheld from employee paychecks. Total amount of taxes to be paid by the company.
If a payroll fails to fund, your account will be charged a $150 failed funding fee and receive a penalty.
Accounts that reach six penalties will be permanently removed from Dripos Payroll.
Step 6 - Confirmation
Step 6 - Confirmation
A final confirmation page will appear after successfully running payroll.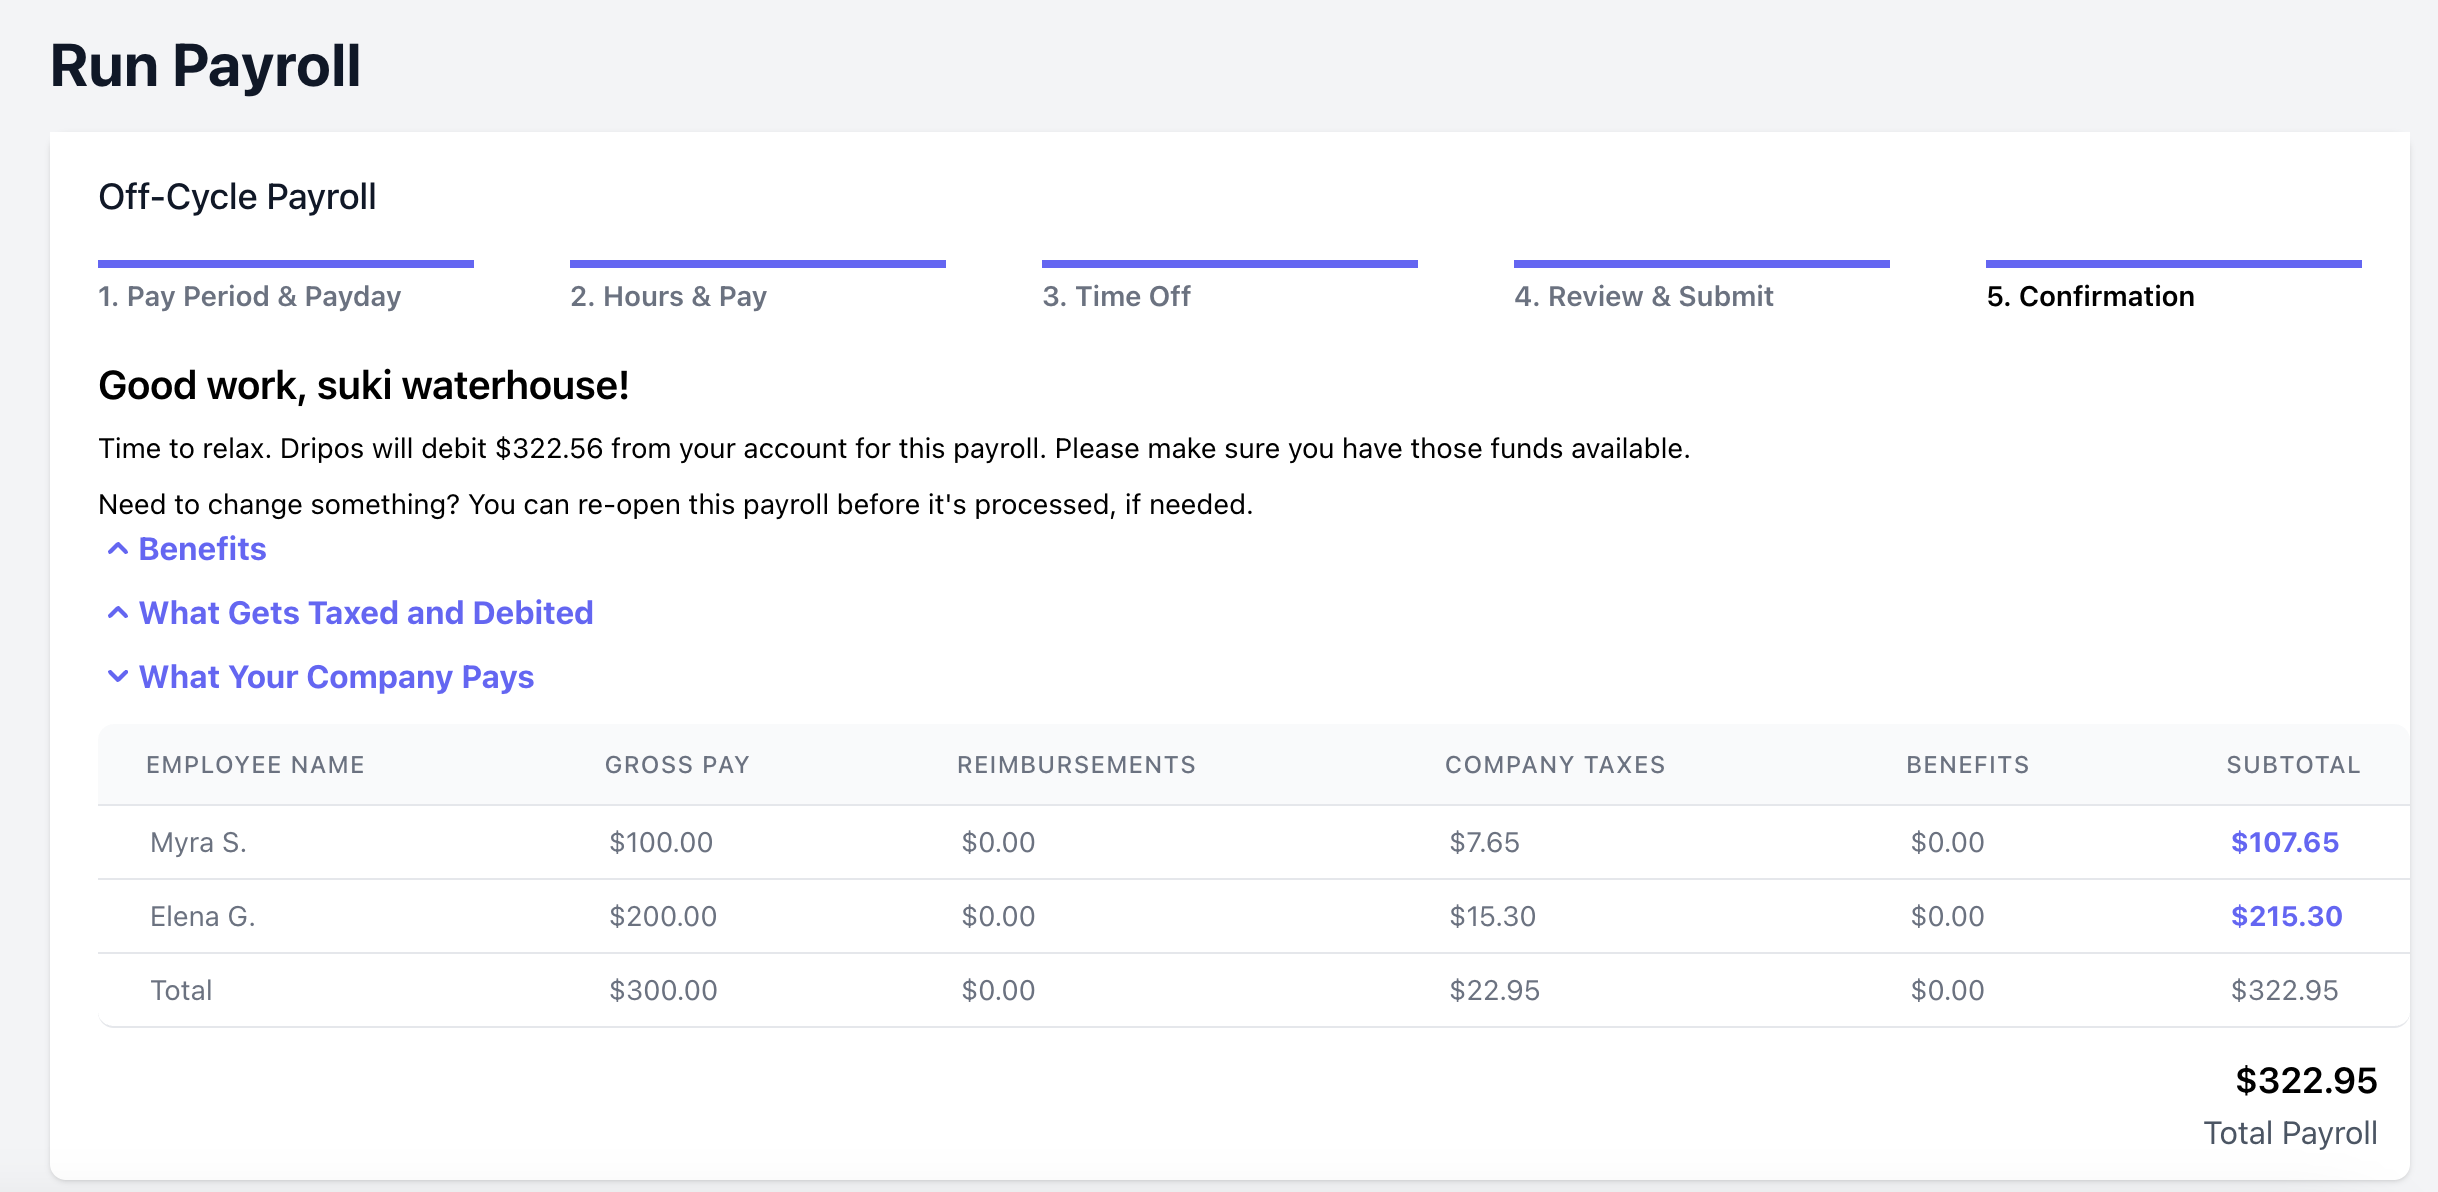
Bonus Payroll
Bonus payrolls can be run at anytime from your Payroll Dashboard.Step 1 - Run Bonus Payroll
Step 1 - Run Bonus Payroll
On your Payroll Dashboard, click Run Payroll from the left sidebar. Select Bonus from Other Payroll Options.
Step 2 - Pay Period & Payday
Step 2 - Pay Period & Payday
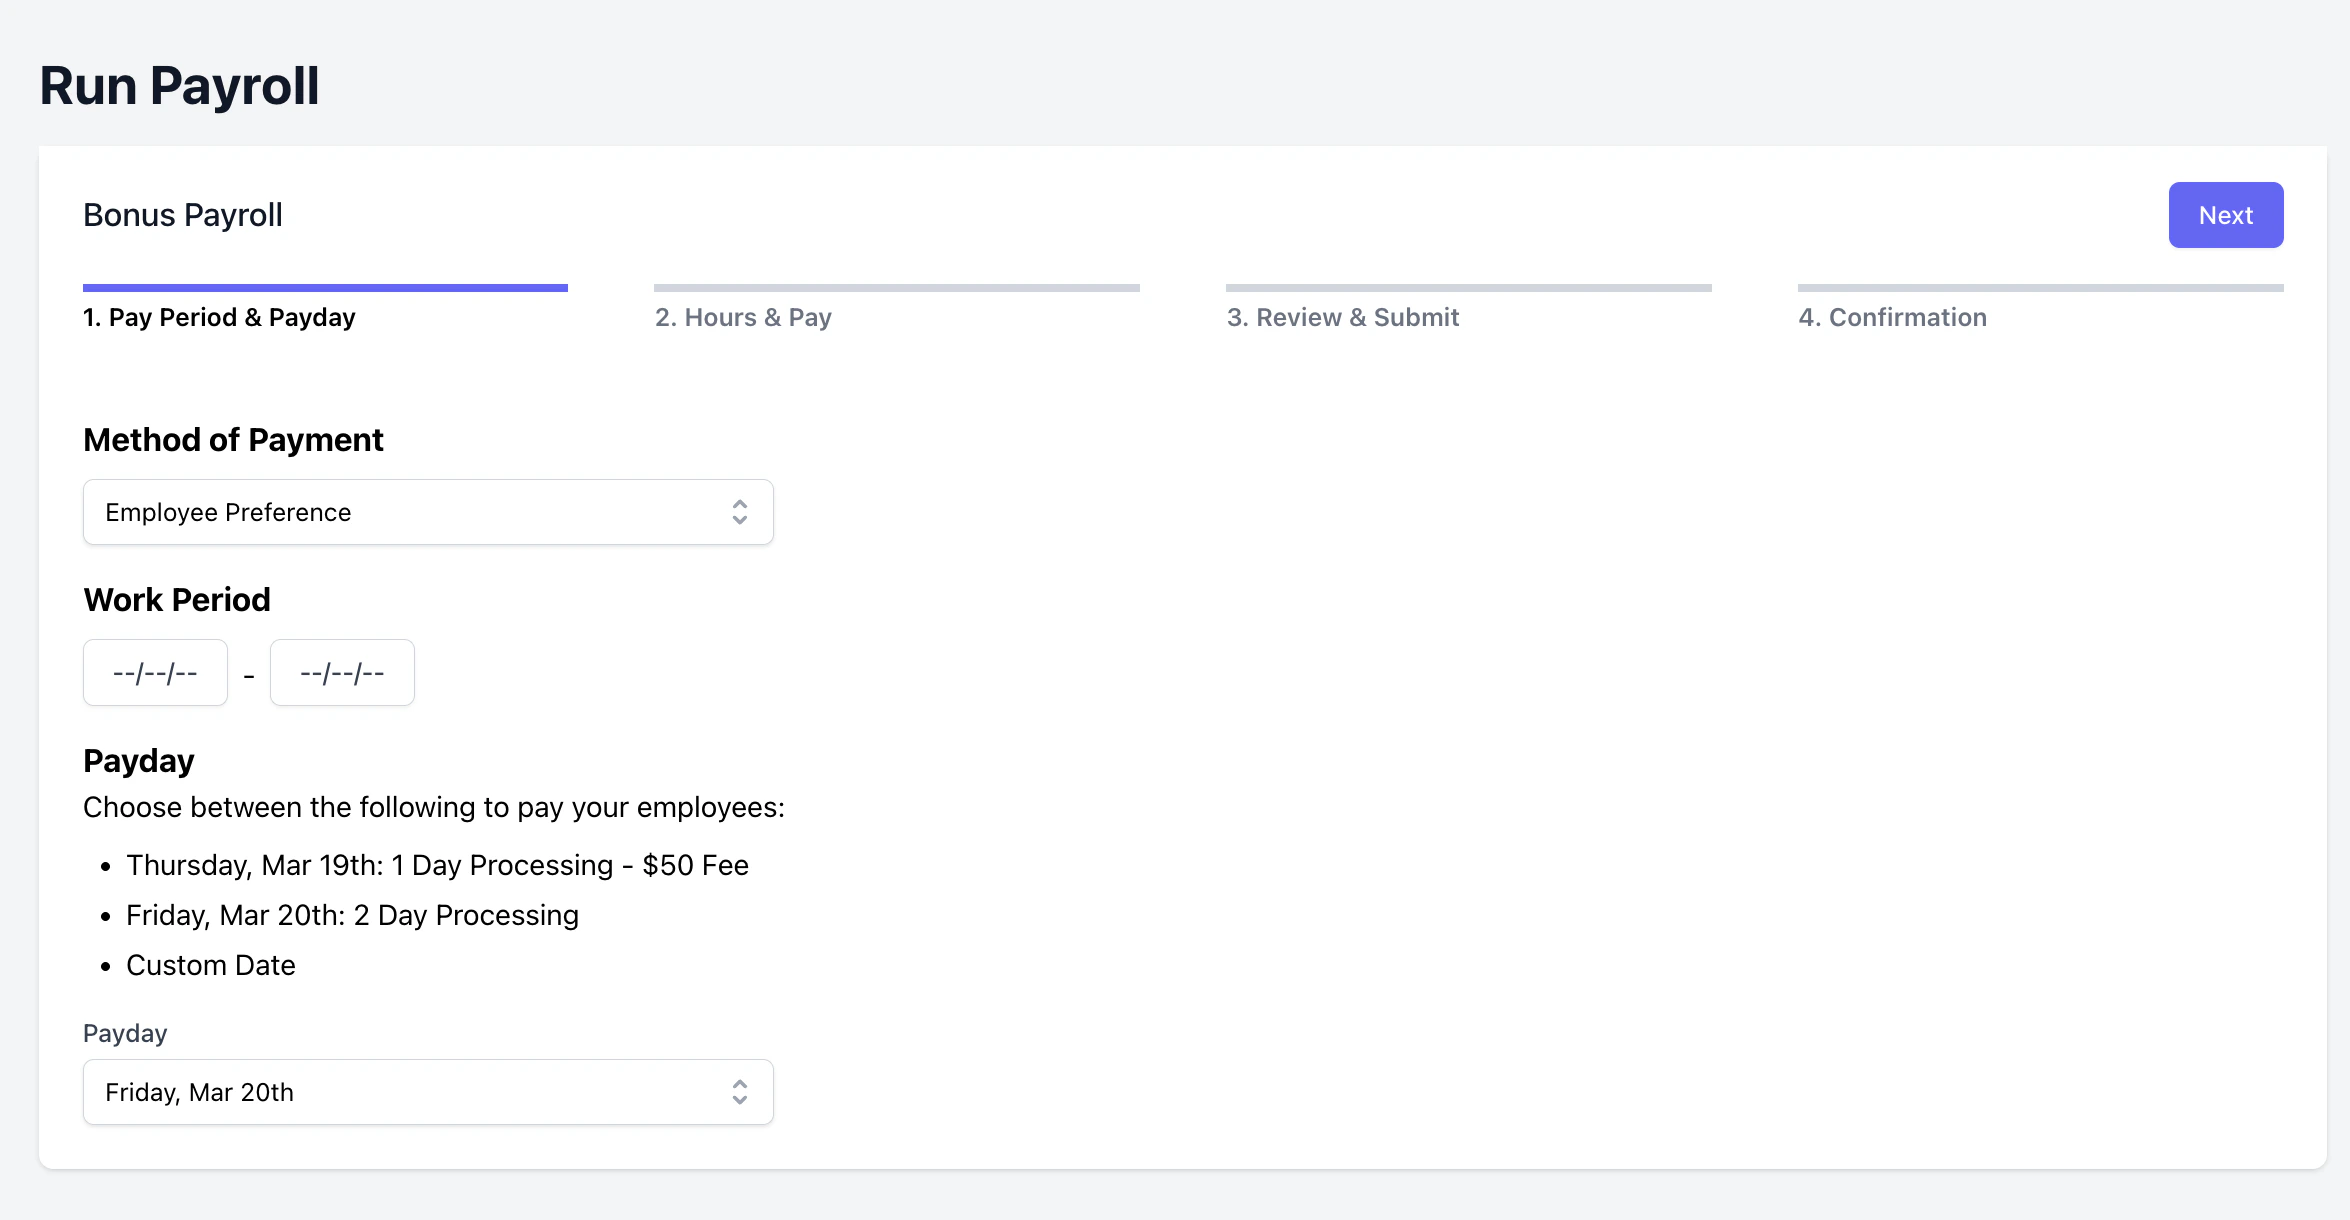
- Employee Preference: Employees will be paid using their chosen payment method (direct deposit or manual pay).
- Manual: Employees will be paid manually. The employer is responsible for paying employees directly.
Step 3 - Hours & Pay
Step 3 - Hours & Pay
Click + Other Earnings. Select Bonus as the Type and input the Amount.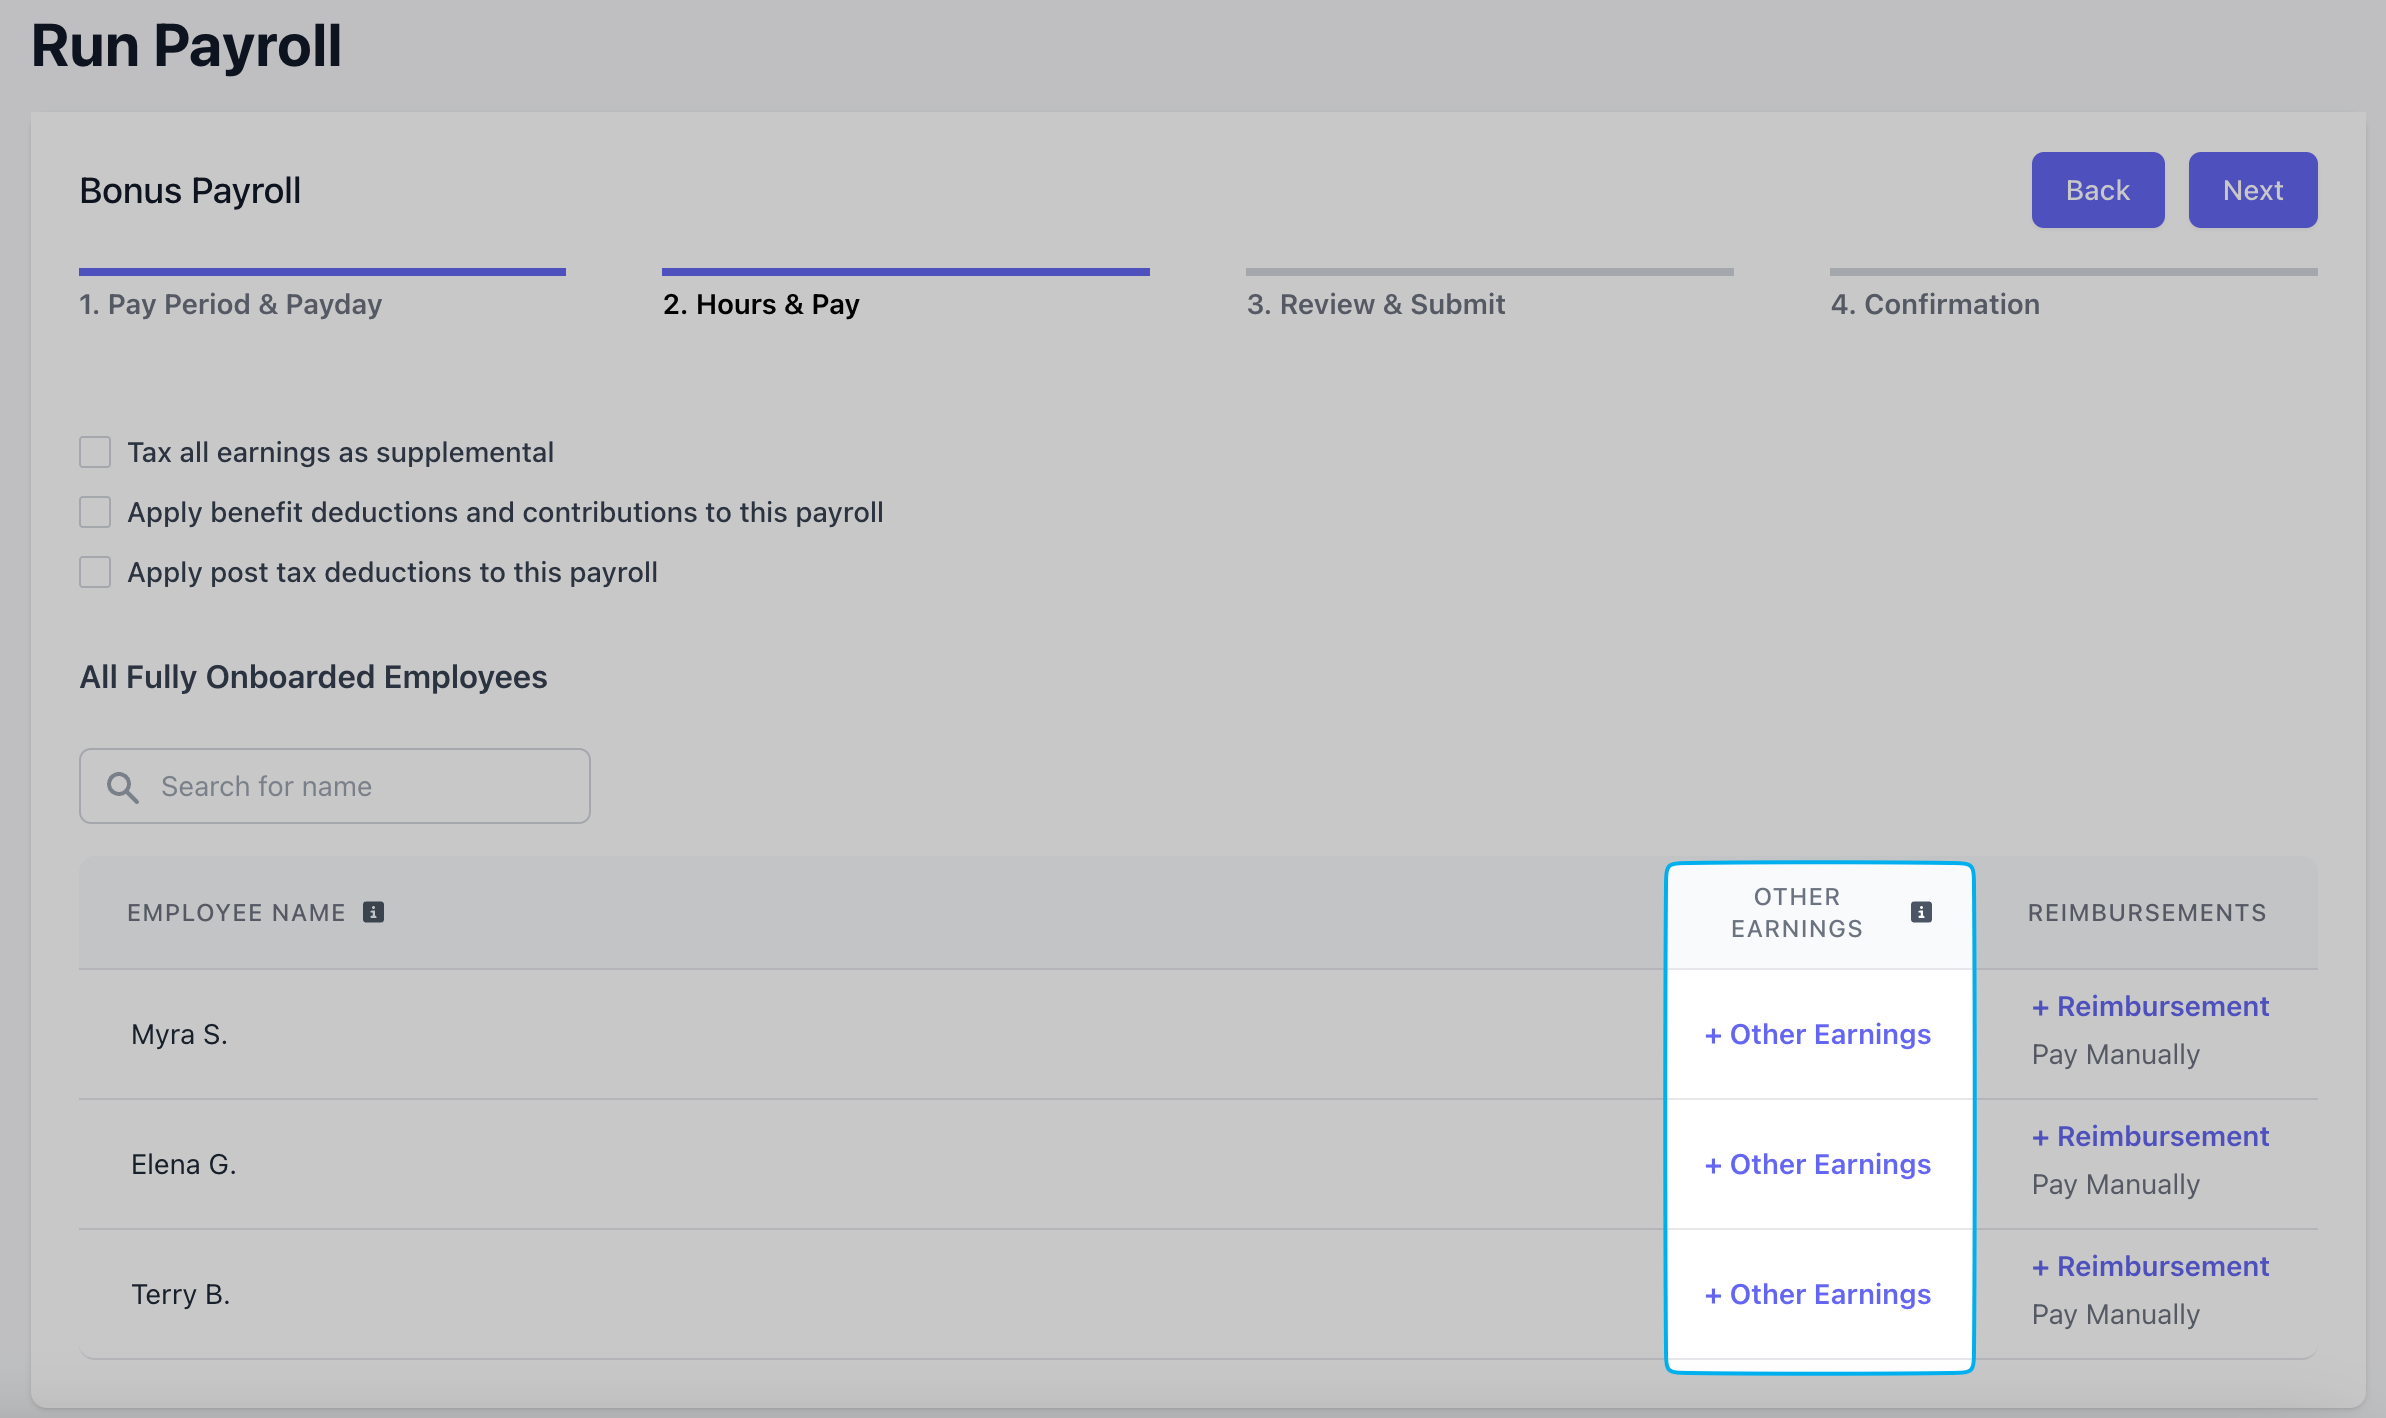
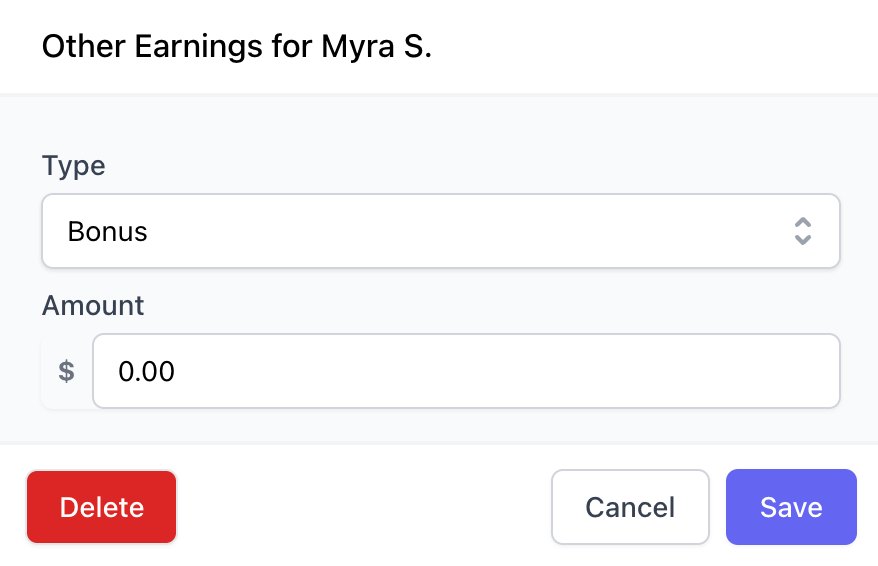
Click + Other Earnings
Input Bonus Amount
Step 4 - Review & Submit
Step 4 - Review & Submit
Review the following information for the bonus payroll.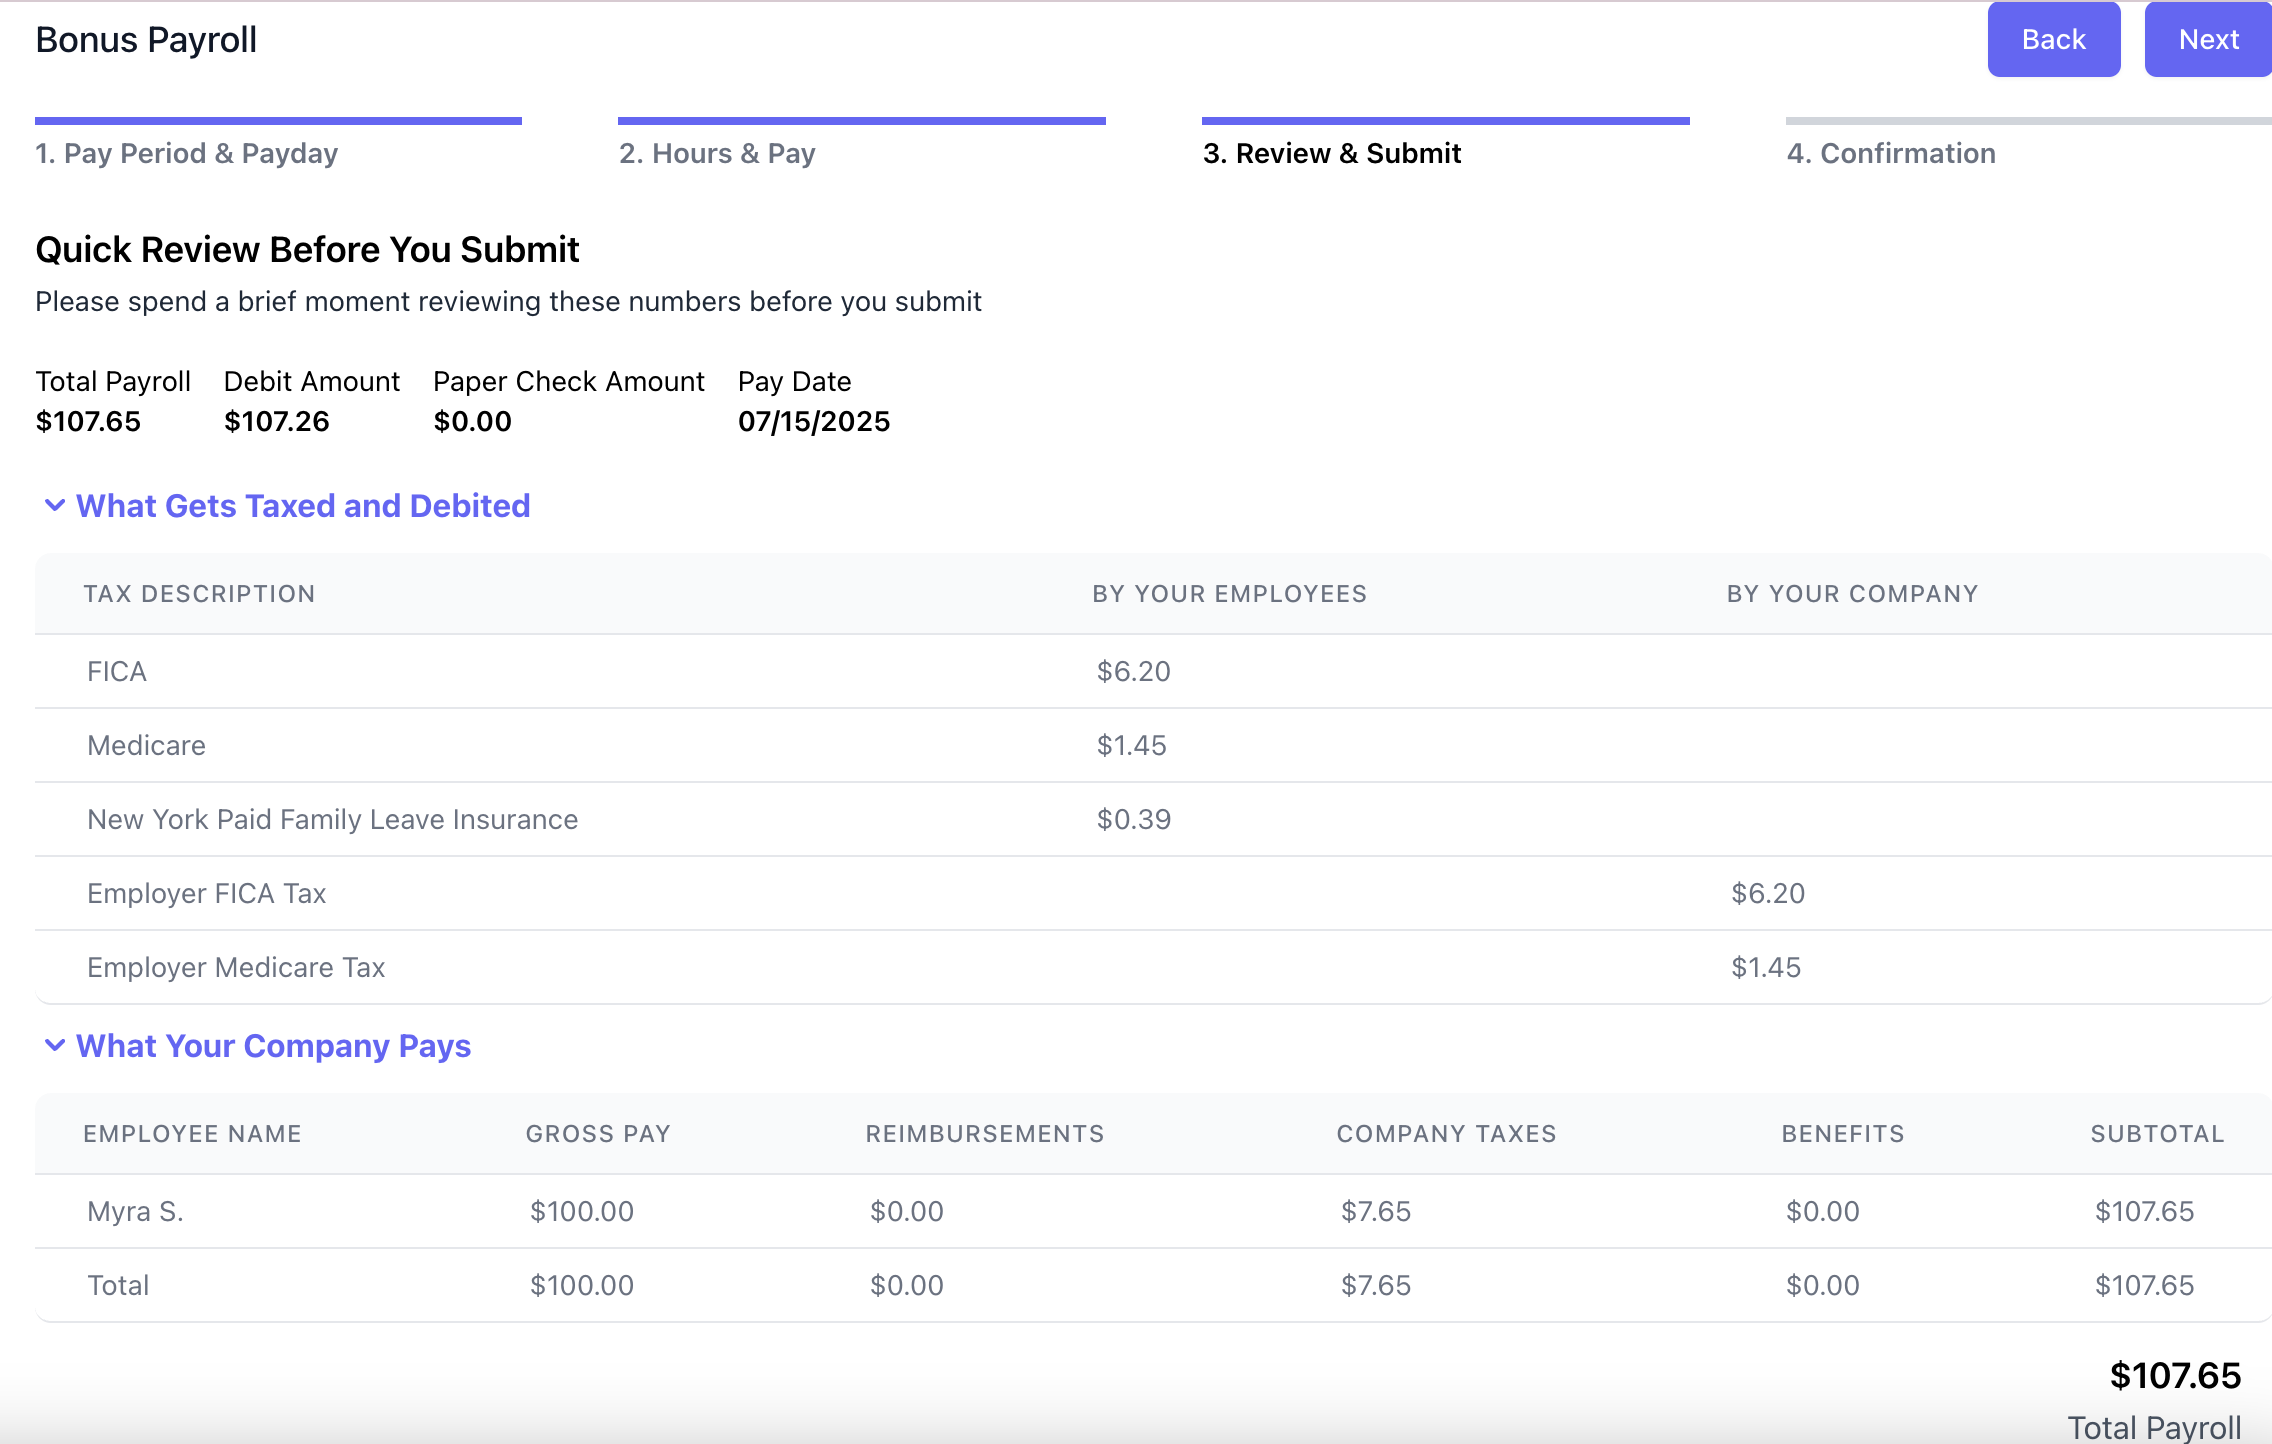
If a payroll fails to fund, your account will be charged a $150 failed funding fee and receive a penalty.
Accounts that reach six penalties will be permanently removed from Dripos Payroll.
Step 5 - Confirmation
Step 5 - Confirmation
A final confirmation page will appear after successfully running payroll.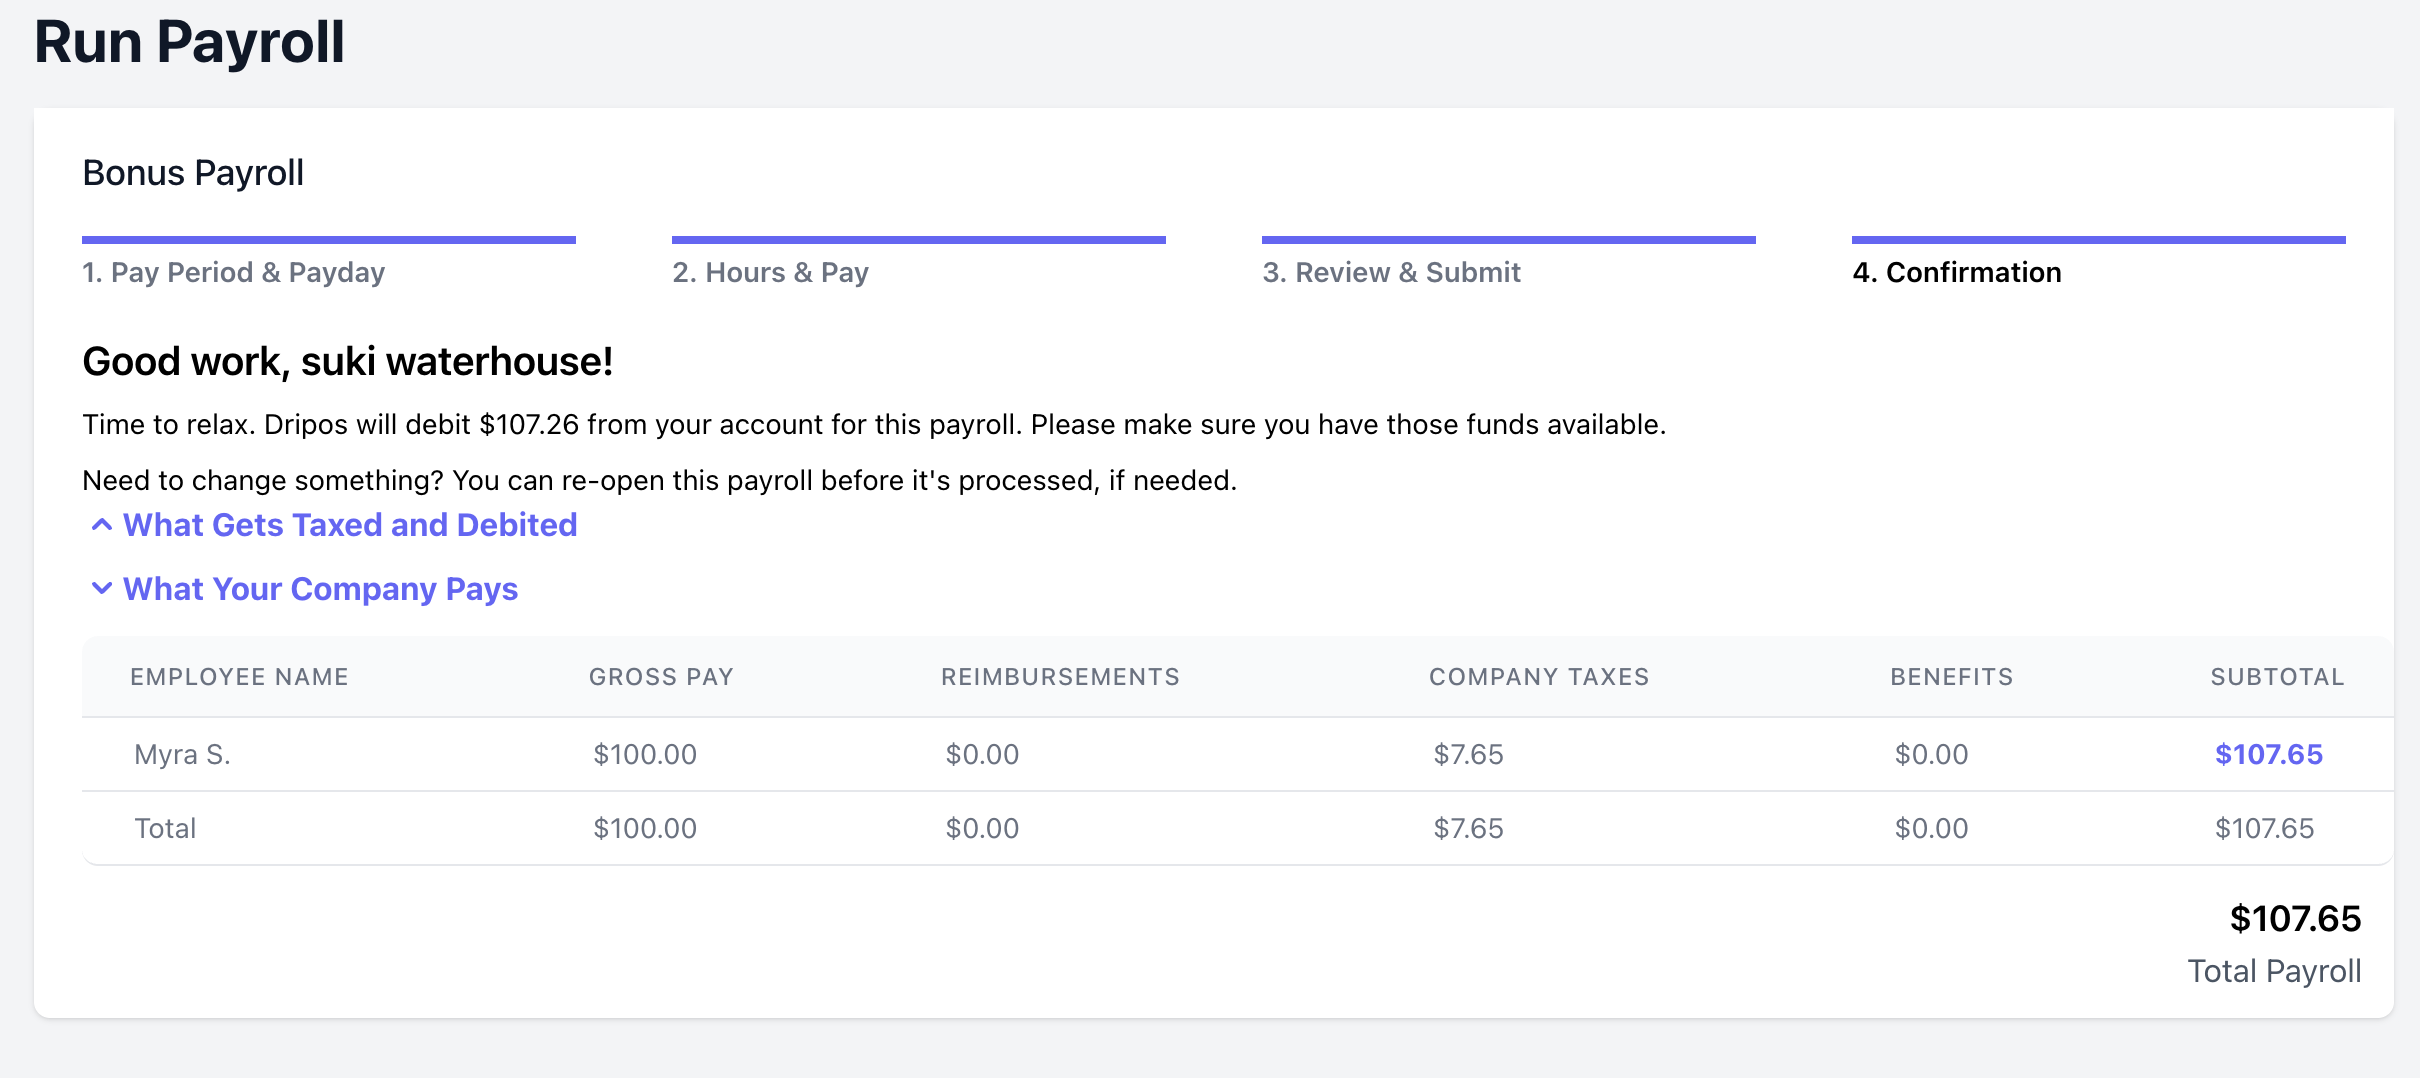
Payroll History
Select View Payroll History from your Payroll Dashboard or click Run Payroll from the left sidebar.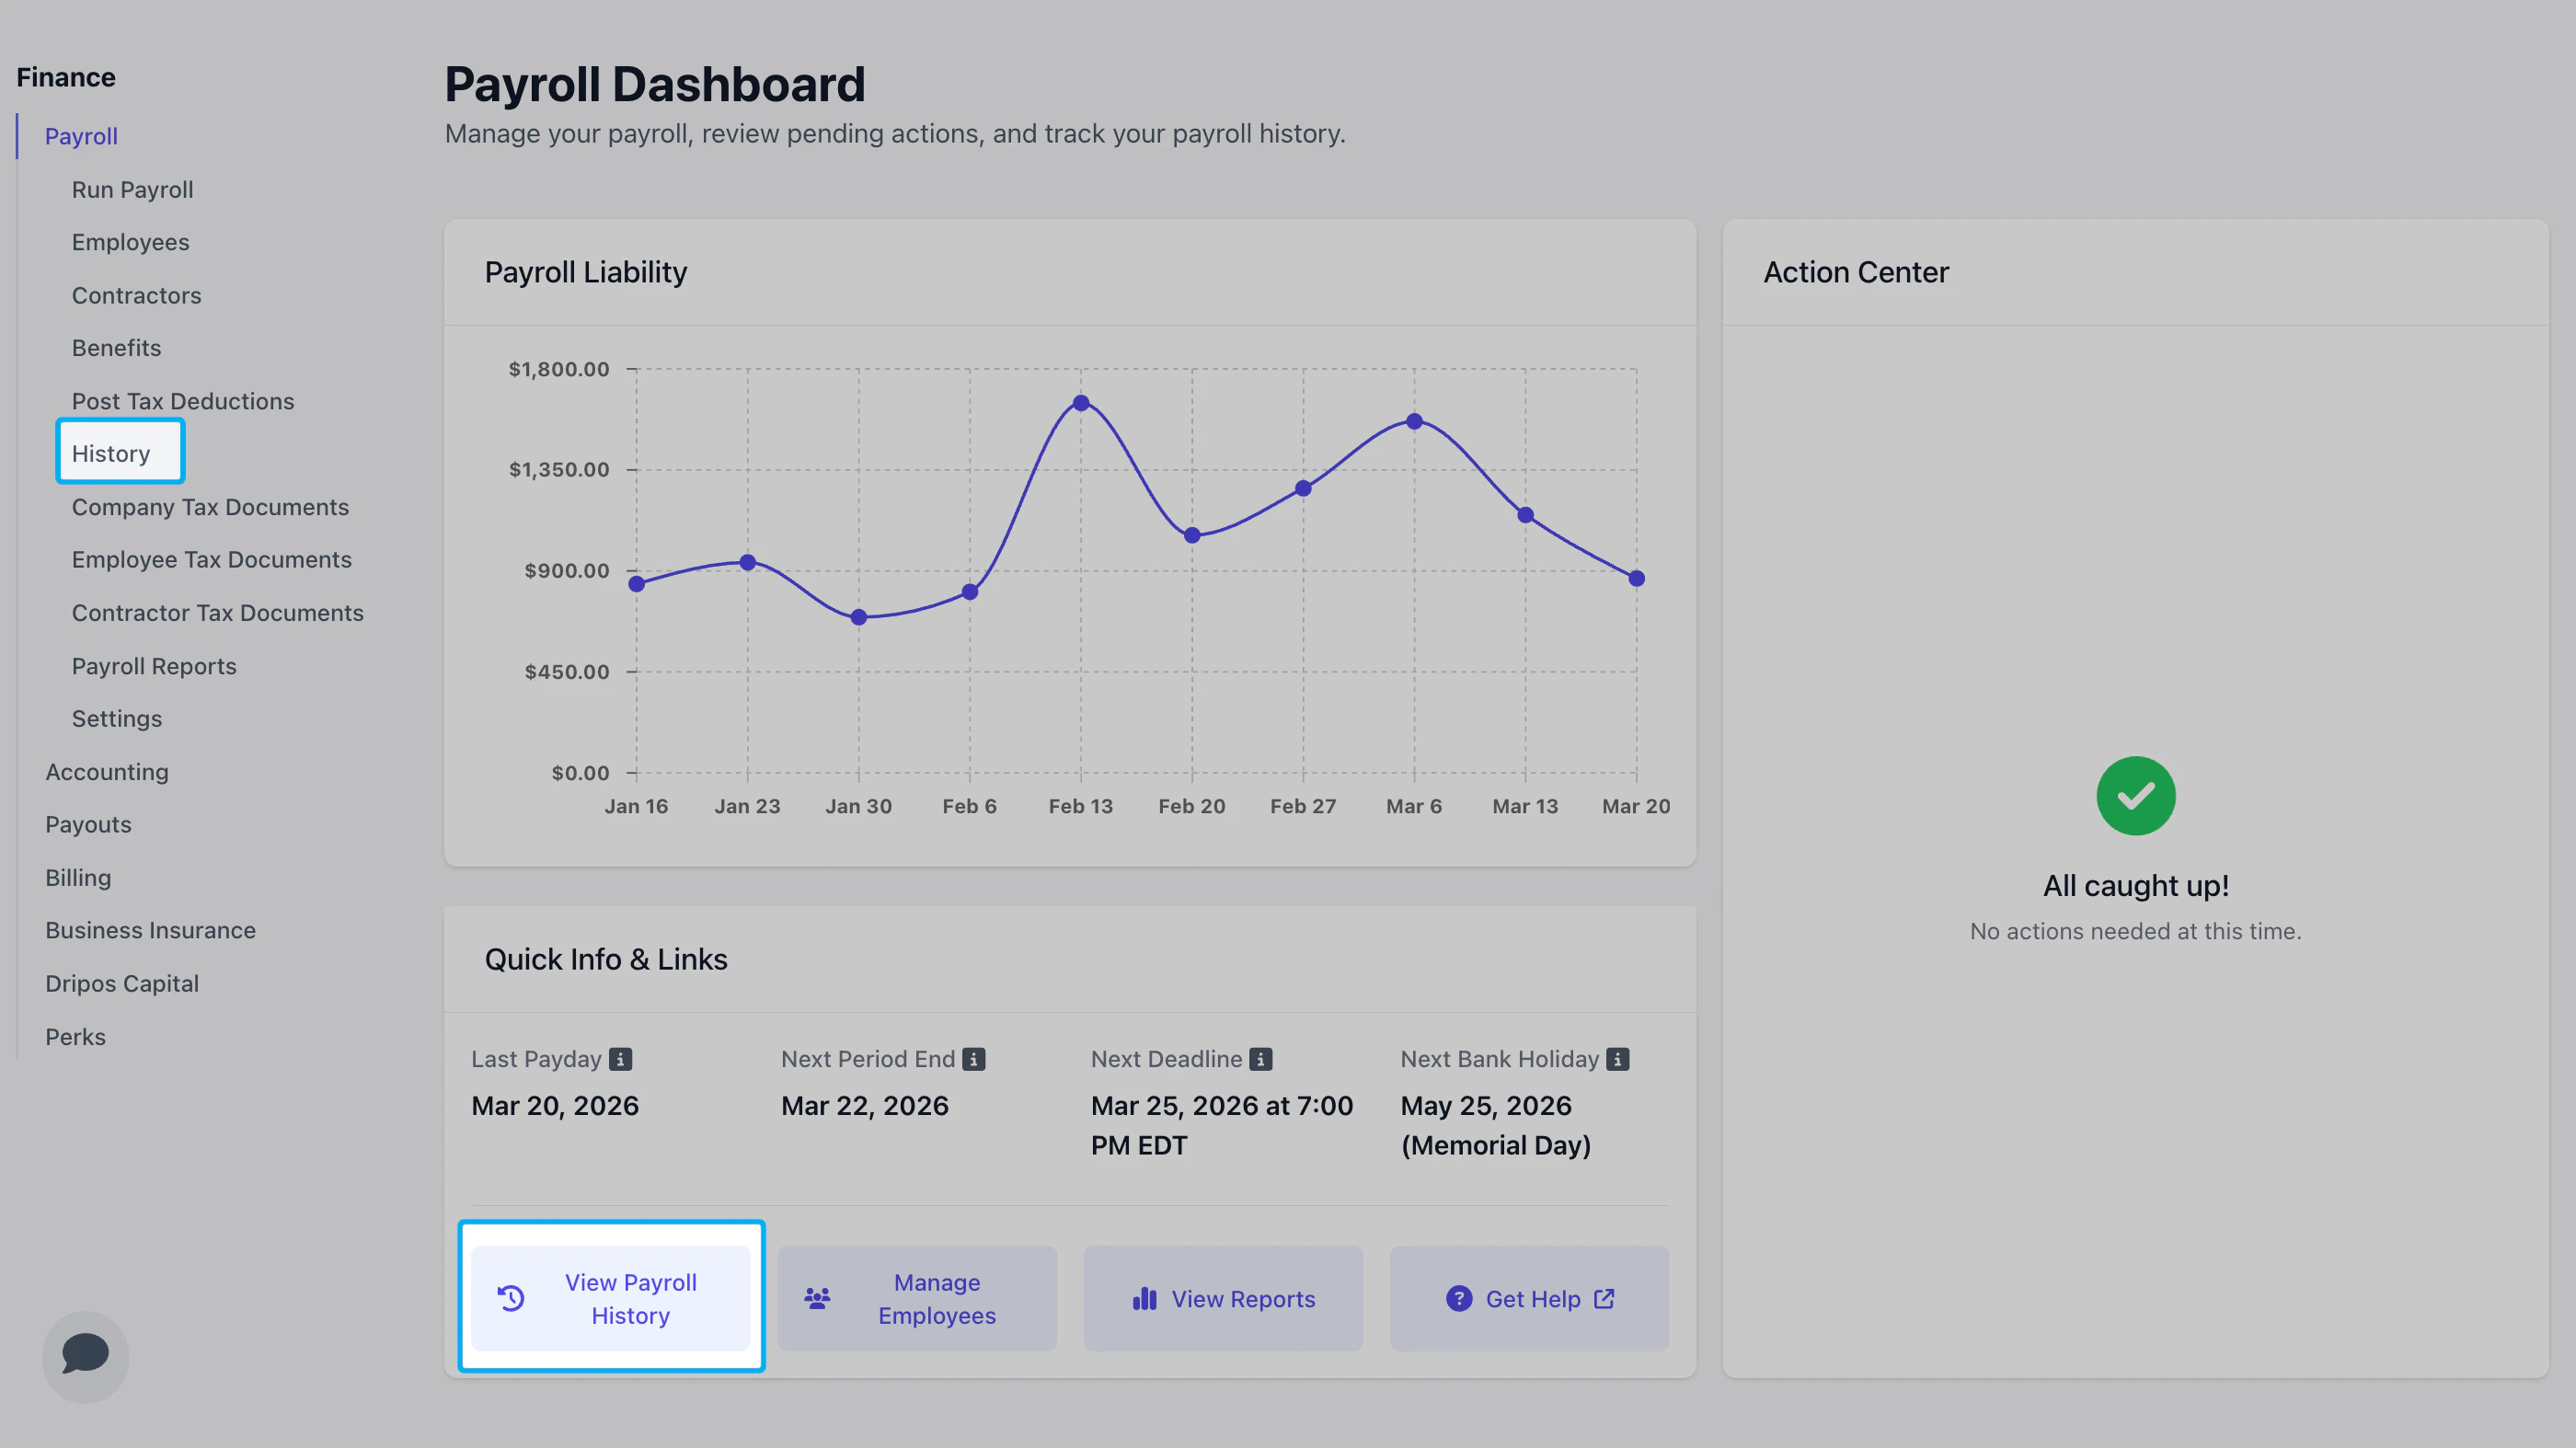
View Payroll Details
View Payroll Details
Click View next to a payroll to see additional details.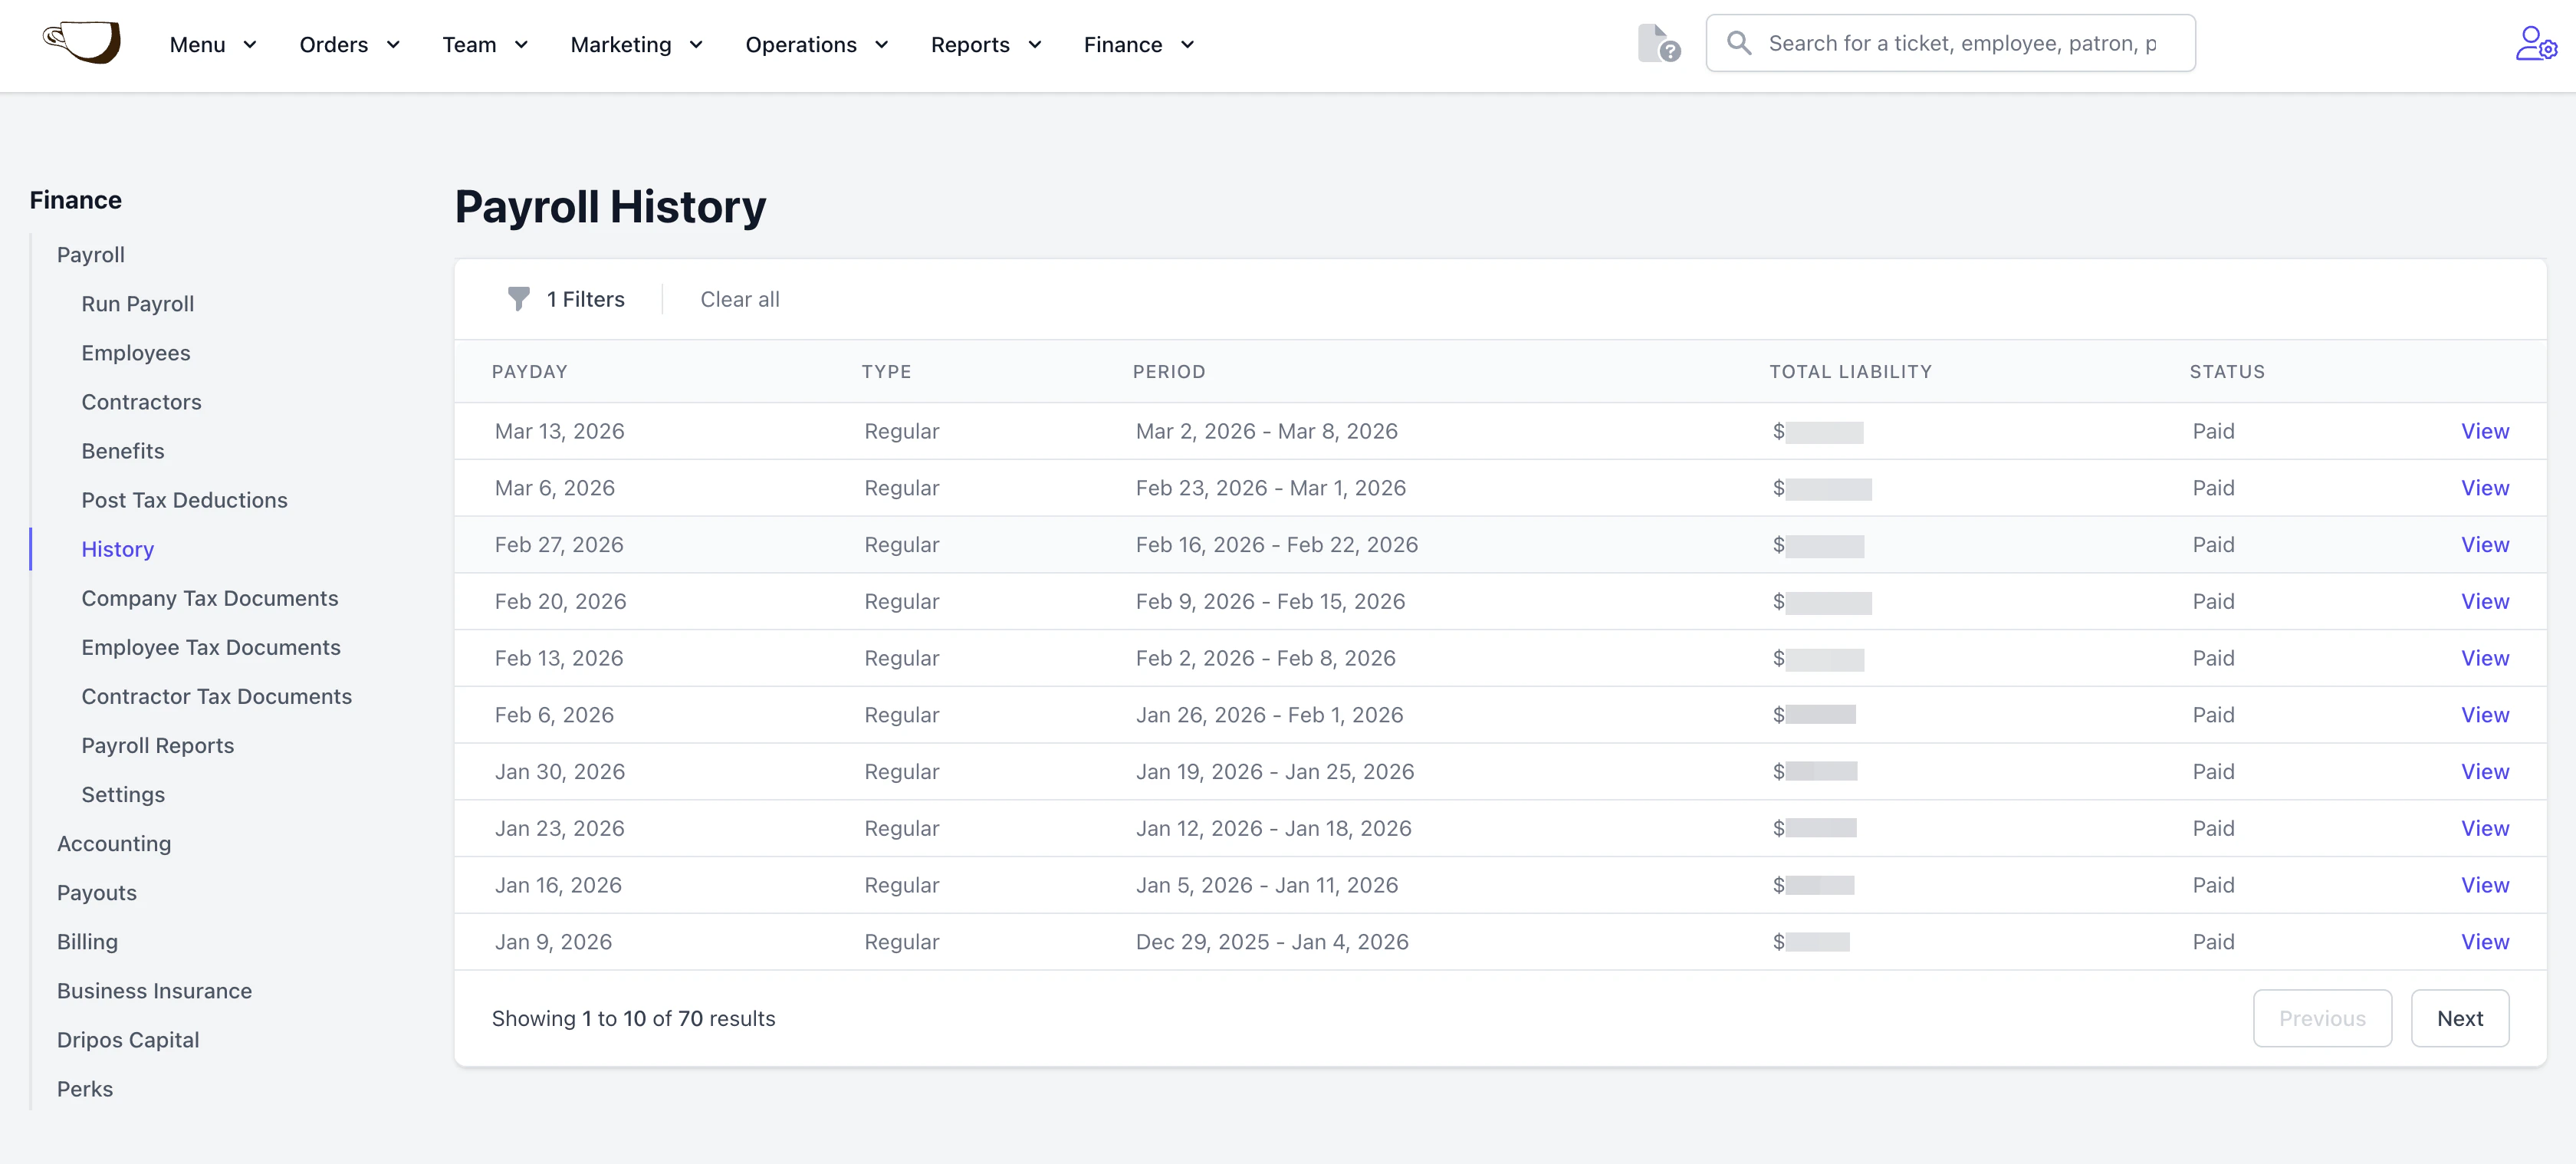
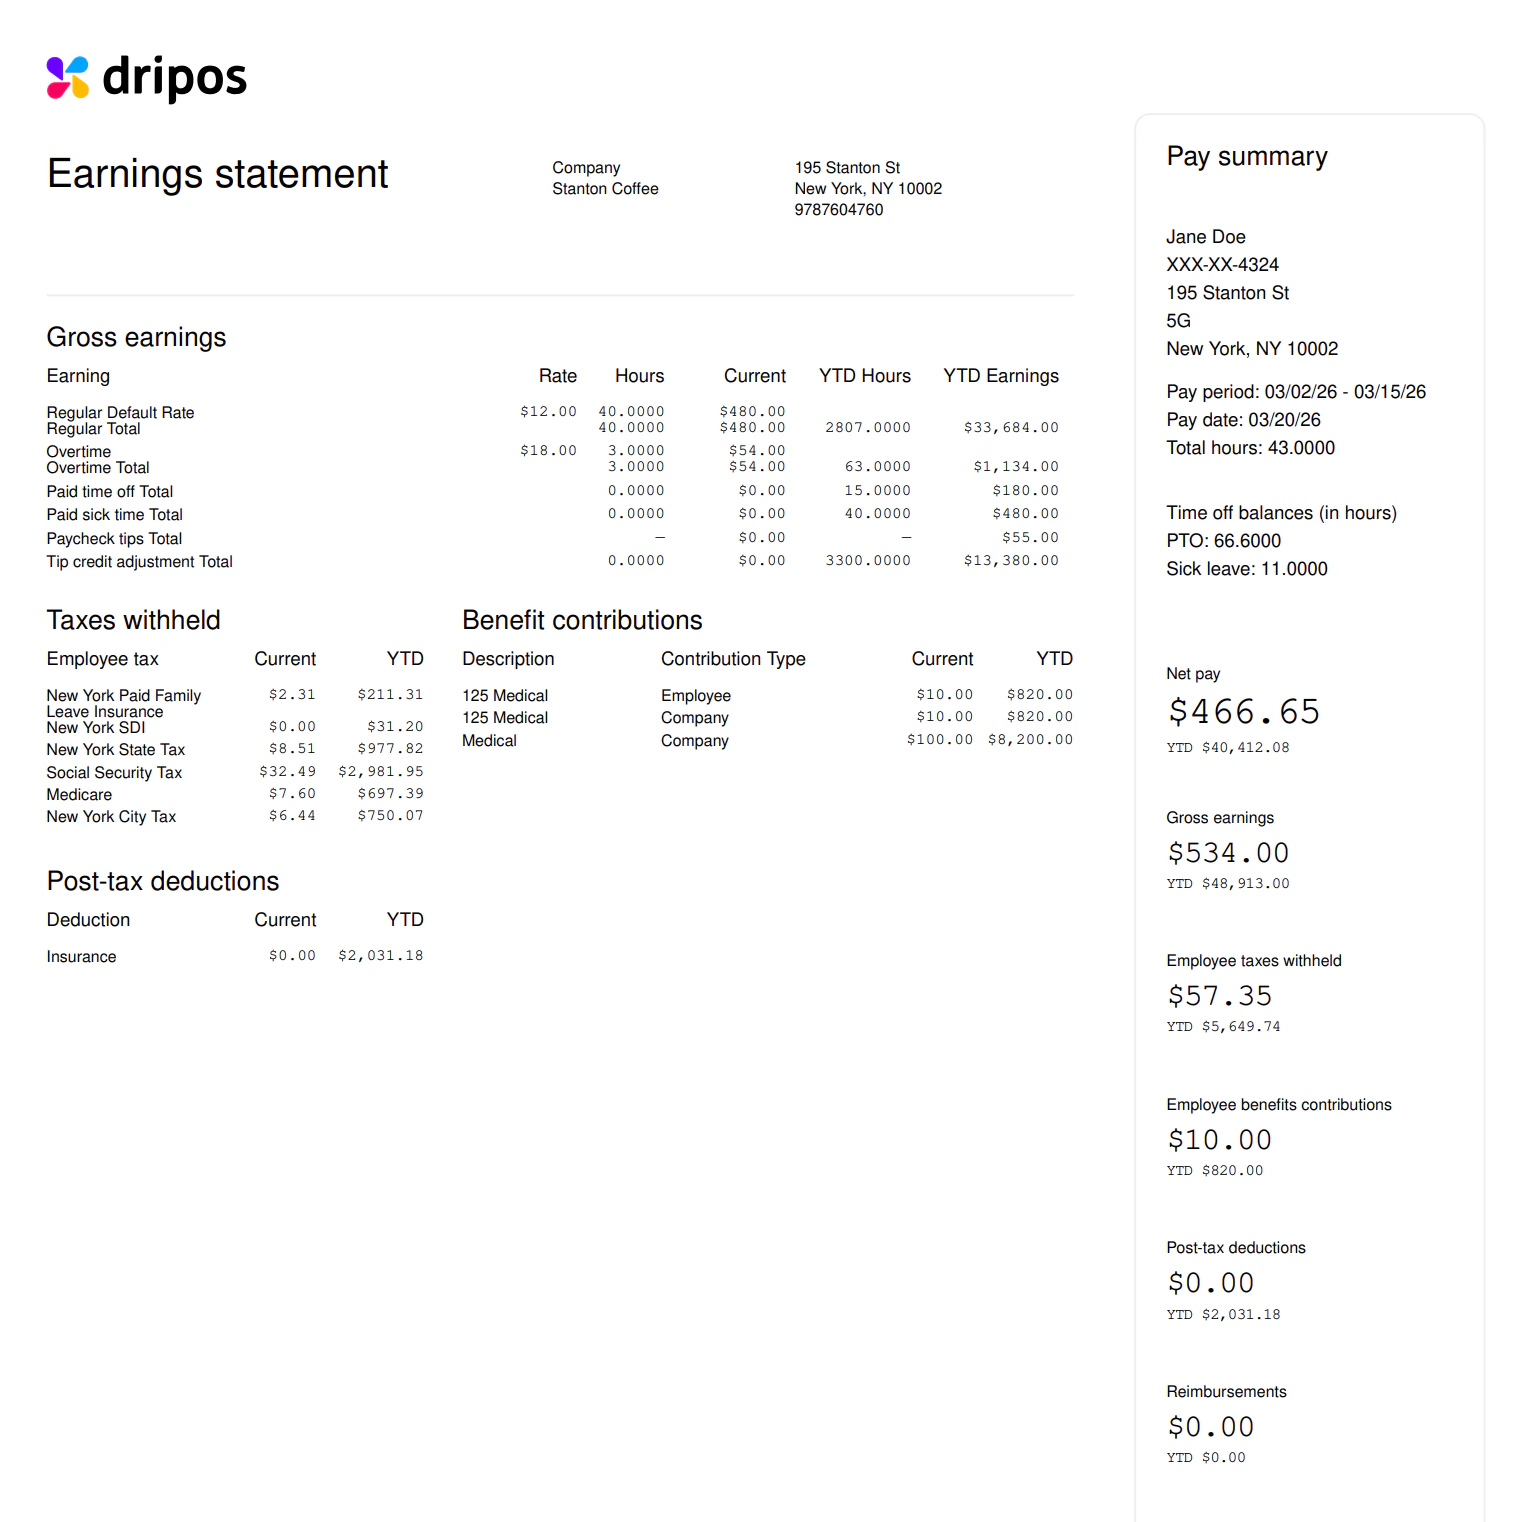
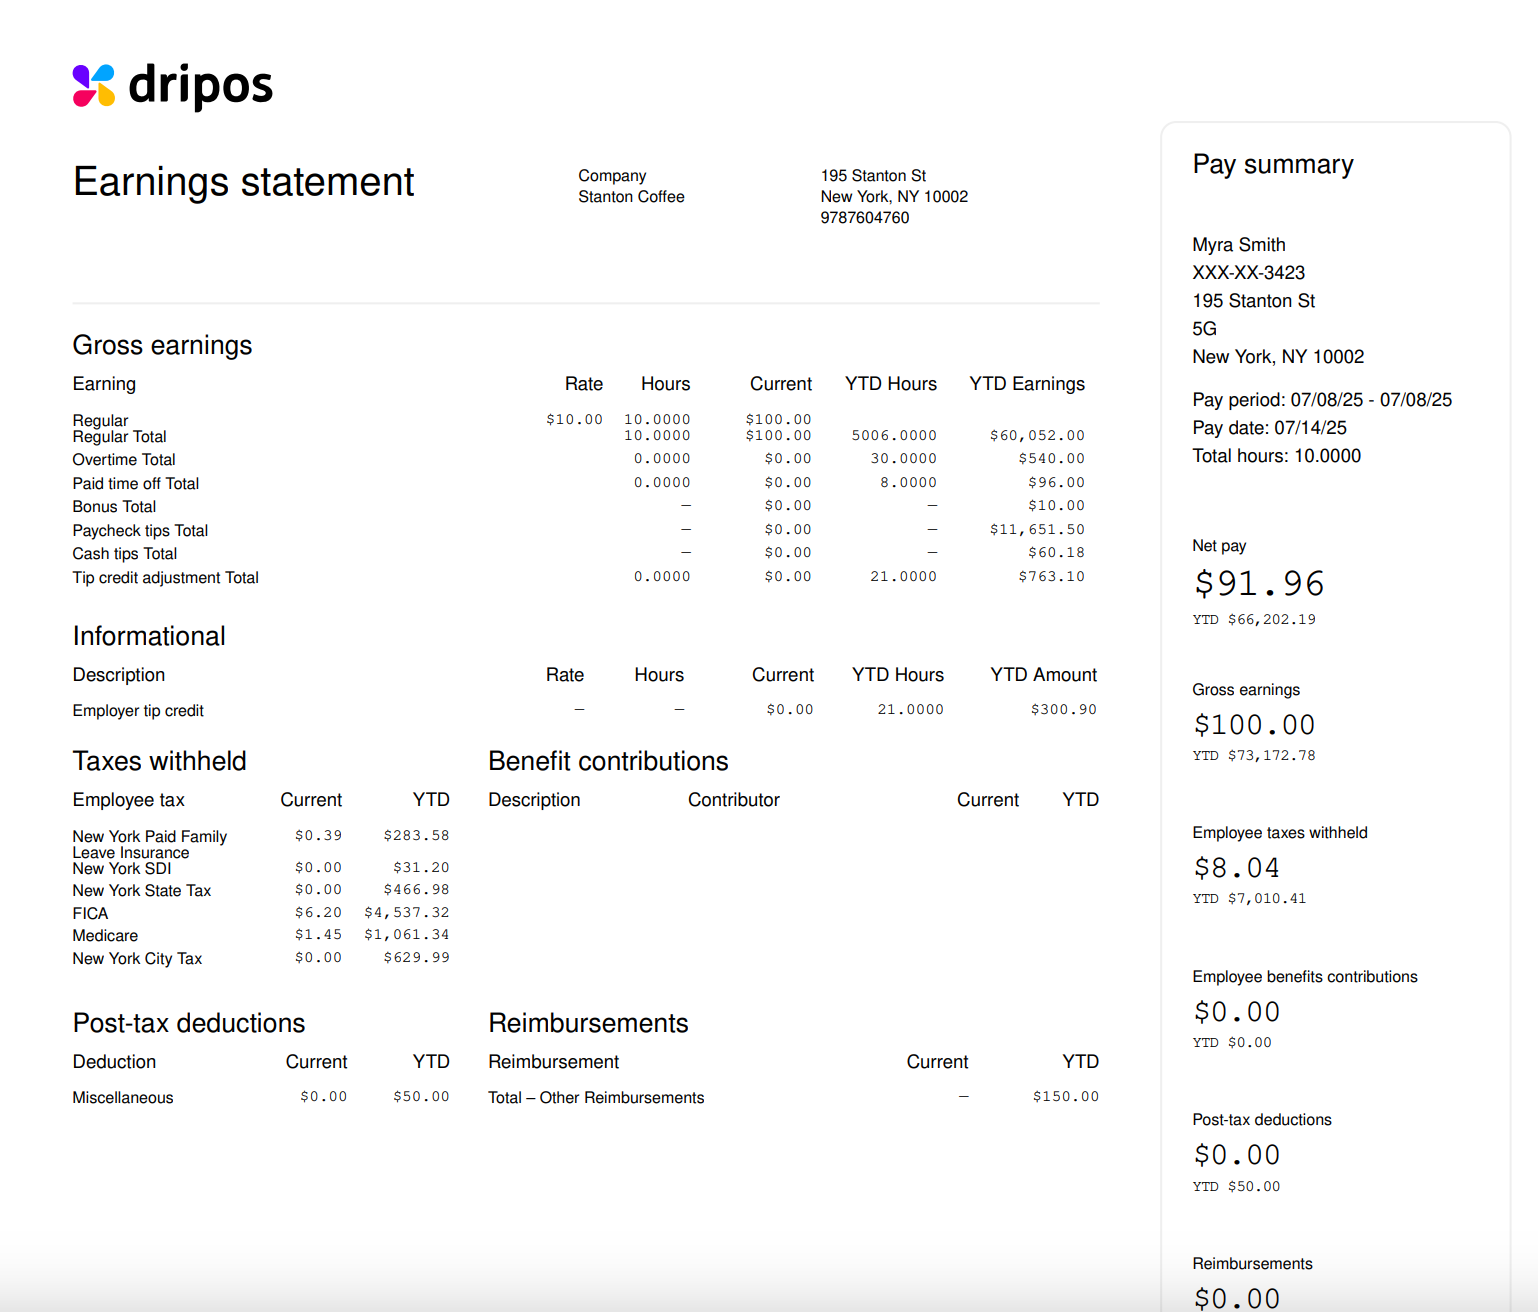
View Employee Paystubs
View Employee Paystubs
To view an employee’s paystub, click the download button.