

These instructions apply to Company Menu. If your locations maintain separate menus, use Create and Manage Menu Categories.
Create a category
1
Open Categories
On the Web Dashboard, go to Menu > Categories.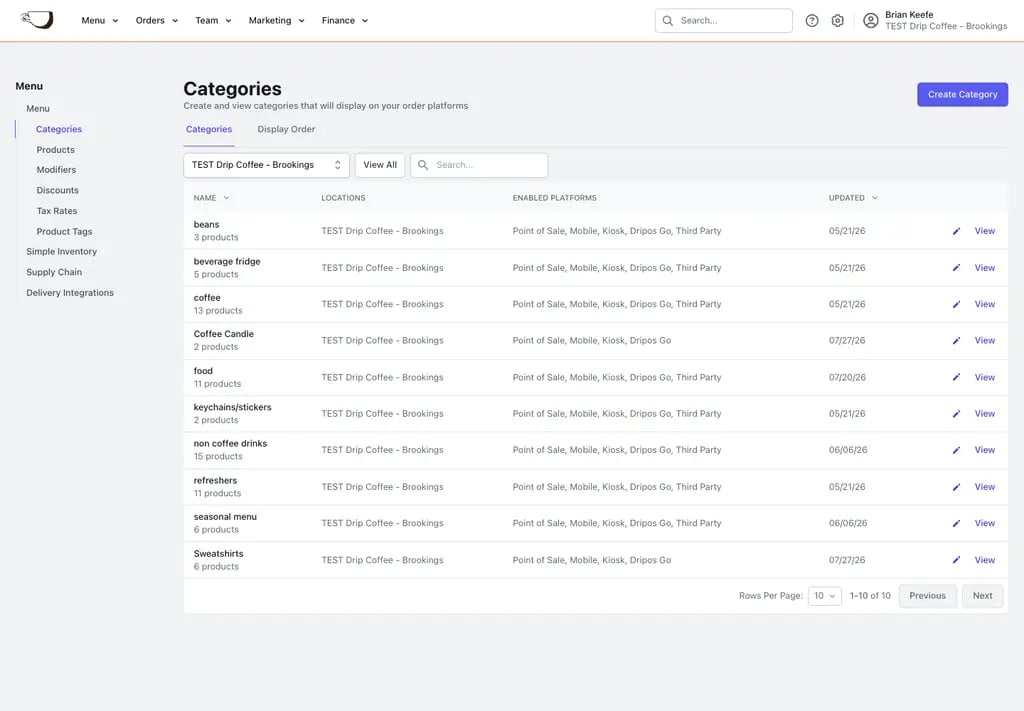
2
Create the category
Click Create Category and complete the category information.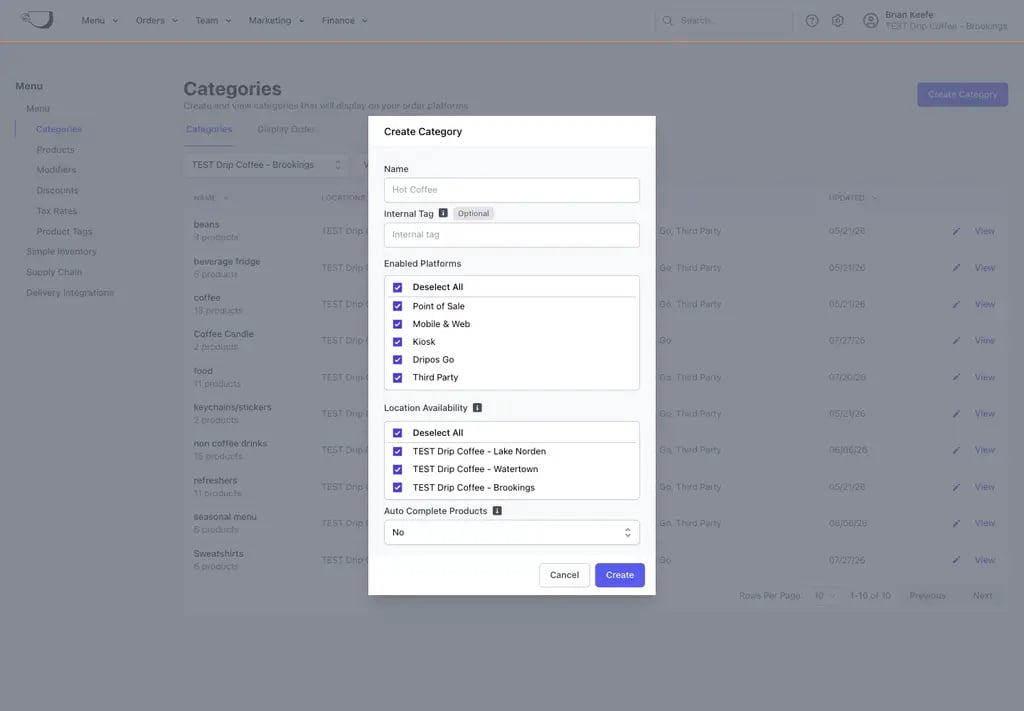
- Name: The customer-facing category name.
- Internal Tag: An internal label that helps your team tell similarly named categories apart. Customers do not see it.
- Enabled Platforms: Choose whether the category appears on Point of Sale, Mobile & Web, Kiosk, Dripos Go, and Third Party ordering platforms.
- Location Availability: Select every store that should offer this category.
- Auto Complete Products: When enabled, products in this category are automatically completed after purchase and do not remain on the ticket screen.
3
Create
Click Create. The category is added to the shared Company Menu and appears only at its selected locations.
Manage category information
Open Menu > Categories, then click View on a category. The Information section shows the customer-facing name, Internal Tag, Scheduled Category, Location Availability, and Auto Complete Products setting. Click Edit Information to update them.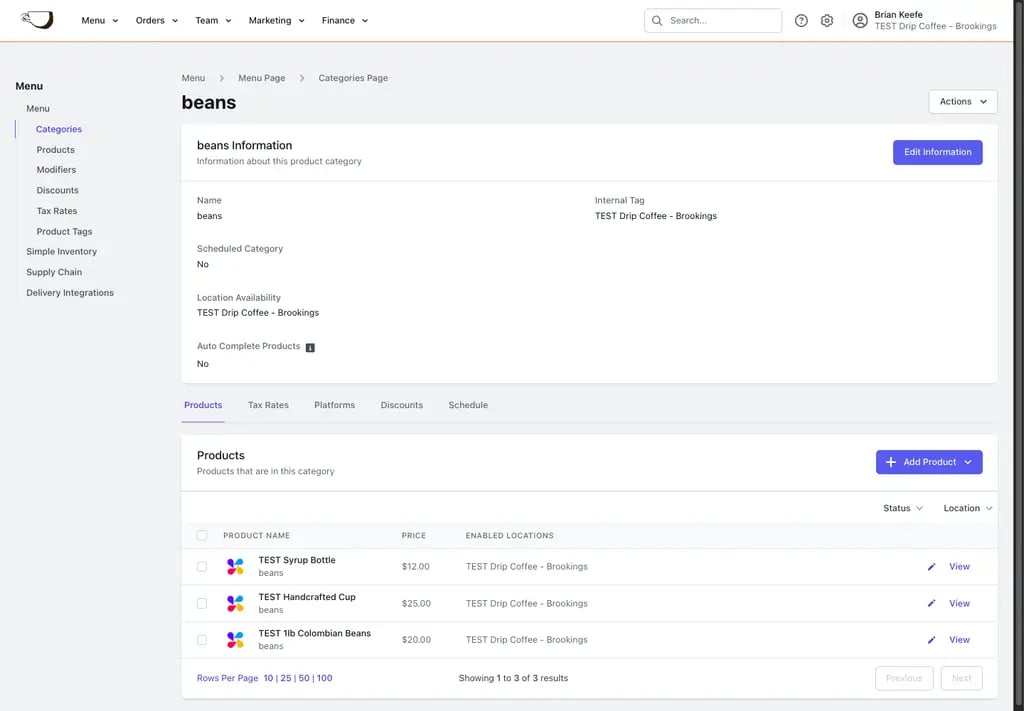
Manage platforms
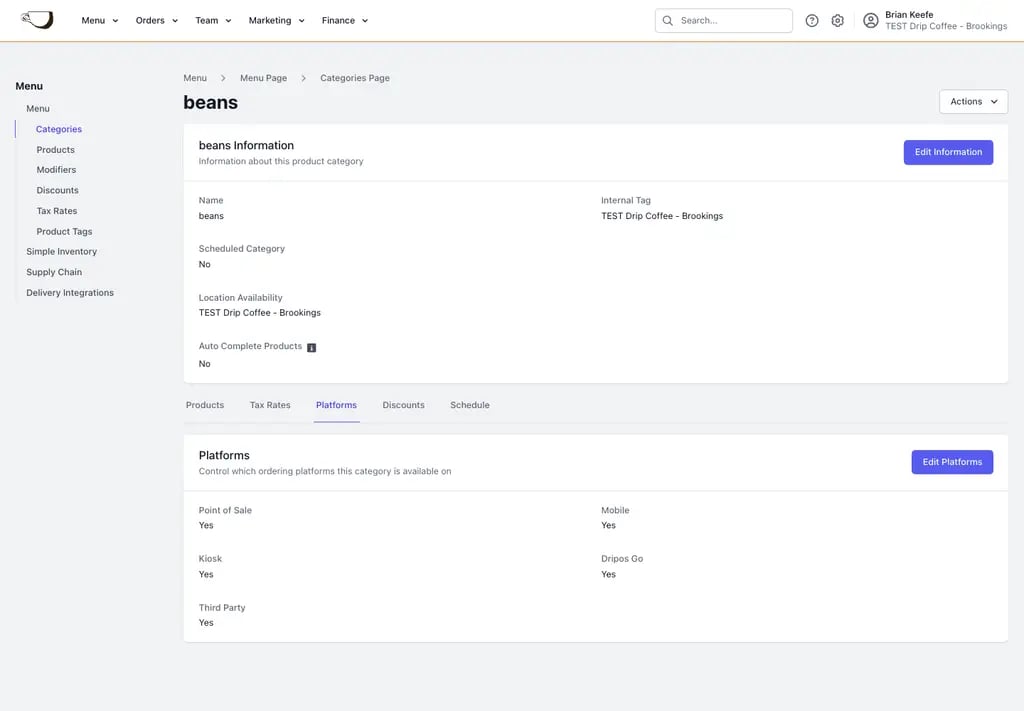
Open the Platforms tab to control where customers can order products in this category.- Point of Sale
- Mobile
- Kiosk
- Dripos Go
- Third Party
Add products
Open the category’s Products tab and click Add Product.- Create Product
Manage tax rates and discounts
Use the Tax Rates tab to attach or remove category tax rates. A category tax rate applies to products in that category unless a product’s tax settings override it. Use the Discounts tab to review discounts attached to the category. Discount availability must be compatible with the category and product locations.Create a category schedule
Open the Schedule tab to choose when the category is available on its enabled ordering platforms. If there is no schedule, the category remains available during store hours. If a schedule exists, the category appears only during the configured date ranges or daily recurrence periods. Click Add Schedule to create one.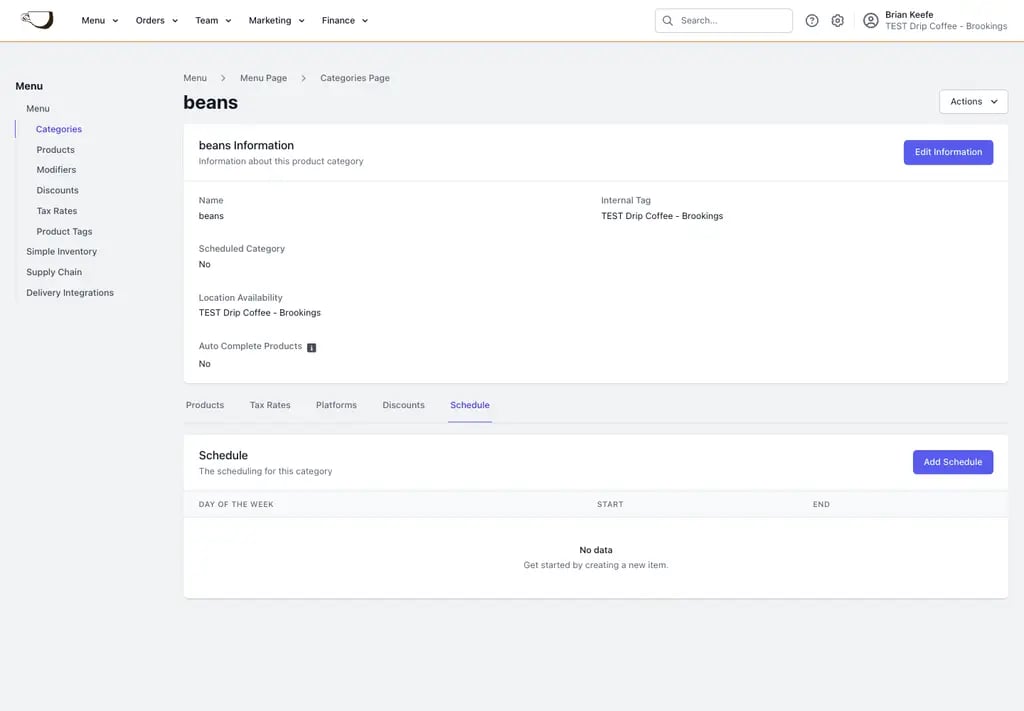
Duplicate a category
- Open the category.
- Click Actions > Duplicate Category.
- Confirm the duplicate.