

These instructions apply to Company Menu. If your locations maintain separate menus, use the original Modifier Basics guide.
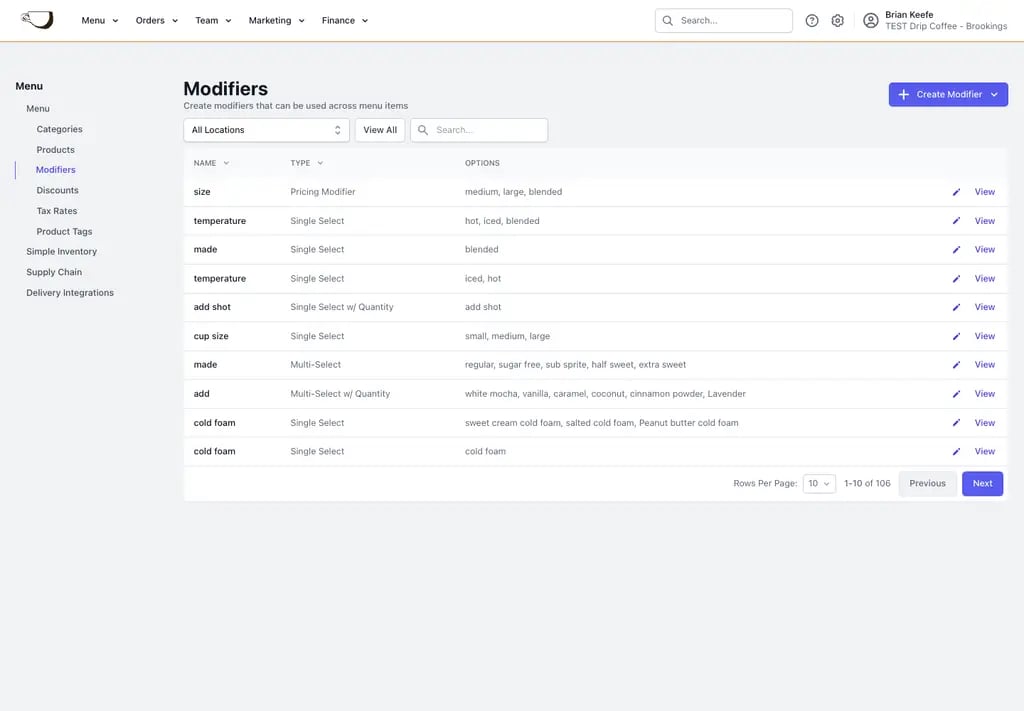
Choose the right modifier
Ask two questions before creating a modifier:- Does the selection change the product’s base price, or add to it?
- Use a Pricing modifier when size or type changes the base price.
- Use an Add-on modifier for additions, substitutions, or customizations.
- Is the modifier shared or product-specific?
- Use a Global modifier when several Company Menu products use the same options.
- Use a Custom modifier when the options belong to one product only.
How Company Menu modifiers differ
Global modifiers are shared across the Company Menu. You do not need to sync separate copies between locations. Editing a Global modifier updates every attached product. Since those products may be available at several stores, review the attached products before changing option names, prices, defaults, or availability. Custom modifiers belong to one product. The modifier is product-specific, but the product can still be shared across several locations.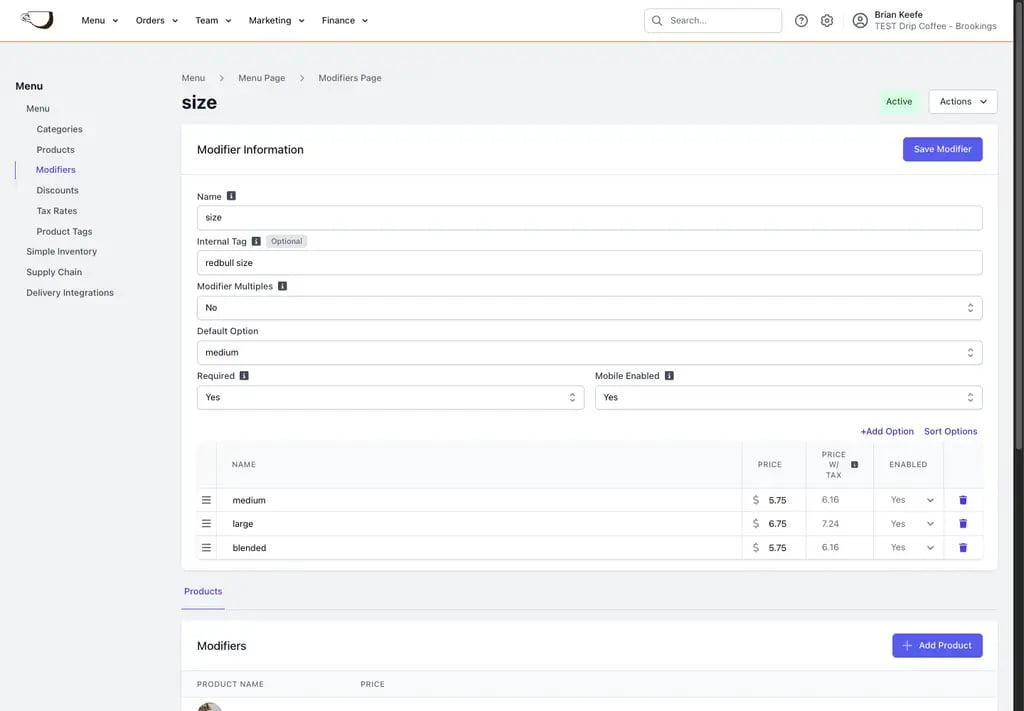
Create a Global Pricing modifier
1
Start the modifier
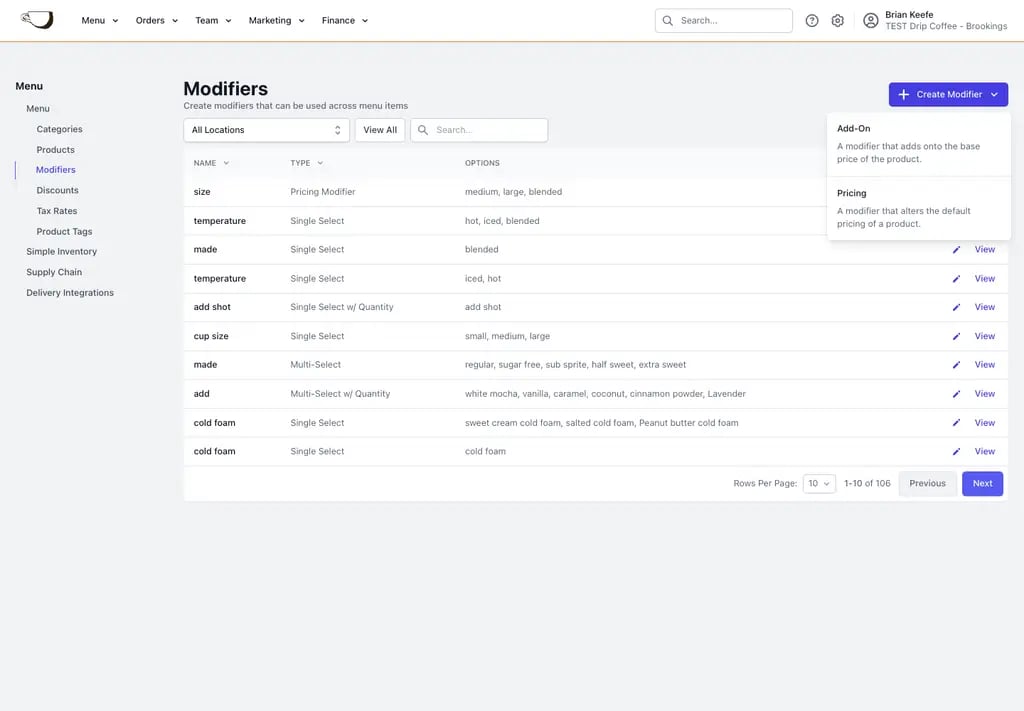
On the Web Dashboard, go to Menu > Modifiers > Create Modifier > Pricing.
2
Enter modifier details
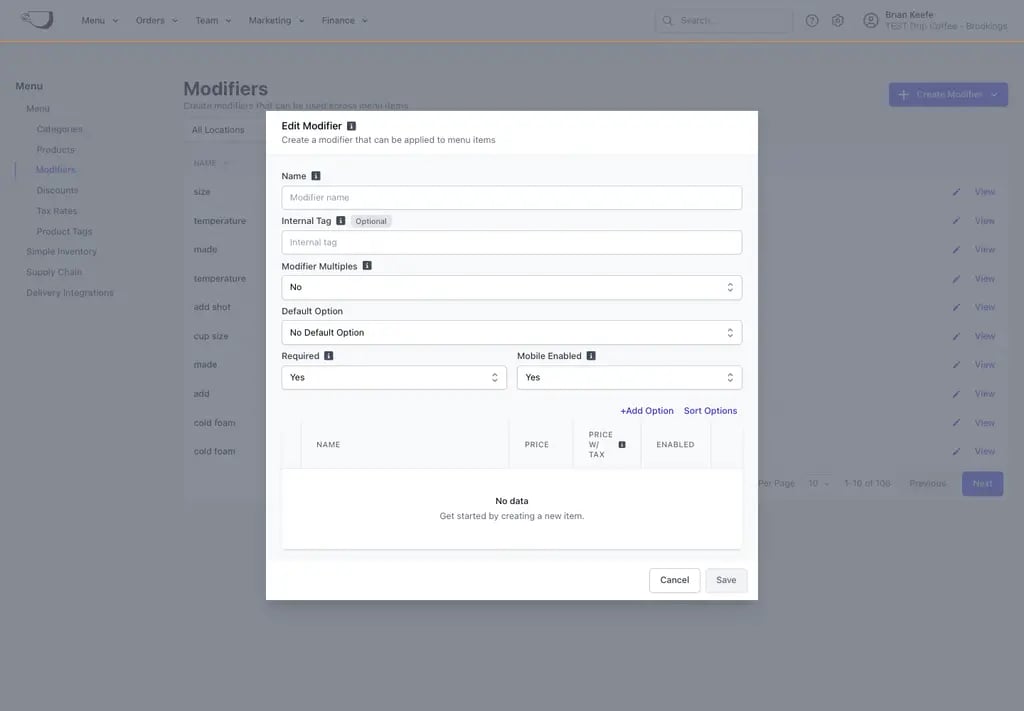
- Name: The customer-facing modifier name, such as Latte Sizes.
- Internal Tag: An internal label used to distinguish similarly named modifiers. Customers do not see it.
- Modifier Multiples: Allow option prices to scale with quantity when appropriate.
- Default Option: The option selected automatically when the product is added.
- Required: Require an option before checkout.
- Mobile Enabled: Show the modifier on supported mobile ordering platforms.
3
Add pricing options
Add each size or type with its name, price, and Enabled setting.
4
Save
Save the modifier, then attach products from its Products tab.
Create a Global Add-on modifier
1
Start the modifier
On the Web Dashboard, go to Menu > Modifiers > Create Modifier > Add-On.
2
Choose a modifier type
- Single Select: One option can be selected.
- Single Select w/ Quantity: One option can be selected with an adjustable quantity.
- Multi-Select: Several different options can be selected.
- Multi-Select w/ Quantity: Several options can be selected with quantity limits.
- Multi-Select w/ Fixed Price: Several options can be selected for one fixed modifier price.
3
Configure behavior
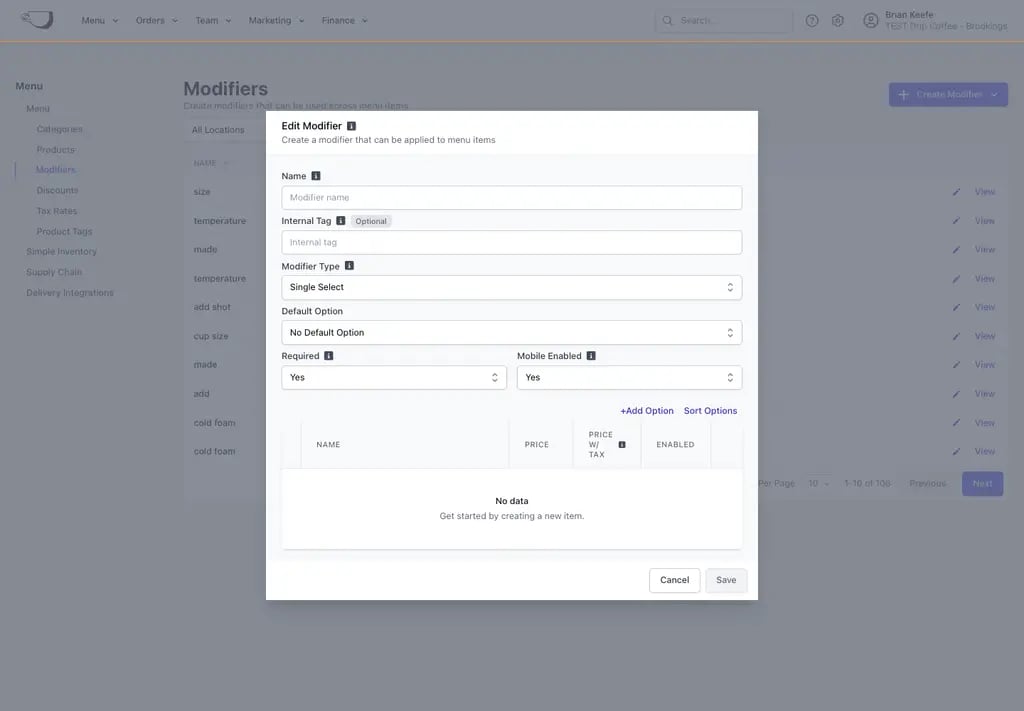
4
Add options
Add each option with its Name, Price, and Enabled setting.
5
Save
Save the modifier, then attach products from its Products tab.
Attach a Global modifier to products
- From the modifier
- From a product
Open Menu > Modifiers > View modifier > Products > Add Product.Select the Company Menu products that should use the modifier and click Add.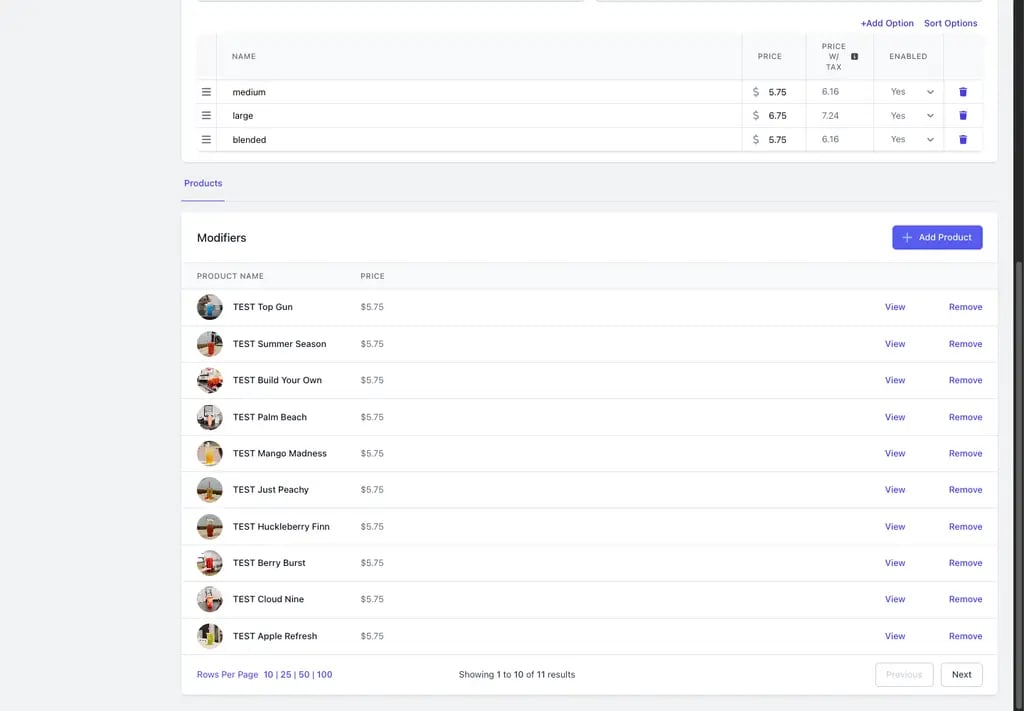
Reorder product modifiers
Open the product’s Modifiers tab and drag the modifier handle to change the checkout order. The order is saved to the shared product.Create a Custom modifier
- Open Menu > Products > View product.
- Open the Modifiers tab.
- Click Add Modifier > Custom.
- Configure the modifier type, behavior, and options.
- Save.