Add Printer Rules
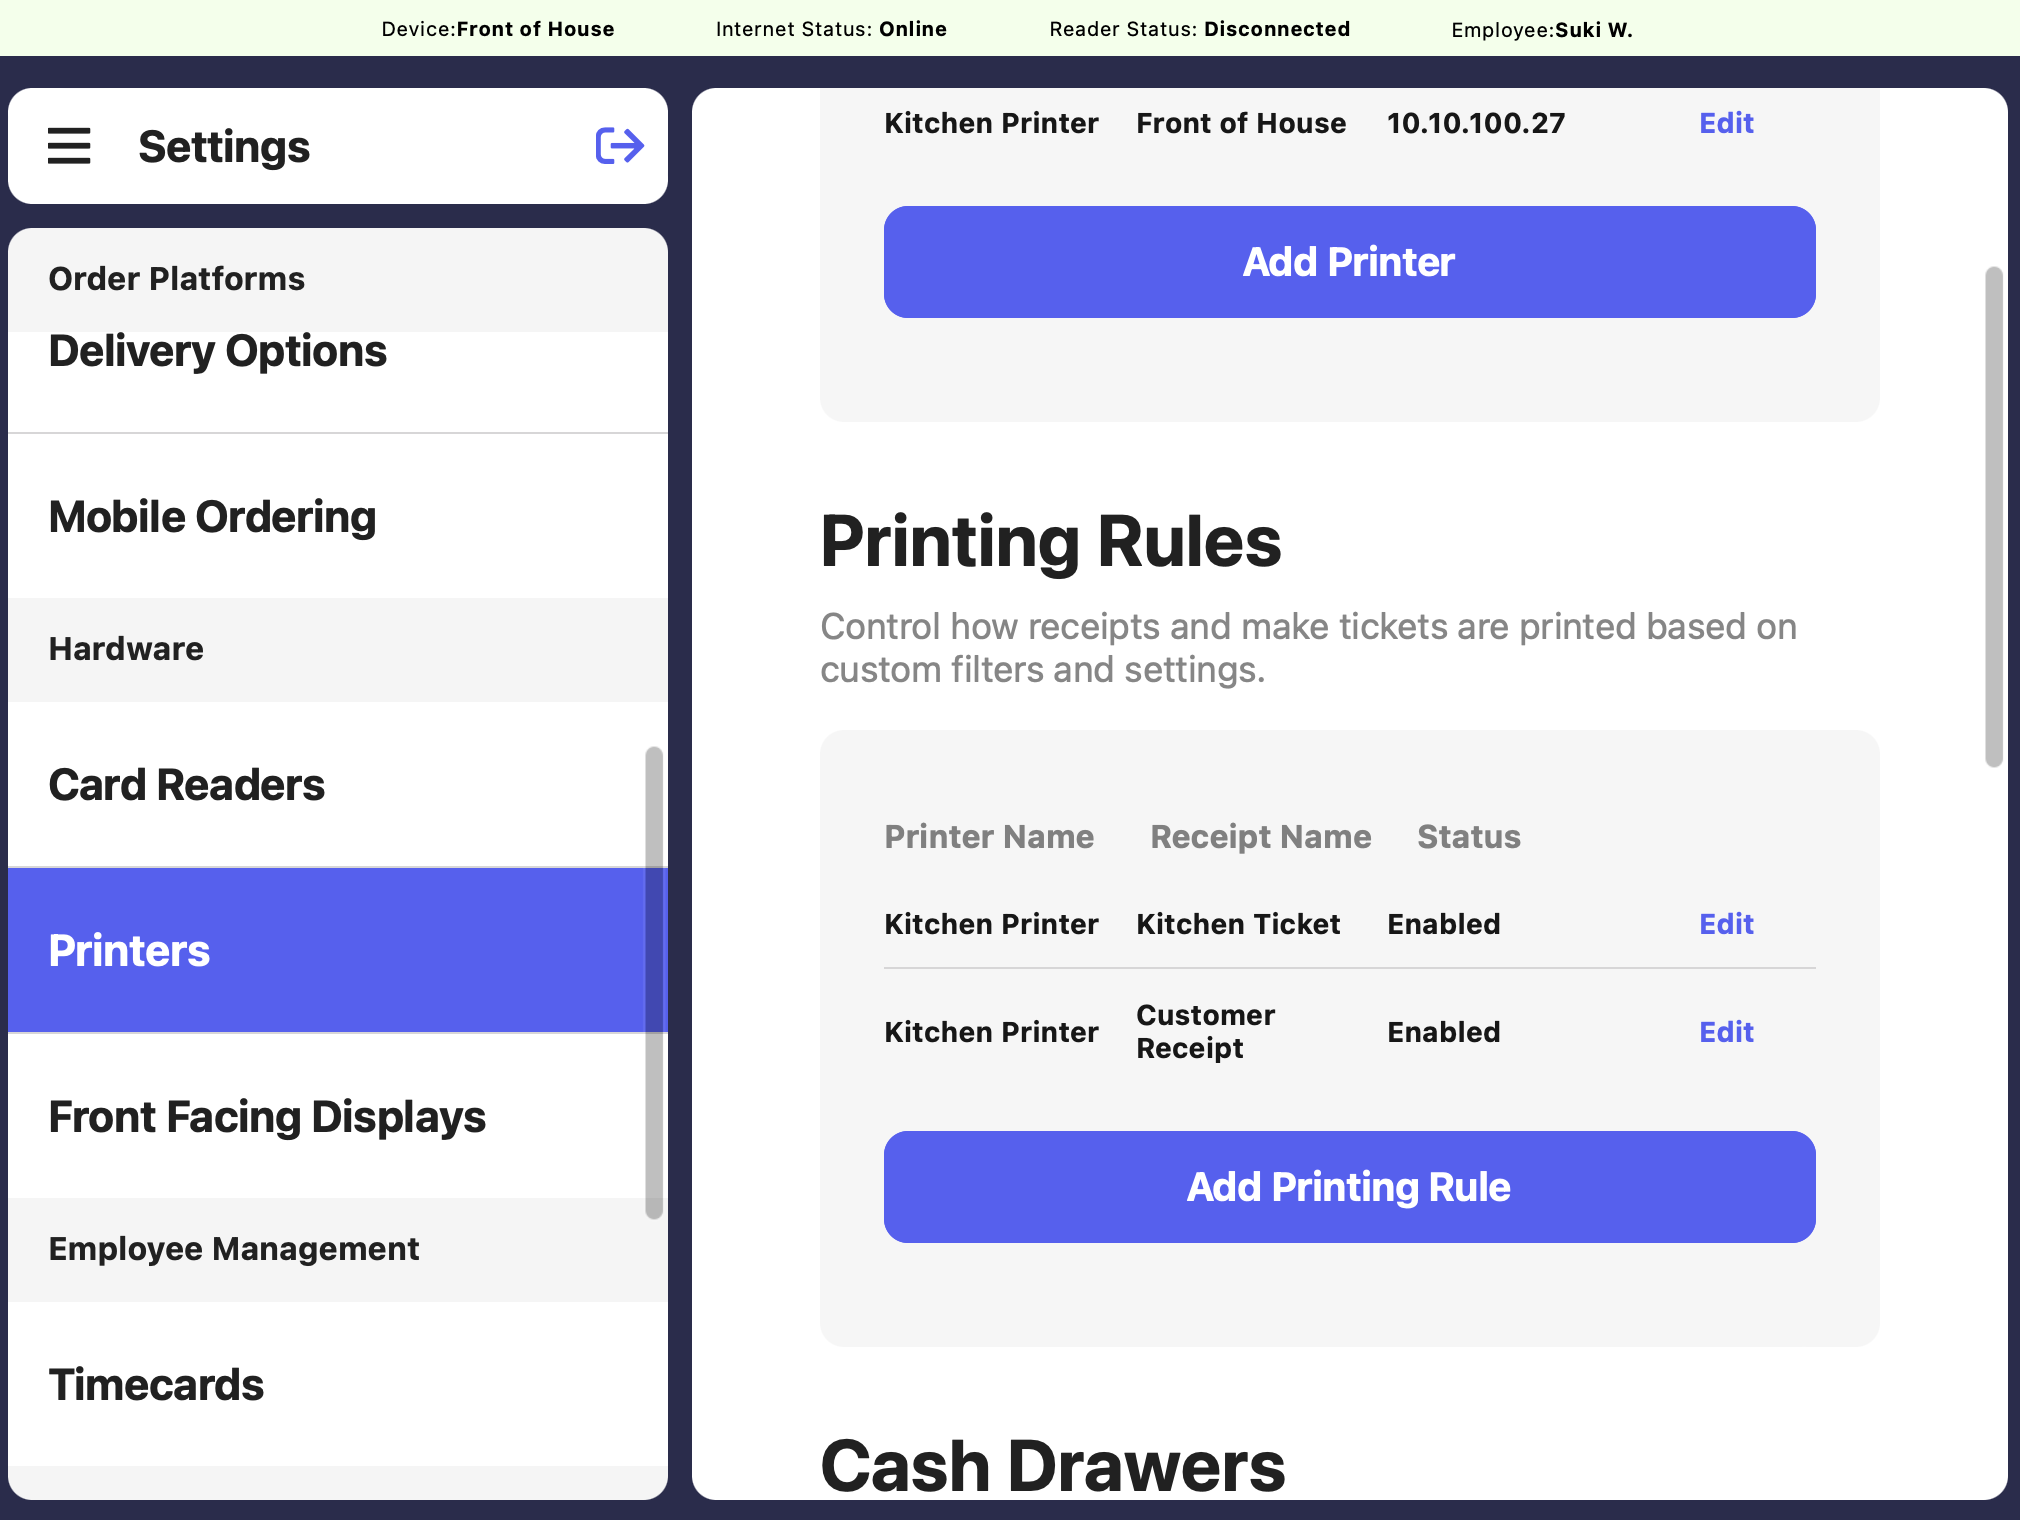
Complete the following fields: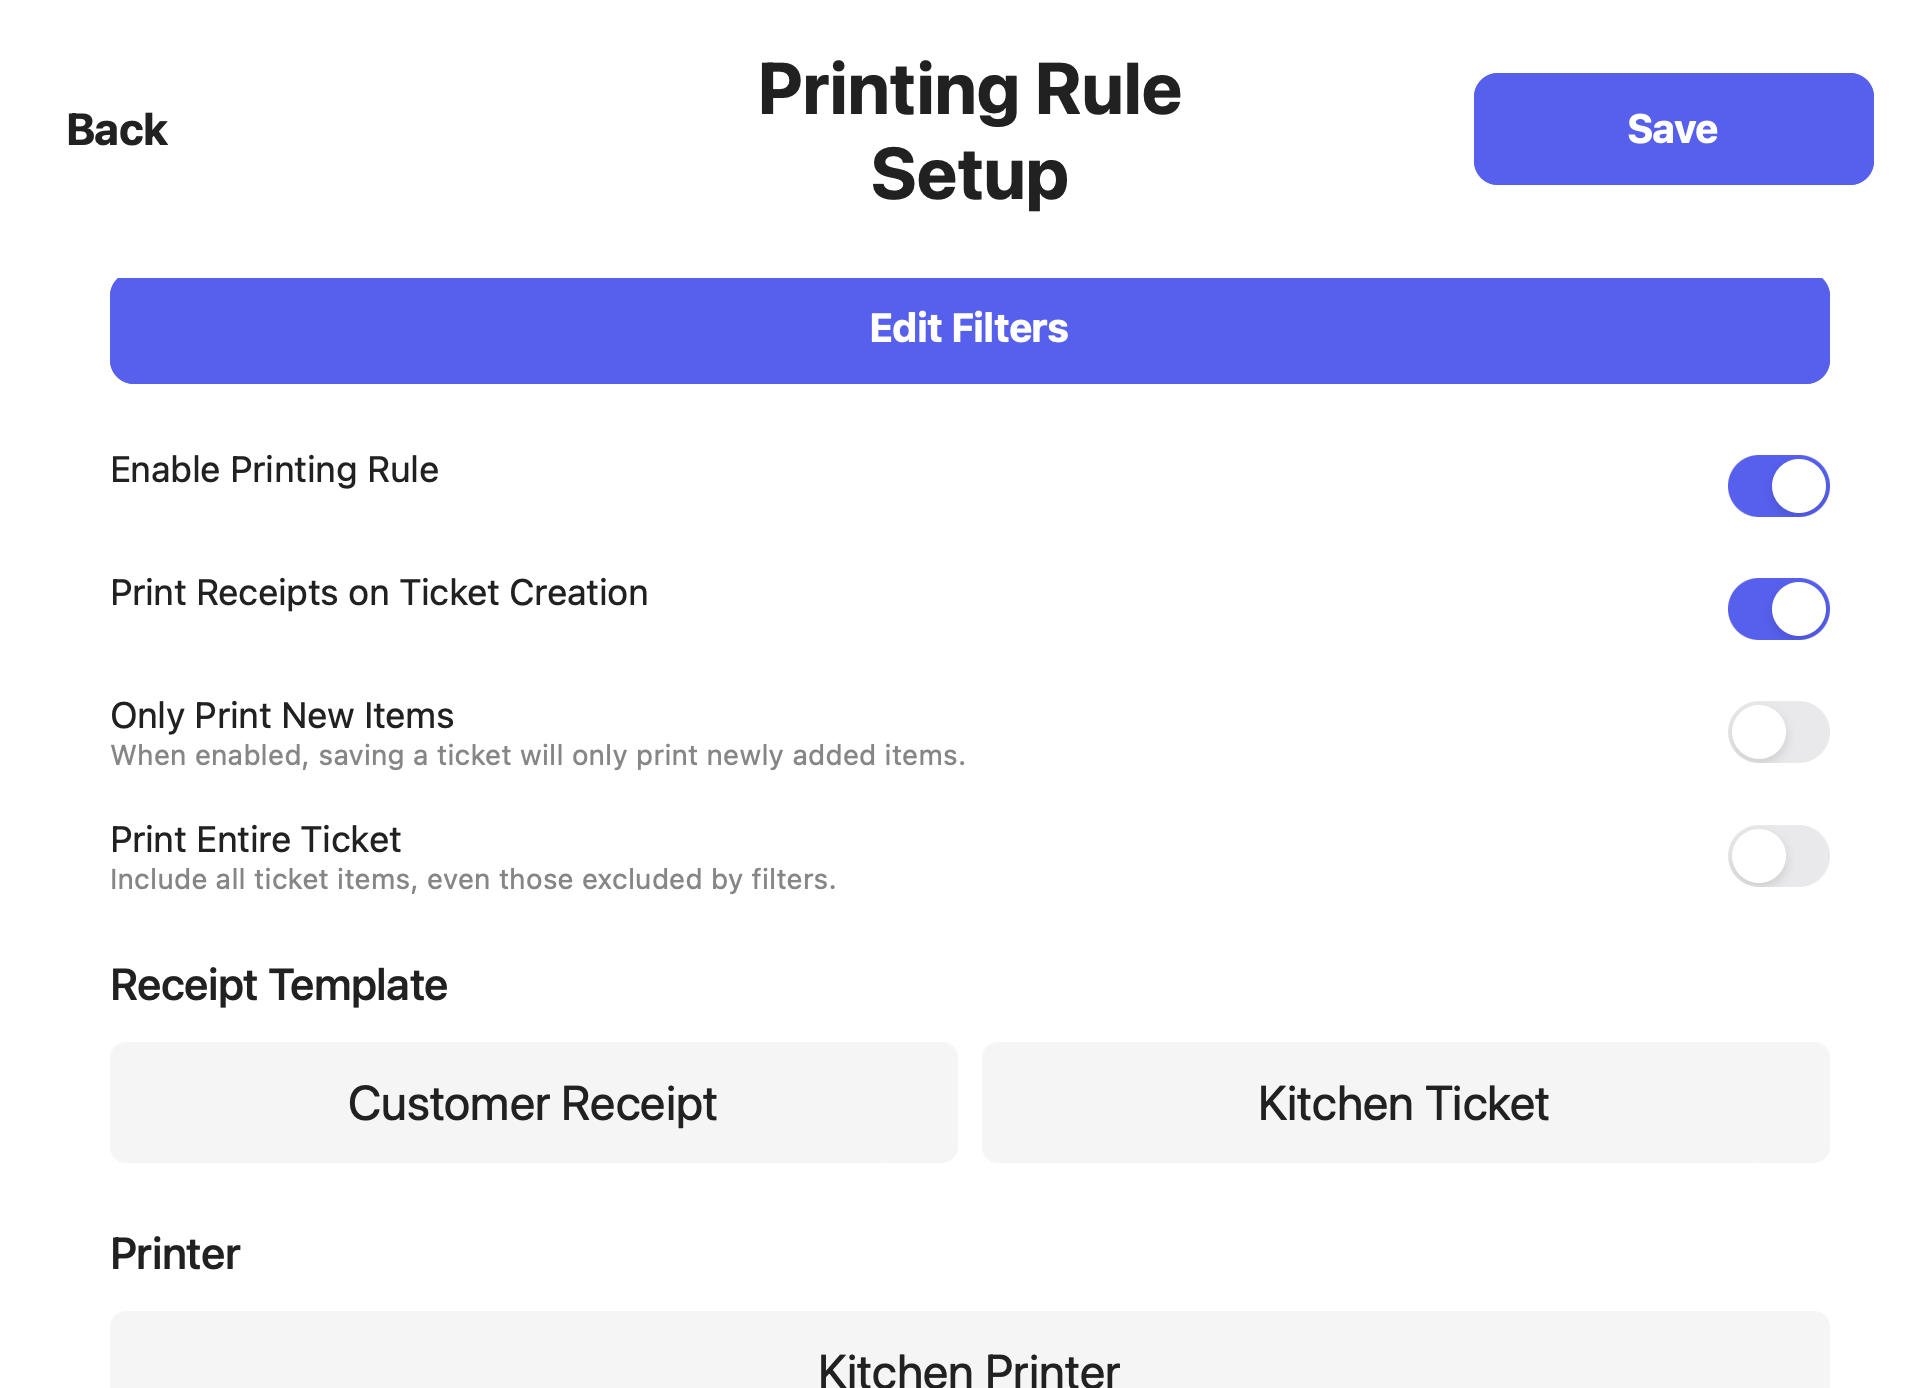
Enable Printing Rule
If toggled on, this template is in use
Print Receipts on Ticket Creation
If toggled on, this ticket will print automatically when checkout is complete
Only Print New Items
If toggled on, if a product has already been printed once it will not print again should new items be added to the order or a saved ticket is used.
Print Entire Ticket
If enabled, the entire order will print if one of its items meets the filter requires (learn more on filtering in the next section)
Filter Printer Rules
Customize your printer routes to only print specific ticket types, categories, products, or orders from specific devices.
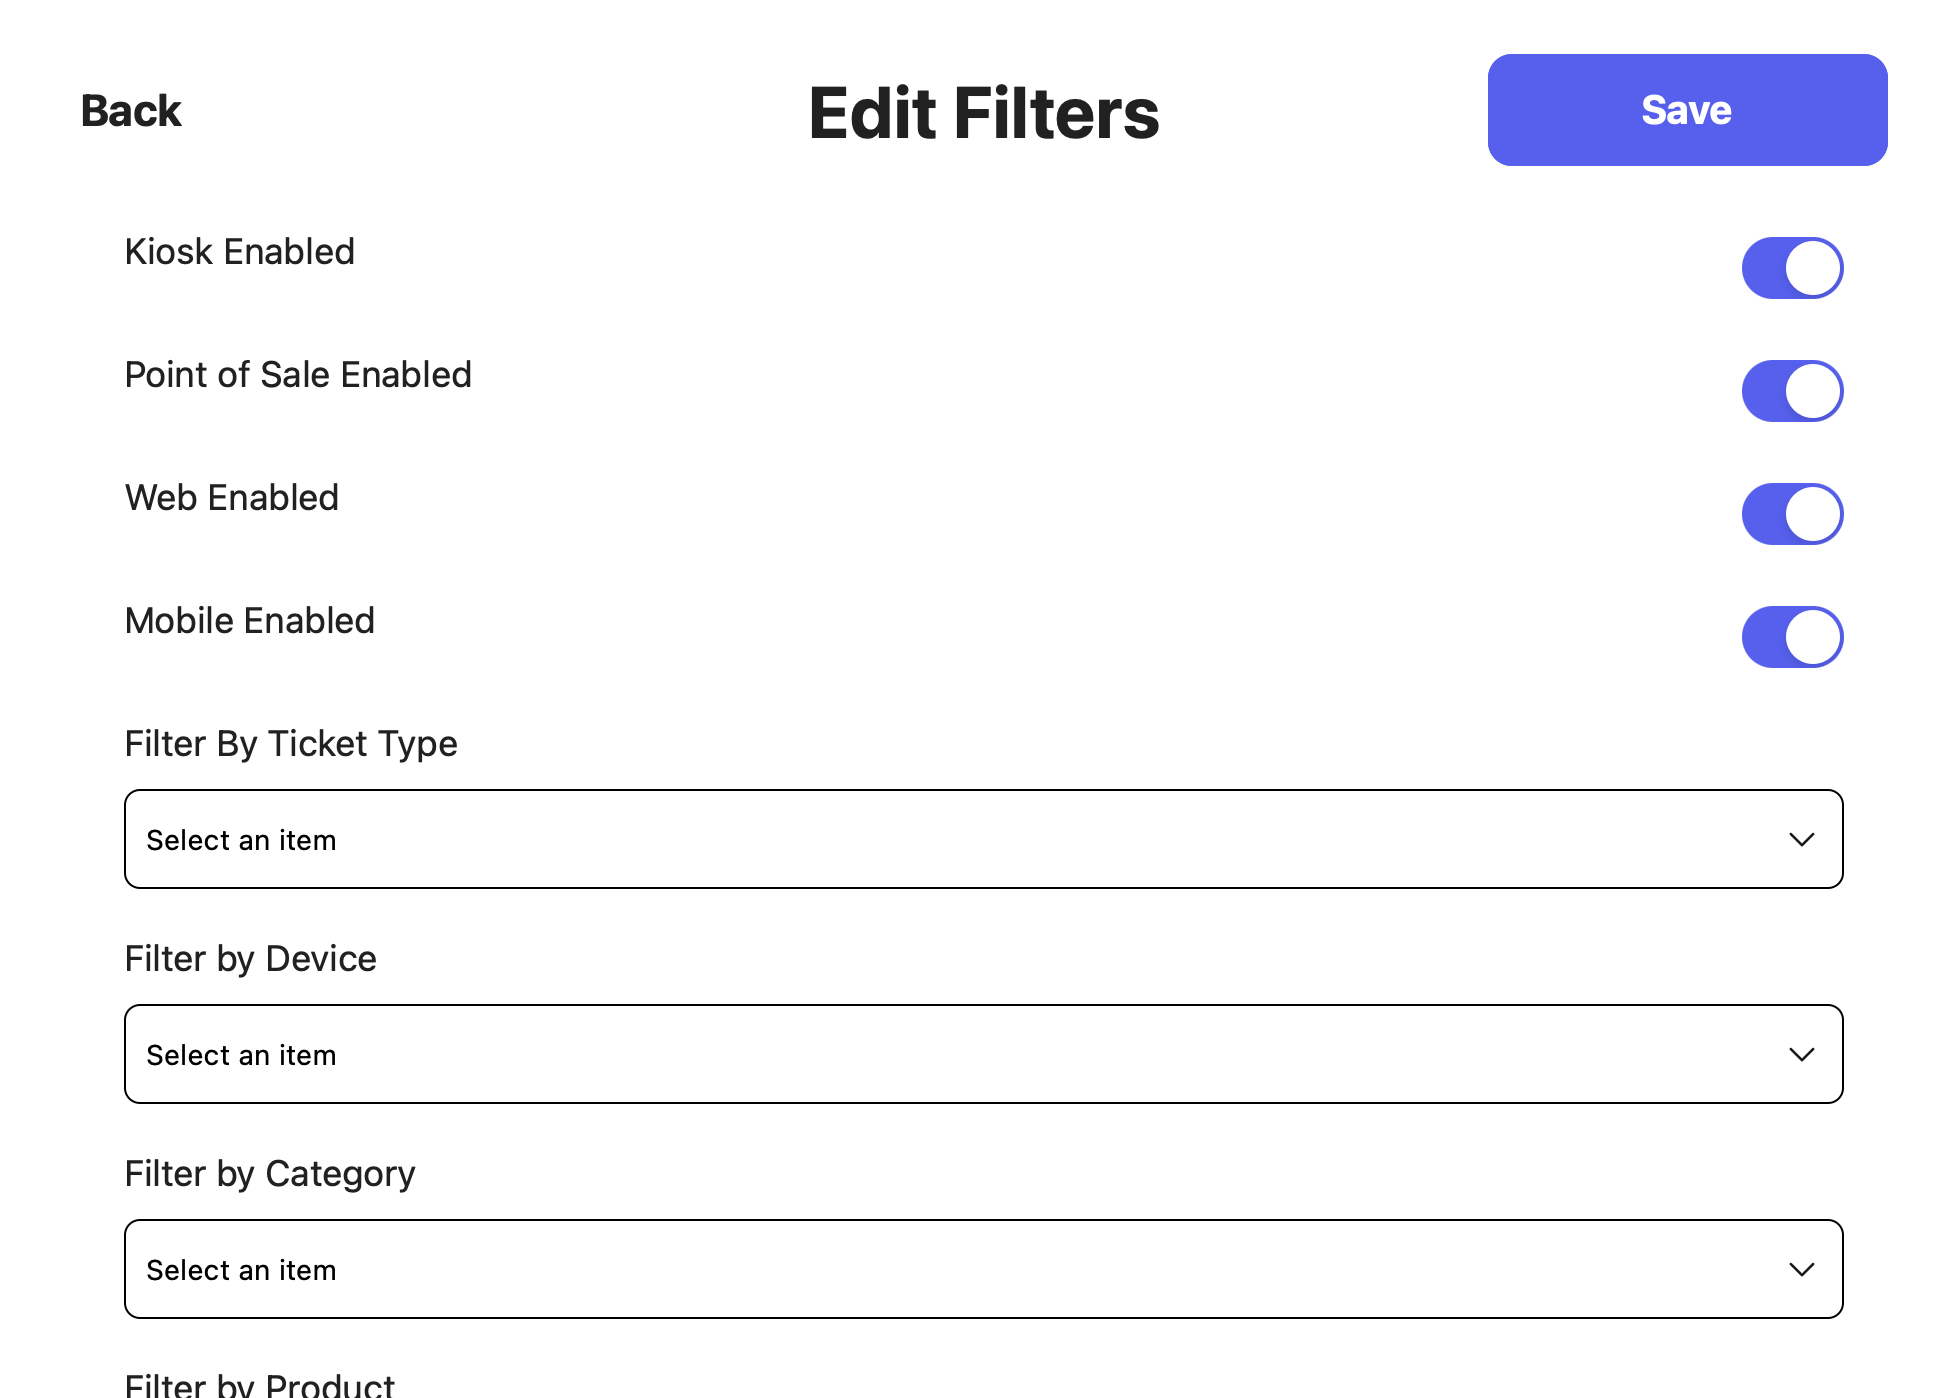
Ticket Type
Choose to print only the ticket types you need—whether it’s dine-in, takeout, or online orders—so the right tickets go to the right place
Device Type
Print tickets only from specific Point of Sale devices—ideal for directing orders to the right printer based on where they were placed
Products
Choose to print only specific products when they’re ordered—perfect for routing items like drinks or sandwiches to the right prep station.
Categories
Choose to print only specific categories when they’re ordered—perfect for routing items like drinks or sandwiches to the right prep station.