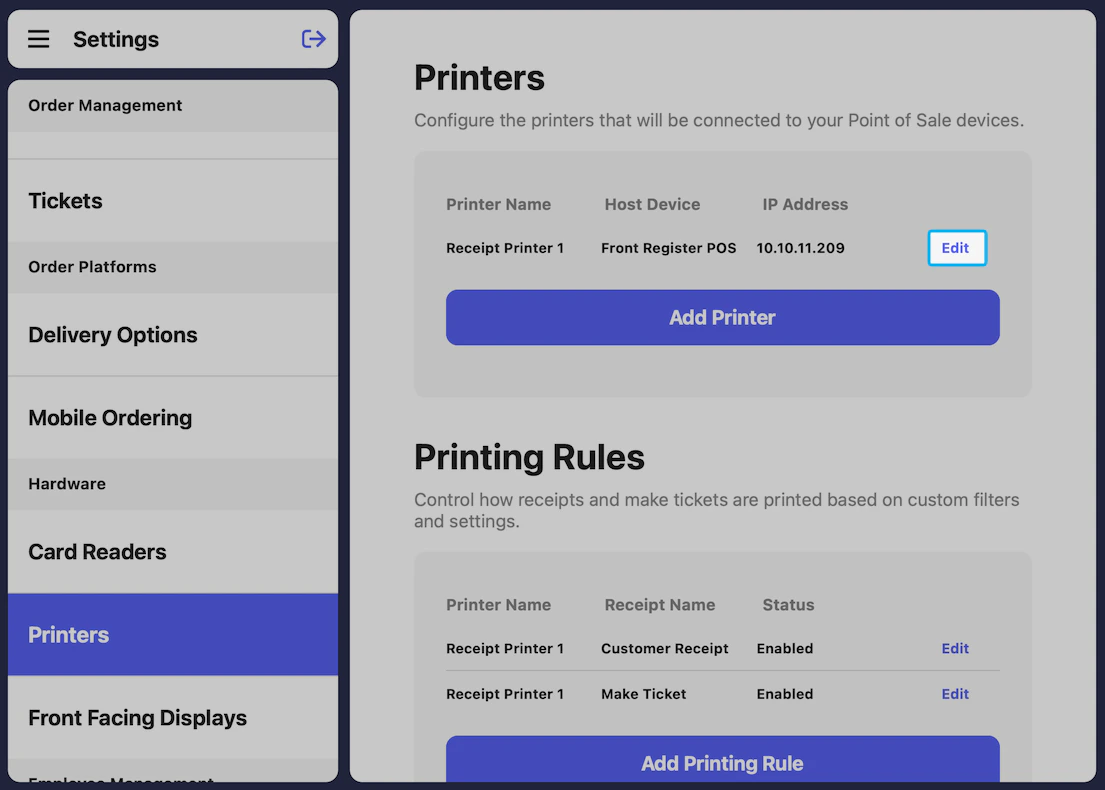
1
On your POS device, press the tribar in the upper left screen and press the Settings (⚙️) button
2
Navigate to Printer Settings and press Add Printer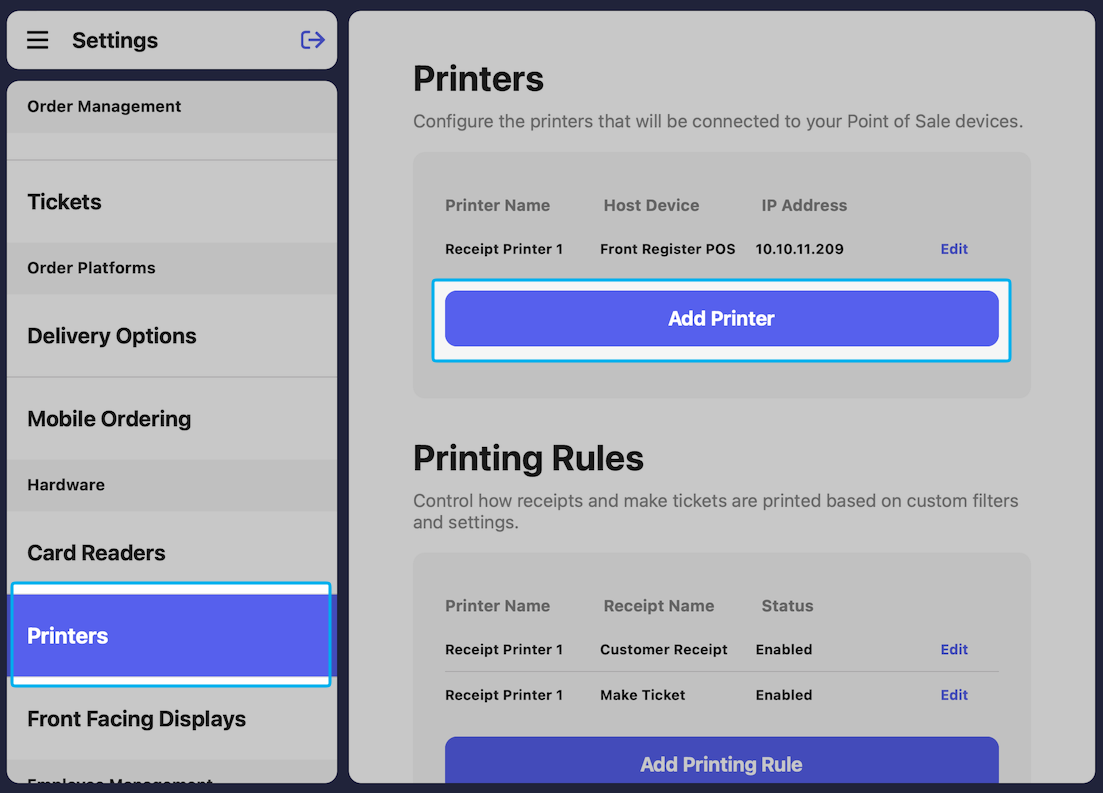
3
Complete the following fields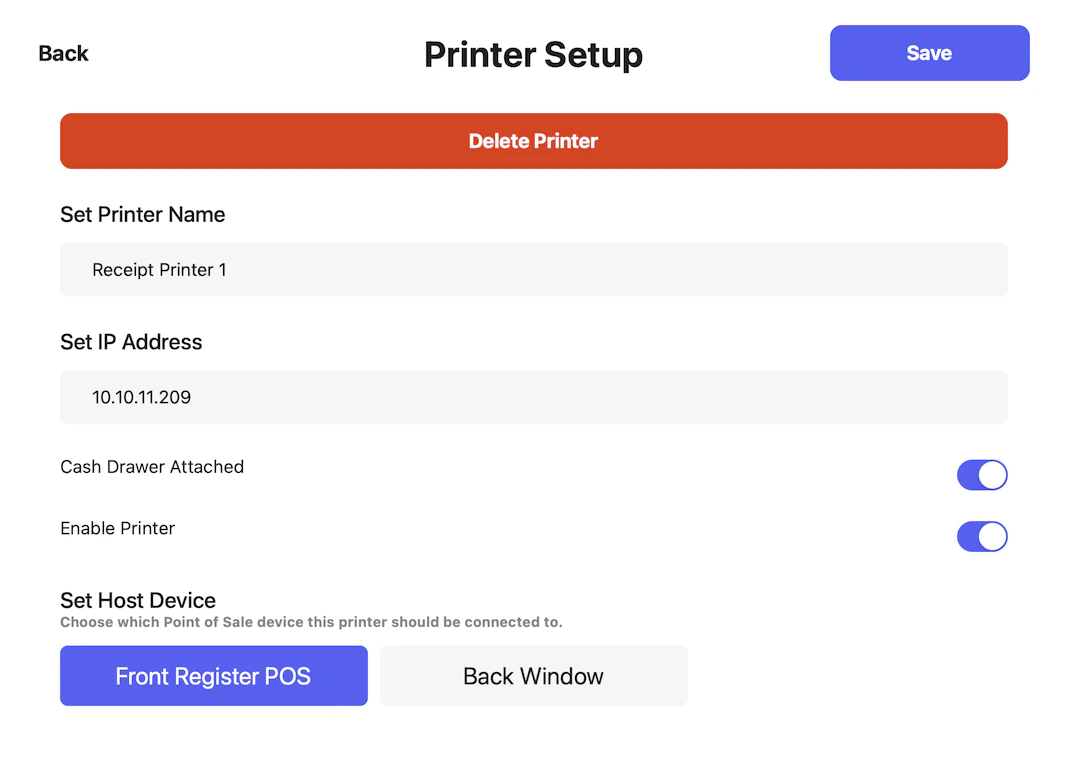
- Enter a name for the printer (i.e., Front Register Receipt Printer, Kitchen Ticket Printer)
- Input the IP address printed on the receipt (xxx.xxx.xx.x)
- Turn this on if a cash drawer is connected to this printer via RJ11/12 cord
- Learn more about connecting a cash drawer to a printer here
- Turn this on to use the printer
- Select the POS device for this printer to print orders from
4
Click Save.You can make edits or delete printers by using the Edit button.