Need to order a new card reader? Place your order here!
V3 Card Reader Pairing Instructions (Latest Update)
V3 Card Reader Pairing Instructions (Latest Update)
1
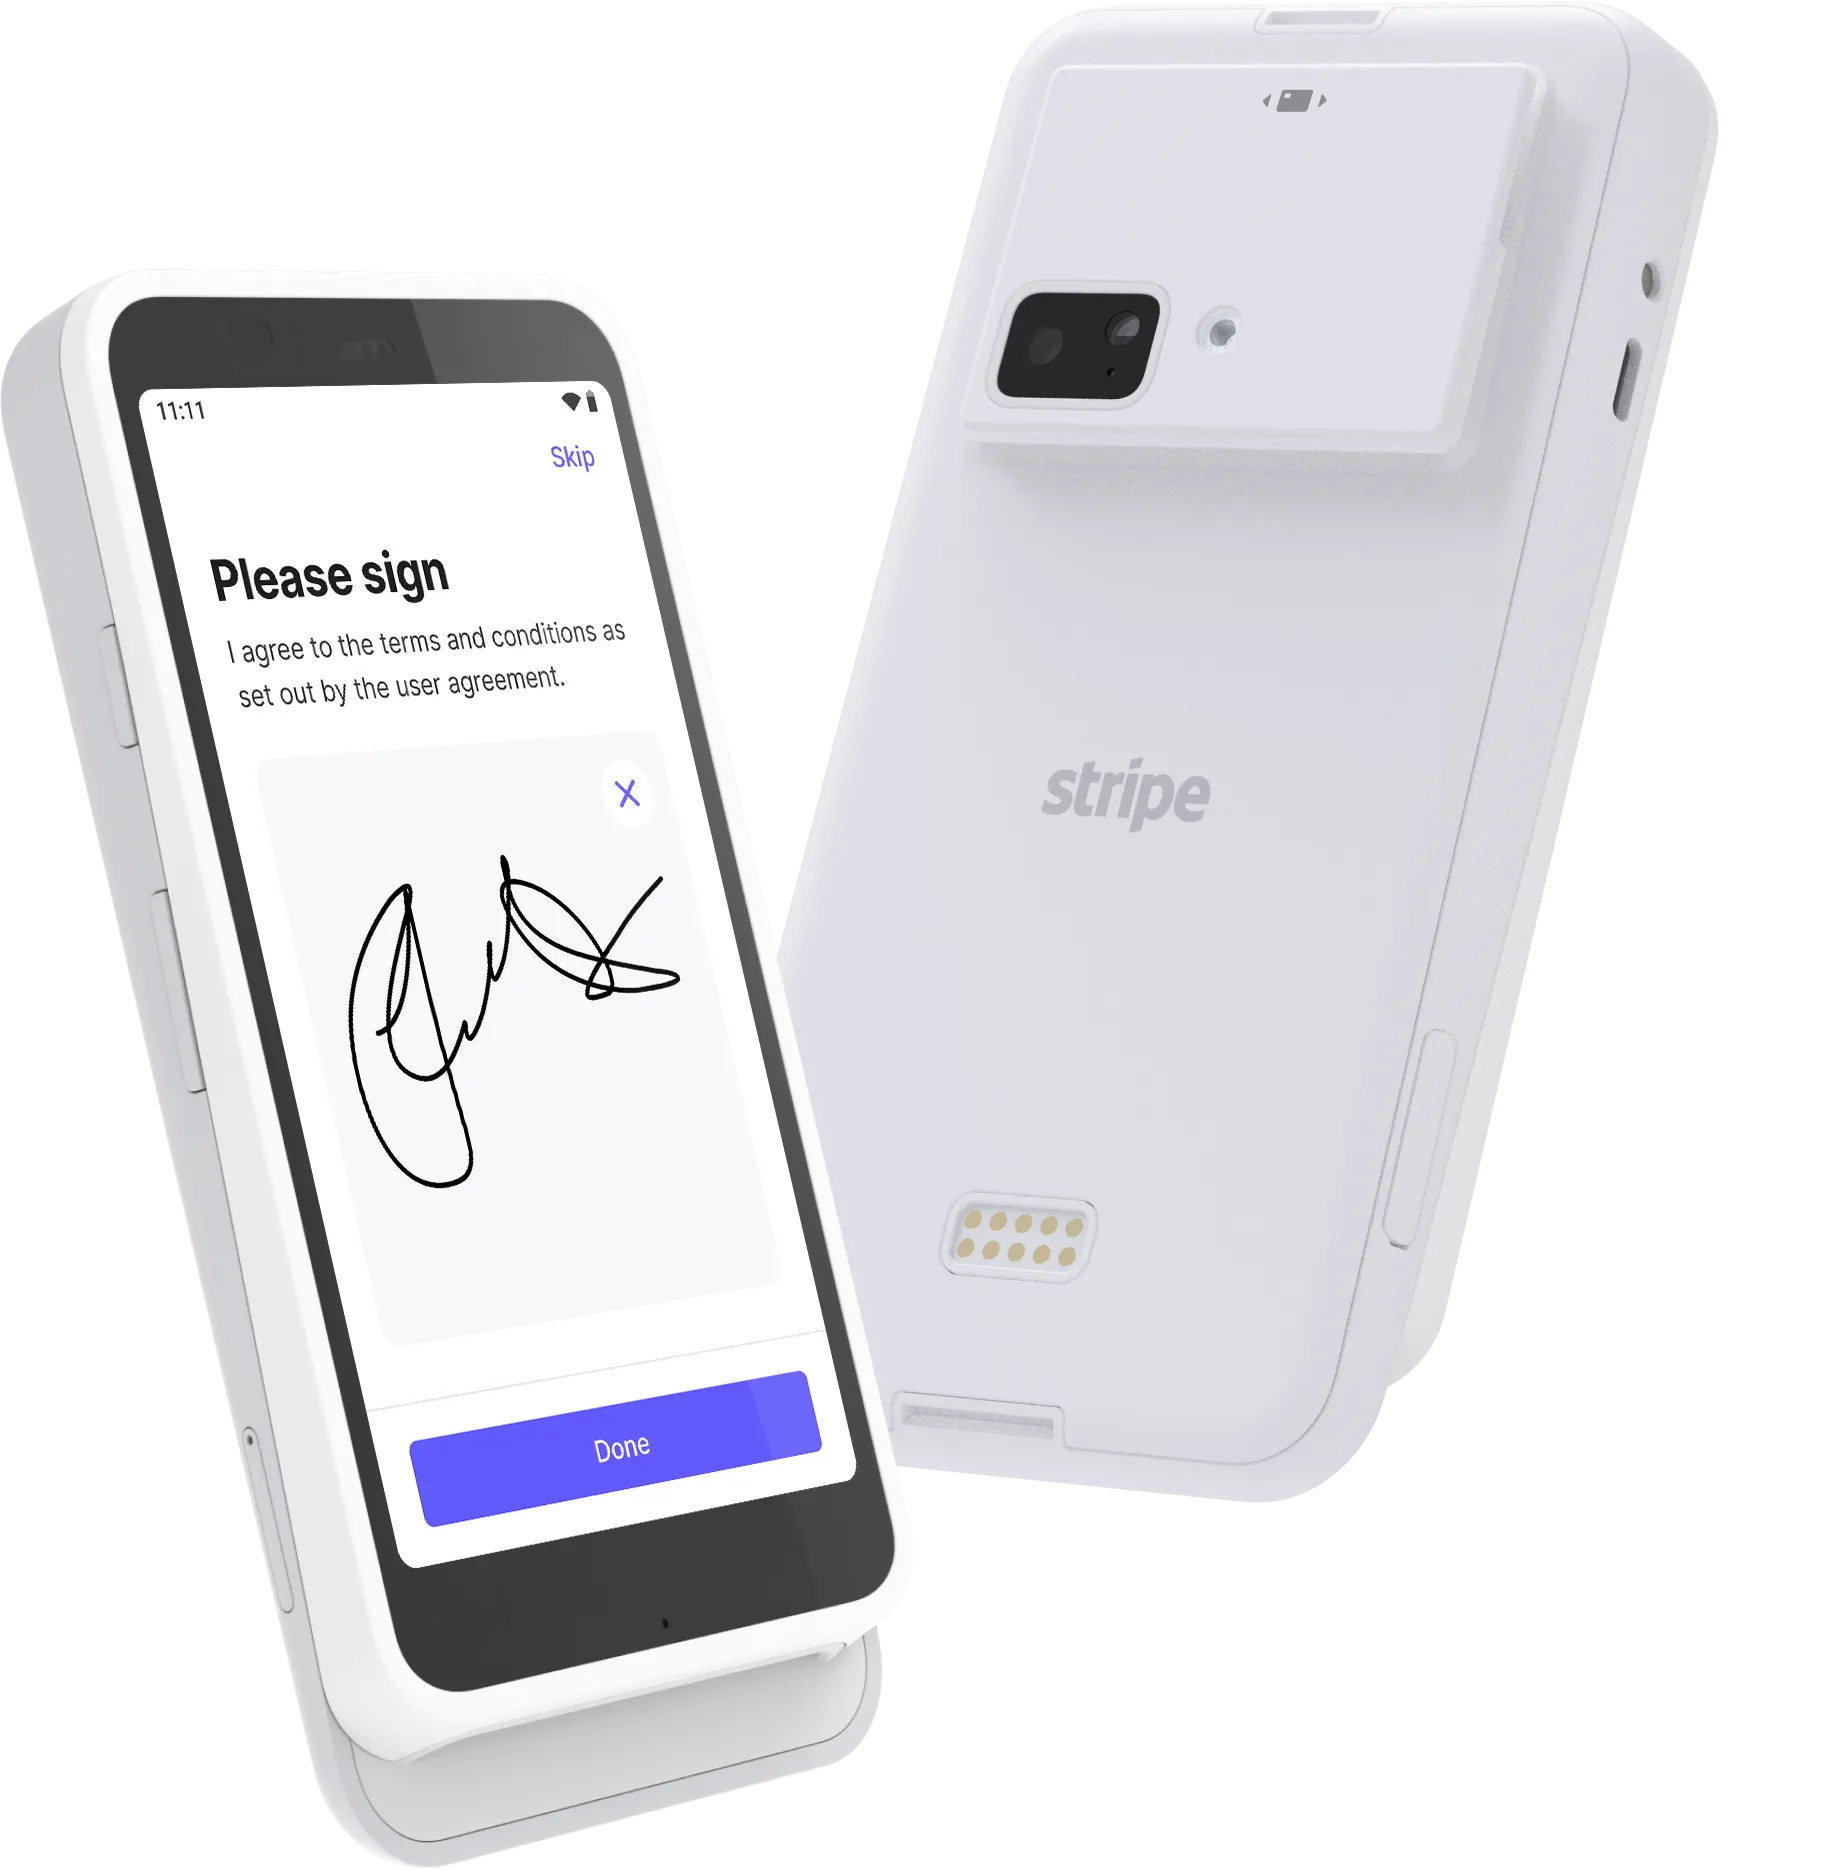
Turn on Card Reader
Hold down the power button for 5 seconds until a purple Stripe screen appears
2
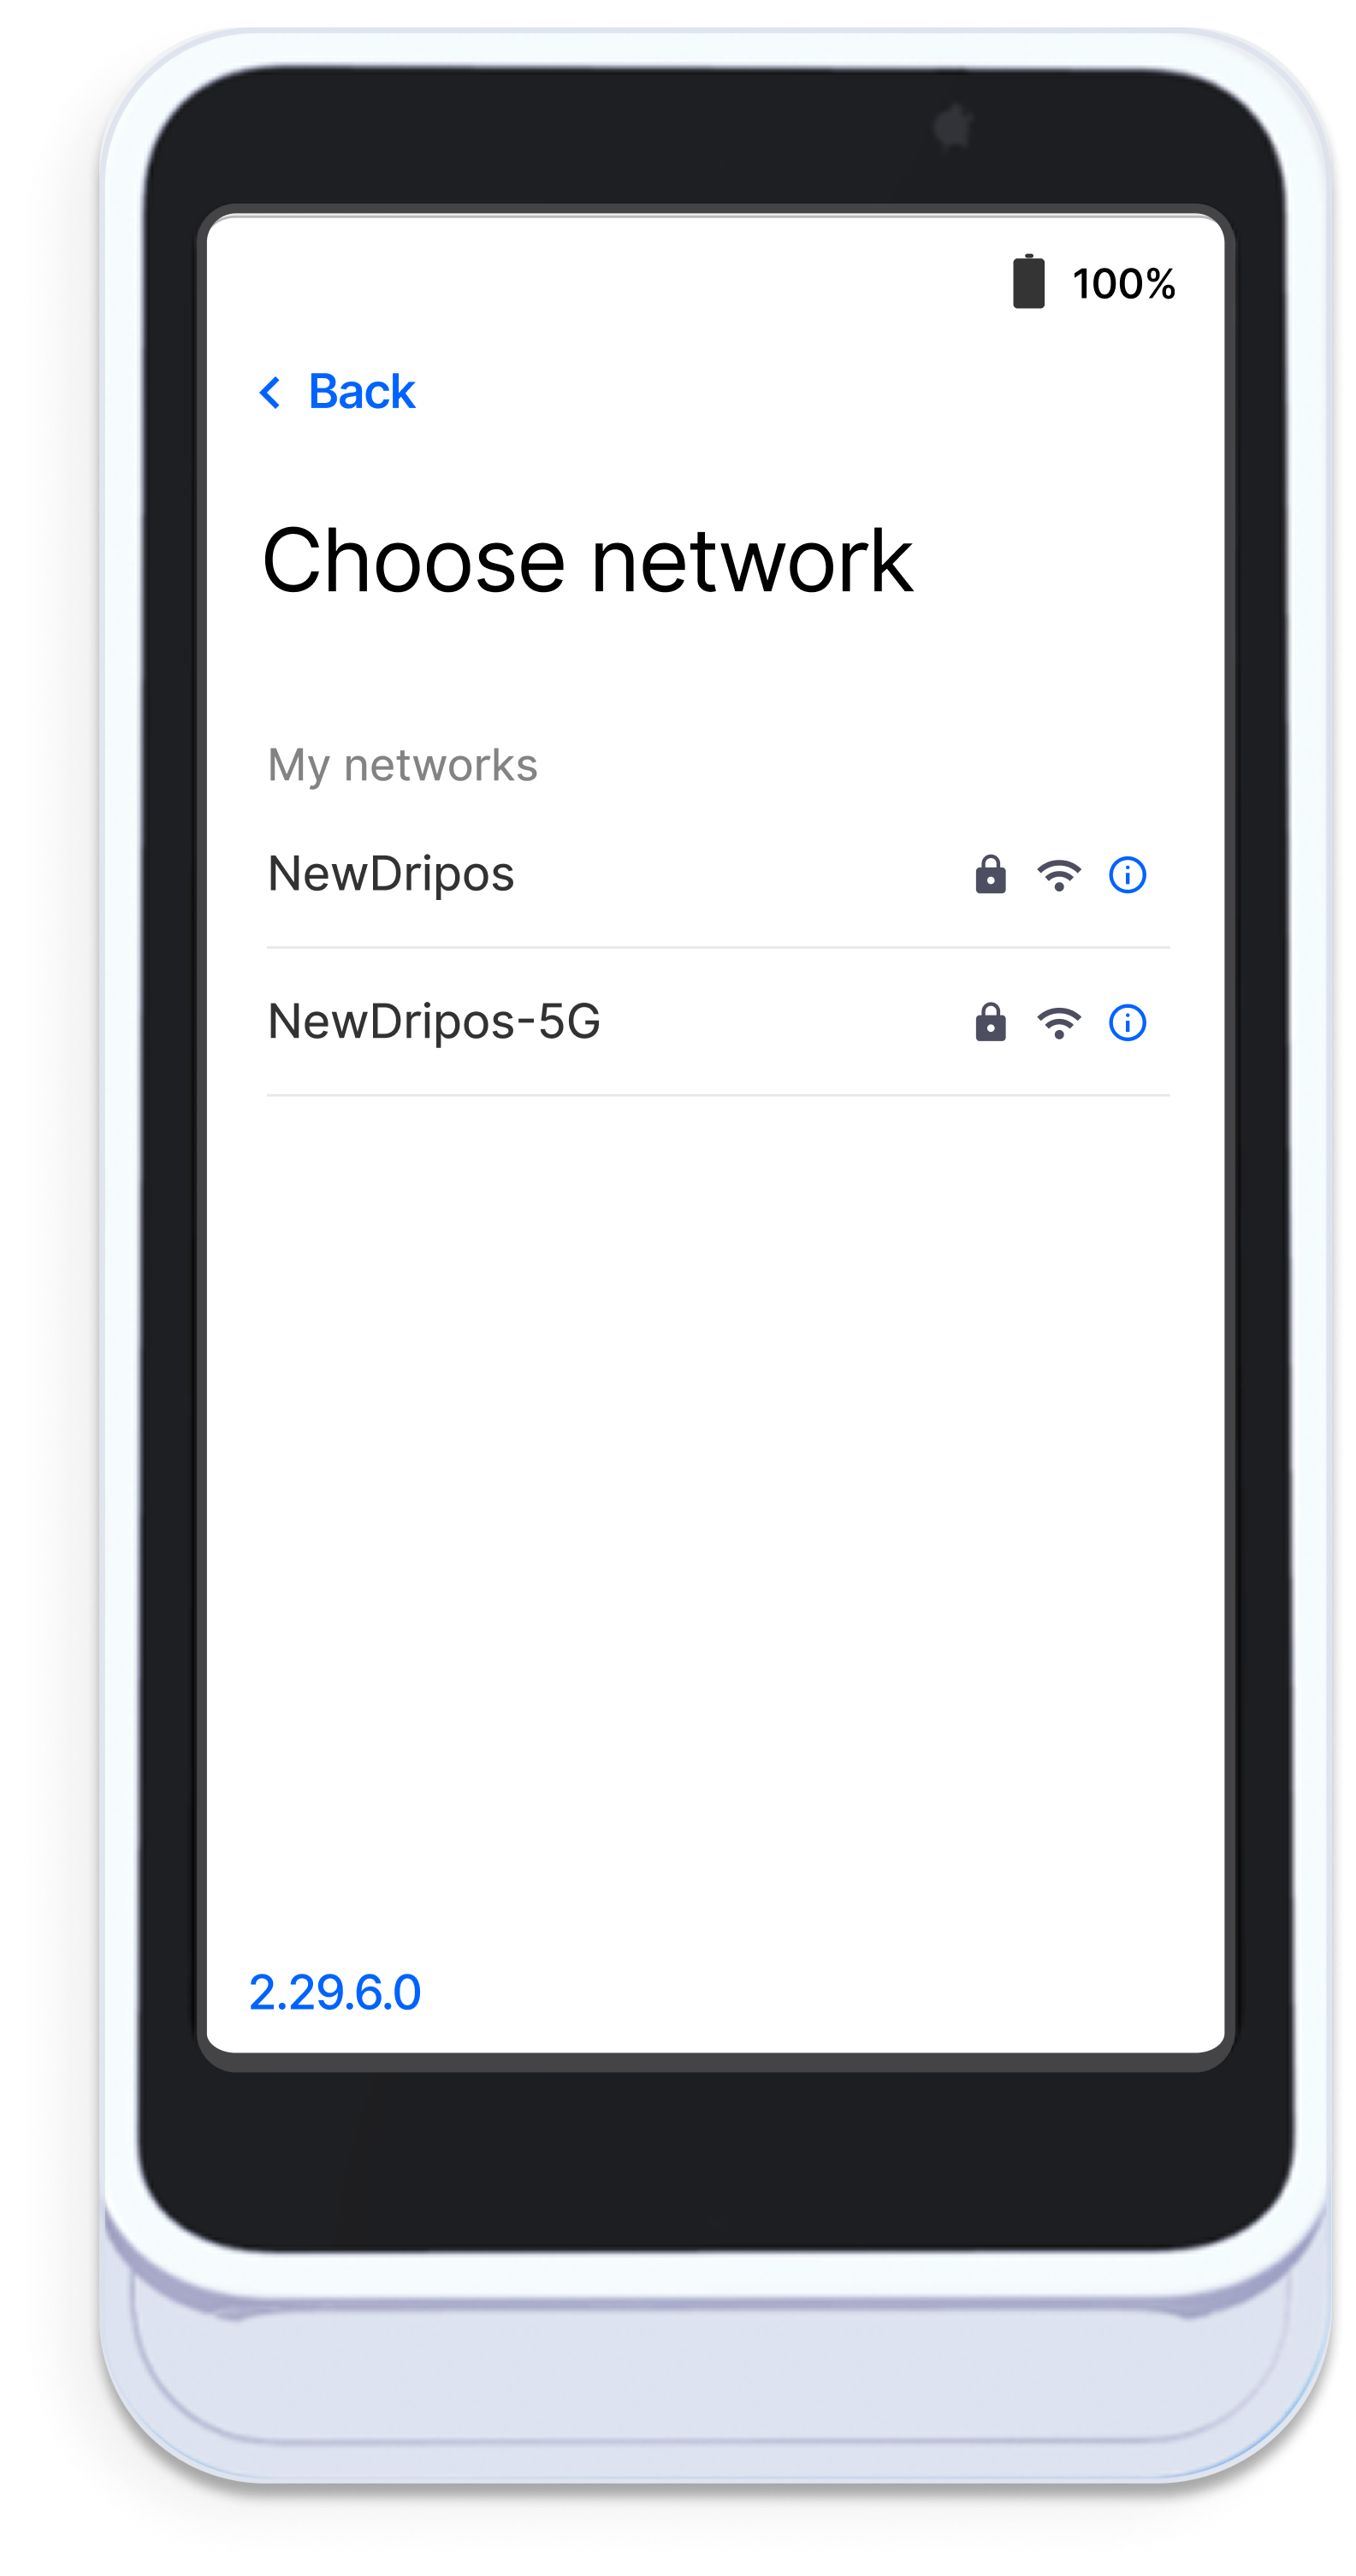
Choose Network
3
Register this Reader
The card reader will now display a three-word pairing code and is ready to connect to the Point of Sale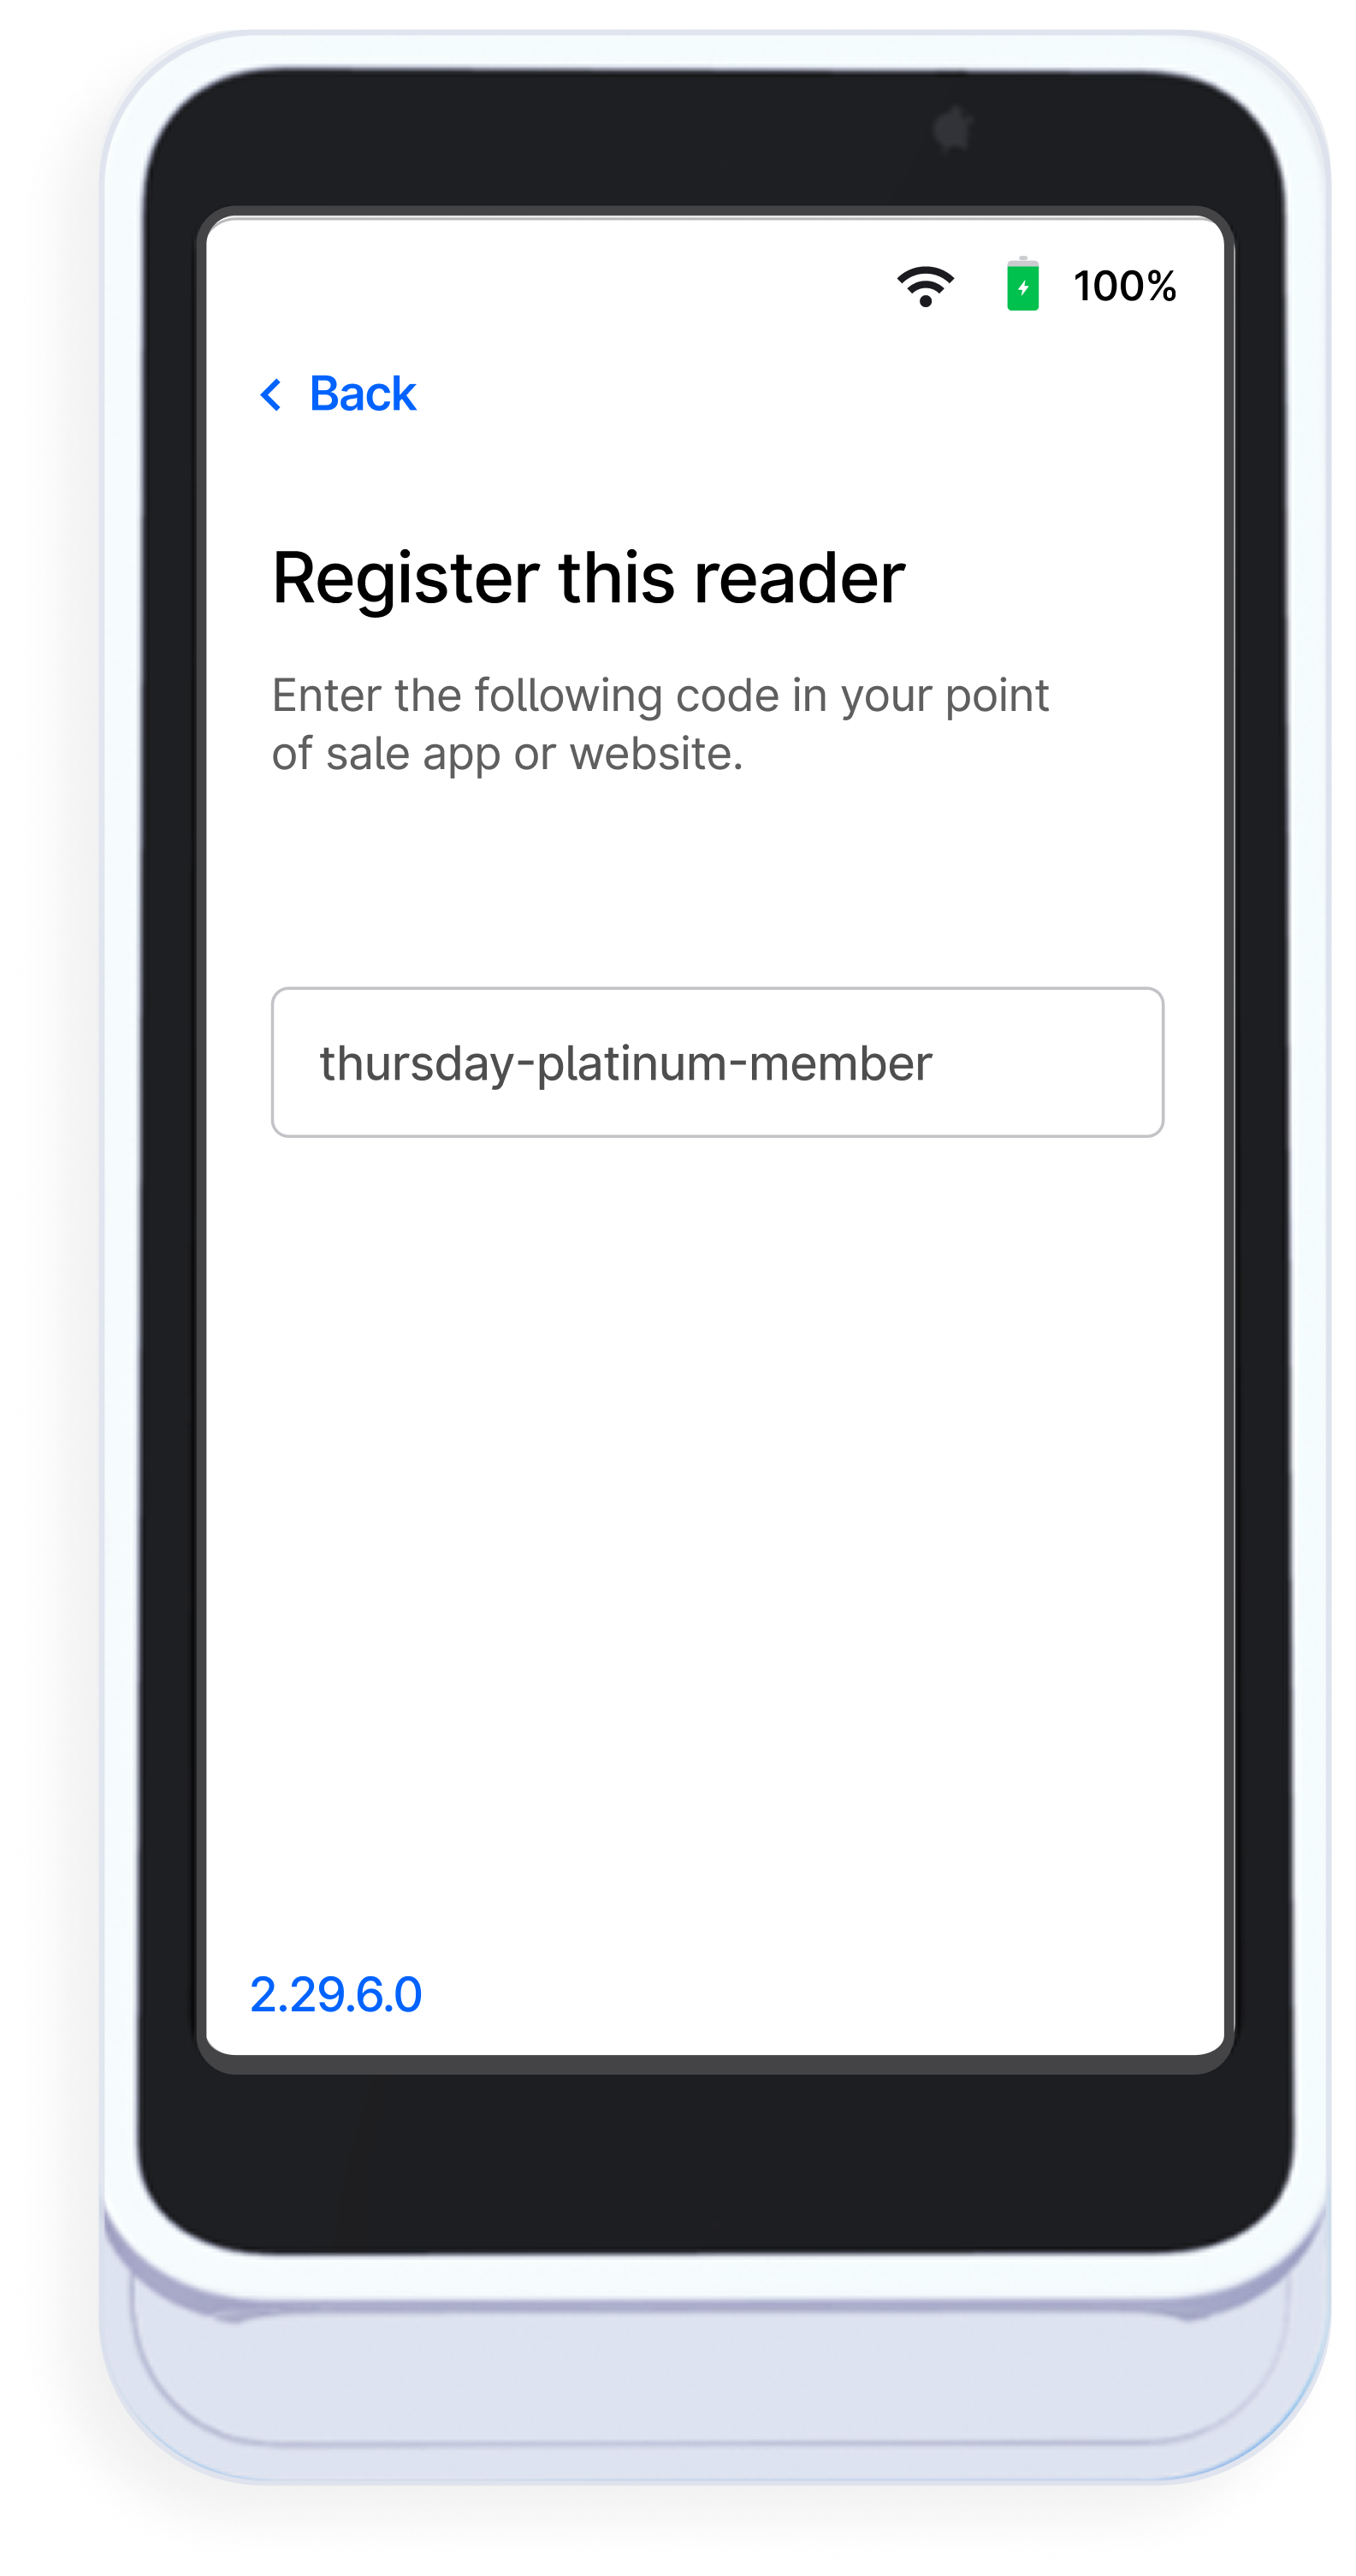
4
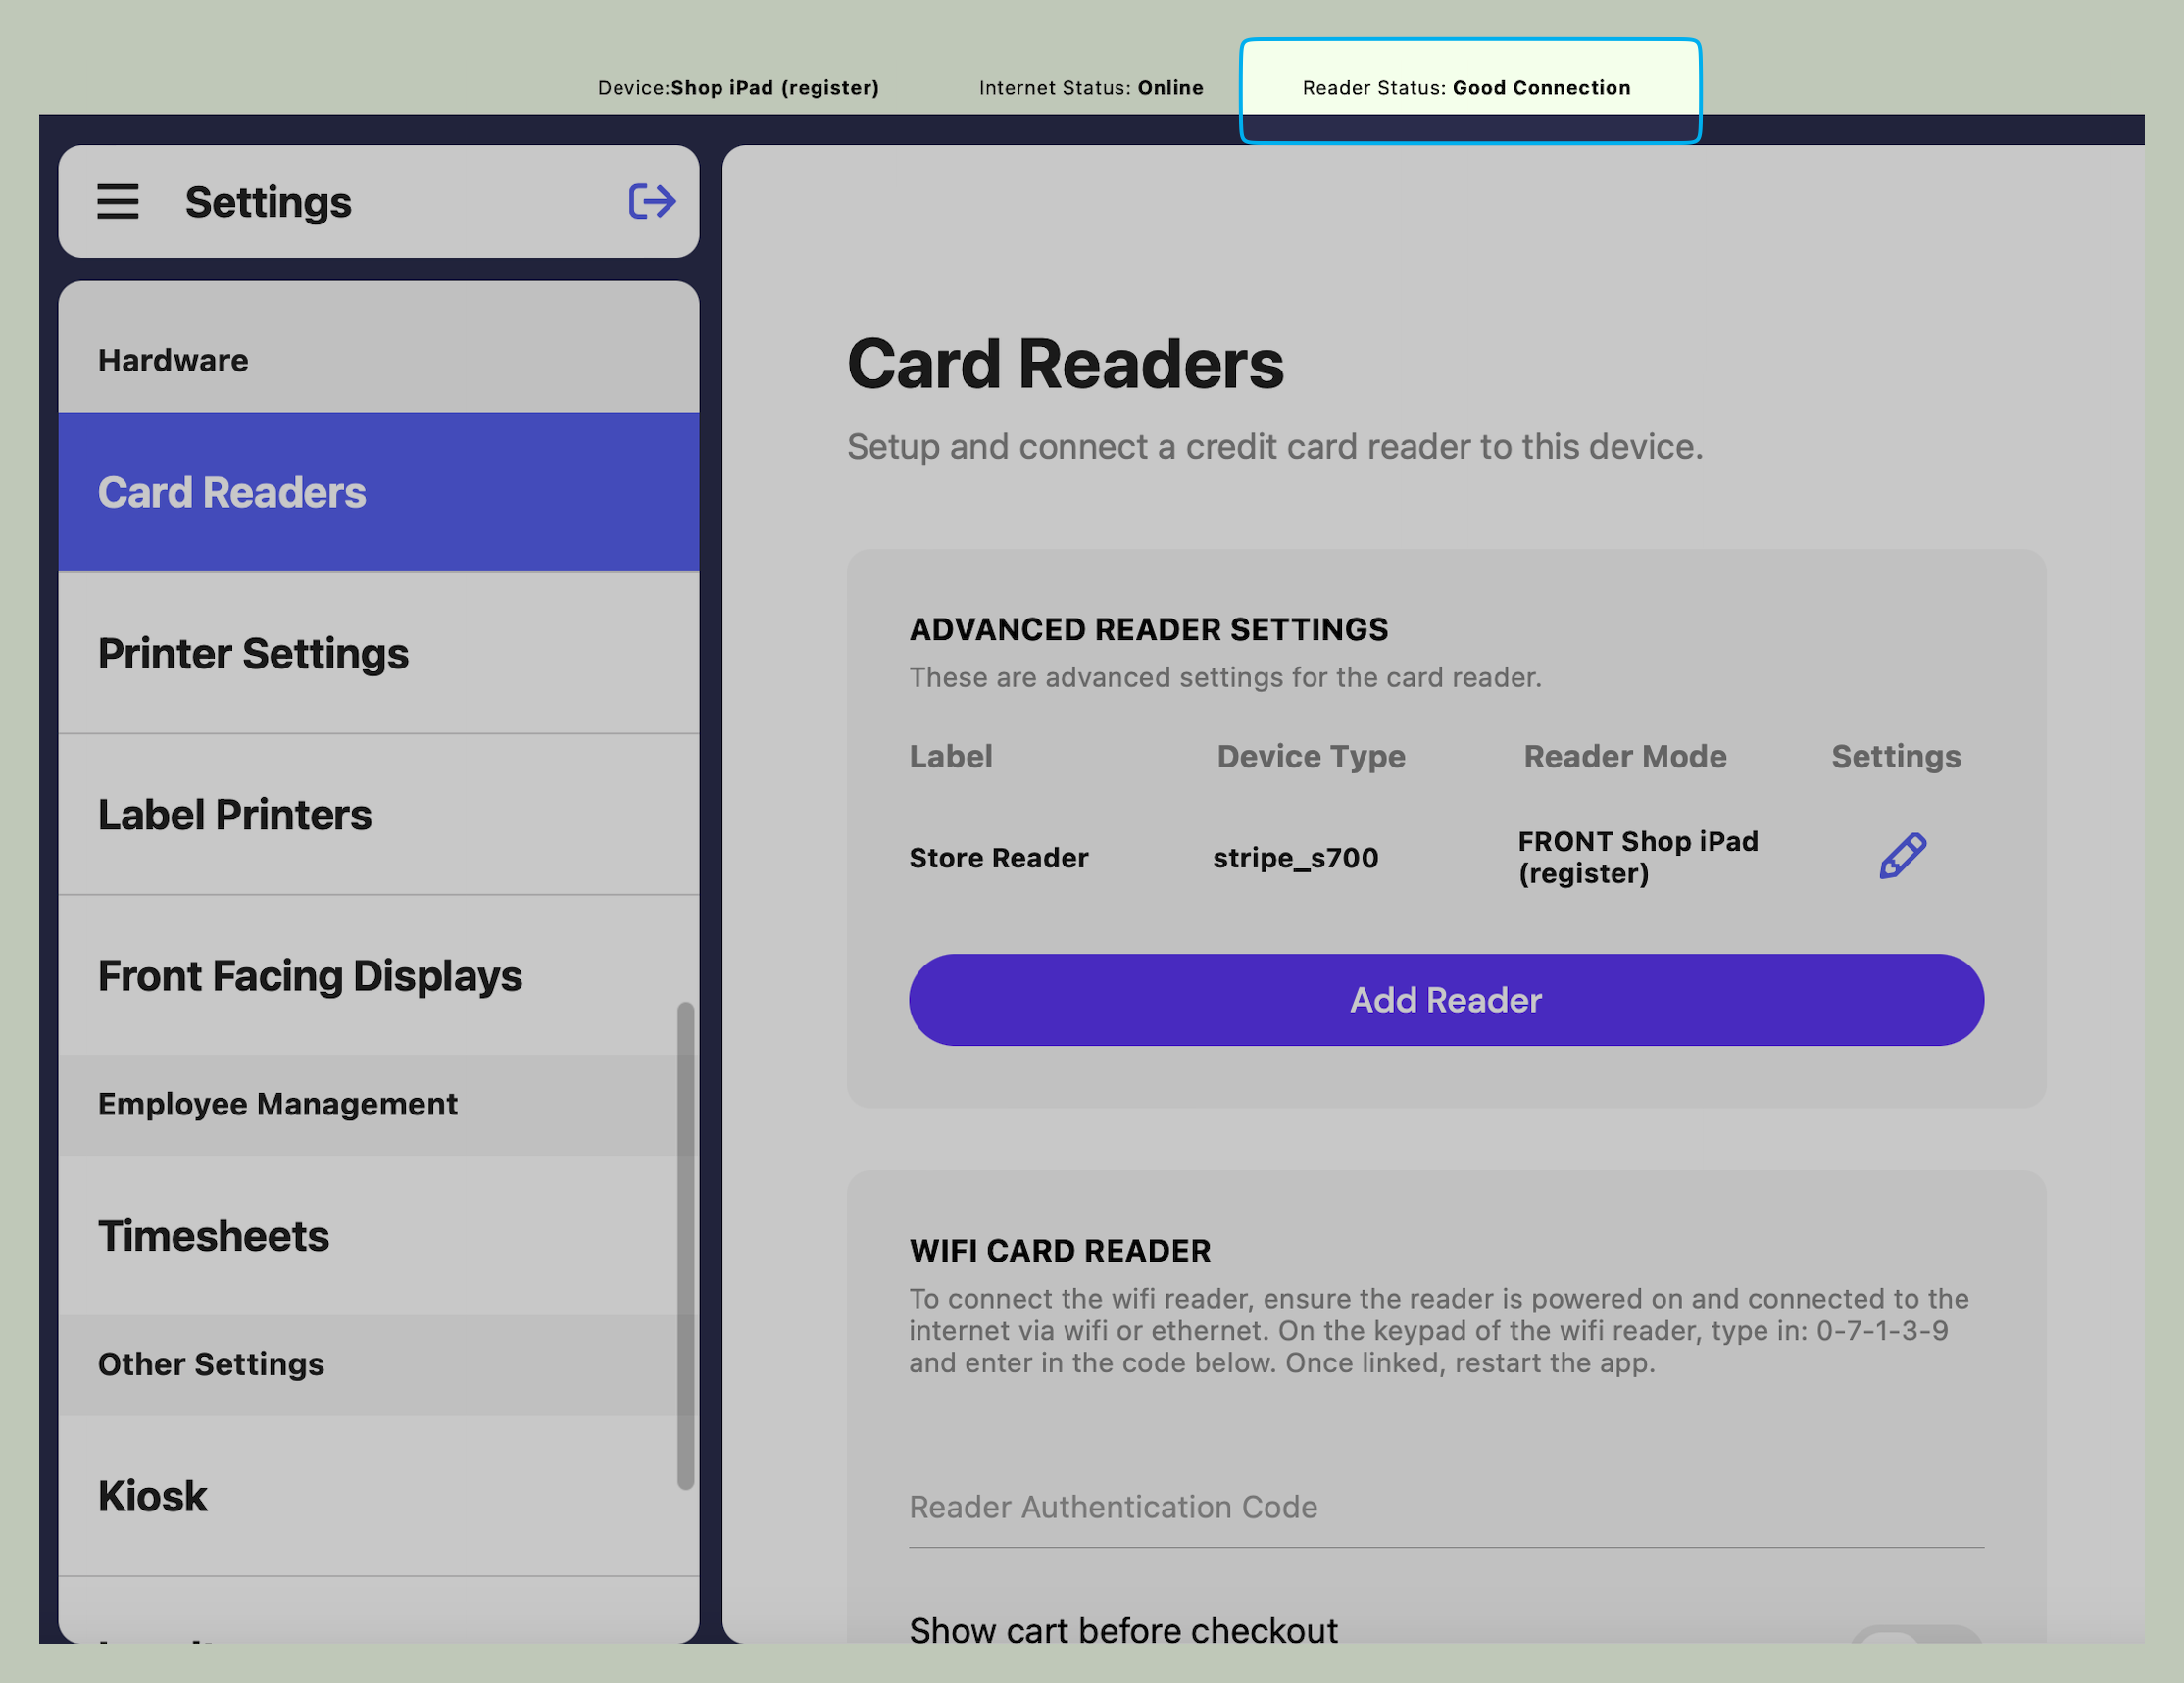
Add Reader
On the Point of Sale, navigate to Settings > Card Readers and click Add Reader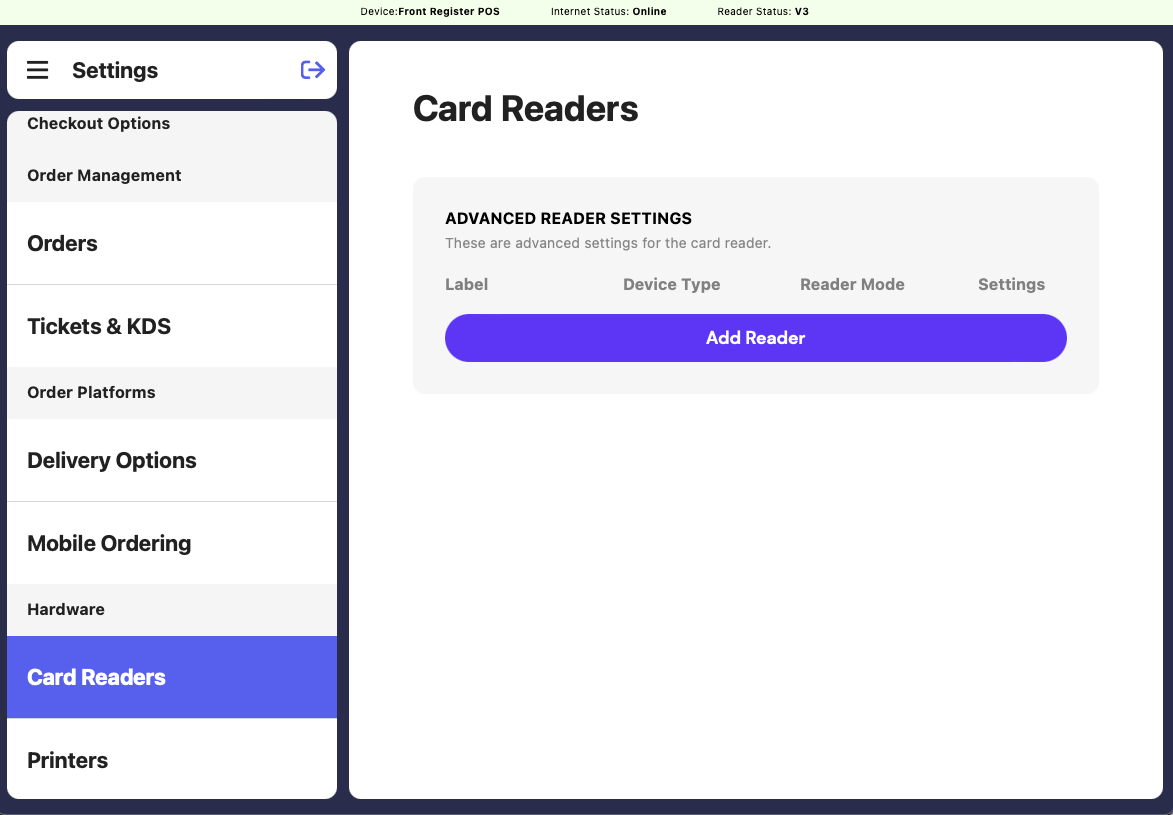
5
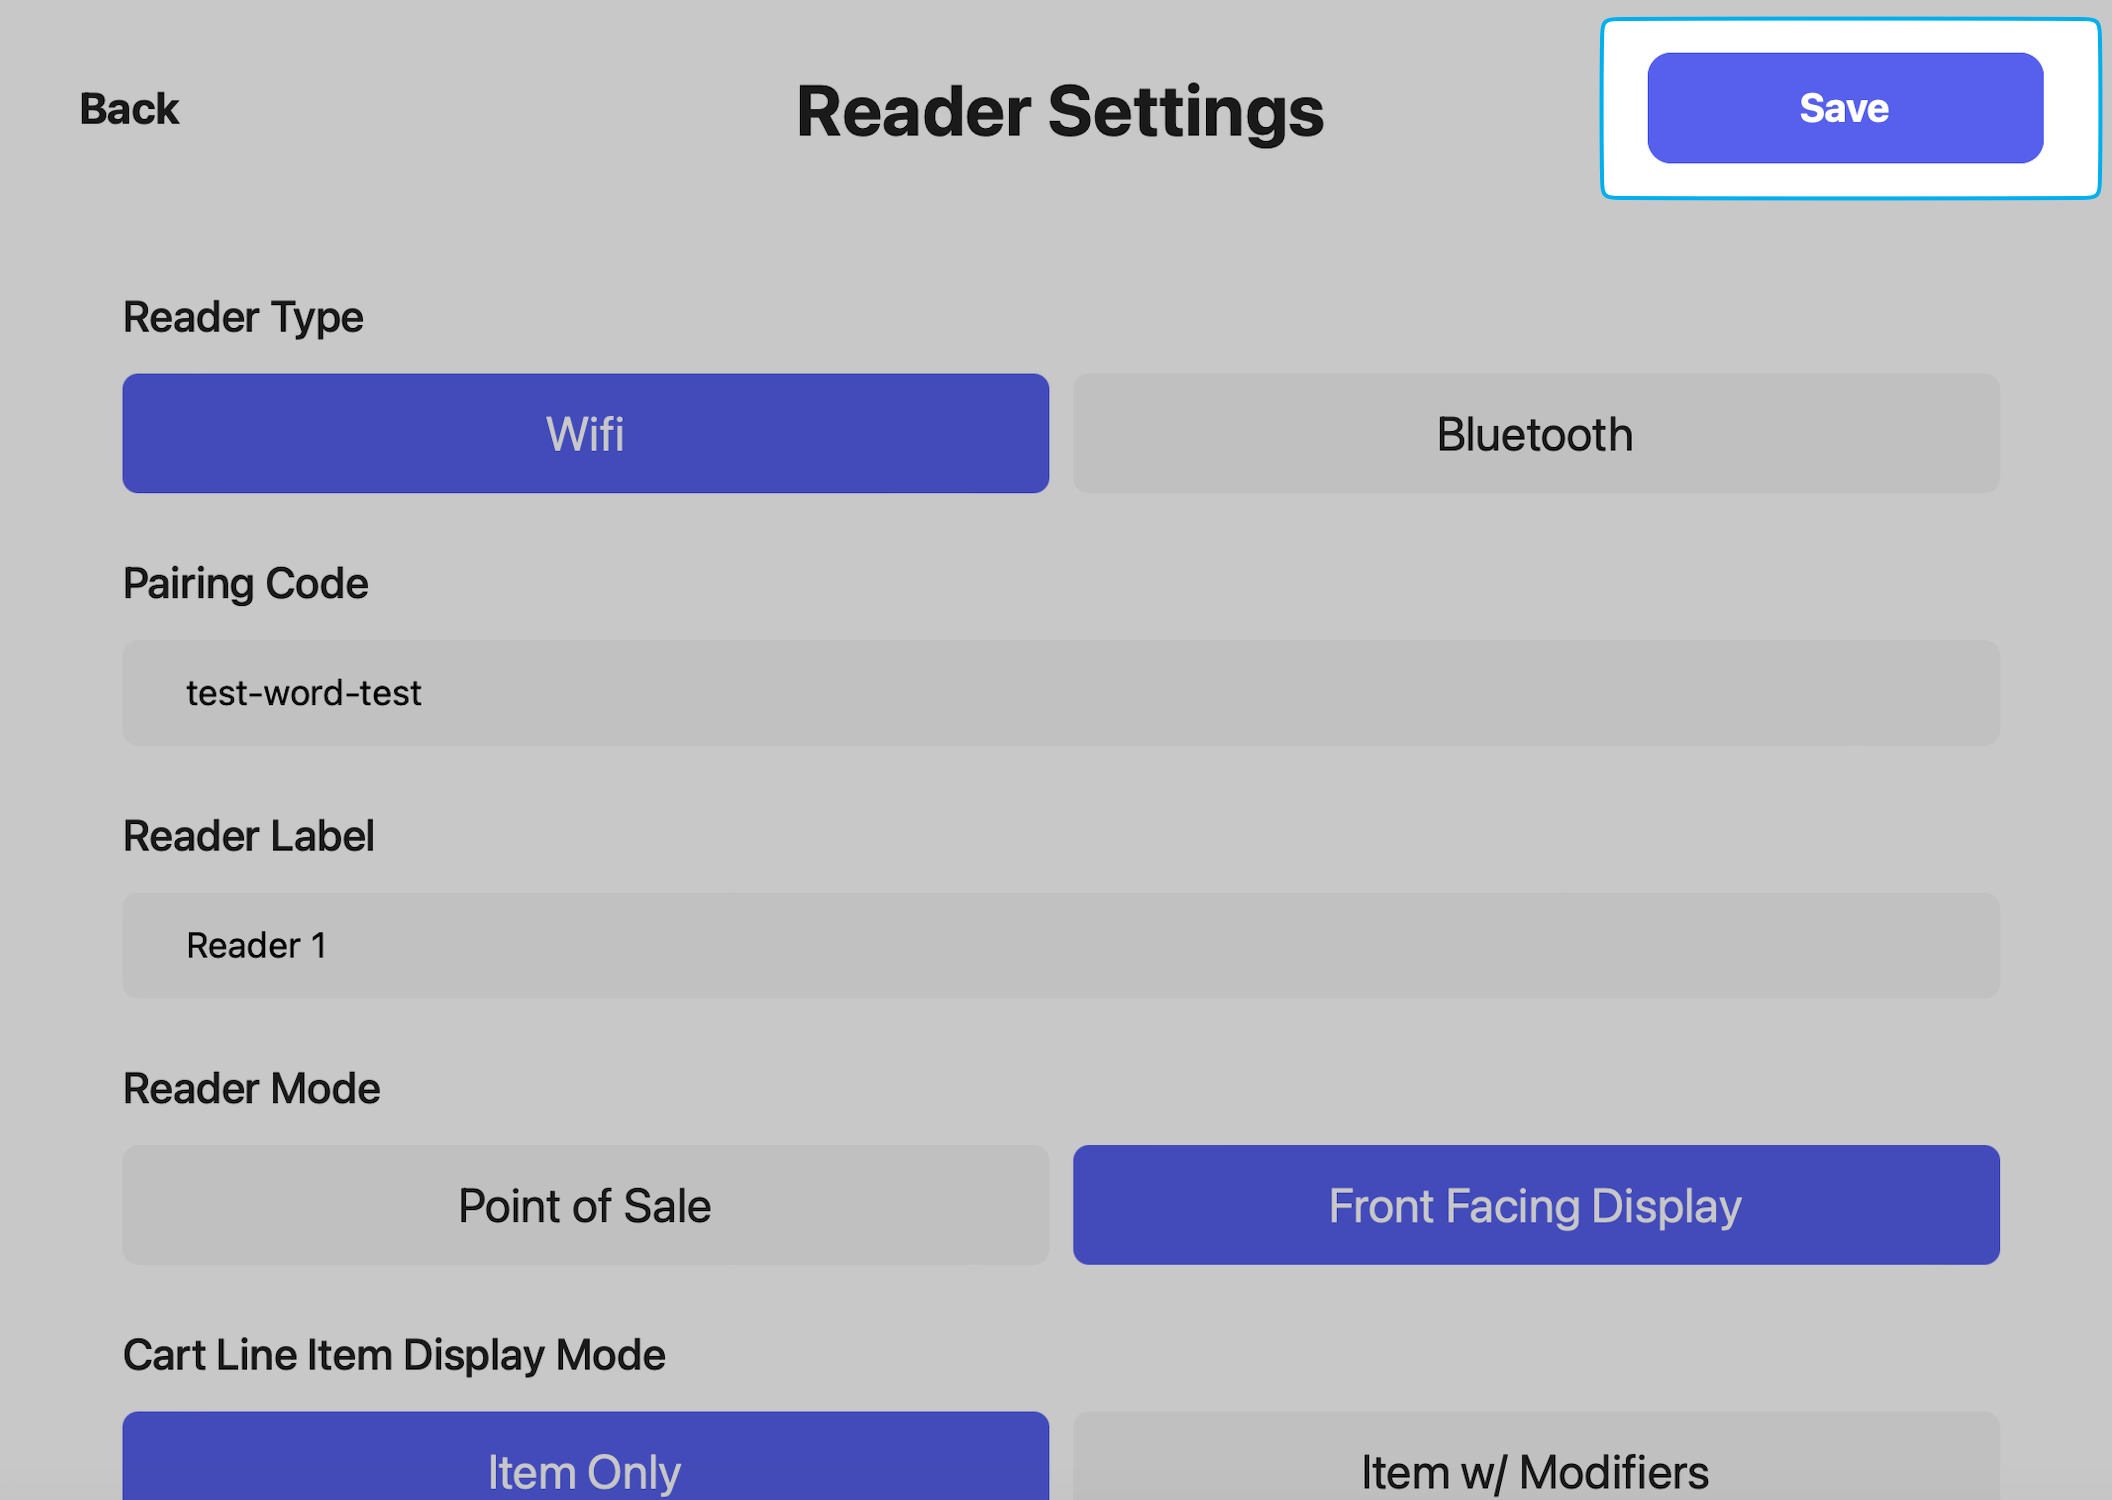
Reader Settings
Enter the following information and press Save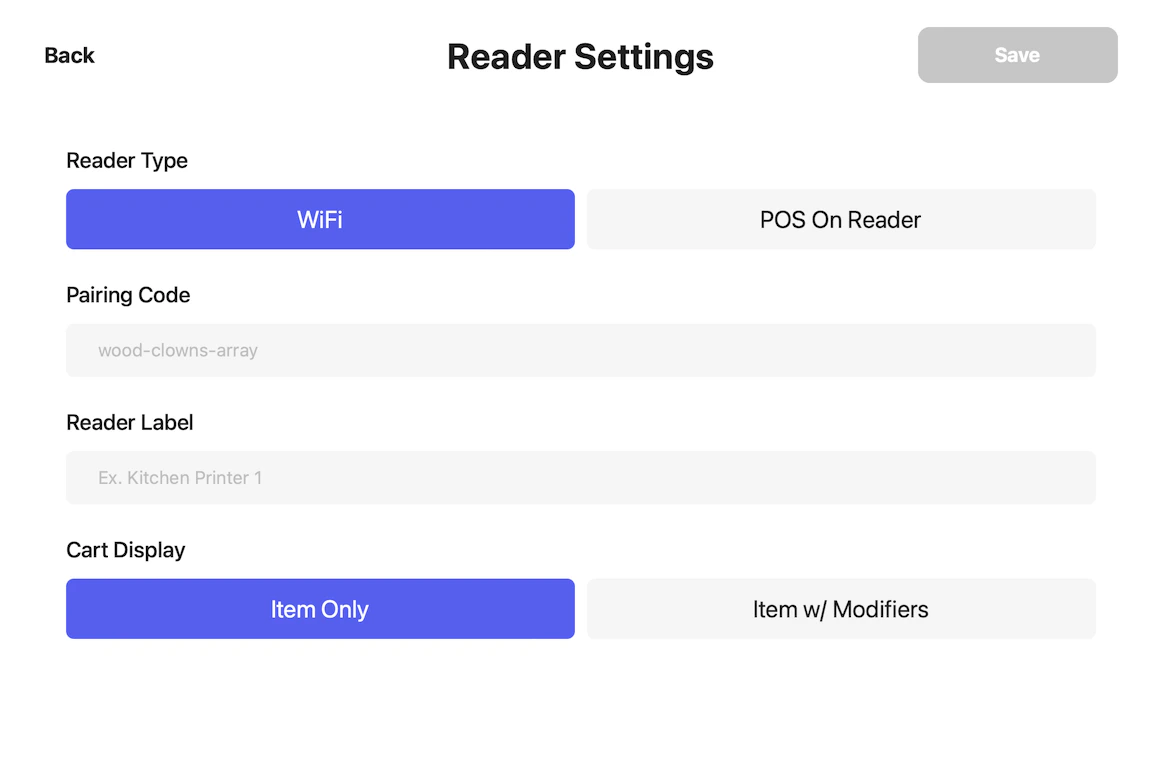

- Select WiFi as the Reader Type
- Enter the pairing code shown on your card reader, including the dashes
- Create a name for this reader (i.e., Front Register Reader, Drive Thru Reader, Register 1 Reader)
- Item Only: Only products added to cart will display on the card reader for customers to view
- Item w/ Modifiers: Products and their selected modifiers will be shown on the card reader for customers to view
6
Select a Register
After the card reader completes the updates, select the register device to connect this reader to
The name of the device is shown at the top of the Point of Sale app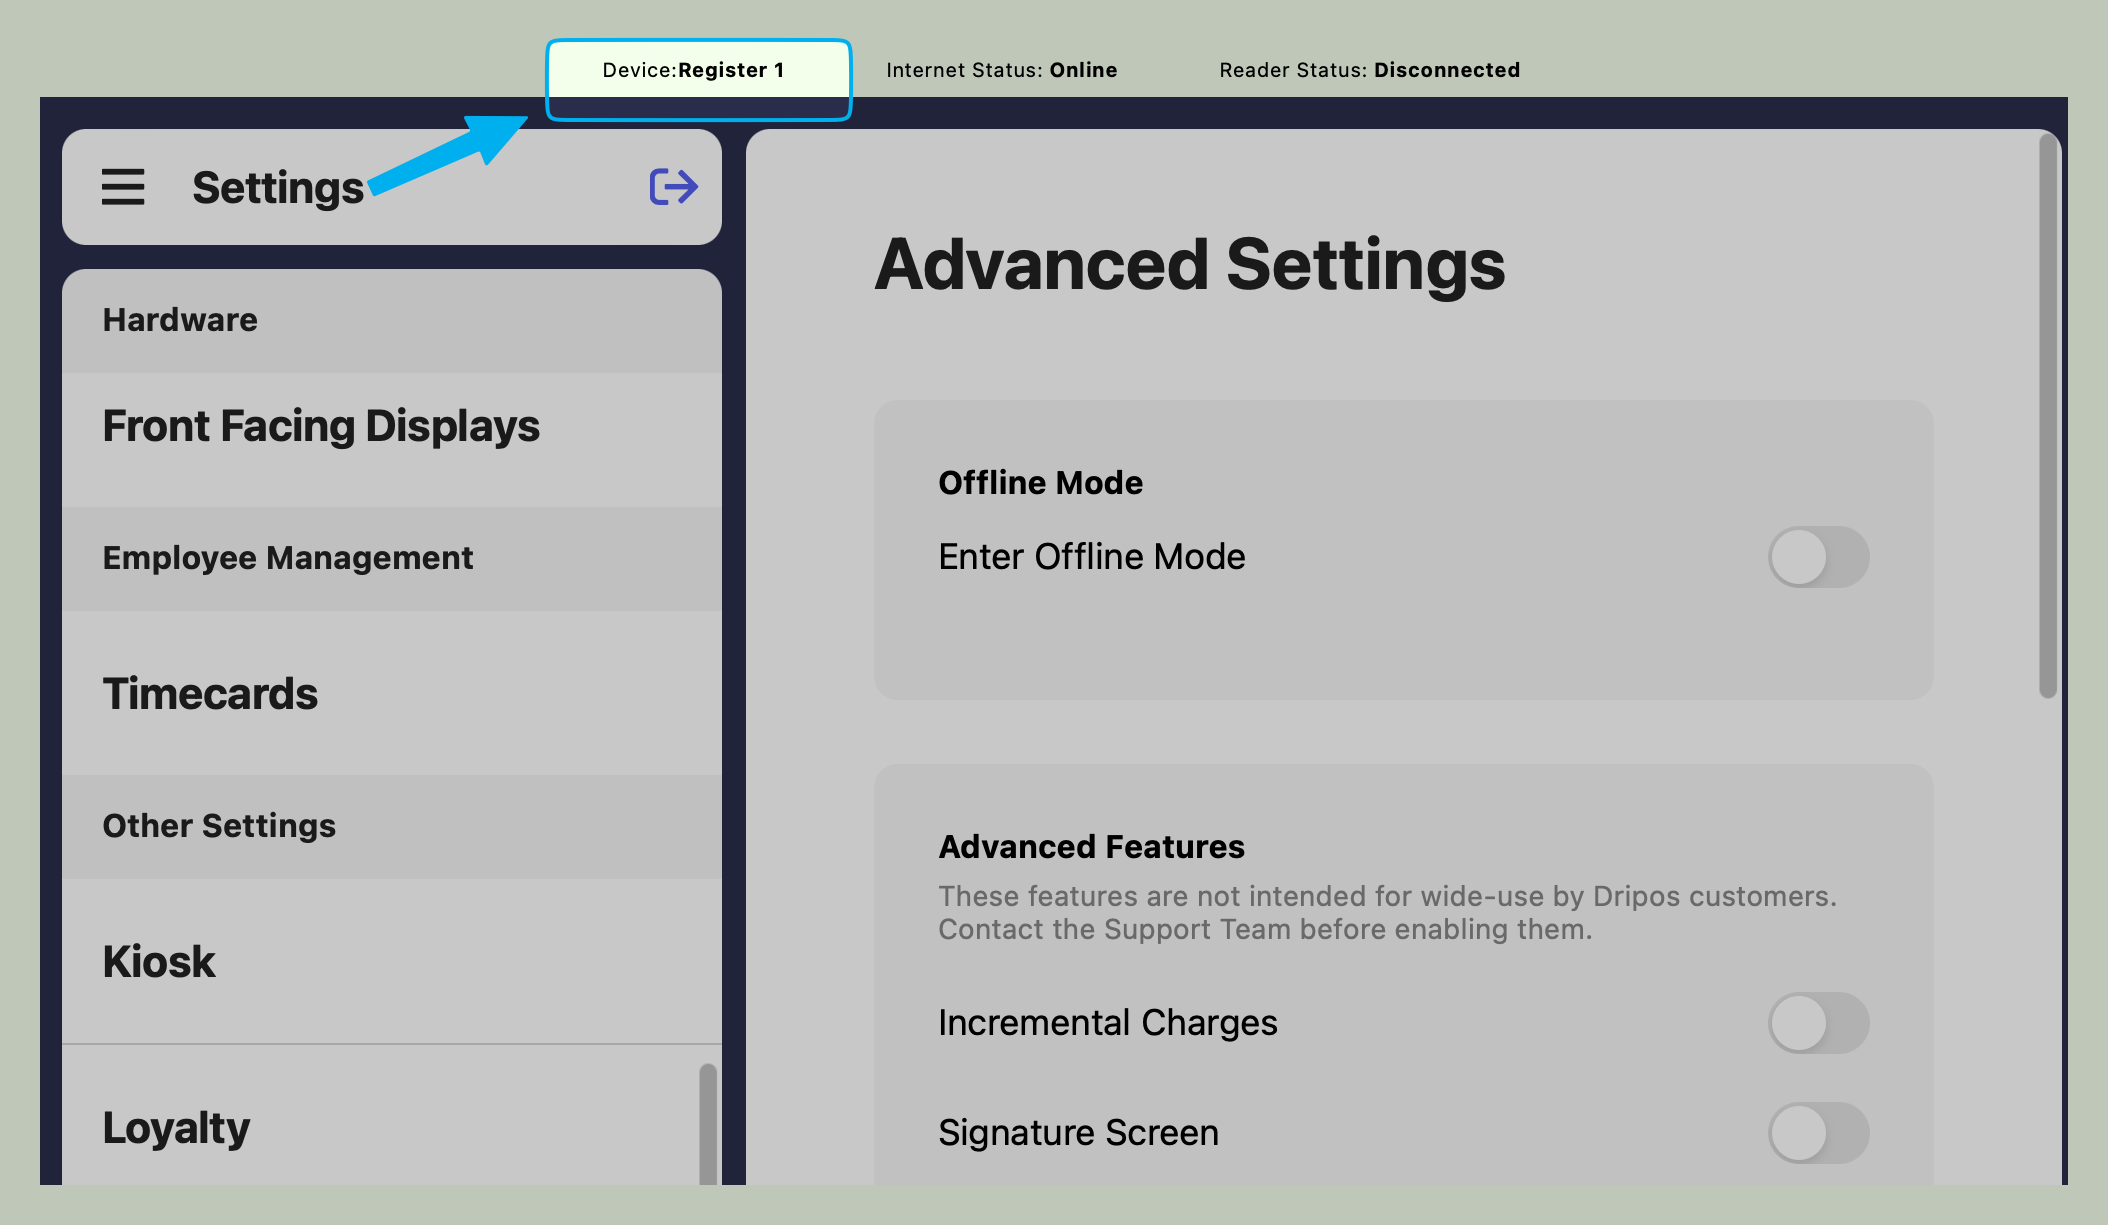
Migrate to Latest Card Reader Software (For Existing Customers)
Migrate to Latest Card Reader Software (For Existing Customers)
1
Turn Off V1 Setting
On the Point of Sale, press the tribar in the upper left corner and navigate to Settings > Advanced Settings to turn off the Enable V1 Card Reader setting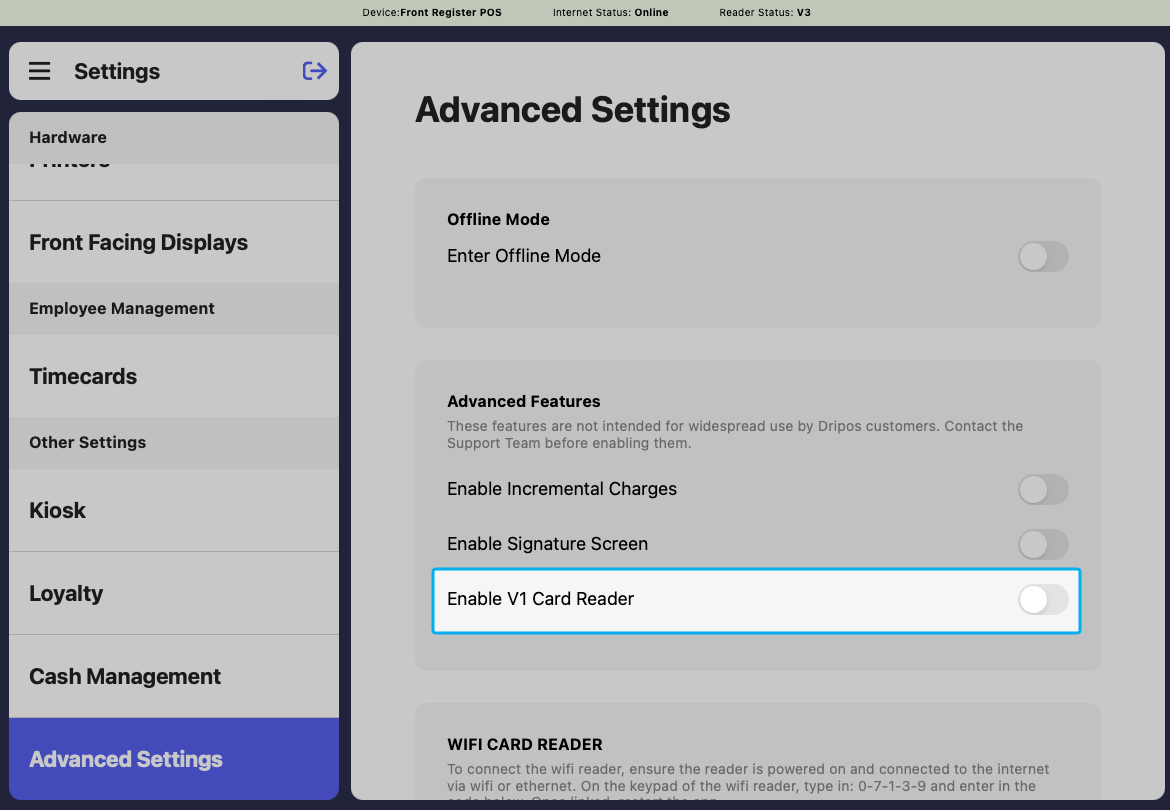
2
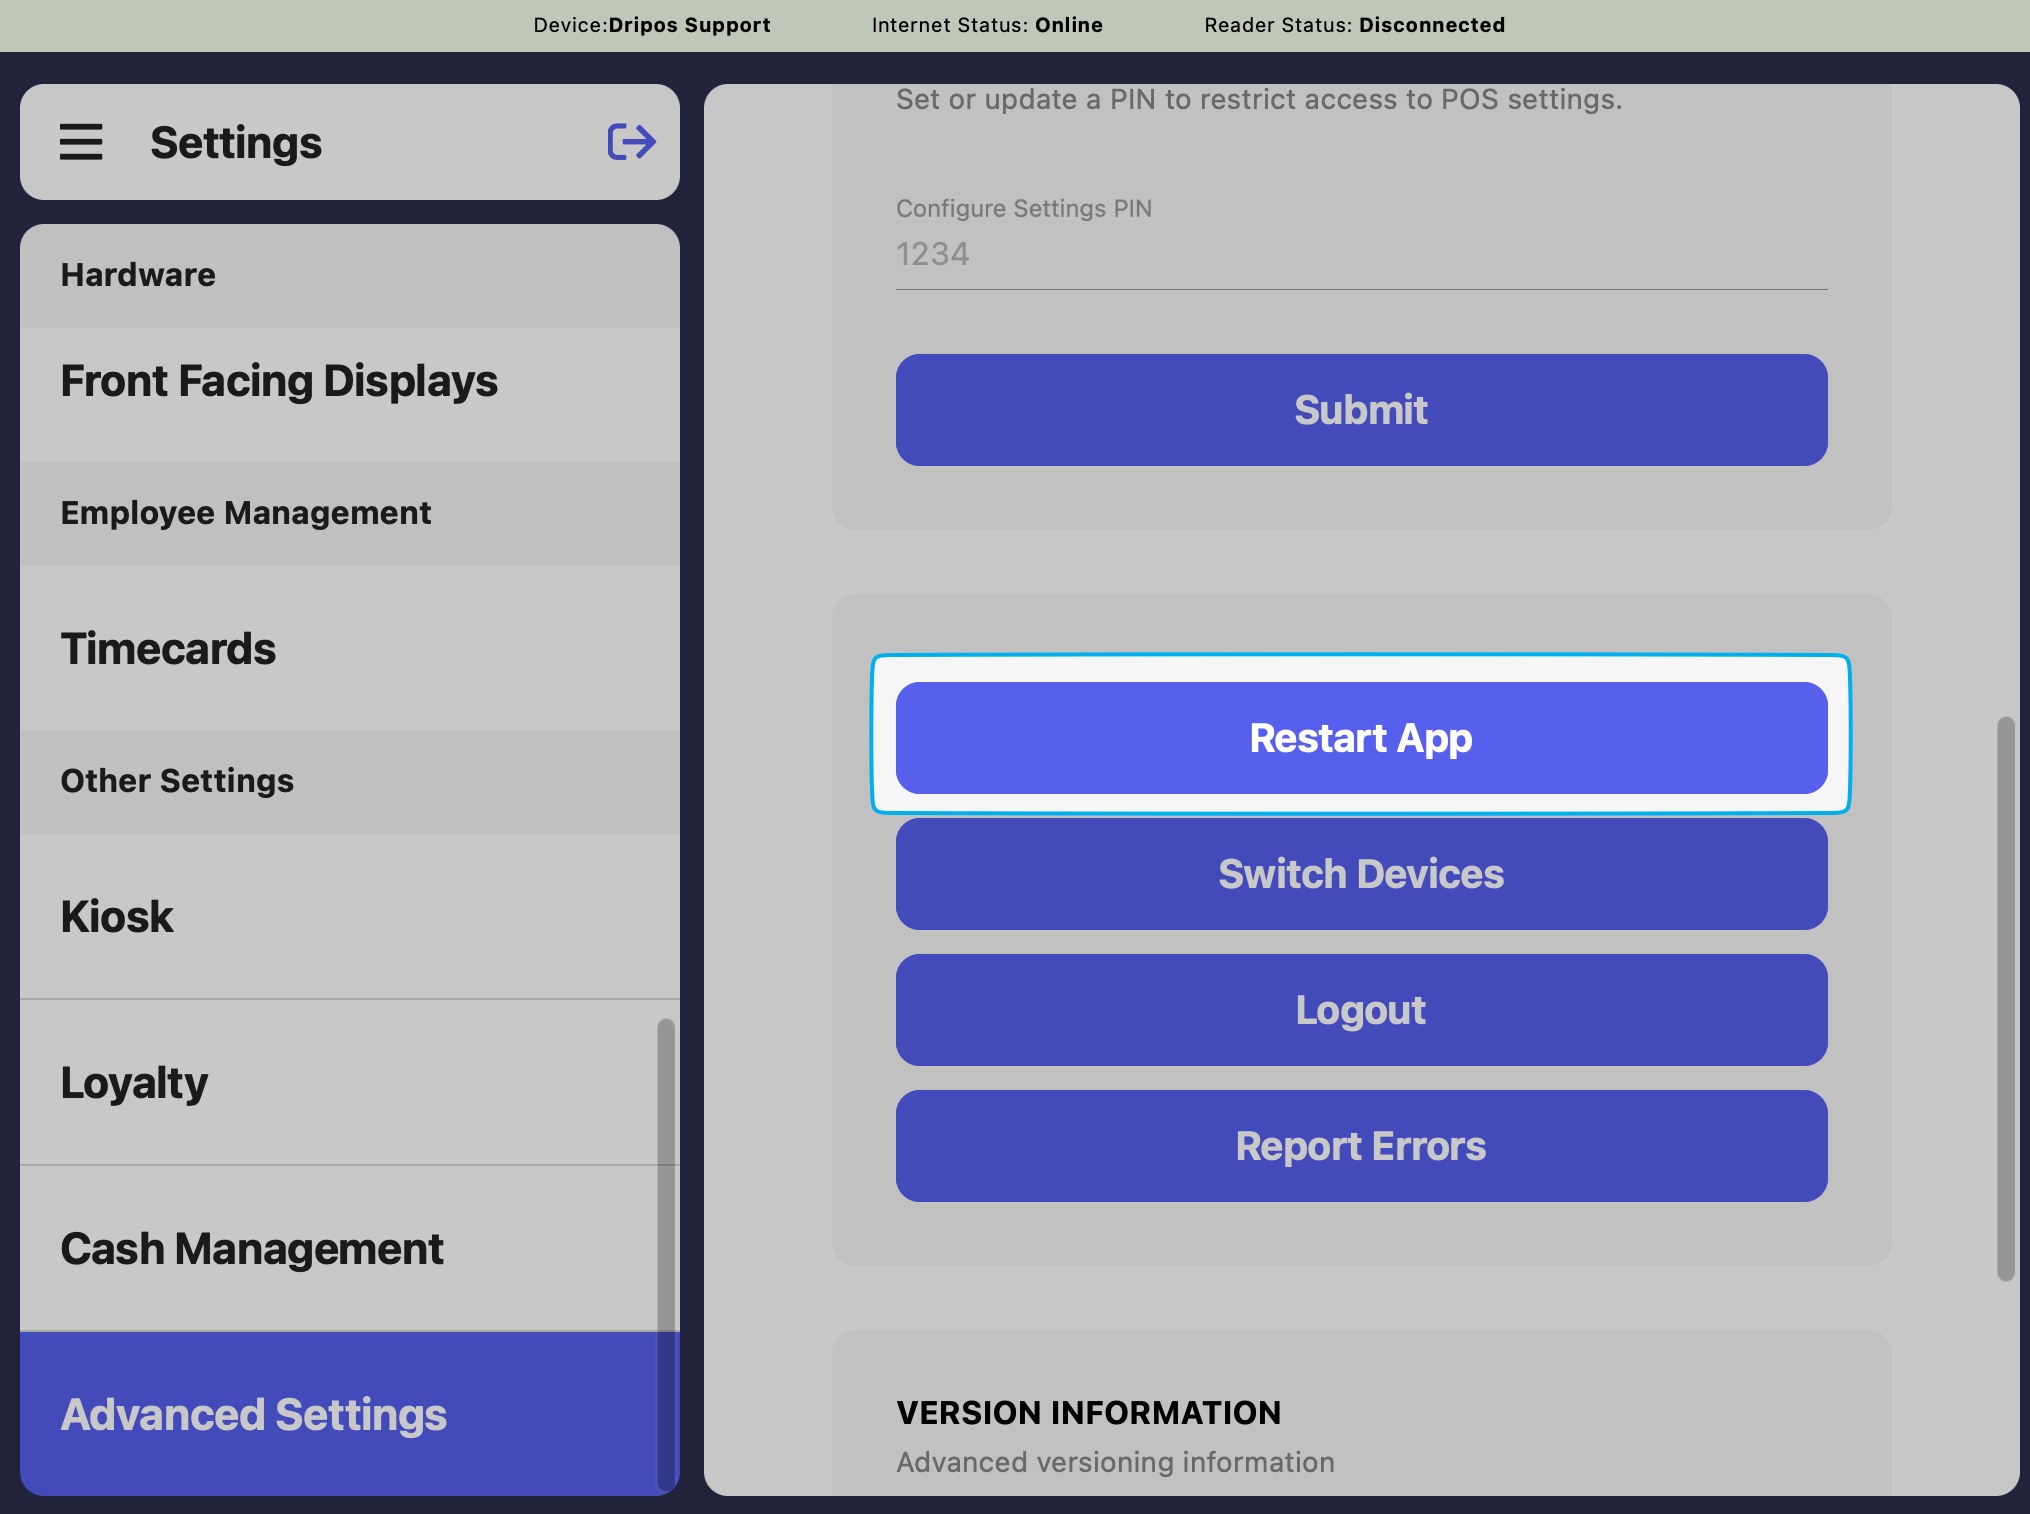
Restart the POS
Press OK and scroll down in Advanced Settings to select the Restart App button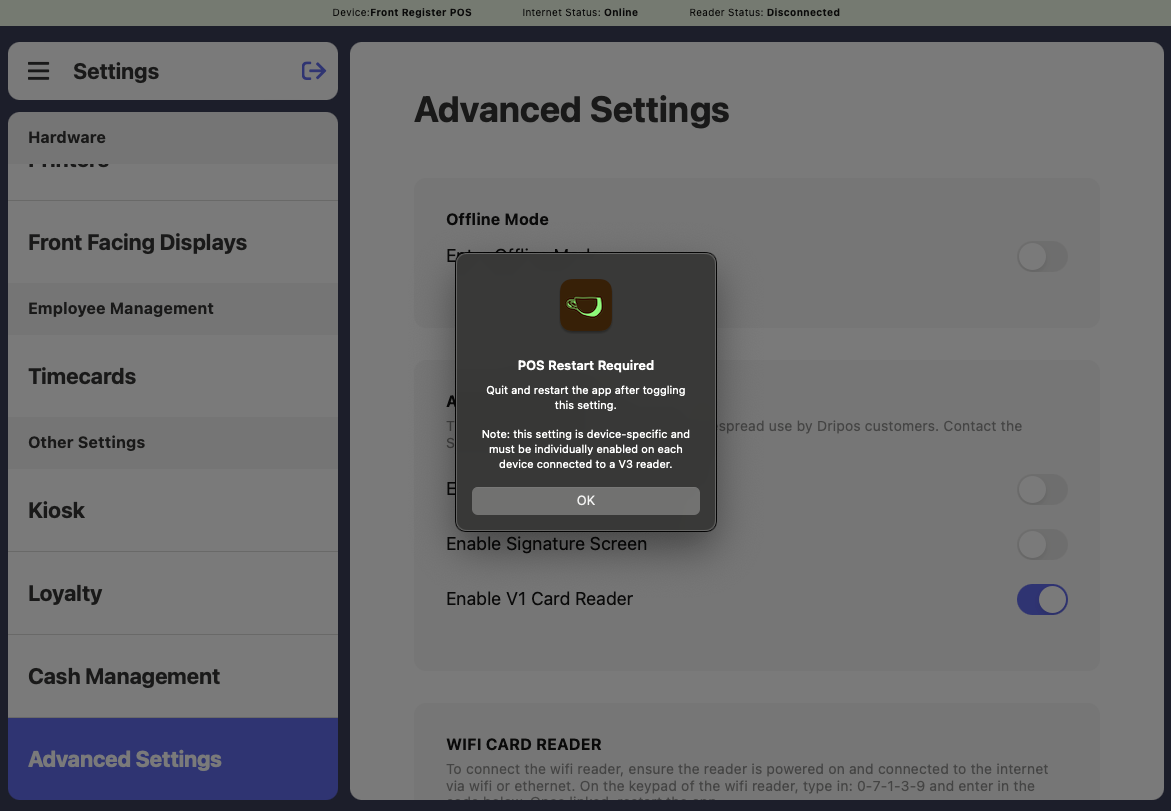
3
Migrate to V3
Navigate to POS Settings > Card Readers, click the pencil icon to update an existing card reader and press Migrate to V3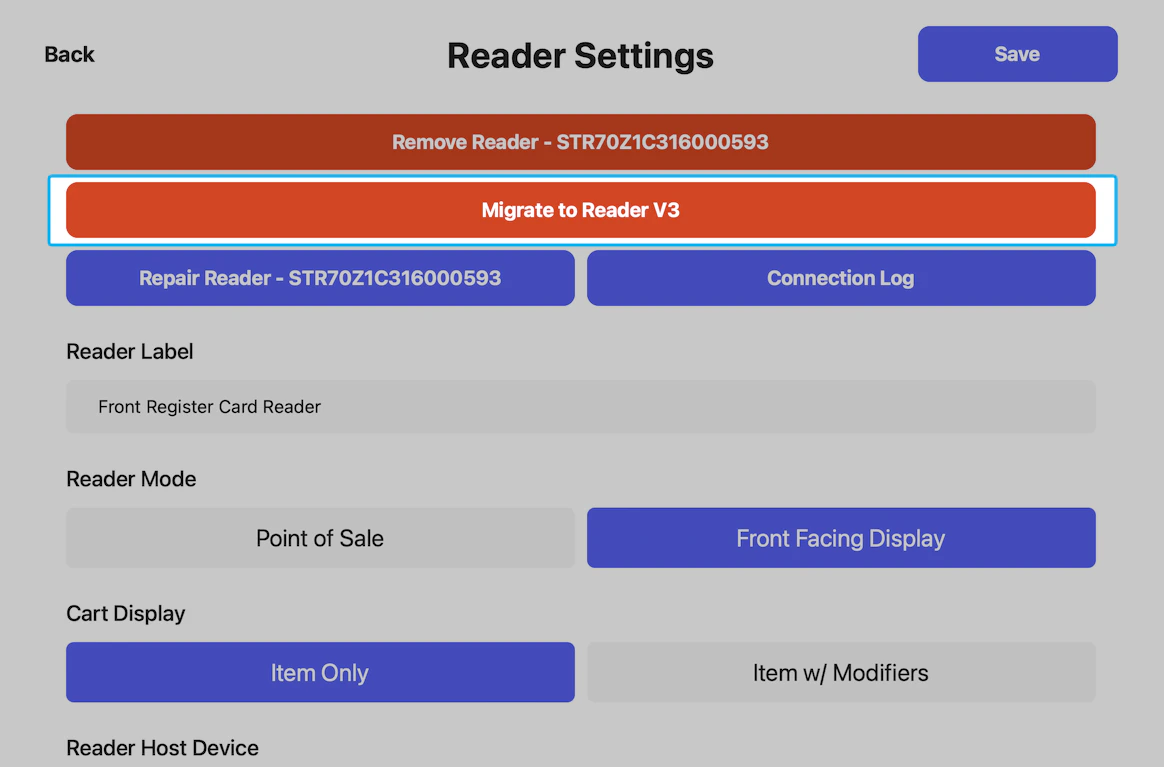
4
Restart Card Reader
Once your card reader successfully migrates to V3, press OK and hold the power button on the card reader to Restart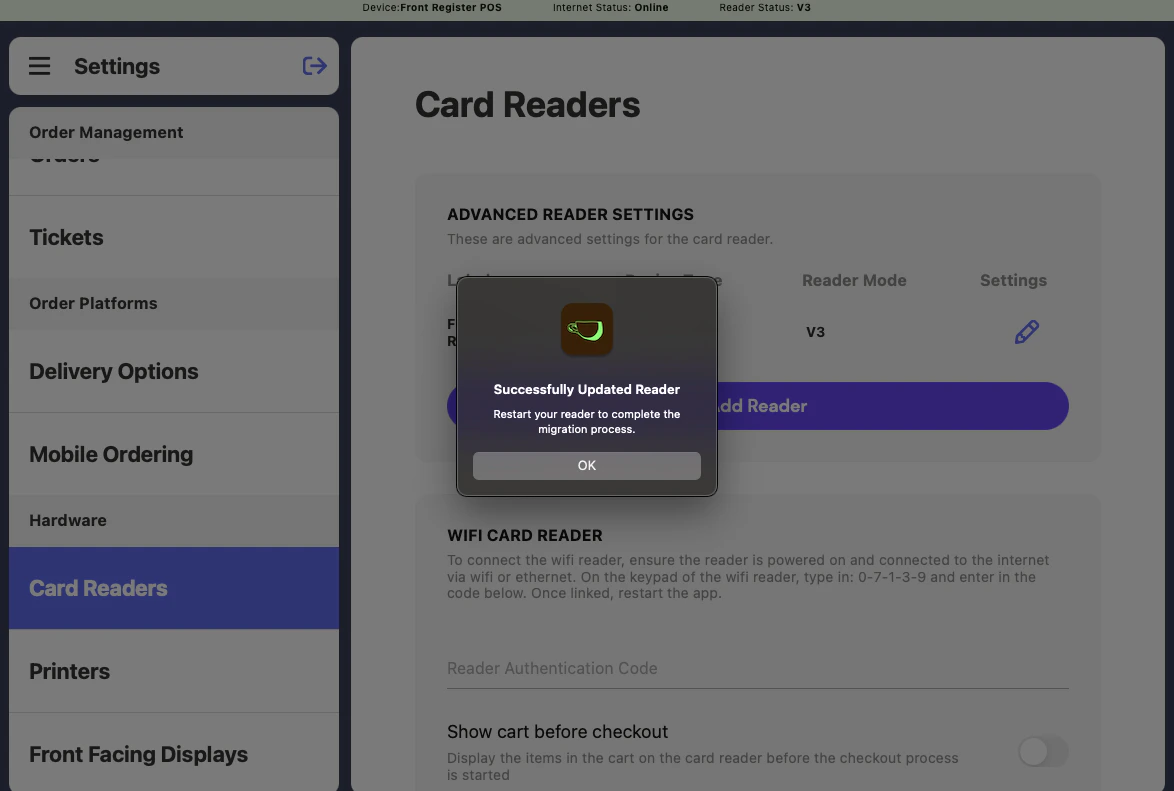
5
Select a Register
After the card reader restarts, select the register device to connect this reader to
The name of the device is shown at the top of the Point of Sale screen.
Kiosk Card Reader Instructions
Kiosk Card Reader Instructions
Do not pair your card reader using these instructions unless instructed by your onboarding specialist or Dripos Support. This is for Kiosk Mode only.
1
Turn on Card Reader
Hold down the power button for 5 seconds until a purple Stripe screen appears
2
Choose Network
3
Register this Reader
Use the three-word pairing code to connect the reader to the Point of Sale device
4
Enable V1 Setting
On the Point of Sale, press the tribar in the upper left corner and navigate to Settings > Advanced Settings to turn on the Enable V1 Card Reader setting
5
Restart the POS
Press OK and scroll down in Advanced Settings to select the Restart App button
6
Add Reader to Point of Sale
On the Point of Sale, navigate to Settings > Card Readers and click Add Reader
7
Configure Reader Settings
Complete the fields below to pair the card reader to the Point of Sale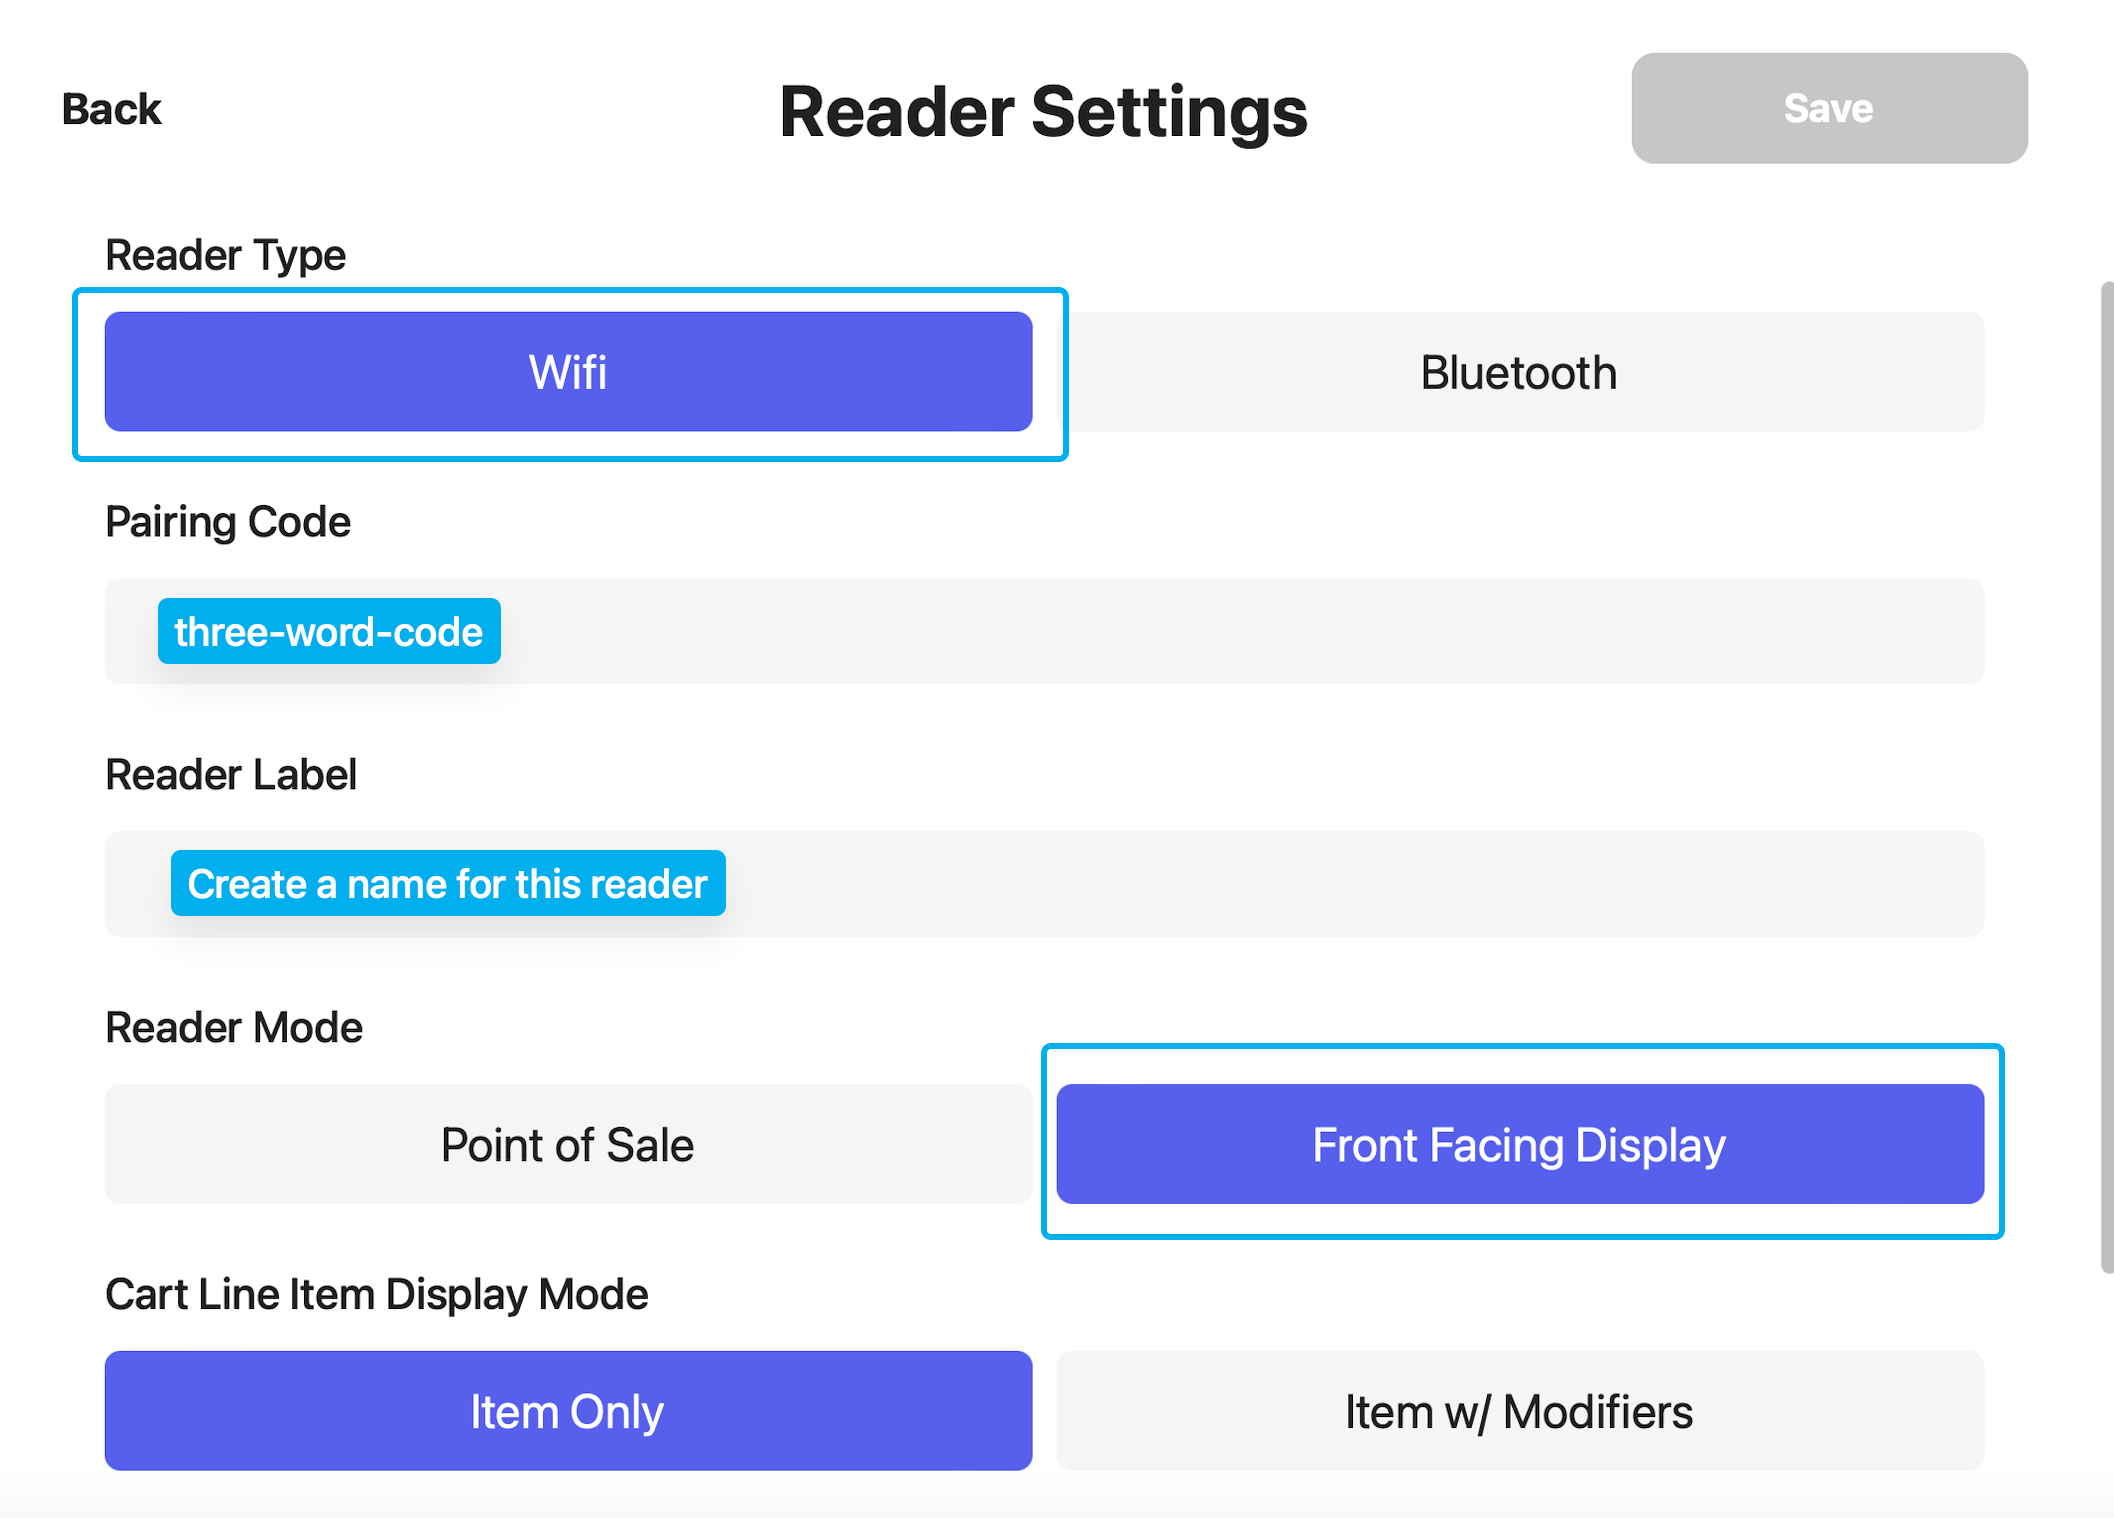
Reader Type
Reader Type
Select Wifi for the S700 pairing
Pairing Code
Pairing Code
Enter the three word code on the card reader from Step 3*Case sensitive including dashes word-word-word
Reader Label
Reader Label
Create a name for this reader, i.e. Front Register Reader, Drive Thru Reader, Register 1 Reader
Reader Mode
Reader Mode
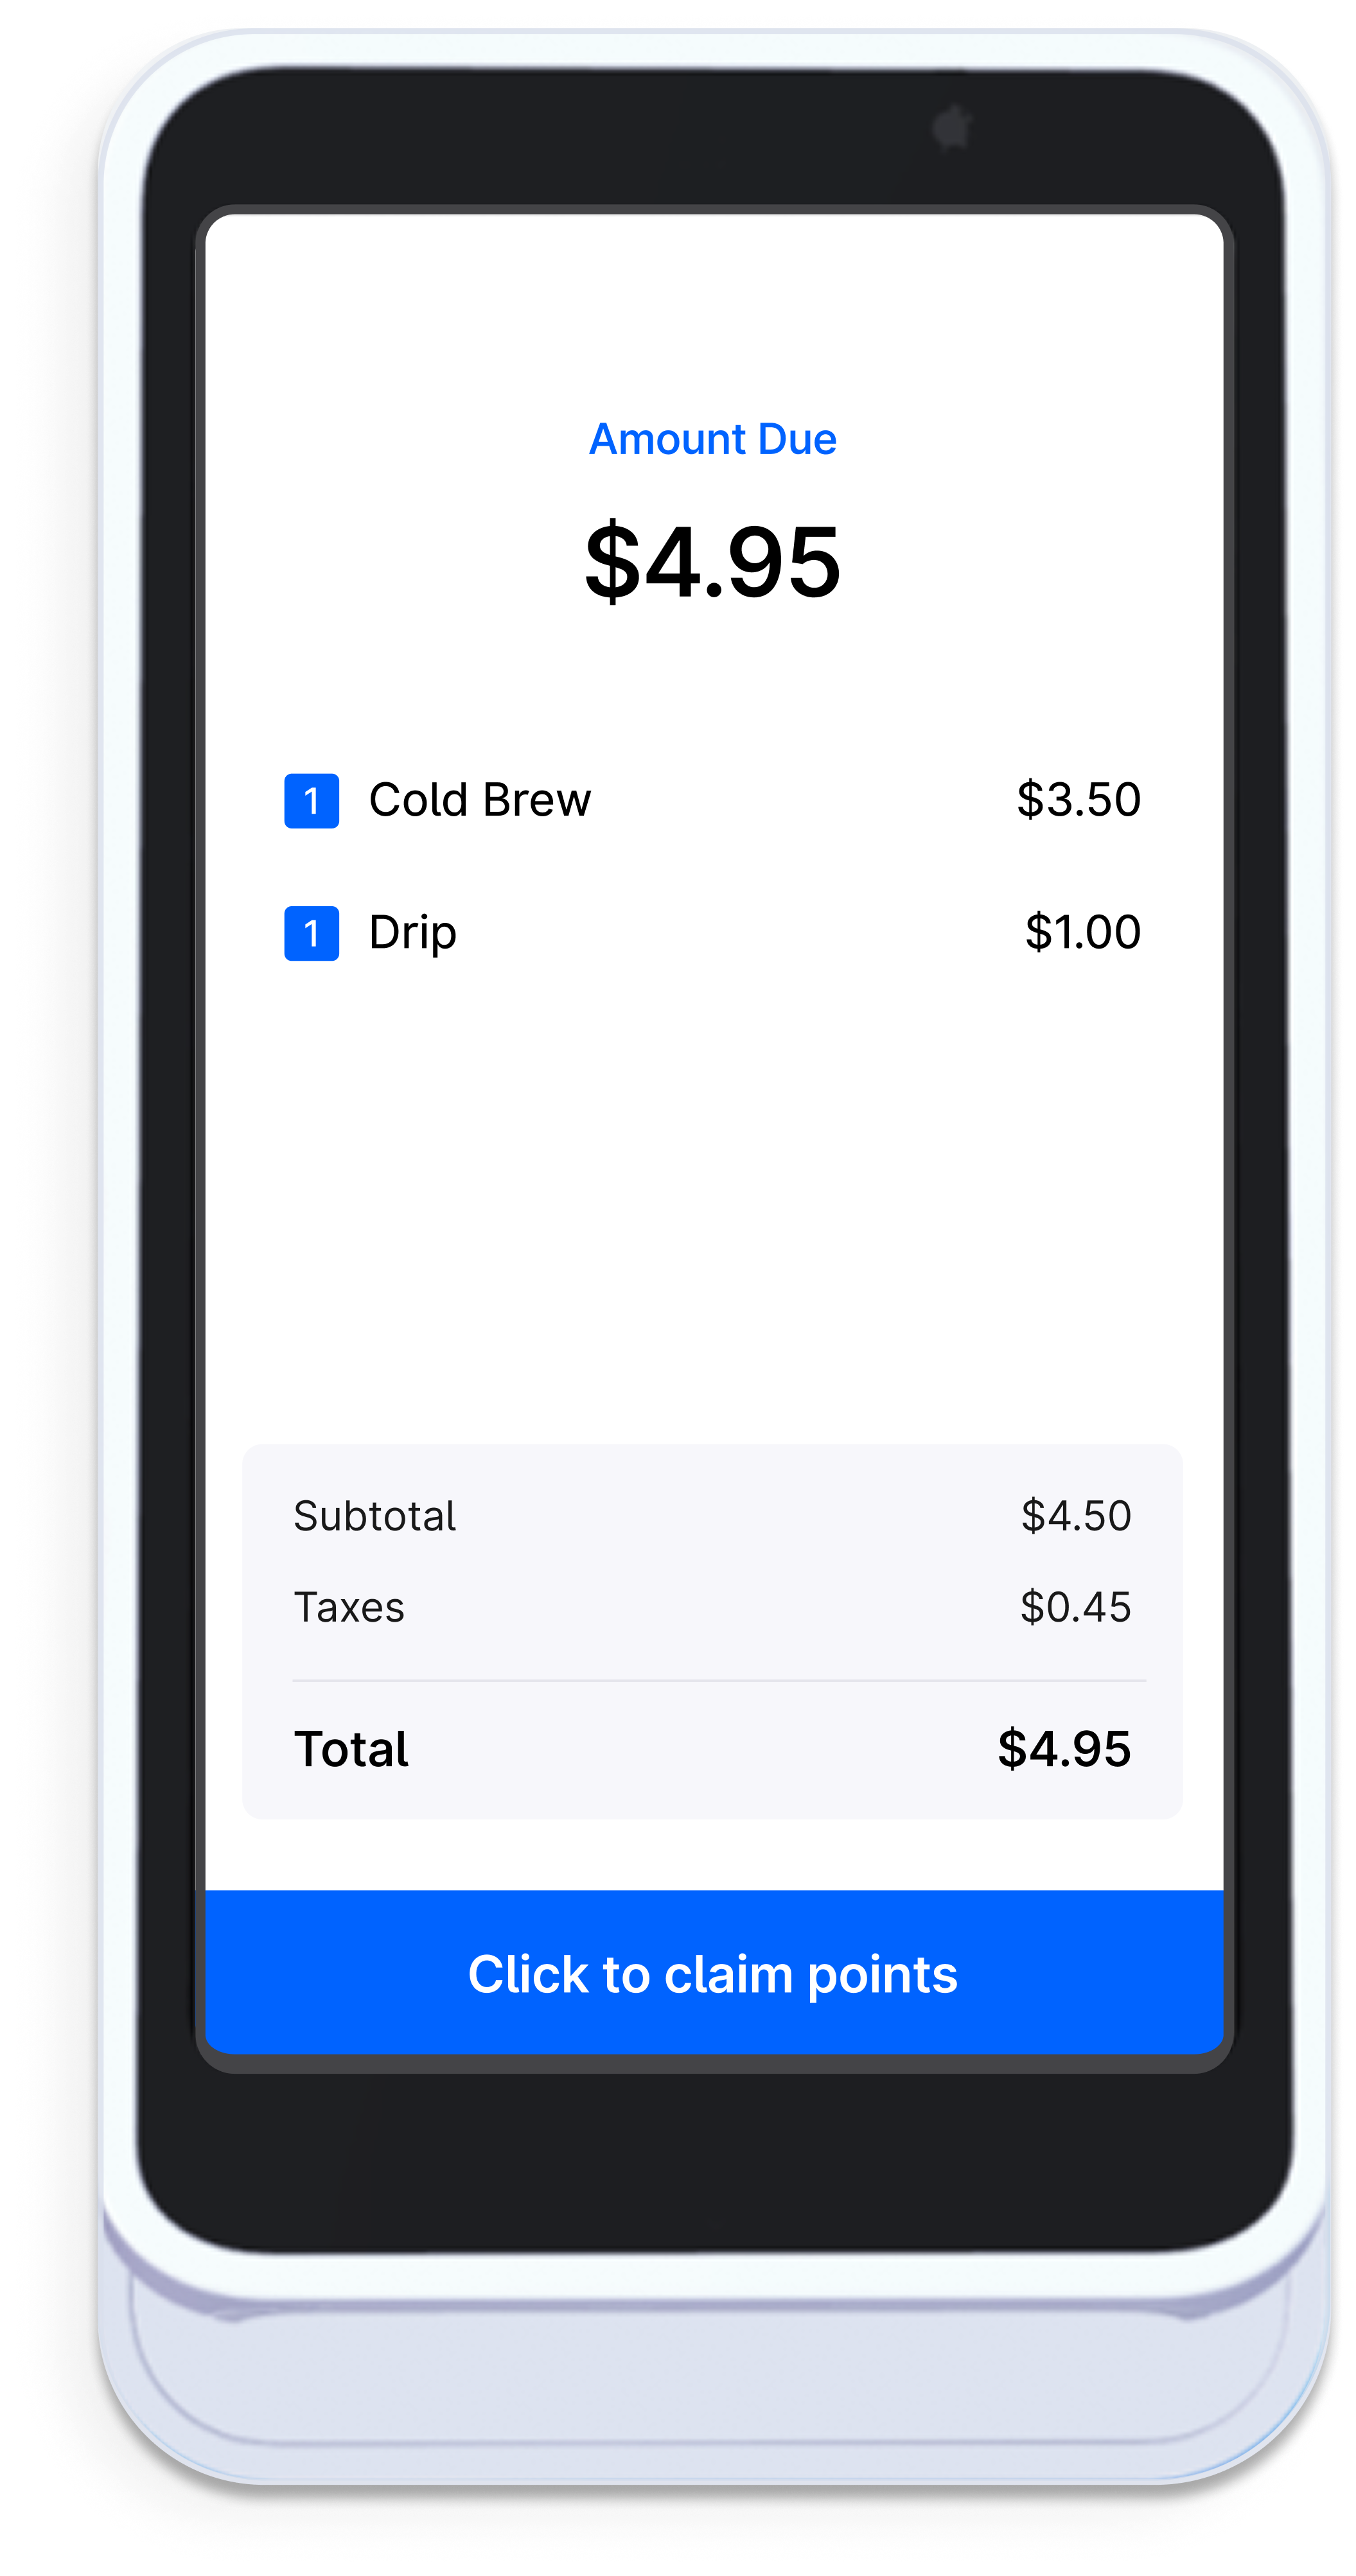
Front Facing Display: Customers can see their items in cart, enter their phone number, and pay with card.
Cart Line Item Display Mode
Cart Line Item Display Mode
Item Only: Only products added to cart will display on the front facing card reader for customers to view
Reader Host Device
Reader Host Device
Select the Point of Sale device to pair this reader with. Find the name of the device you are pairing to here: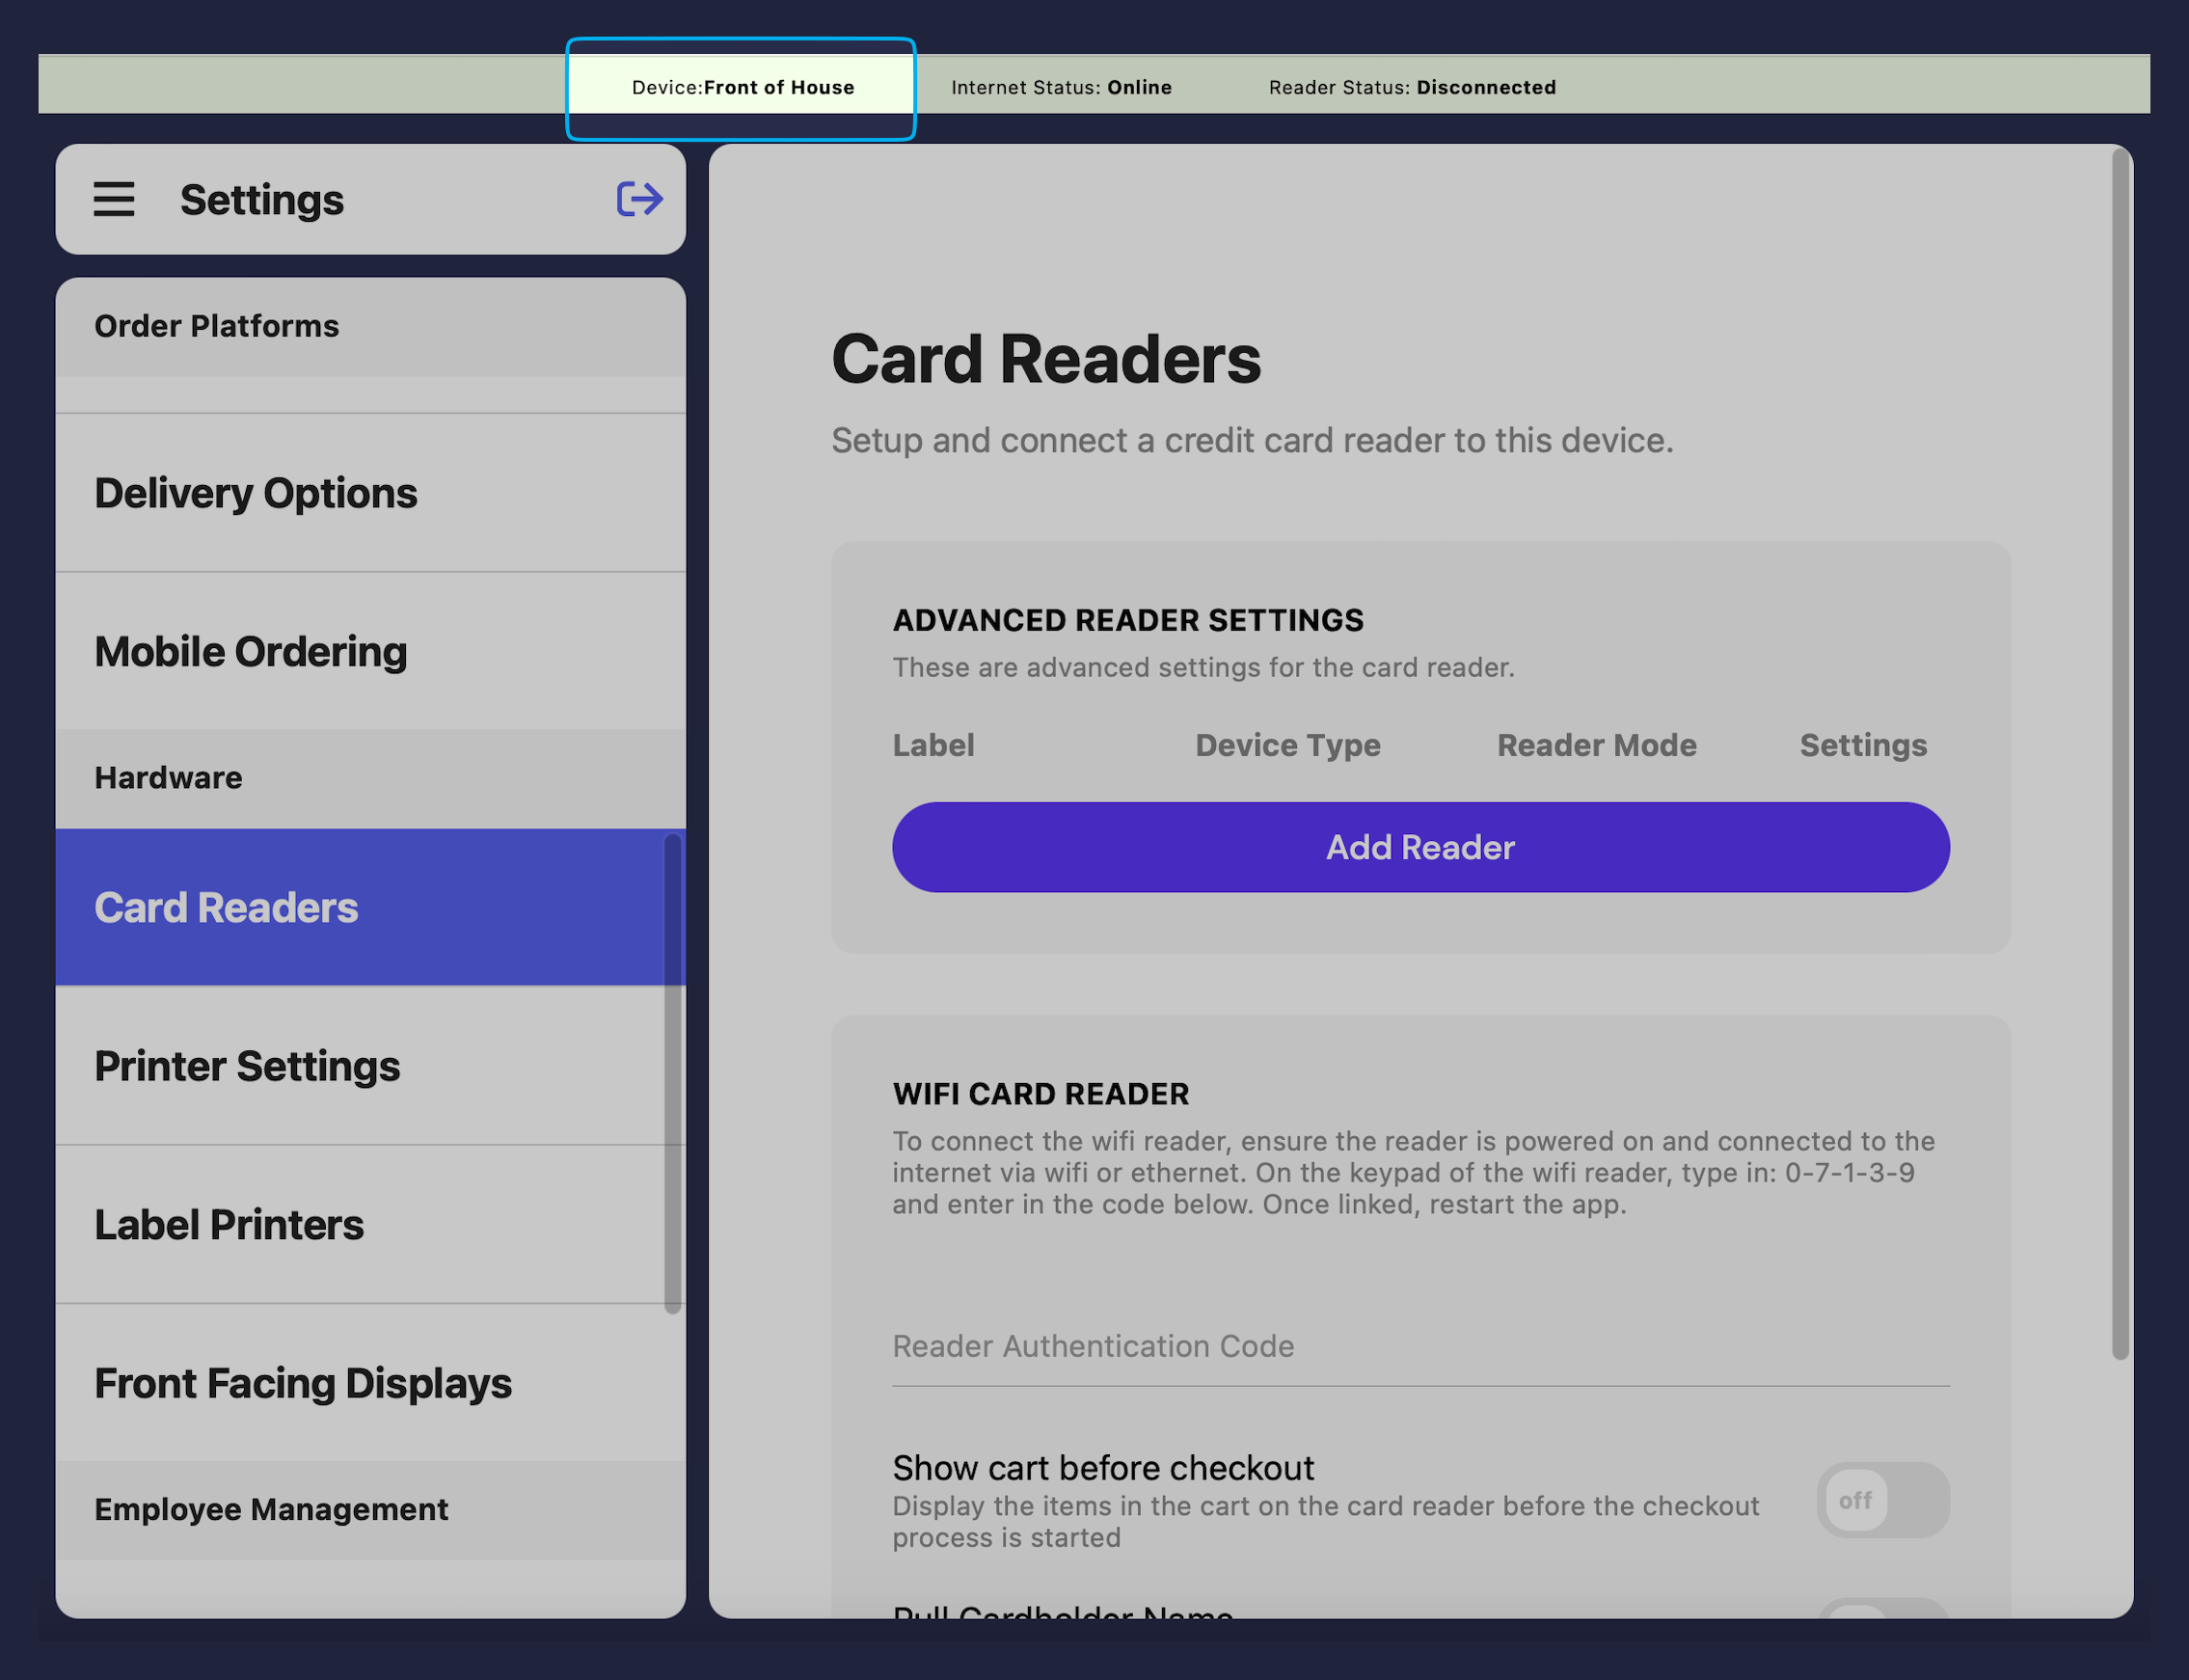
8
Save Reader
9
Confirm Reader Connection
Once a reader is successfully paired, confirm Reader Status = Good Connection