Ethernet
Connect a printer to Wi-Fi via ethernet
Connect a printer to Wi-Fi via ethernet
Remove the printer backing to access the power and ethernet ports. These can be found underneath the printer:

Turn the printer on using the power button in the top right corner: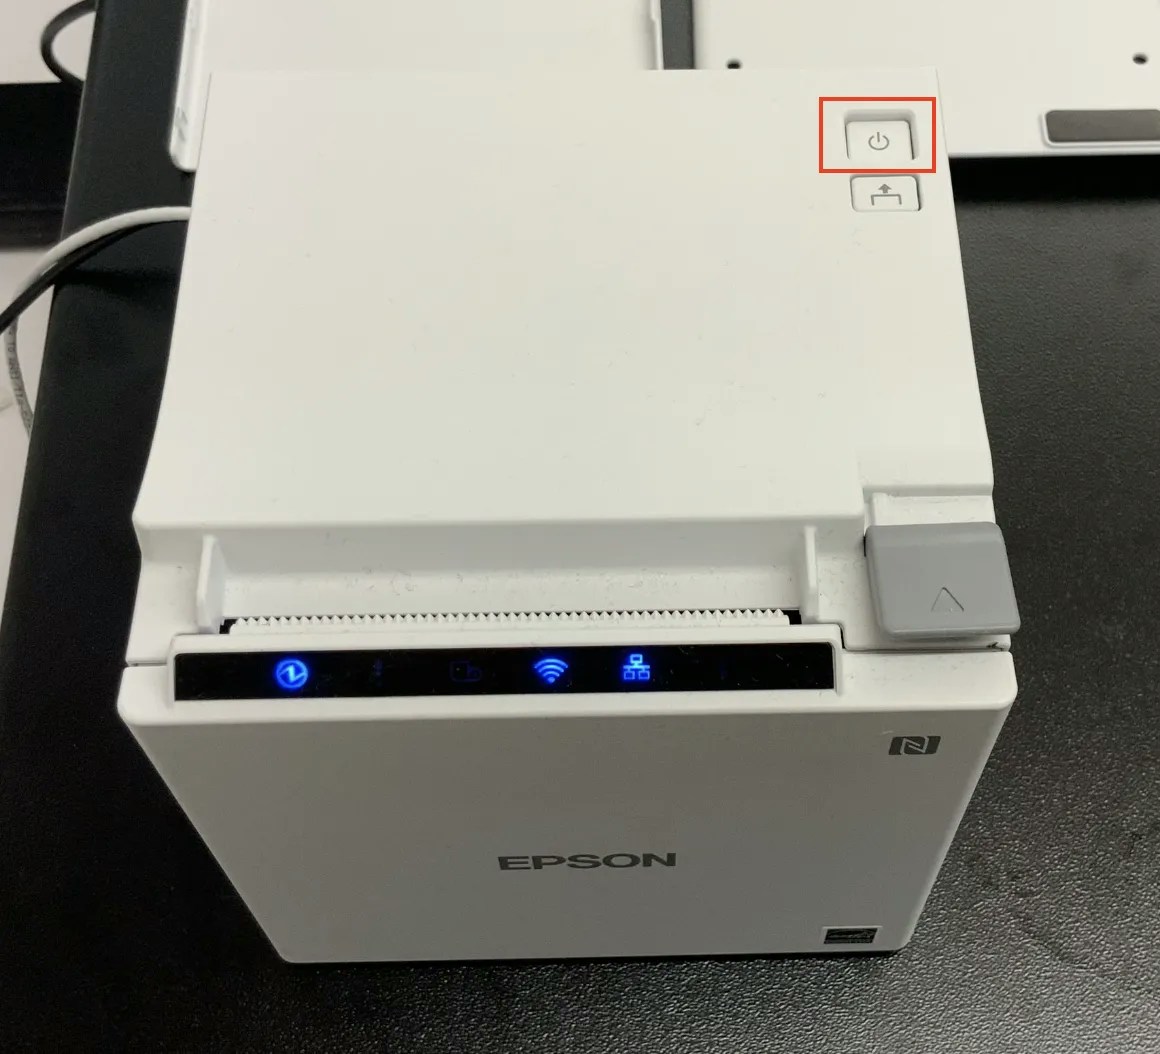
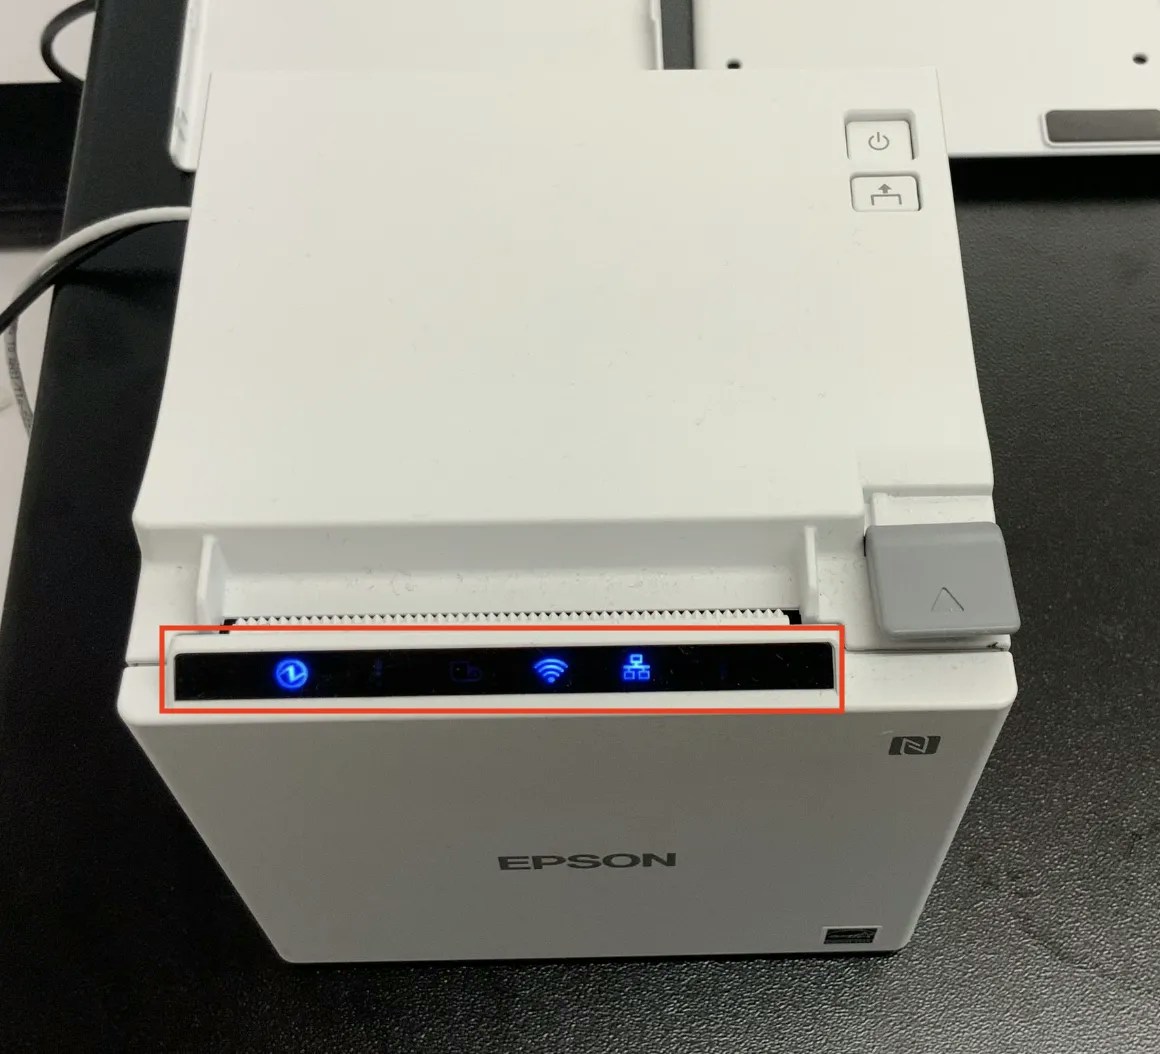
When the printer is fully configured, only the power and ethernet symbols will be lit up in blue: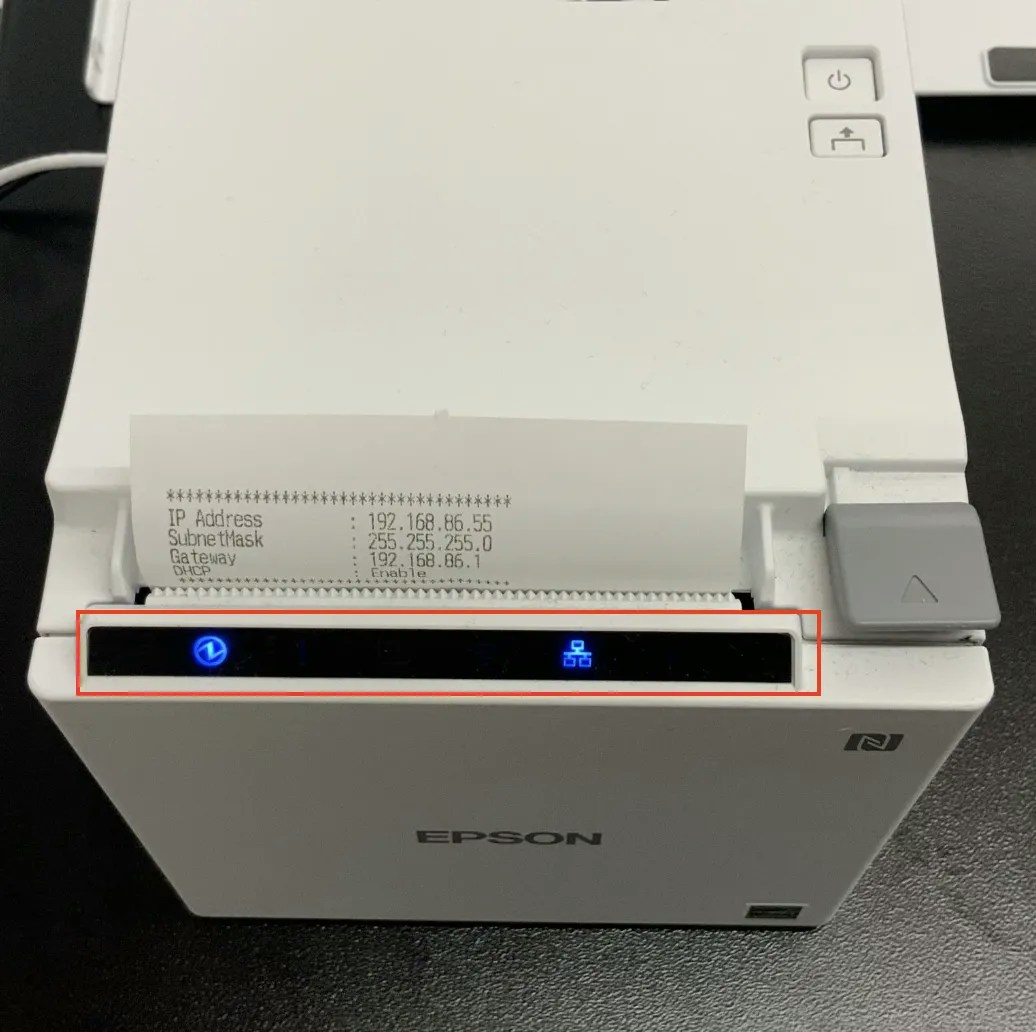
If these lights are not on, your printer is not properly configured to connect to the POS and will not be able to print tickets or receipts.
Once stabilized, the printer will print a short ticket listing an IP address: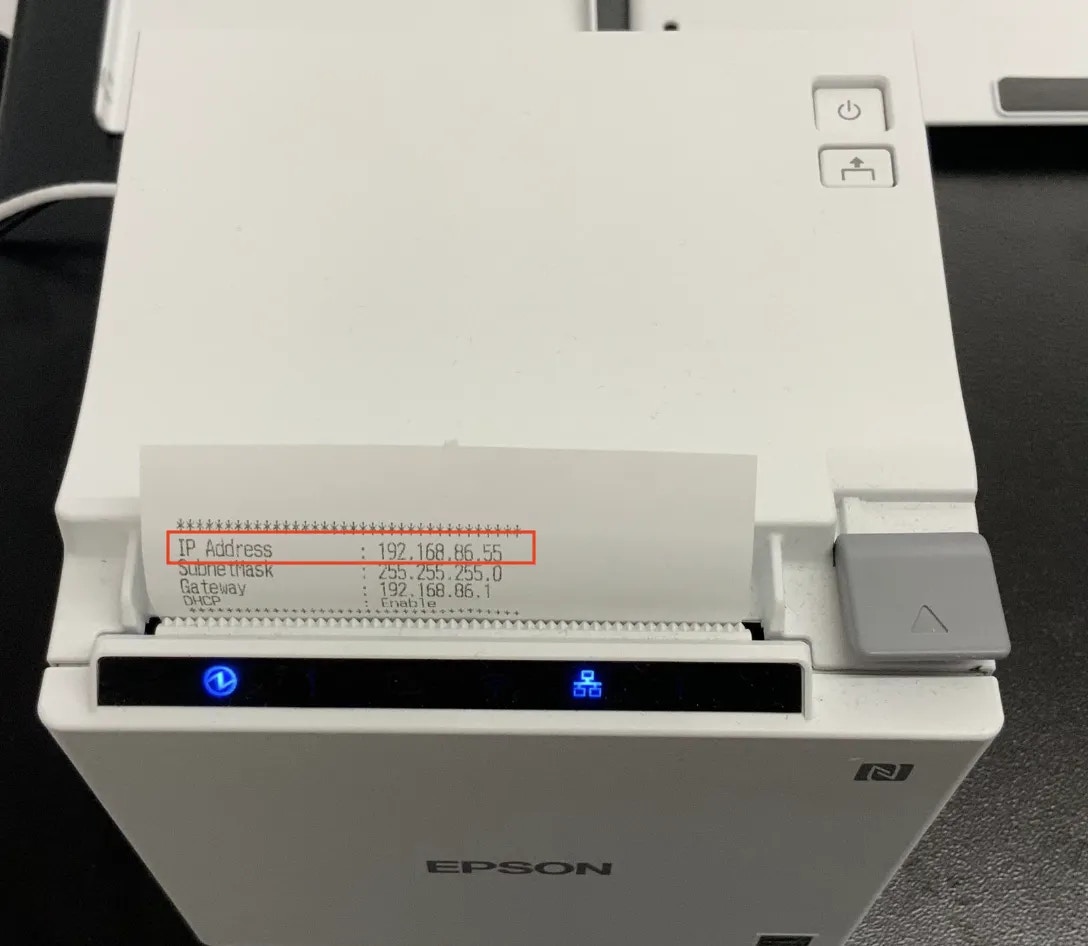
Make sure to hold on to this slip, as the IP address will be needed to connect the printer to the POS device.
Navigate to your tablet’s system settings > Wi-Fi > click the information button next to the connected Wi-Fi > ensure the first three sets of numbers (xxx.xxx.xxx) of the Wi-Fi’s IP address matches the IP address that printed.
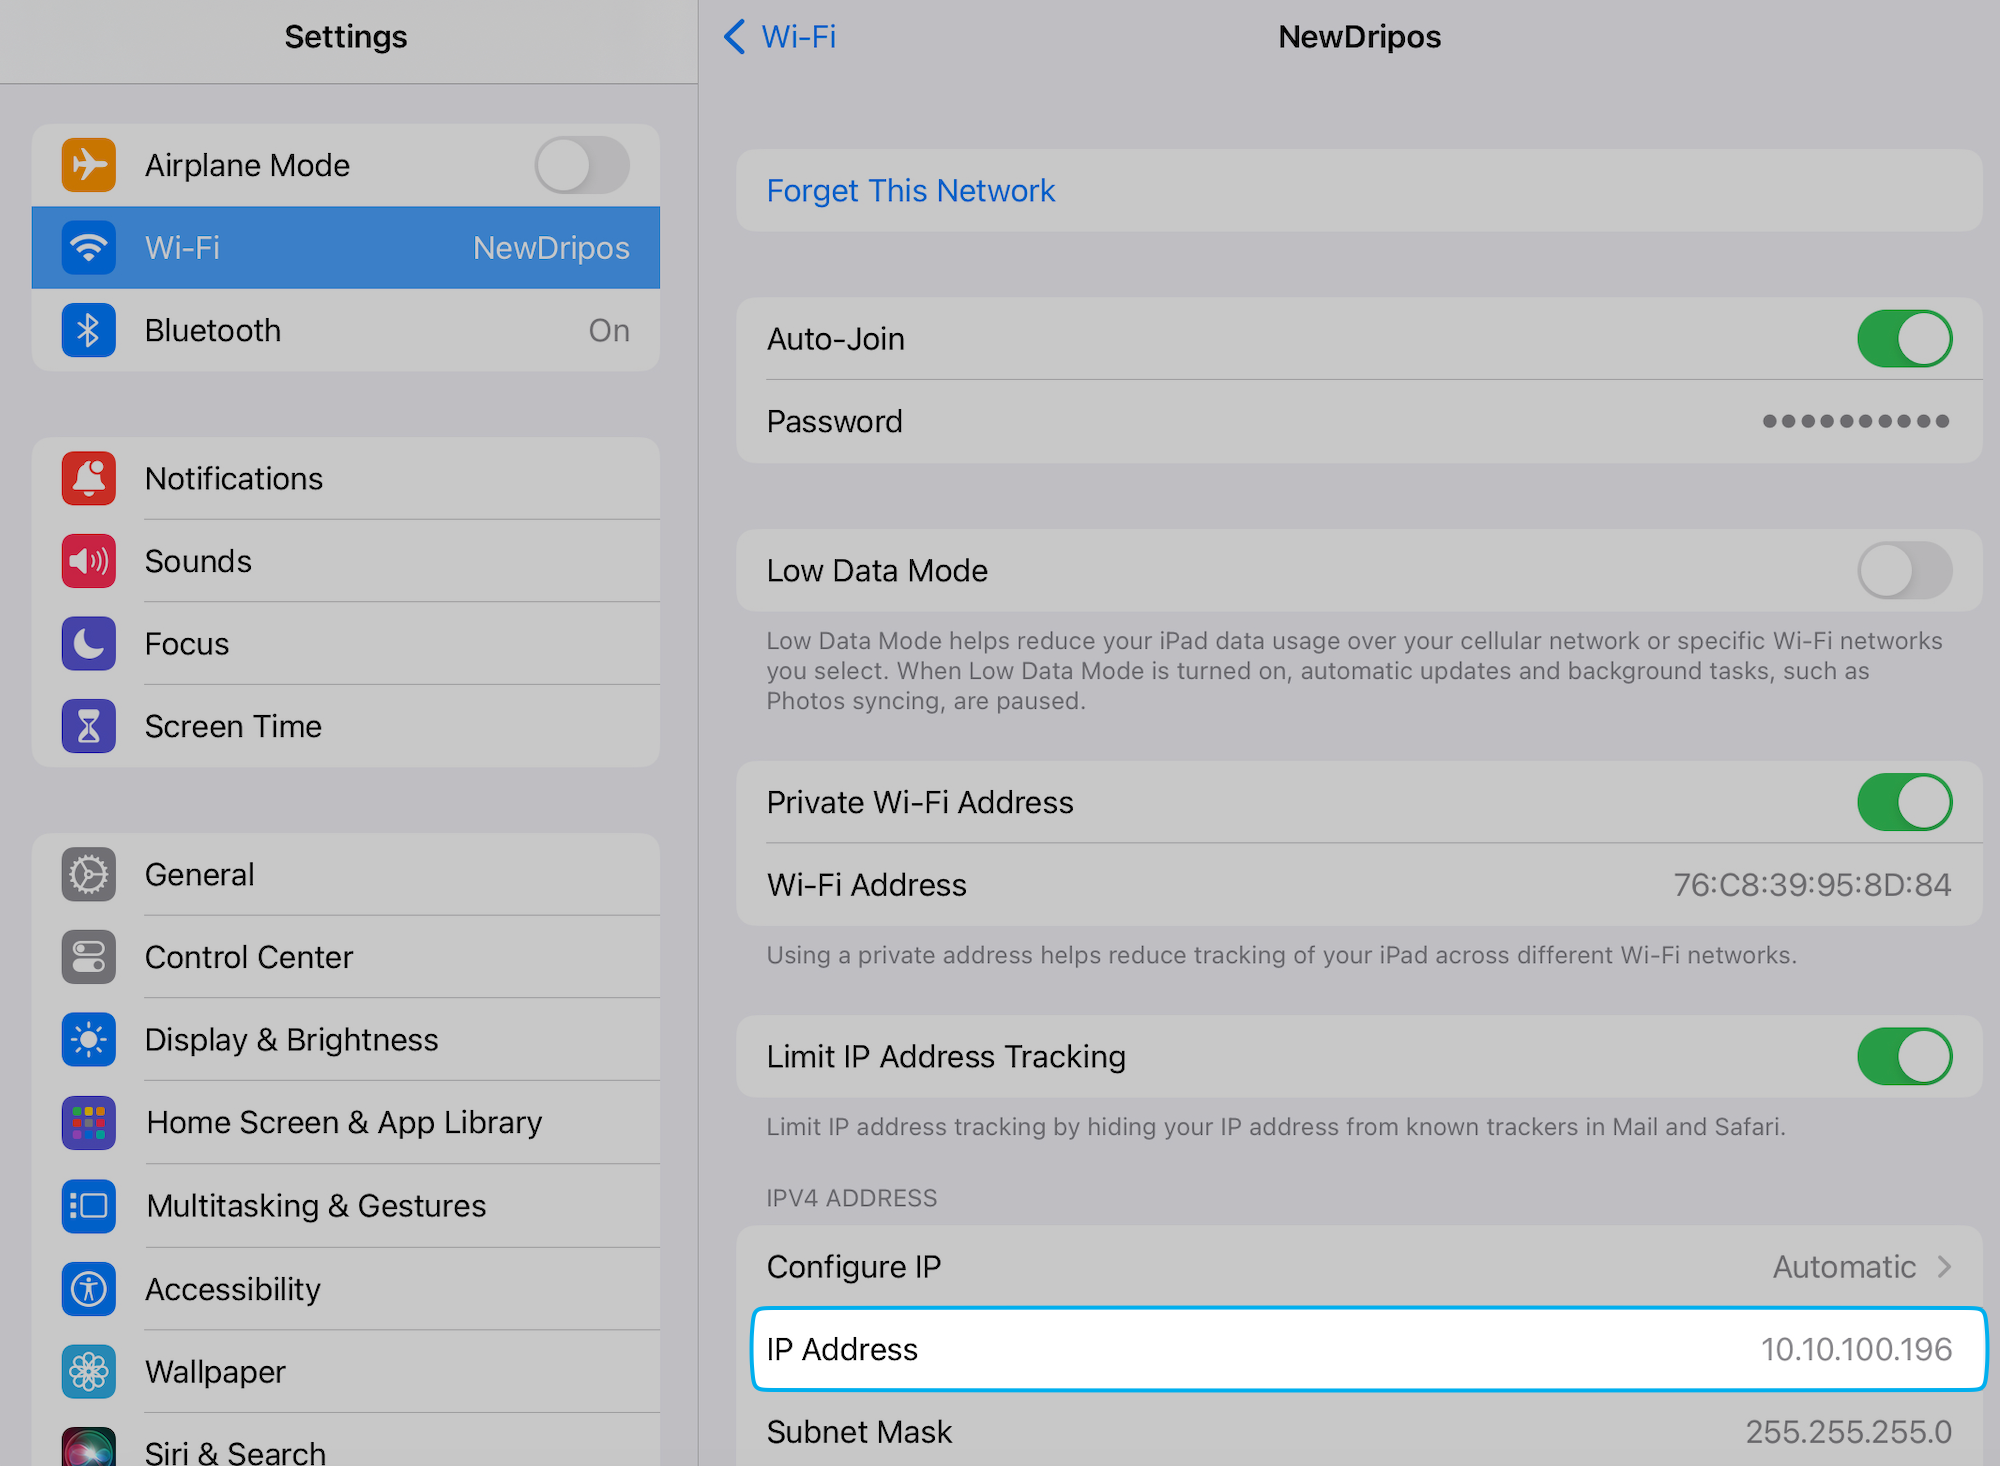
The last set of numbers (.xxx) will never be the same across devices connected to a Wi-Fi network.
Wi-Fi Dongle
The following is requirement to set up a Wi-Fi dongle with an Epson printer:Epson TM Utility App
Epson Wi-Fi Dongle
📲 Reach out to Dripos Support to purchase a Wi-Fi dongle compatible with our printers.
Connect a printer to Wi-Fi via Wi-Fi dongle
Connect a printer to Wi-Fi via Wi-Fi dongle
With the Epson Wi-fi USB Dongle plugged into the USB-A Port of the printer, turn on the printer using the power button to automatically initiate the Wi-fi SimpleAP setup. Two prompts should print:
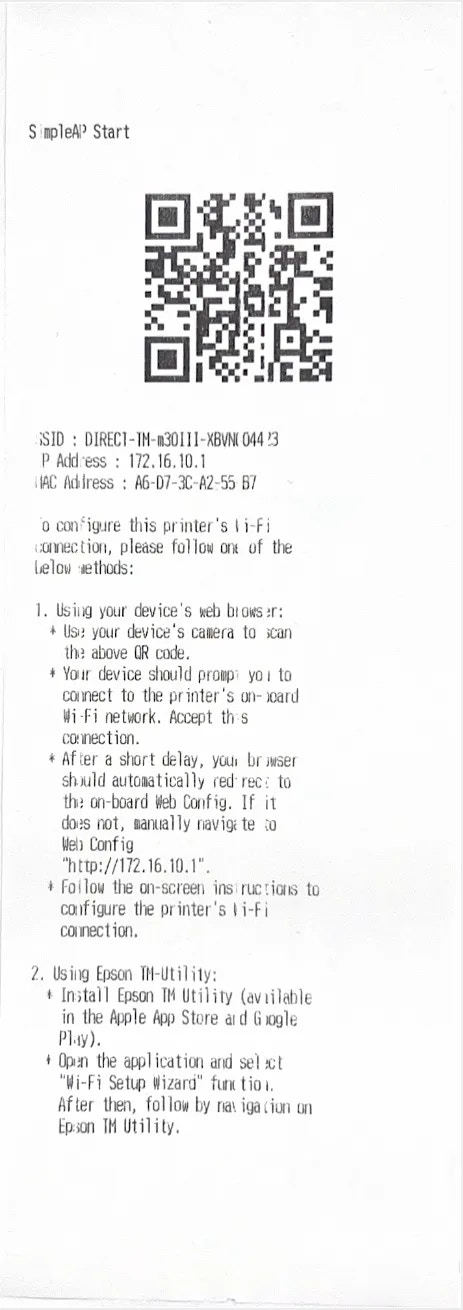
SimpleAP Initialization
SimpleAP Start Slip
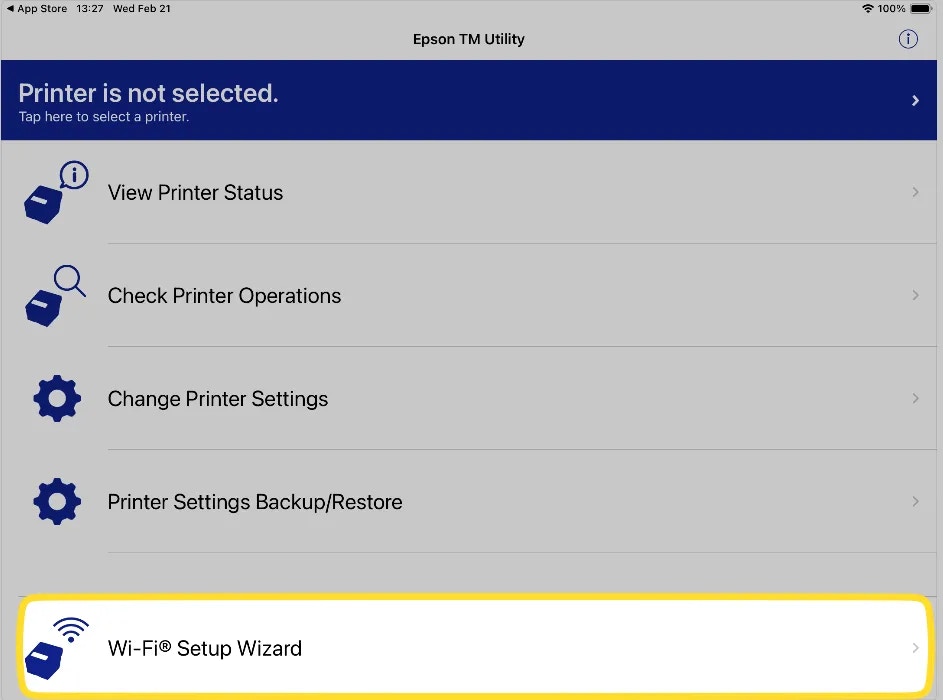
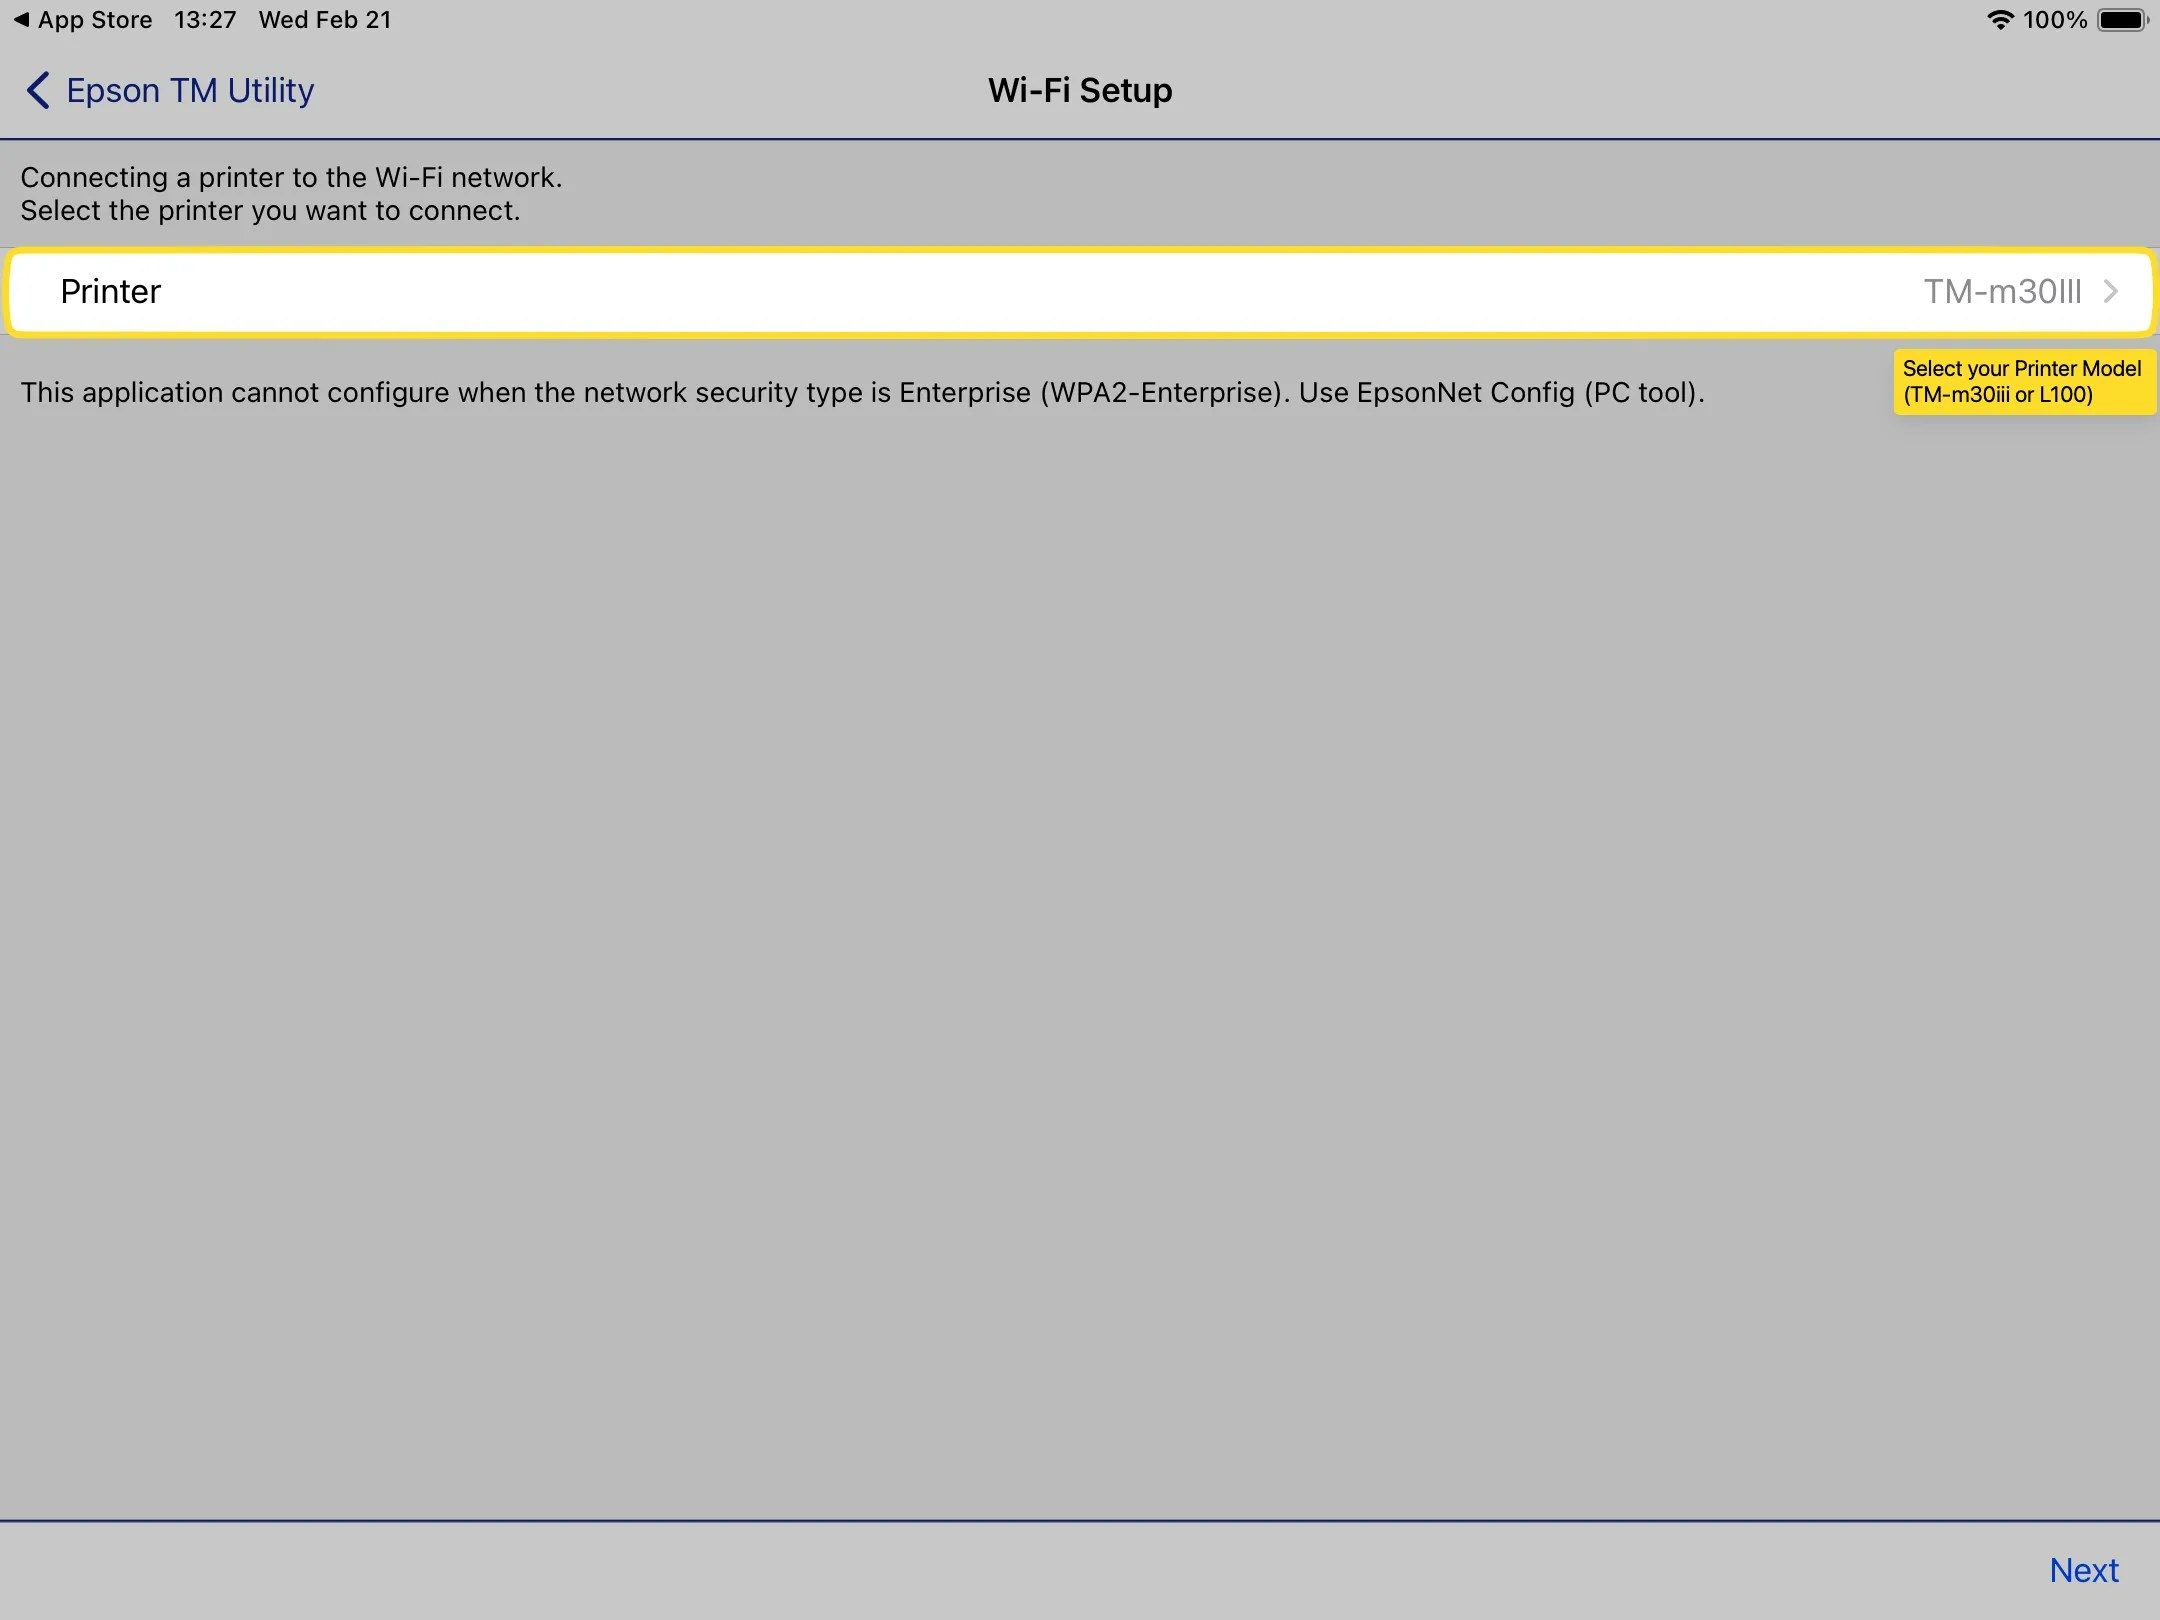
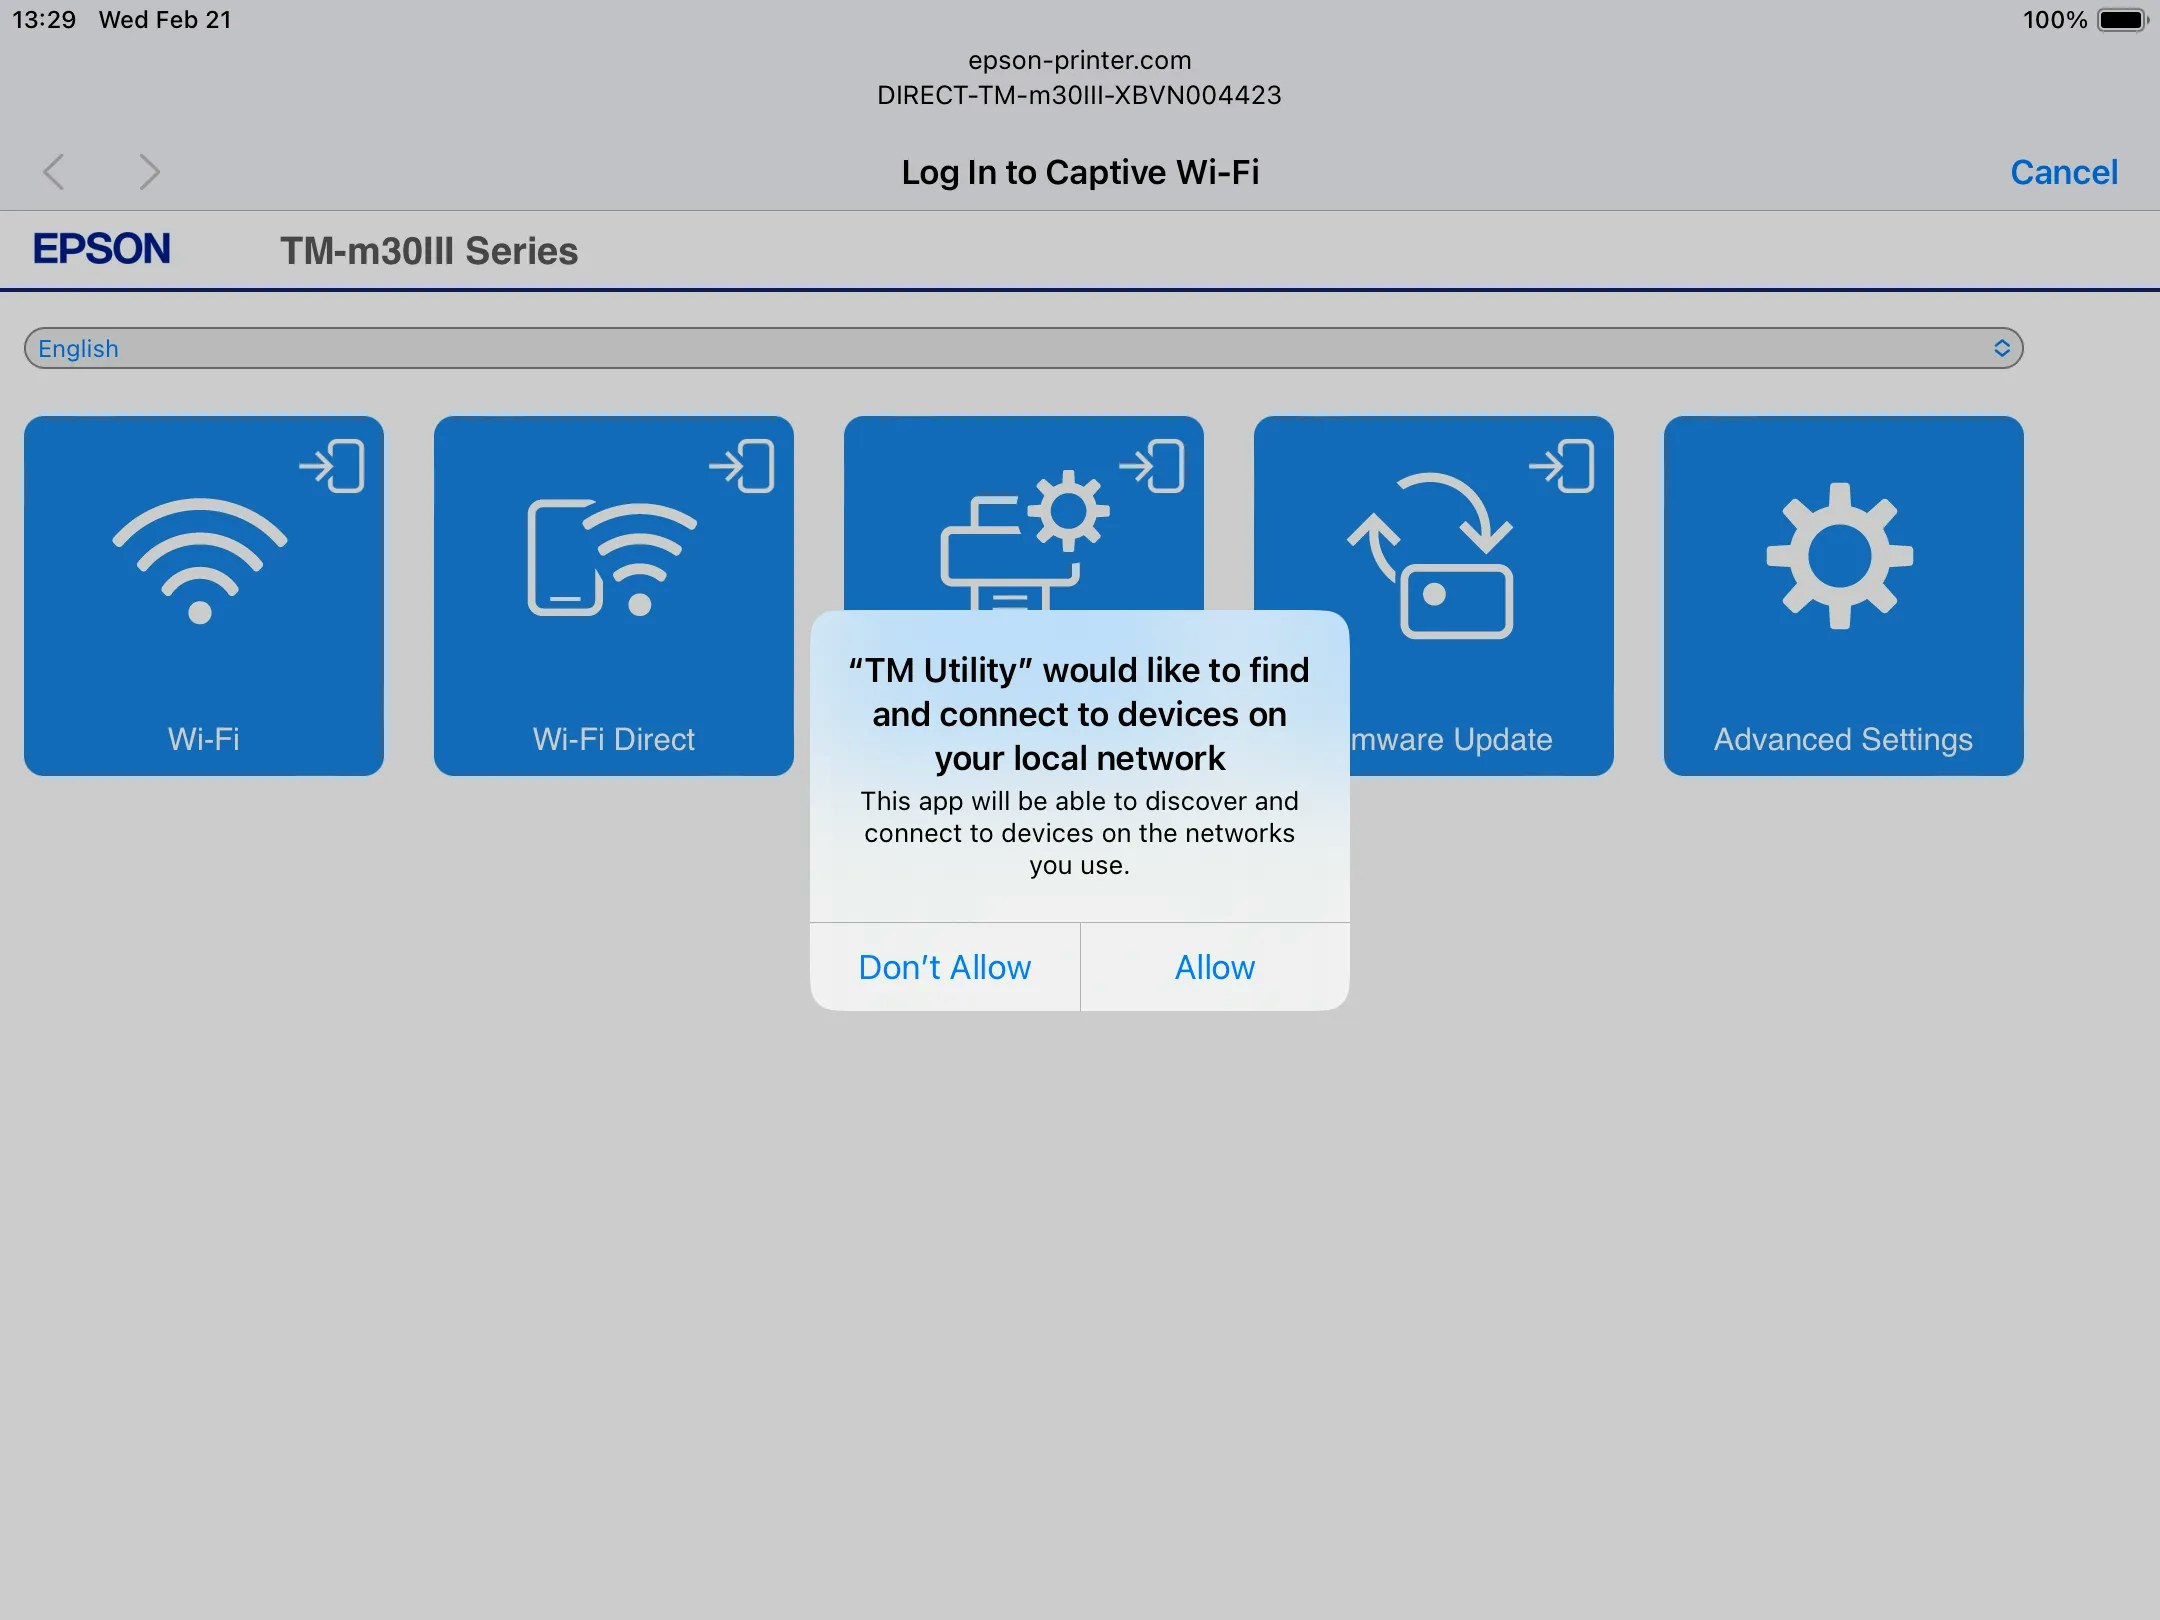
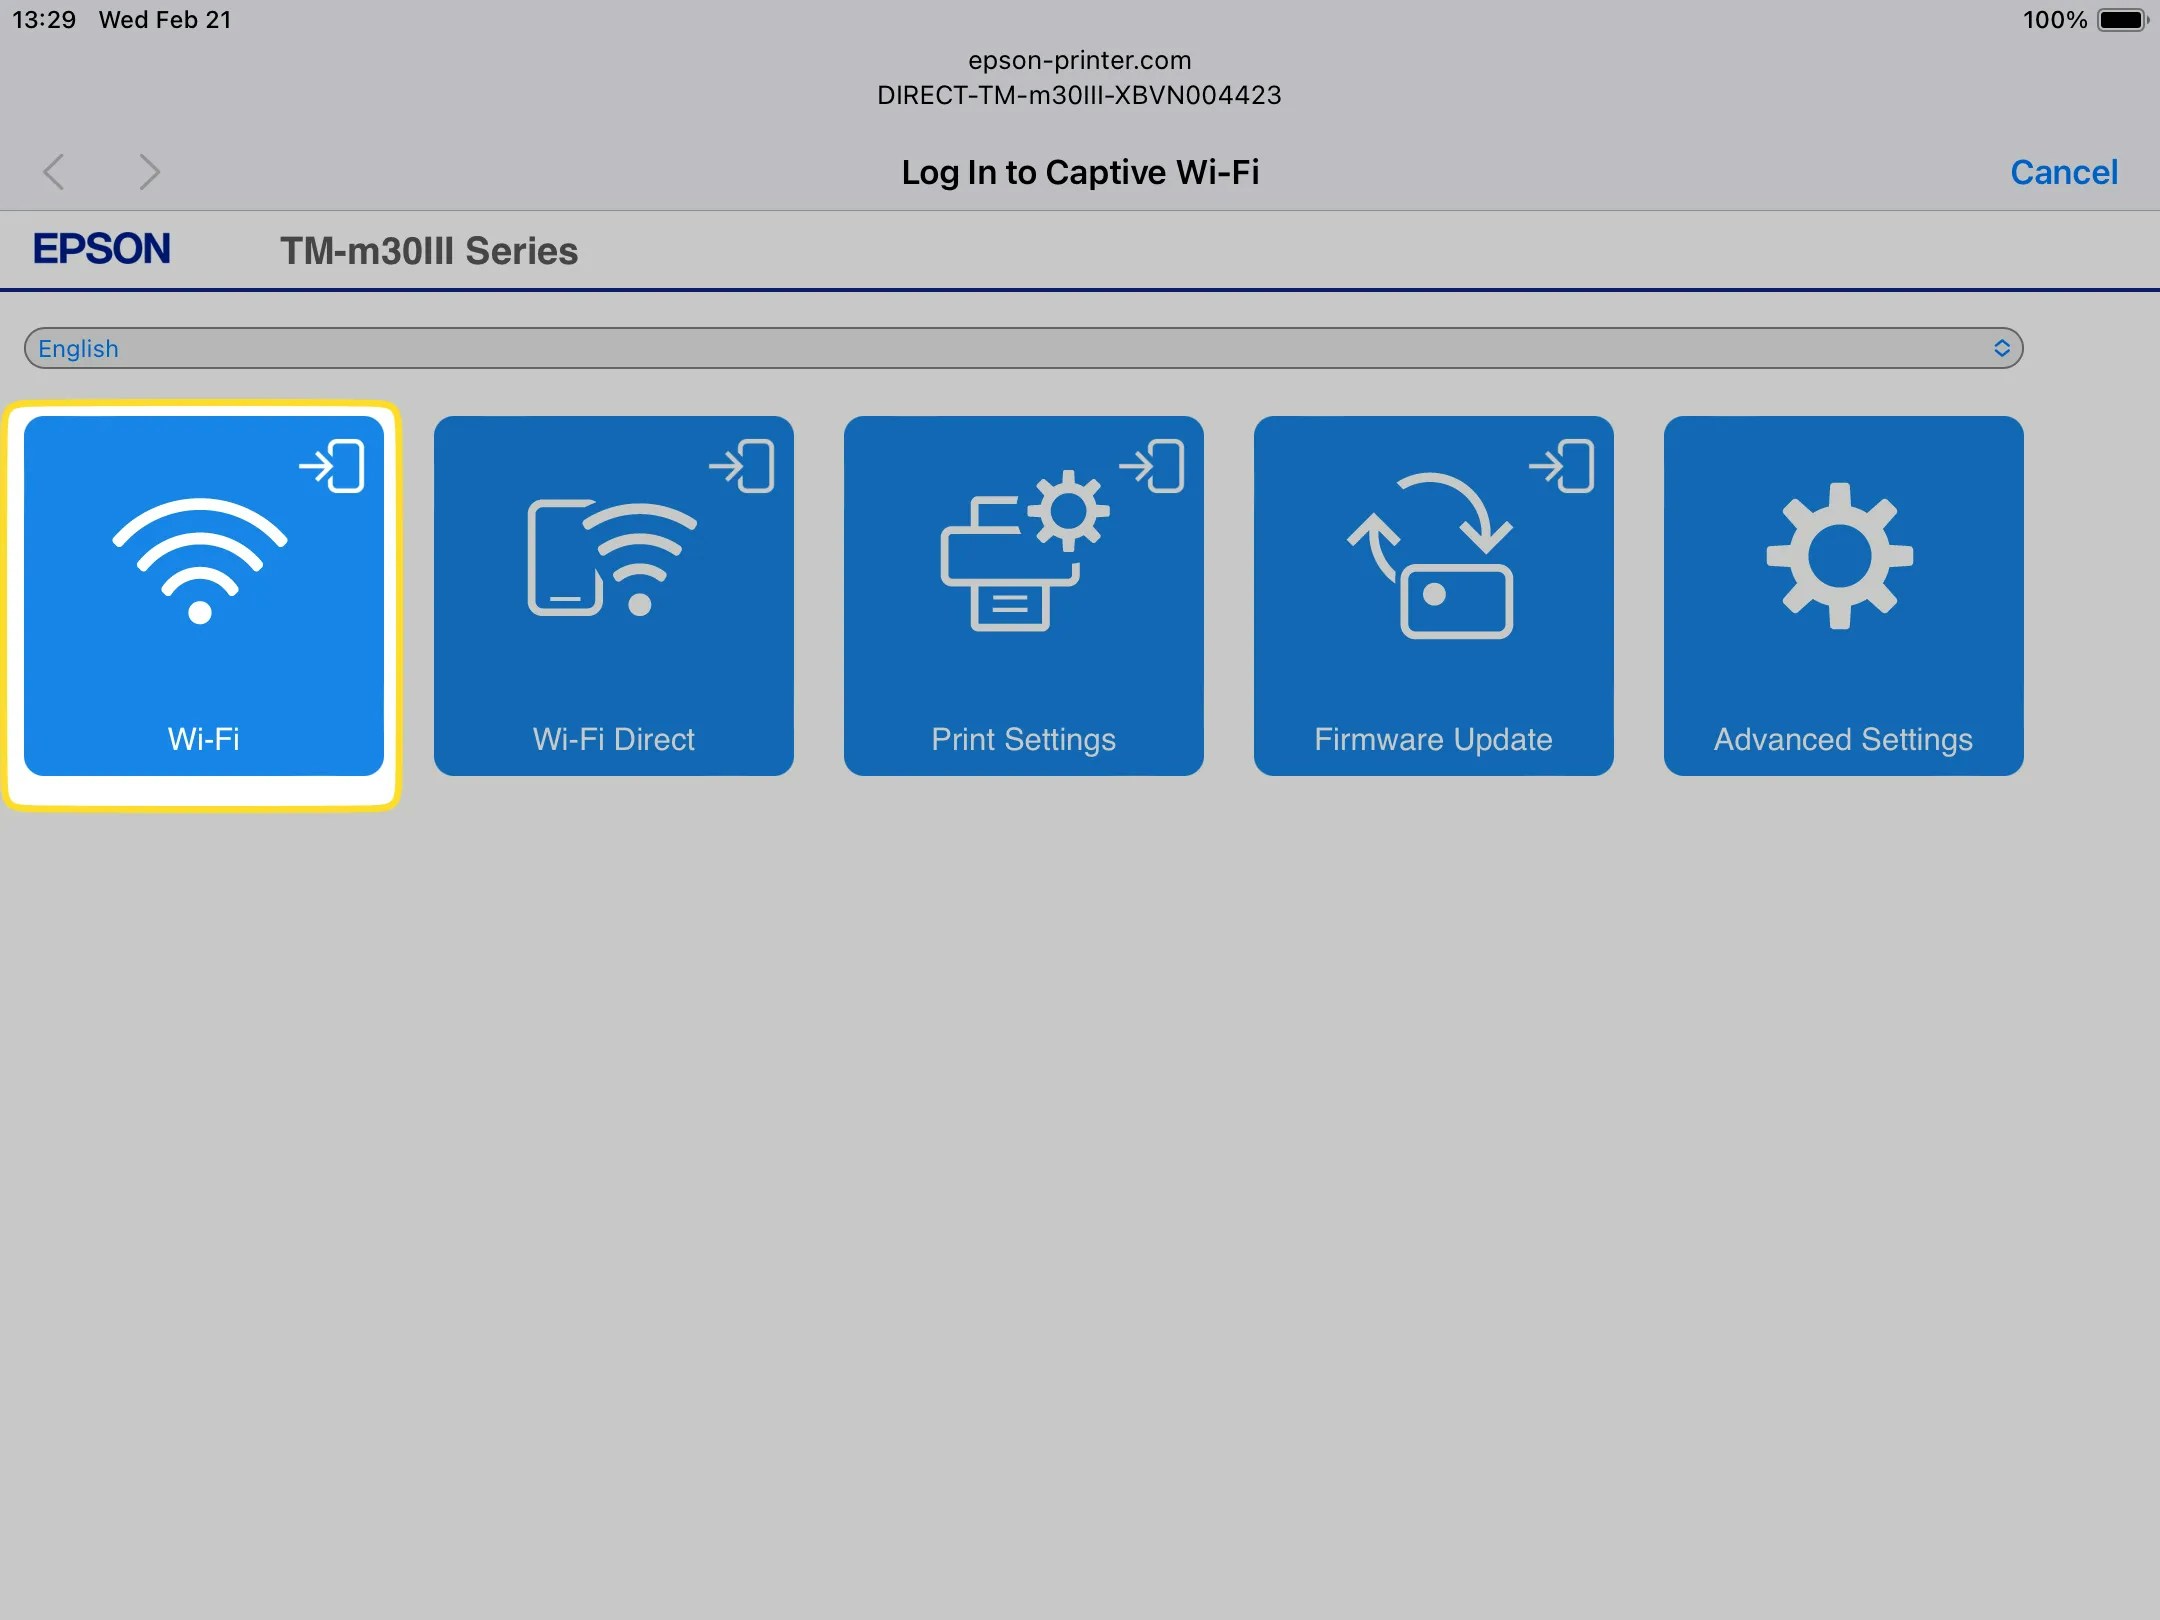
The TM Utility App will walk through the step-by-step process to connect the app to your printer.Press Allow when the app prompts for permissions as it looks to connect to your device: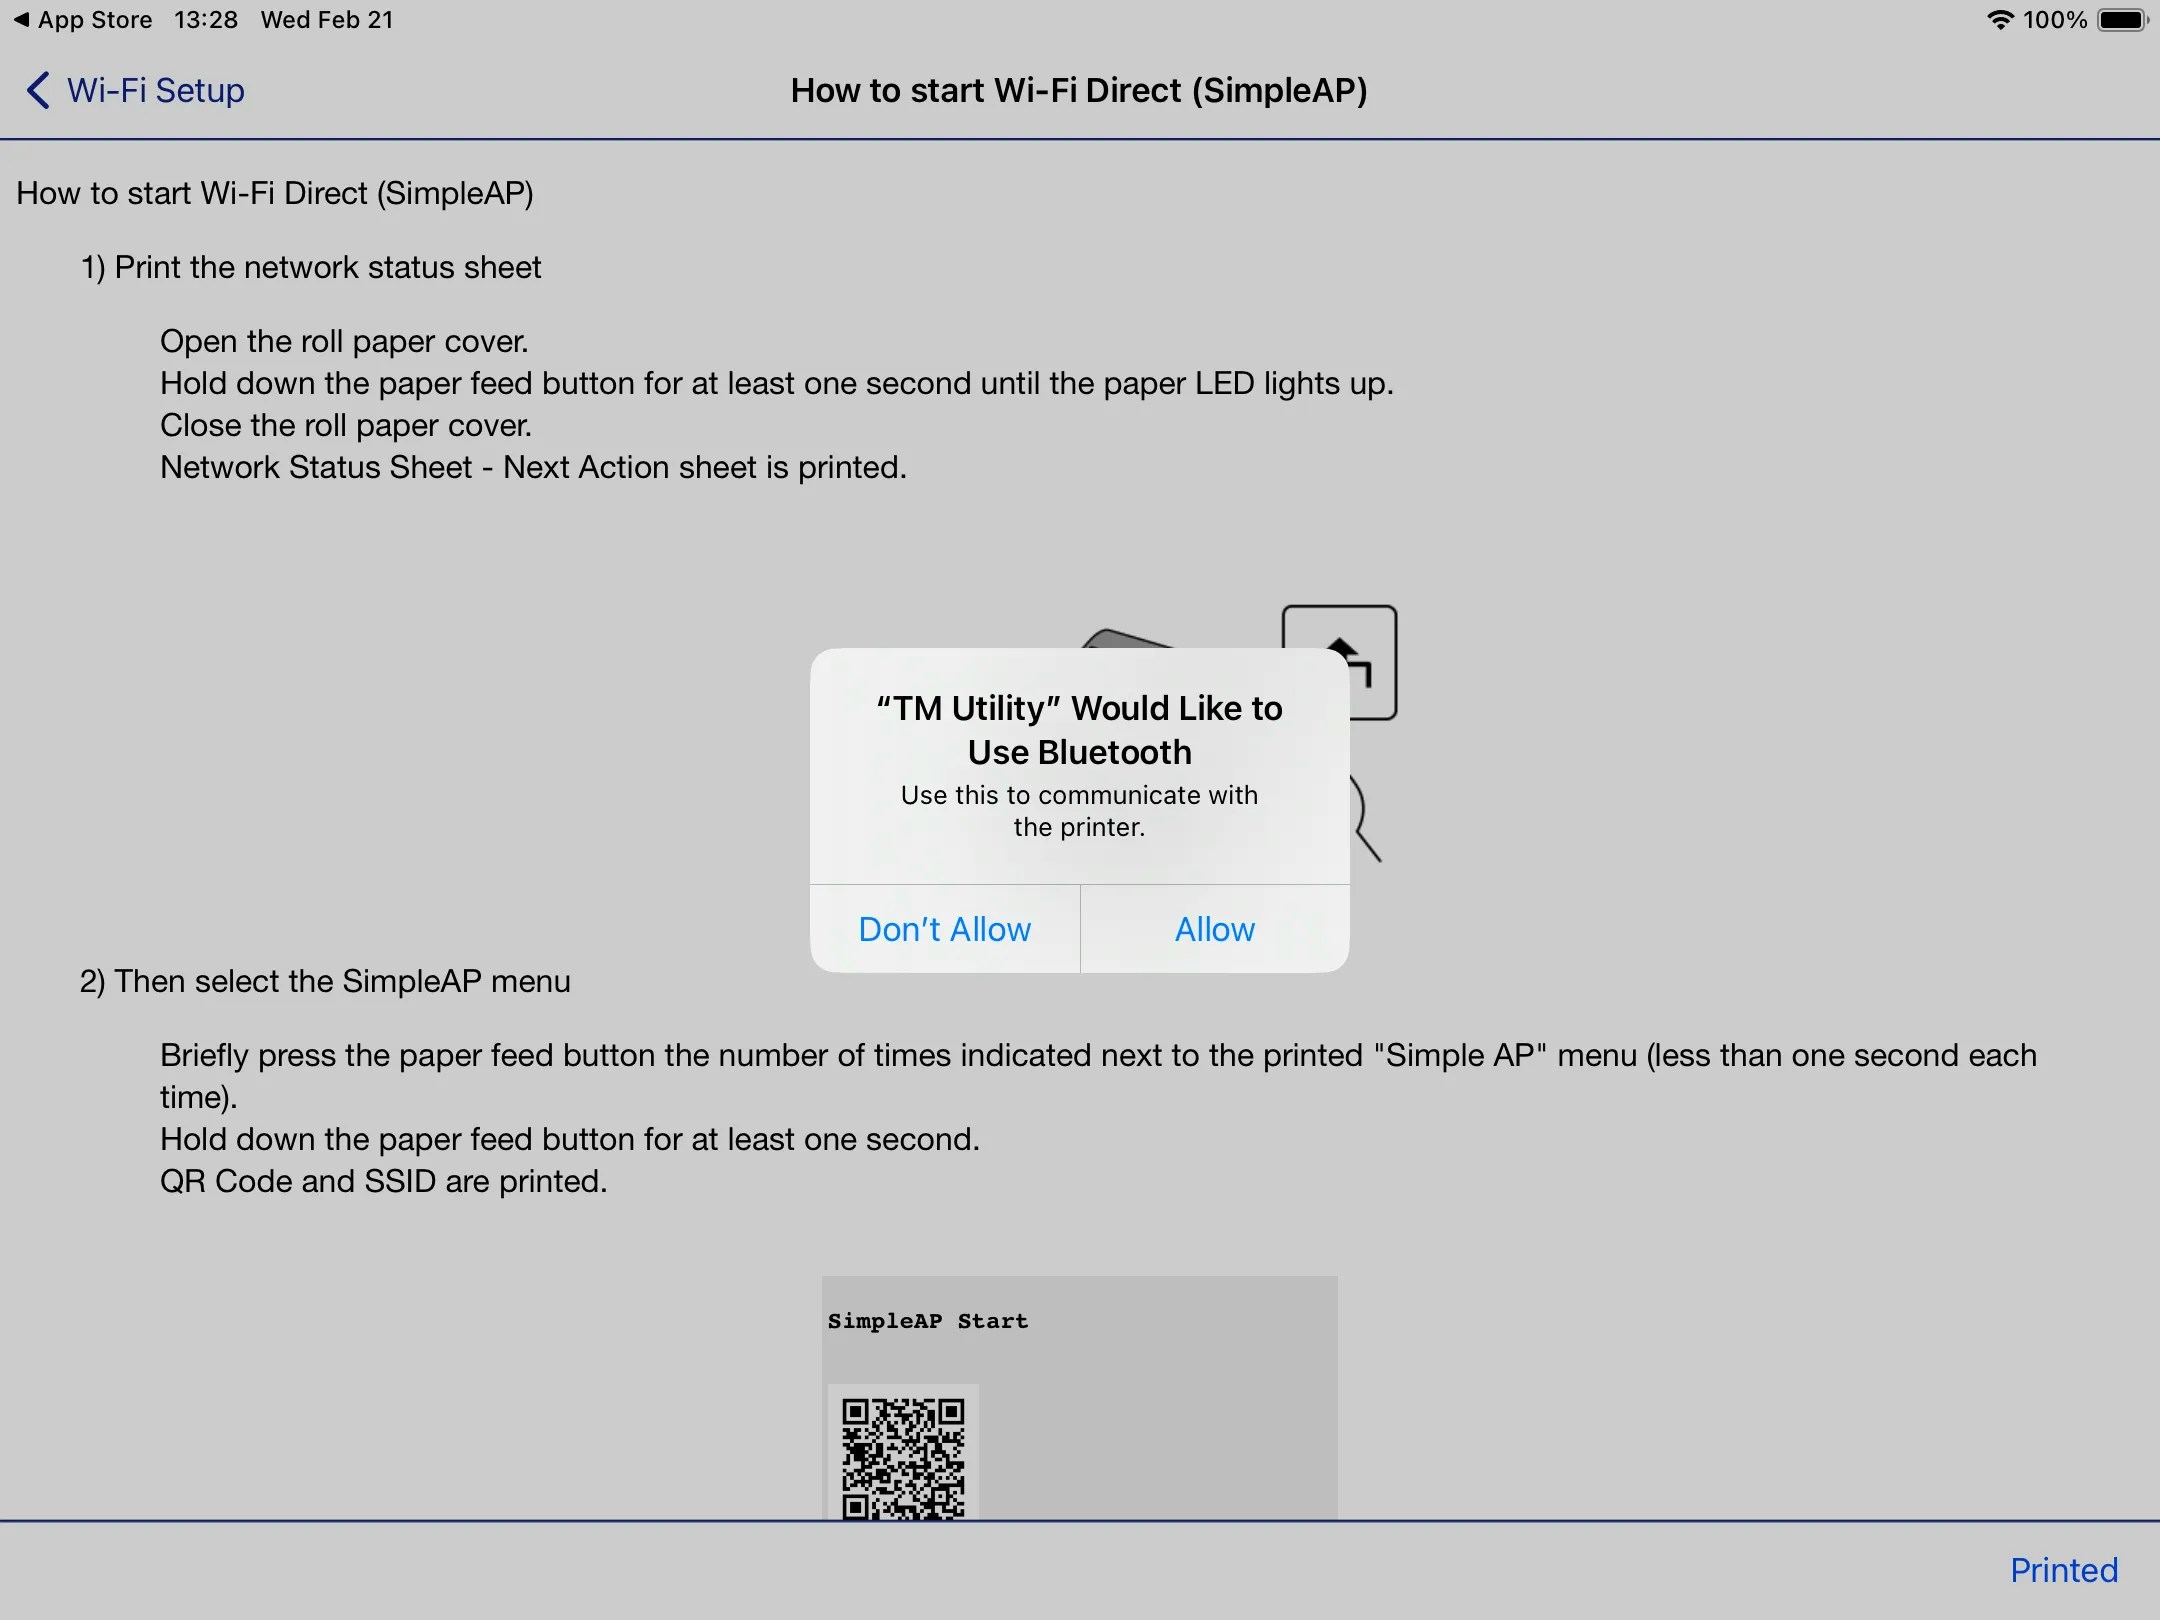
The app will prompt that it wants to join a Wi-Fi network named DIRECT-TM-xxxxx. Click Join.It will ask for a password. The first time password is the serial number on the back of your printer.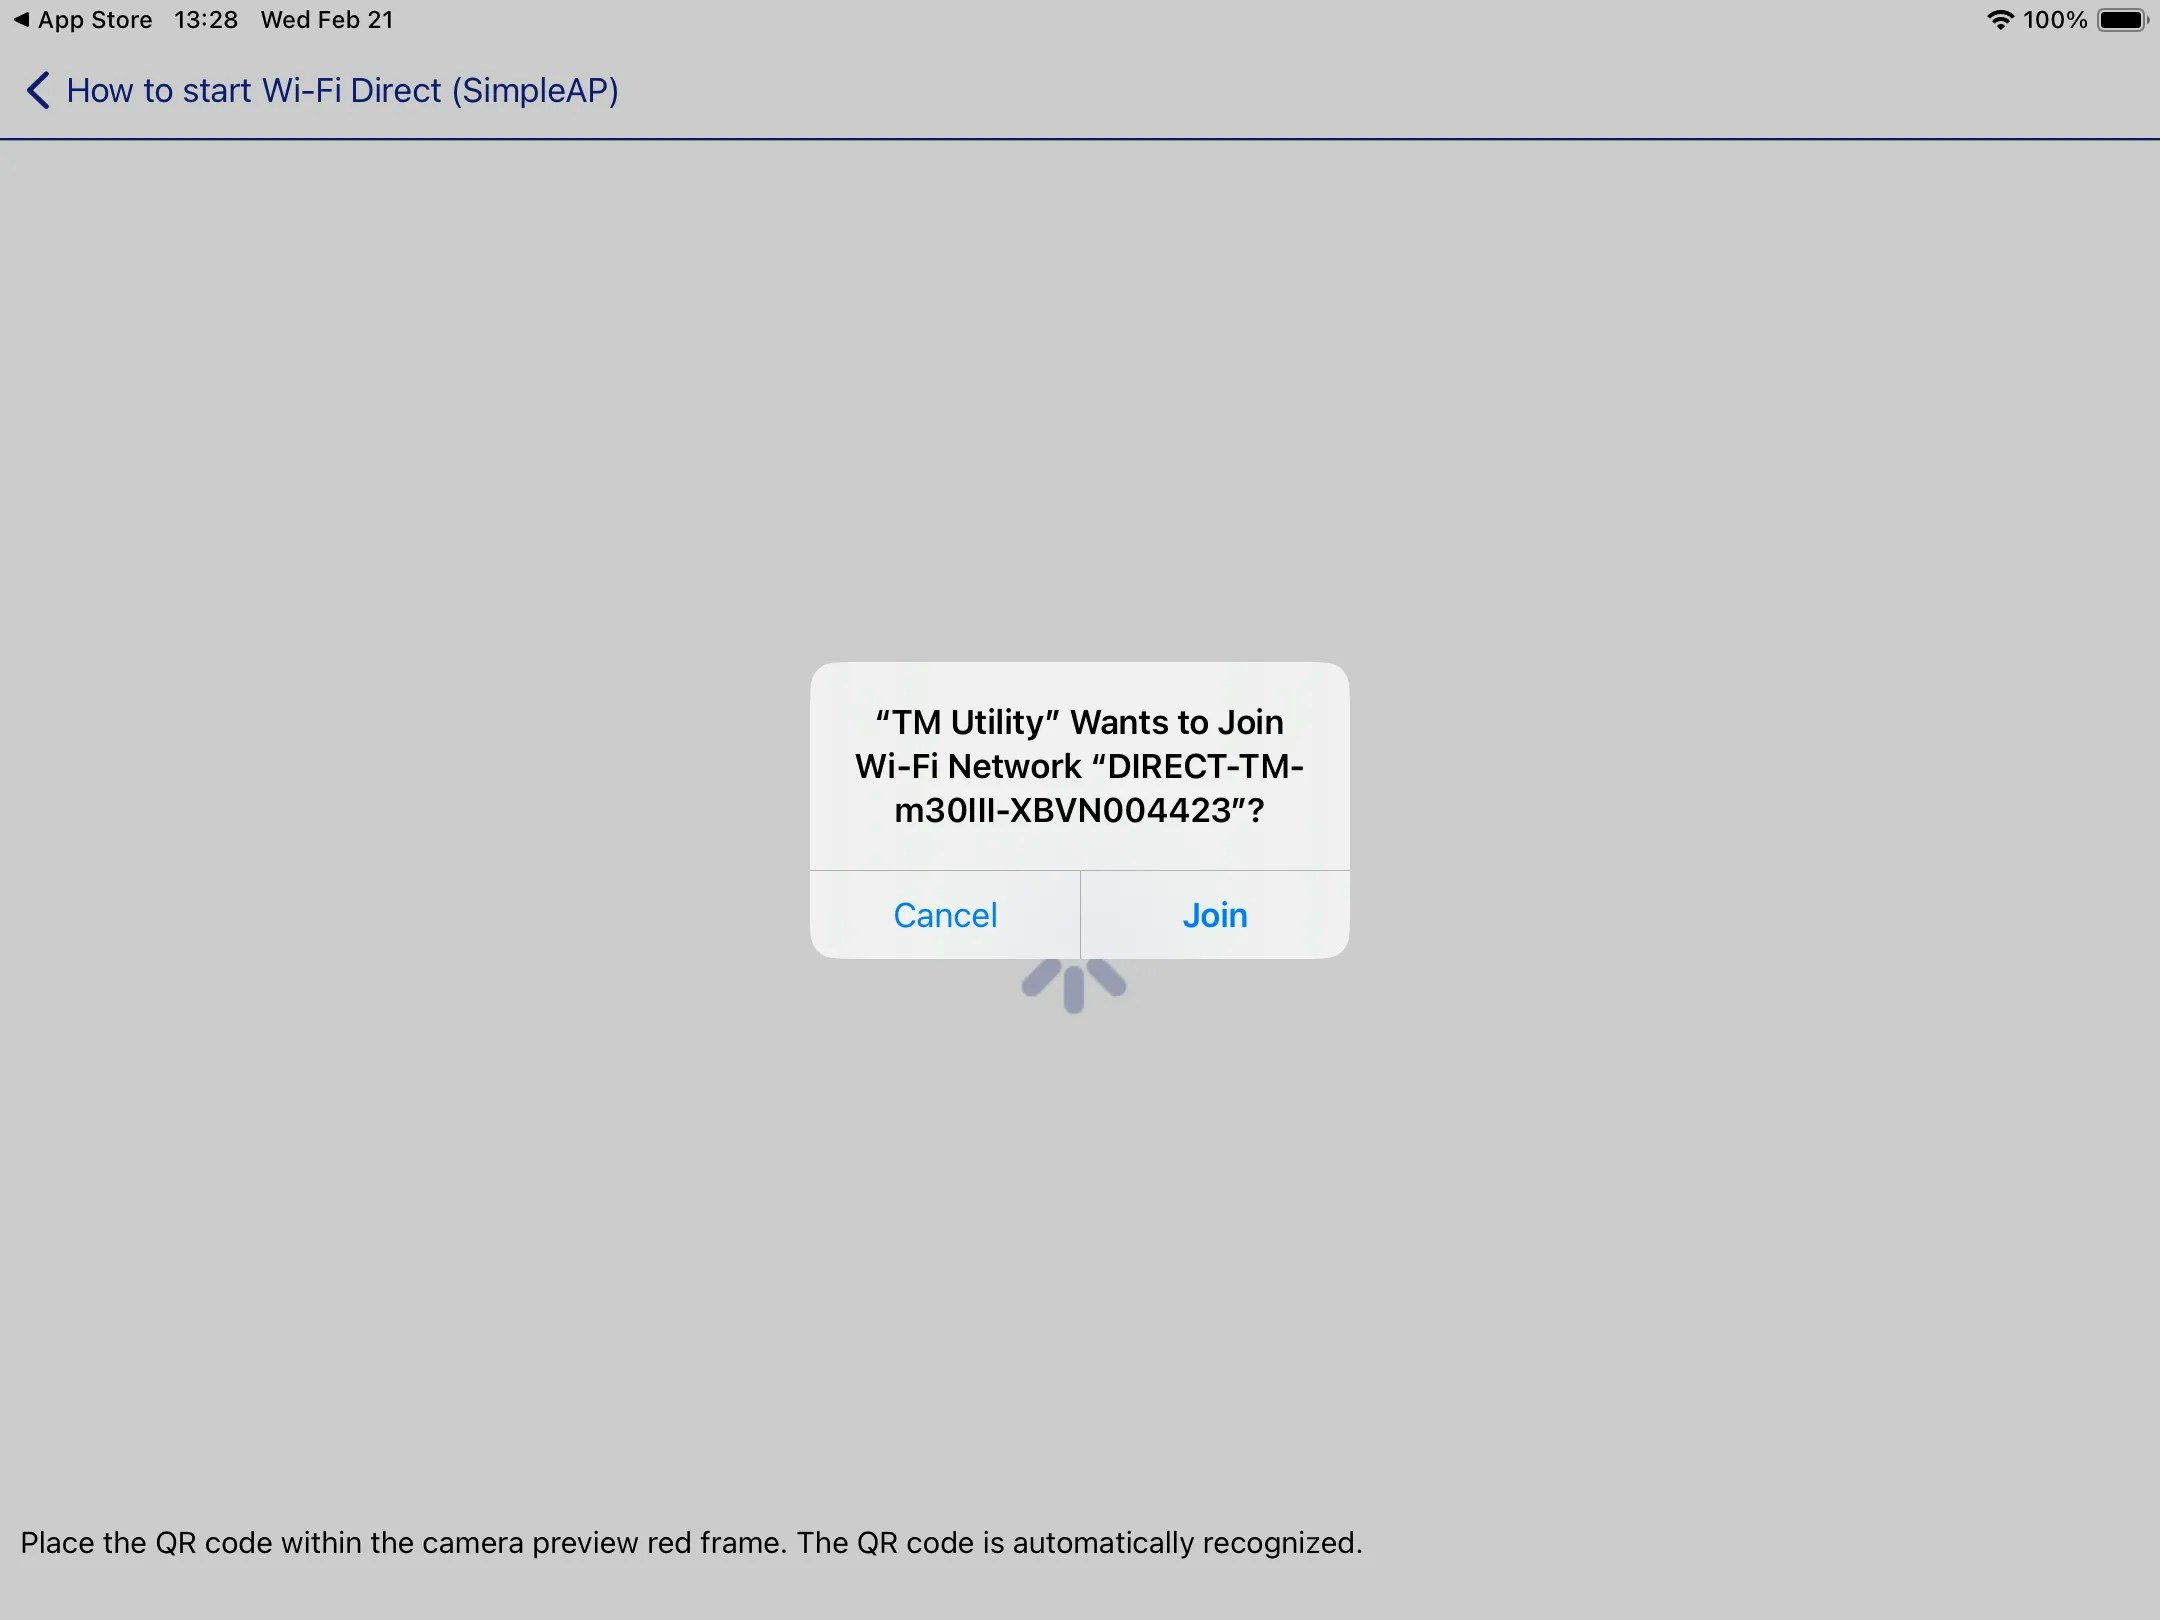
Select your Wi-Fi network. Make sure it’s the same network your POS Device is connected to. When inserting the Wi-fi password, take your time as the printer won’t be able to connect with an incorrect password: 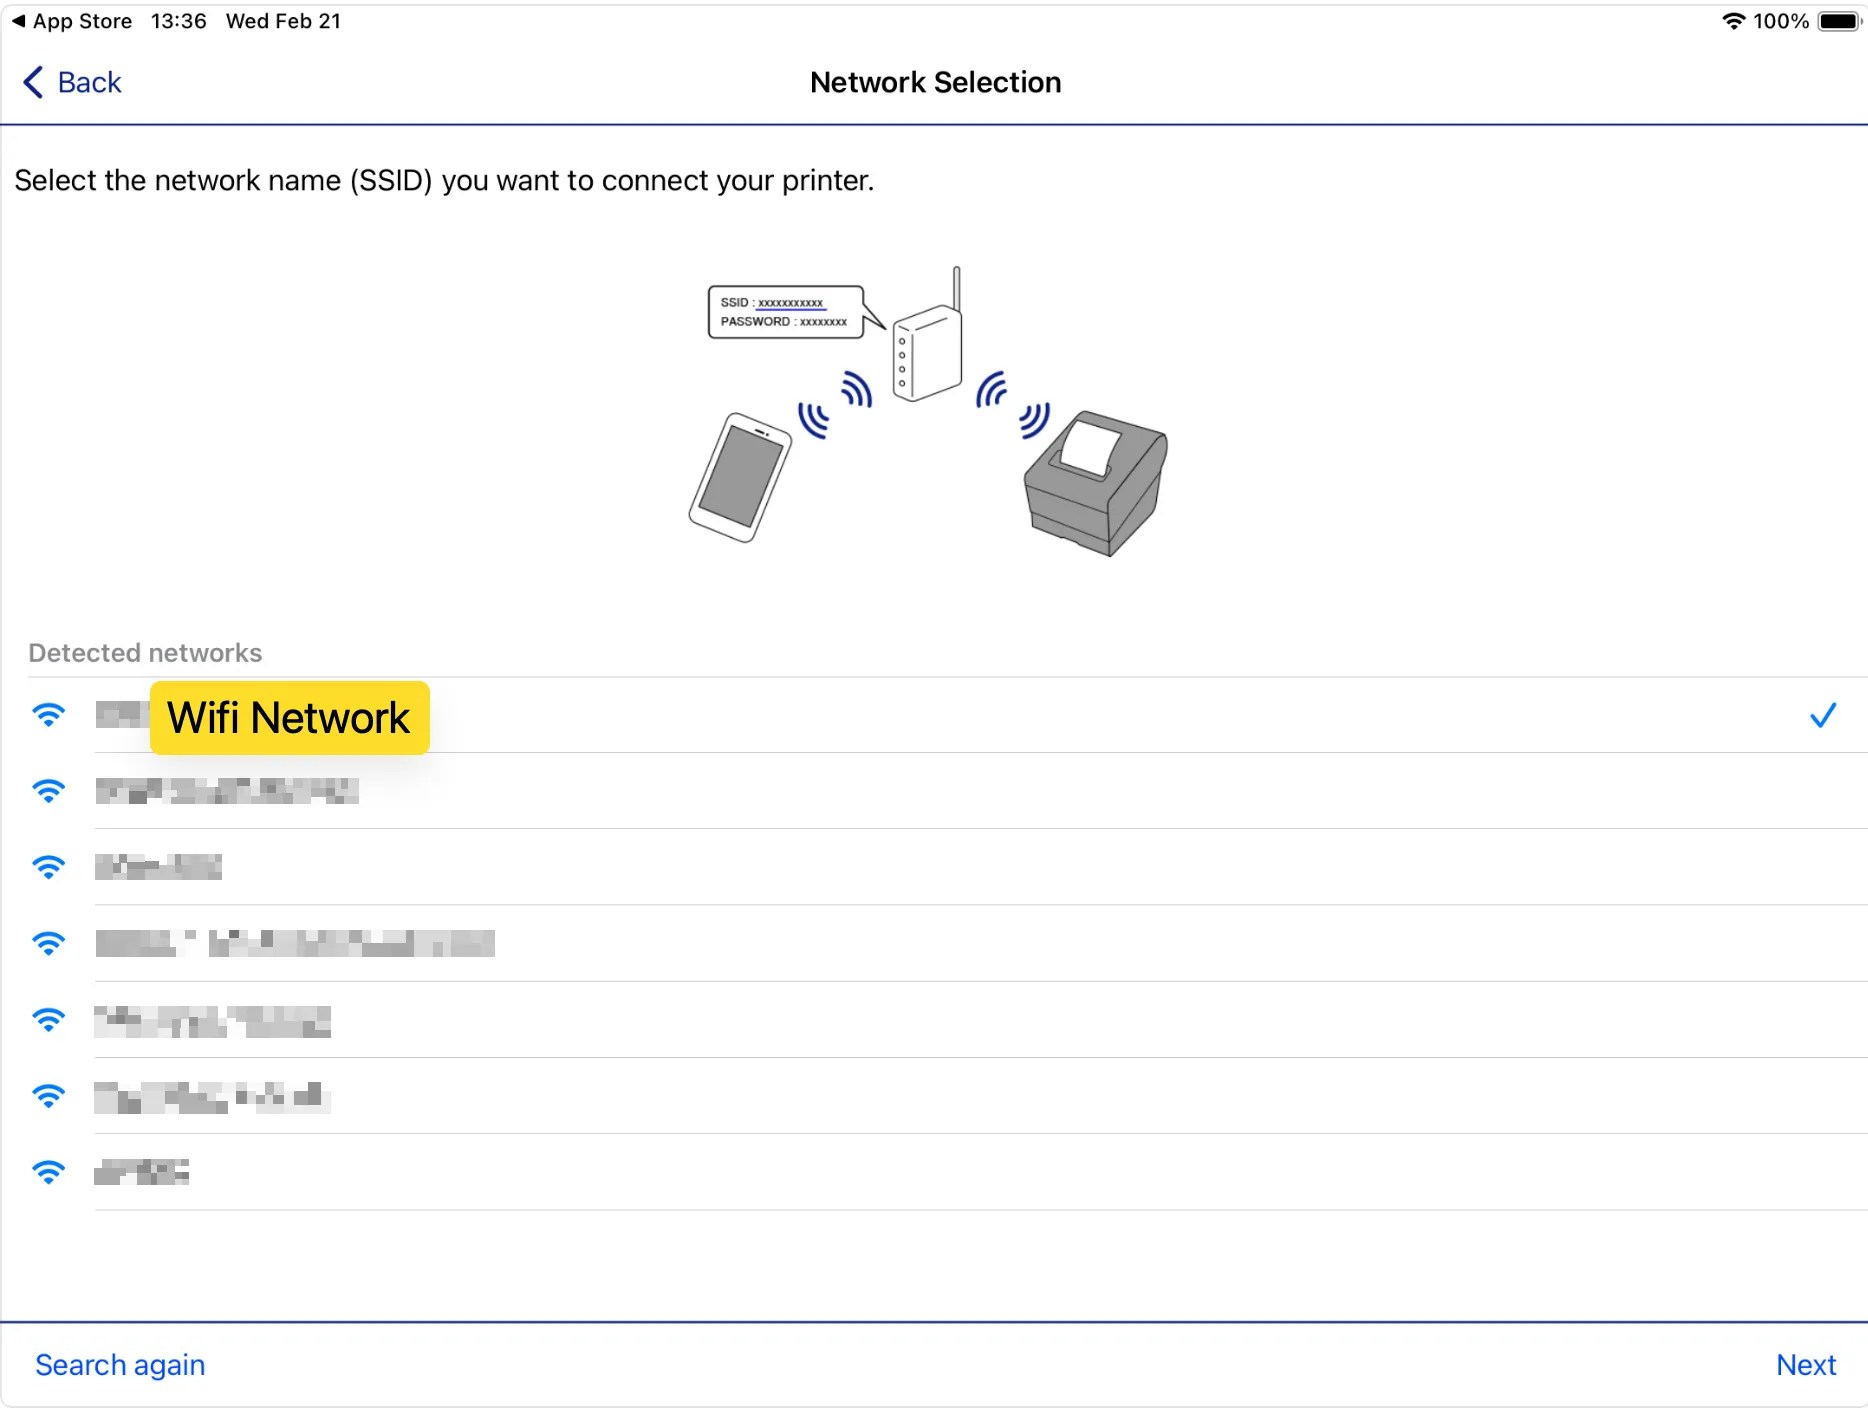
When ready, press Set to Printer at the end of the setup to send the Wi-Fi network information to the printer to connect to: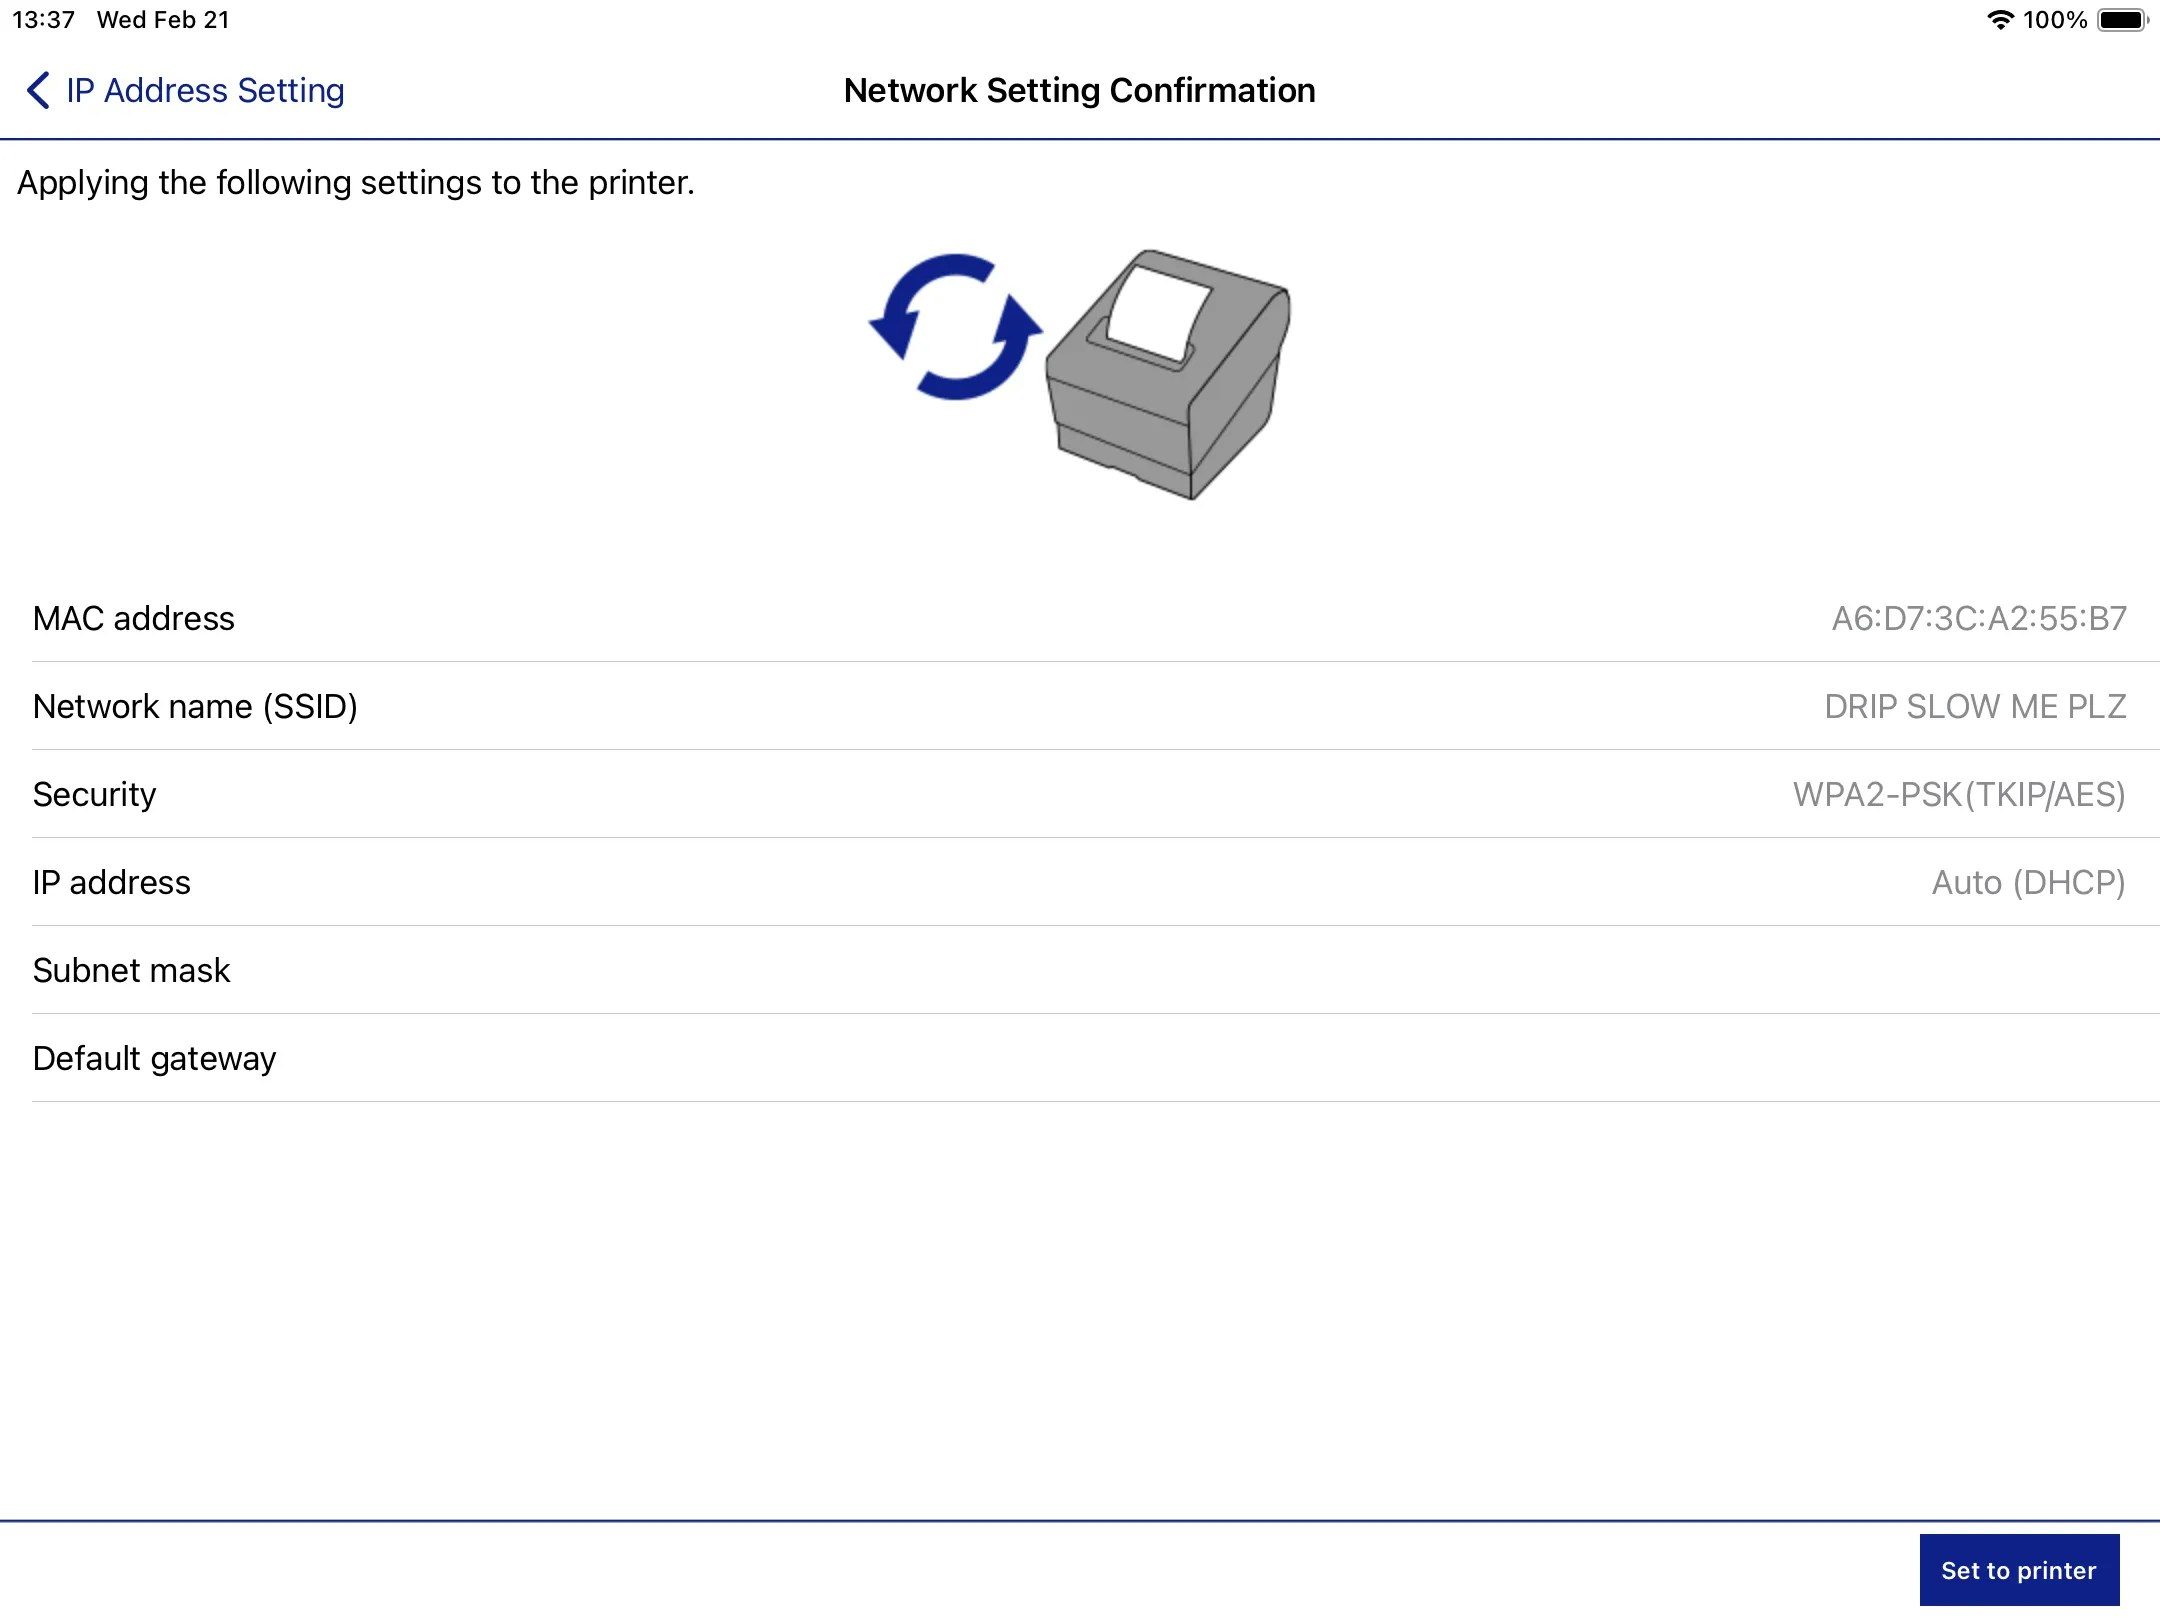
➡️ Once your printer is connected to Wi-Fi, it can now be paired with Dripos!