Create and Sell Gift Cards
Sell a Gift Card from the Point of Sale
Sell a Gift Card from the Point of Sale
Purchase Gift Cards on the POSSell a gift card directly from the Point of Sale during checkout.Schedule Send a Gift CardPurchase a gift card today and schedule a future date for the recipient to receive it.
To sell a physical gift card, enter the Gift Card Number, which is a 12-16 digit unique PAN (Personal Authentication Number).Click Scan Card to utilize your tablet’s camera to scan a Code 128 barcode on the back of Dripos Compatible Gift Cards.To learn more about Dripos Compatible Gift Cards, click here
Sell a Gift Card from the Order App
Sell a Gift Card from the Order App
Purchase Gift Cards on the Order App
Sell a Gift Card from the Order Website
Sell a Gift Card from the Order Website
Purchase Gift Cards on the Order Website
Online Gift Card Store
Online Gift Card Store
Purchase Gift Cards from Online Gift Card PageEvery Dripos location has an online marketplace where customers can buy their shop’s gift cards - even outside of store hours!View your gift card website link here.
Create a Gift Card Manually from Web Dashboard
Create a Gift Card Manually from Web Dashboard
Manually Create Gift Cards from the Web Dashboard
Gift cards created from the web dashboard do not send a notification message to the recipient.Click Actions > Resend to send a manually created gift card to a recipient.
Manage Gift Cards
View Gift Card Balance and Activity
View Gift Card Balance and Activity
- Web Dashboard
- Point of Sale
- Order Website
- Order App
Navigate to Marketing > Gift Cards > View gift card > see Balance.View Activity Log for a list of all transactions associated with this gift card.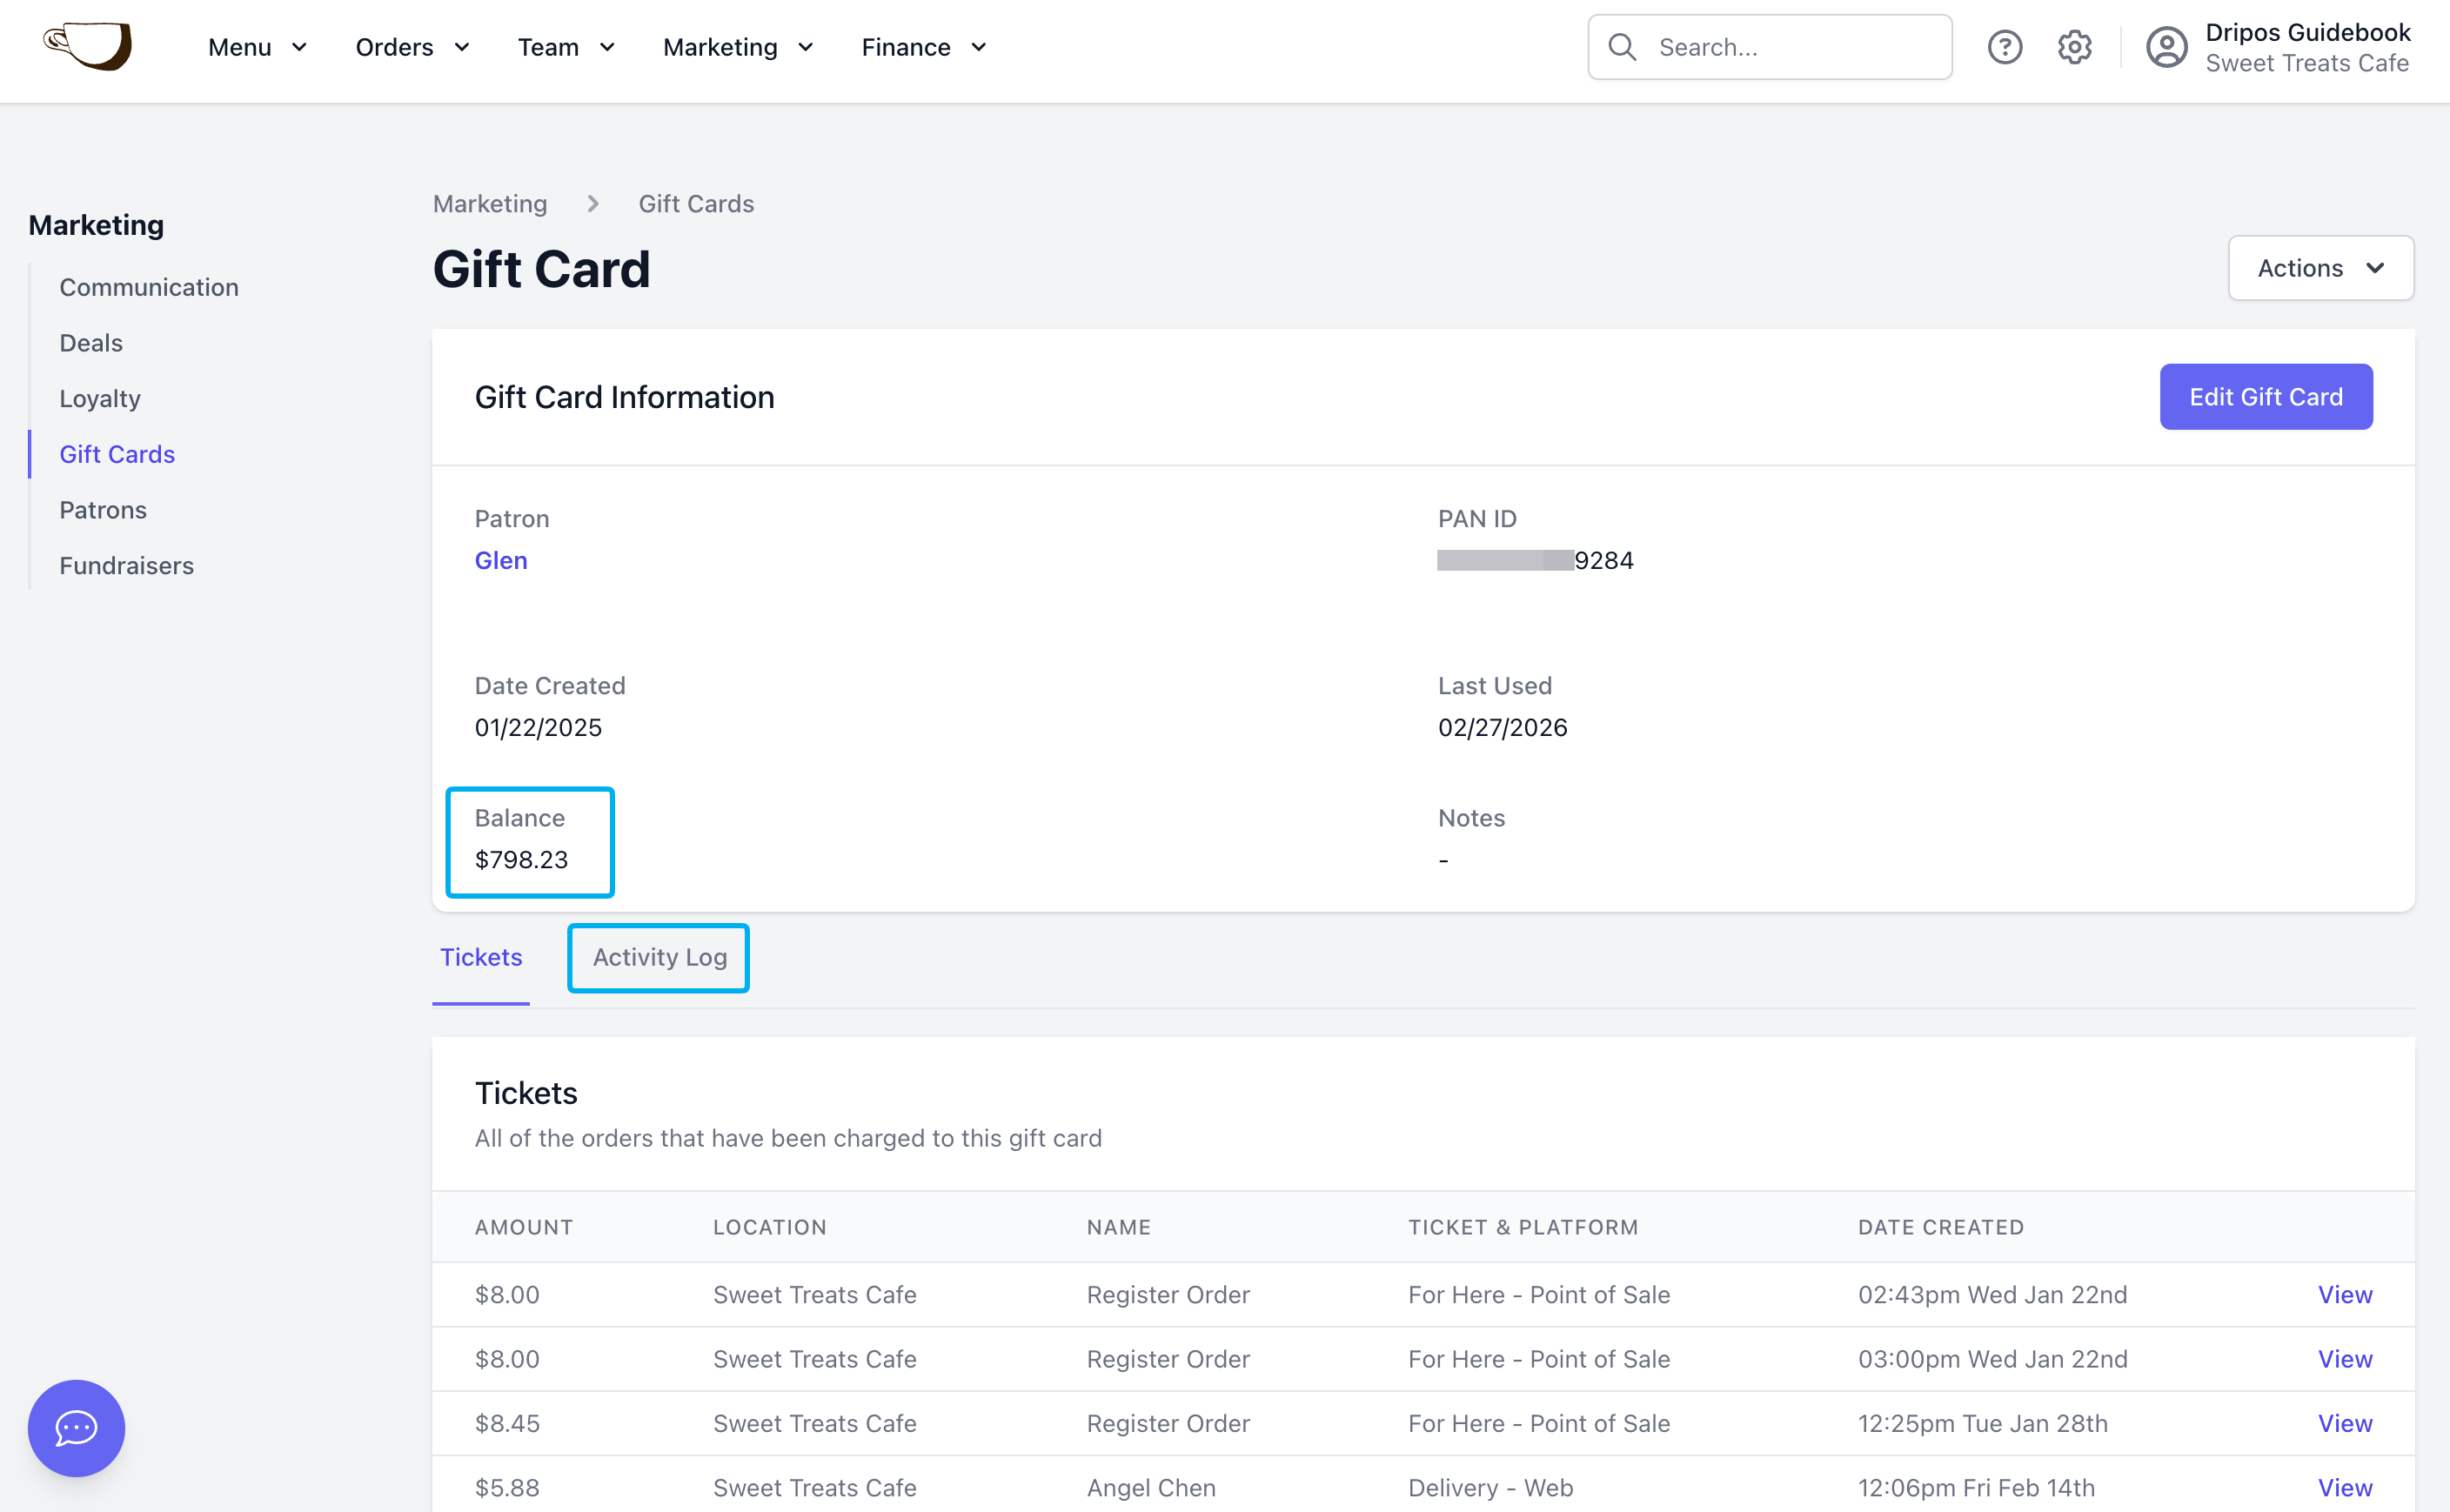
Adjust Gift Card Balance
Adjust Gift Card Balance
- Web Dashboard
- Point of Sale
Adjust Gift Card Balance on the Web Dashboard
Navigate to Marketing > Gift Cards > View gift card > Edit Gift CardTo increase a gift card balance, add an amount i.e, $15To decrease a gift card balance, enter a negative amount using a (-) sign i.e., -$10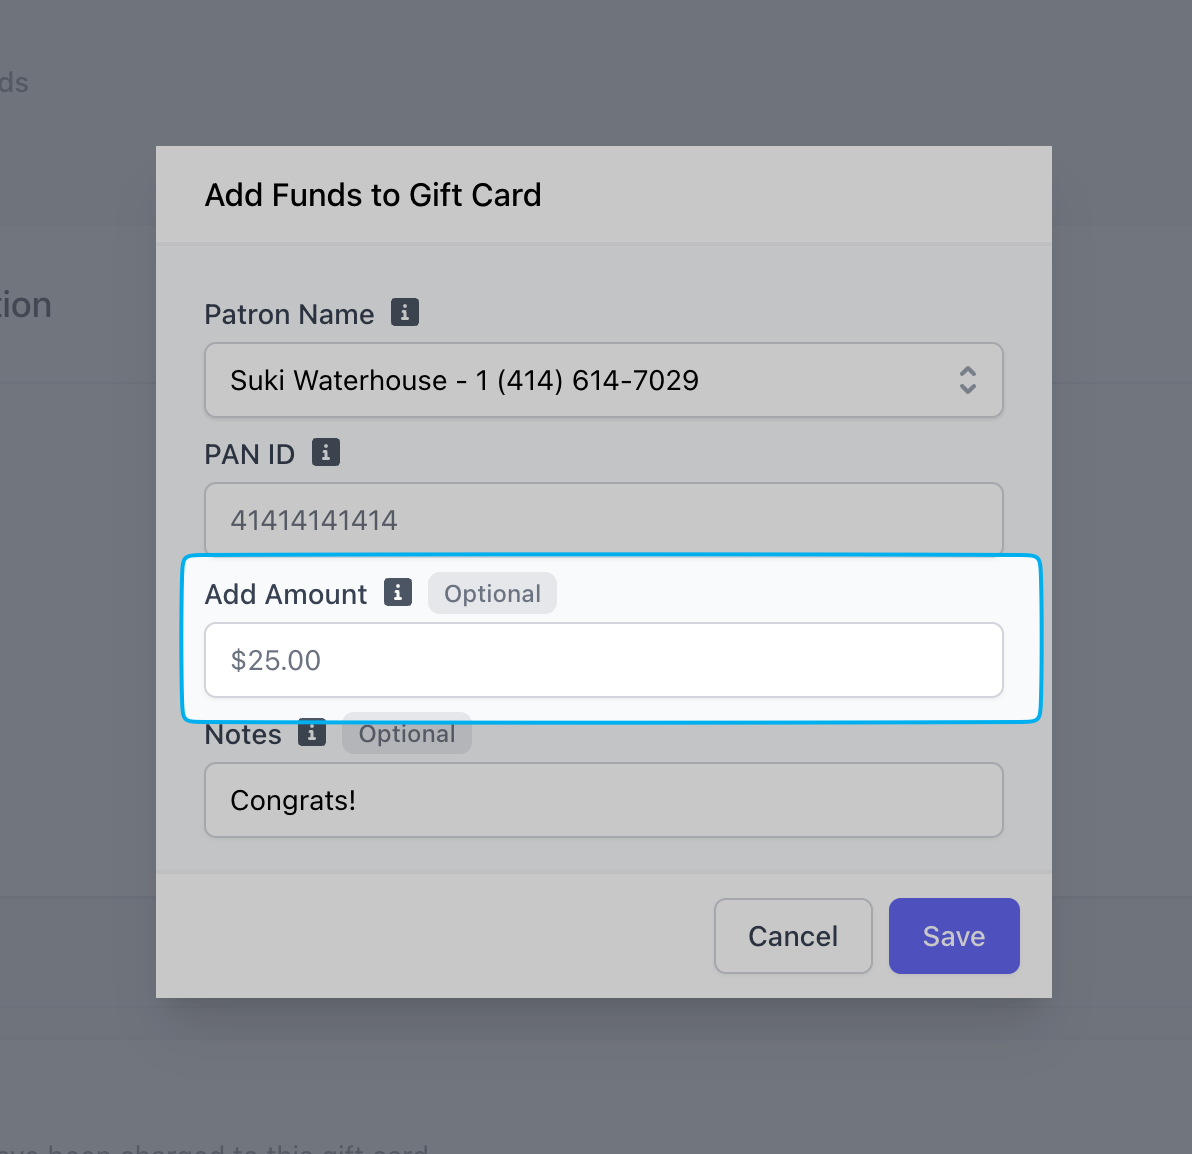
Reload a Gift Card
Reload a Gift Card
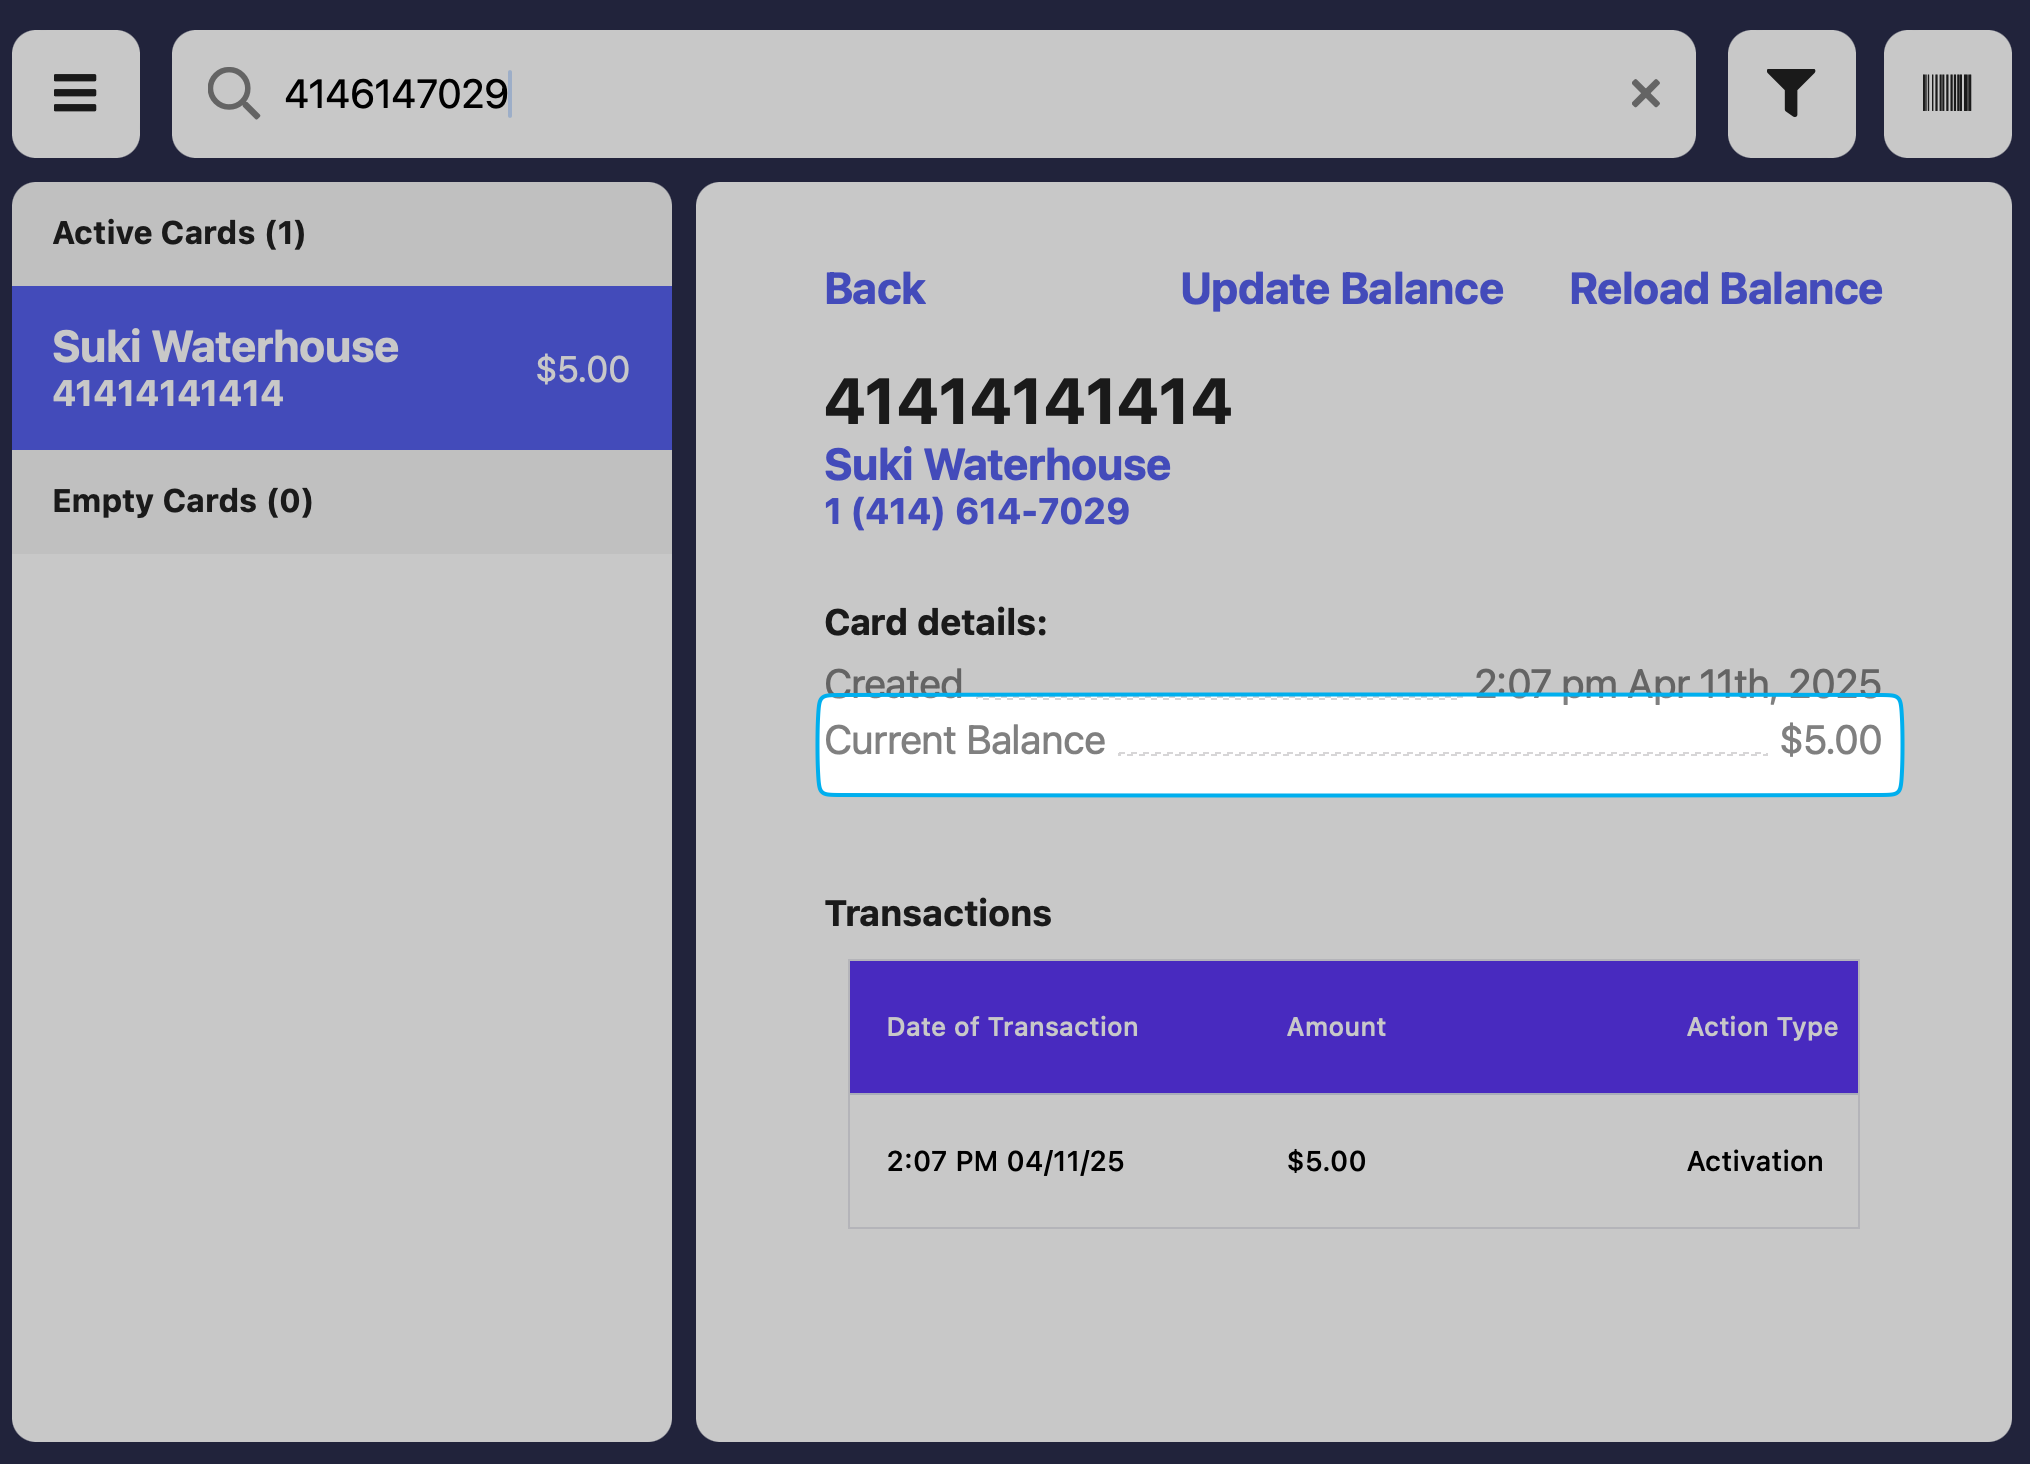
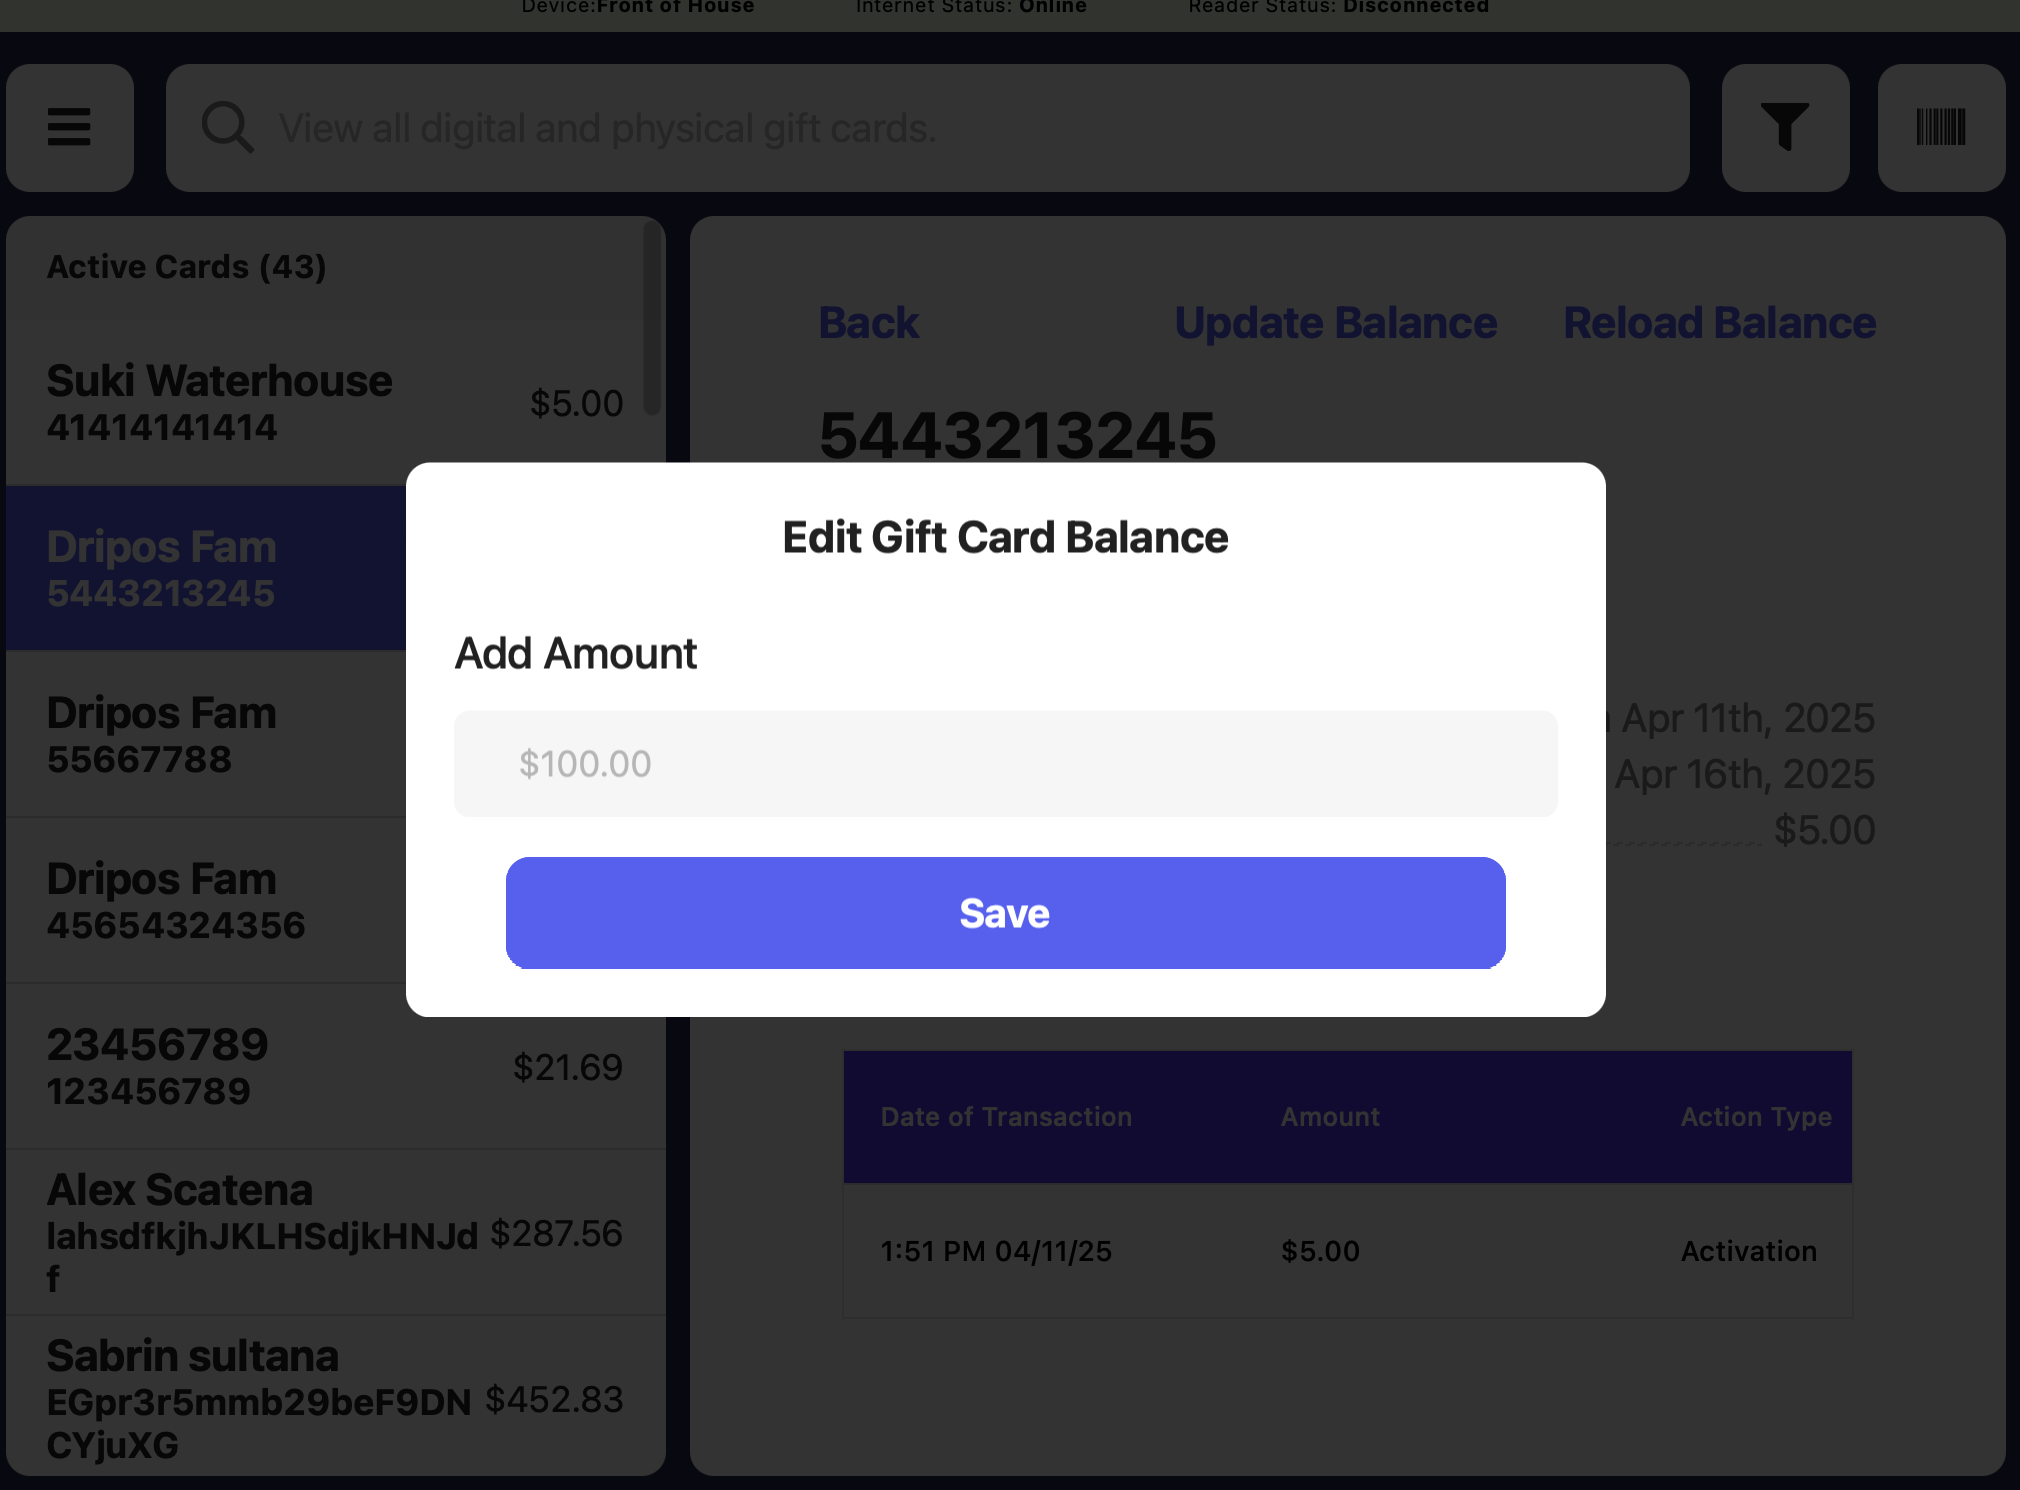
Reuse a physical gift card by reloading it!Press the tribar in the upper left screen corner > Gift Cards > select gift card > Reload Balance
Press the tribar in the upper left screen corner > Gift Cards > select gift card > Reload Balance
Delete Gift Card
Delete Gift Card
Delete a Gift Card
Gift Card PAN IDs are locked and cannot be changed after a gift card is purchased.Gift cards can only be deleted from the Wed Dashboard.Navigate to Marketing > Gift Cards > View gift card > click Actions > Delete Gift Card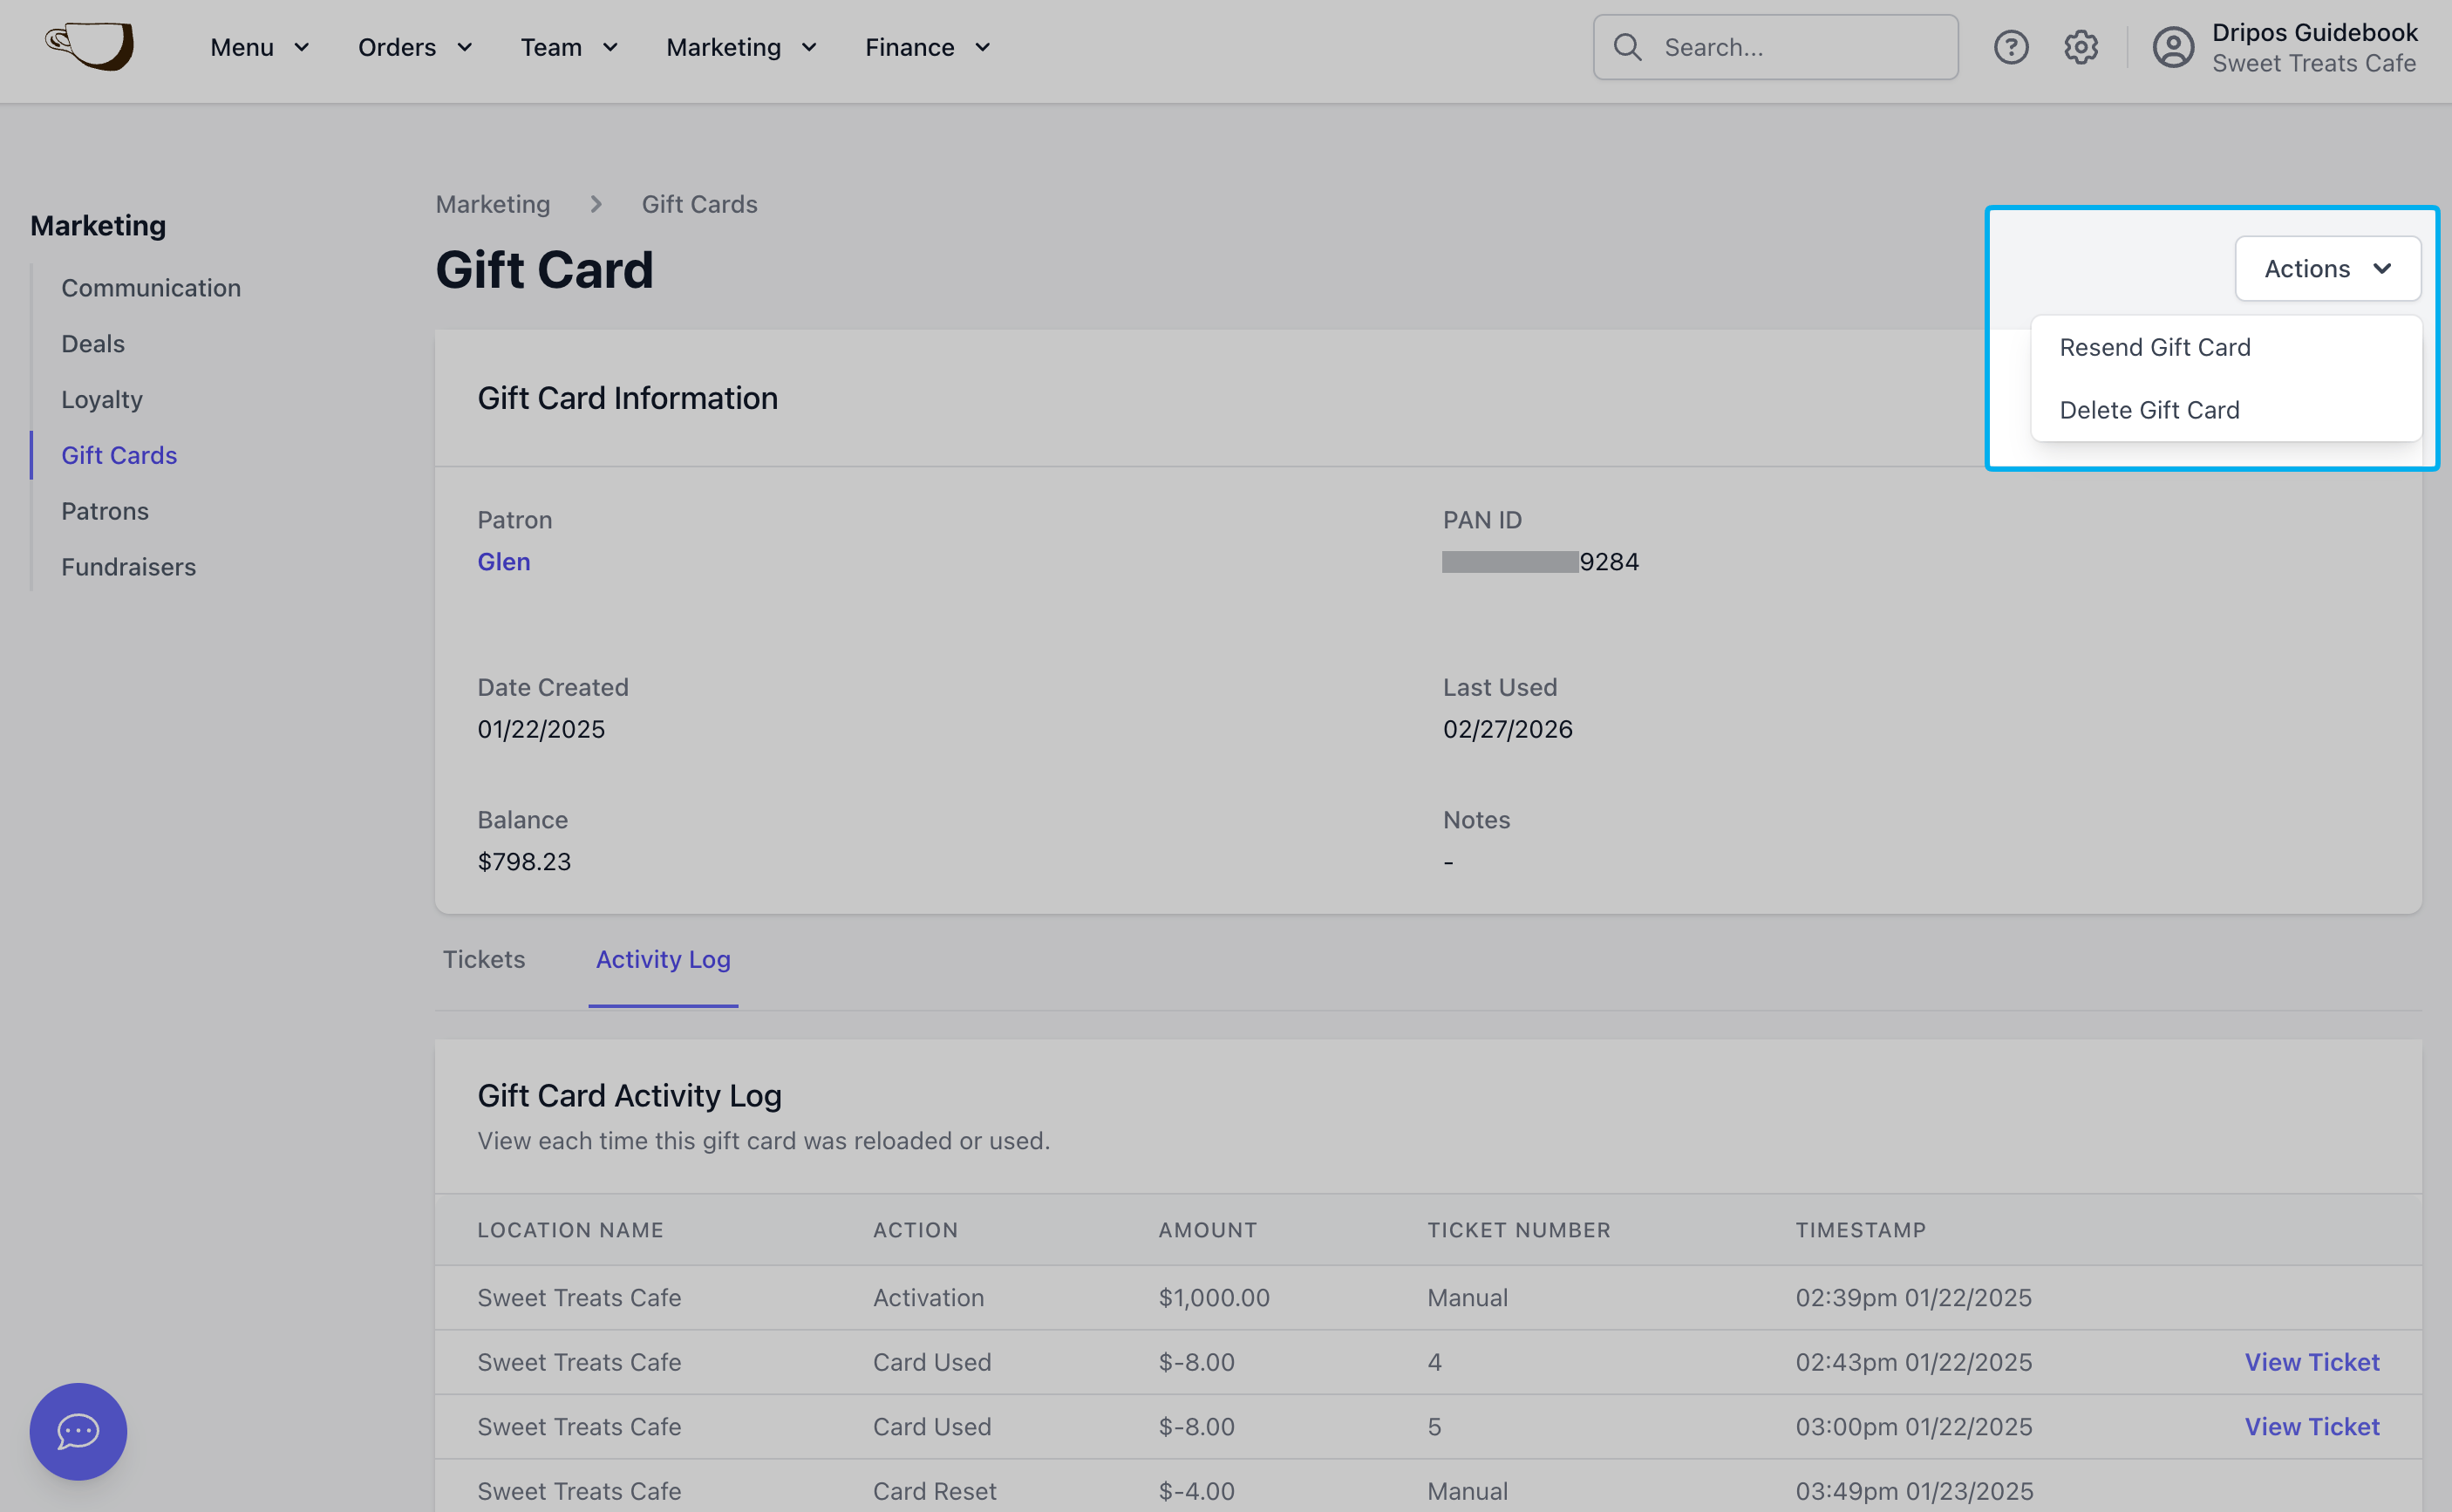
Redeem Gift Cards
Physical Gift Cards
Physical Gift Cards
- Point of Sale
- Order App
- Order Website
Physical gift cards can be redeemed upon checkout by clicking Gift Card on the payment method screen and using one of these methods: Click Scan to scan the barcode of the gift card. Search for a gift card by the PAN ID number. If a patron is checked in, their linked gift cards will appear at the top of the list.
Digital Gift Cards
Digital Gift Cards
- Point of Sale
- Order App
- Order Website
Digital gift cards can be redeemed upon checkout by clicking Gift Card on the payment method screen and using one of these methods: Search for a gift card by the PAN ID number. If a patron is checked in, their linked gift cards will appear at the top of the list.
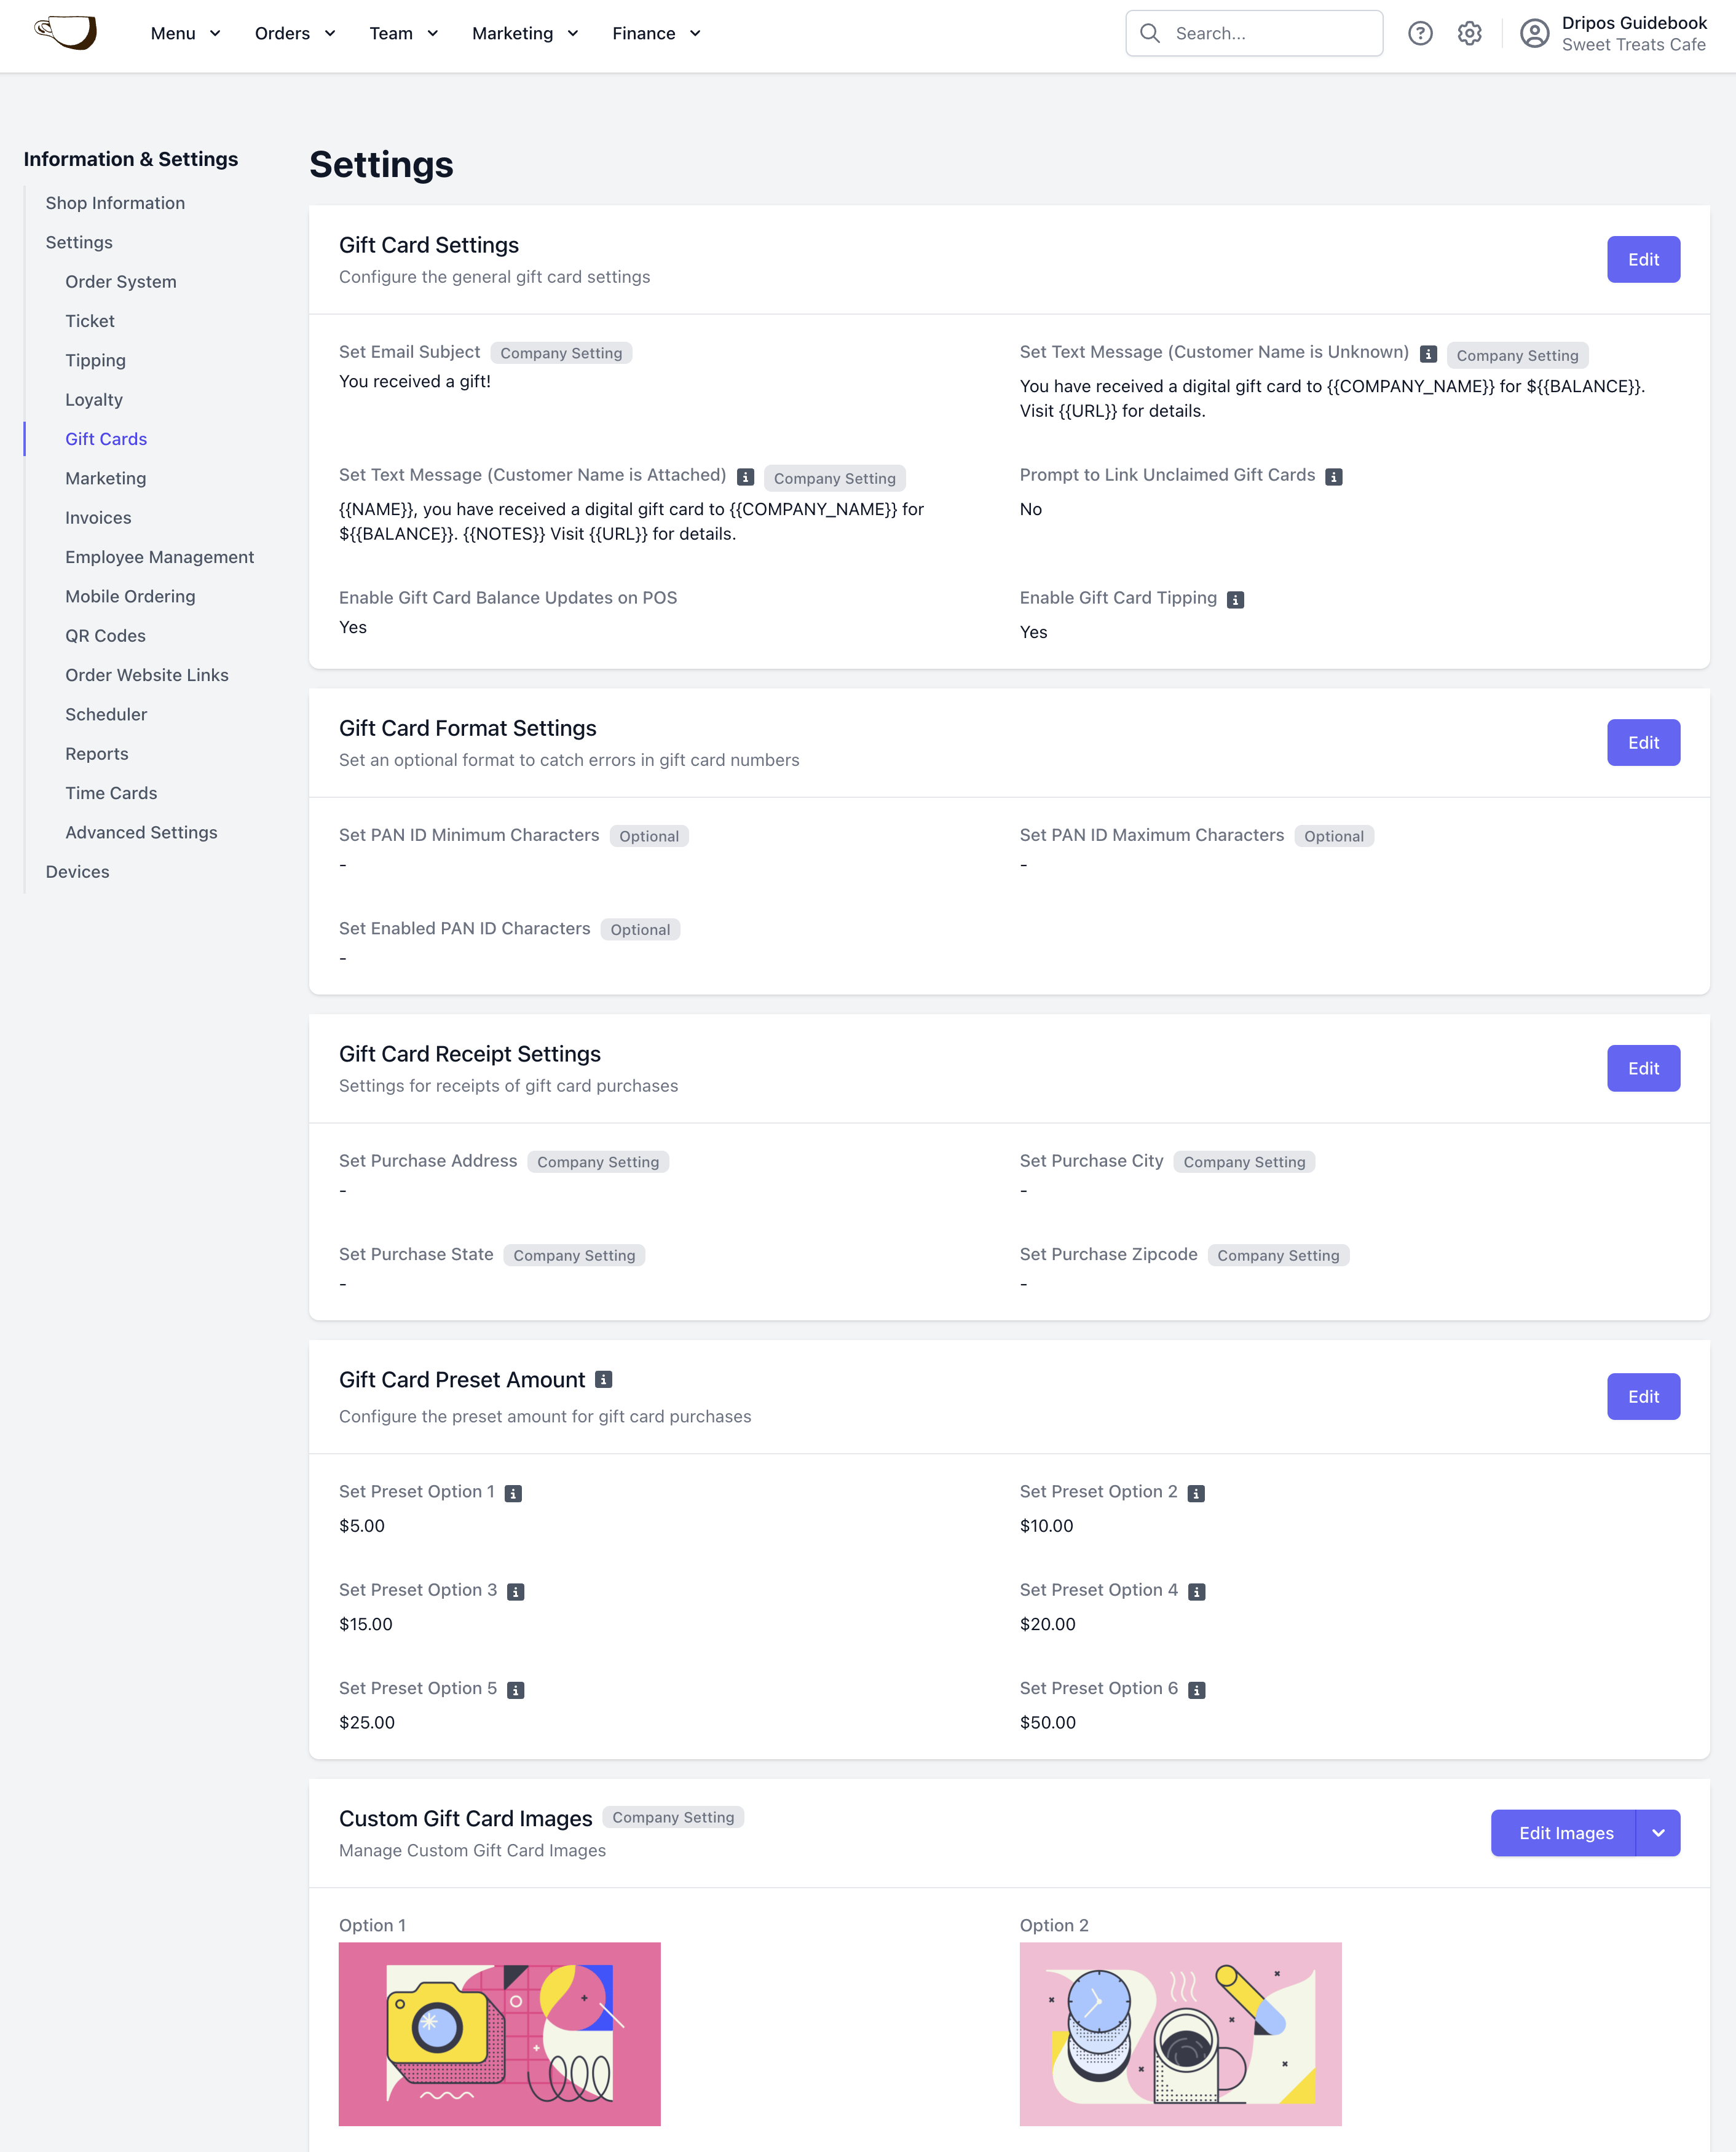
Gift Card Settings
View and edit all gift card settings from the Dashboard. Click the settings icon in the upper right corner > Settings > Gift CardsPurchase & Format Settings
Set Text Message (Patron Name Unknown)
Set Text Message (Patron Name Unknown)
The text that a customer will receive when a gift card is created for them.
Max Length: Messages can be 512 Characters Text Tags: The following text consists of tags that can be used when editing your gift card text.Once you’ve completed your edits, click Save to save your changes!
- NOTES: The notes attached to this gift card.
- BALANCE: The balance in dollars of the gift card.
- URL: The url that can be used to view the balance of this gift card.
- COMPANY_NAME: The name of the company attached to this location.
Set Text Message (Patron Unknown)
Set Text Message (Patron Unknown)
The text that a customer will receive when a gift card is created for them.
Max Length: Messages can be 512 Characters Text Tags: The following text consists of tags that can be used when editing your gift card text.Once you’ve completed your edits, click Save to save your changes!
- NOTES: The notes attached to this gift card.
- BALANCE: The balance in dollars of the gift card.
- URL: The url that can be used to view the balance of this gift card.
- COMPANY_NAME: The name of the company attached to this location.
- NAME: The name of the customer/patron.
Prompt to Link Unclaimed Gift Cards
Prompt to Link Unclaimed Gift Cards
When a patron is attached to a transaction, selecting an unclaimed gift card during checkout will prompt you to link it to their account.
Enable Gift Card Balance Updates on POS
Enable Gift Card Balance Updates on POS
If enabled, cashiers can update the balance of gift cards on the Point of Sale.Learn more about updating the balance of a gift card here.
Enable Gift Card Tipping
Enable Gift Card Tipping
Allow patrons to add a tip when paying with Gift Cards.
Gift Card Formatting Settings
Gift Card Formatting Settings
Set PAN ID Minimum Characters: Sets the minimum length required for gift card PAN IDs, blocking creation or reload of cards with shorter numbers.Set PAN ID Maximum Characters: Sets the maximum allowed length for gift card PAN IDs, preventing use of longer numbers for new or reloaded cards.Set Enabled PAN ID Characters: Set the allowed characters for a gift card number. This field is case-sensitive. (e.g. 1234567890 or abcdef). Leave this field blank to allow any characters.
Receipt Settings
Settings for receipts of gift card purchases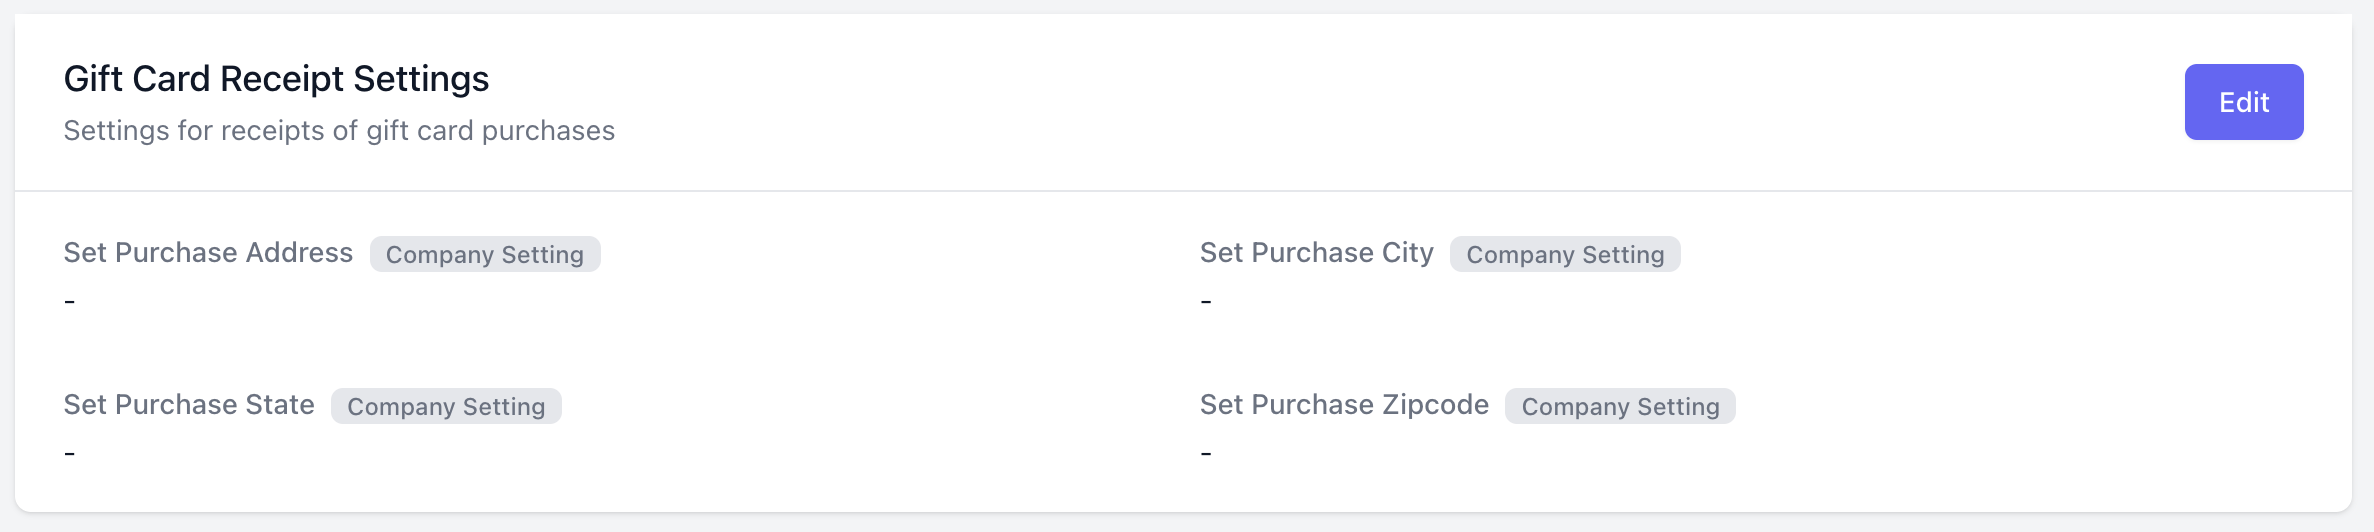
Preset Amount Settings
Choose default gift card amounts to be presented in the gift card purchasing menu on the POS. The cashier will be able to input a custom amount as well.
Custom Image Settings
Custom Gift Card Images
Custom Gift Card Images
Create custom digital gift cards for your store!
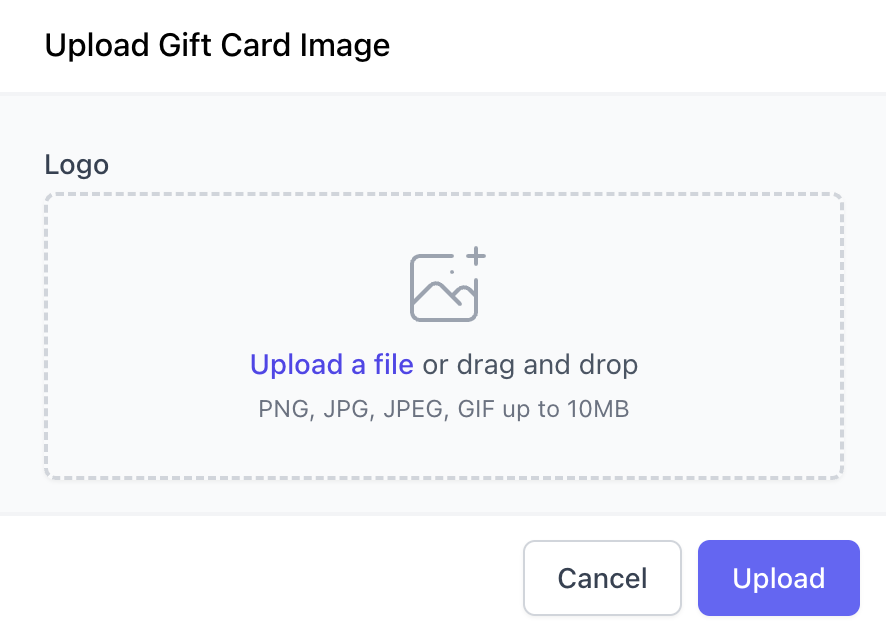
Upload Images: Click Edit Images > Upload Images. Upload a file up to 10MB. Click Upload once you’re done.
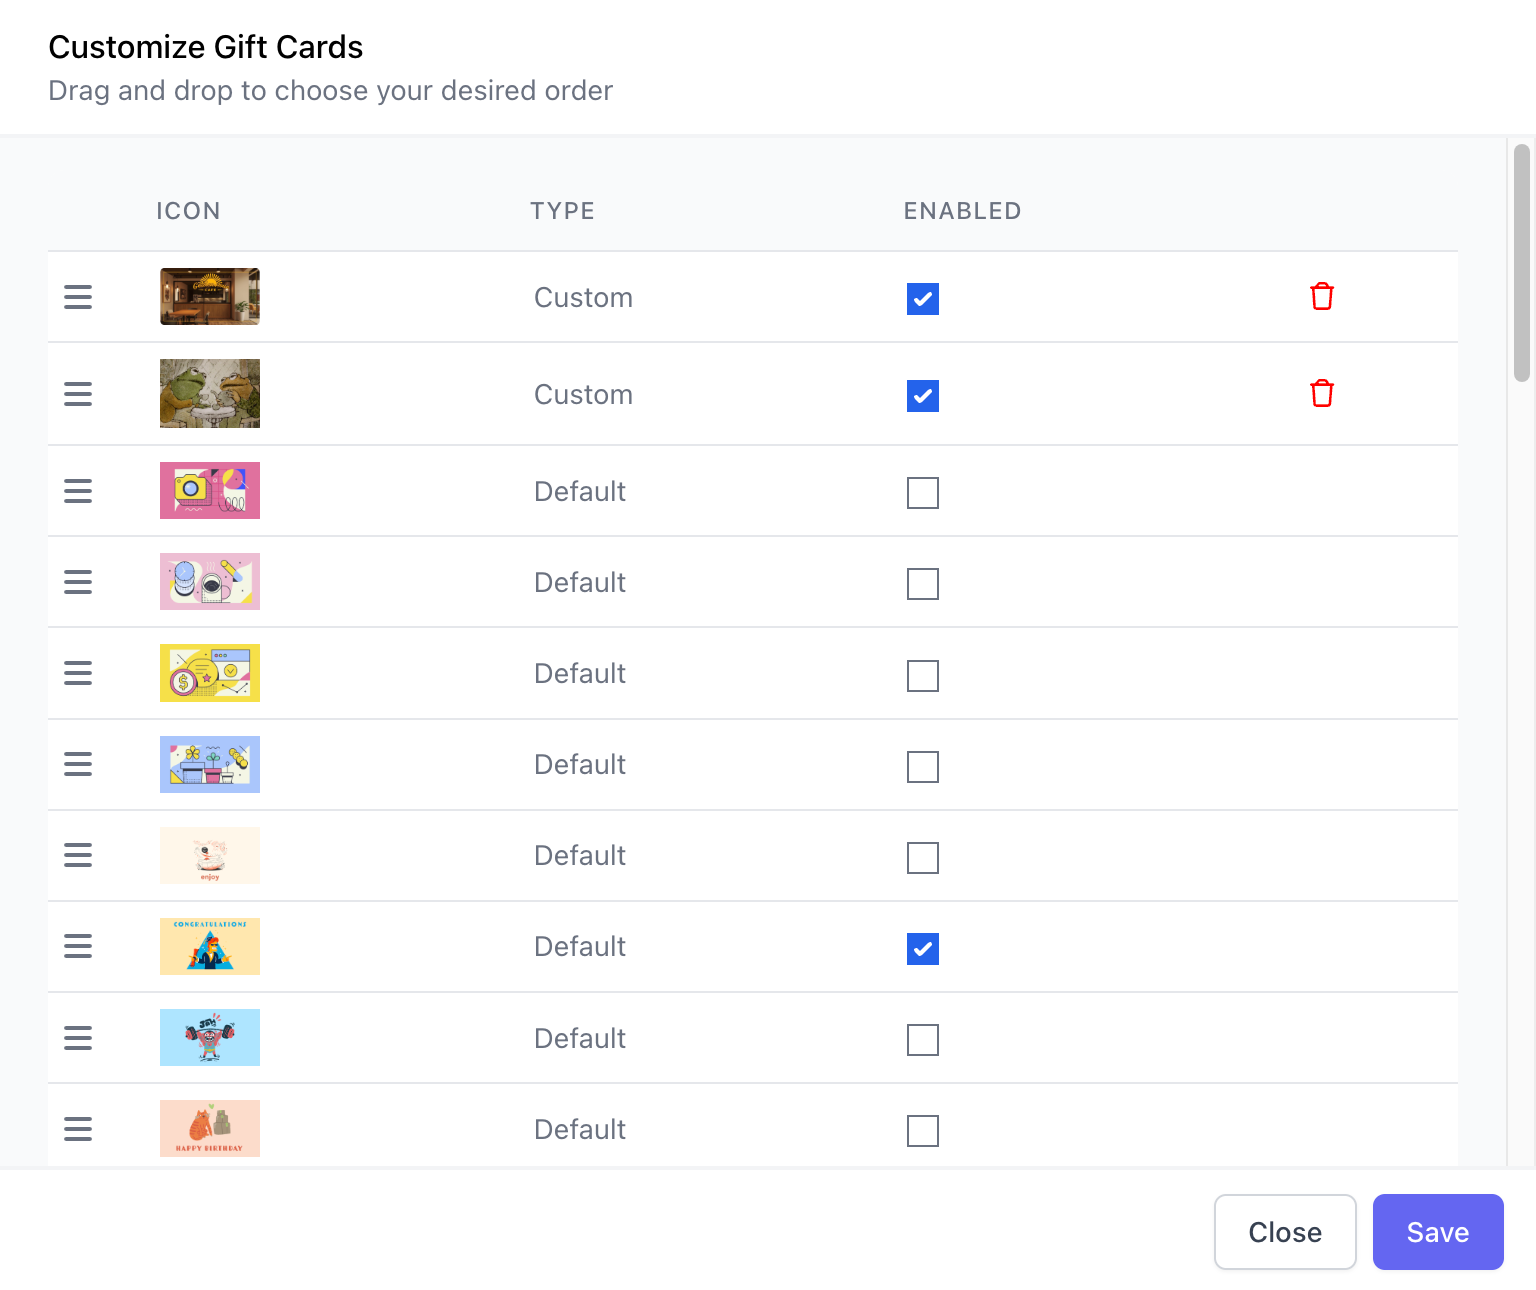
Customize Gift Cards: Reorder the display of gift cards and enable/disable specific gift cards. Click Edit Images > Customize.
Reorder Images: Click on the three lines on the left most column and drag your image’s row to reorder them.
Enable / Disable Images: Under the column labeled Enabled, select or disselect the checkboxes to enable or disable, respectively.
Delete Images: To delete your uploaded images, click the red trashcan icon.