Overview
Press the tribar in the upper left screen corner > Cash to access your cash drawers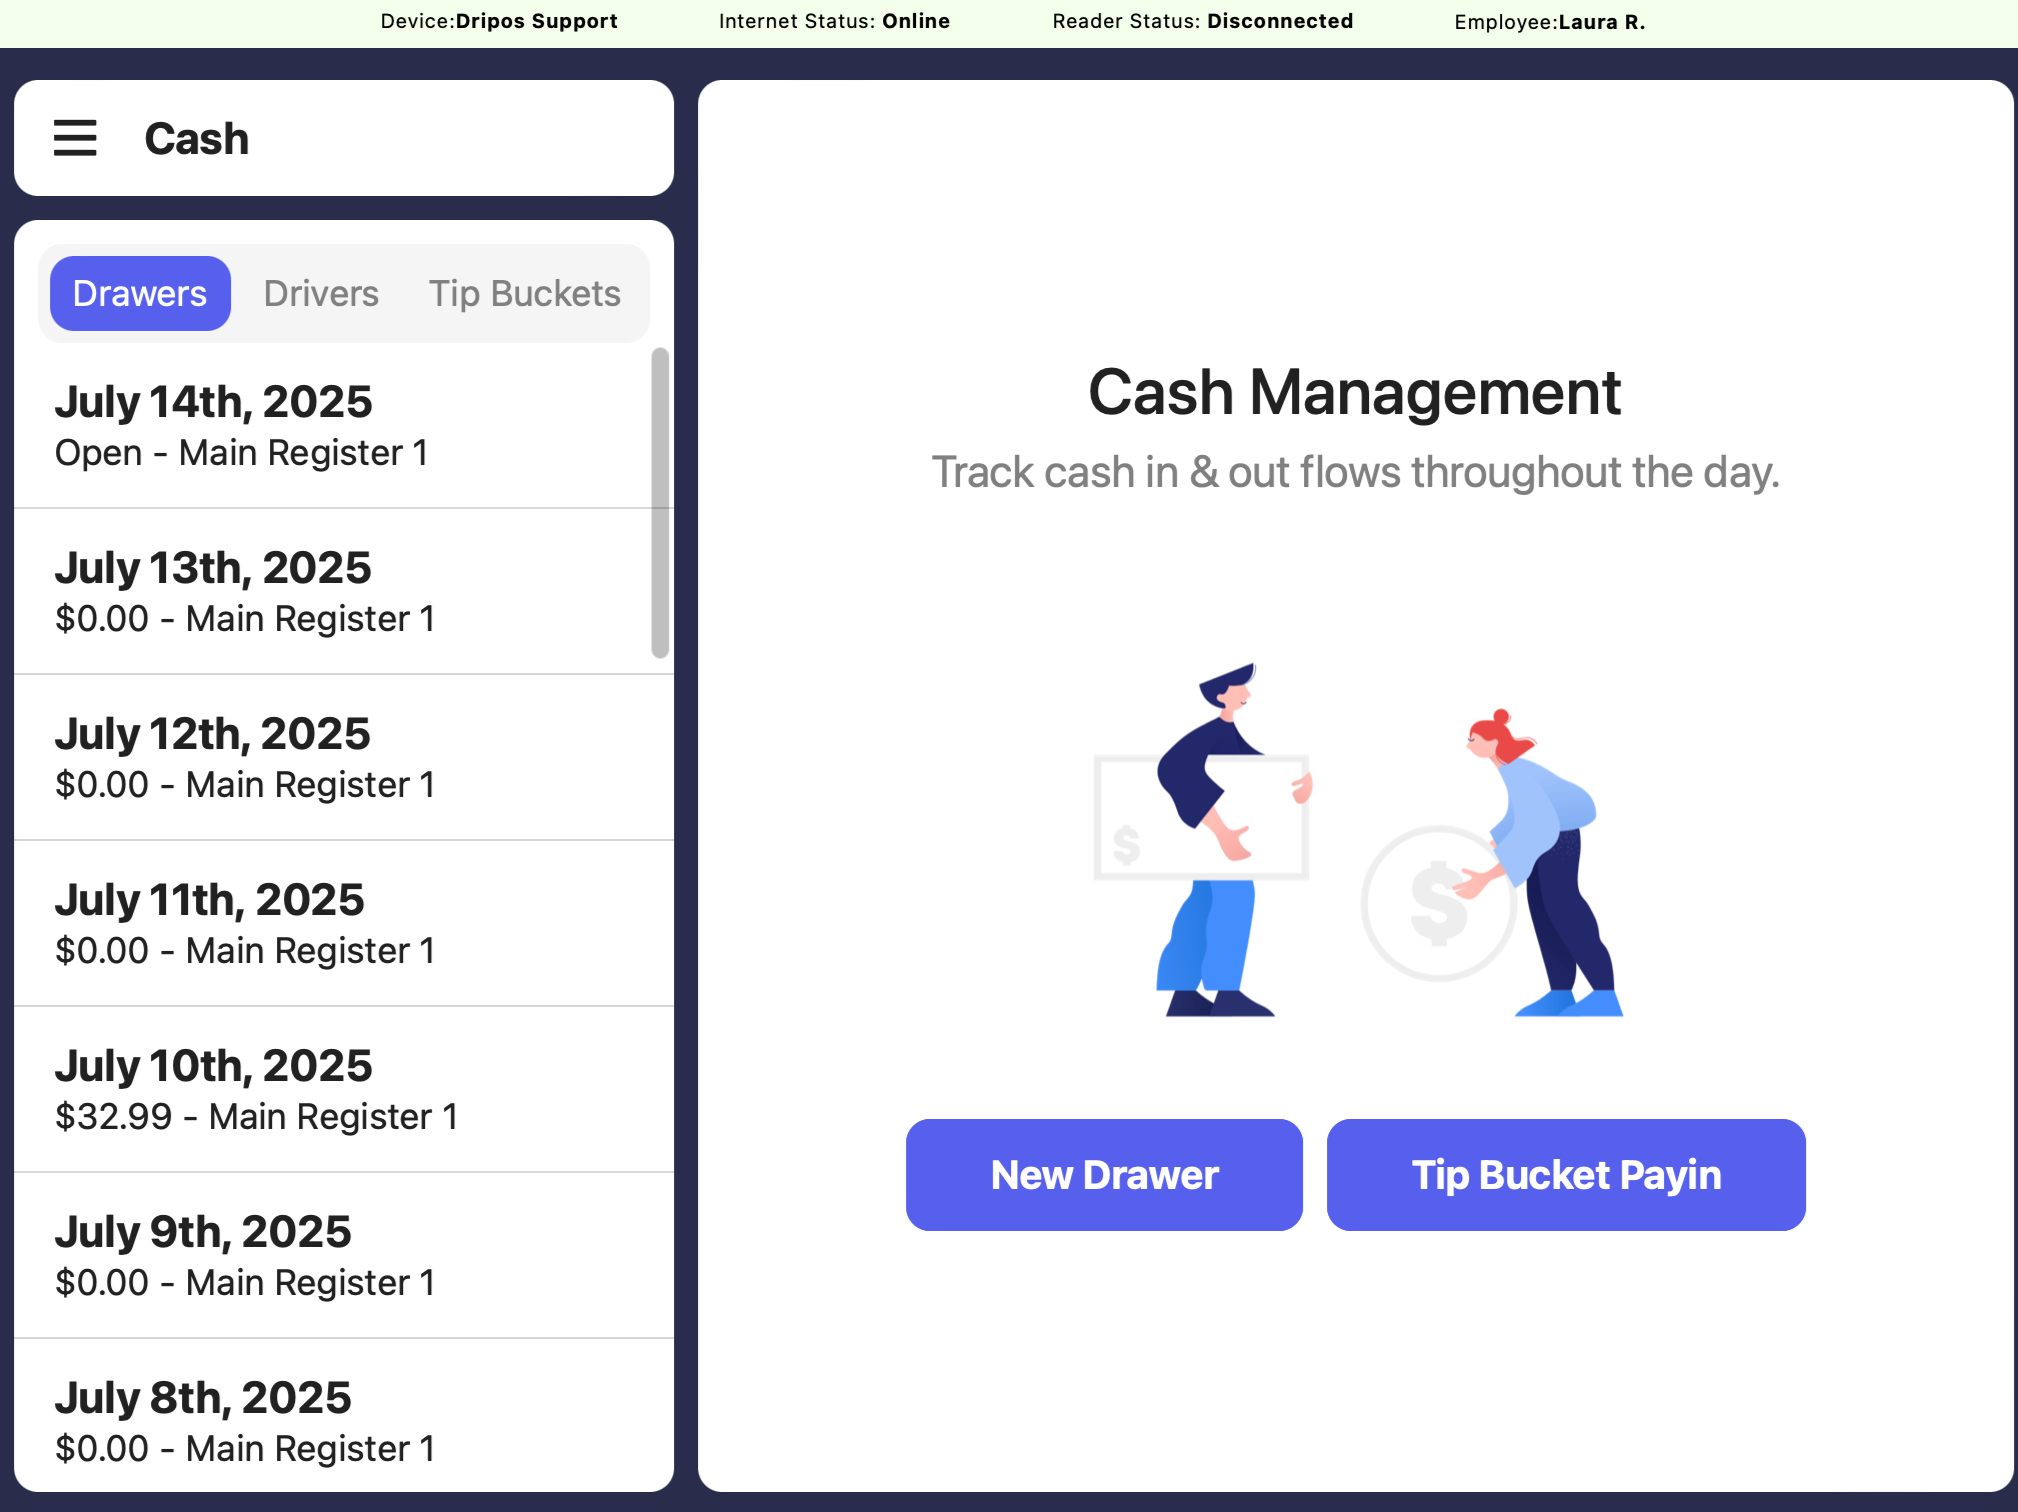
New Drawer
Open a new cash drawer at the start of every business day
Tip Bucket Payin
Combine your cash and card tips into one tip pool
View Activity
View all open and closed cash drawers under DrawersView all tip bucket payin activity under Tip Buckets
Open a Cash Drawer
Start each day with a new cash drawer to keep track of money movement throughout the day1
Tap New Drawer and enter the starting amount of cash you are starting with in the drawer > press Submit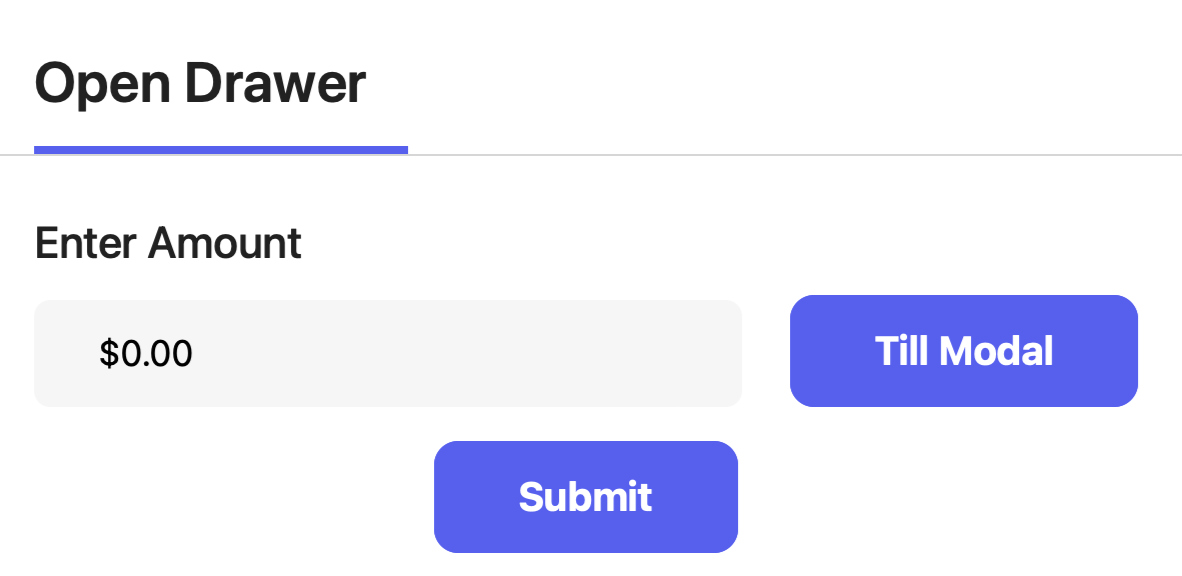
2
An alternative option is to tap Till Modal to enter the starting amount of cash by specific bills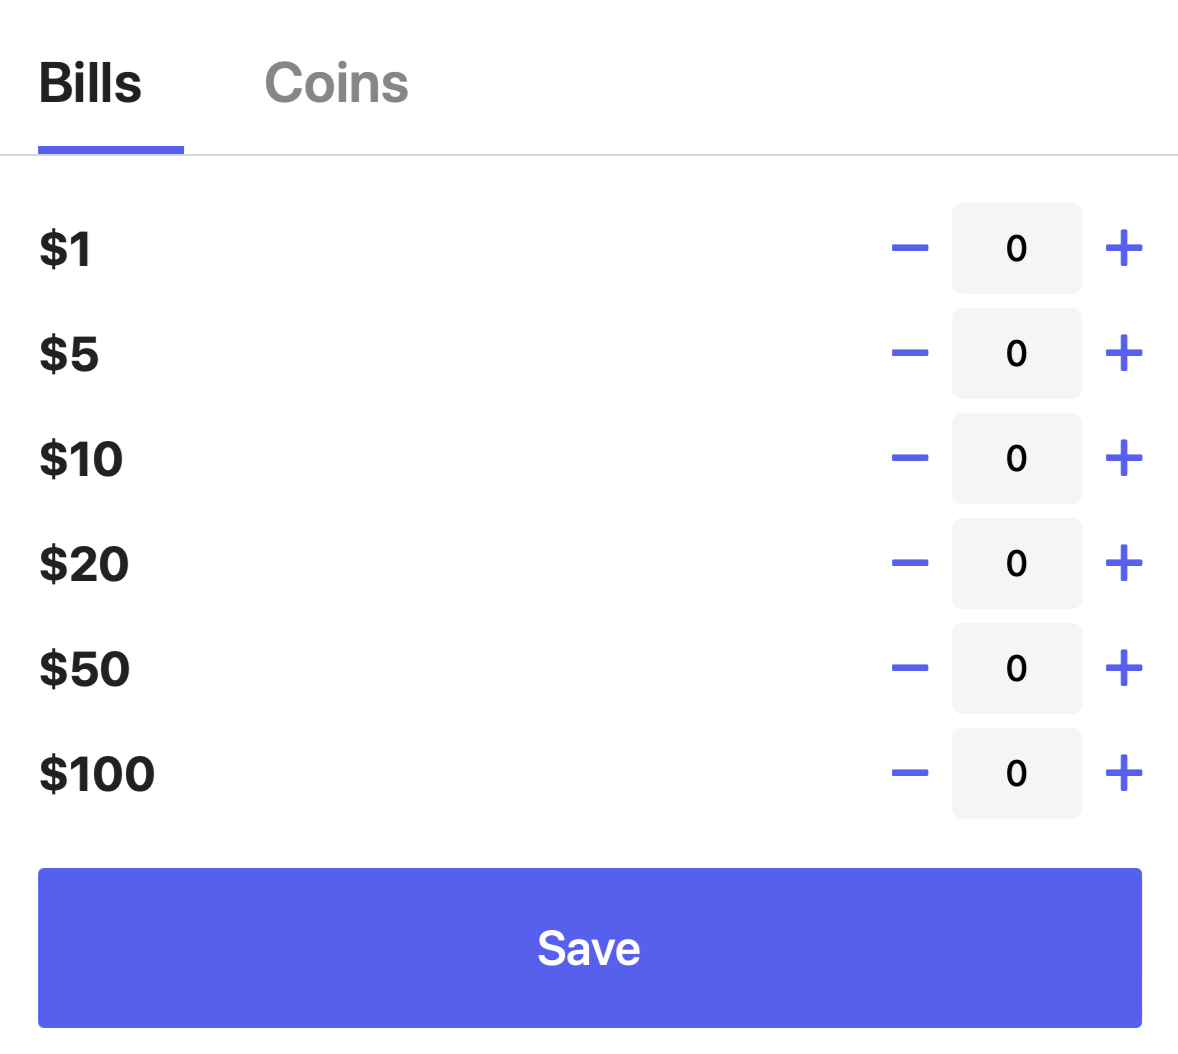
Understand Cash Drawers
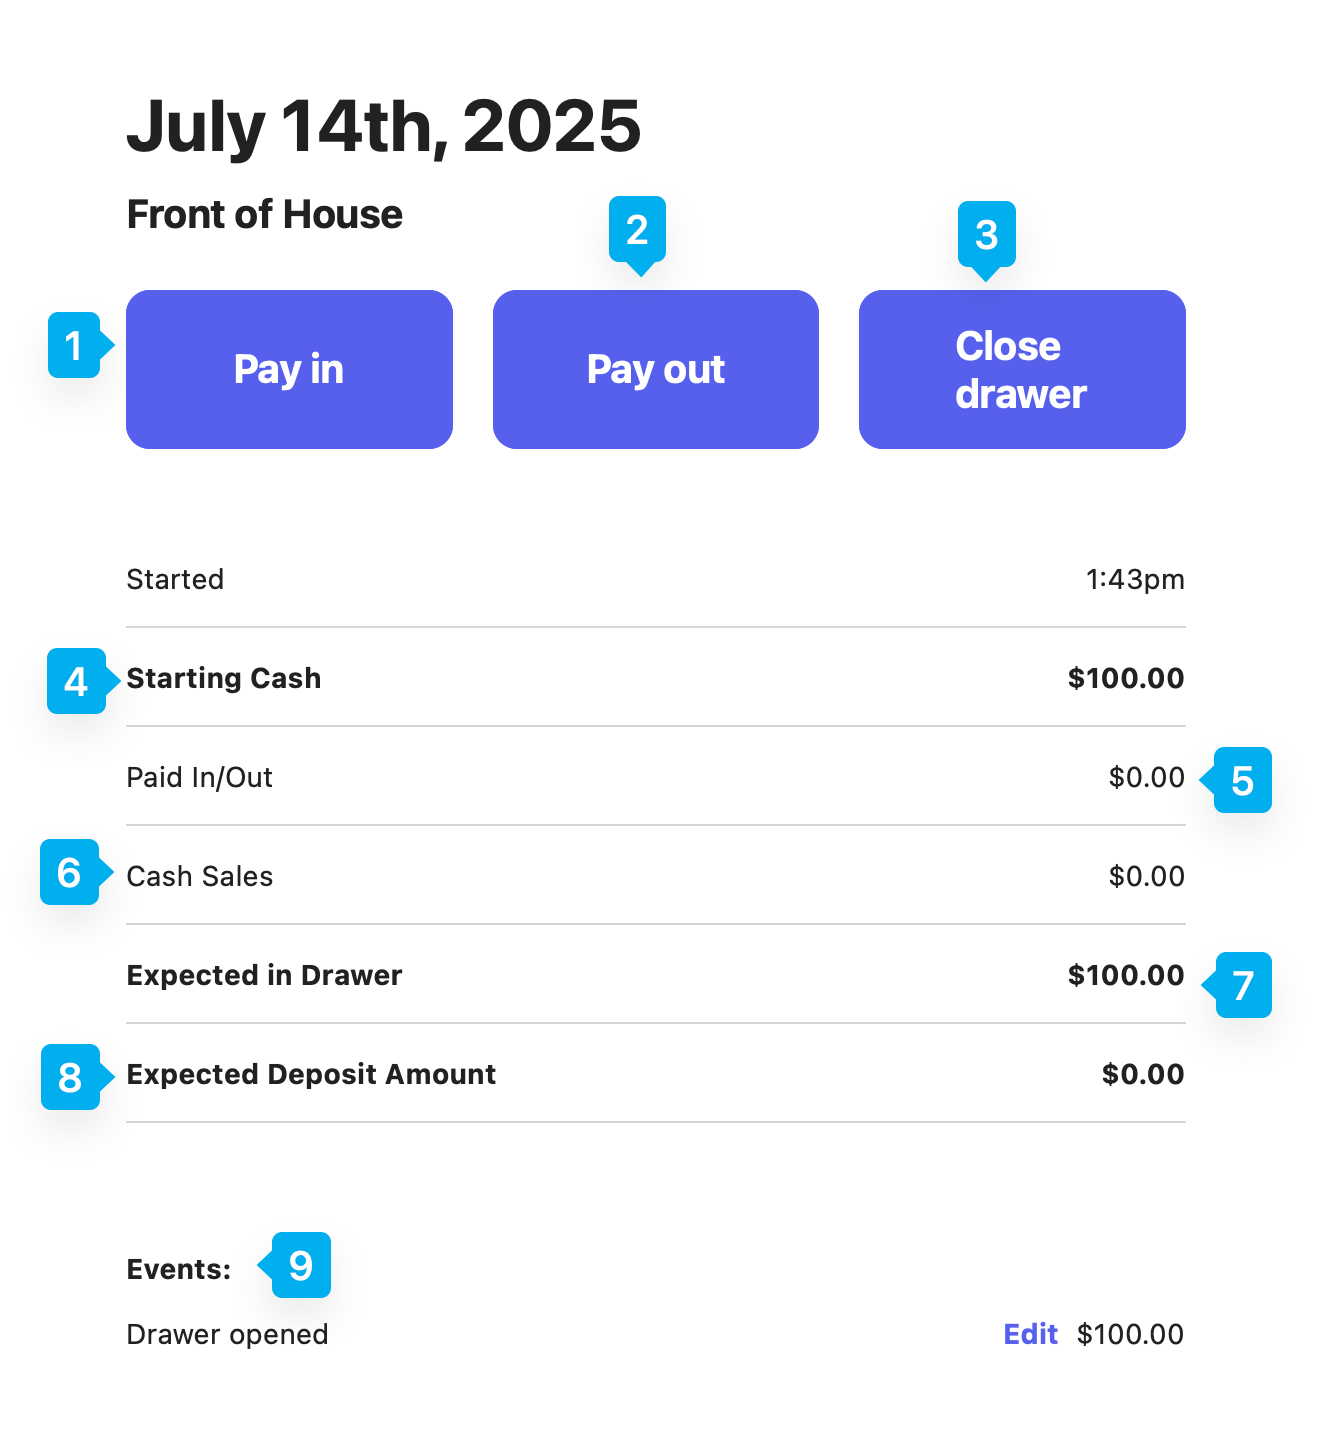
Pay In
Document when cash put into the drawer (not a sale), i.e. change from grabbing milk at the grocery store
Payout
Document when cash is taken out of the drawer for business purposes, i.e. to go to the store to grab a gallon of milk
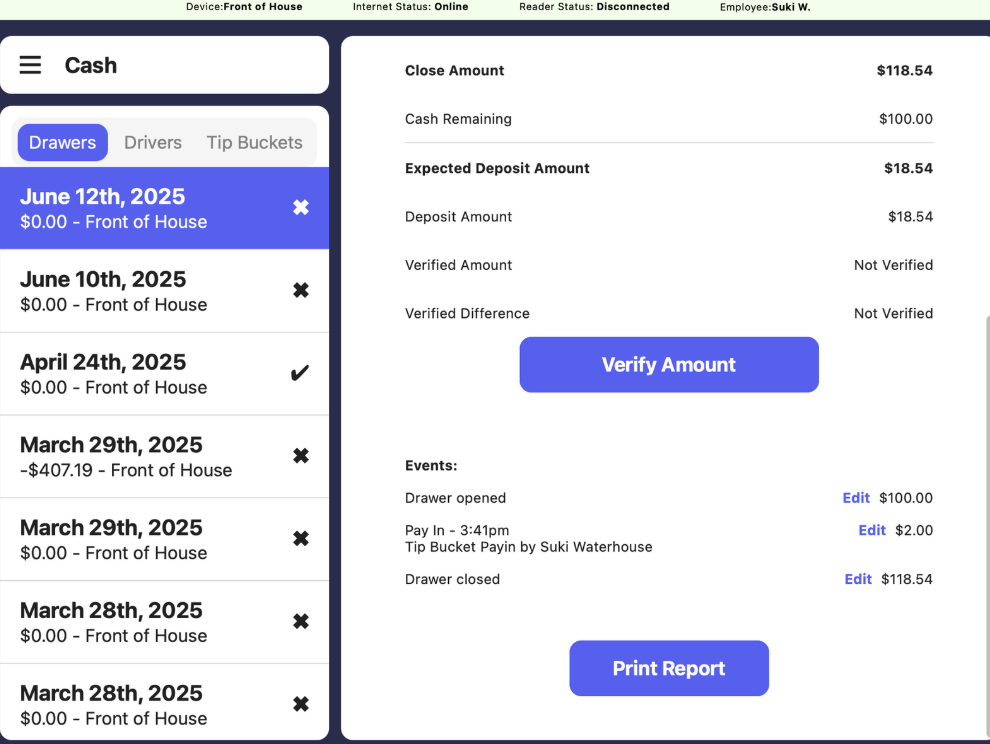
Close Drawer
Press to close a drawer at the end of the day
Starting Cash
Initial amount of cash the drawer had upon opening
Paid In/Out
Total balance of pay ins and pay outs
Cash Sales
Total cash sales on the POS since the drawer was opened
Expected in Drawer
Based on the starting cash, pay ins/out, and cash sales
Expected Deposit Amount
Based on if the same starting cash amount is to remain in the drawer after closing (Expected In Drawer - Starting Cash)
Events
All events except sales, including drawer opening and closing, tip bucket pay ins, and other pay ins and pay outs.
Close a Cash Drawer
Close a cash drawer at the end of every day, or at the start of a shift change - whichever makes the most sense for your business!1
Find the open drawer and tap Close Drawer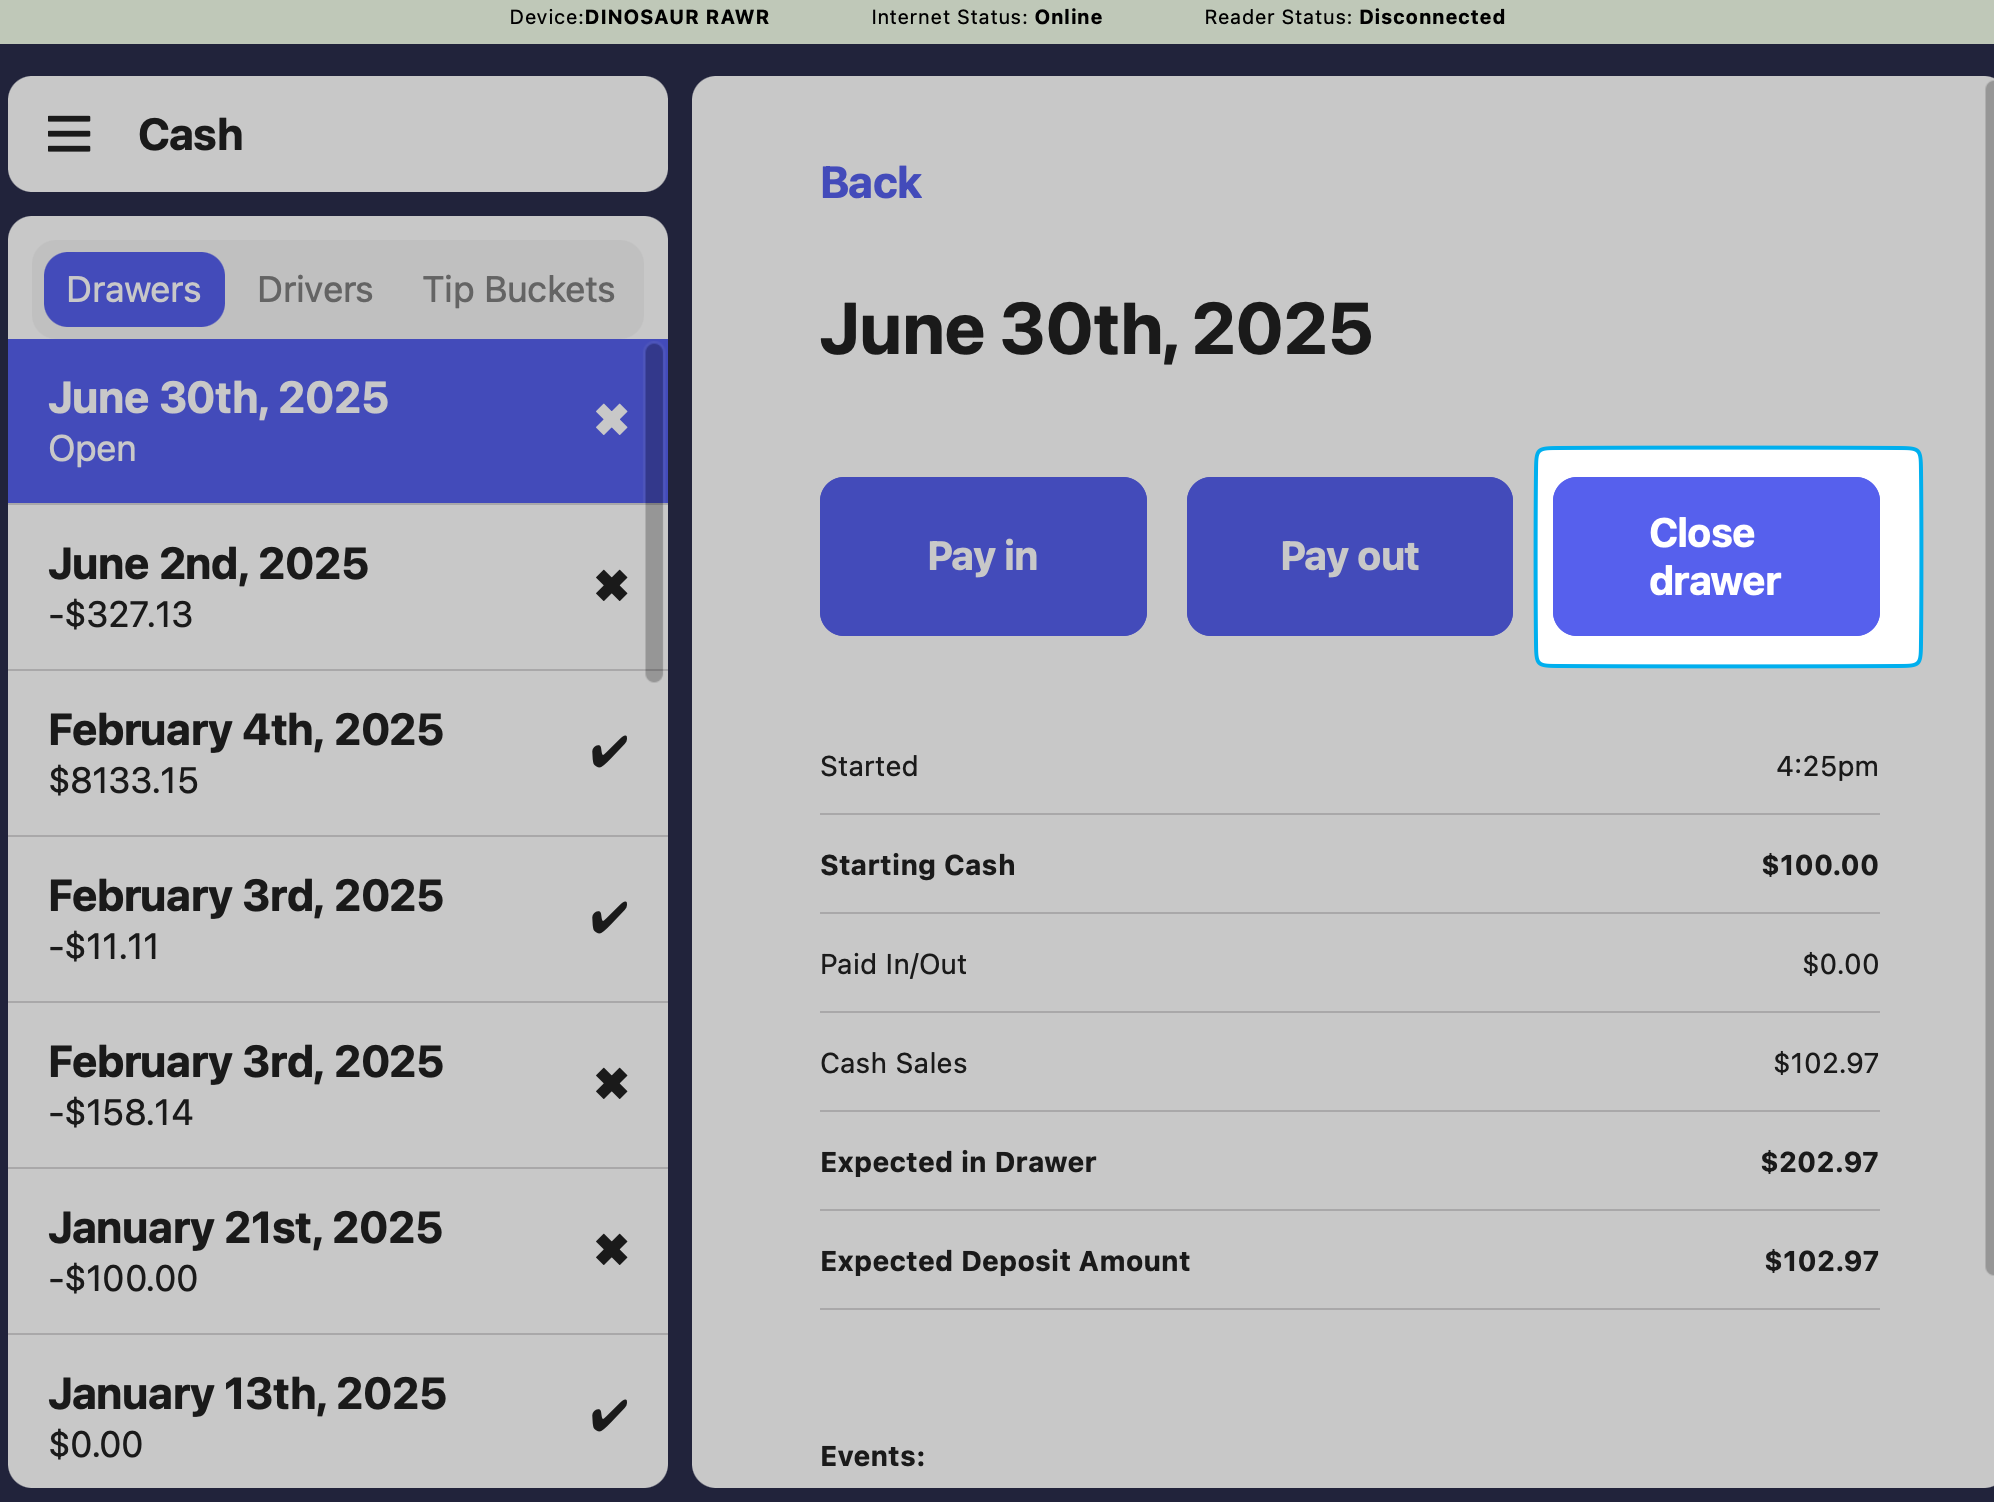
2
Enter Amount in Drawer: The total amount of cash counted in the drawer at closingDrawer Reset: Amount of cash to leave in the drawer for the next opener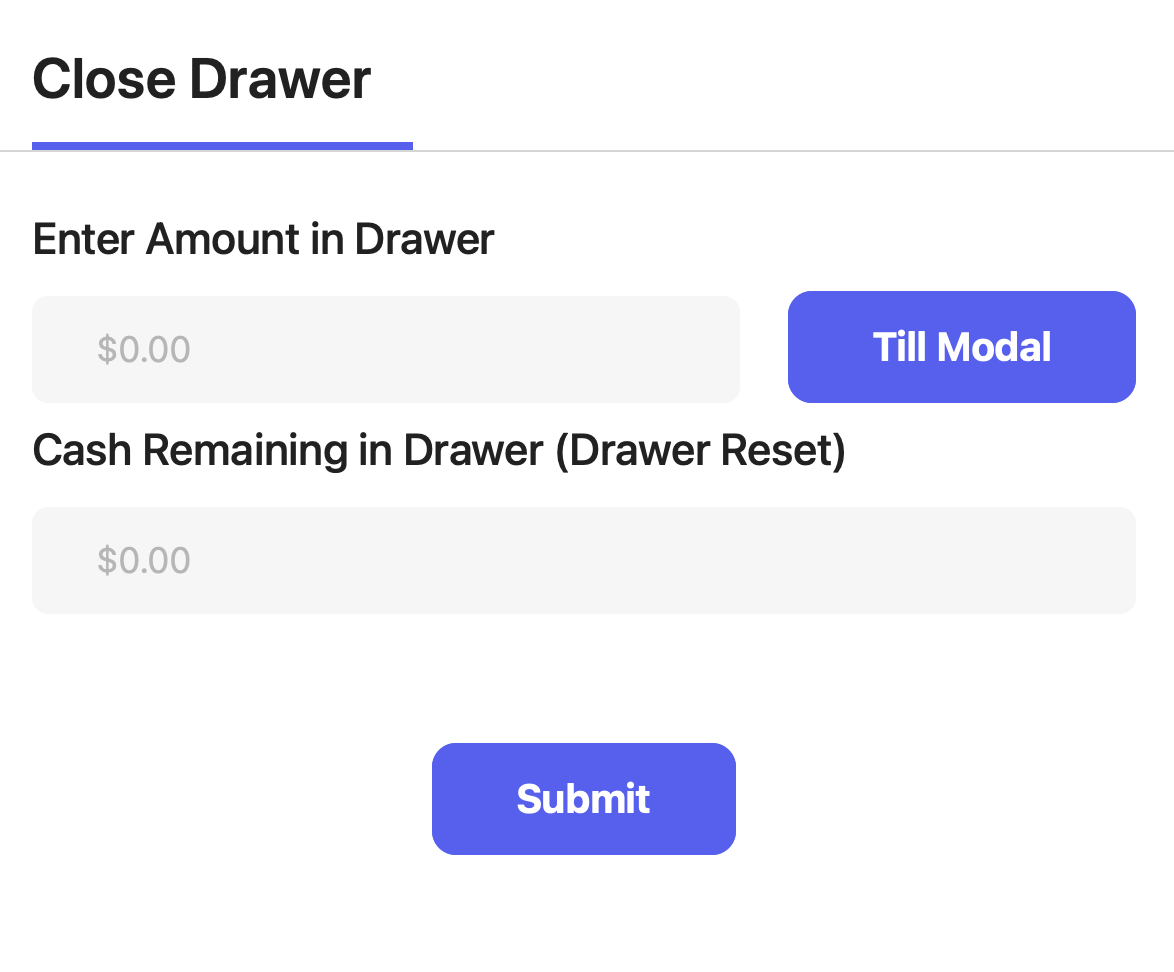
3
Verify Amount: Confirm the amount counted in the drawer at closingPrint Report: Print the cash drawer report with each line item listed