1. Create Units
2. Create Ingredients
3. Build Recipes
Create a Unit
Every ingredient will be measured with units. Dripos provides standard units of measurement that are preset and ready for use. If the unit you need is not a standard unit, you may create a custom unit!Standard Units
Standard Units
A ready-to-use set of standard units — like grams, milliliters, and count — plus their built-in unit conversions.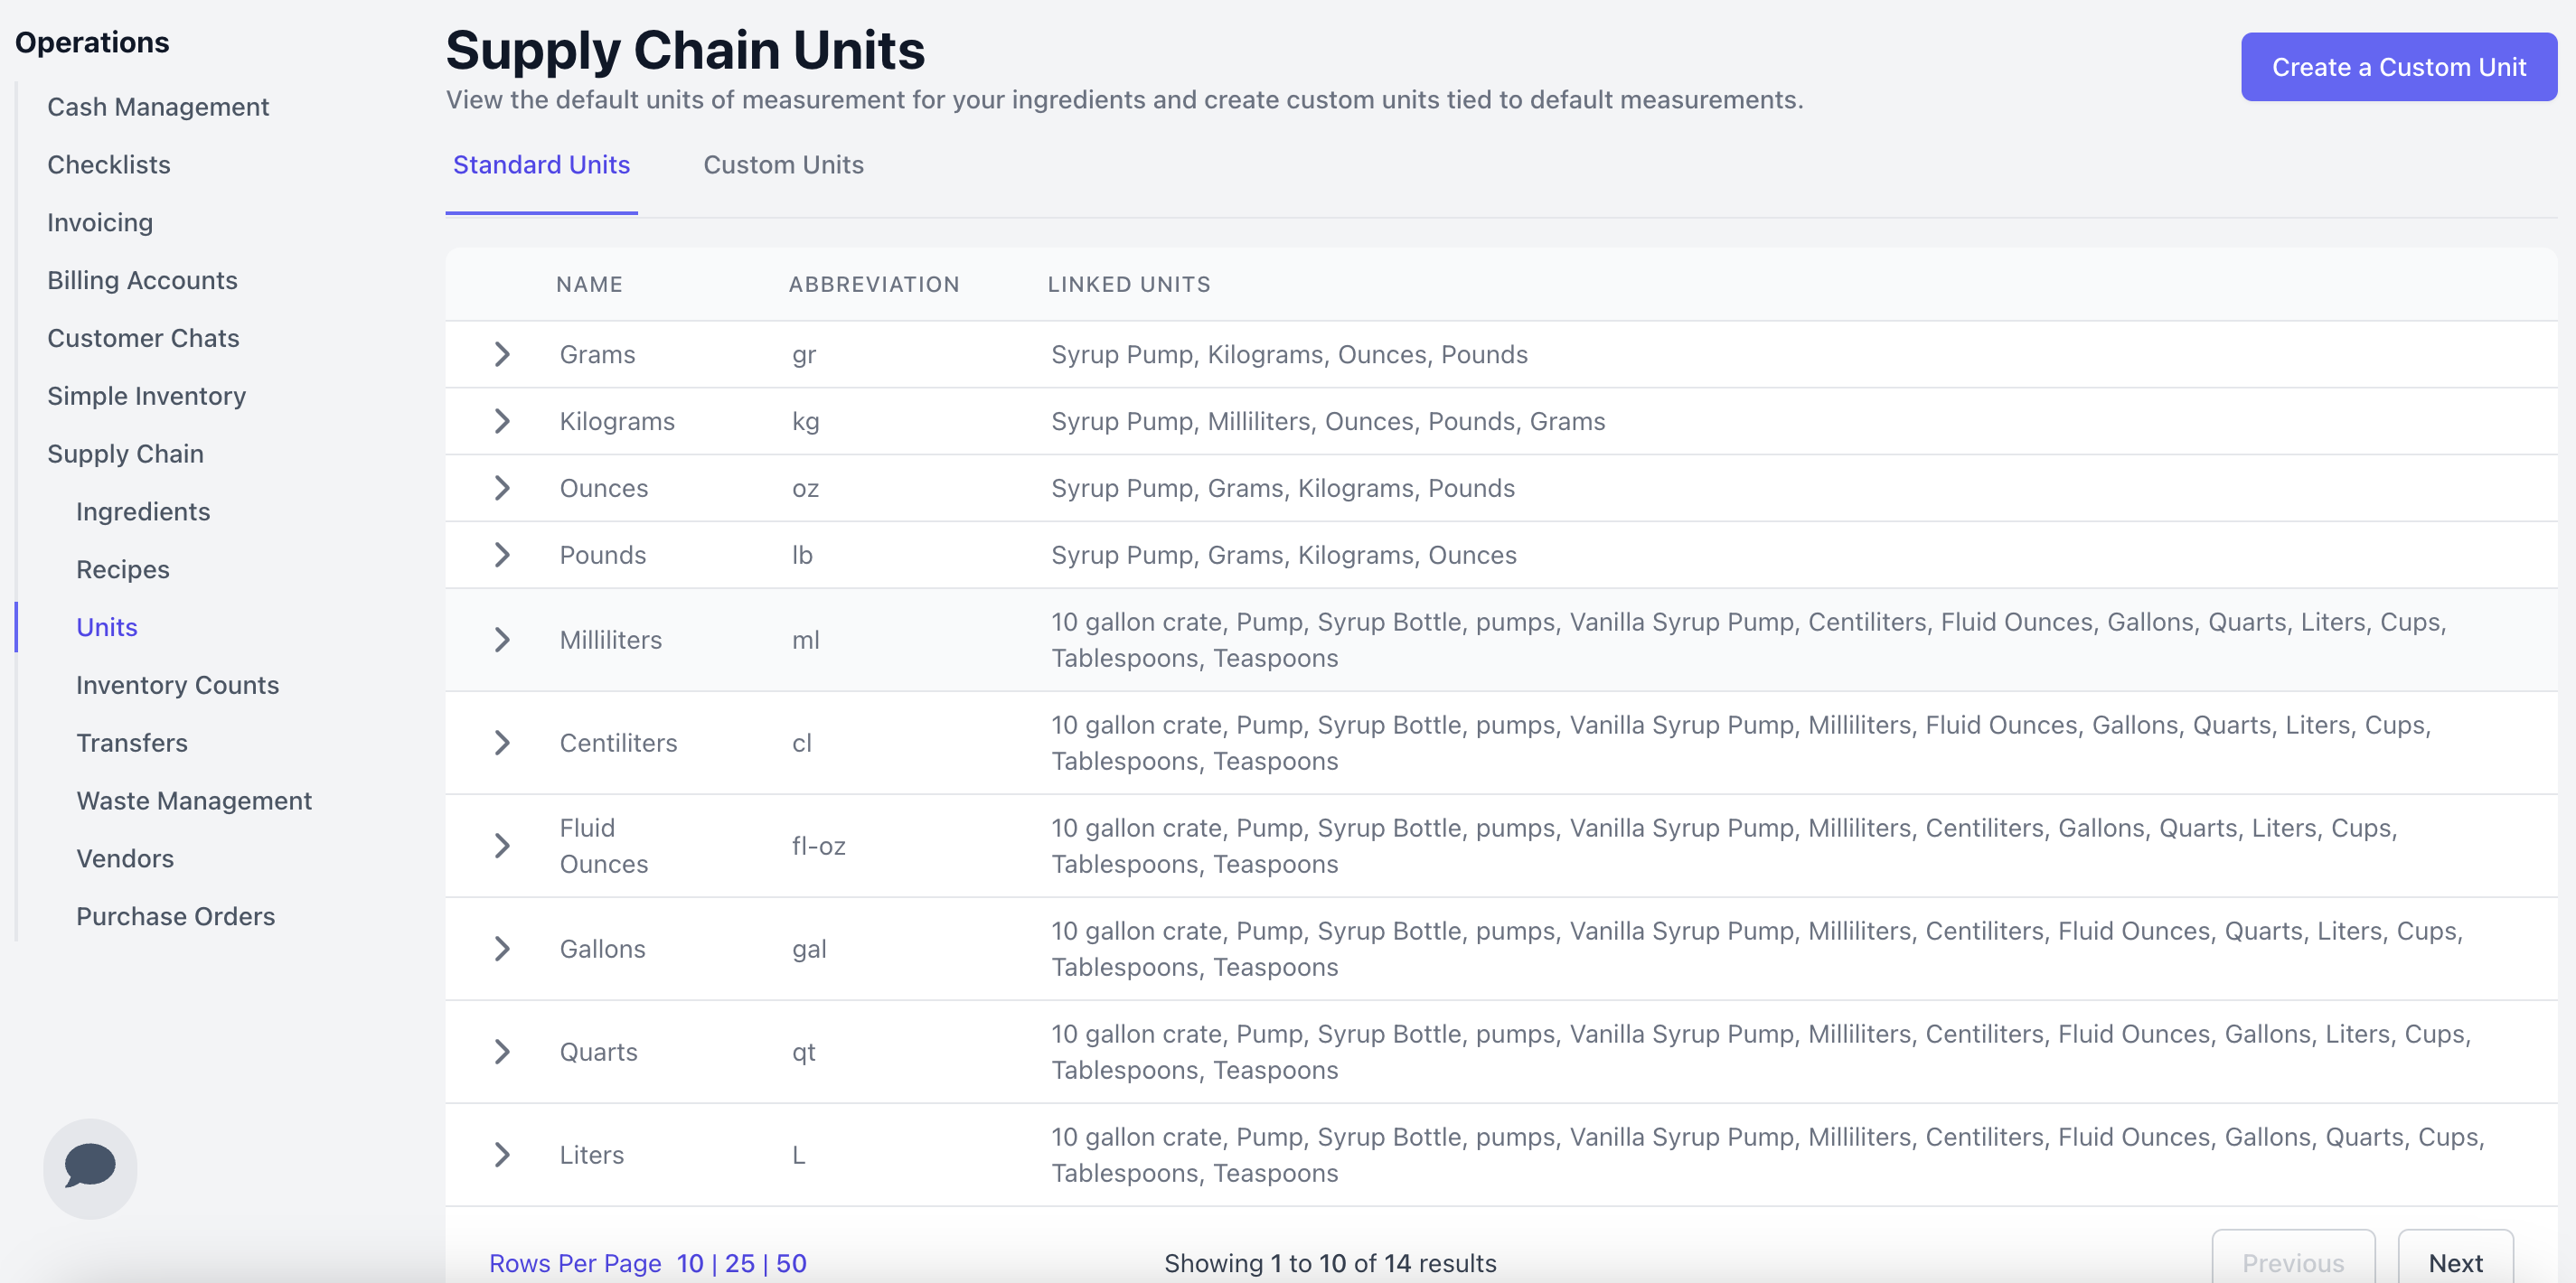
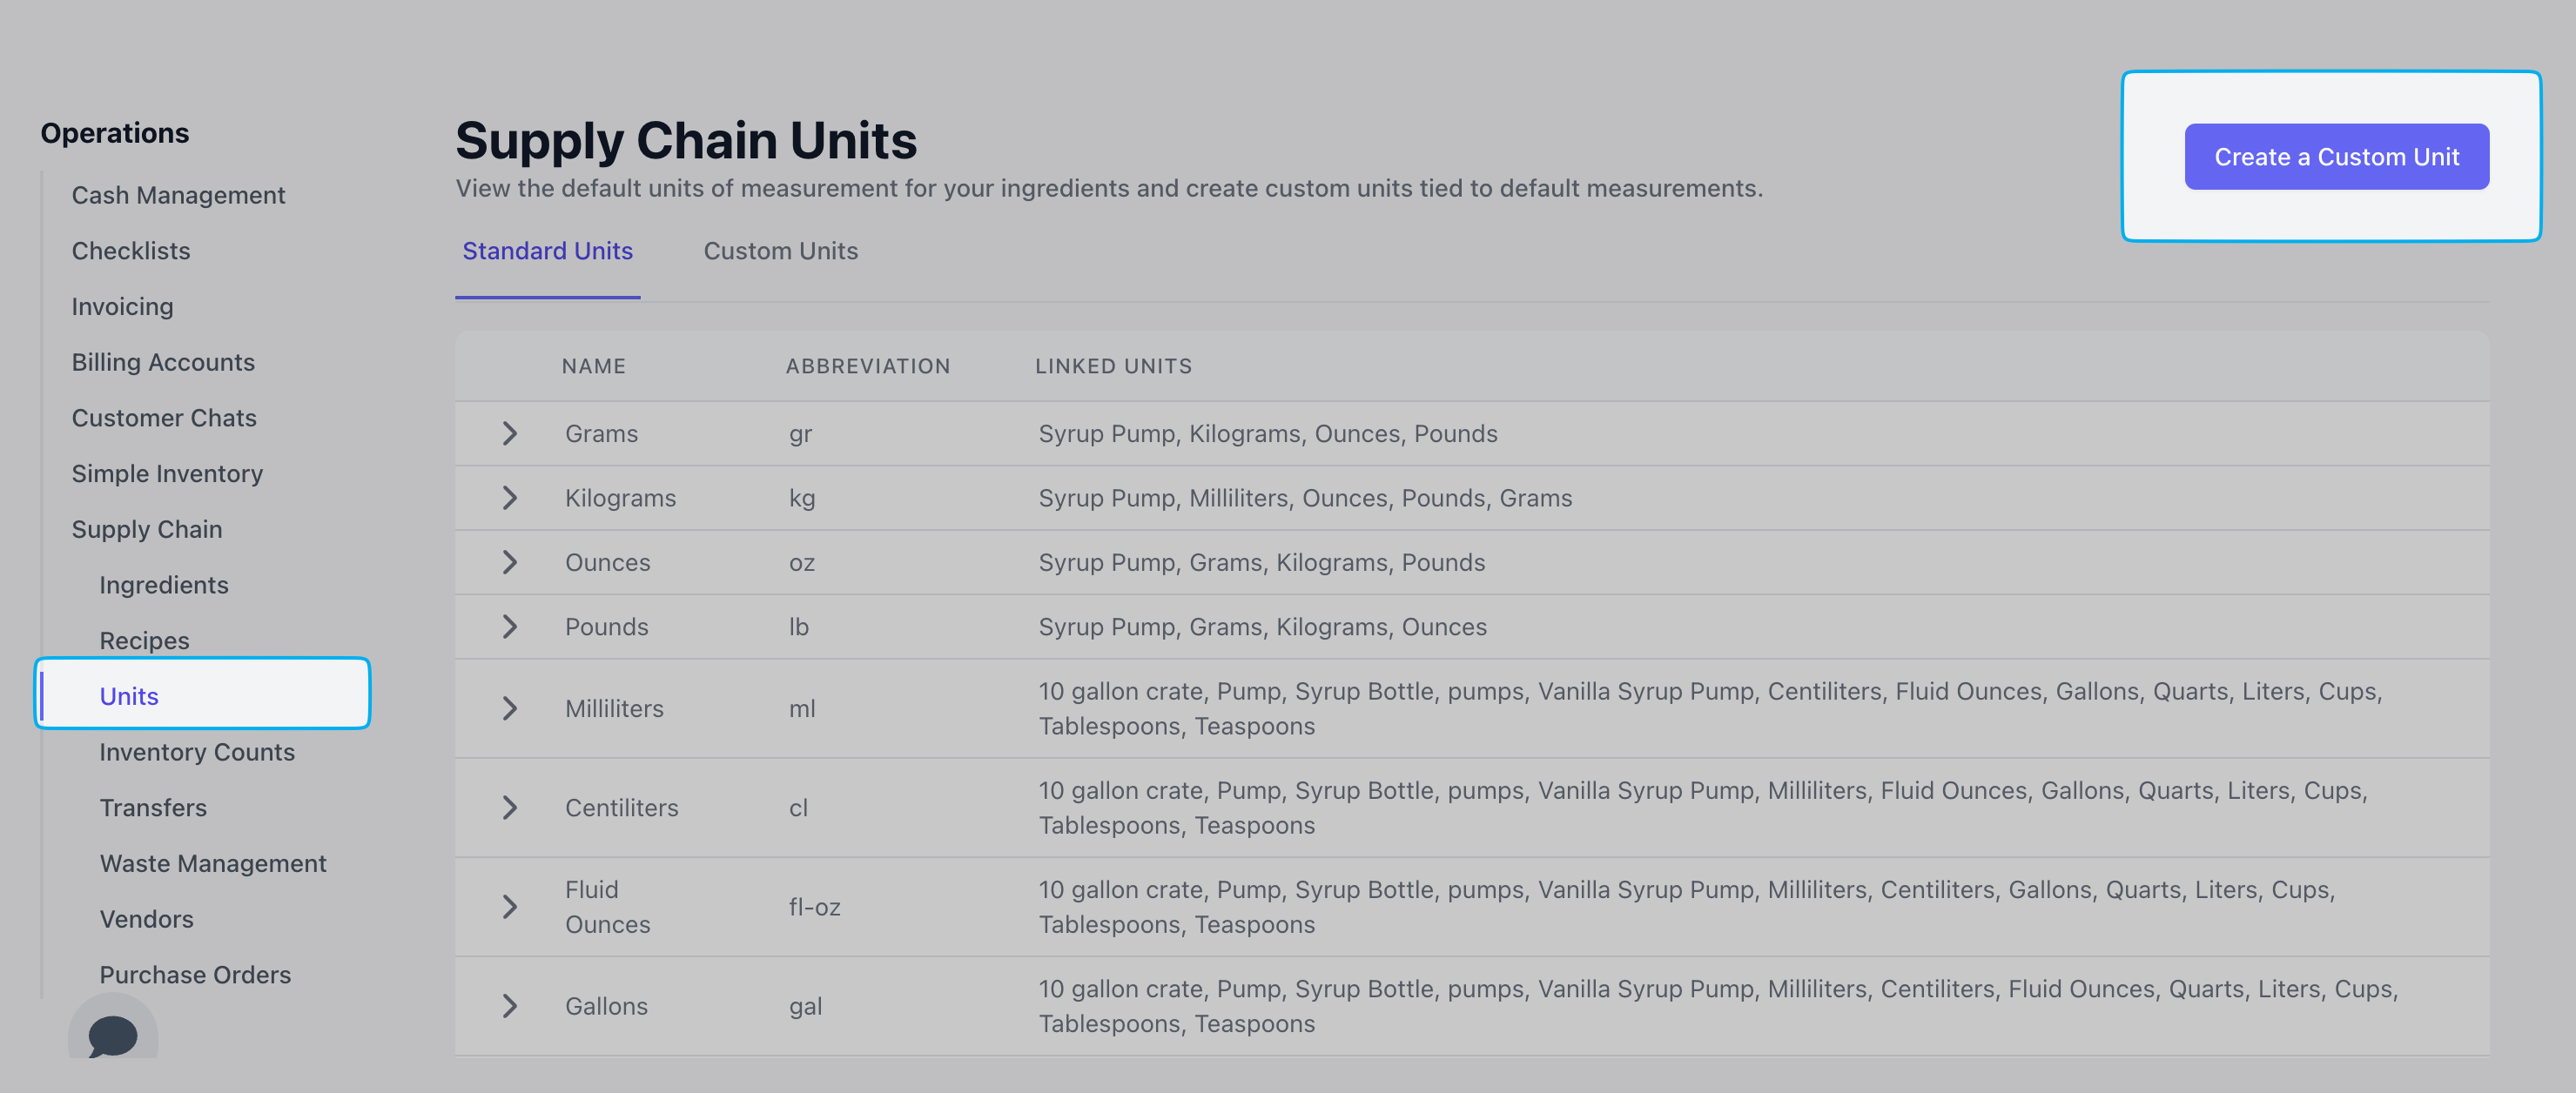
Custom Units
Custom Units
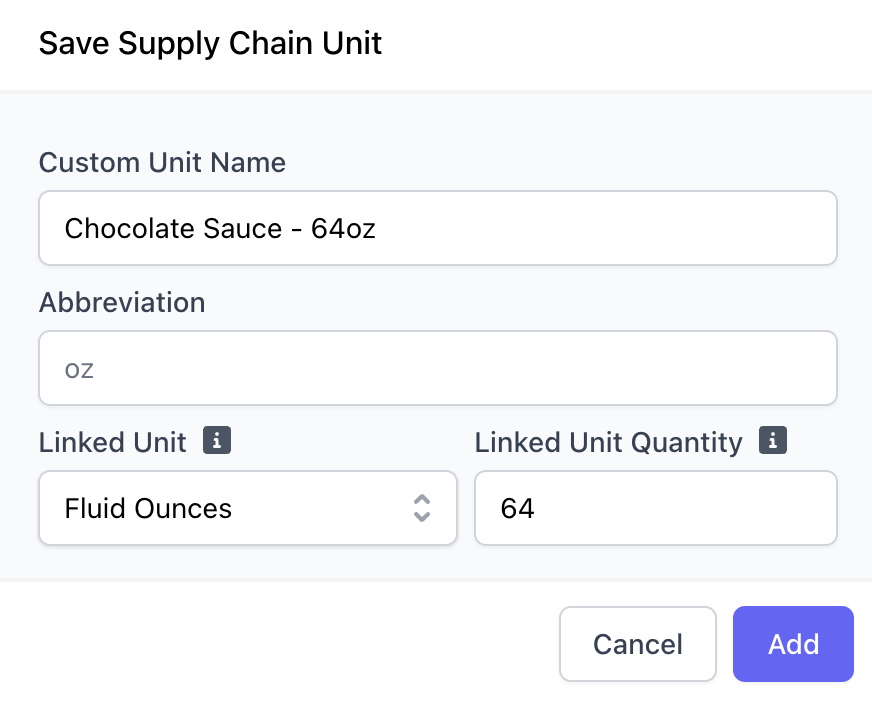
For an ingredient not using a standard unit of measurement, create a custom unit linked to a standard unit.Create a Custom UnitIn this example, we will create a custom unit for Case - 16 oz. cups, where 1 Case = 50 cups and Chocolate Sauce - 64oz, where 1 case = 64 fluid oz.
Fill out the following fields and click Add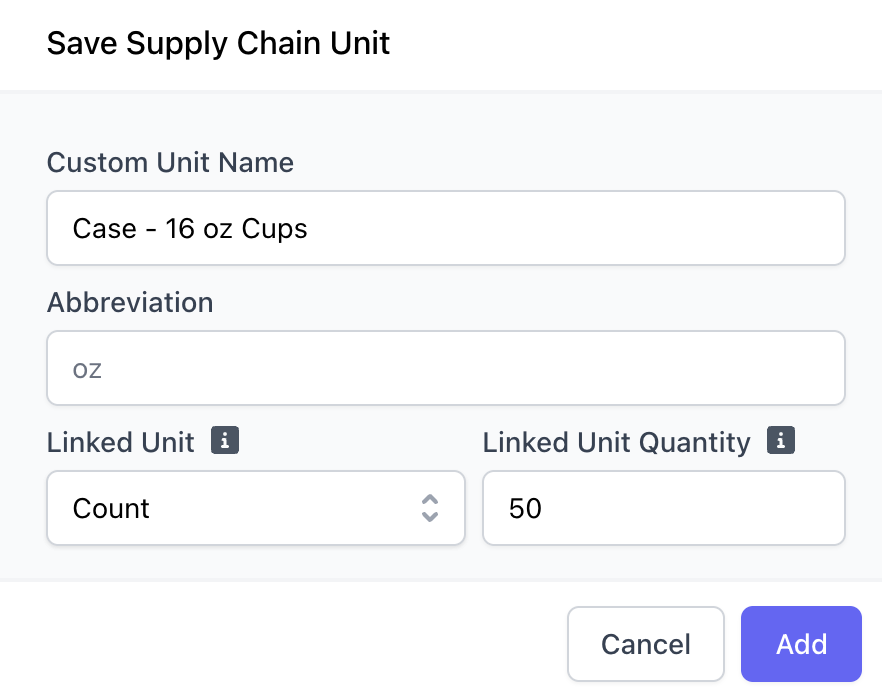
Case of Cups
Chocolate Sauce
- Name, i.e. Case - 16oz cups, Chocolate Sauce - 64oz
- Abbreviation: A short code (2–3 letters) for your own internal tracking or labeling
- Linked Unit: The relational unit used to convert this custom unit, i.e. count, fluid oz
- Linked Unit Quantity: How much of the relational unit goes into one of the custom units, i.e. 50, 64
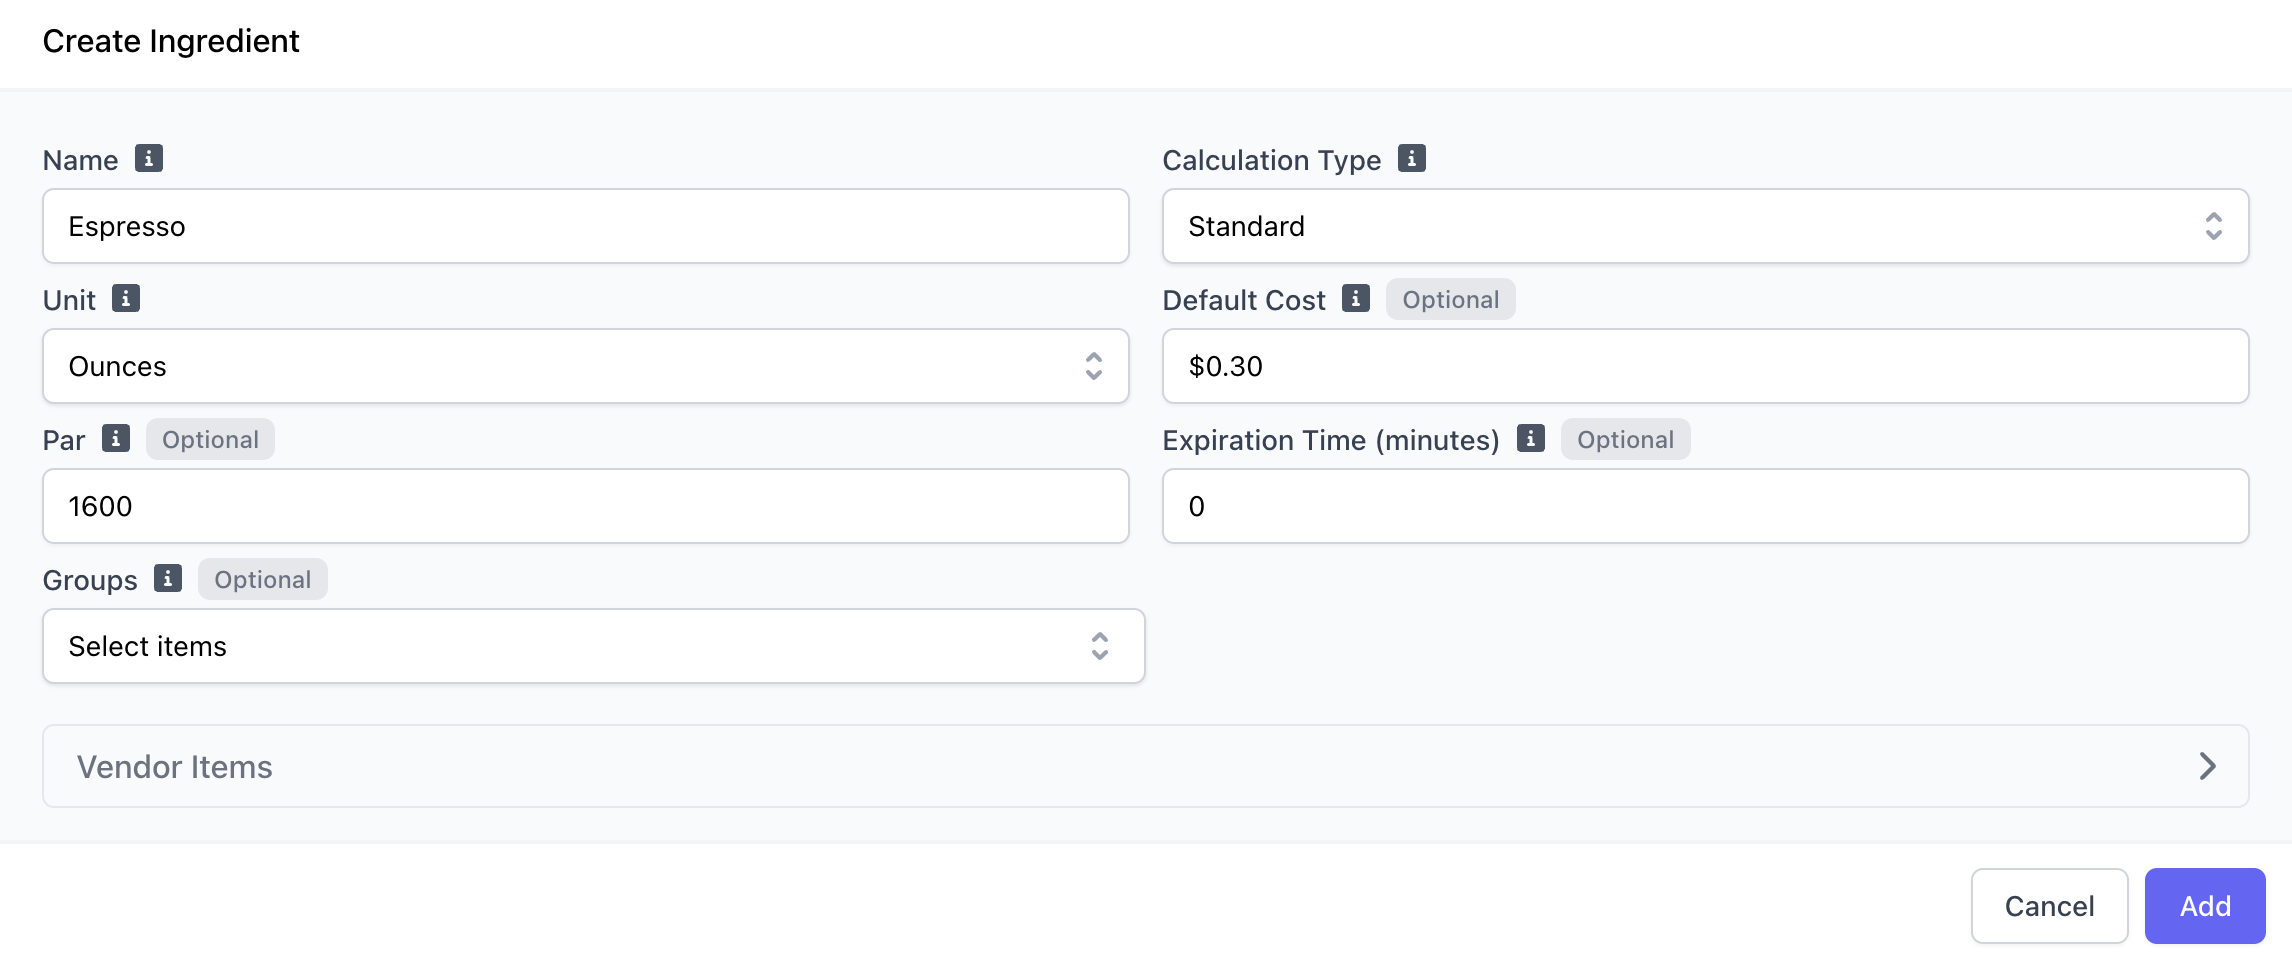
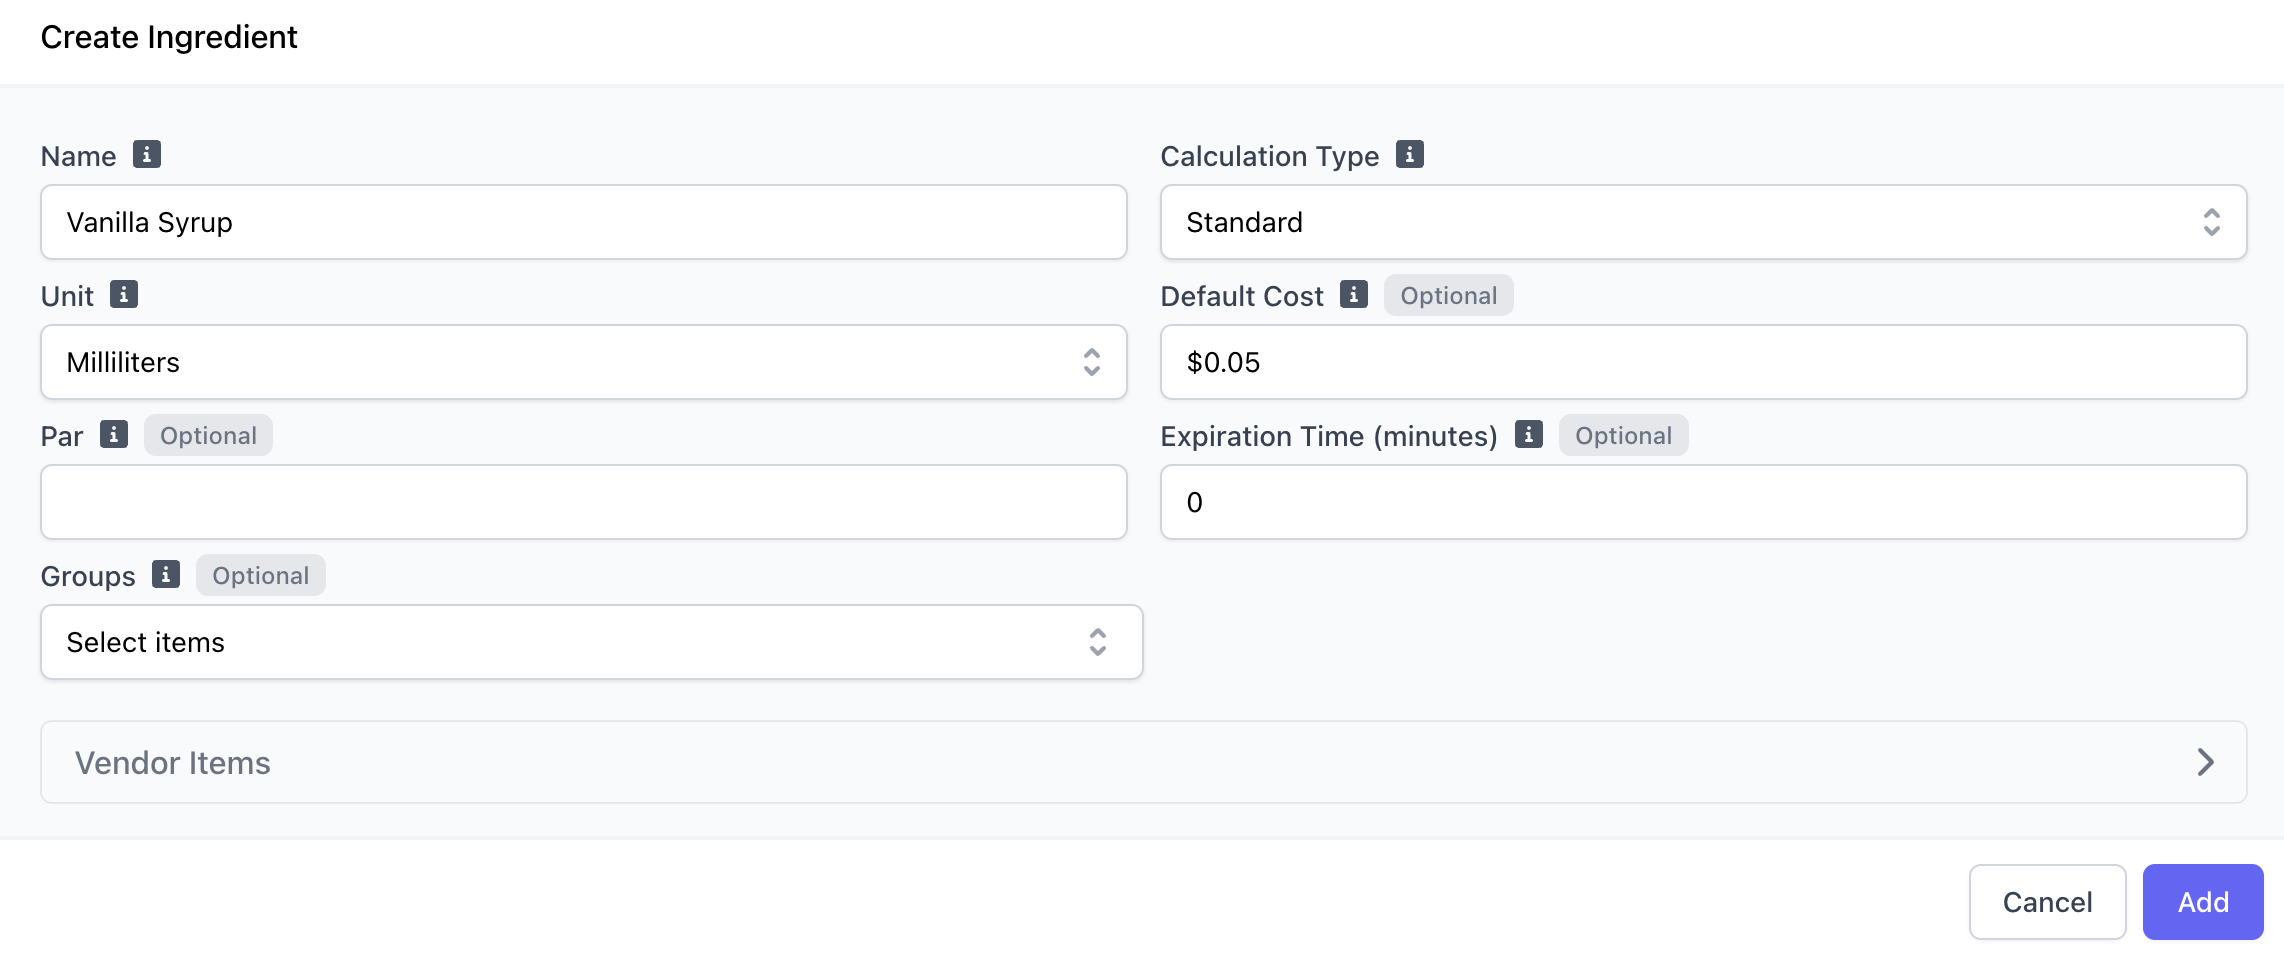
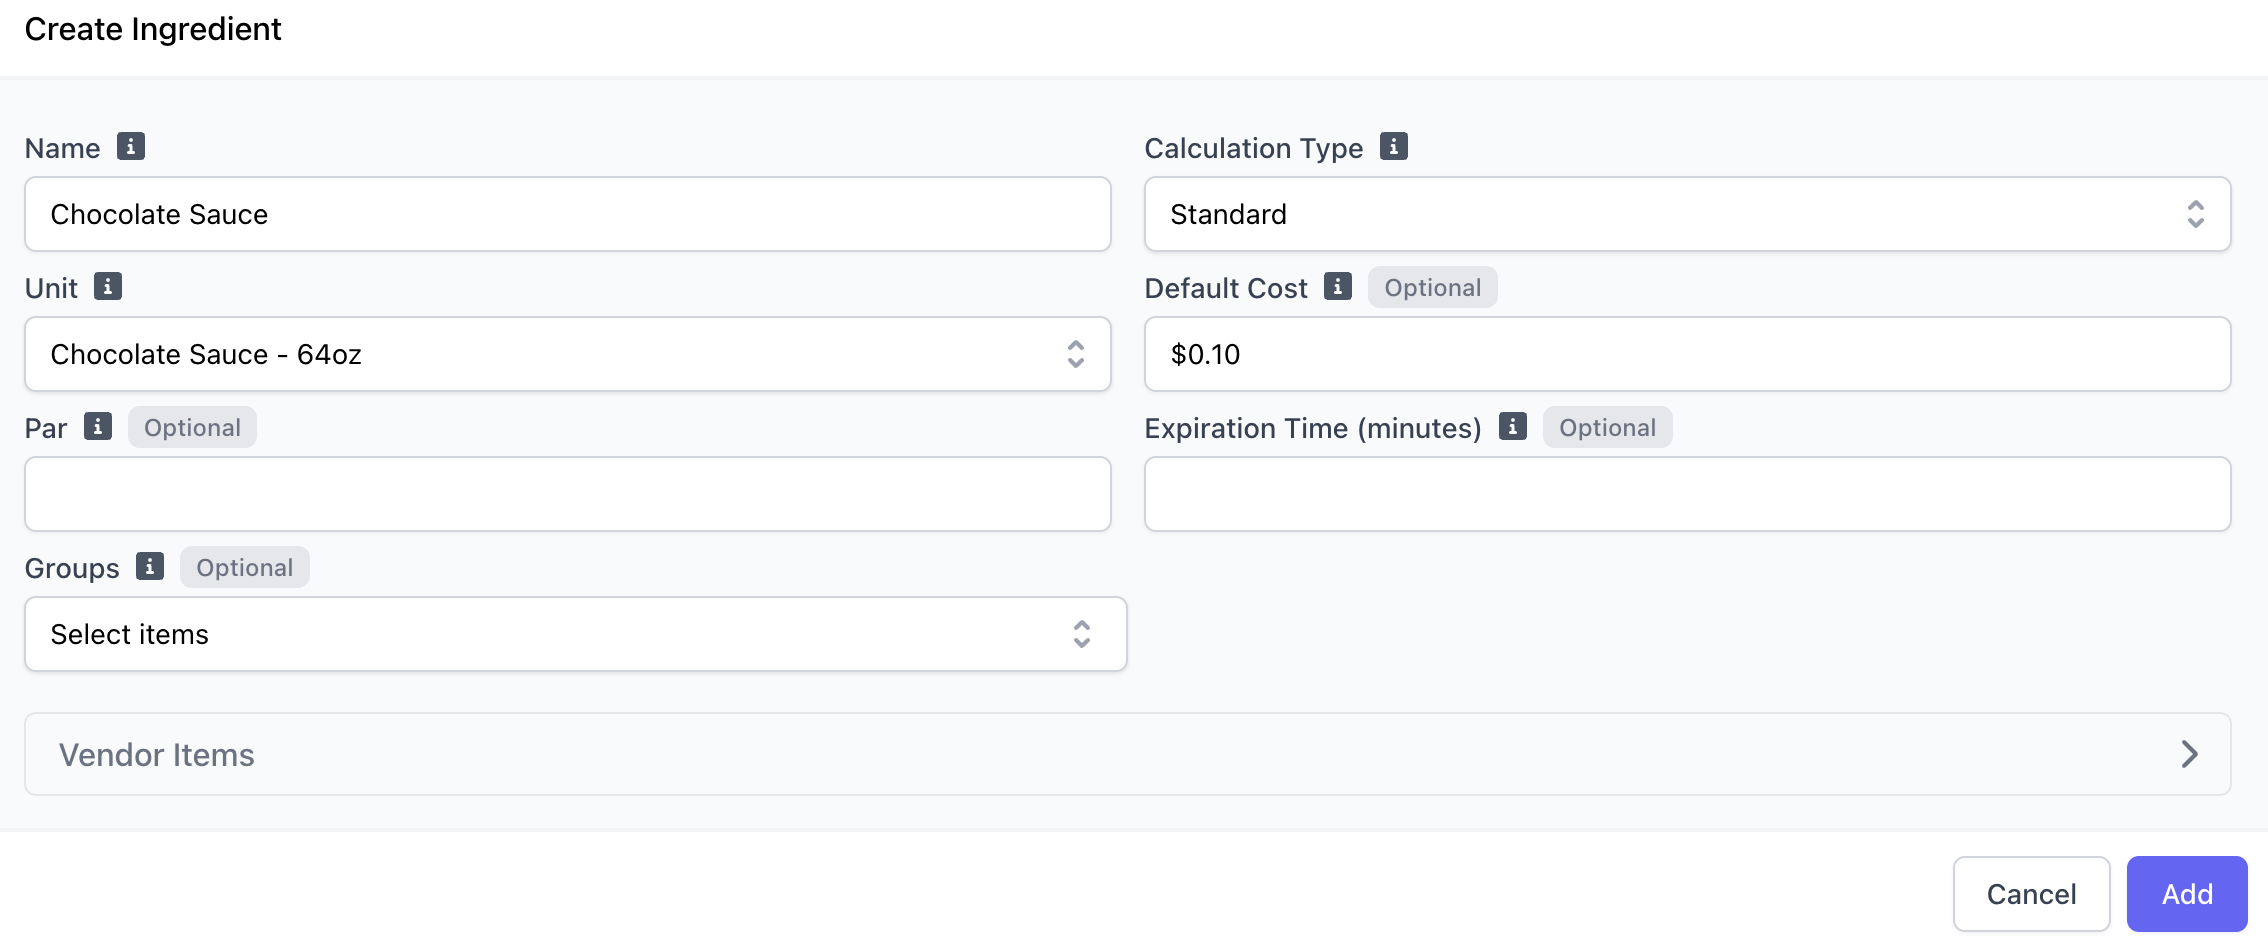
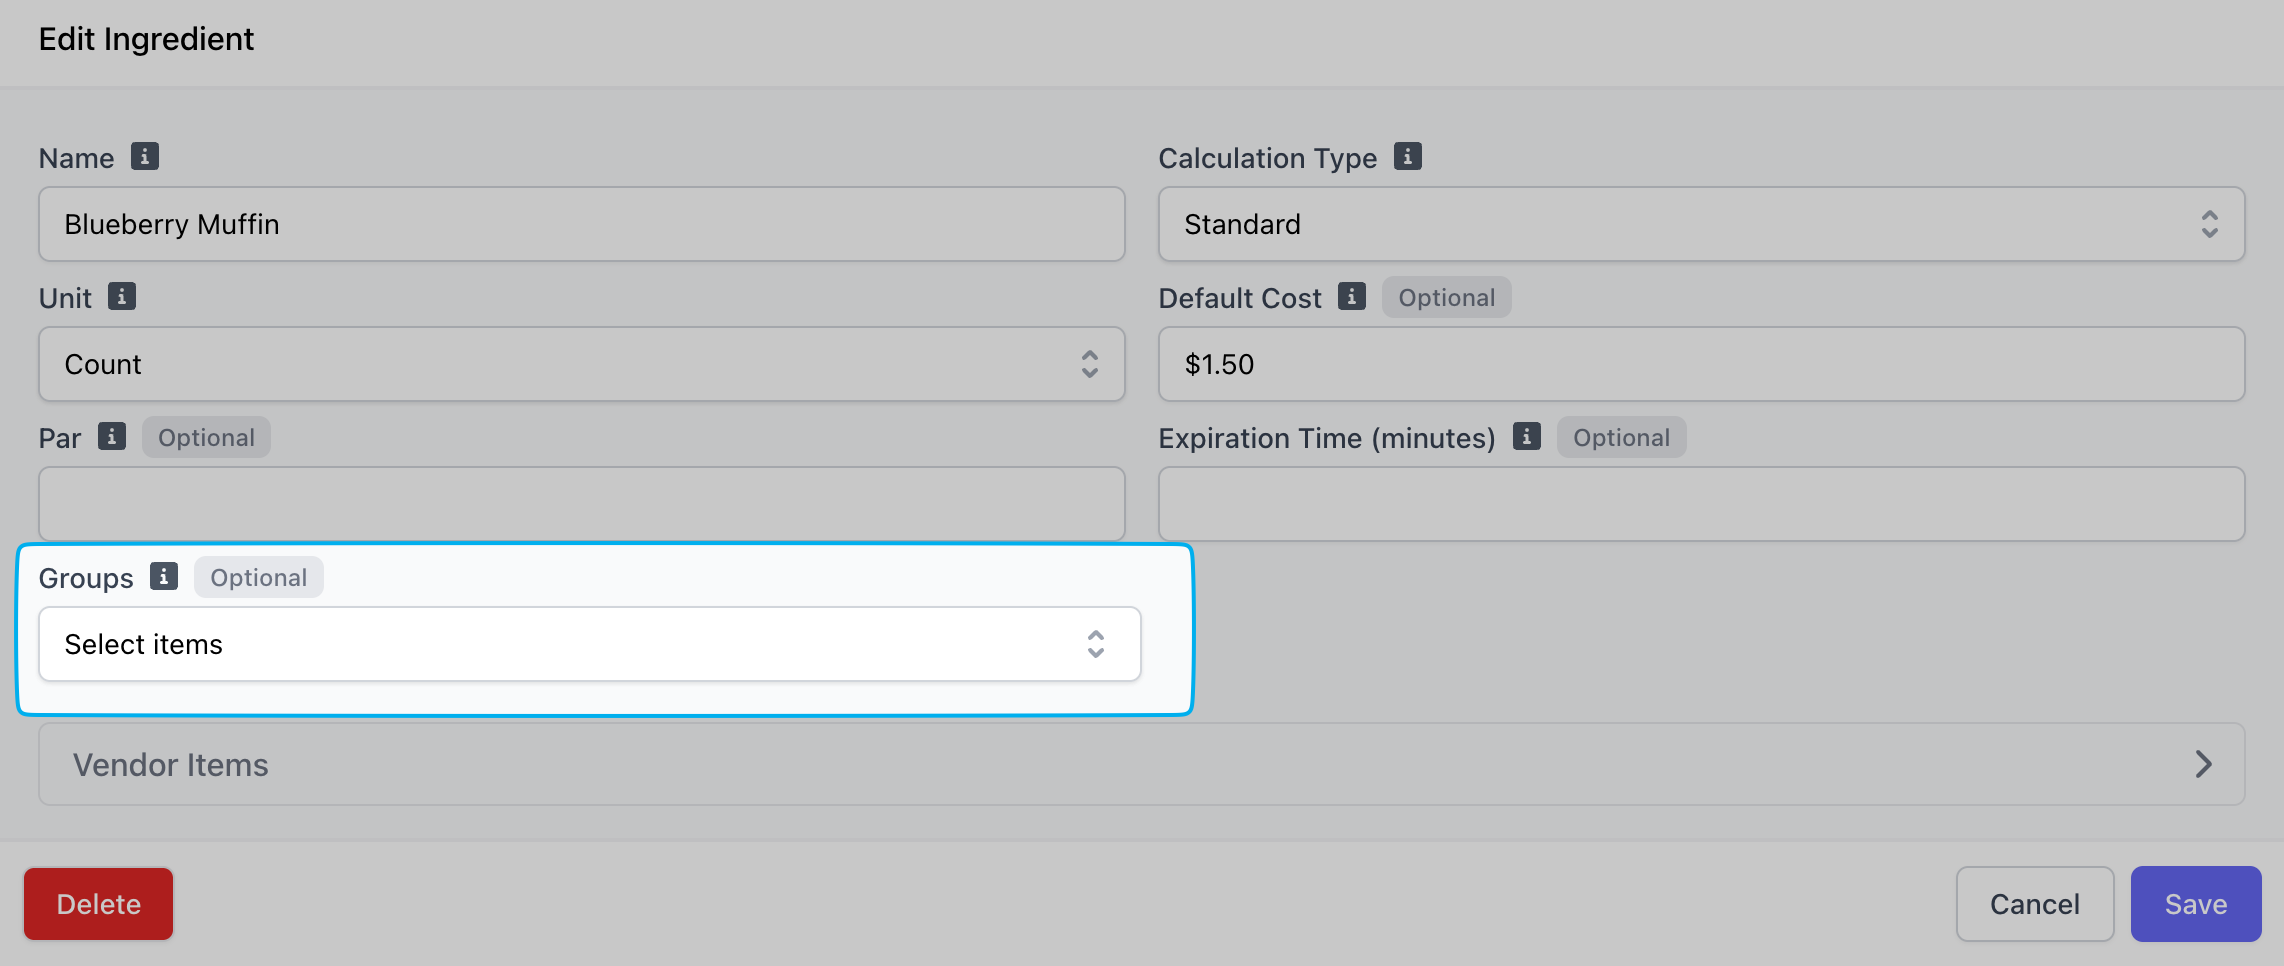
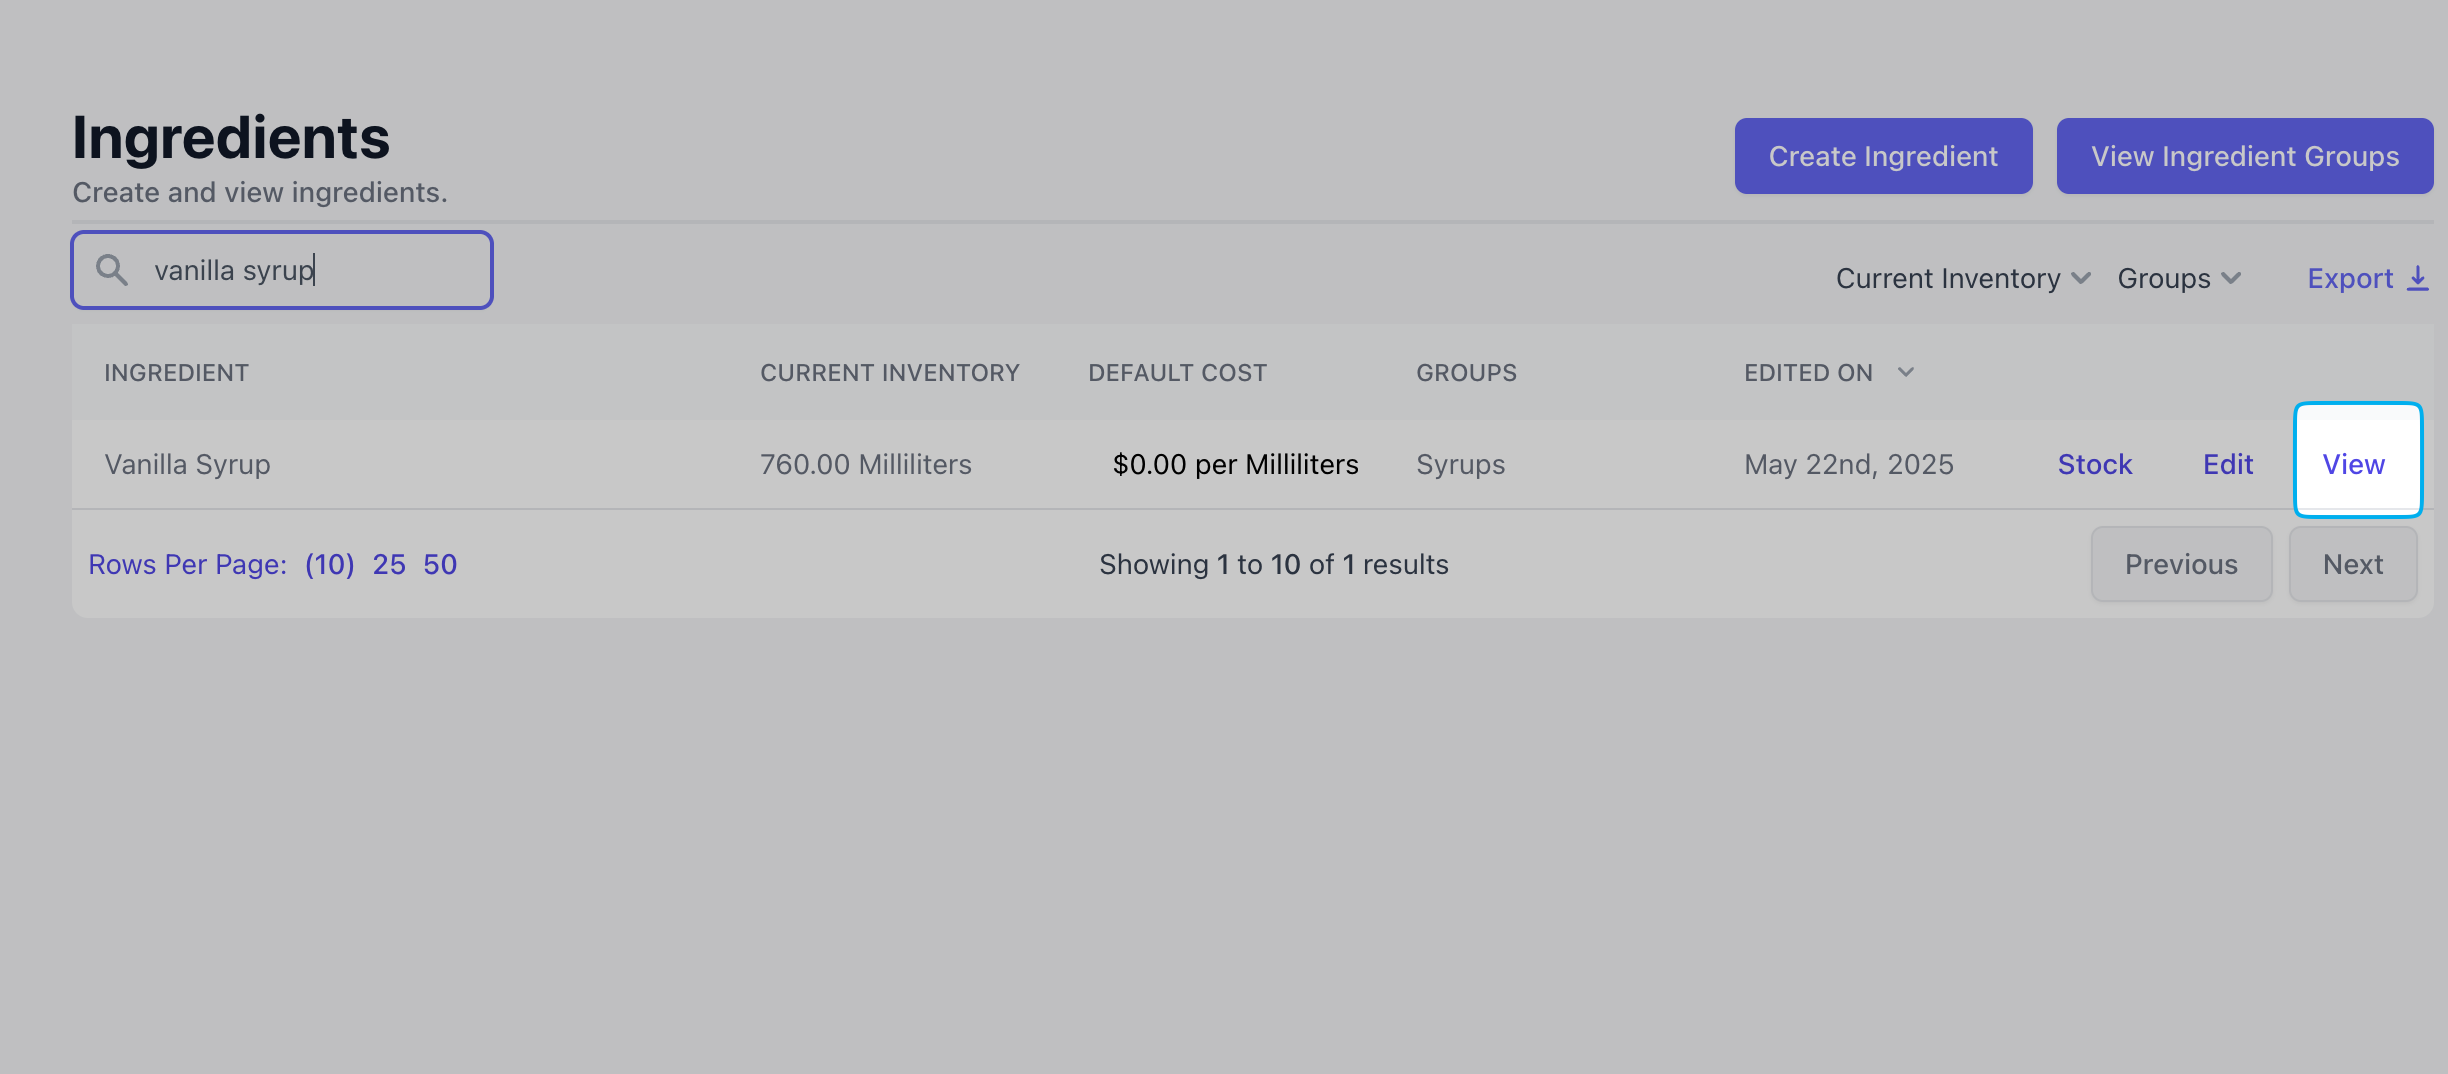
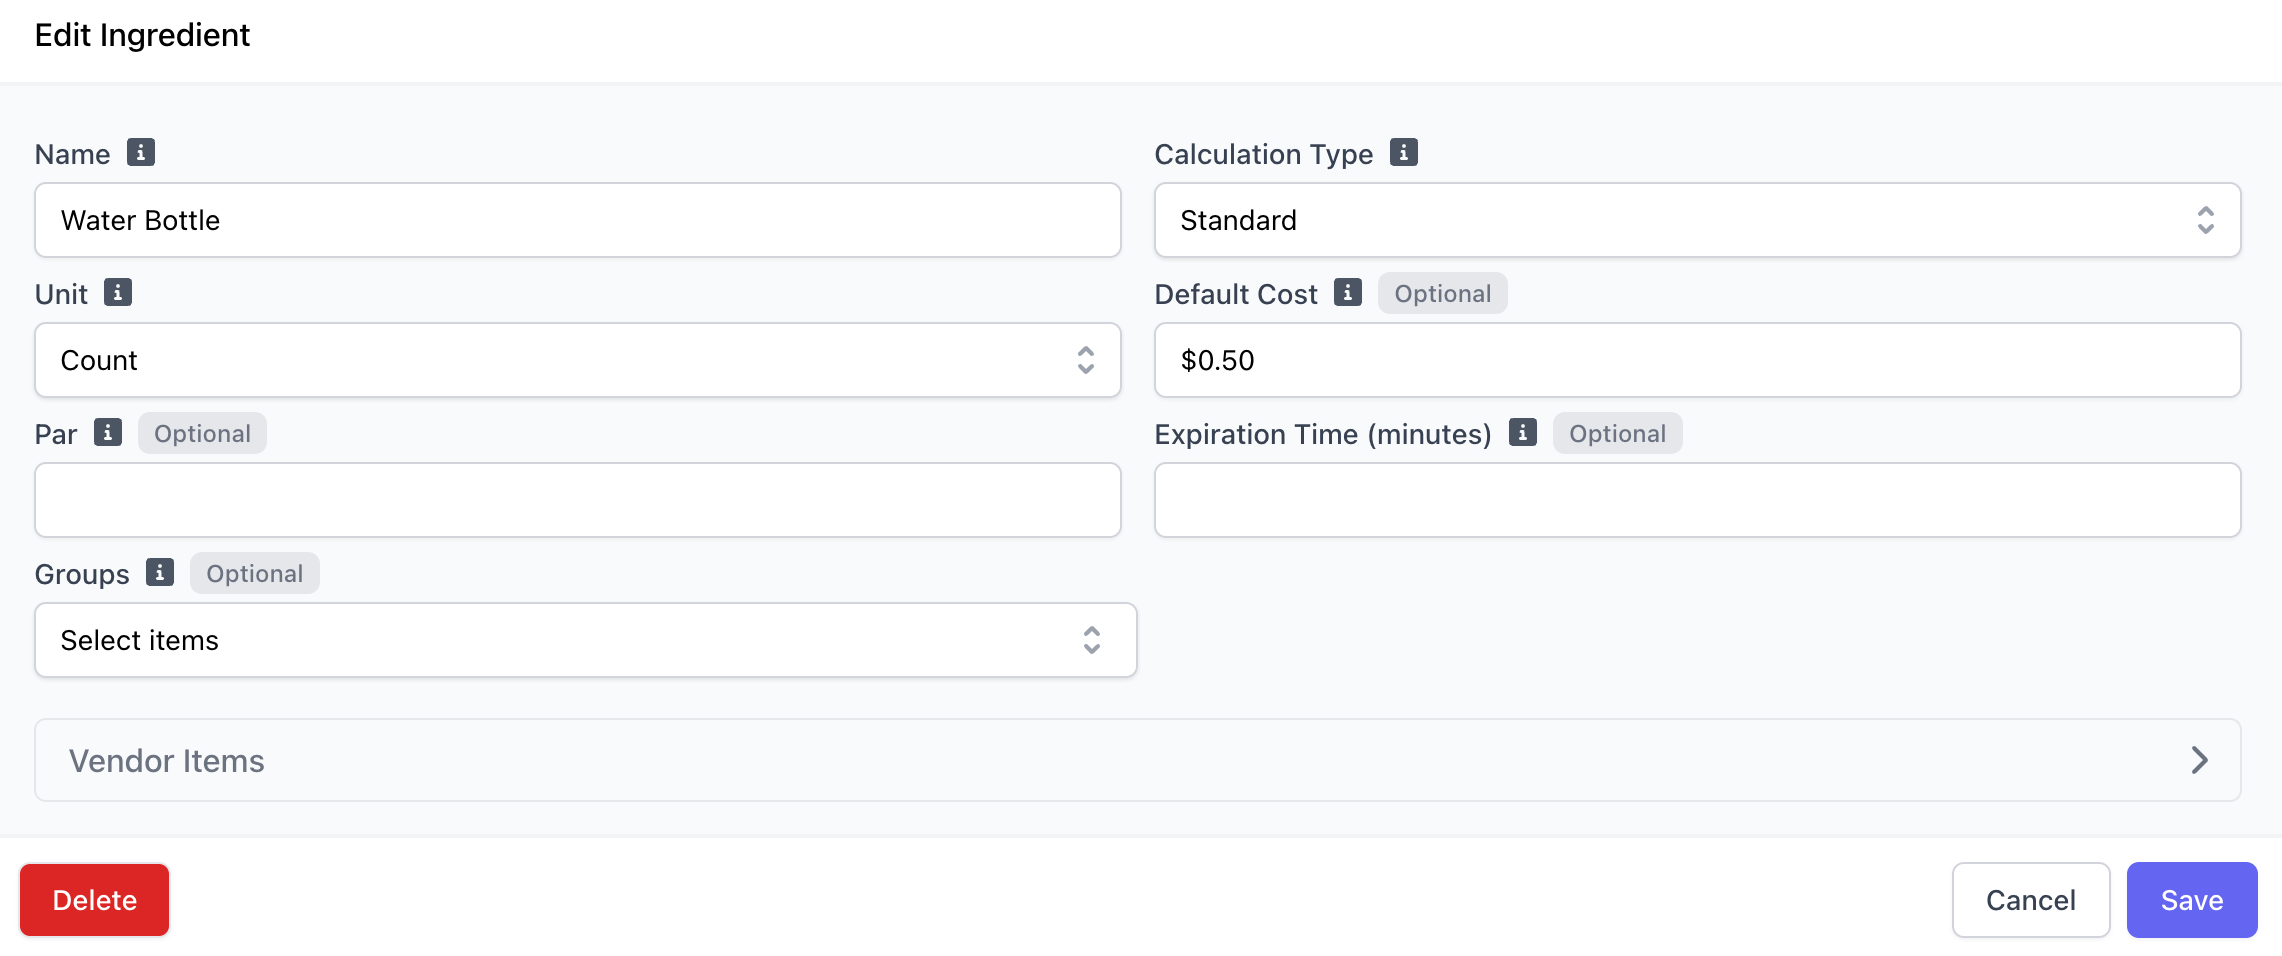
Create an Ingredient
Ingredients make up a product’s recipe. For example, a latte will be made up of espresso, various milk types, various cup sizes, various syrups, and so forth. These are the goods that you will track the quantity of in your supply chain system.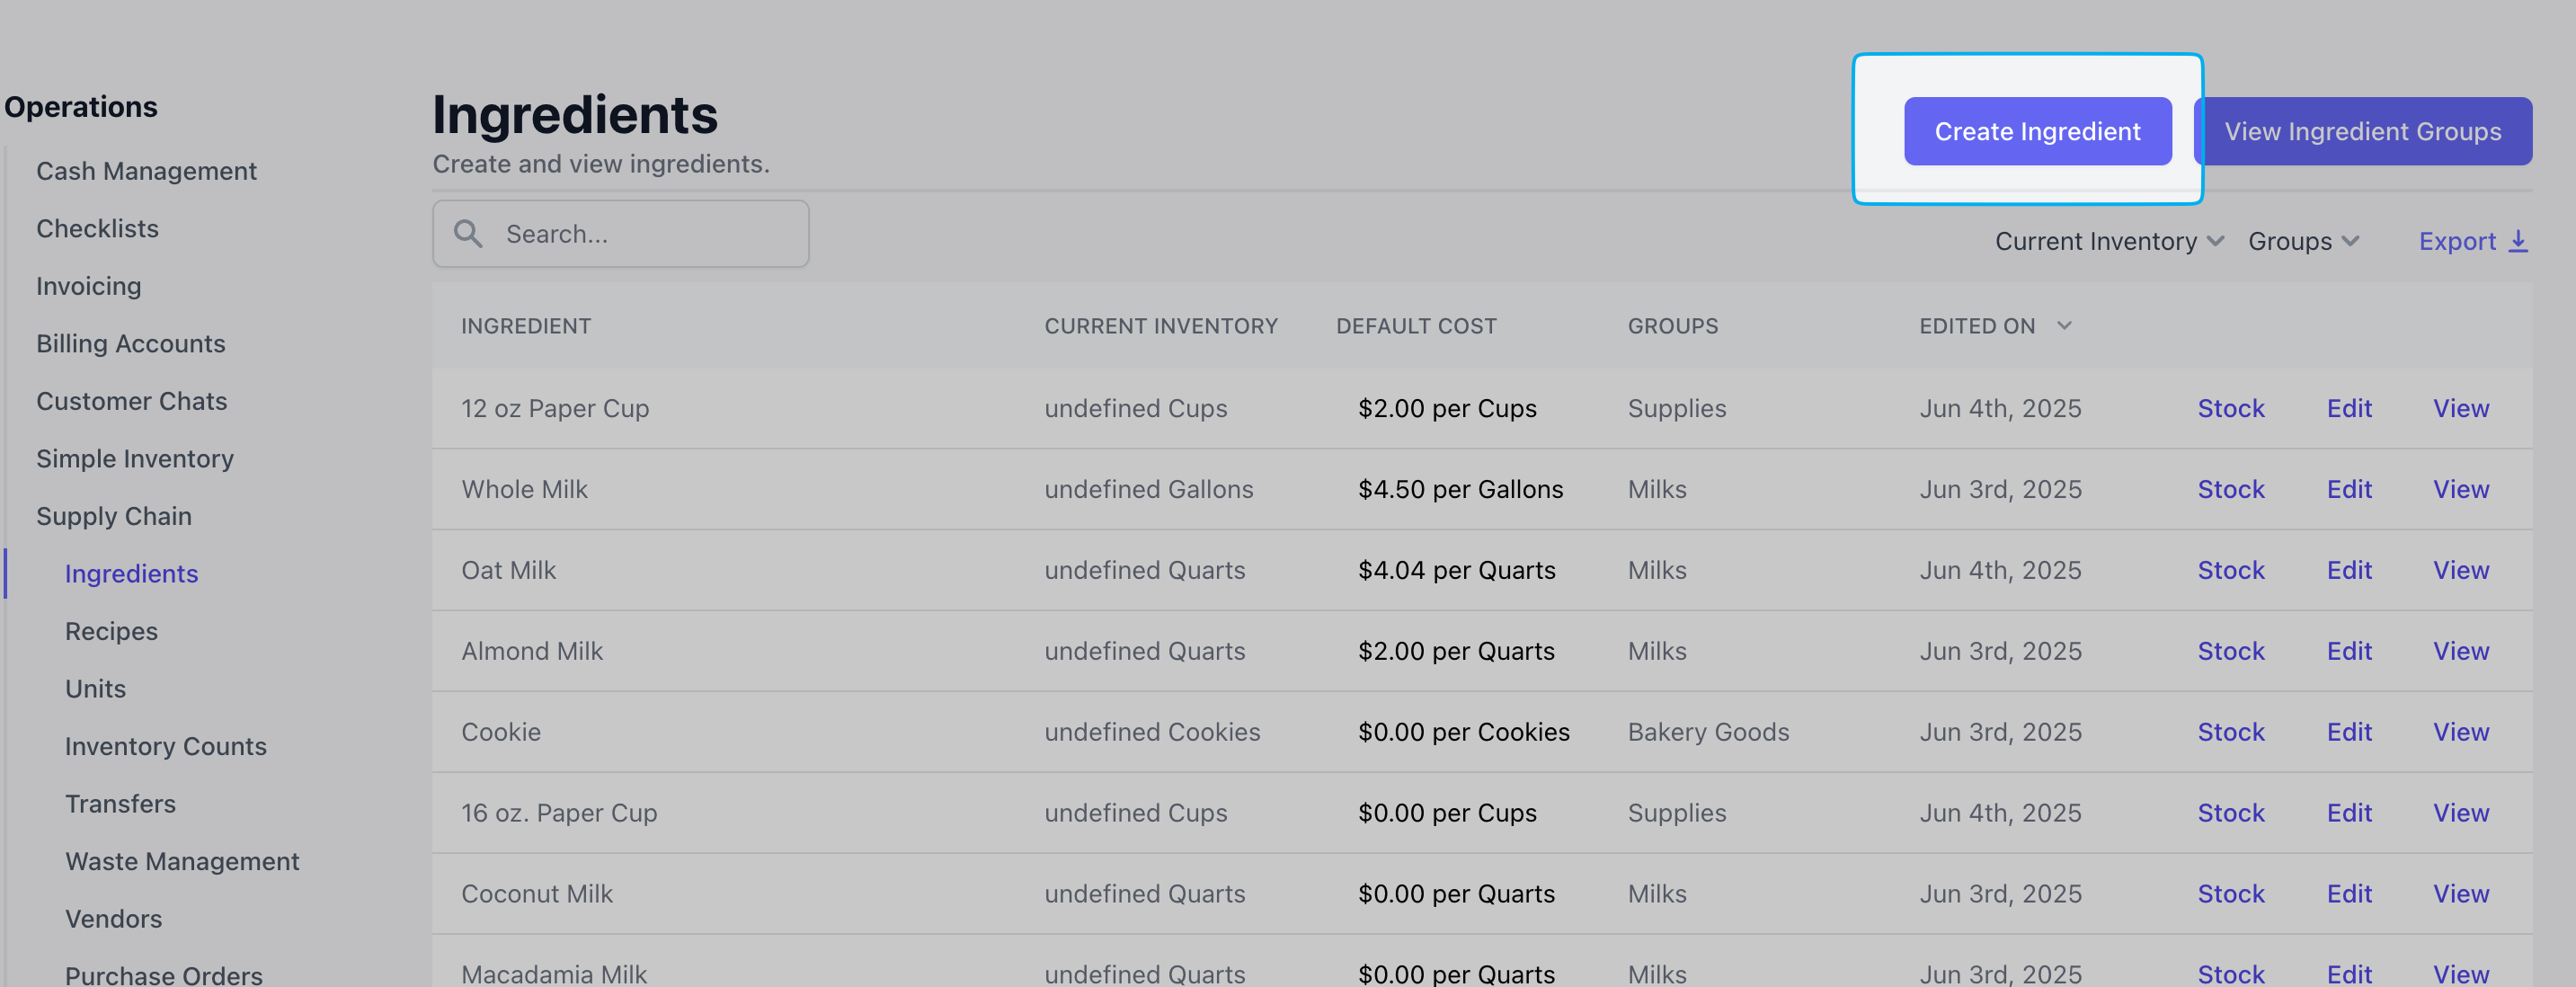
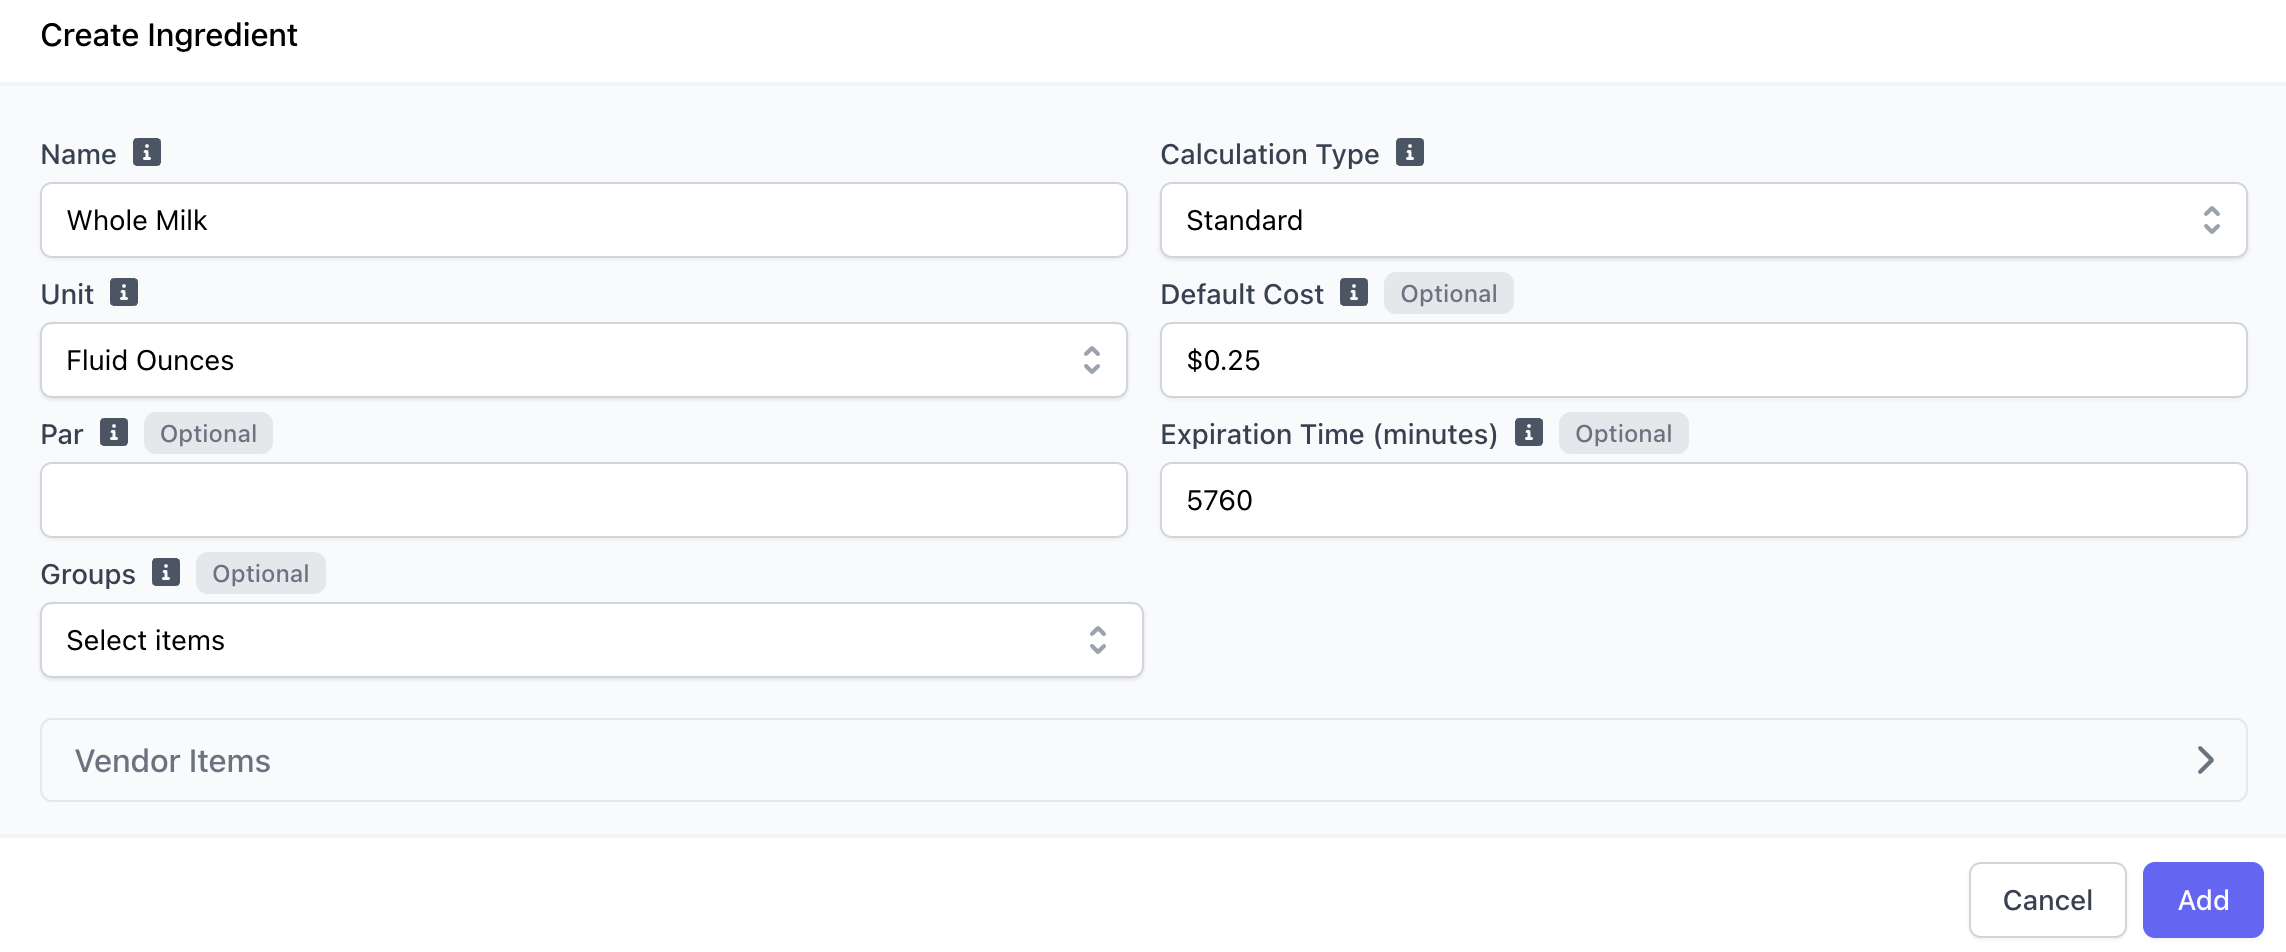
Complete the following fields: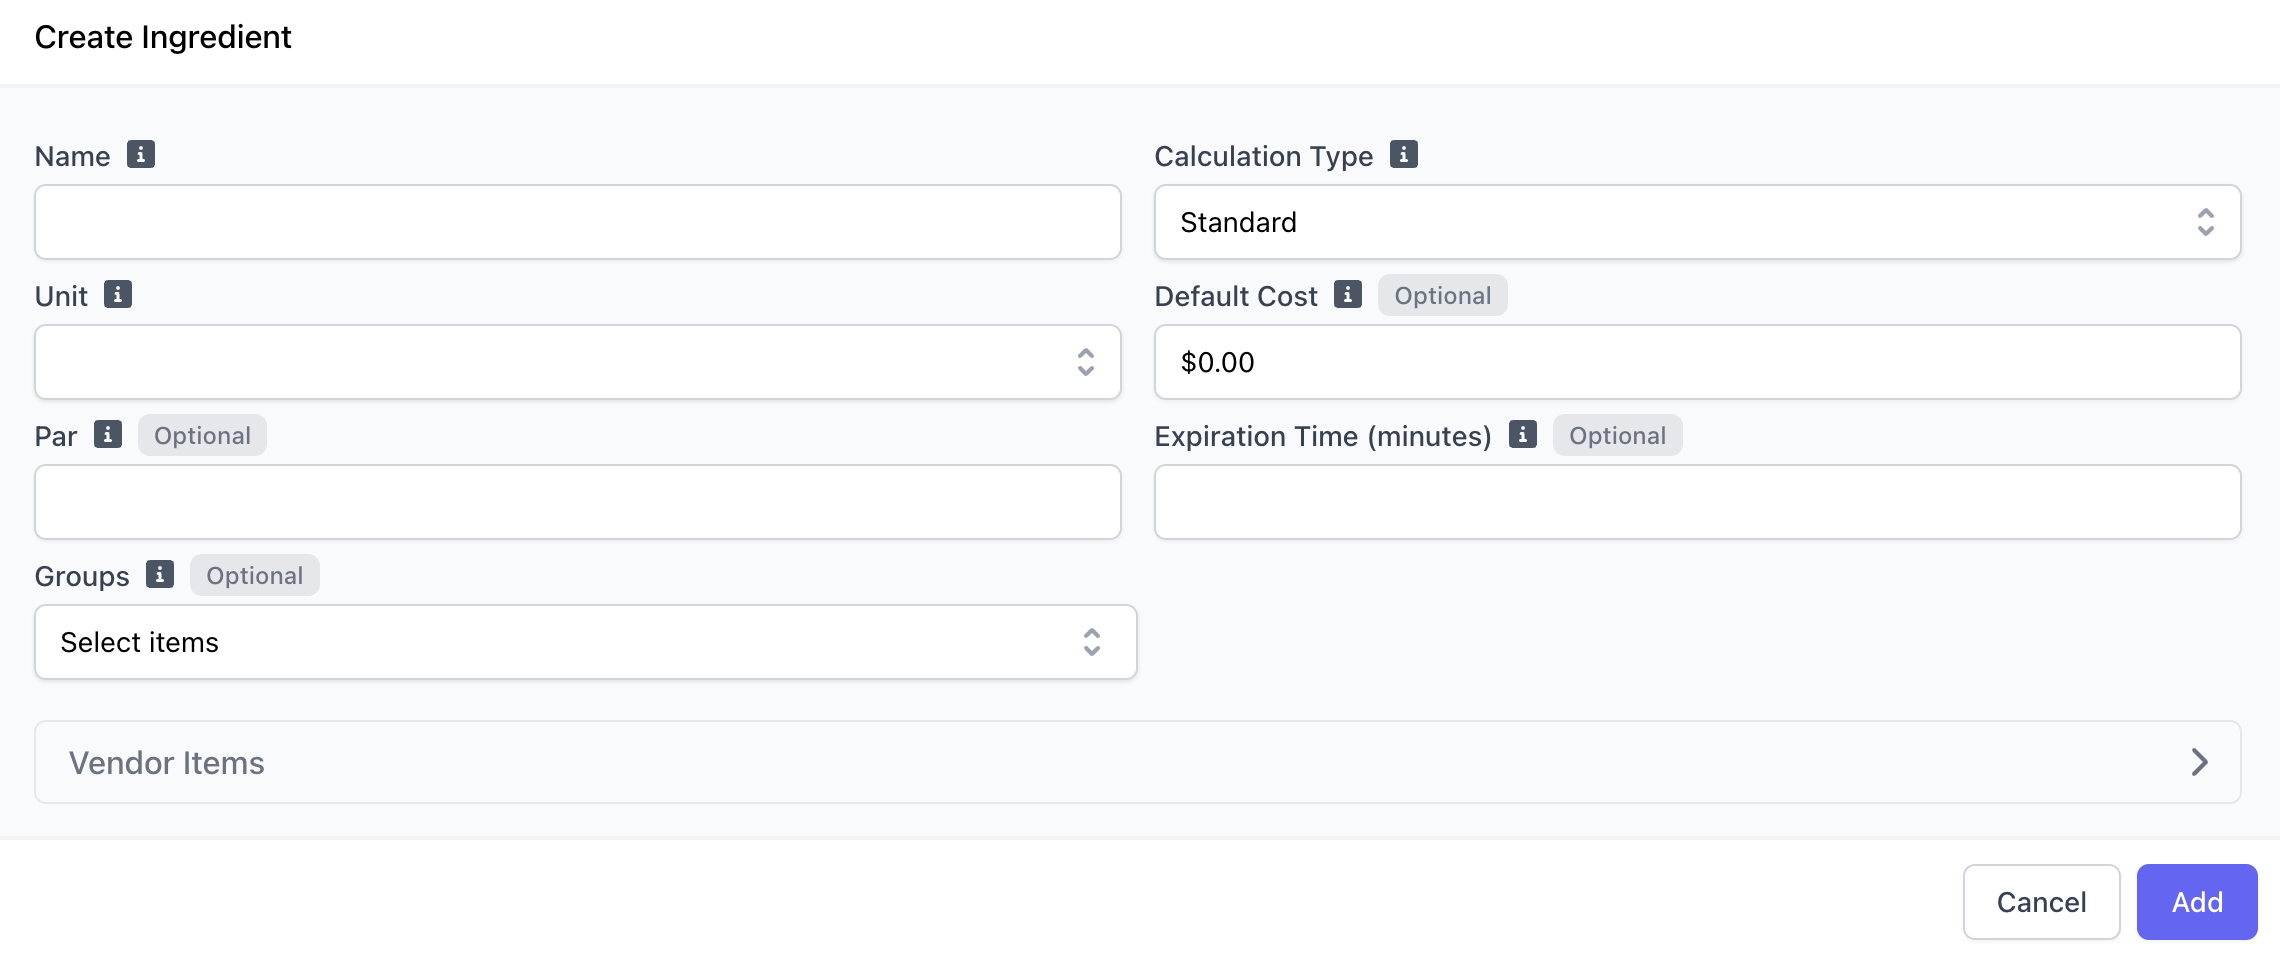
Name
Espresso, Whole Milk, Vanilla, Chocolate Sauce, 16oz Cups, Bacon
Calculation Type
- Standard (Default): Any stocking event will add/subtract from this ingredient’s stock directly.
- Consume Sub-Recipes: When a sub-recipe is linked to the product, stock adjustments will apply both to this ingredient and to the ingredients included in the sub-recipe.
This option will only appear if the ingredient has a sub-recipe attached. Click here to learn about sub-recipes.
Unit
How the ingredient will be measured in a recipe. i.e. milk = fluid ounces, espresso = oz, blueberry muffin = count, syrup = milliliters
Custom Units16 oz cups = custom unit of Case - 16 oz cupsChocolate Sauce = custom unit of Chocolate Sauce - 64oz
Default Cost (optional)
Cost of one unit of this ingredient. This cost will be used to calculate the cost of recipes, stocking events, and waste events.i.e., $0.10 per ml of syrup, $3 per count of blueberry muffin, $0.30 per oz of espresso
If sub-recipes exist, this is not configurable and is calculated based on the sub-recipe costs and quantities.
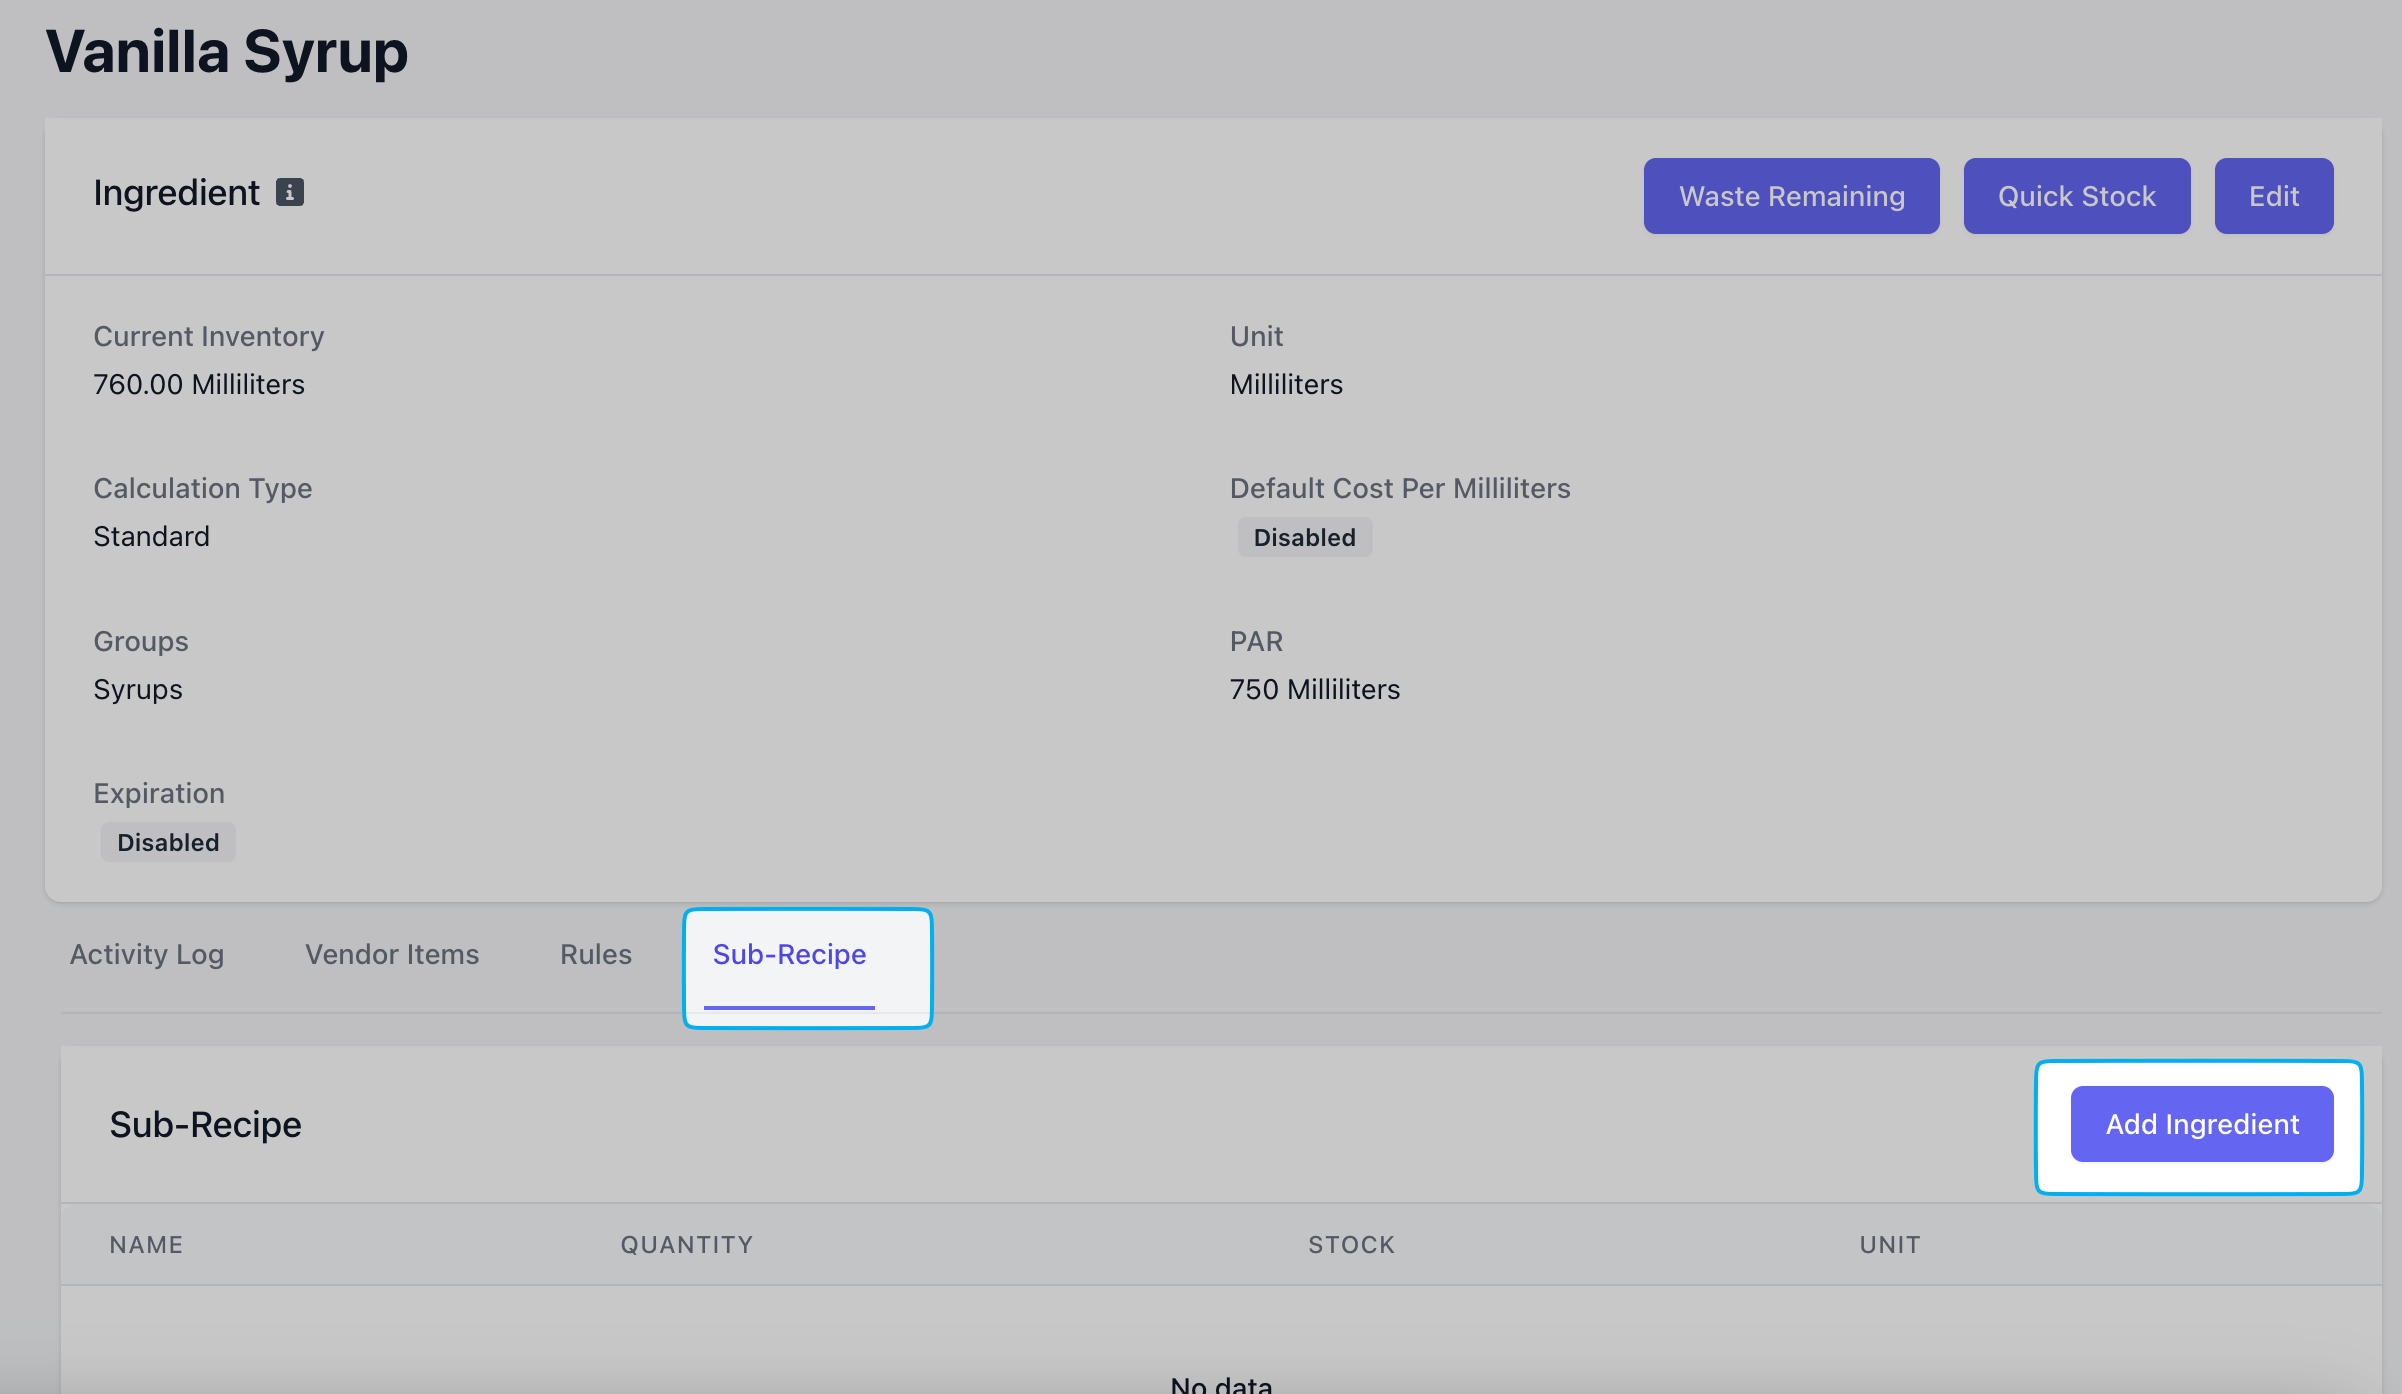
Par (optional)
Baseline inventory quantity you want to have in stock at any given time.
This is for your own internal tracking and will not hinder supply chain usage.
Expiration Time (optional)
If added, stock added of an ingredient will expire (and therefore, decrease) after the set amount of minutes
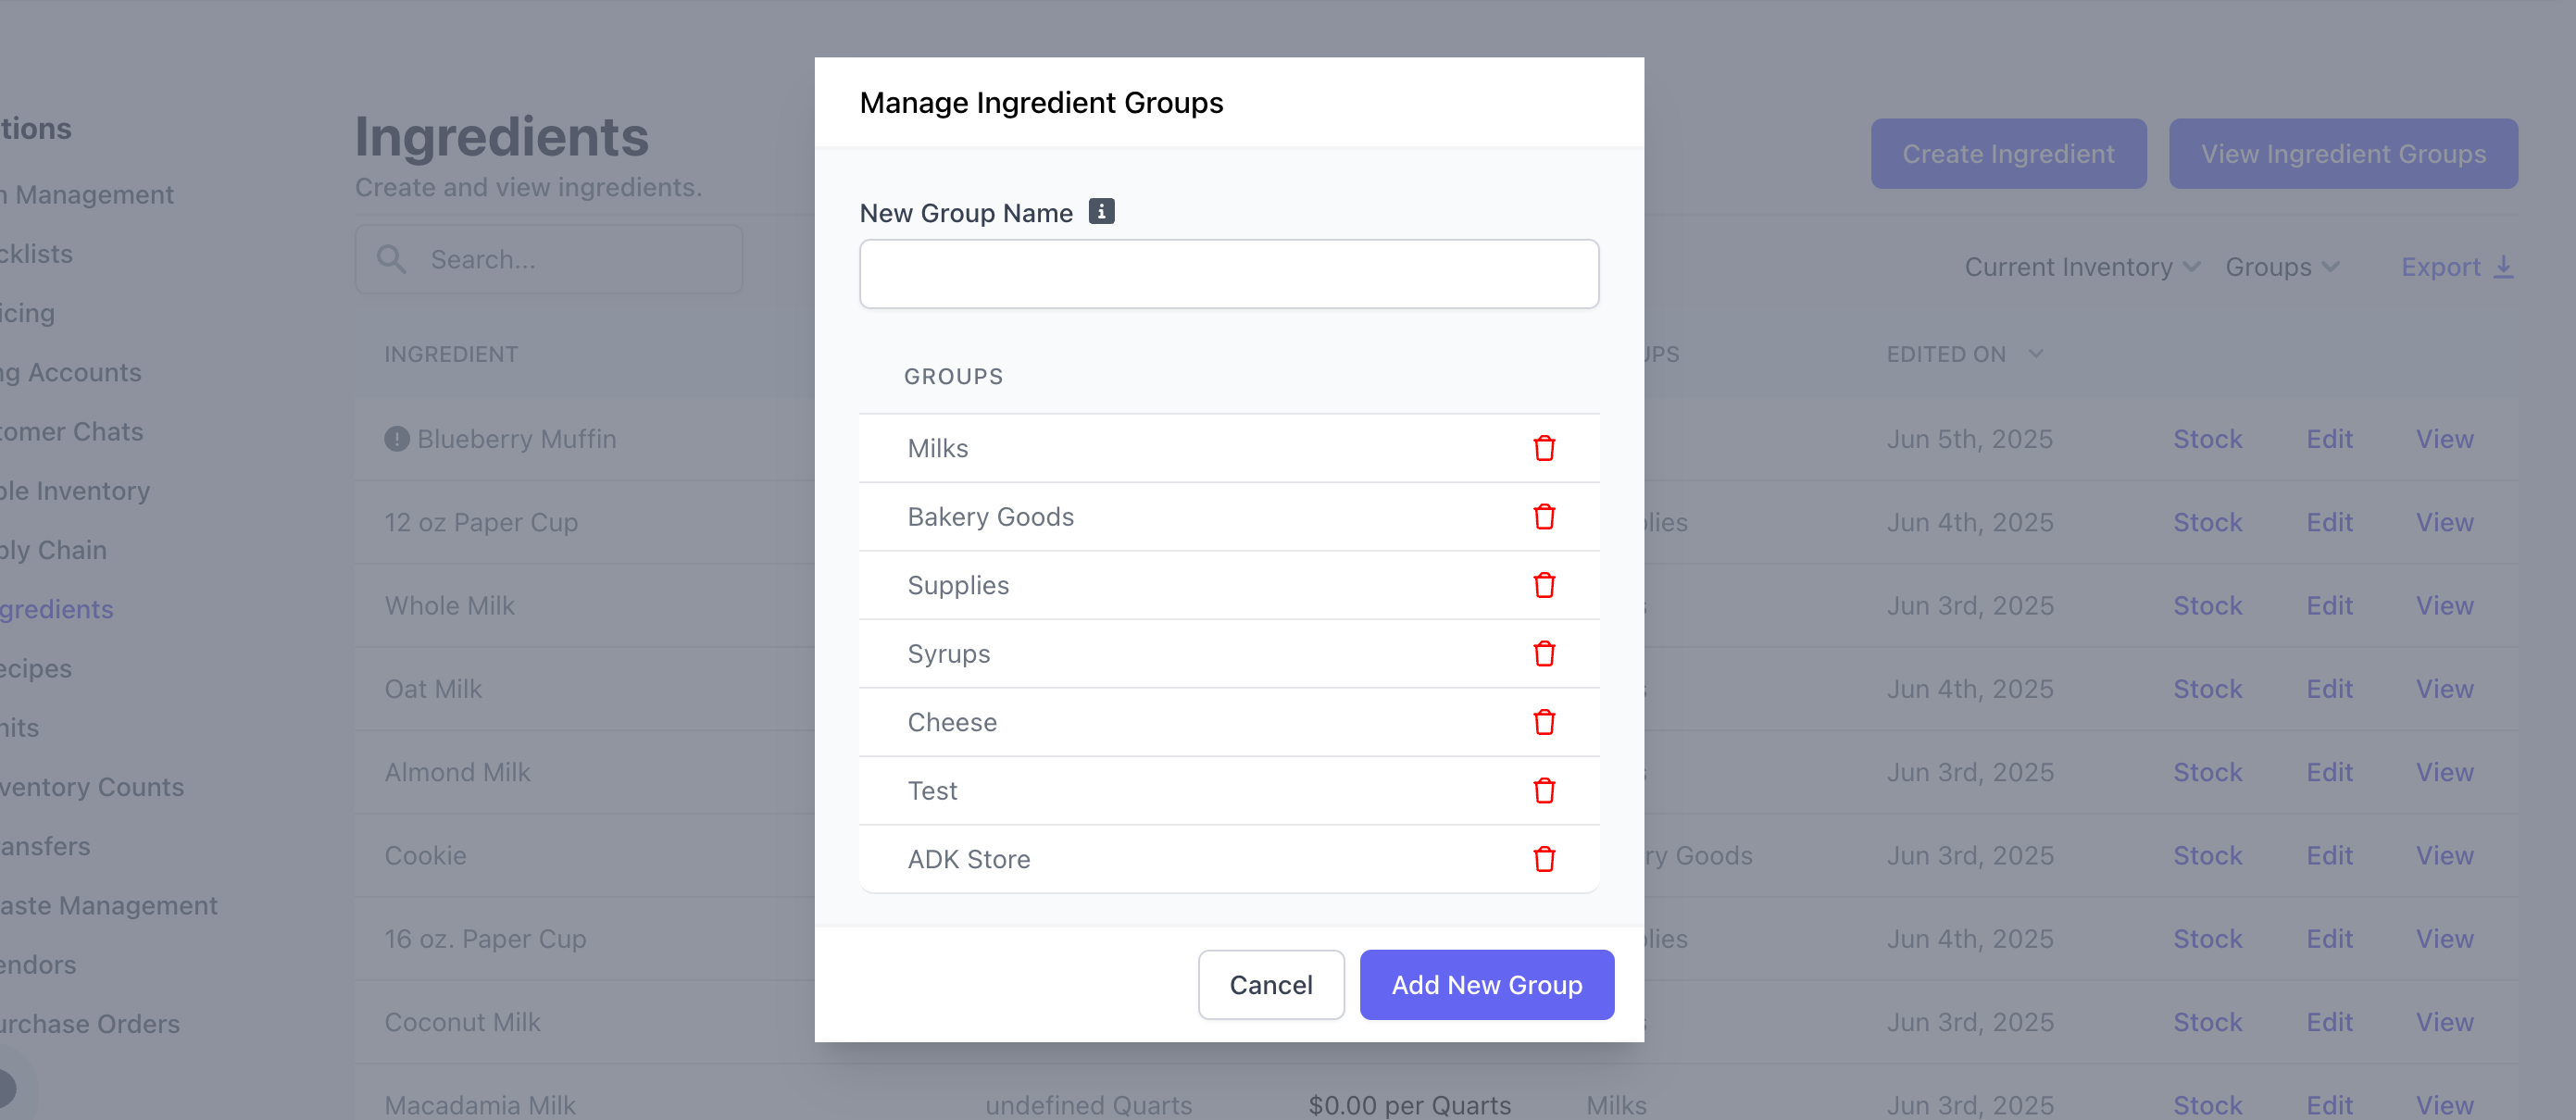
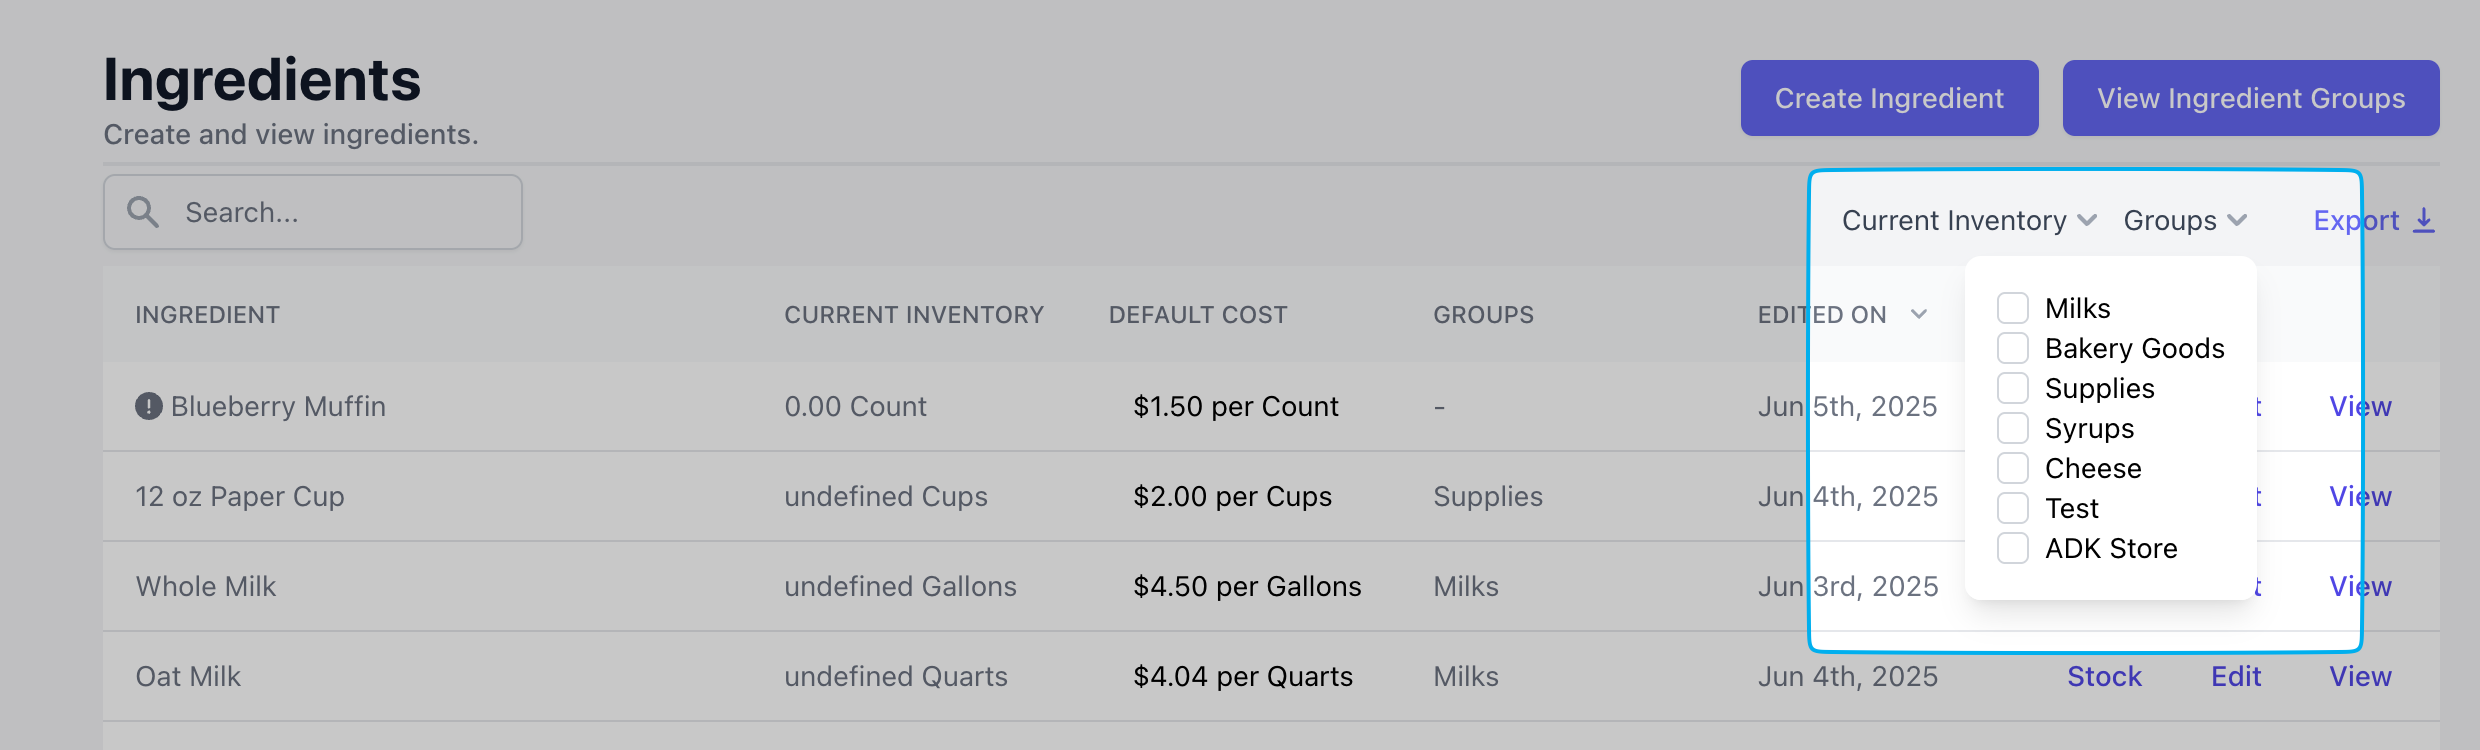
Groups (optional)
The ingredient group that the ingredient should be added to
Learn how to create ingredient groups here. Only existing groups will appear in the selection menu.


Ingredient Groups
Organize your ingredients into groups to easily filter and manage your ingredient view.Create an Ingredient Group
Create an Ingredient Group

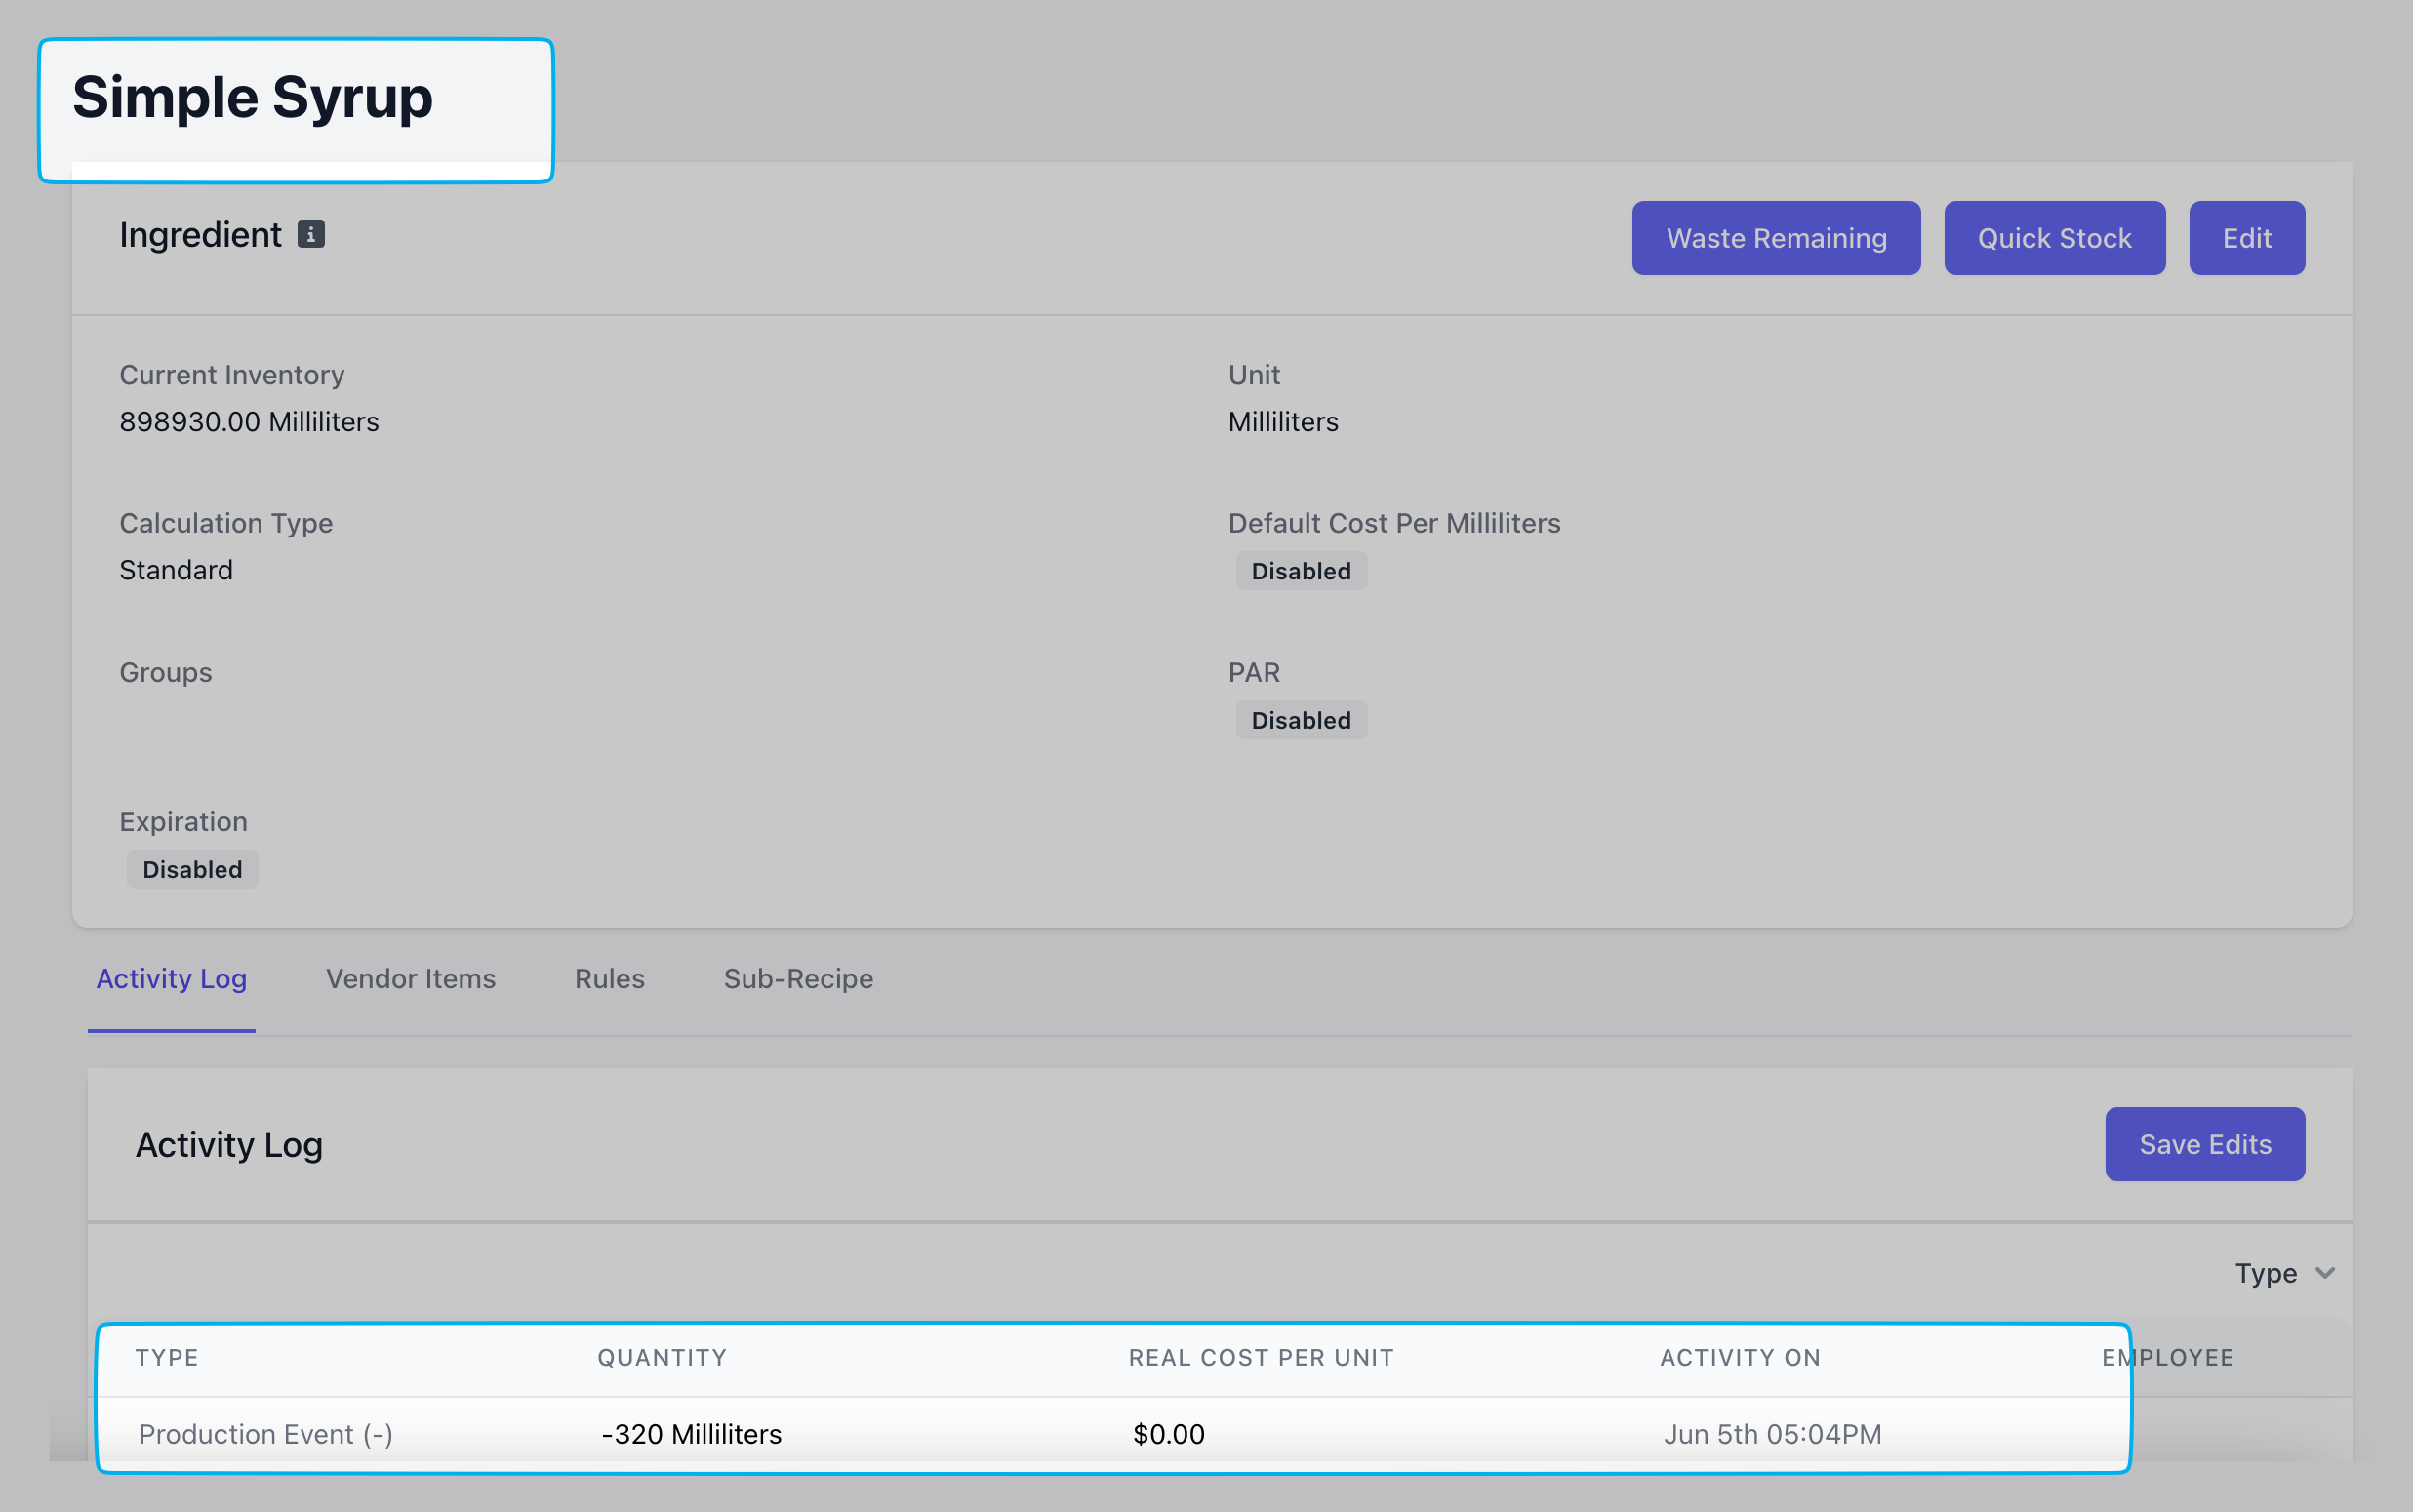
Activity Logs
Track your Inventory History View all activity related to your ingredients: ✅ Sales | ✅ Quick Stock adjustments | ✅ Waste | ✅ Inventory Counts | ✅ Purchase Orders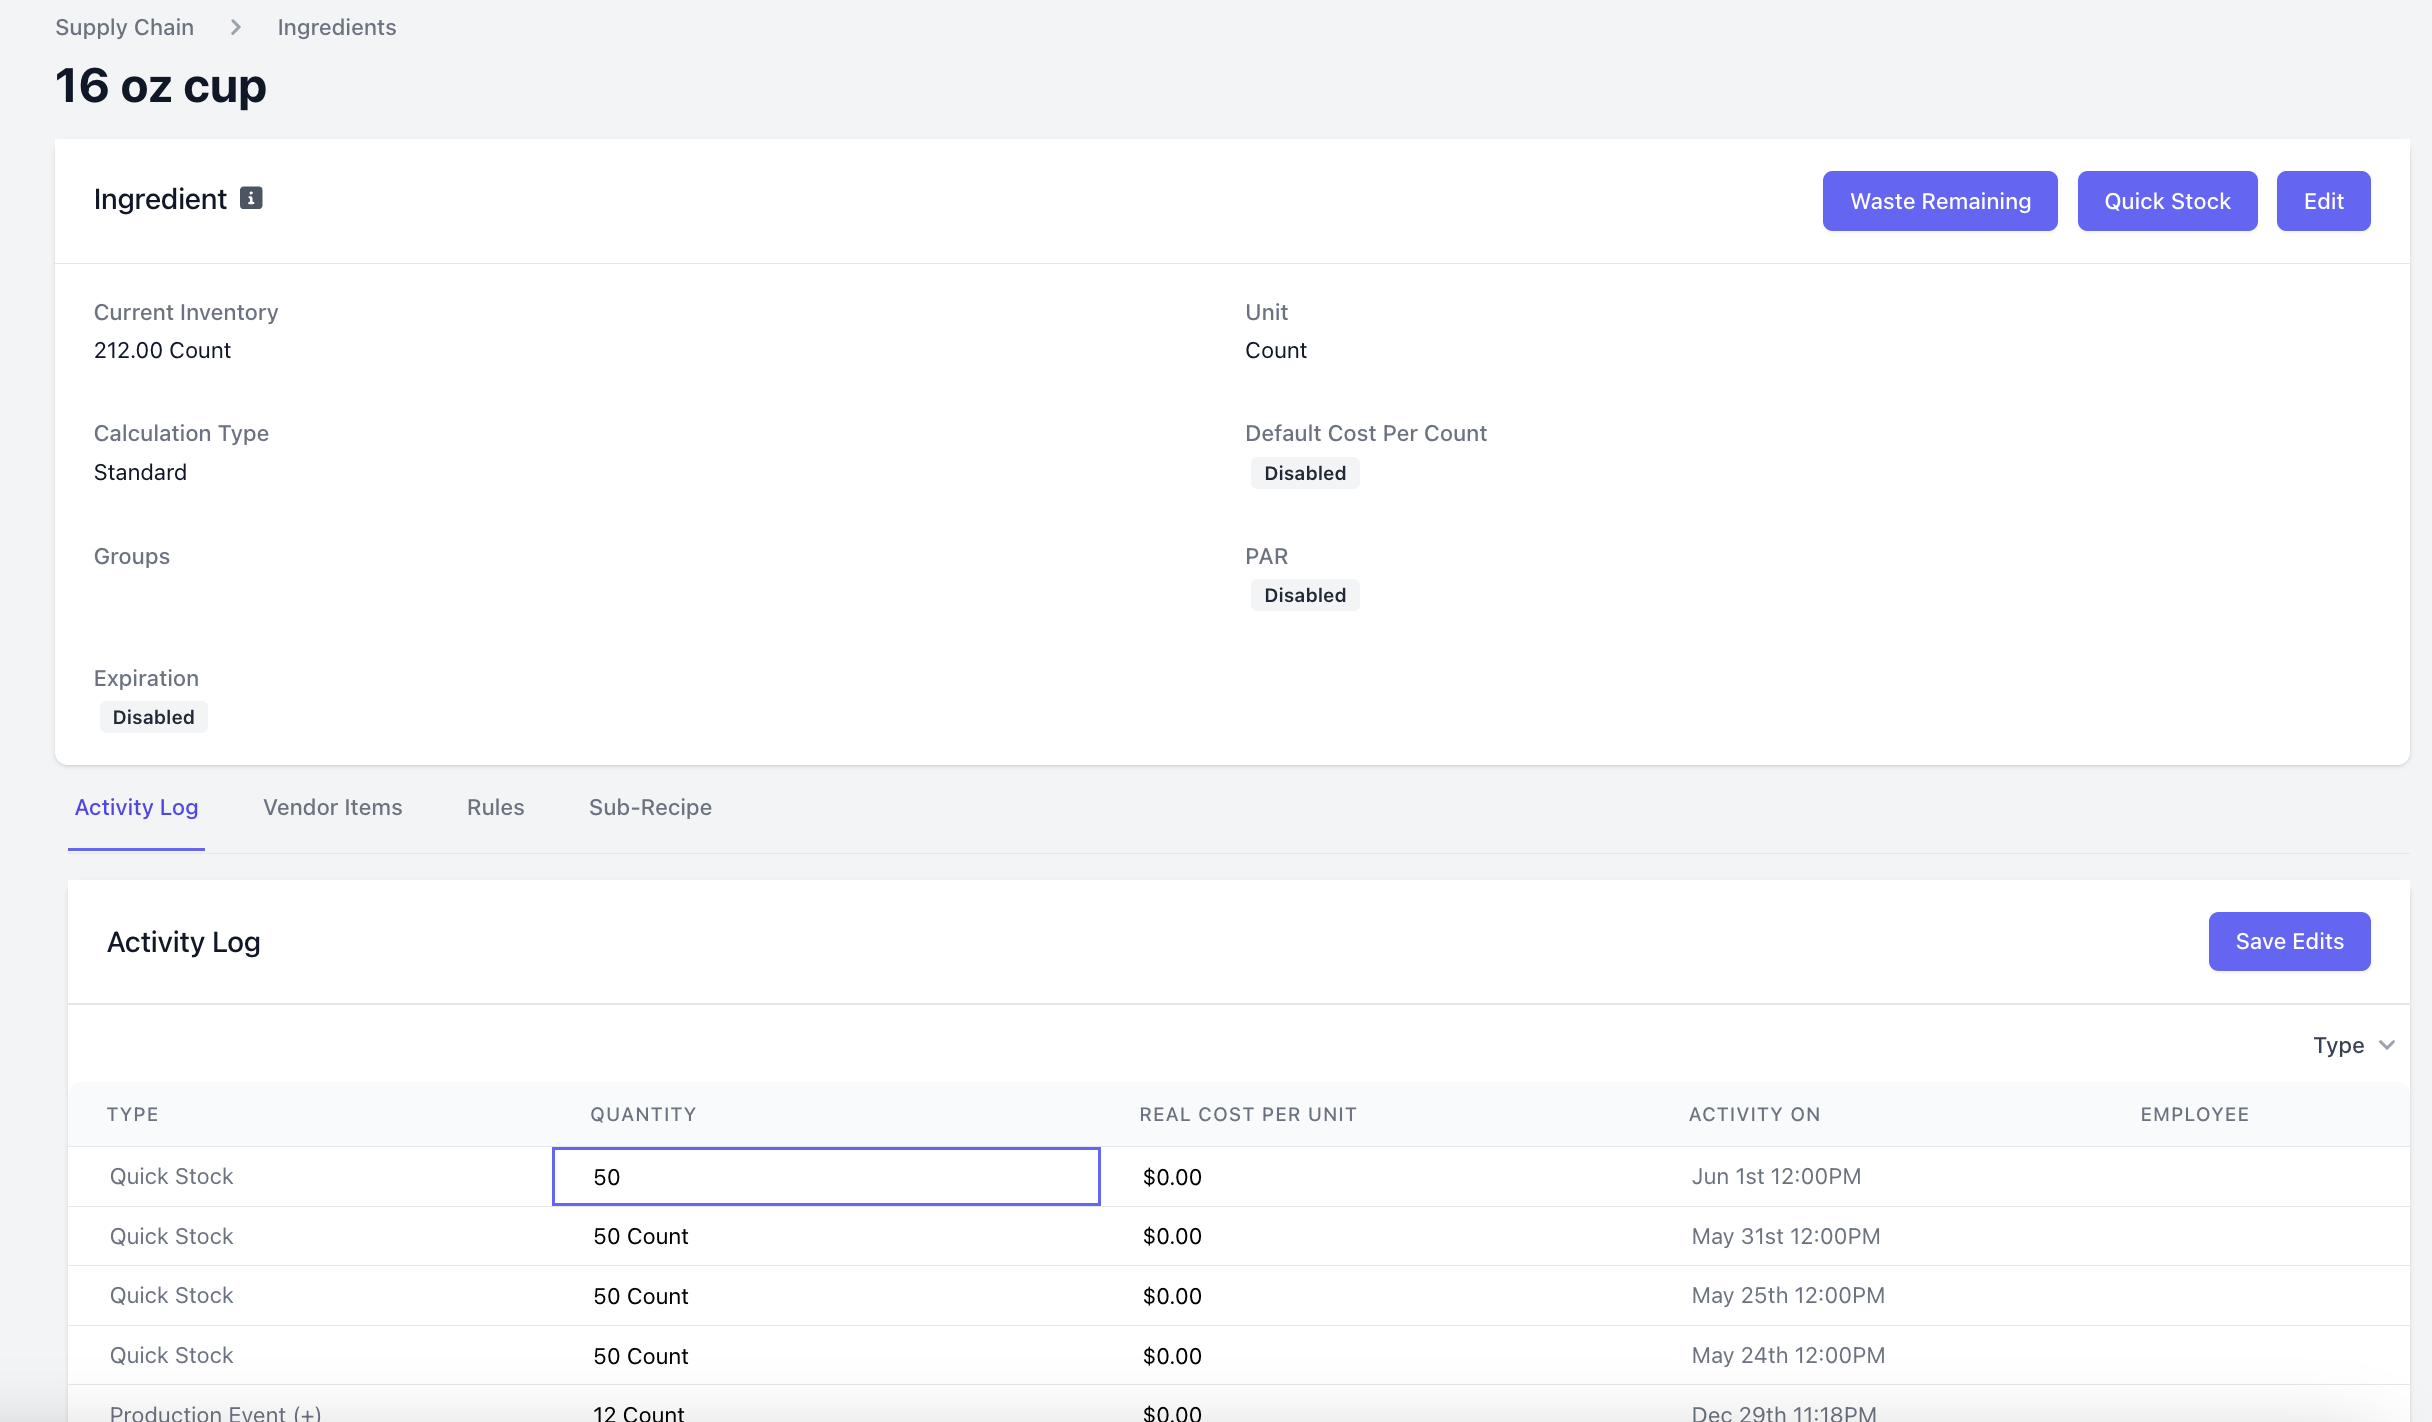
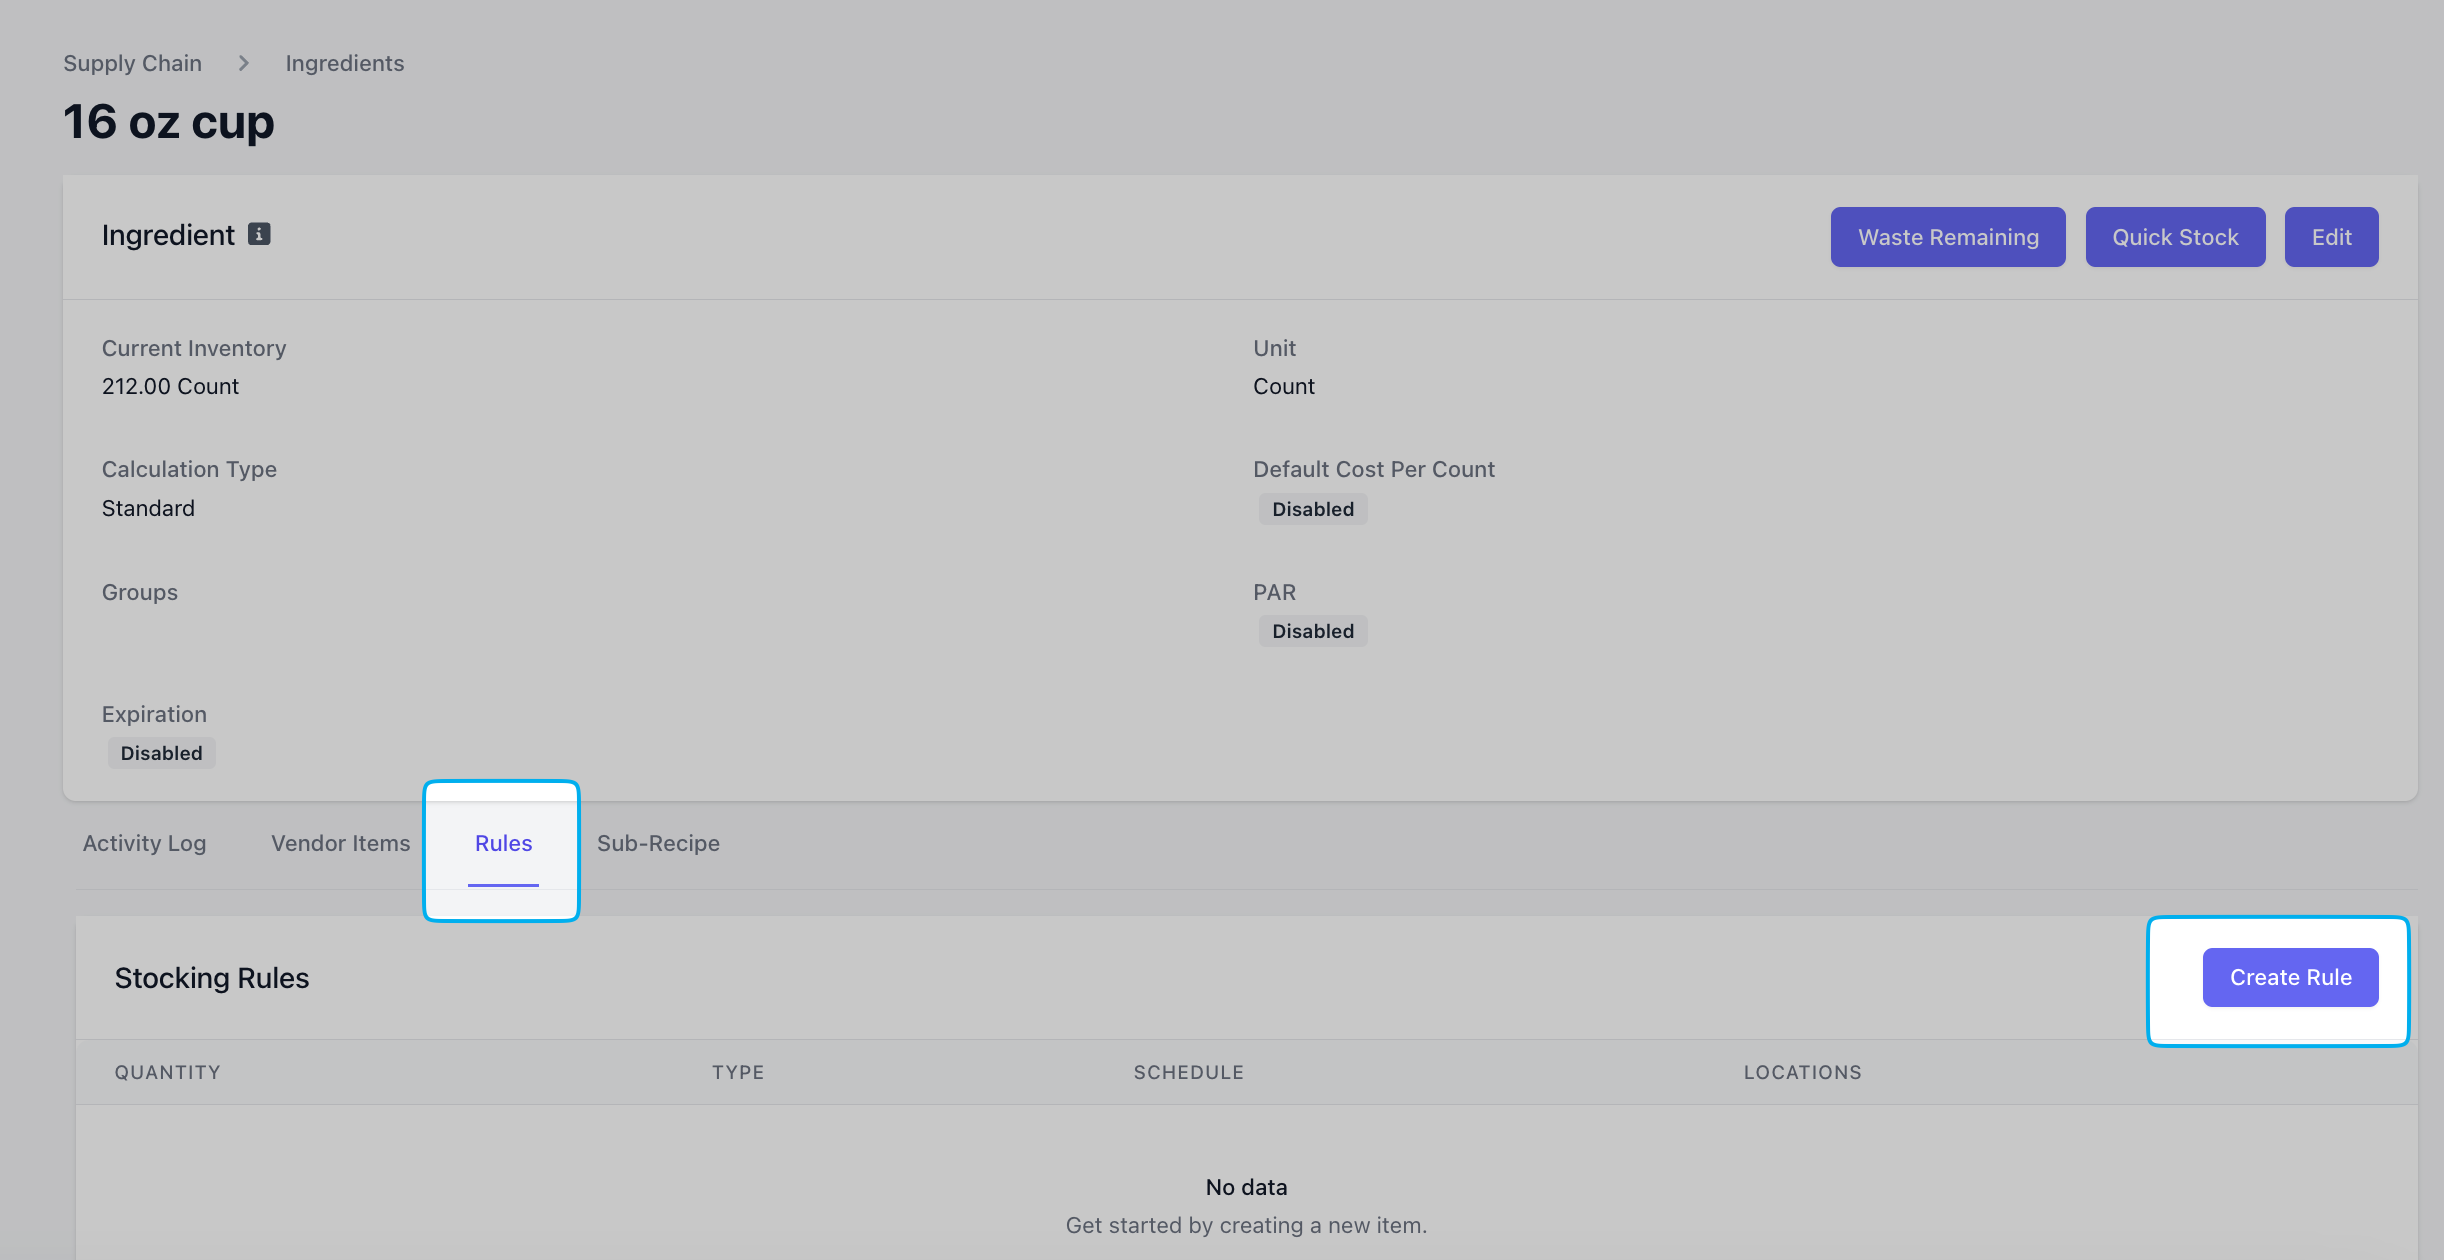
Rules
Automate ingredient restocking Set up automatic restocking schedules for individual ingredients—perfect for ingredients you receive or make on a regular basis.Create an Ingredient Rule
Create an Ingredient Rule
Fill in the following fields: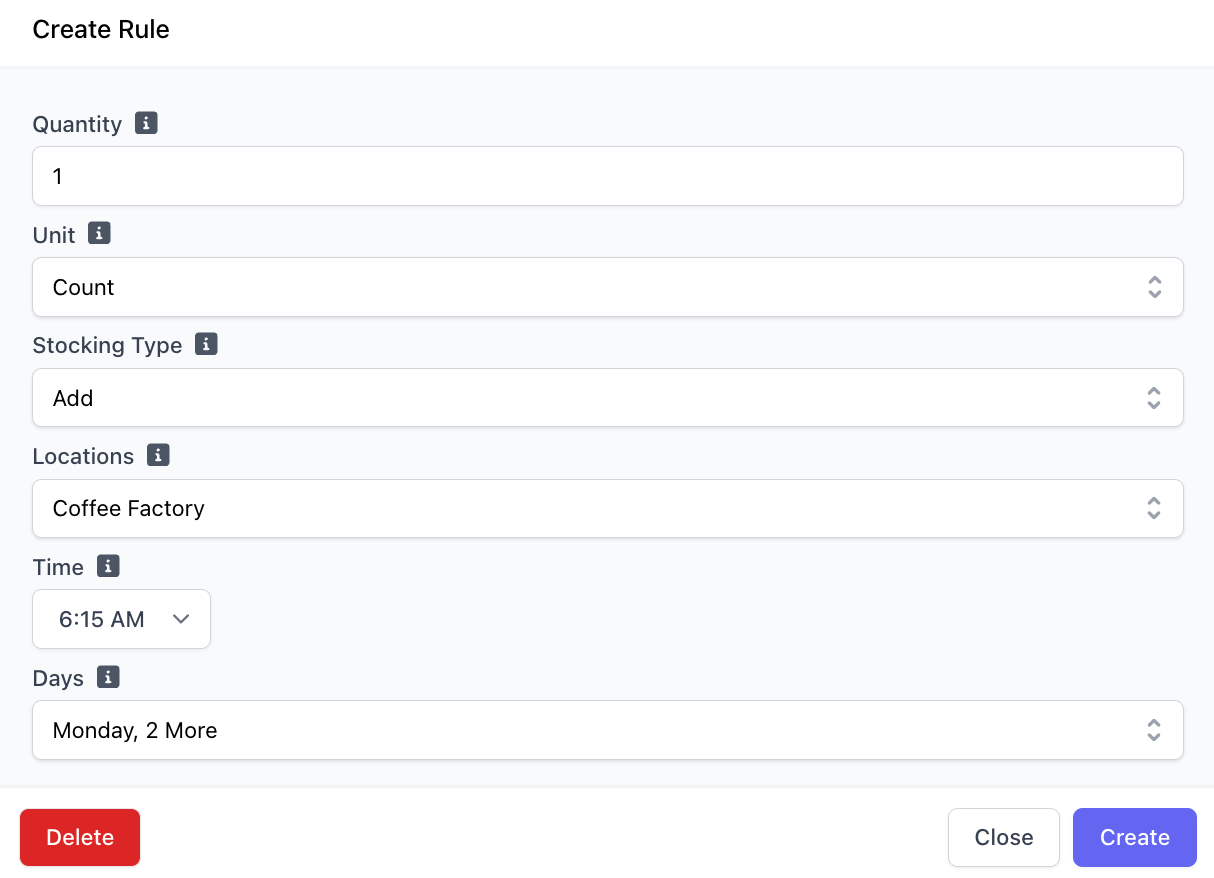
Stocking Type
Reset: The current inventory will be set to the selected quantity
- Record Waste: If selected, surplus stock will be designated as waste, and a corresponding waste event will be logged.
Quantity
The number of units that should be automatically stocked for that given rule
Unit
The unit to stock
Day(s) & Time
Select a minimum of one day when the rule will be automatically triggered and the time
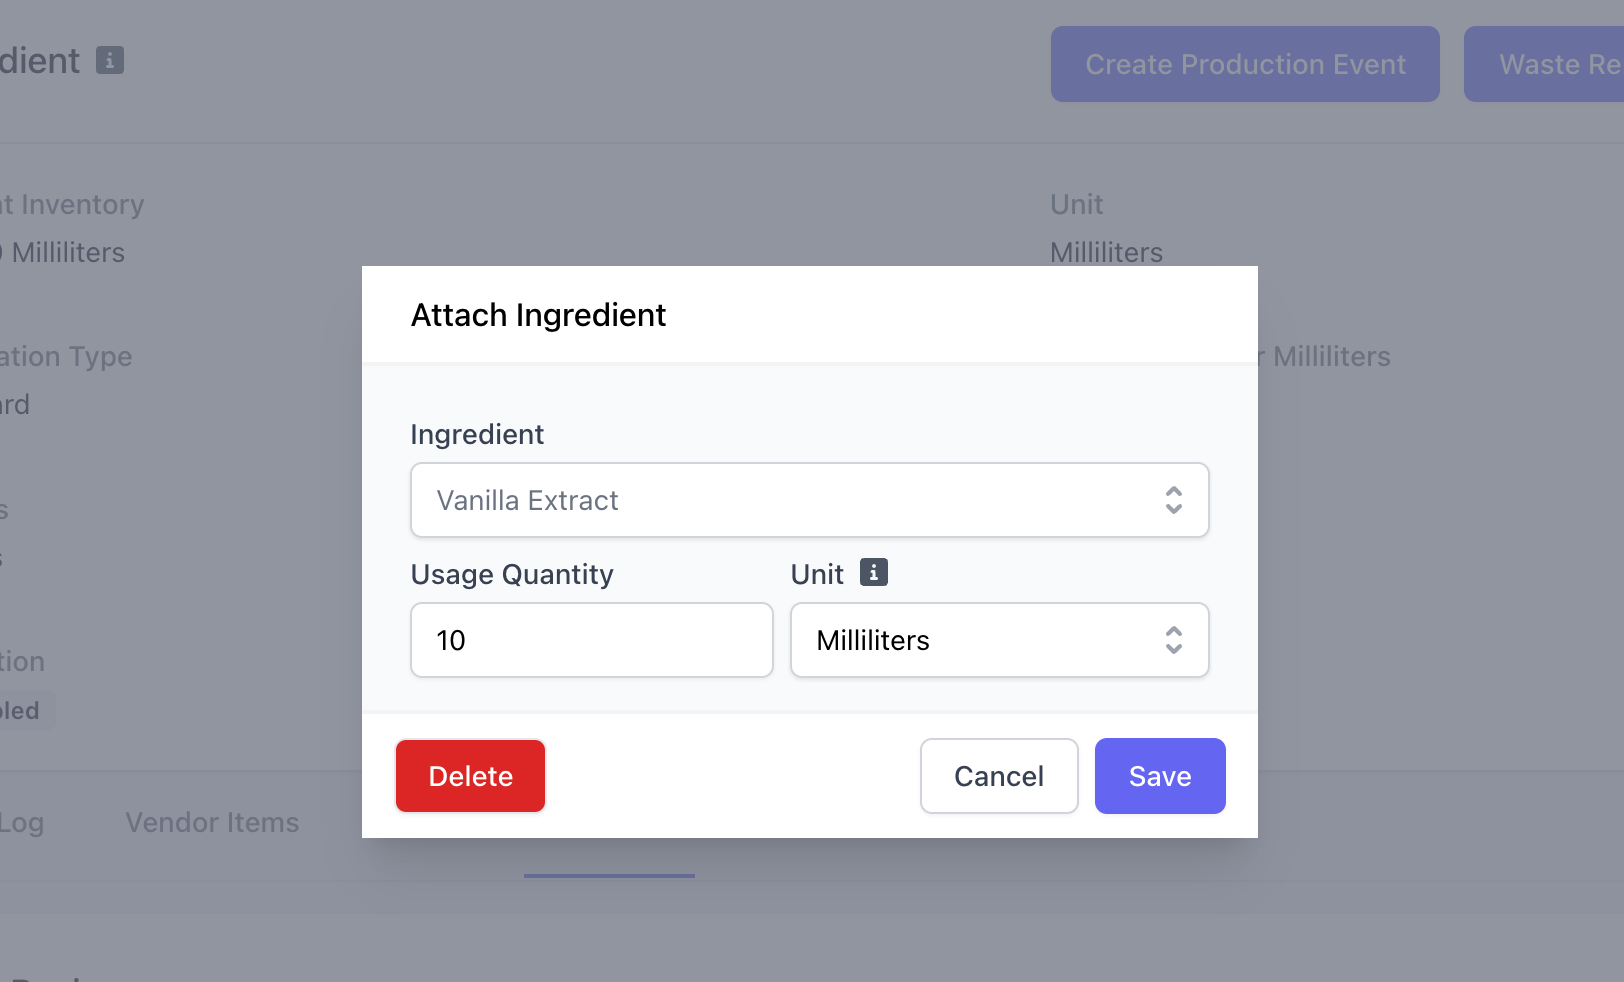
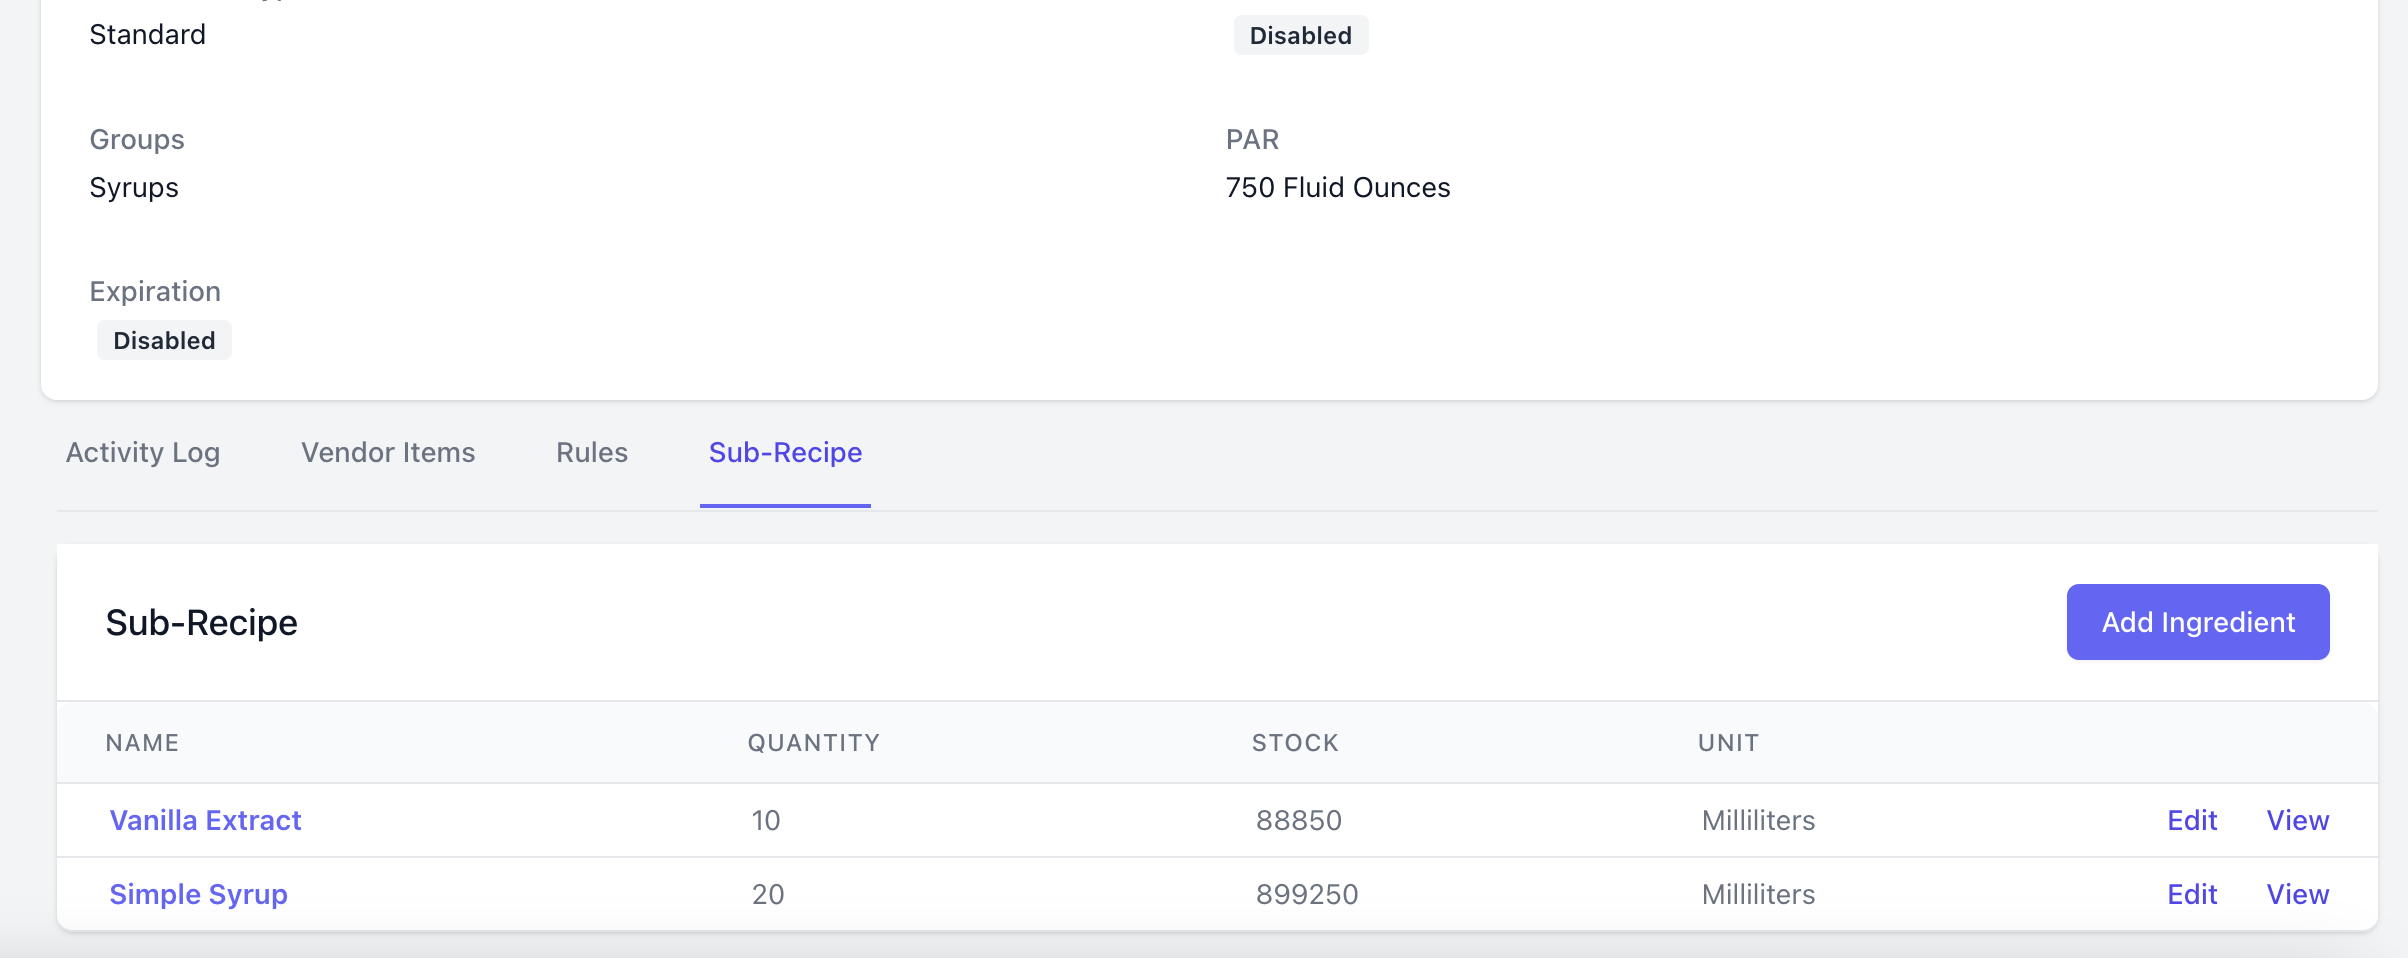
Sub Recipes
Track ingredients composed of other ingredients by creating sub-recipes. Do you make your syrups in-house? Are your breads made fresh daily? Use subrecipes to track ingredients used to make those ingredients attached to products for sale. Learn how to stock sub-recipe ingredients and their corresponding ingredients properly with Production Events.Create a Sub Recipe
Create a Sub Recipe
In this example, we will create a subrecipe for house-made vanilla syrup.
Create the ingredients that will be used to make the final ingredient (i.e. vanilla syrup will be made up of two ingredients: simple syrup and vanilla extract).
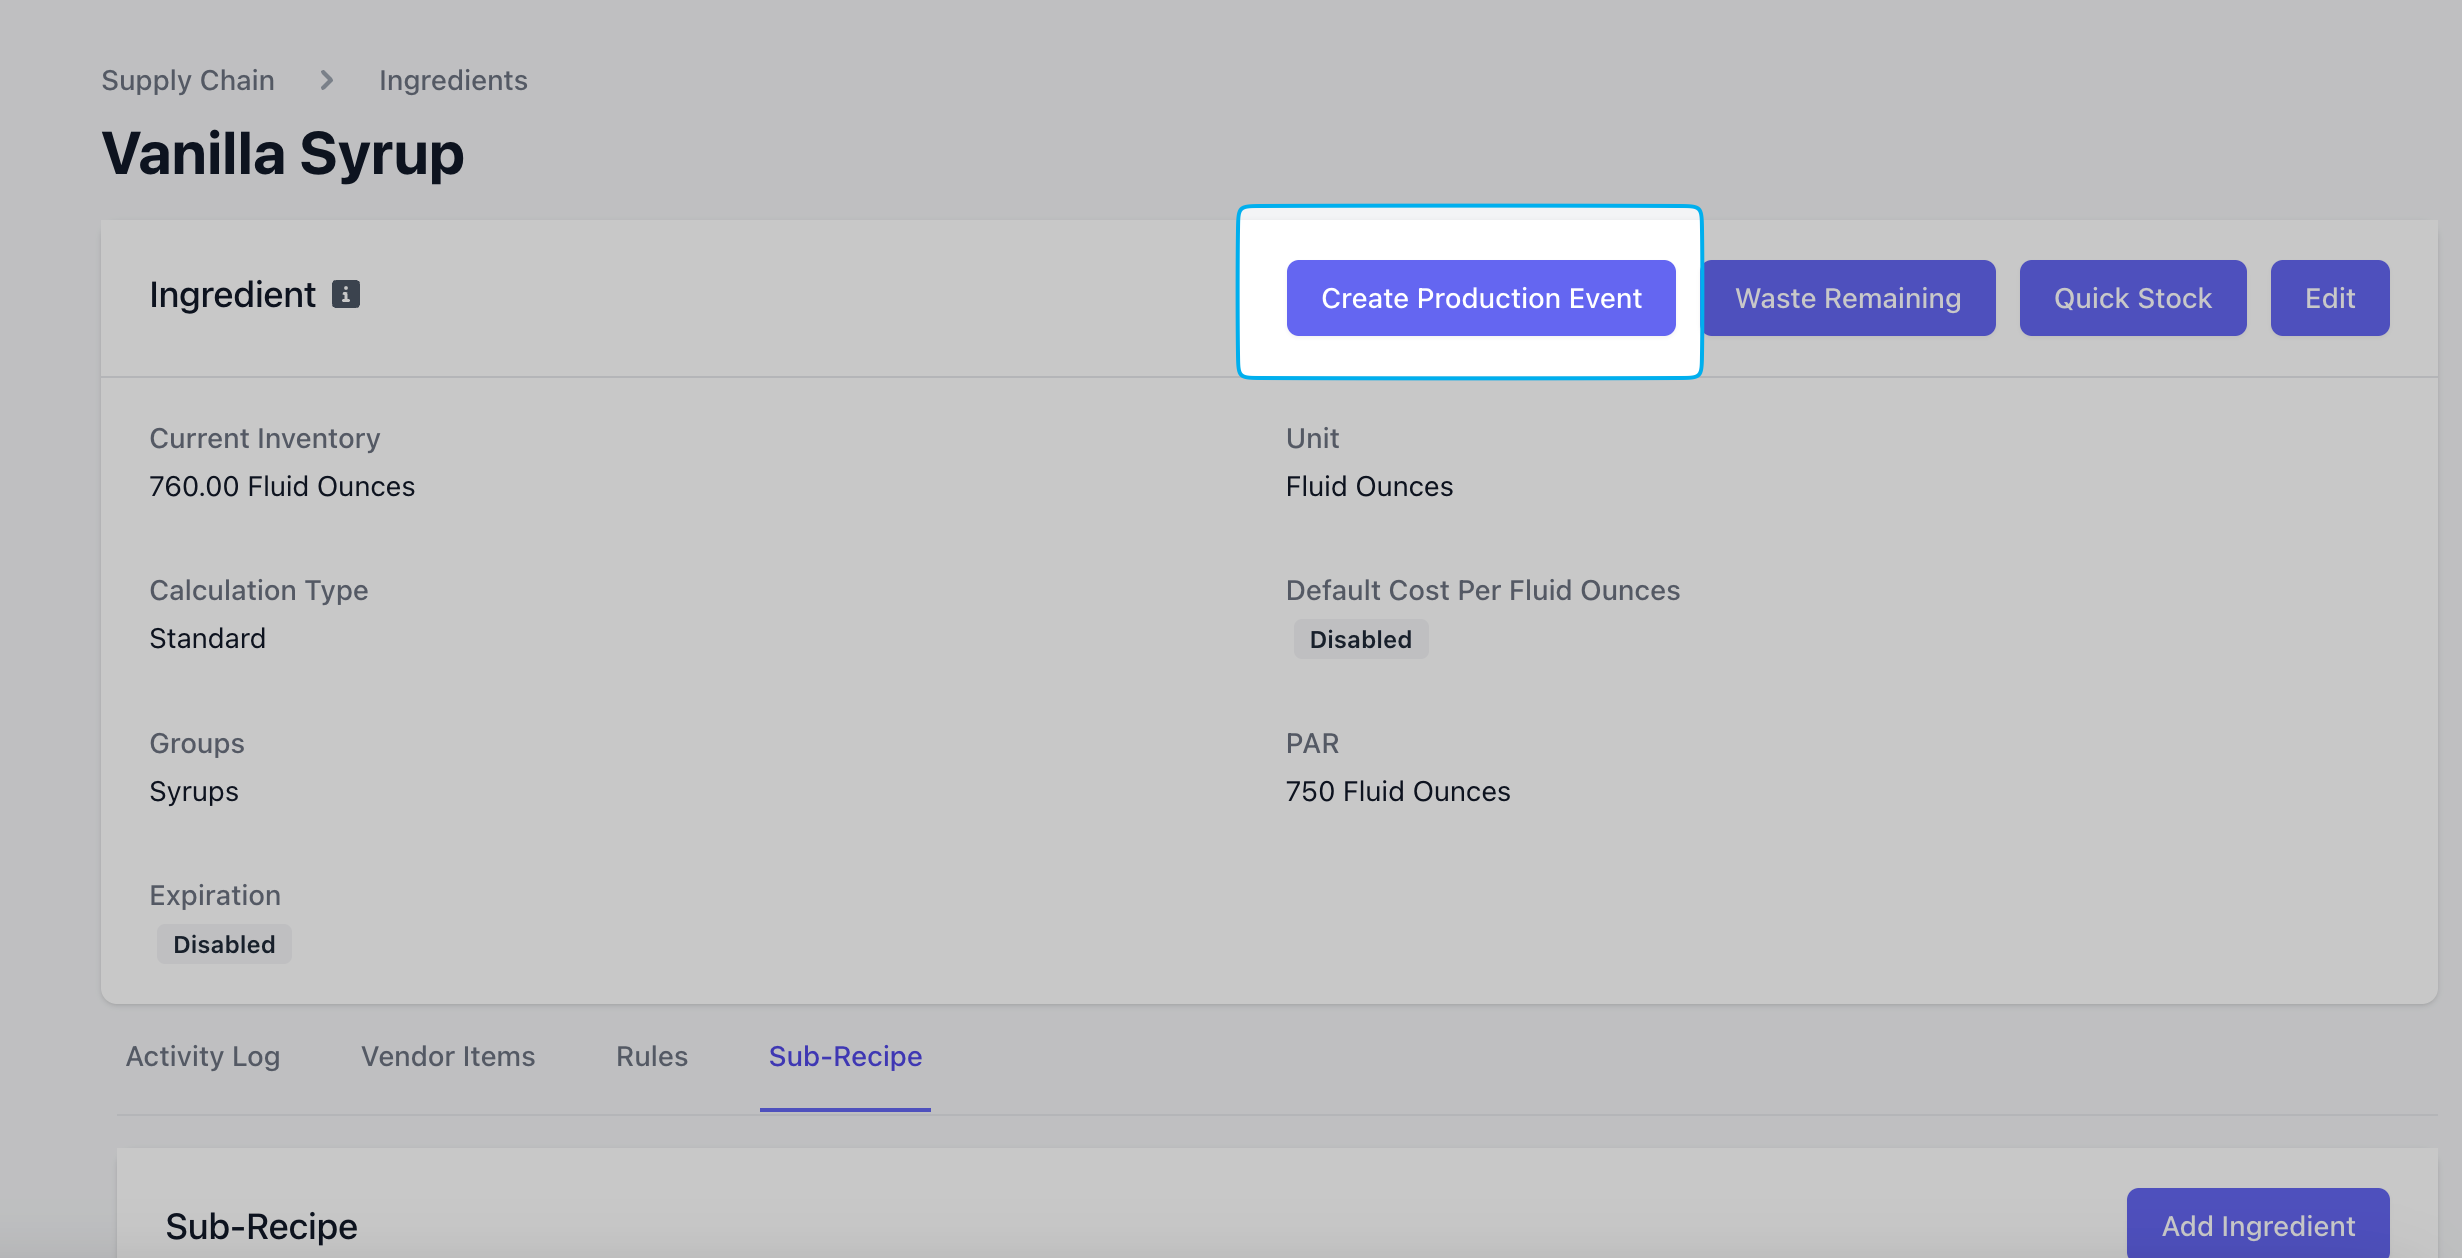
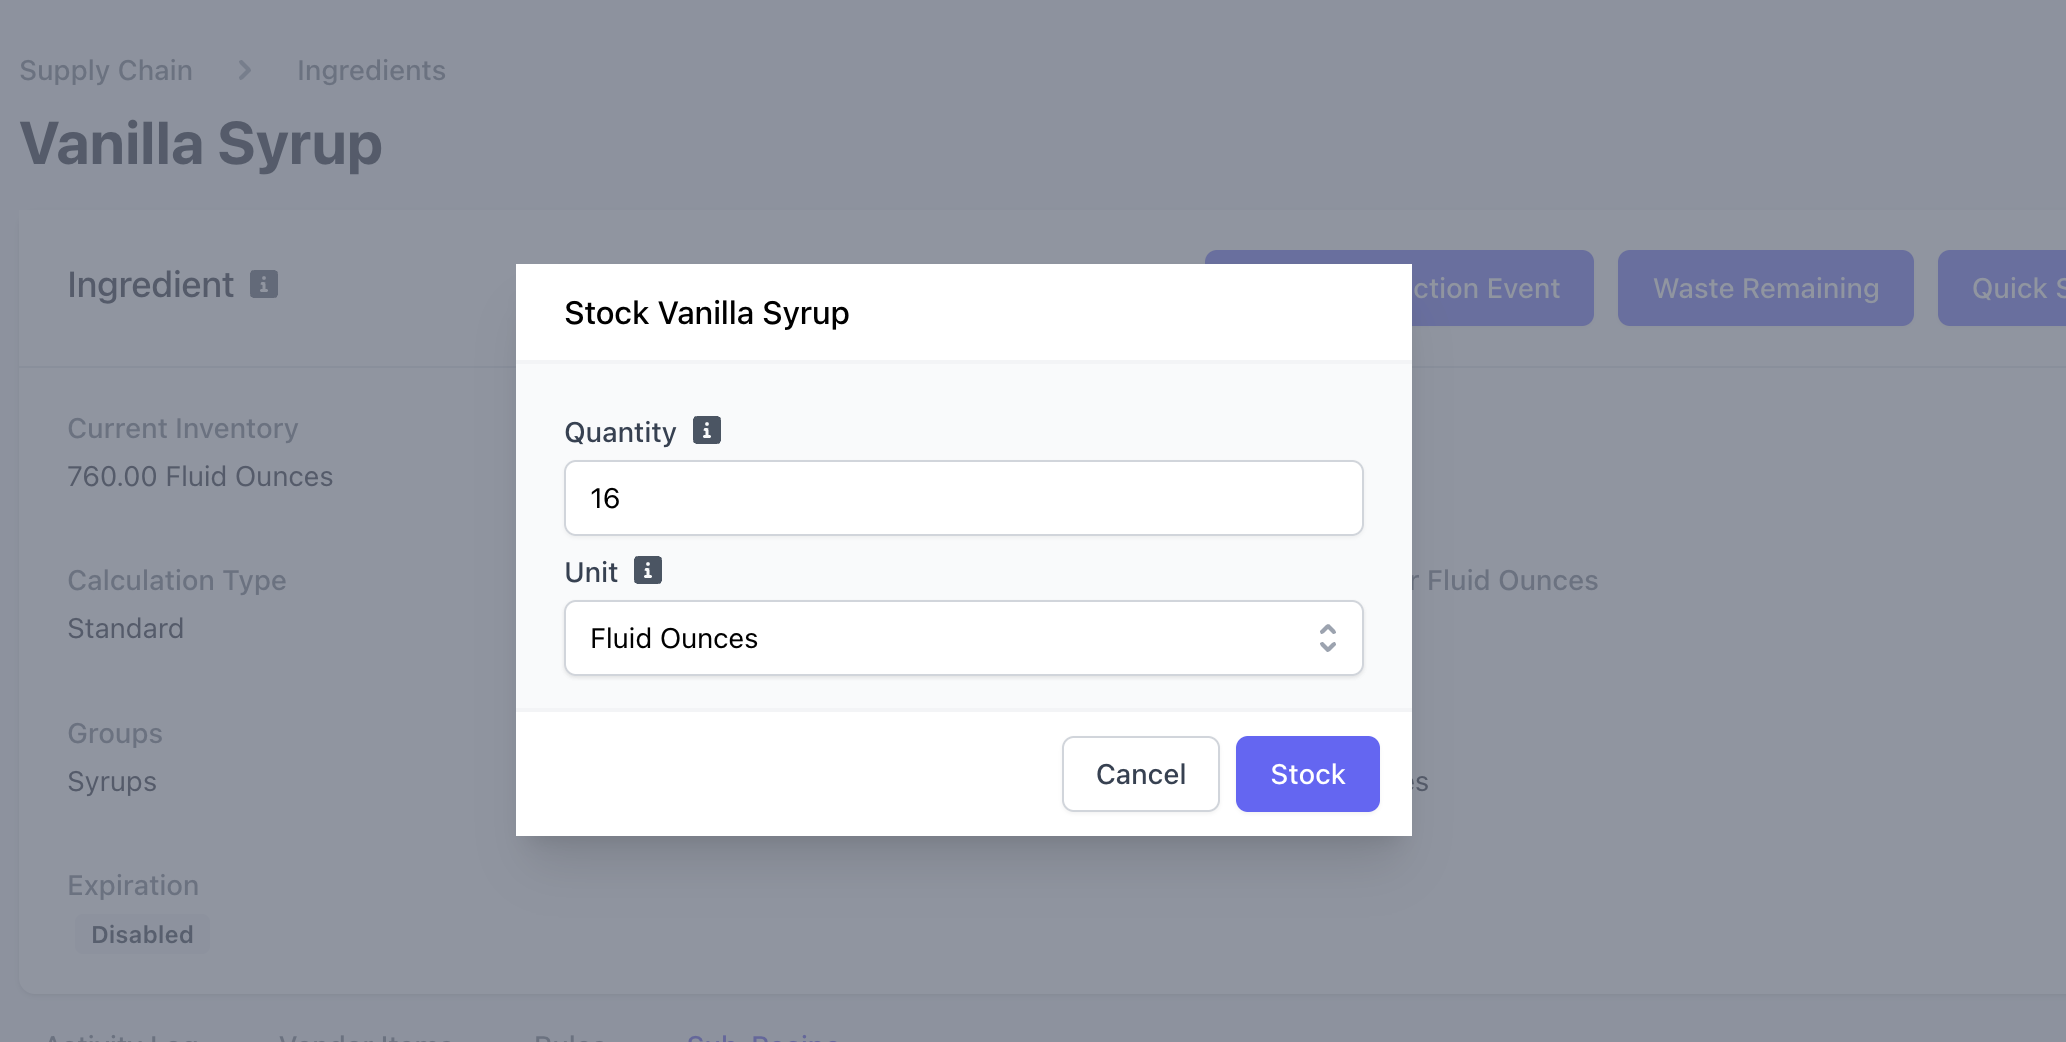
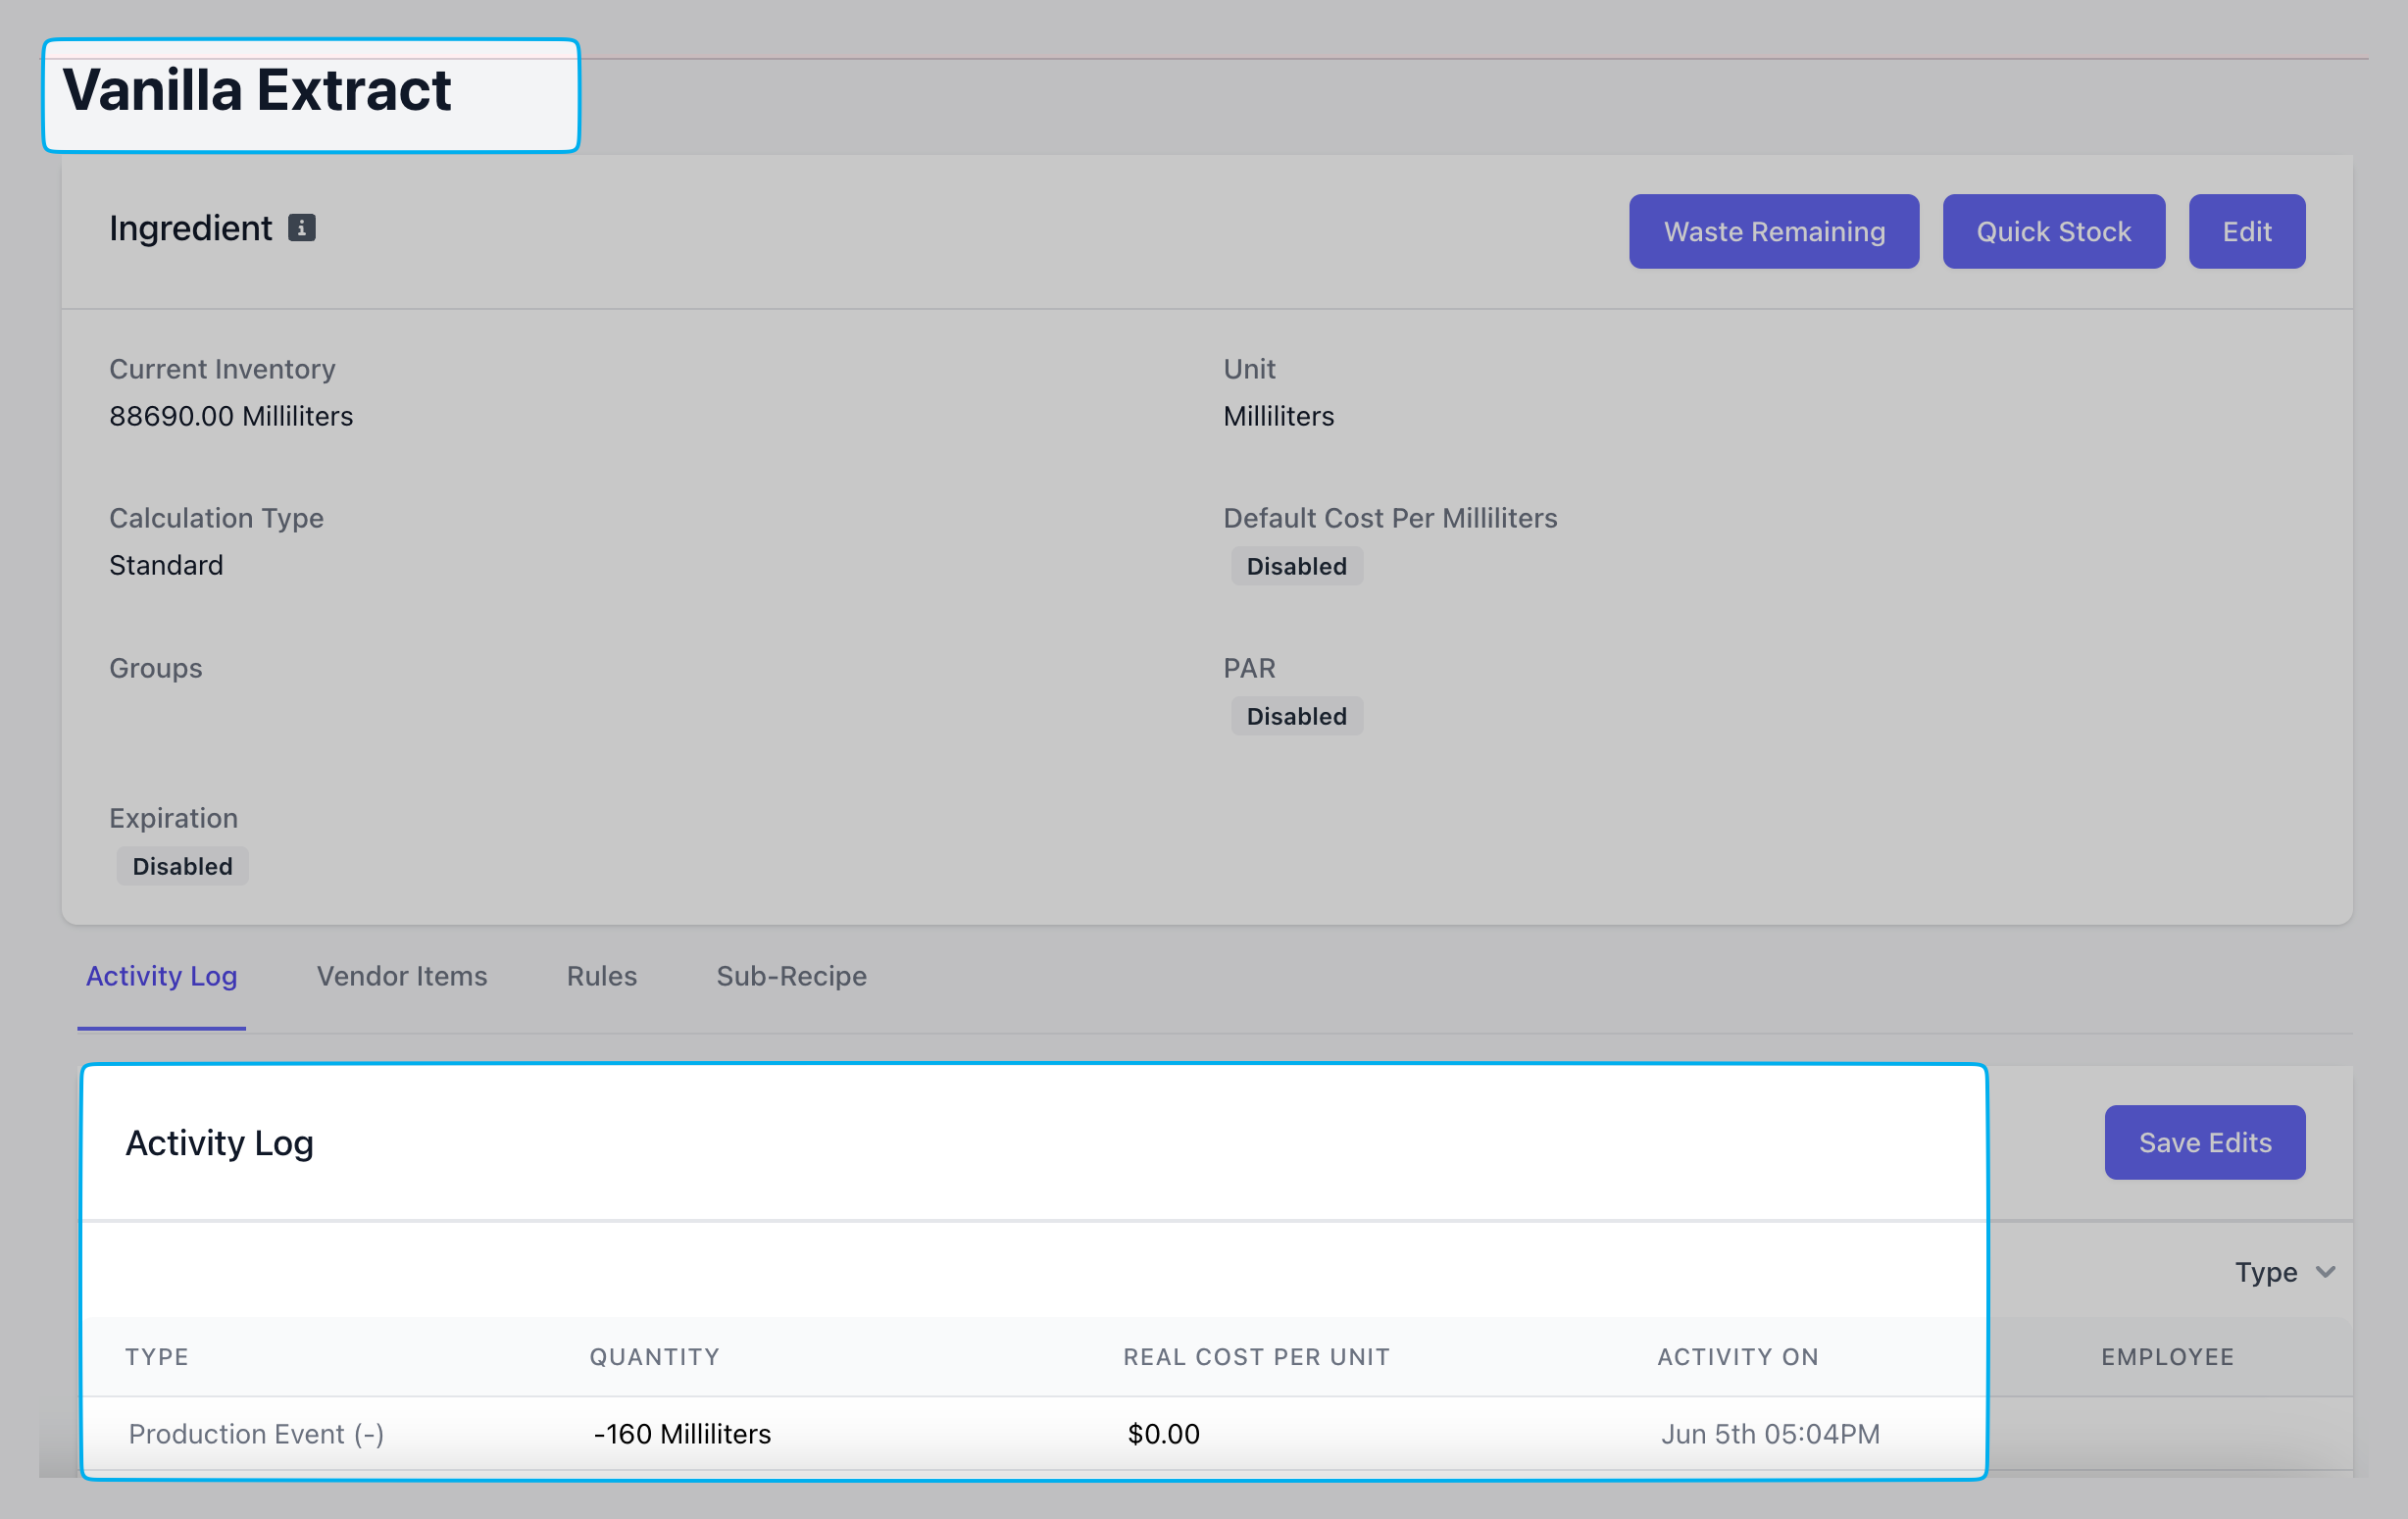
Create a Production Event
Create a Production Event
Have you just finished making a fresh batch of house-made syrup?Use a production event to decrease the stock of the ingredients used in the sub recipe and in turn, restock the final ingredient.
Build a Recipe
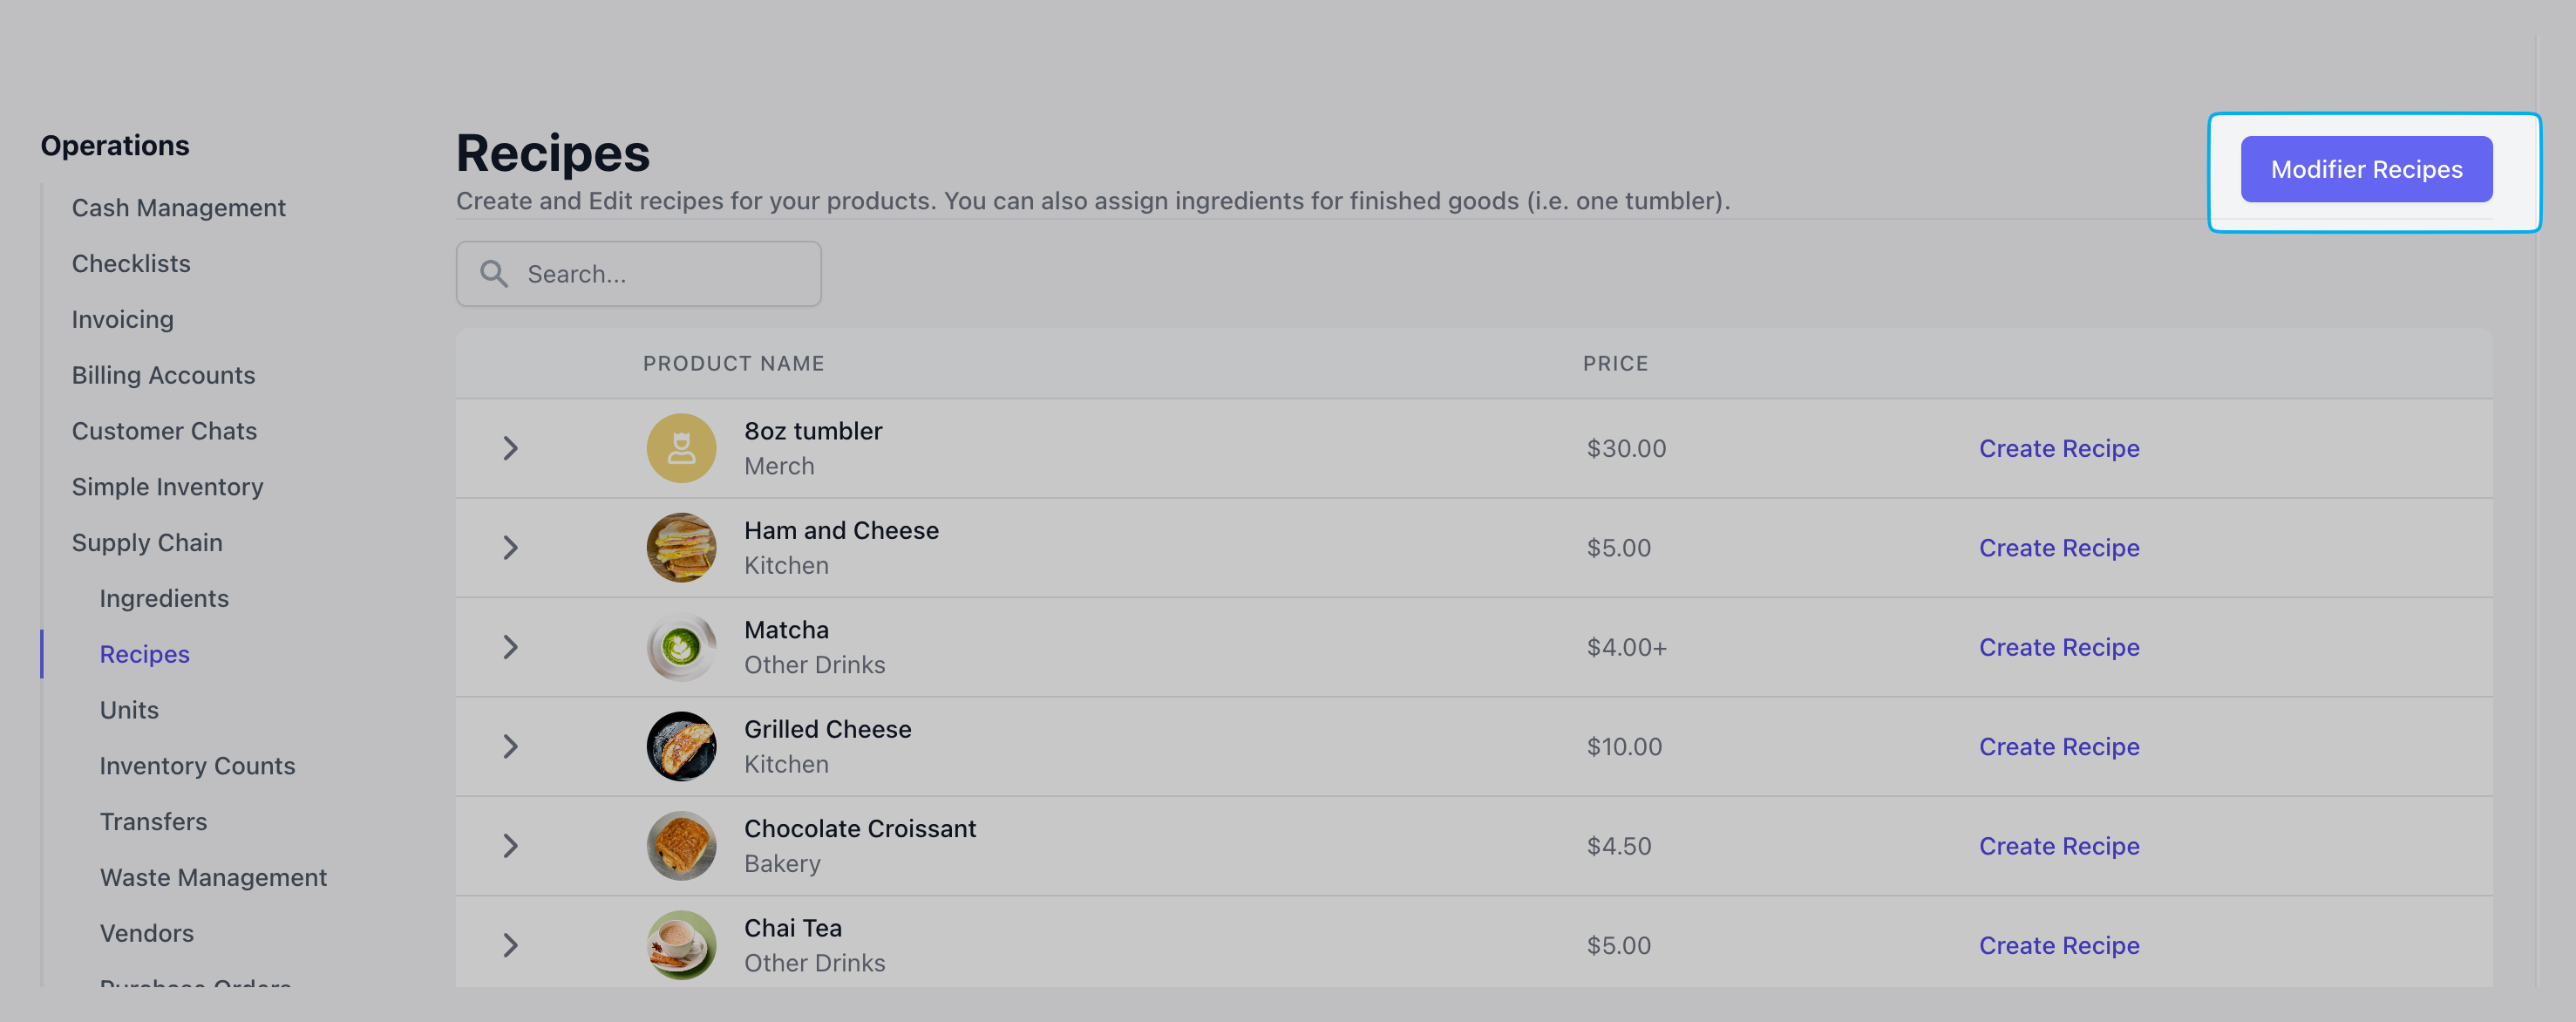
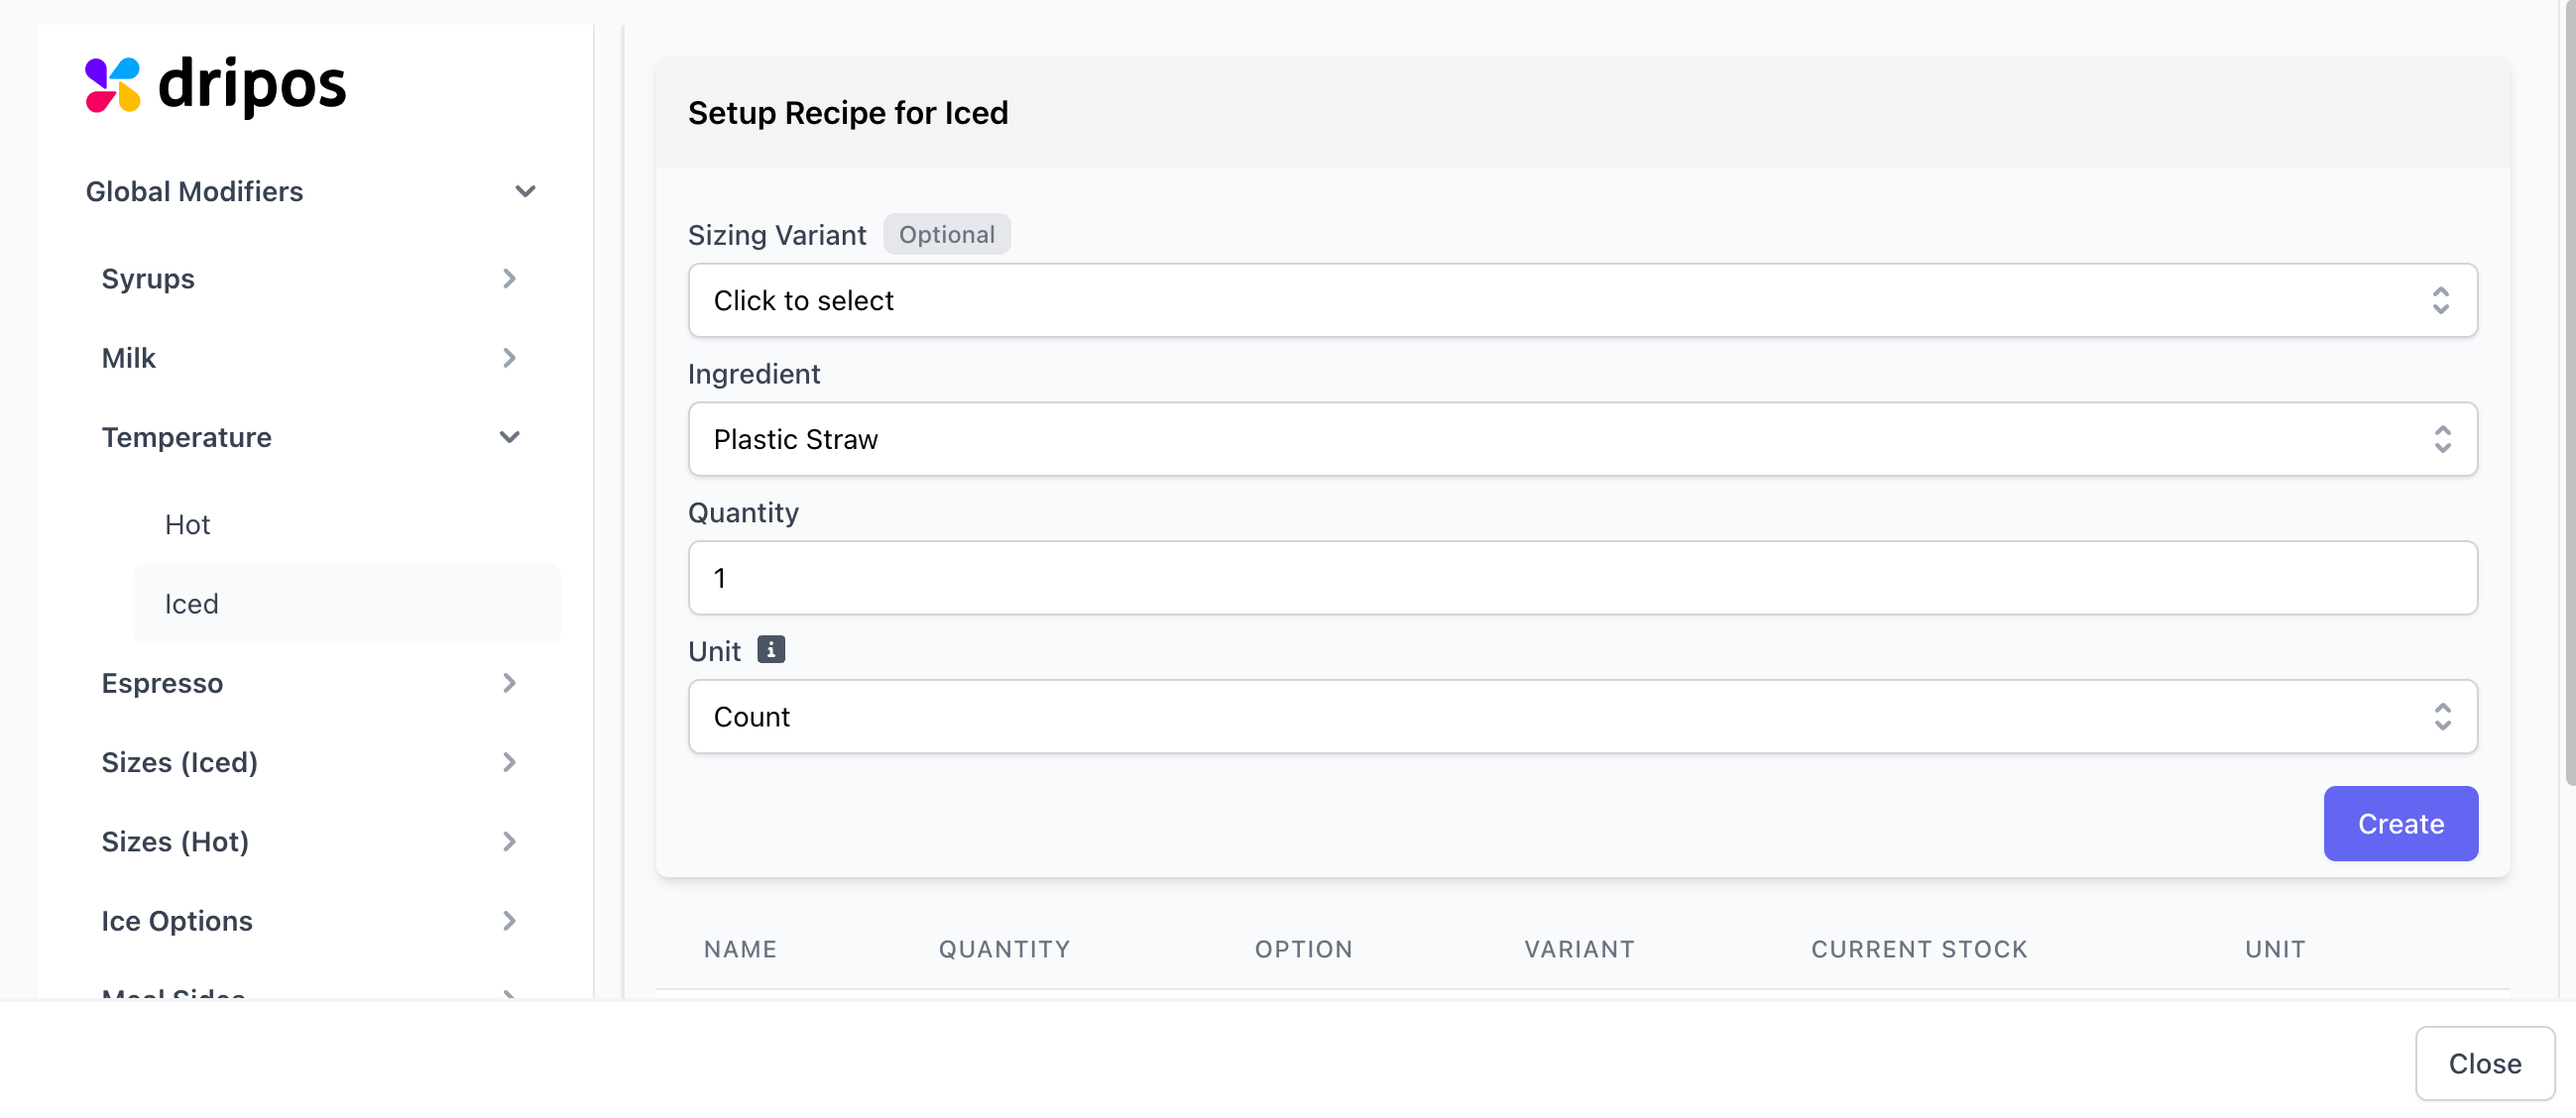
Every product in your menu has a recipe ready to build upon in Dripos Supply Chain. When a product is sold on any Dripos platform, the stocks of ingredients linked to its recipe are automatically reduced by the amount used.Customizable Products
Follow these steps to create a recipe for a customizable product that relies on modifier options for ordering (i.e. espresso drinks, breakfast sandwiches, etc.)Create Recipe for Customizable Products
Create Recipe for Customizable Products
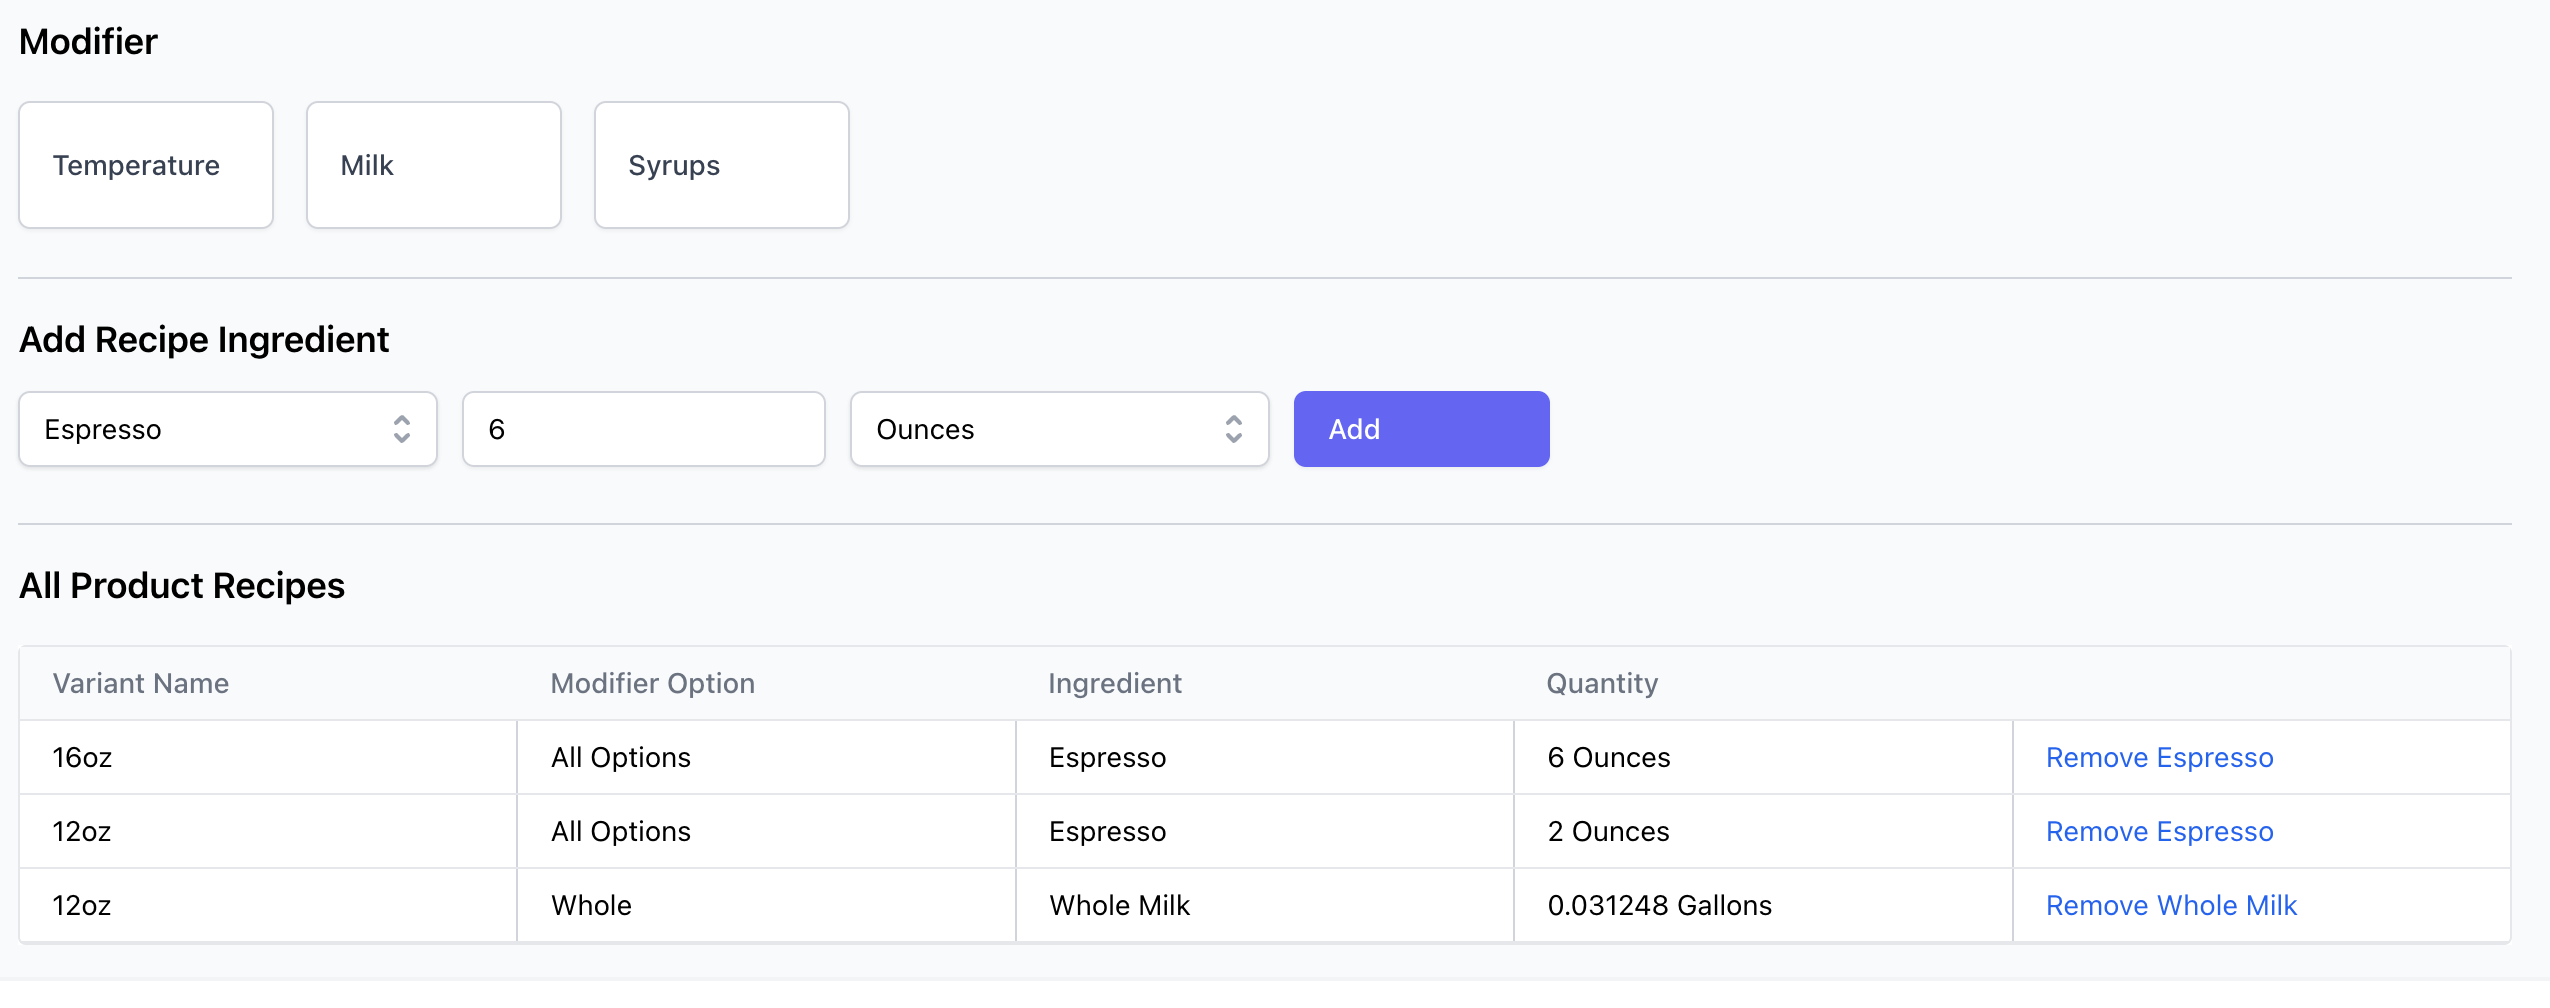
On the Dashboard, navigate to Menu > Supply Chain > Recipes > select Create next to the desired product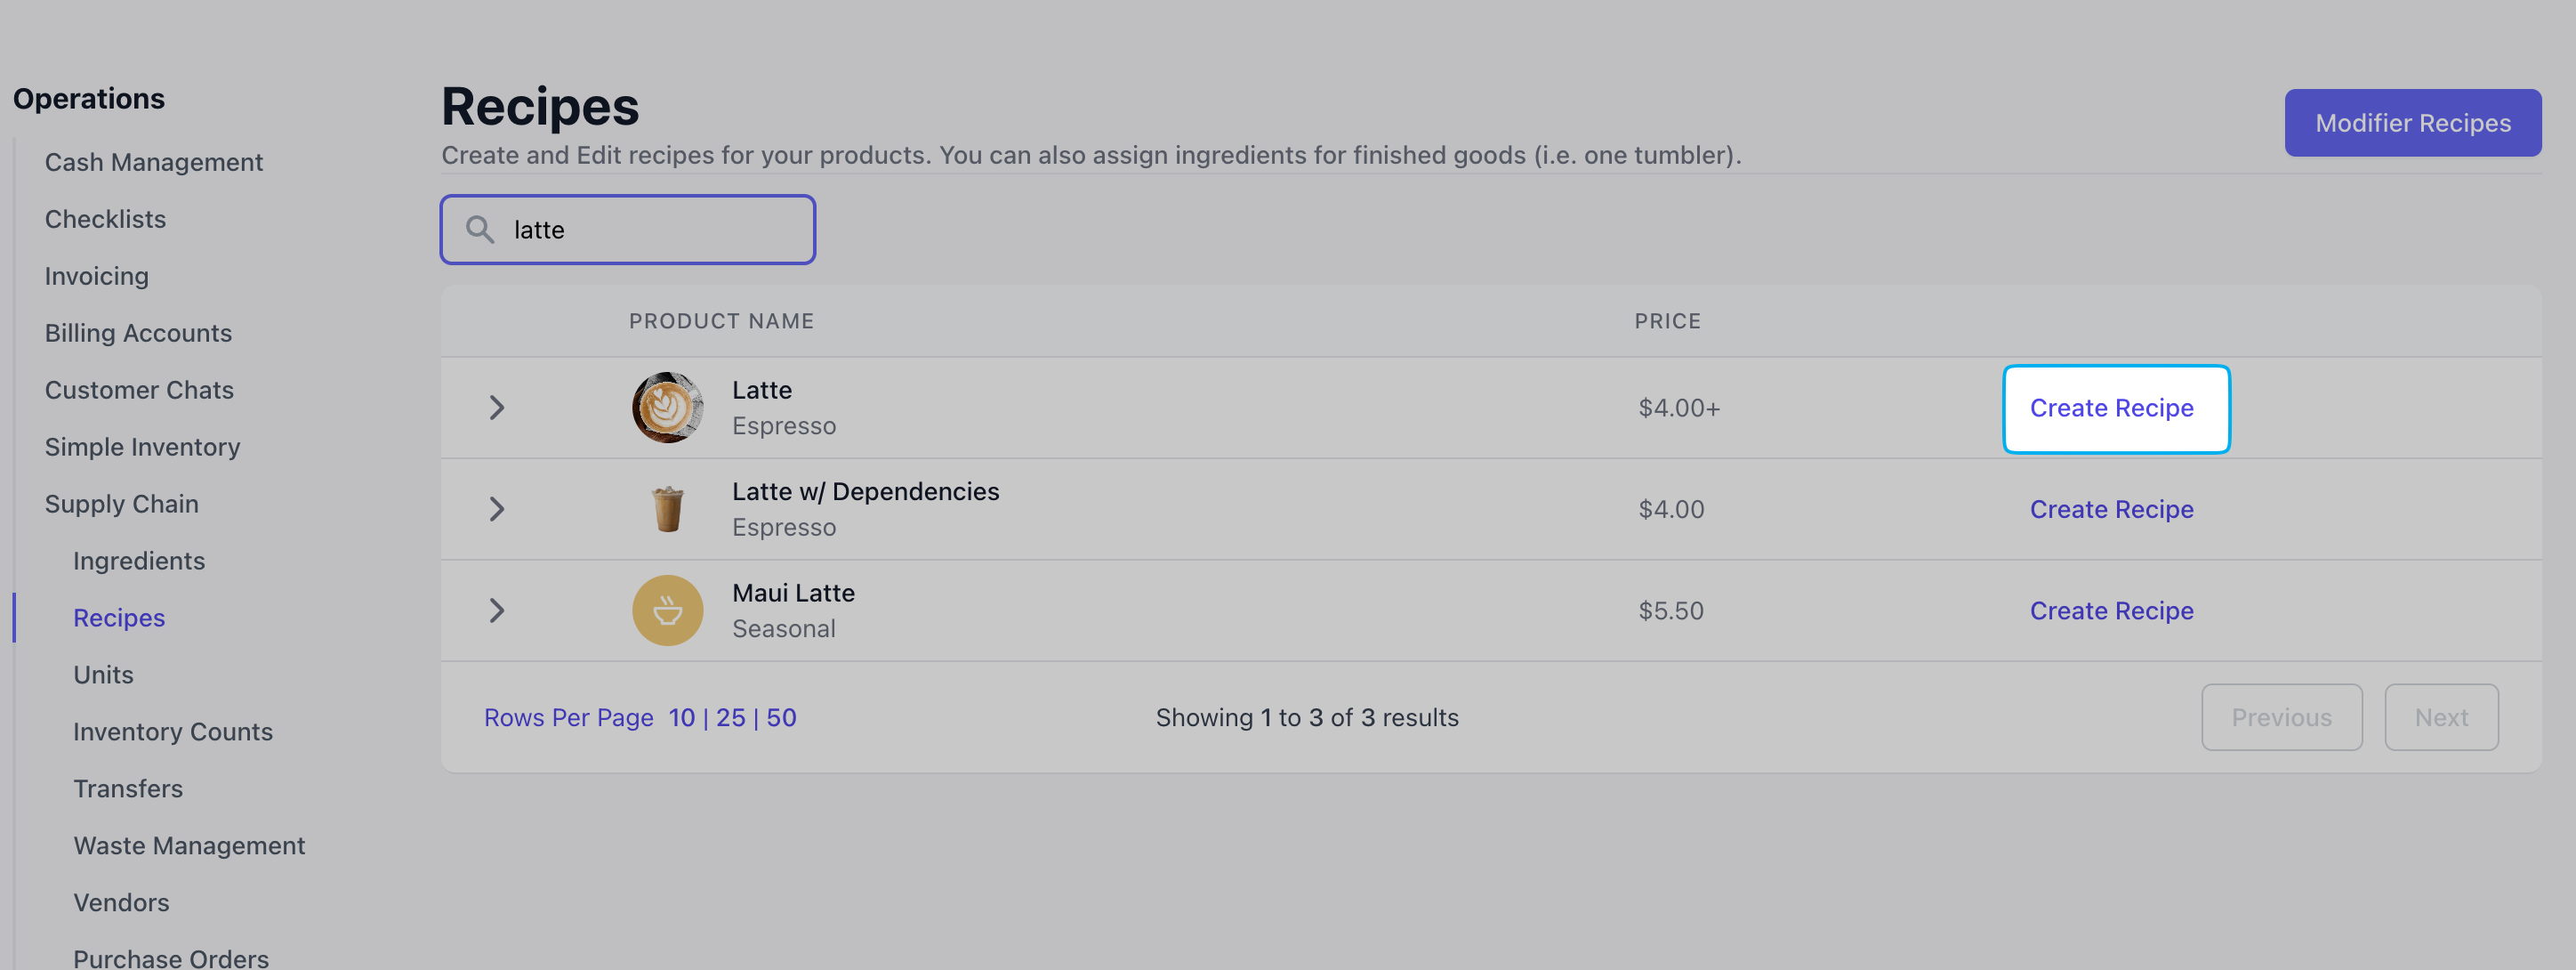
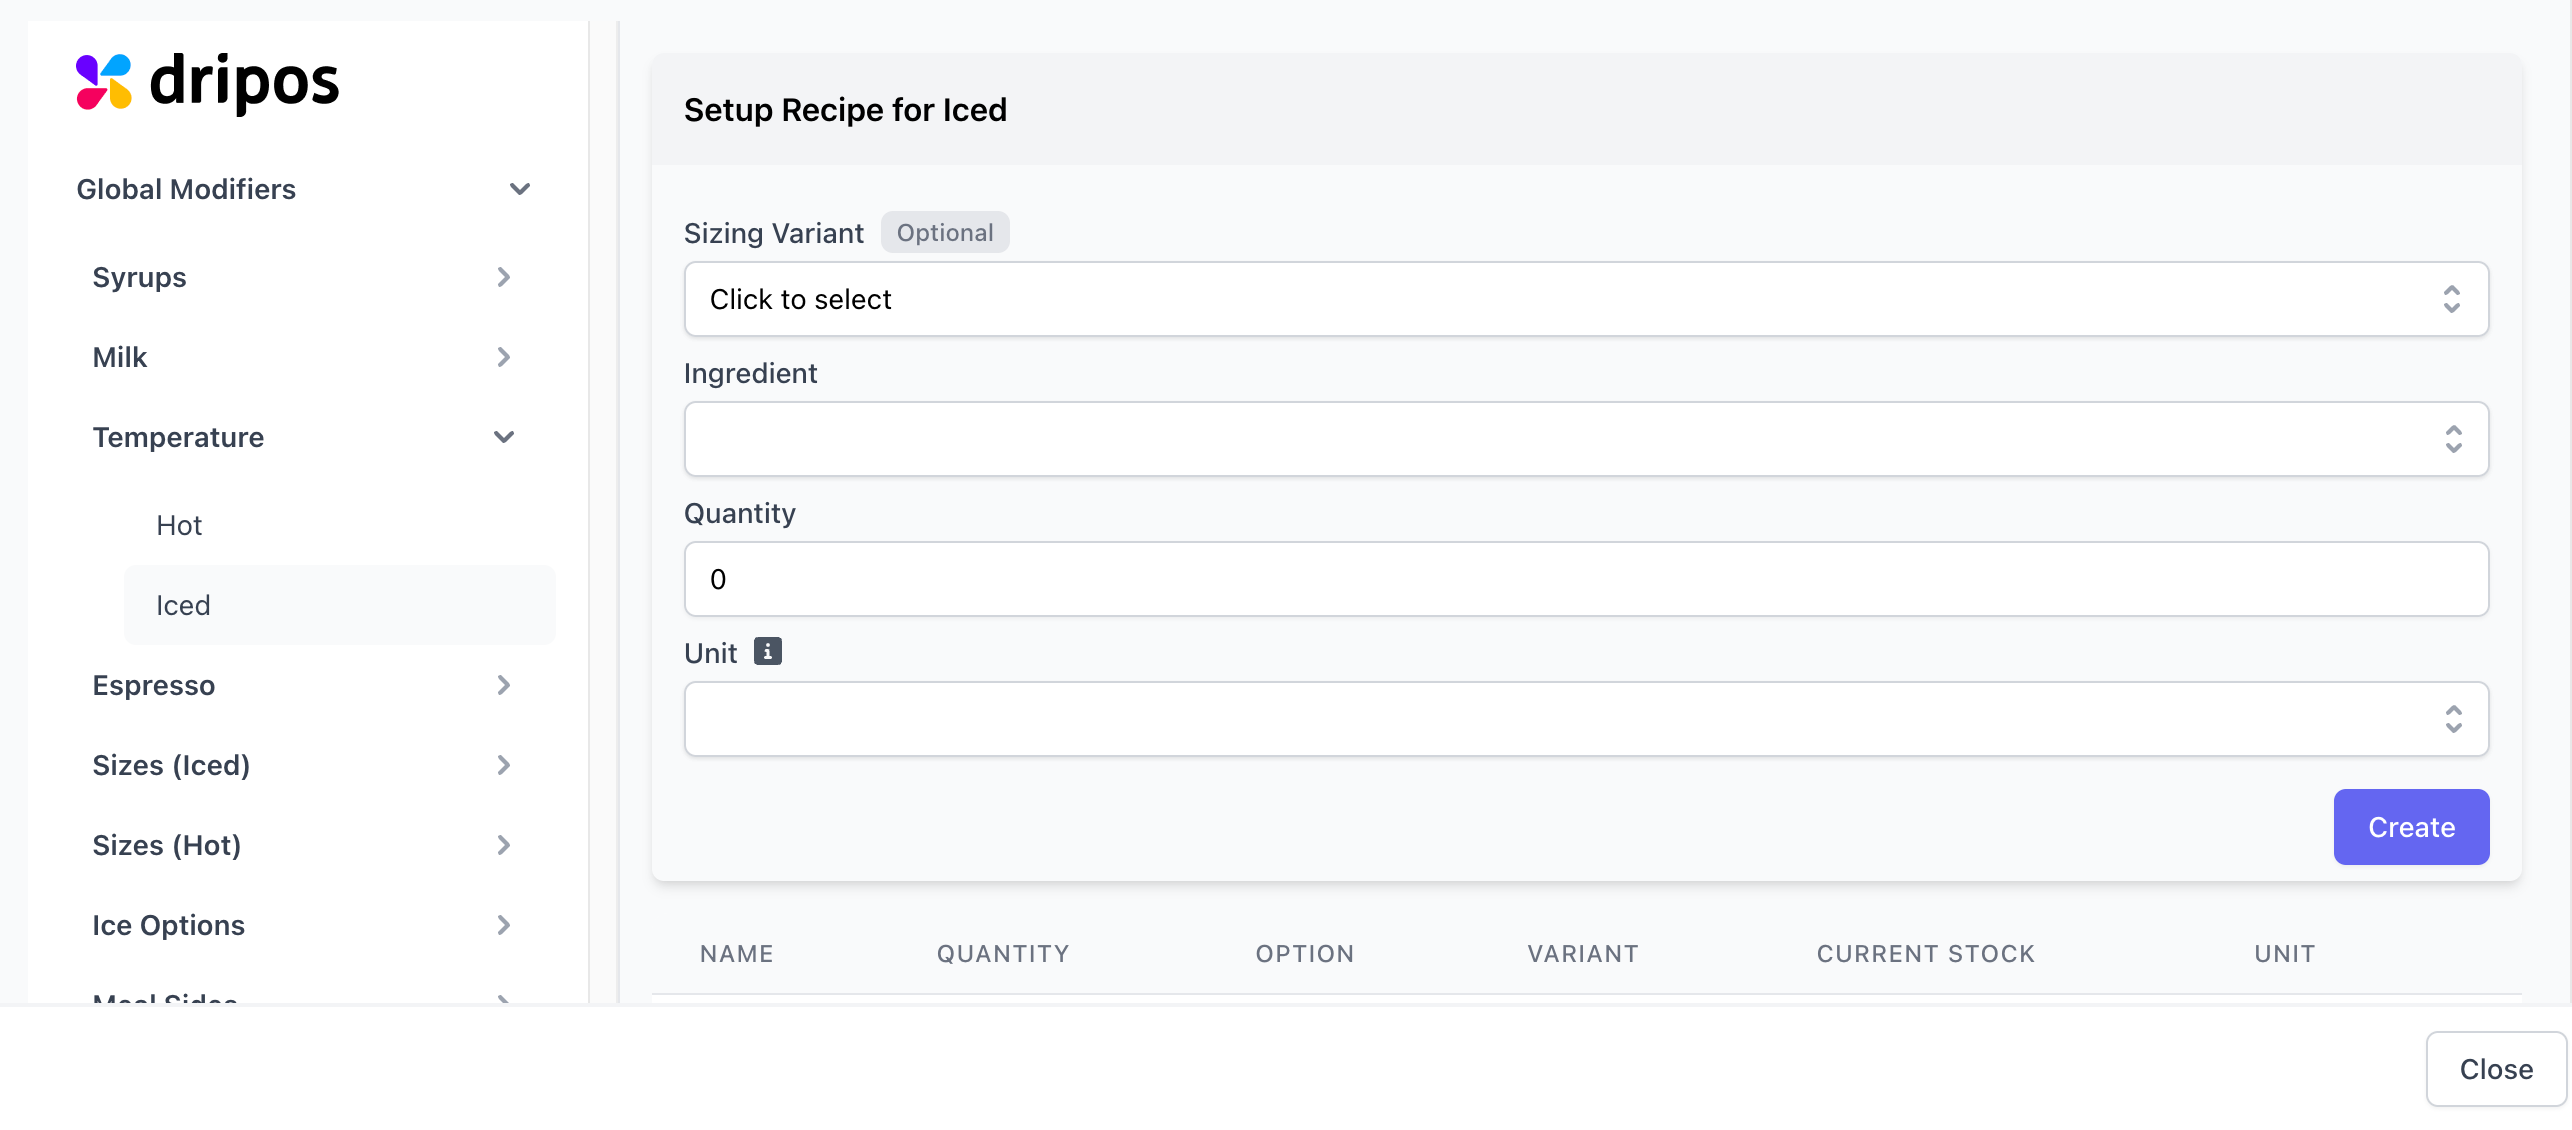
Understanding Variants
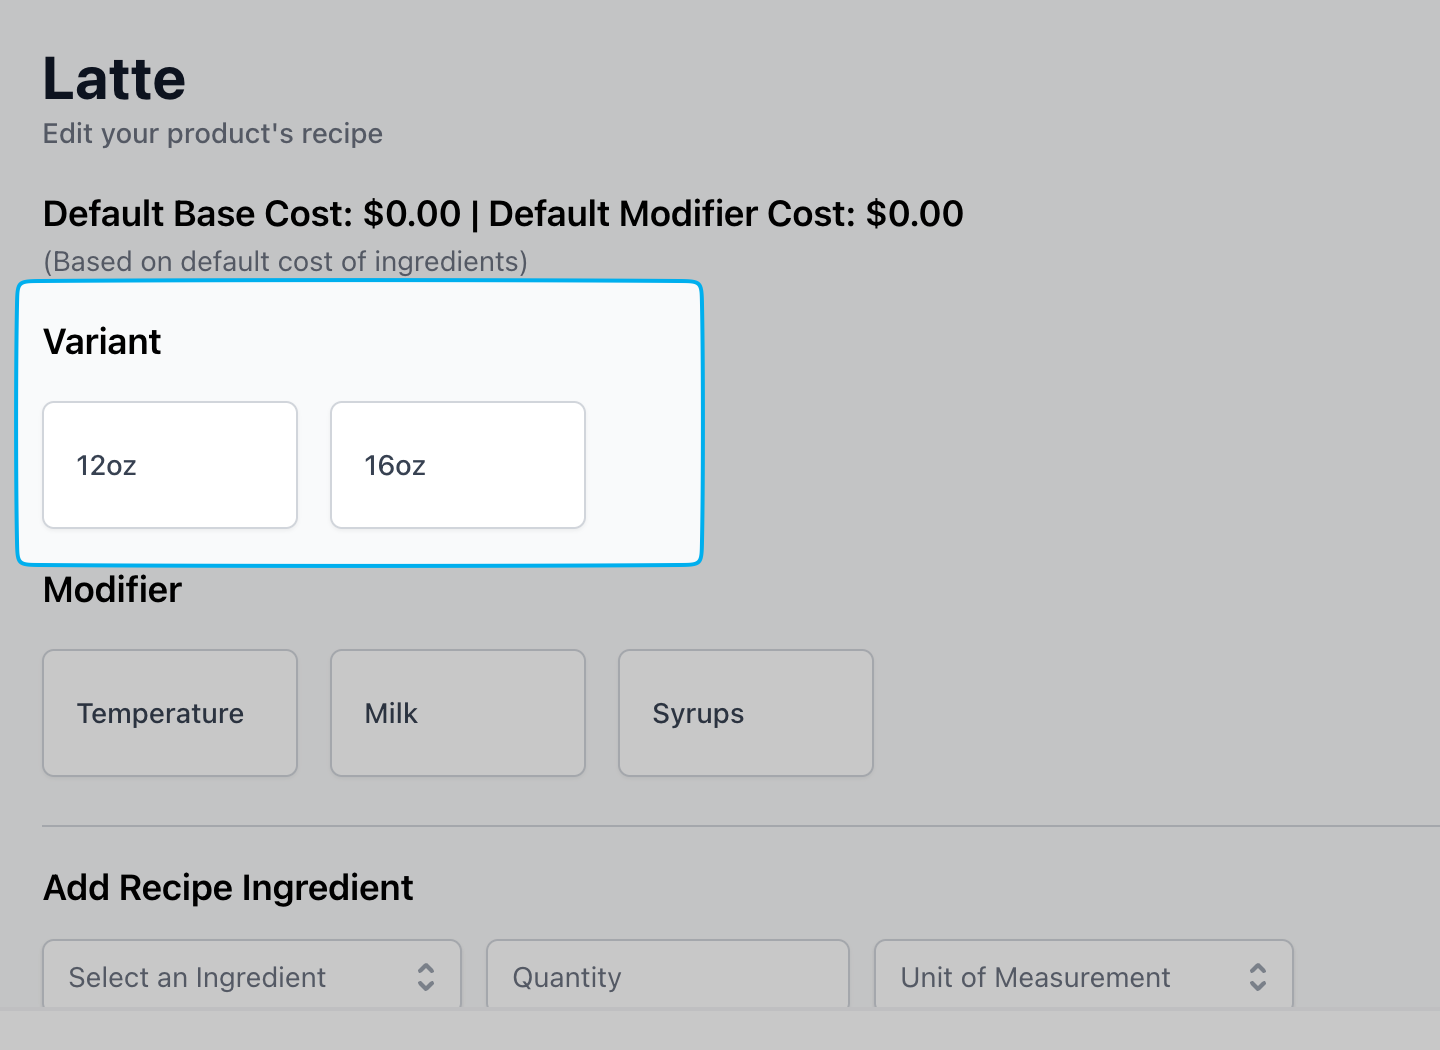
Add Ingredient to Variant
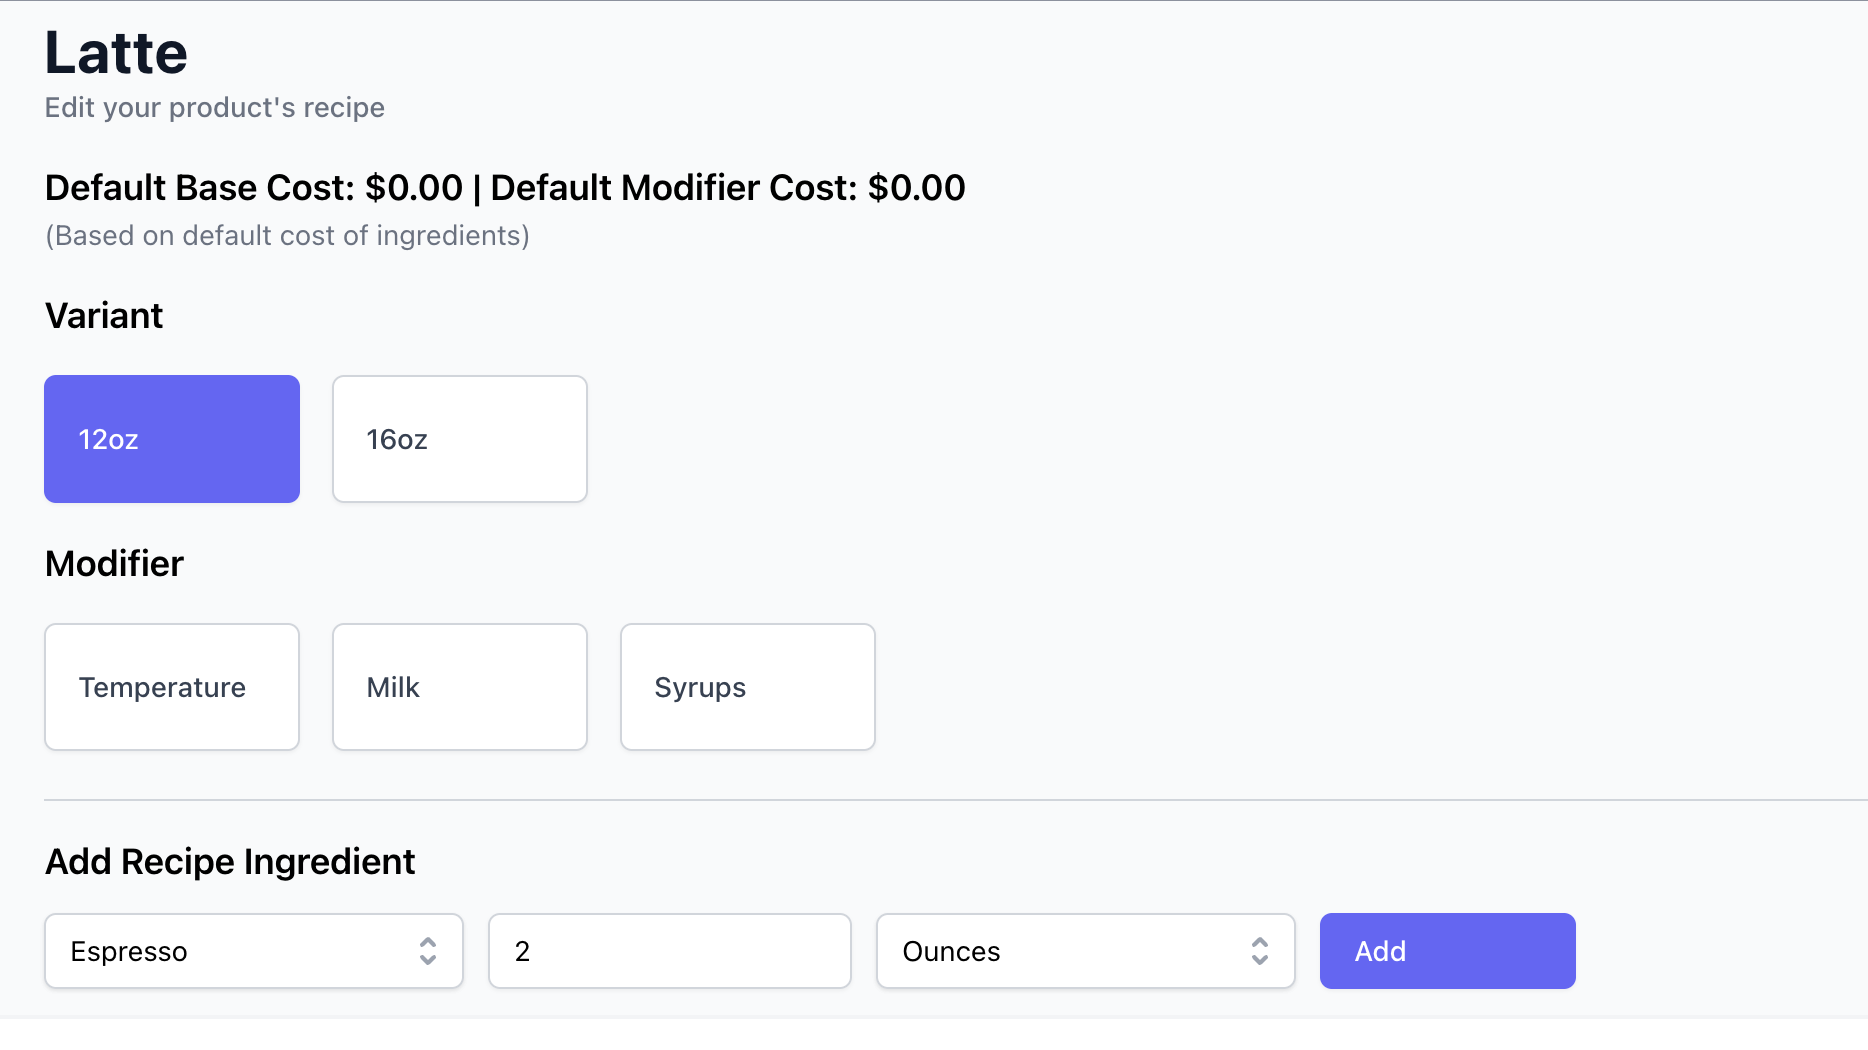
Add Ingredient to Variant and Modifier
For example, a 12oz and 16oz latte will use different amounts of milk. To add the ingredient of whole milk to each variant, select the variant (12oz) > select the modifier Milk > select the whole milk option > add the recipe ingredient > enter the quantity to use (2oz) > click Add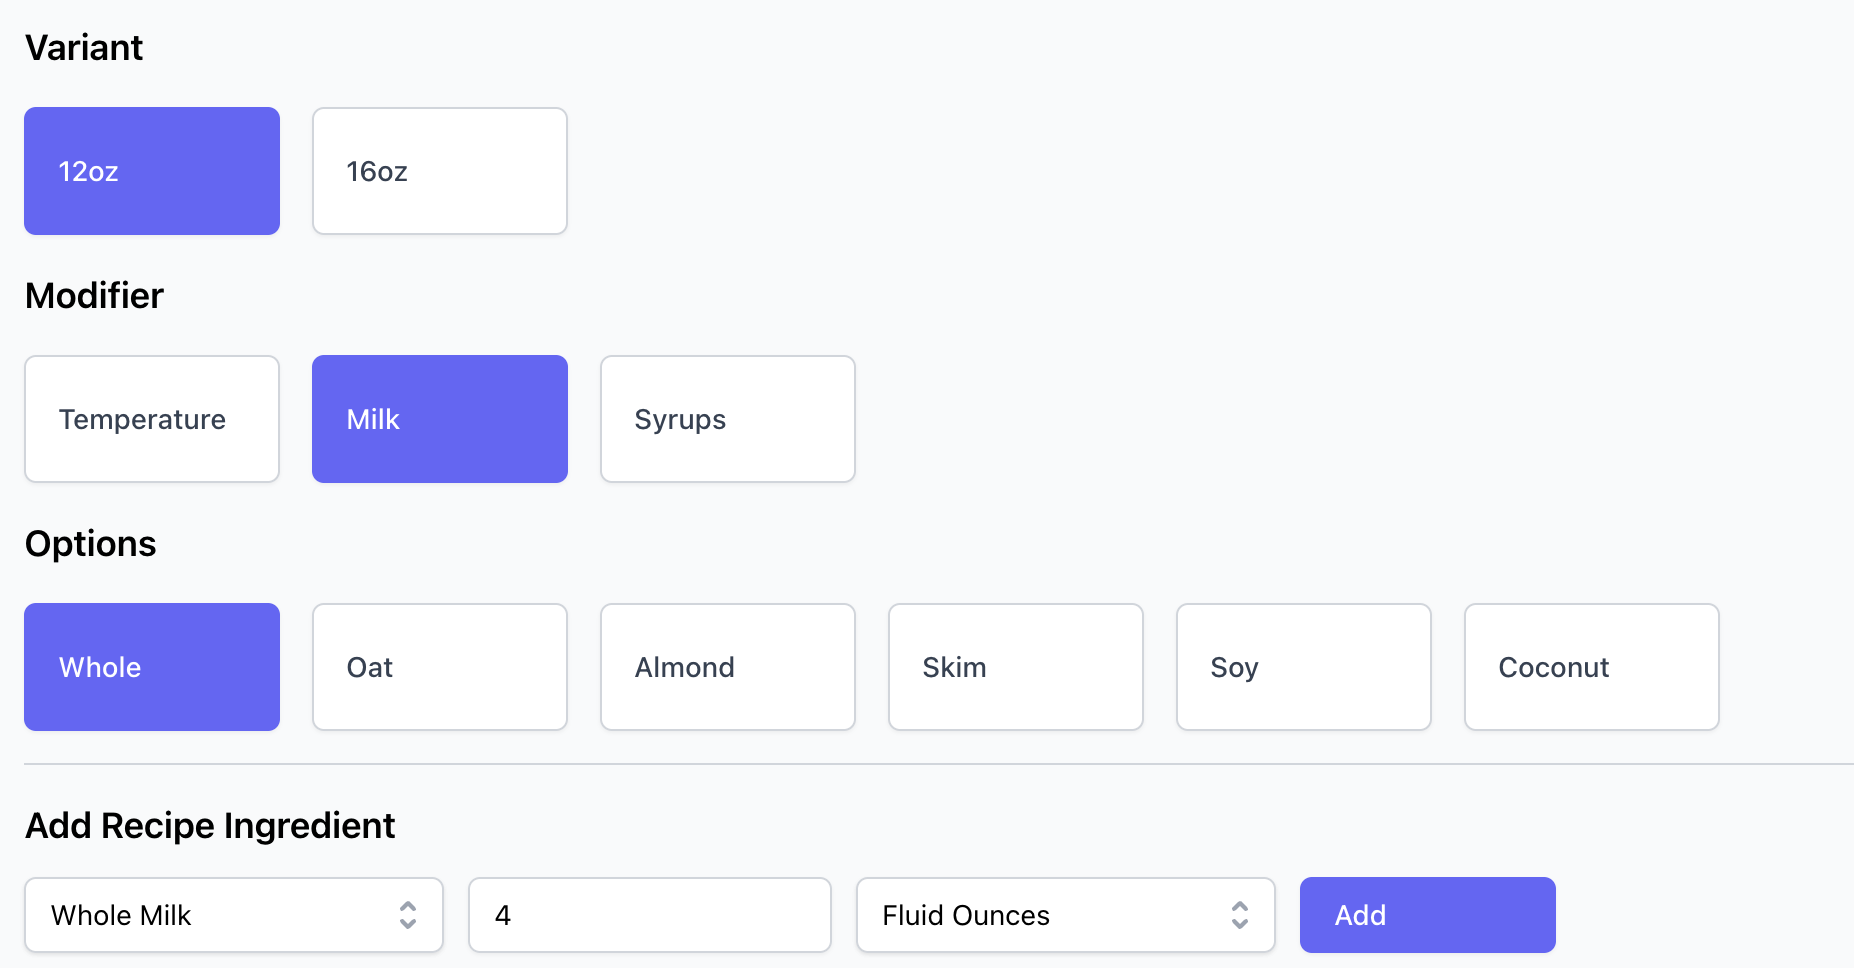
Grab & Go Products
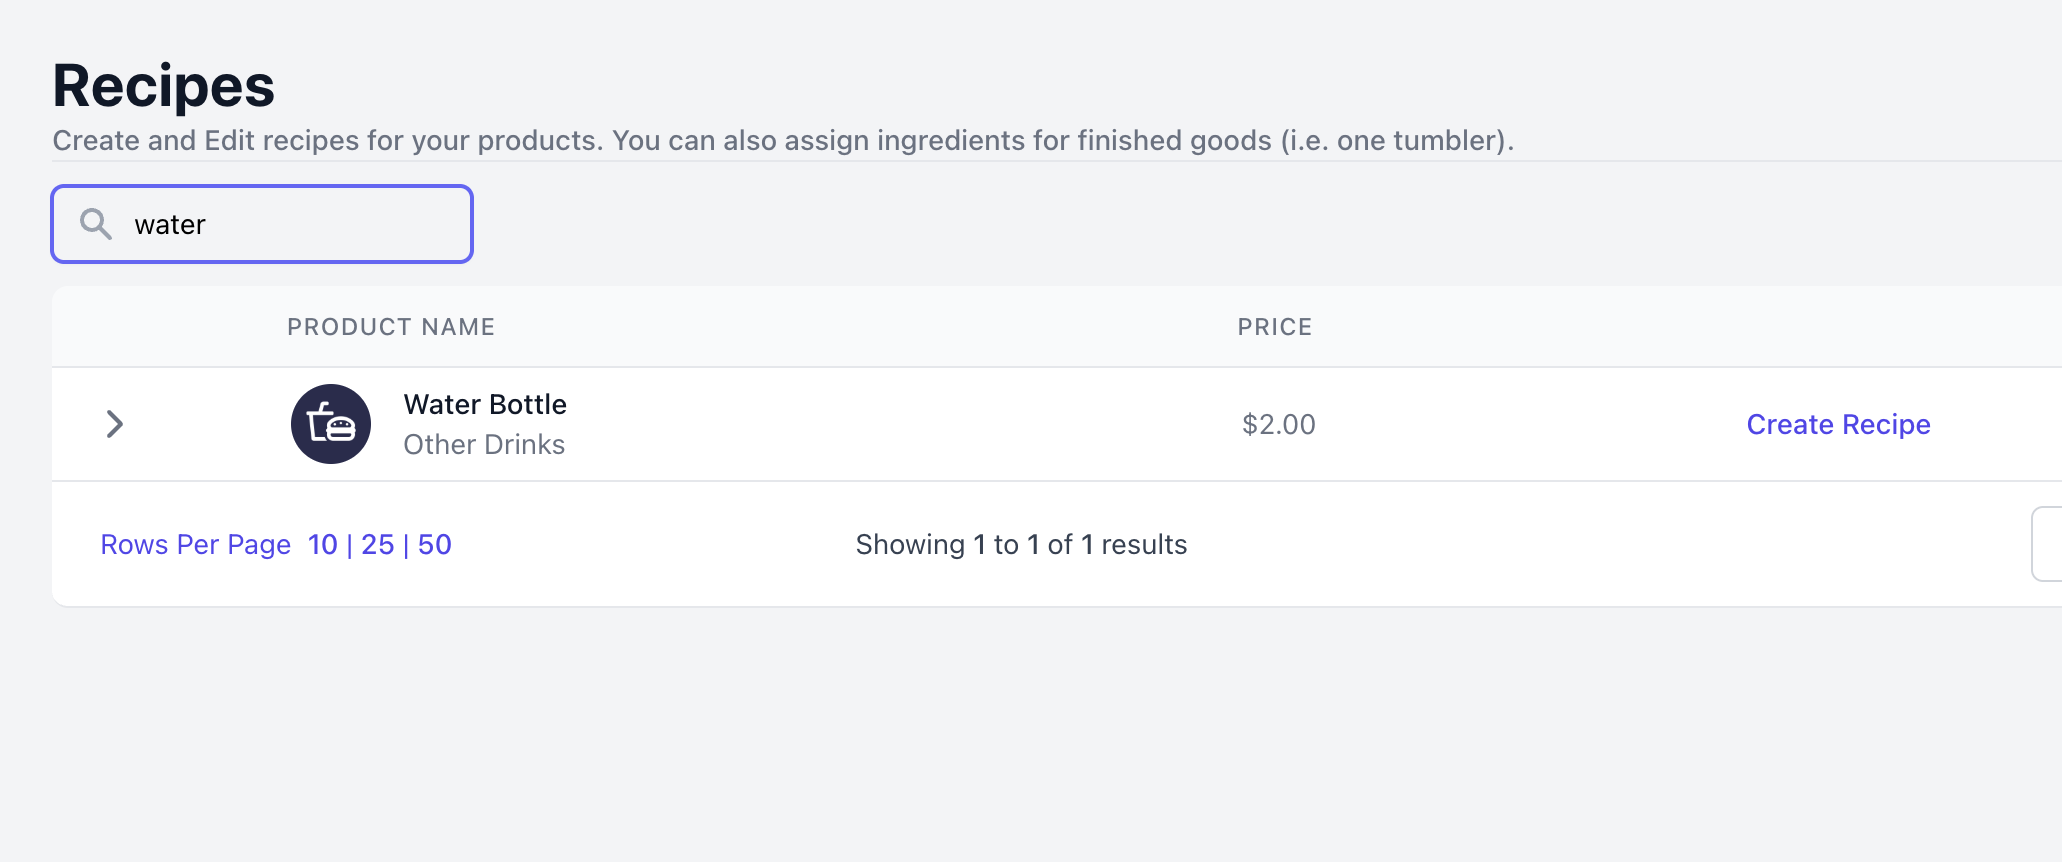
Use supply chain to track quantity of simple inventory products such as bakery items and canned beverages.Single Product
Single Product
Use these steps if you have a stand alone product for sale, i.e. water bottle, croissant

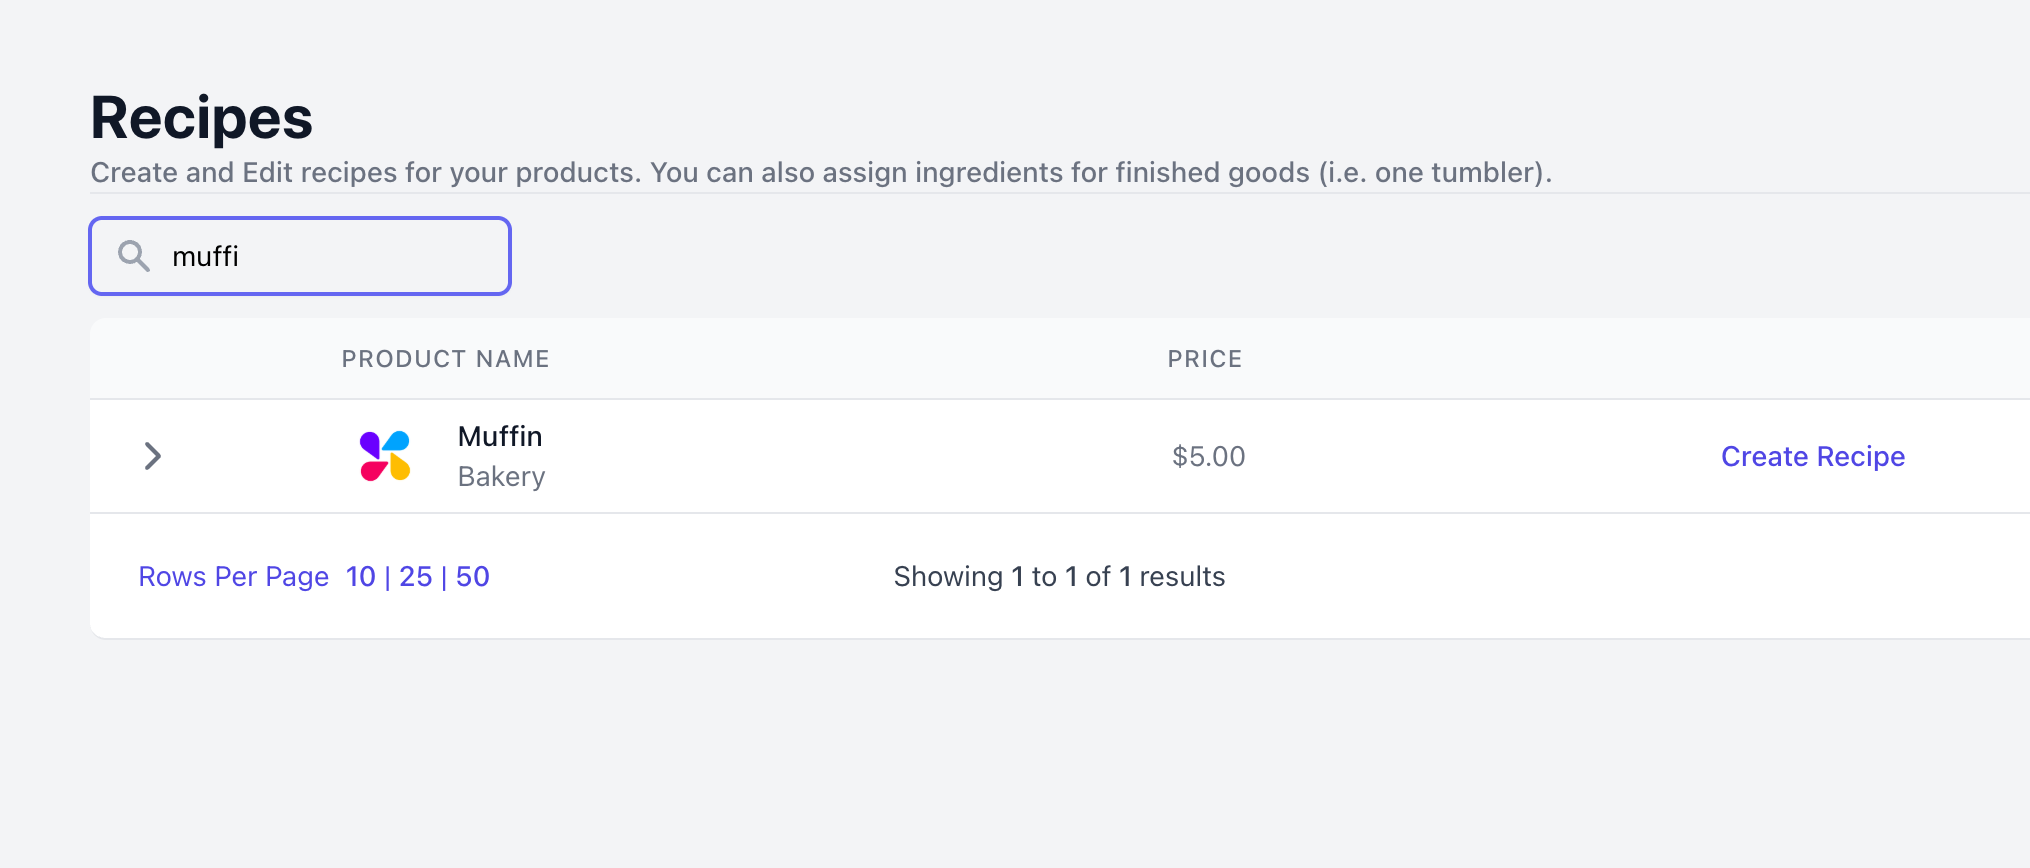
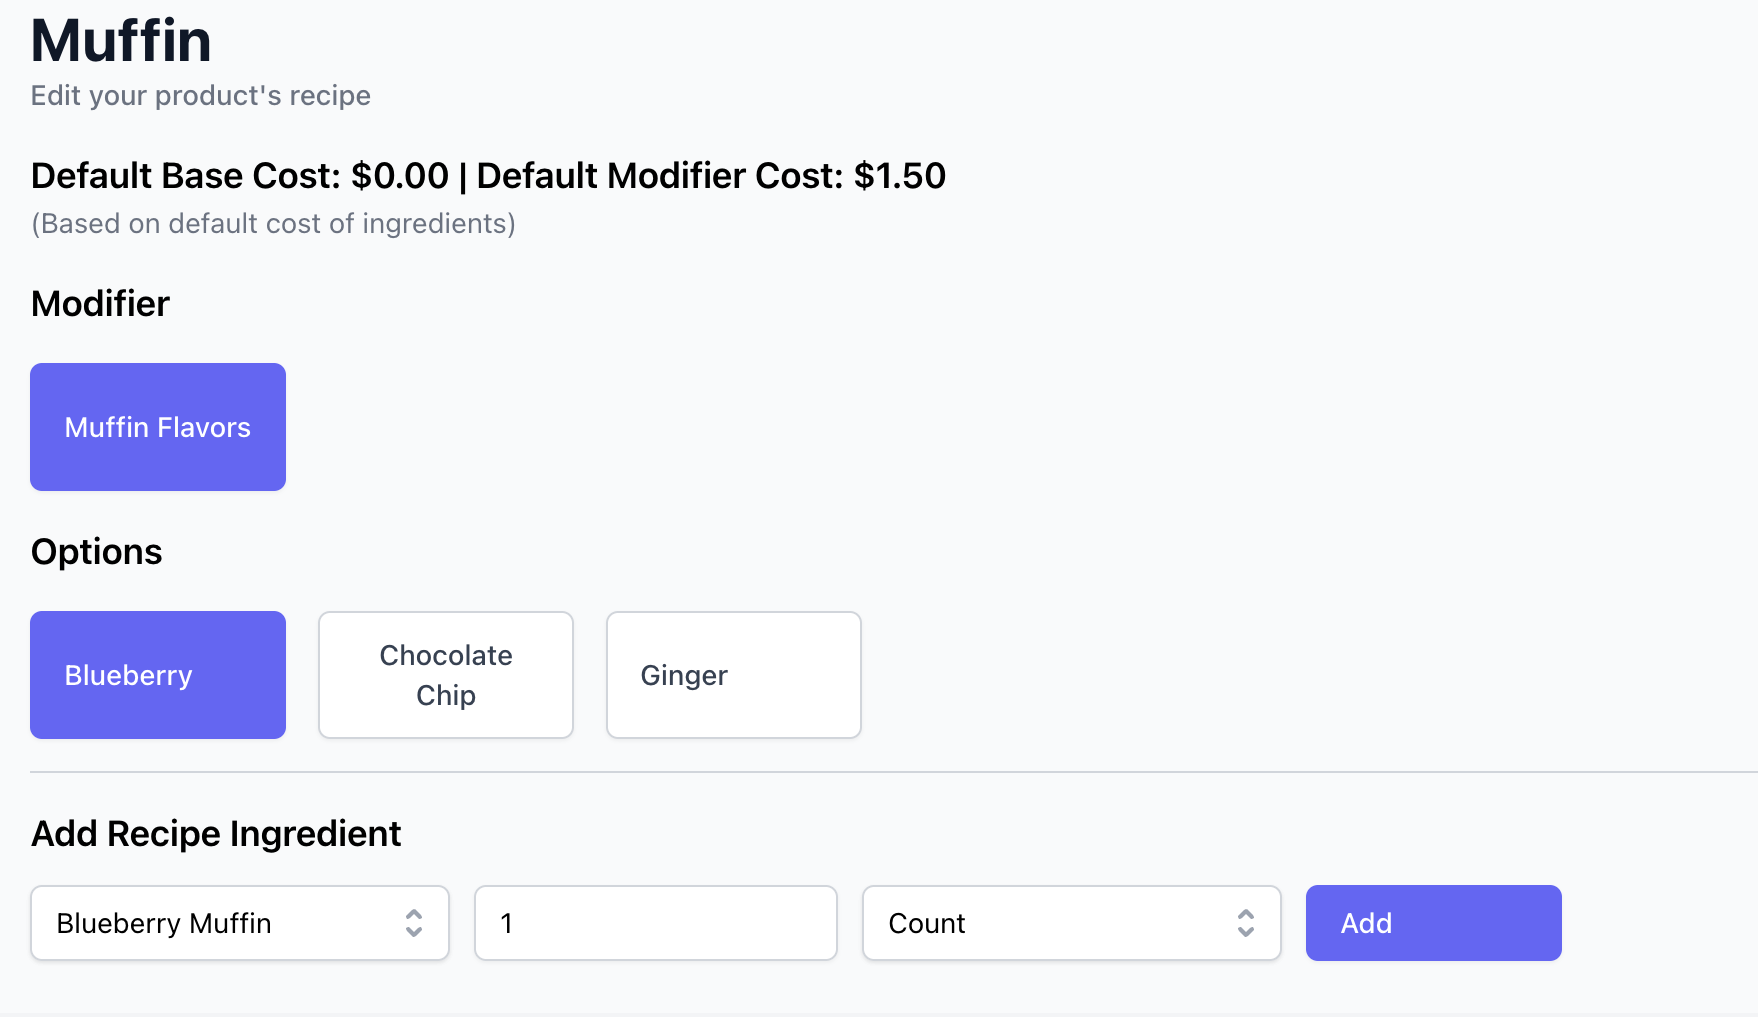
Product with Modifier Options
Product with Modifier Options
Use these steps if you have a product with modifier options acting as a singular flavor/type/choice, i.e. product is muffins and has various flavor option modifiers
Create Ingredients
Create a singular ingredient for each modifier choice (i.e., an ingredient for each muffin flavor)