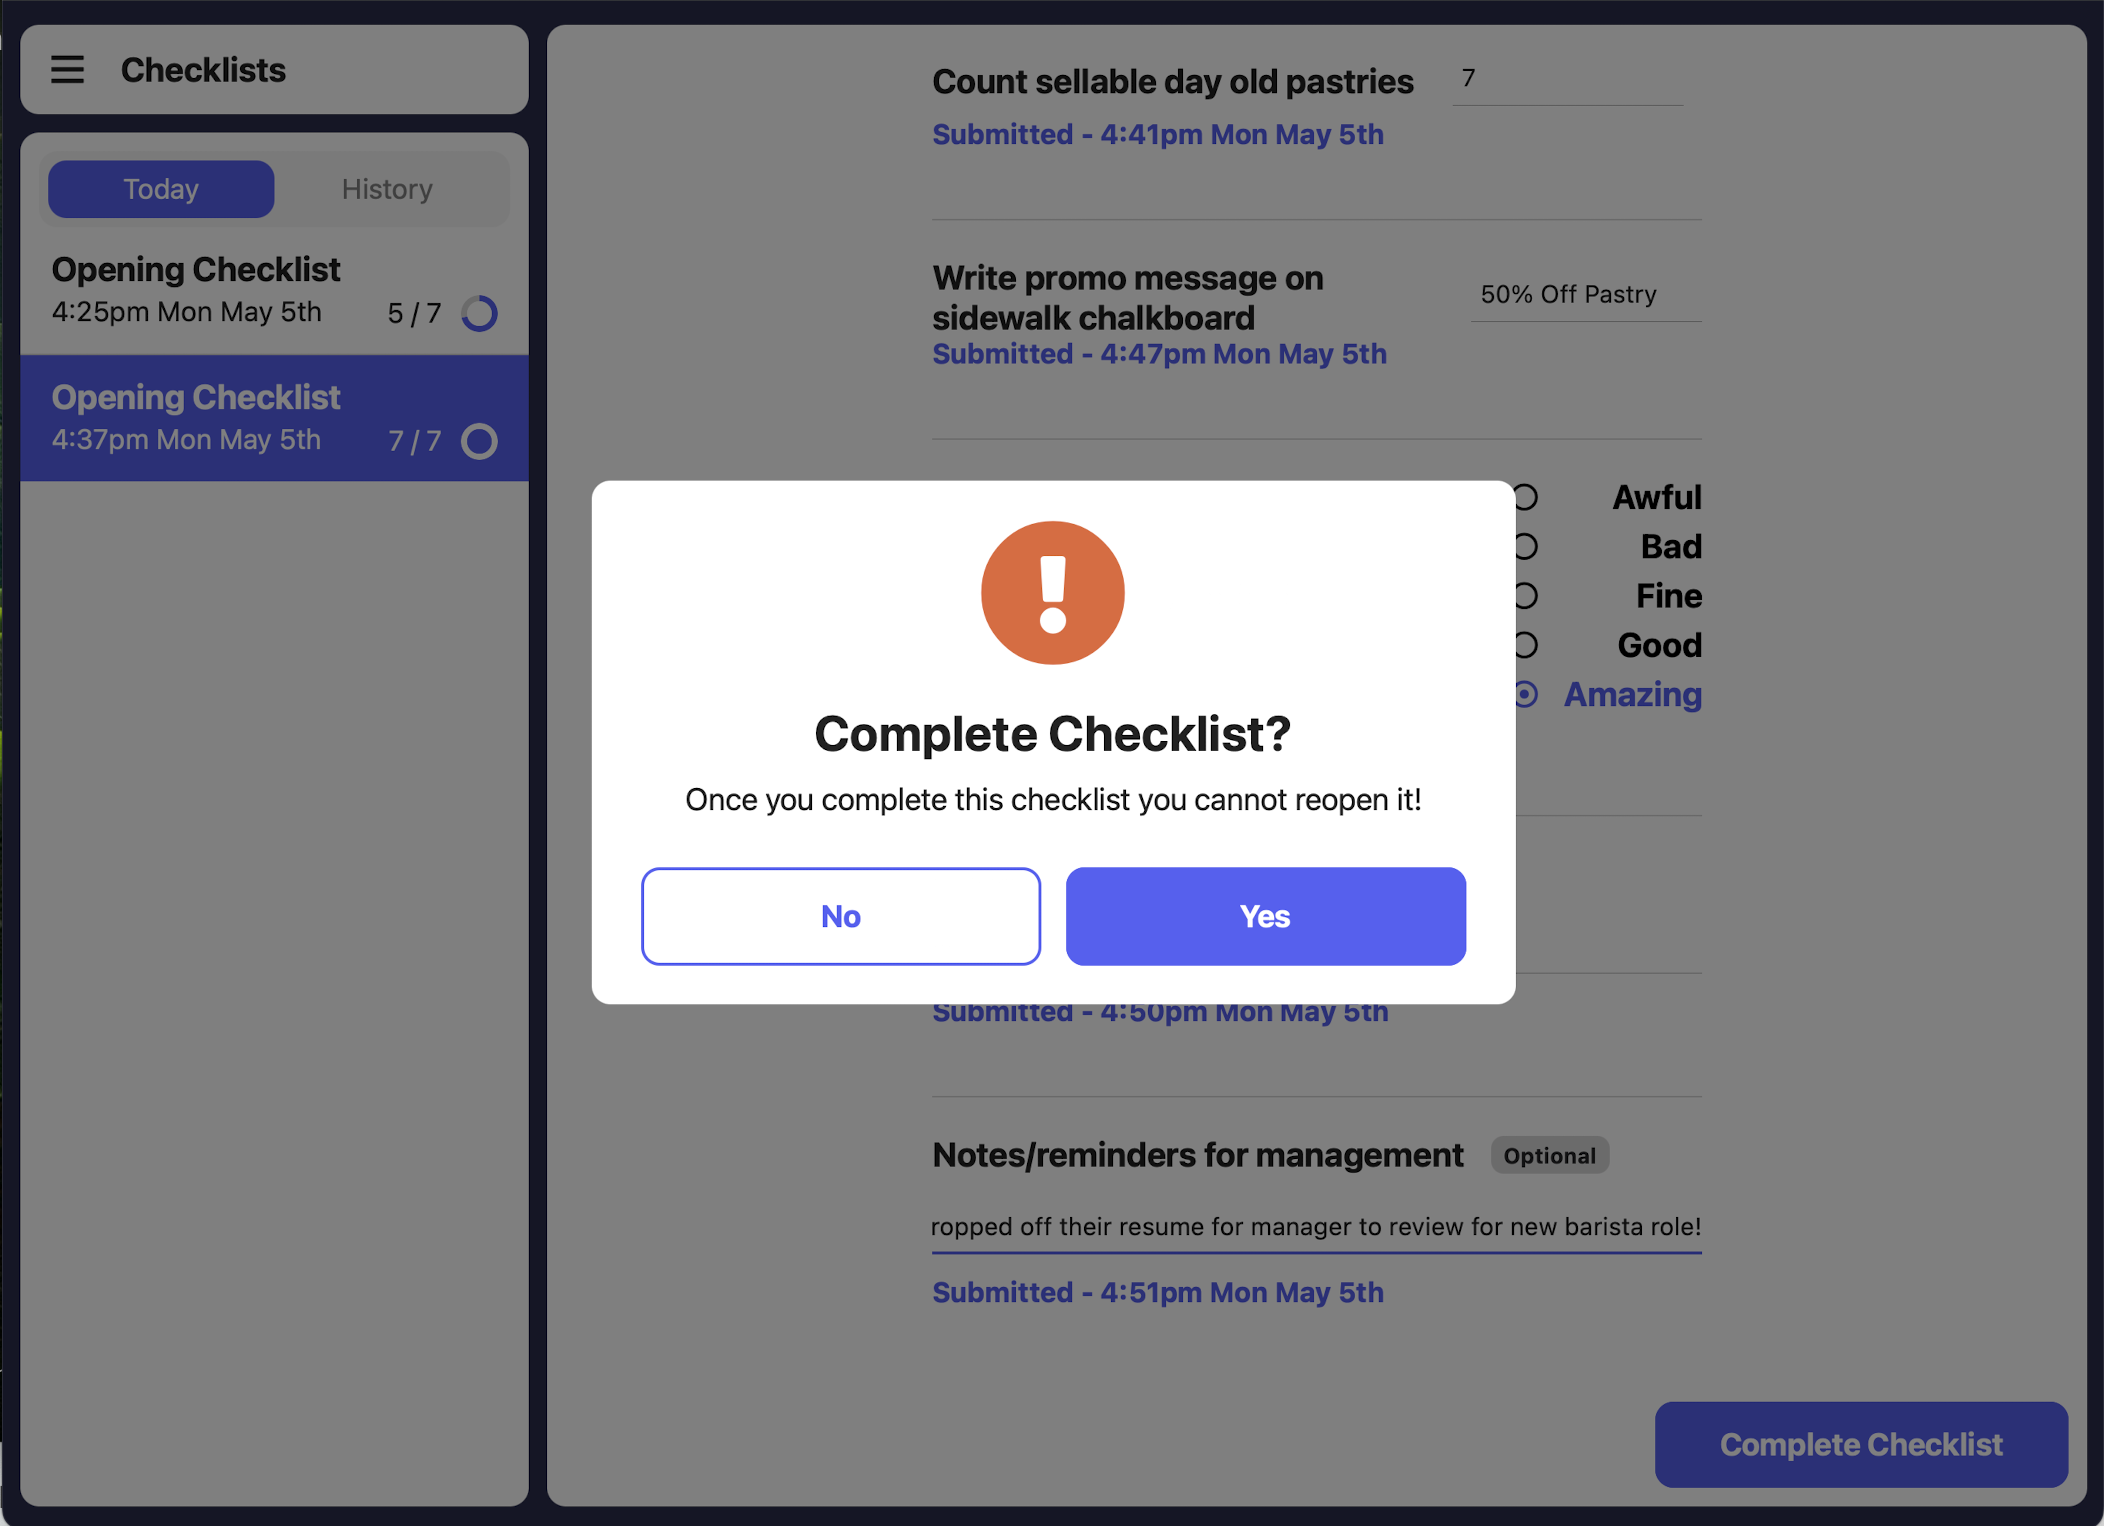
Dripos checklists allows you to create tasks for your employees to finish, on a schedule of your choosing.

You can create, customize, and manage checklists from the Web Dashboard. Employees will then be able to access and complete these tasks on the Point of Sale.

Create Checklists on the Web Dashboard

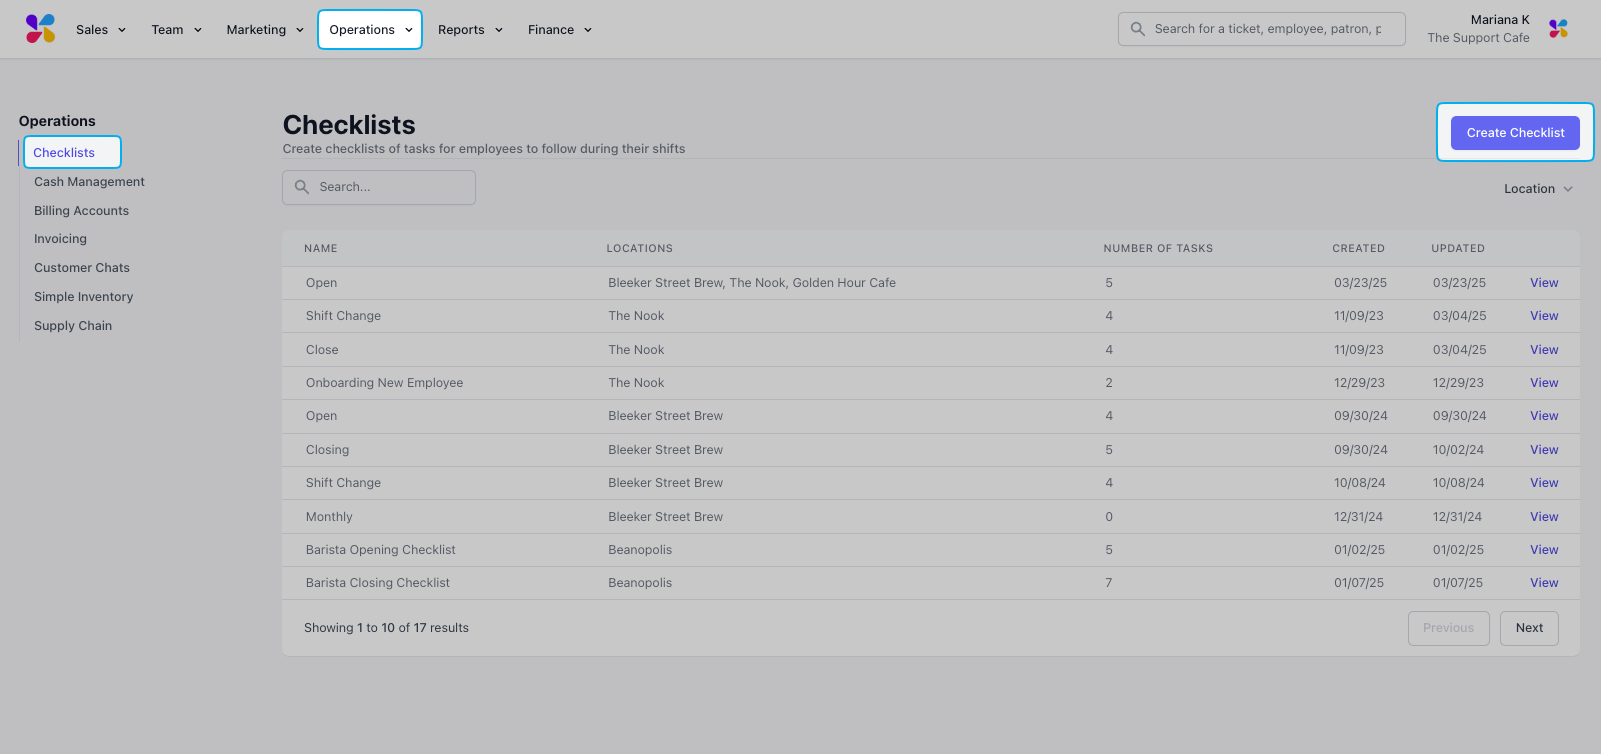
  1. Log on to the Web Dashboard. Once signed in, select Operations > Checklists:
  1. Click on the Create Checklist button in the top right corner:
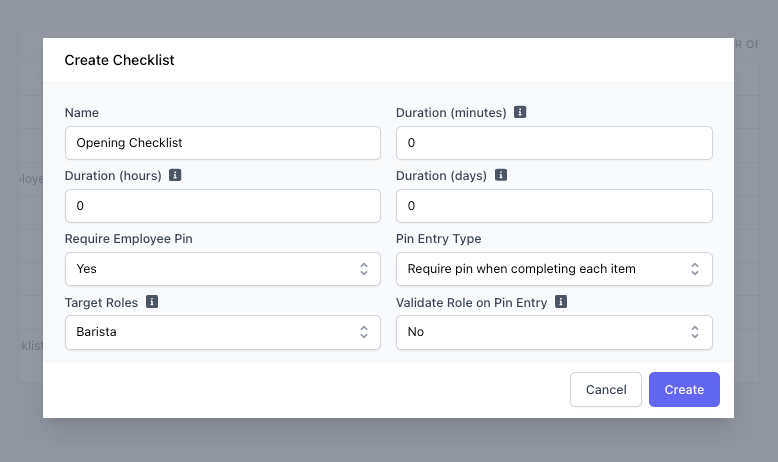
  1. This will prompt a pop-up to appear where you will need to fill in the following information:

Name: This will be the title of your checklist.

Duration: Here, you can set a limit for how long your employees have to complete this checklist once it appears on the Point of Sale.

Require Employee PIN: If this is set to yes, employees will need to enter their individual PIN in order to complete checklist tasks, and the checklist history will reflect who completed each task.

Pin Entry Type (If Require Employee PIN is Set to Yes): Here, you can choose whether to require the employee entry PIN for each checklist item or once when closing the checklist.

After you have finished filling in these fields, click Create.

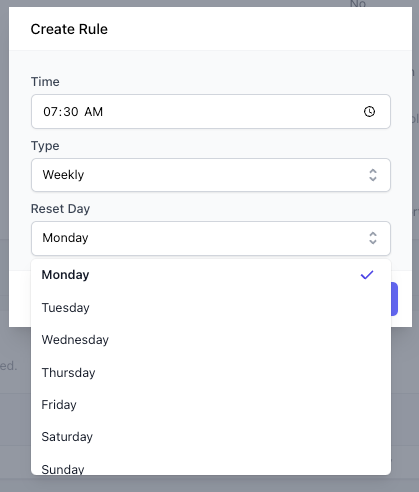
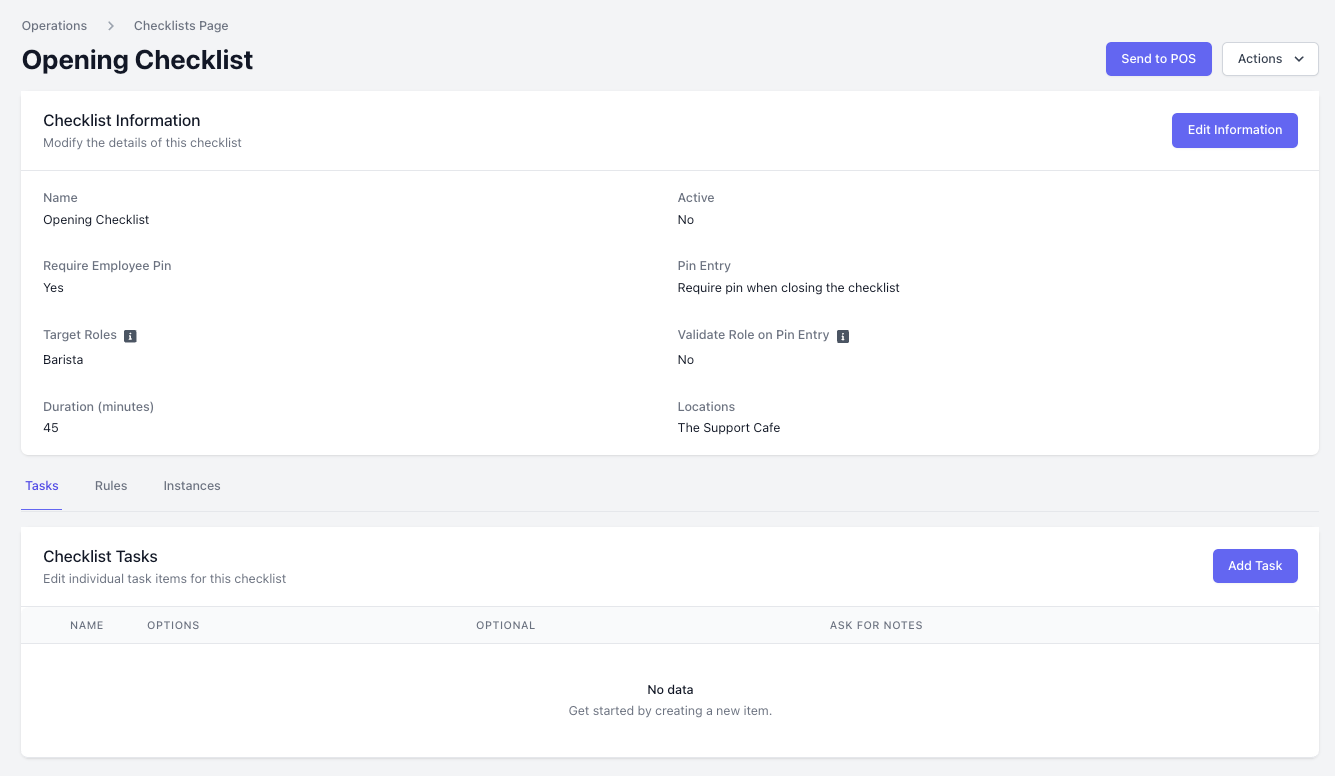
  1. You will then be directed to the settings page of the checklist. Here, you can create individual tasks for the checklist, set rules for when you want them to appear on your POS device, and view instances of when they’re completed.

You must create a Rule in order for your checklist tasks to appear on the POS.


Add Checklists Tasks

Create Checklist Tasks on the Web Dashboard

  1. Log on to the Web Dashboard. Once signed in, select Operations > Checklists:
  1. Locate the checklist you want to attach a task to > click View:
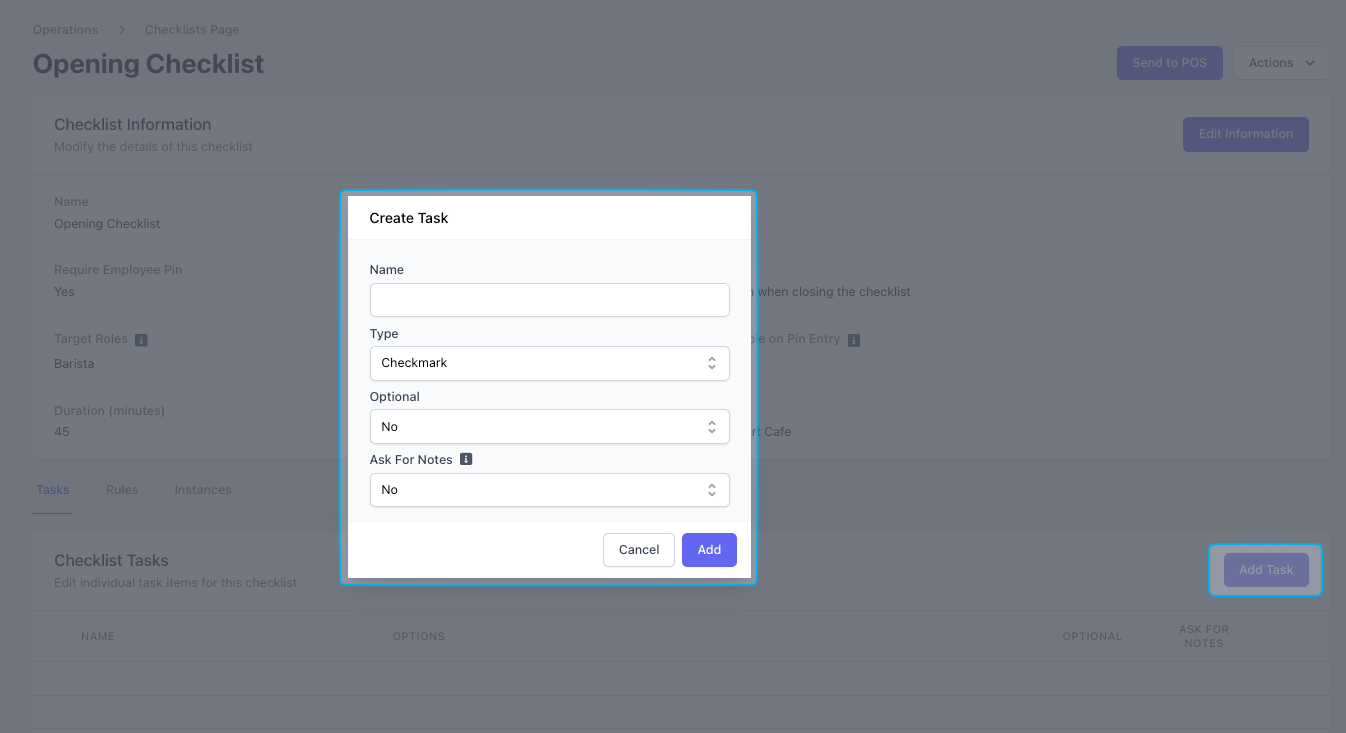
  1. Once on the checklist’s information page, click on the Tasks tab at the bottom of the screen and click Add Task:
  1. This will prompt a pop-up to appear where you will need to enter the task information:

Name: The name for the task.

Type: Select the task type that best suits your needs: Checkmark, Yes or No, Number, Short Answer, Long Answer, Dropdown, Radio Select, Picture, Temperature, Rating.

Optional: Choose if completing this task is optional.

Ask for Notes: Choose whether to ask additional notes upon completion of the task.

  1. Once you are done, click Add:

The next time your shop opens, the task will be displayed under the checklist on your Point of Sale.

Editing and Deleting Tasks on the Web Dashboard

  1. Log on to the Web Dashboard. Once signed in, select Operations > Checklists:
  1. Locate the checklist you want to edit > click View:
  1. Once on the checklist’s information page, click on the Tasks tab at the bottom of the screen and click Edit on the specific task you want to modify:
  1. This will prompt a pop-up to appear where you can edit or delete the task:

Checklist Task Types

There are seven different task types you can select from when creating a checklist:

Checkmark: If selected, employees will need to click on the box next to a particular task to confirm that it has been completed. Checkmark tasks will initially be displayed on the Point of Sale with a faded grey checkmark.

Once these tasks are marked as completed, which will require you to click on the greyed out checkmark. The checkmark will automatically turn blue:

Yes or No: If selected, employees will need to select either yes or no in response to a question.

Before yes or no tasks are completed, both options will appear grayed out. Tap either of these options to complete the task:

Number: If selected, employees will need to enter a numeric value to complete a task.

To complete the task, simply type in a number into the respective field and click Enter. A ‘0’ will be displayed in the field until the number task is completed:

Short Answer: If selected, employees will need to write a short response next to the respective task in order to mark it as completed.

Long Answer: If selected, employees will need to write a longer response next to the respective task in order to mark it as completed.

Dropdown: If selected, employees will need to select a response from a list of options in order to mark a task as completed.

You can customize these options yourself when creating a dropdown task on the Web Dashboard:

Radio Select: If selected, employees will need to choose a response option from a set of listed options, similarly to a multiple choice selection.

You can customize these options yourself when creating a radio select task on the Web Dashboard:

Picture: If selected, employees will need to upload a photo in order to mark a task as completed.

On the POS, an incomplete picture task will be accompanied by a button that says Take a Picture:

Temperature: If selected, employees will need to enter a numeric value to complete a task.

Until temperature tasks are finalized, a vacant line with faded text reading ‘enter number’ will be visible. To complete the task, simply type in a number into the respective field and click Enter.

Rating: If selected, employees will need to select from a list of several options.

Rating tasks are most suitable for checklists related to cleaning or maintaining the restaurant, such as a task named ‘Rate cleanliness of the bathroom’.

You can customize these options yourself when creating a rating task on the Web Dashboard:


Checklist Management

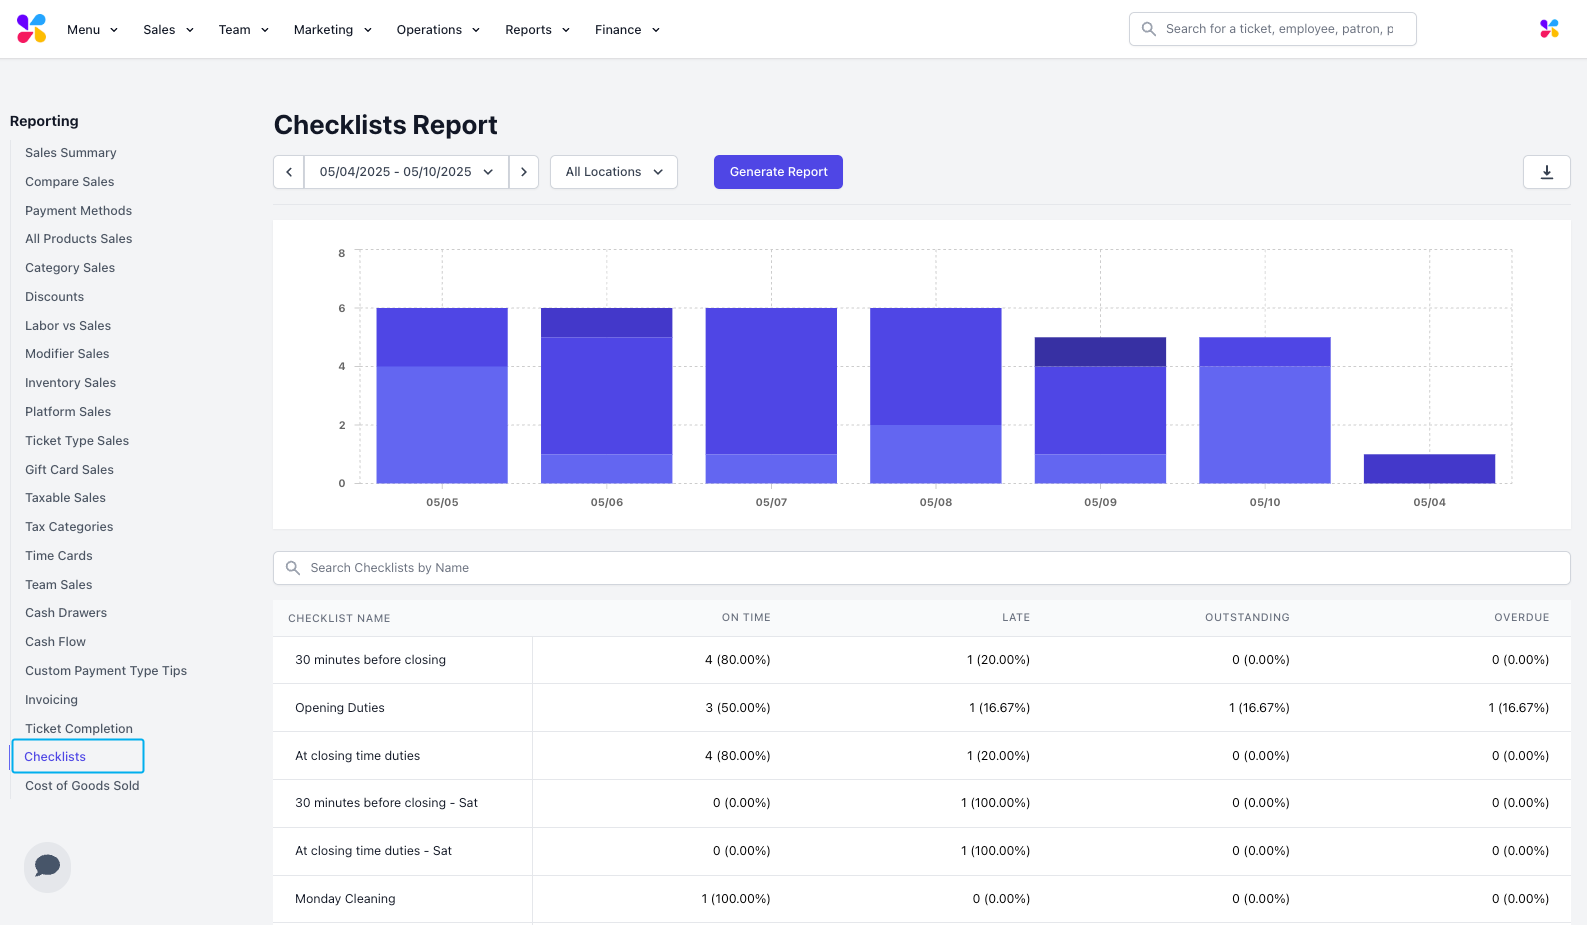
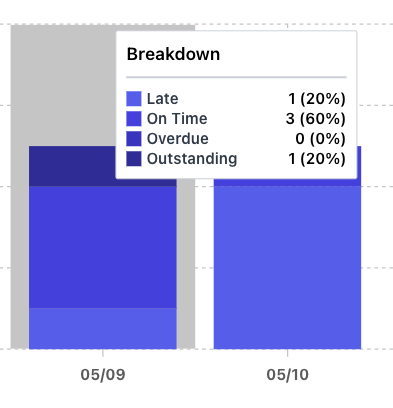
Managers and partners are able to access information about completed checklists and track the progress of your employees through the Dripos Web Dashboard and Point of Sale.

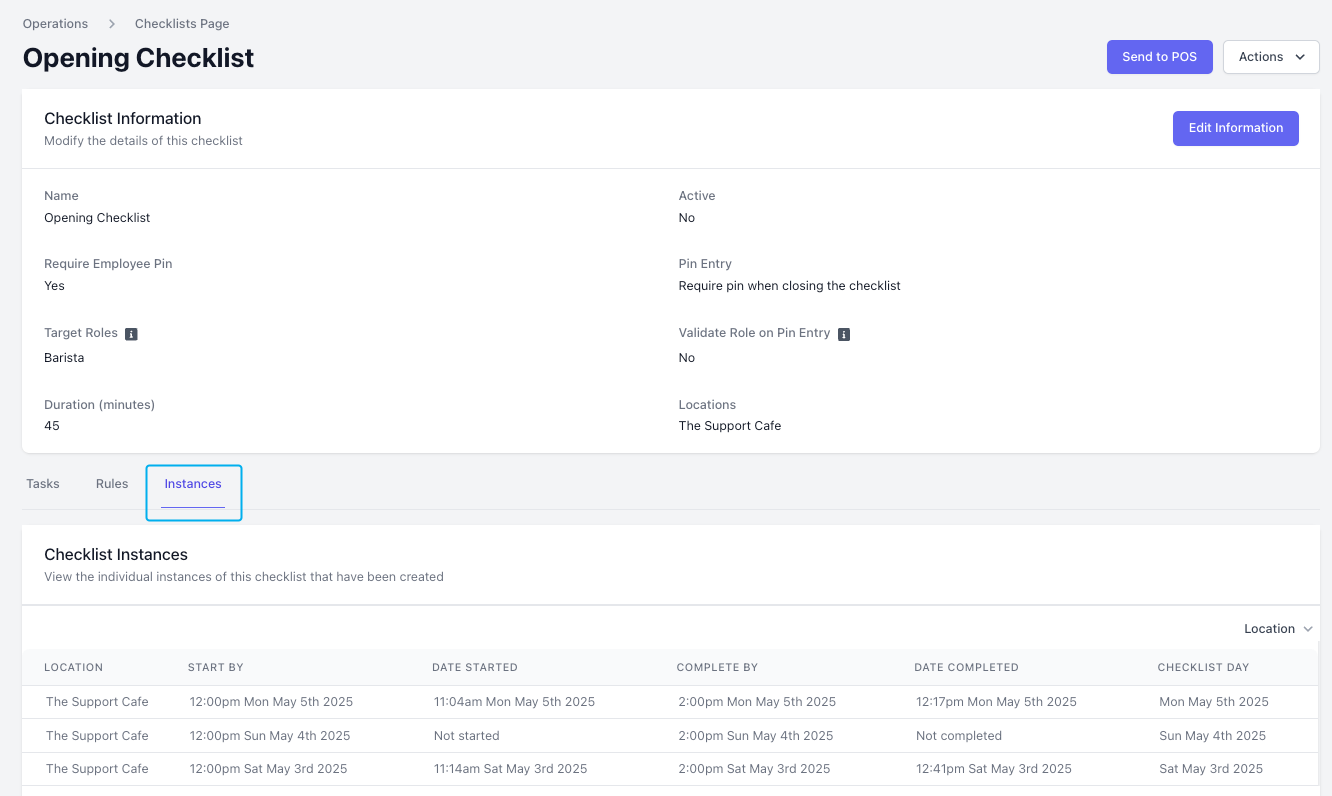
This allows you to easily view the status of checklists, identify the employees who have completed them, and determine the timestamps of their completion.

Access Information on Completed Checklists using the Web Dashboard

  1. Log on to the Web Dashboard. Once signed in, select Operations > Checklists:
  1. Locate the checklist you want to attach a task to > click View:
  1. Once on the checklist’s information page, click on the Instances tab to view when the checklist has been created and completed:

Access Information on Completed Checklists using the POS

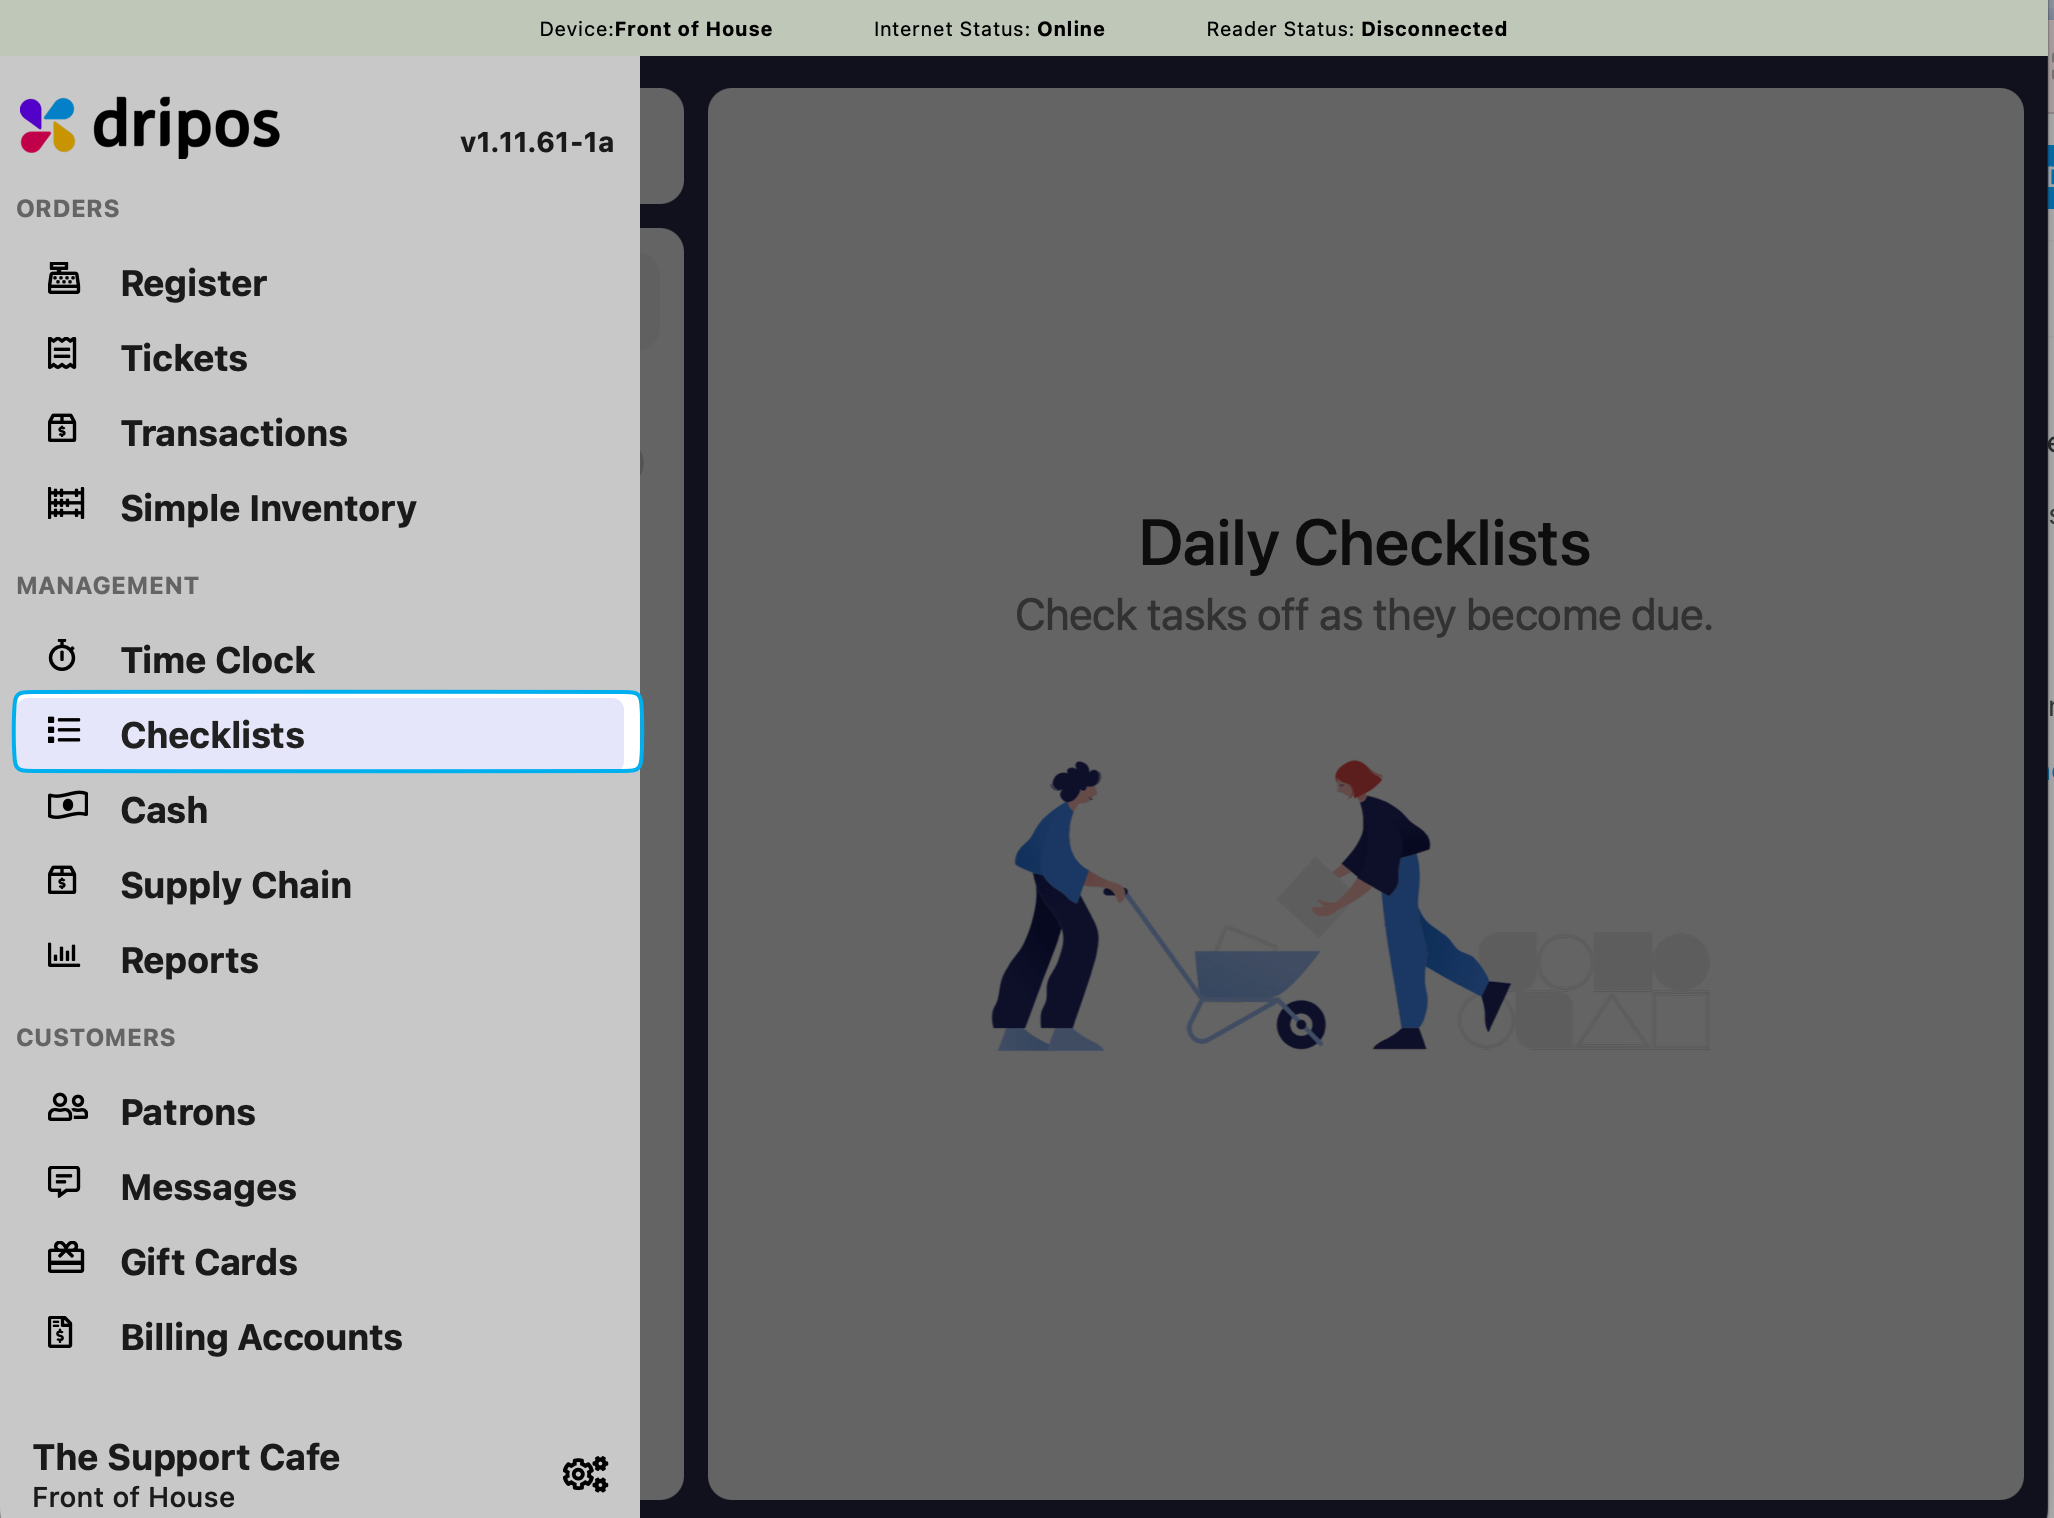
  1. Log on to the Point of Sale. Once signed in, click on the 3 line icon at the top left of the screen > Checklists:
  1. To view the history of a checklist, click the History tab on the left:
  1. Click on the specific checklist you want to view the history for.

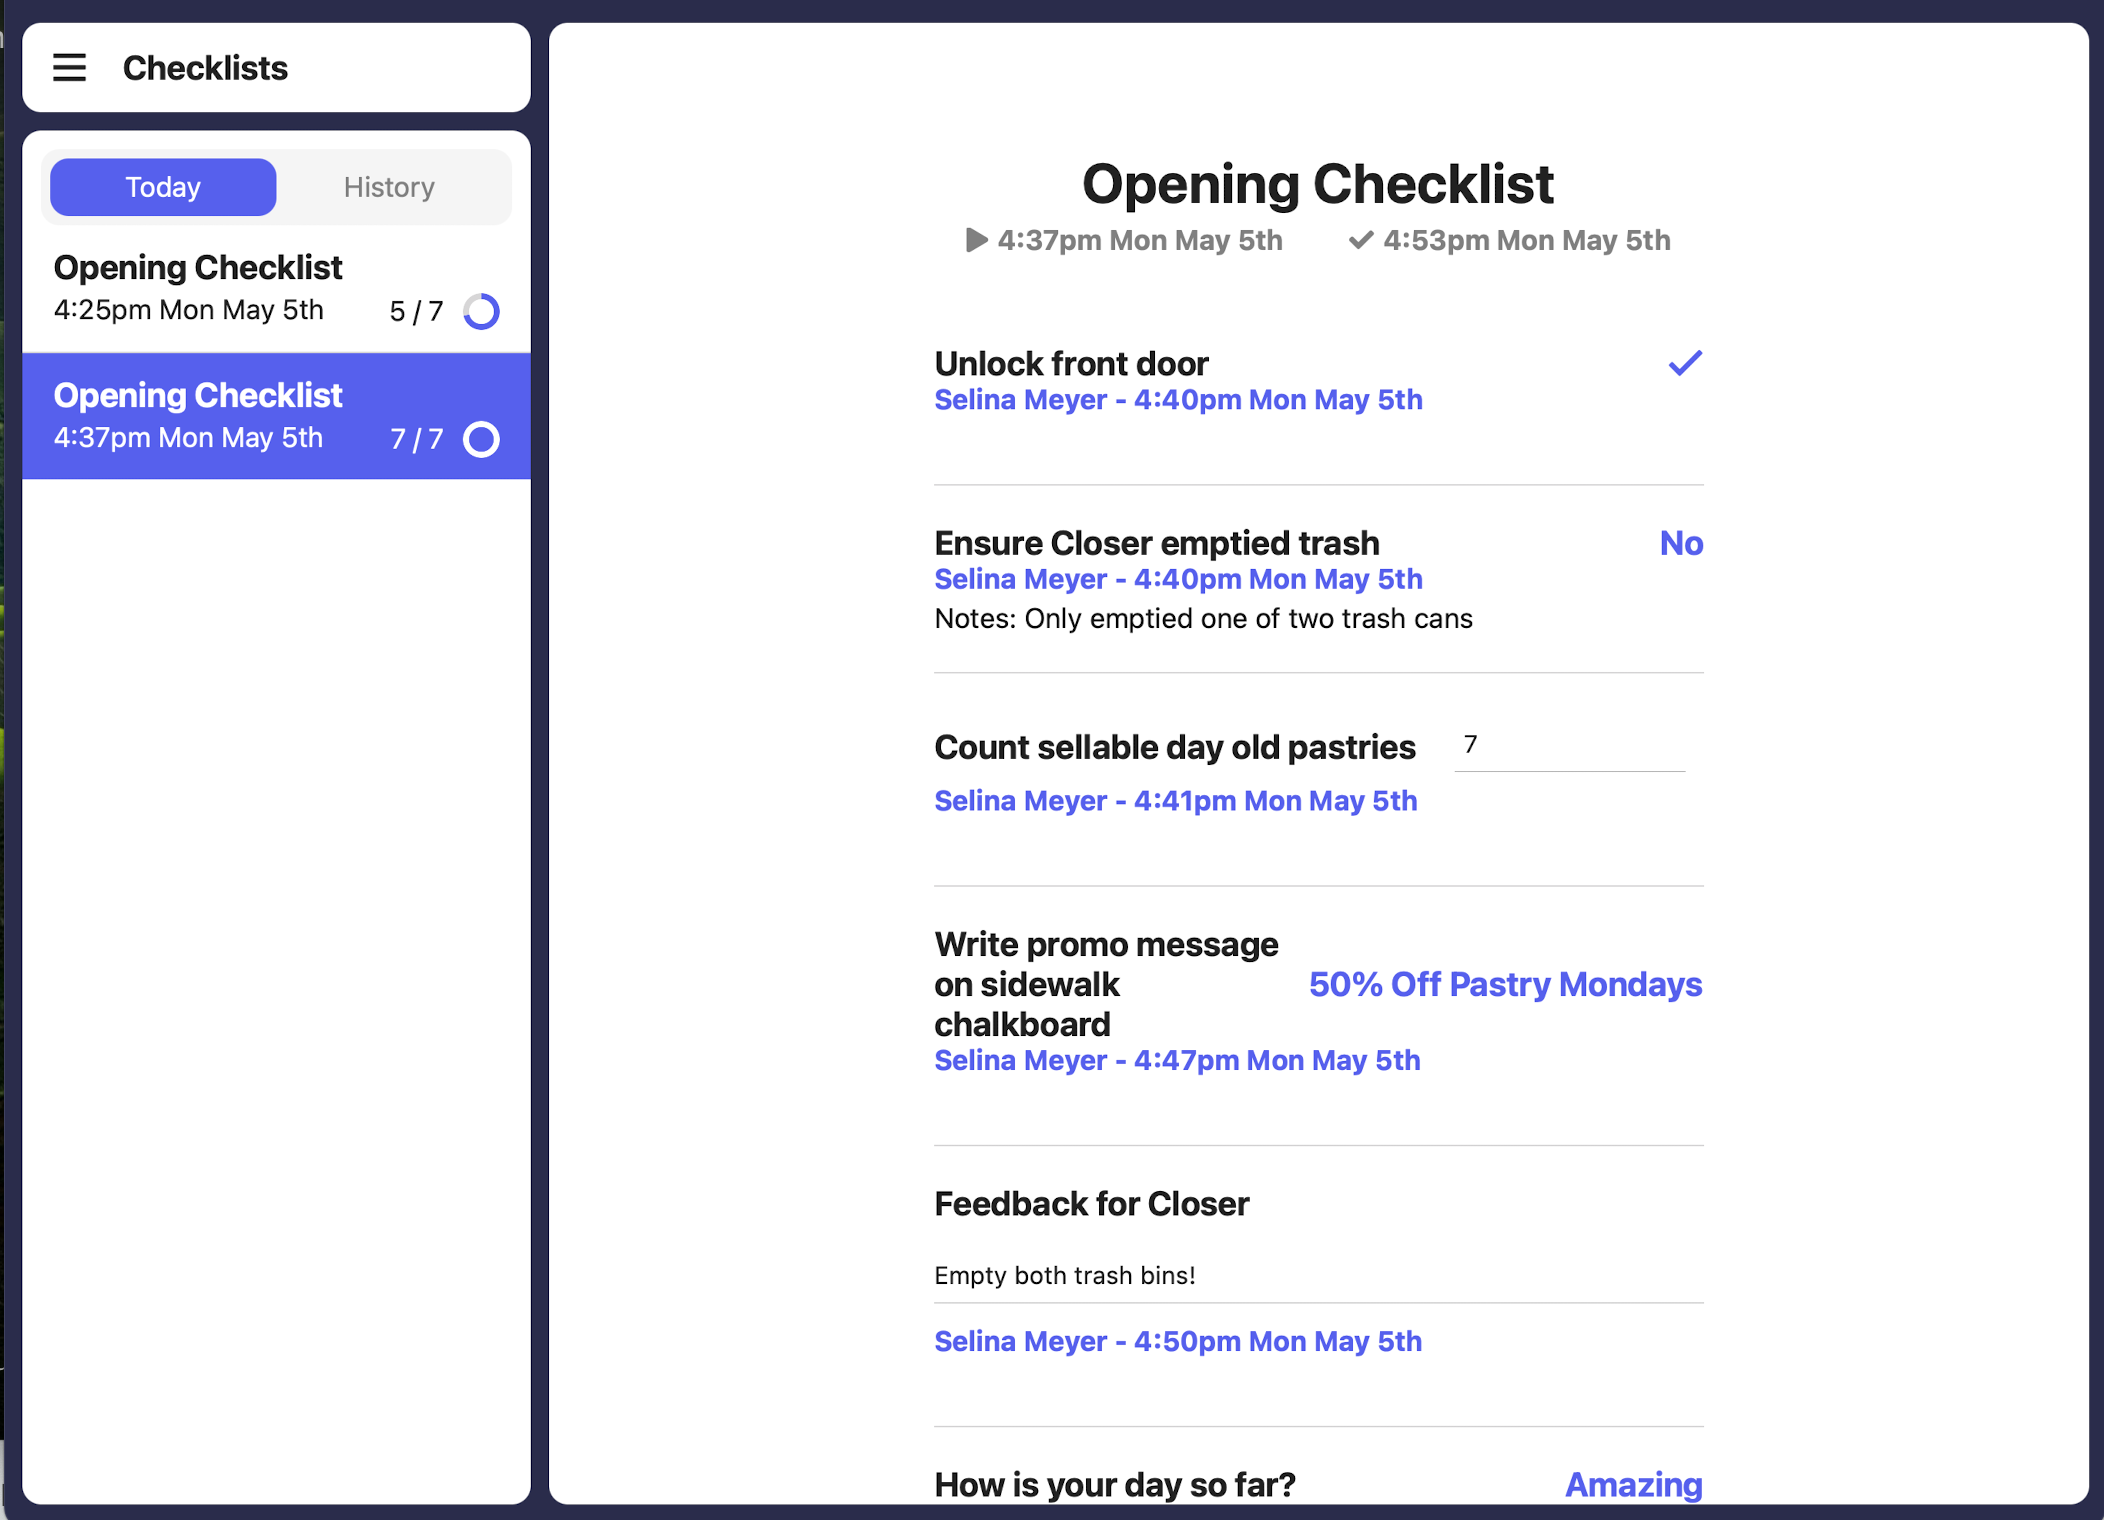
  2. Under the individual checklist’s title, two times will be displayed: the time that the checklist first appeared on the POS, which will be displayed in grey, and the time that the checklist was fully completed, which will be displayed in red:

  1. If an employee PIN was required for the checklist, completed tasks will also list the name of the employee that completed them, as well as the date and time at which the task was finished:

Missed Checklists

Checklists that are incomplete will not display times. Instead, they will be labeled as “Was Missed” in the checklist history:

Edit Checklists on the Web Dashboard

  1. Log on to the Web Dashboard. Once signed in, select Operations > Checklists:
  1. Locate the checklist you want to attach a task to > click View:
  1. Once on the checklist’s information page, click the Edit Information button:
  1. This will prompt a pop-up to appear where you can edit the checklist’s Name, Duration (in minutes), Require Employee PIN Setting, Pin Entry Type, and Active Status.
  1. Once you have finished making your desired modifications, click Save.

Deleting Checklists on the Web Dashboard

  1. Log on to the Web Dashboard. Once signed in, select Operations > Checklists:
  1. Locate the checklist you want to attach a task to > click View:
  1. Once on the checklist’s information page, click on the Actions button at the top right of the screen > select Delete Checklist:
  1. This will prompt a confirmation modal to appear. To delete the checklist, click Confirm: