Create an Employee
1
Create an Employee
On the Web Dashboard, click Team > My Team > Employees > Create Employee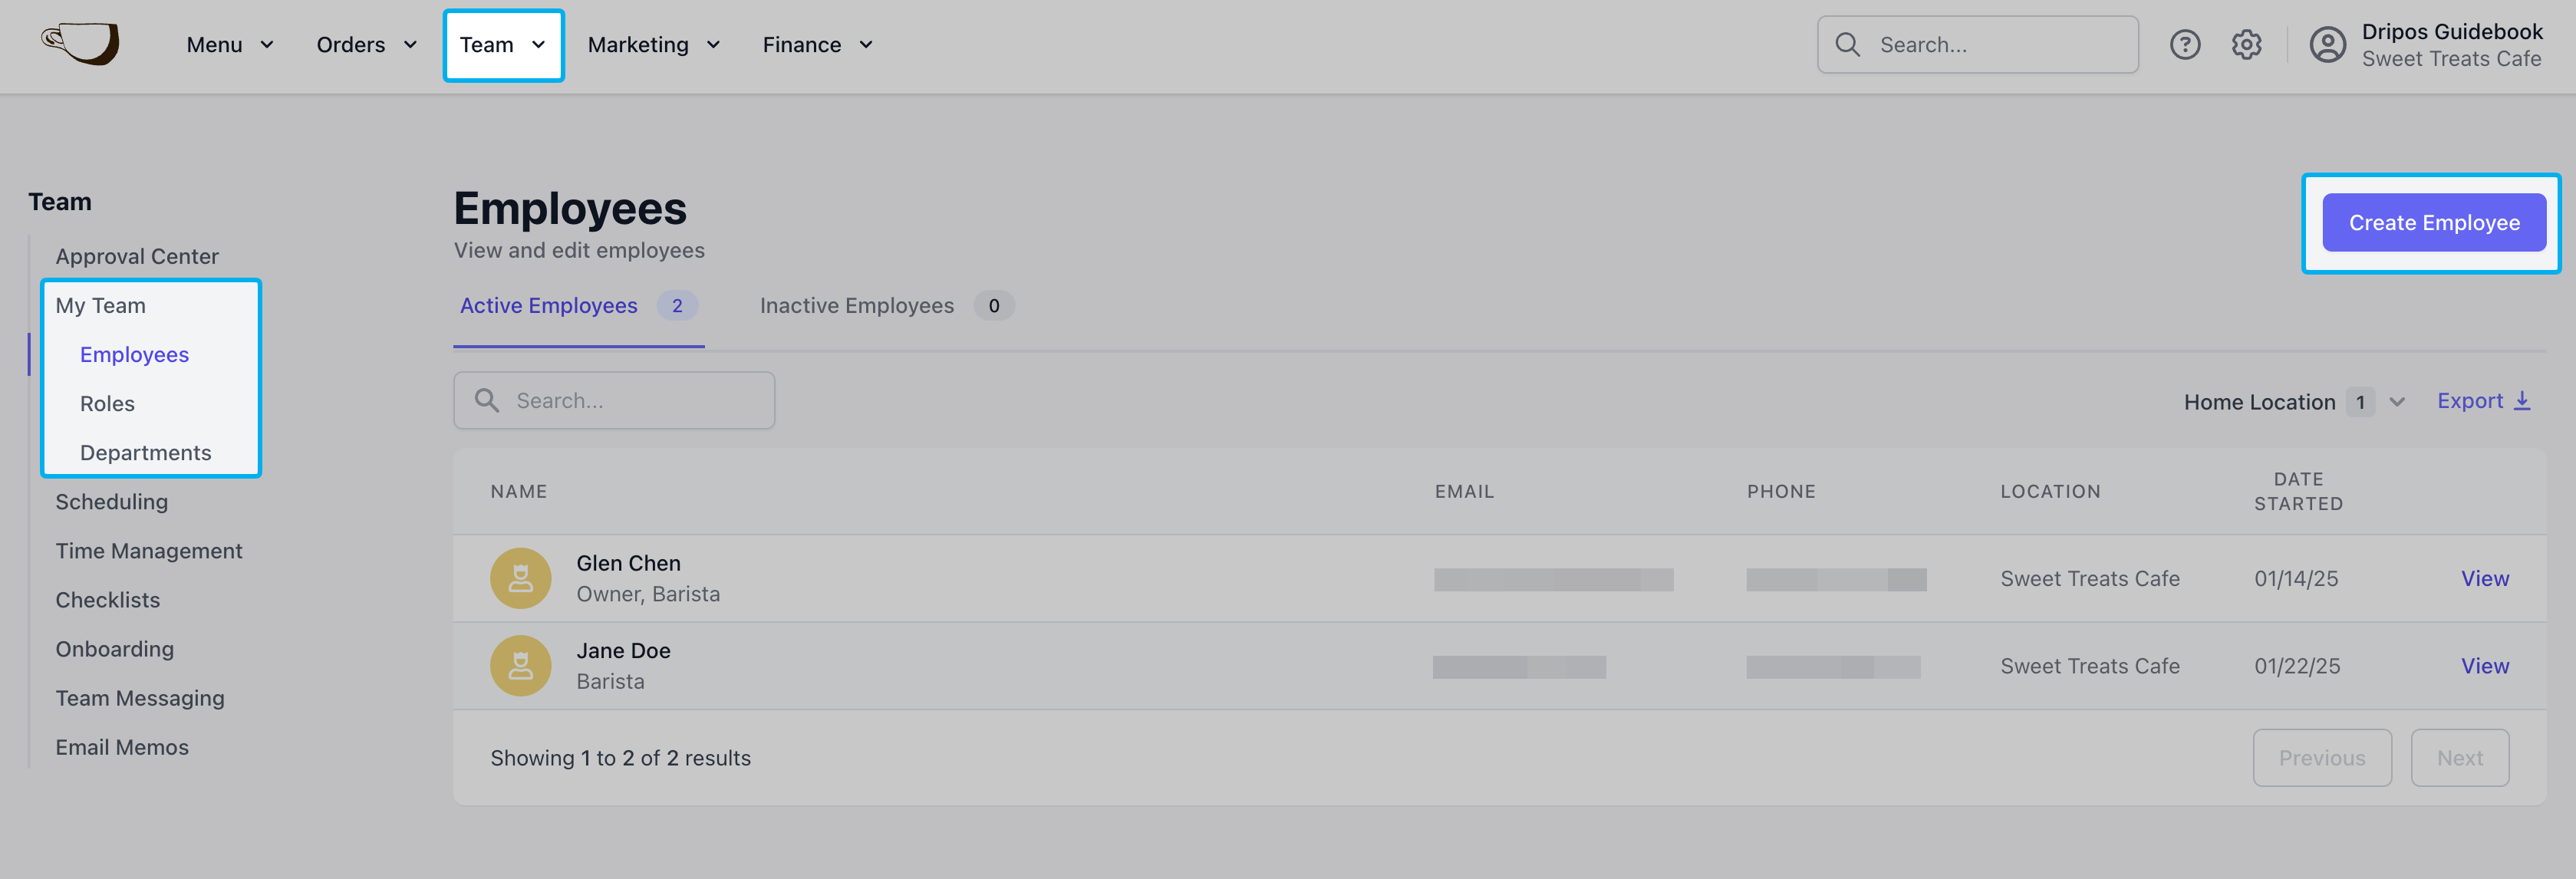
2
Complete Employee Information Fields
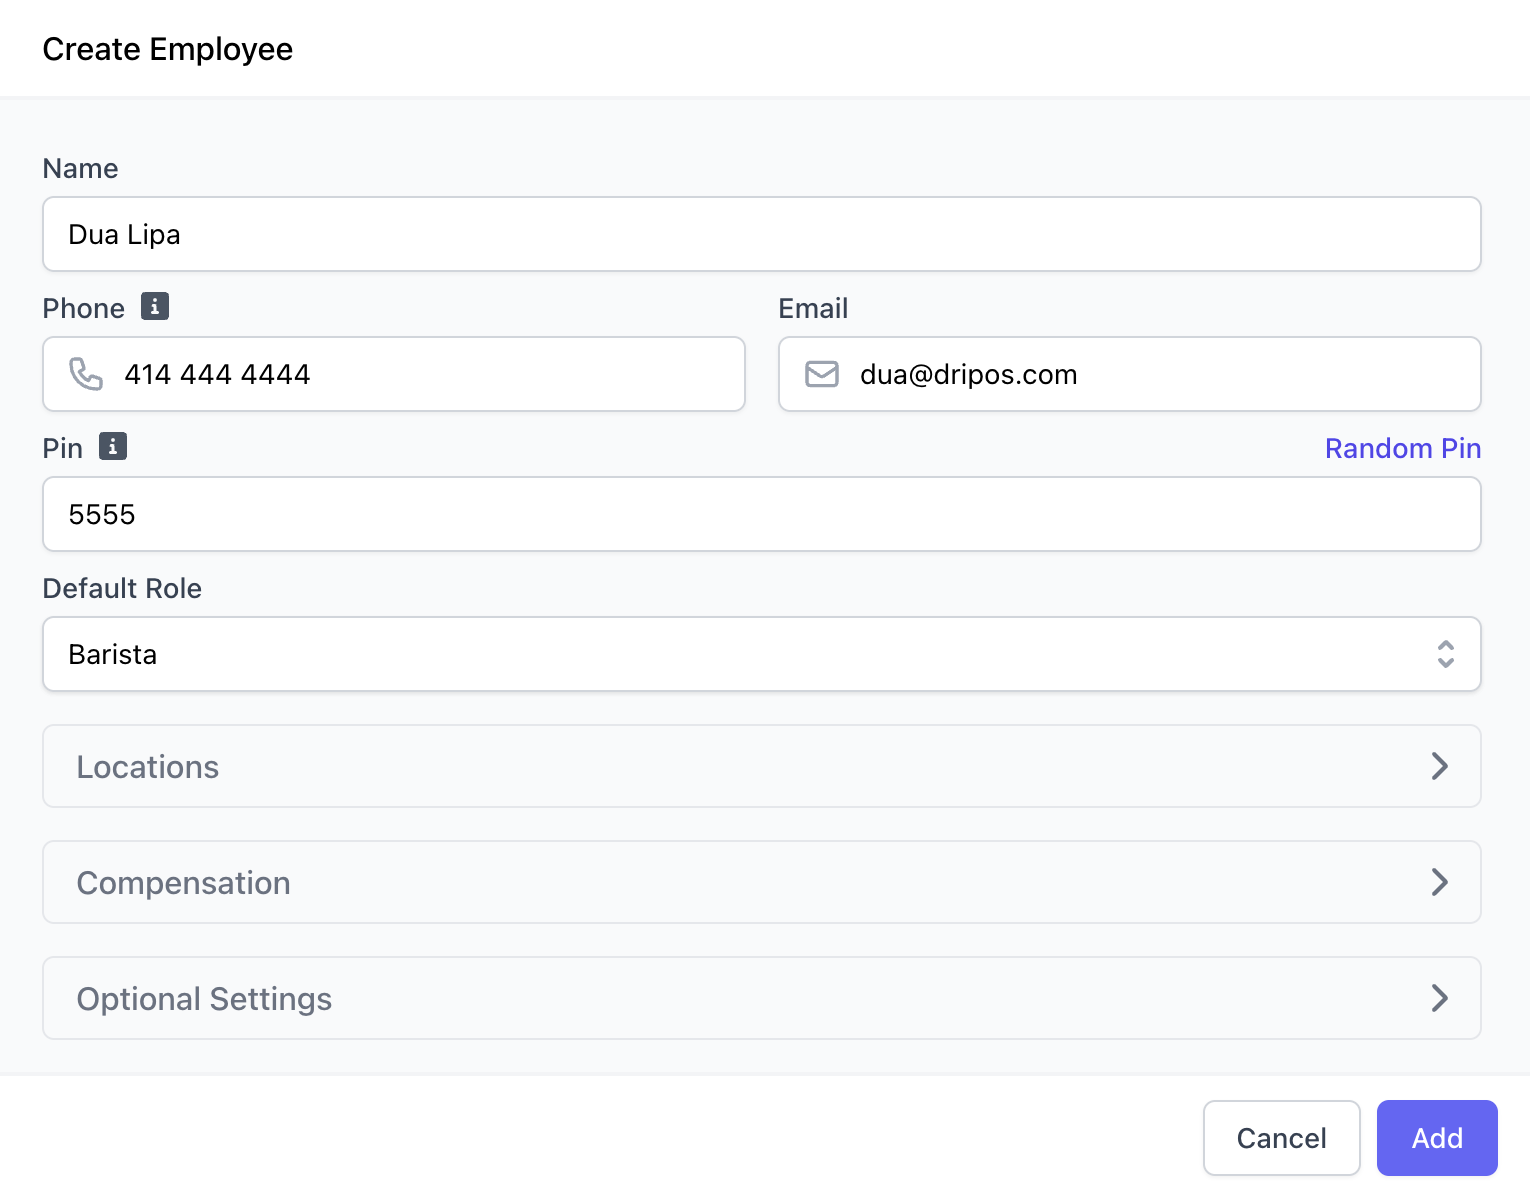
Phone
Phone
Ensure the employee’s phone number is their own unique number and is able to receive text messages.
PIN
PIN
Unique PIN used to clock in and access PIN protected settings, if applicable.
Default Role
Default Role
Role that the time clock defaults to unless otherwise selected.
3
Complete Location Fields
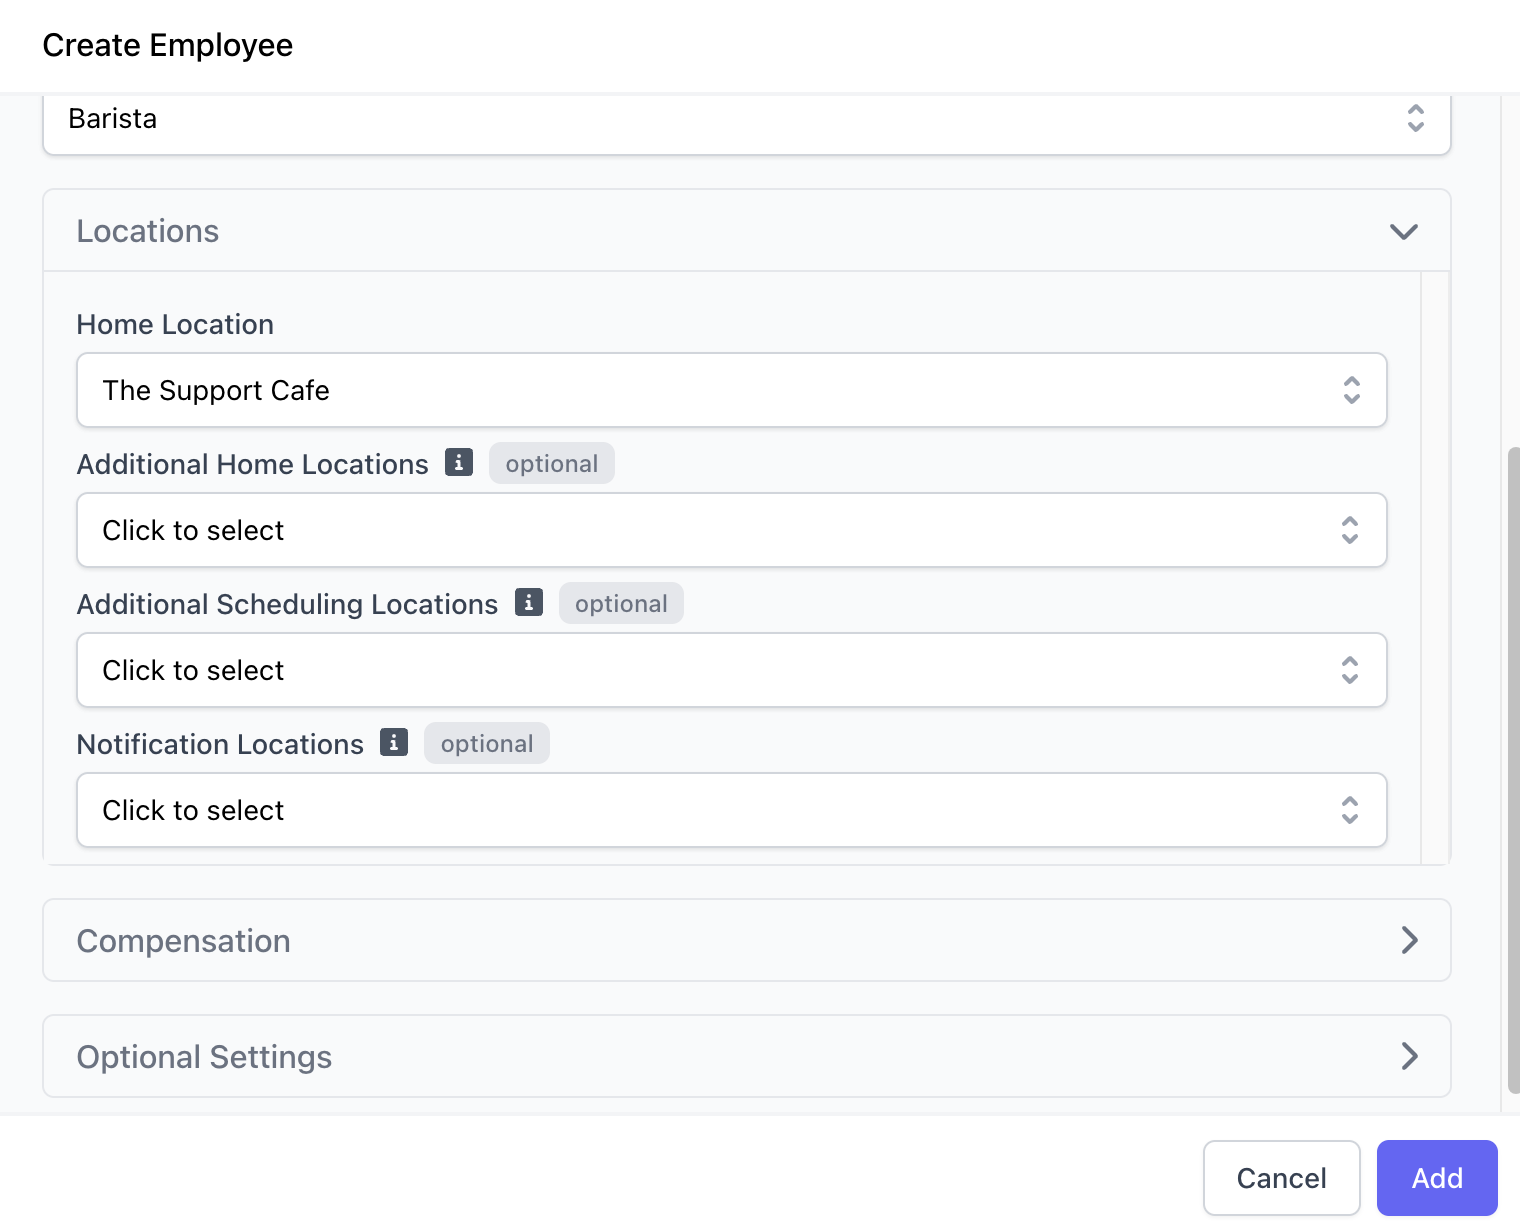
Home Location
Home Location
The primary location an employee has permissions at and is scheduled at.
Additional Home Locations
Additional Home Locations
Gives employees permissions to the following locations, in addition to their home location.
Additional Scheduling Locations
Additional Scheduling Locations
Additional locations besides the Home Location that an employee can be scheduled at.
Notification Locations
Notification Locations
Locations where the employee receives trade request and late clock-in notifications.
4
Complete Compensation Fields
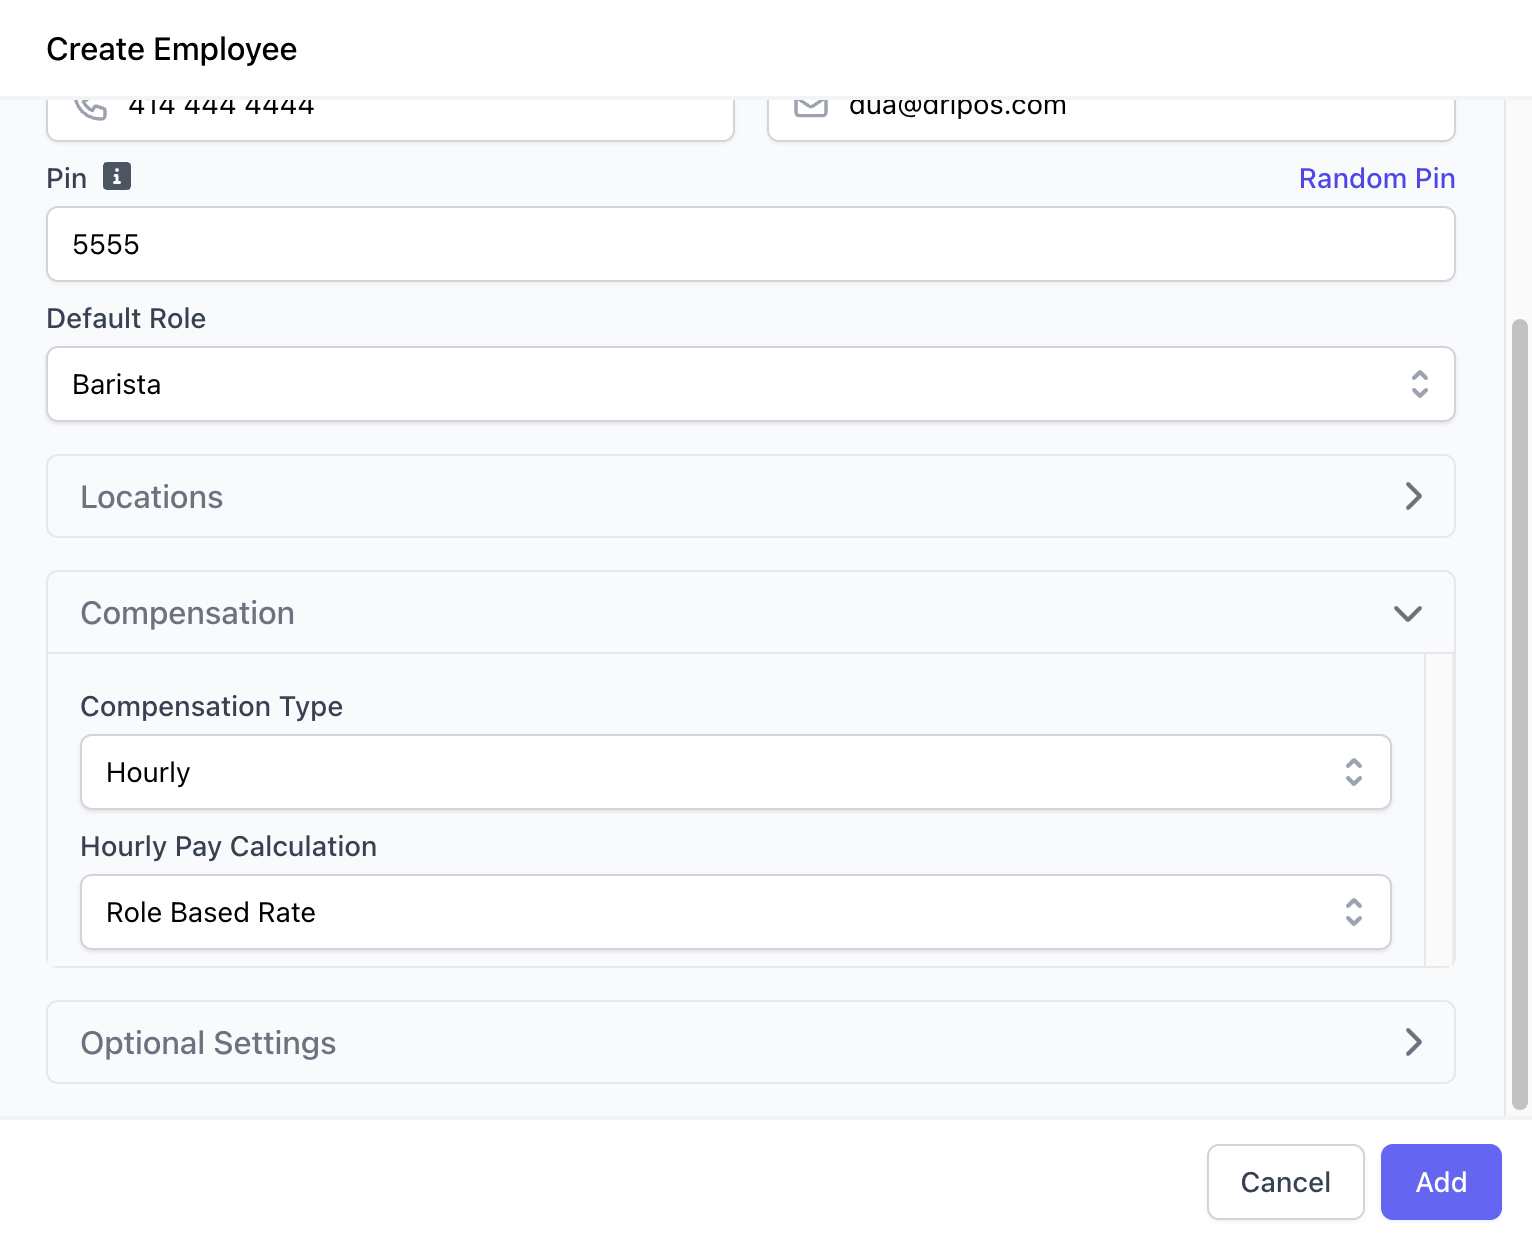
Compensation Type
Compensation Type
Hourly: Rate that employee will earn per hour clocked inSalary: Lumpsum amount that an employee will earn per year. Weekly pay will automatically be calculated at Salary ÷ 52 (i.e., a salary of $50,000 will have a weekly pay of $961.54)
Hourly Pay Calculation (Hourly Compensation Type Only)
Hourly Pay Calculation (Hourly Compensation Type Only)
Role Based Rate: Employee will be paid a rate that is assigned to the role they clock in withEmployee Specific Rate: Employee will be paid a rate specific to their individual self
5
Optional Settings
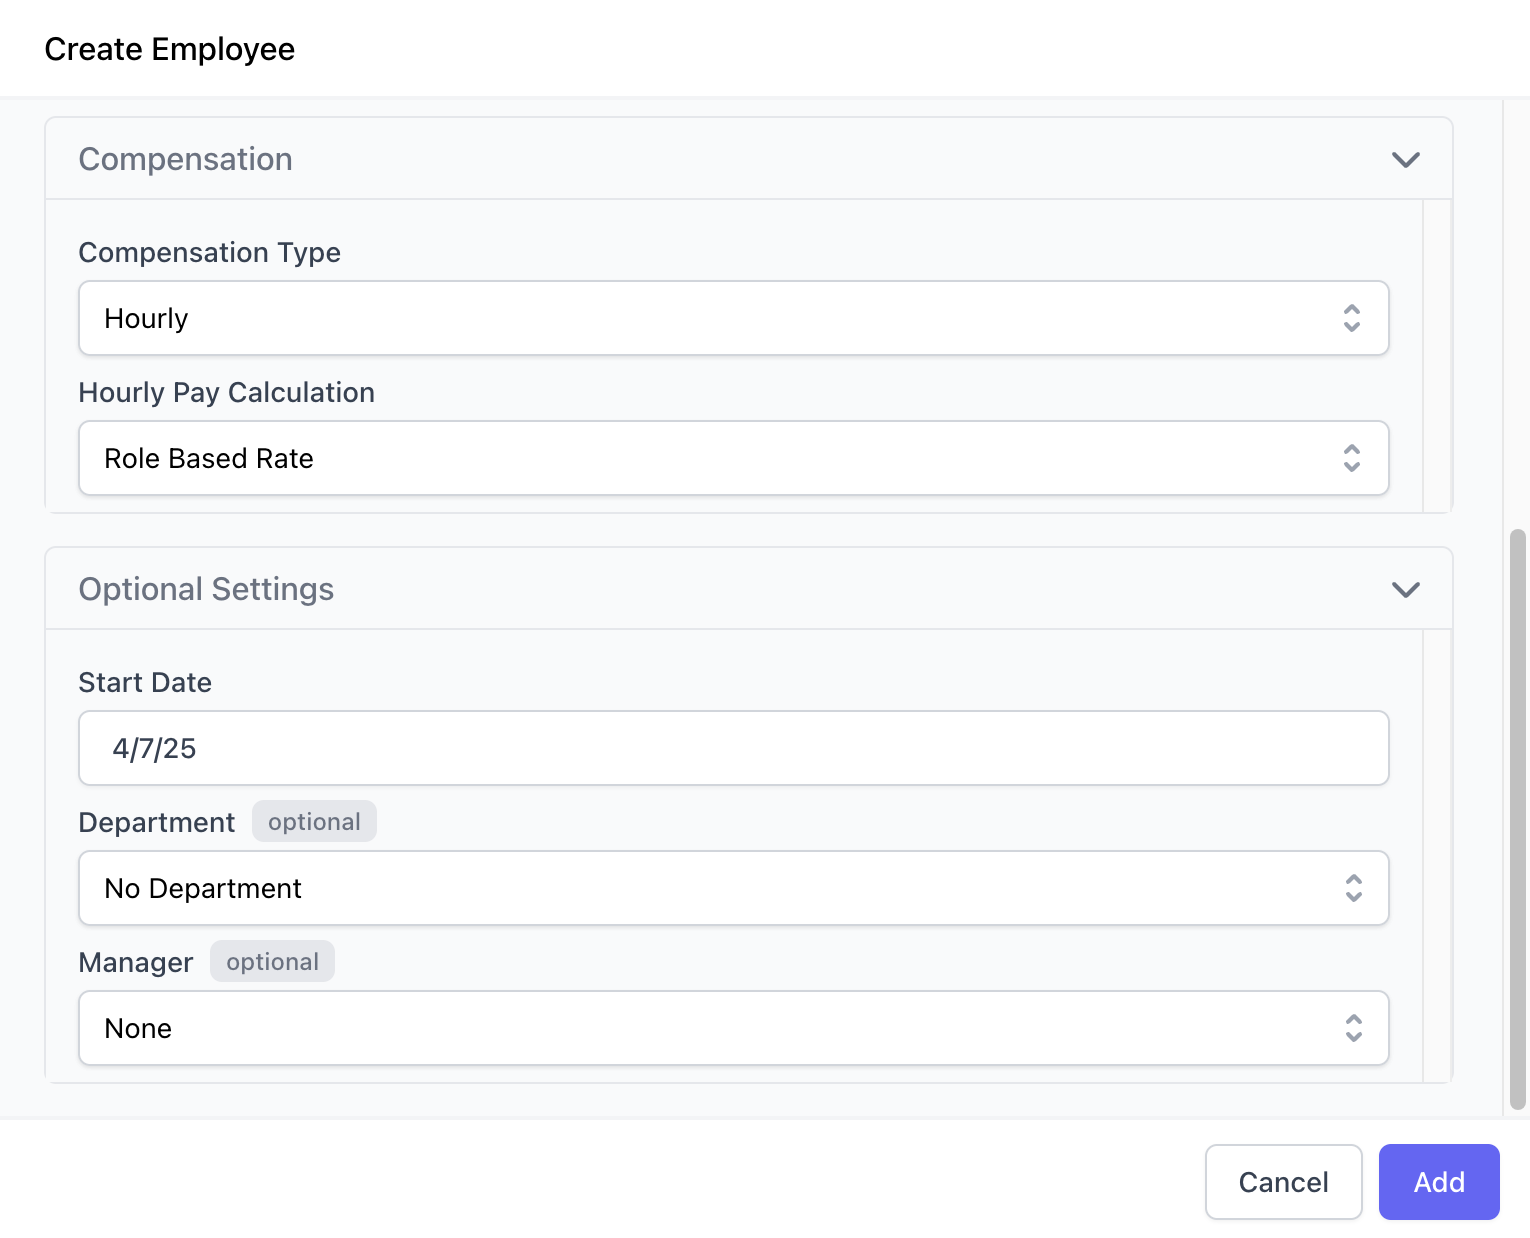
Start Date
Start Date
Select the employee’s start date on the calander. This is solely for your viewing and will not impact payroll (if applicable).
Department
Department
This is an optional field that you can select if your shop has departments set up.
Manager
Manager
This is an optional field that you can utilize to assign the employee a specific manager.
Terminate and Reactivate Employees
Remove an active employee through termination. Reactivate a terminated employee at any time.Terminate Employee
Terminate Employee
Terminate an employee in Dripos if they are no longer employed at the shop or are a seasonal employee that will not return for an extended period of time.An employee profile will always live in the Dripos system and can be reactivated at anytime.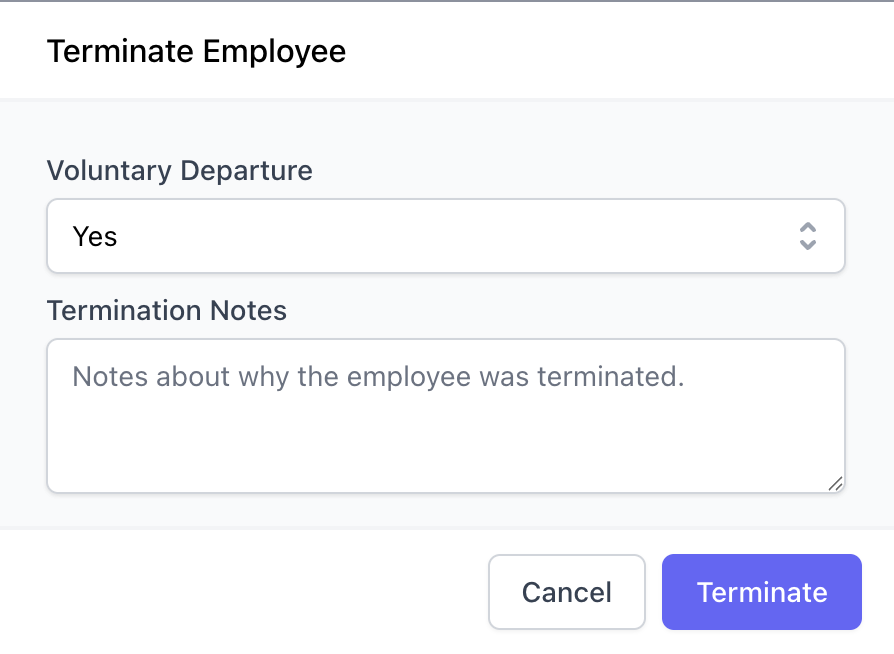
1
View Employee
On the Dashboard click Team > My Team > Employees and click View on the employee you wish to terminate.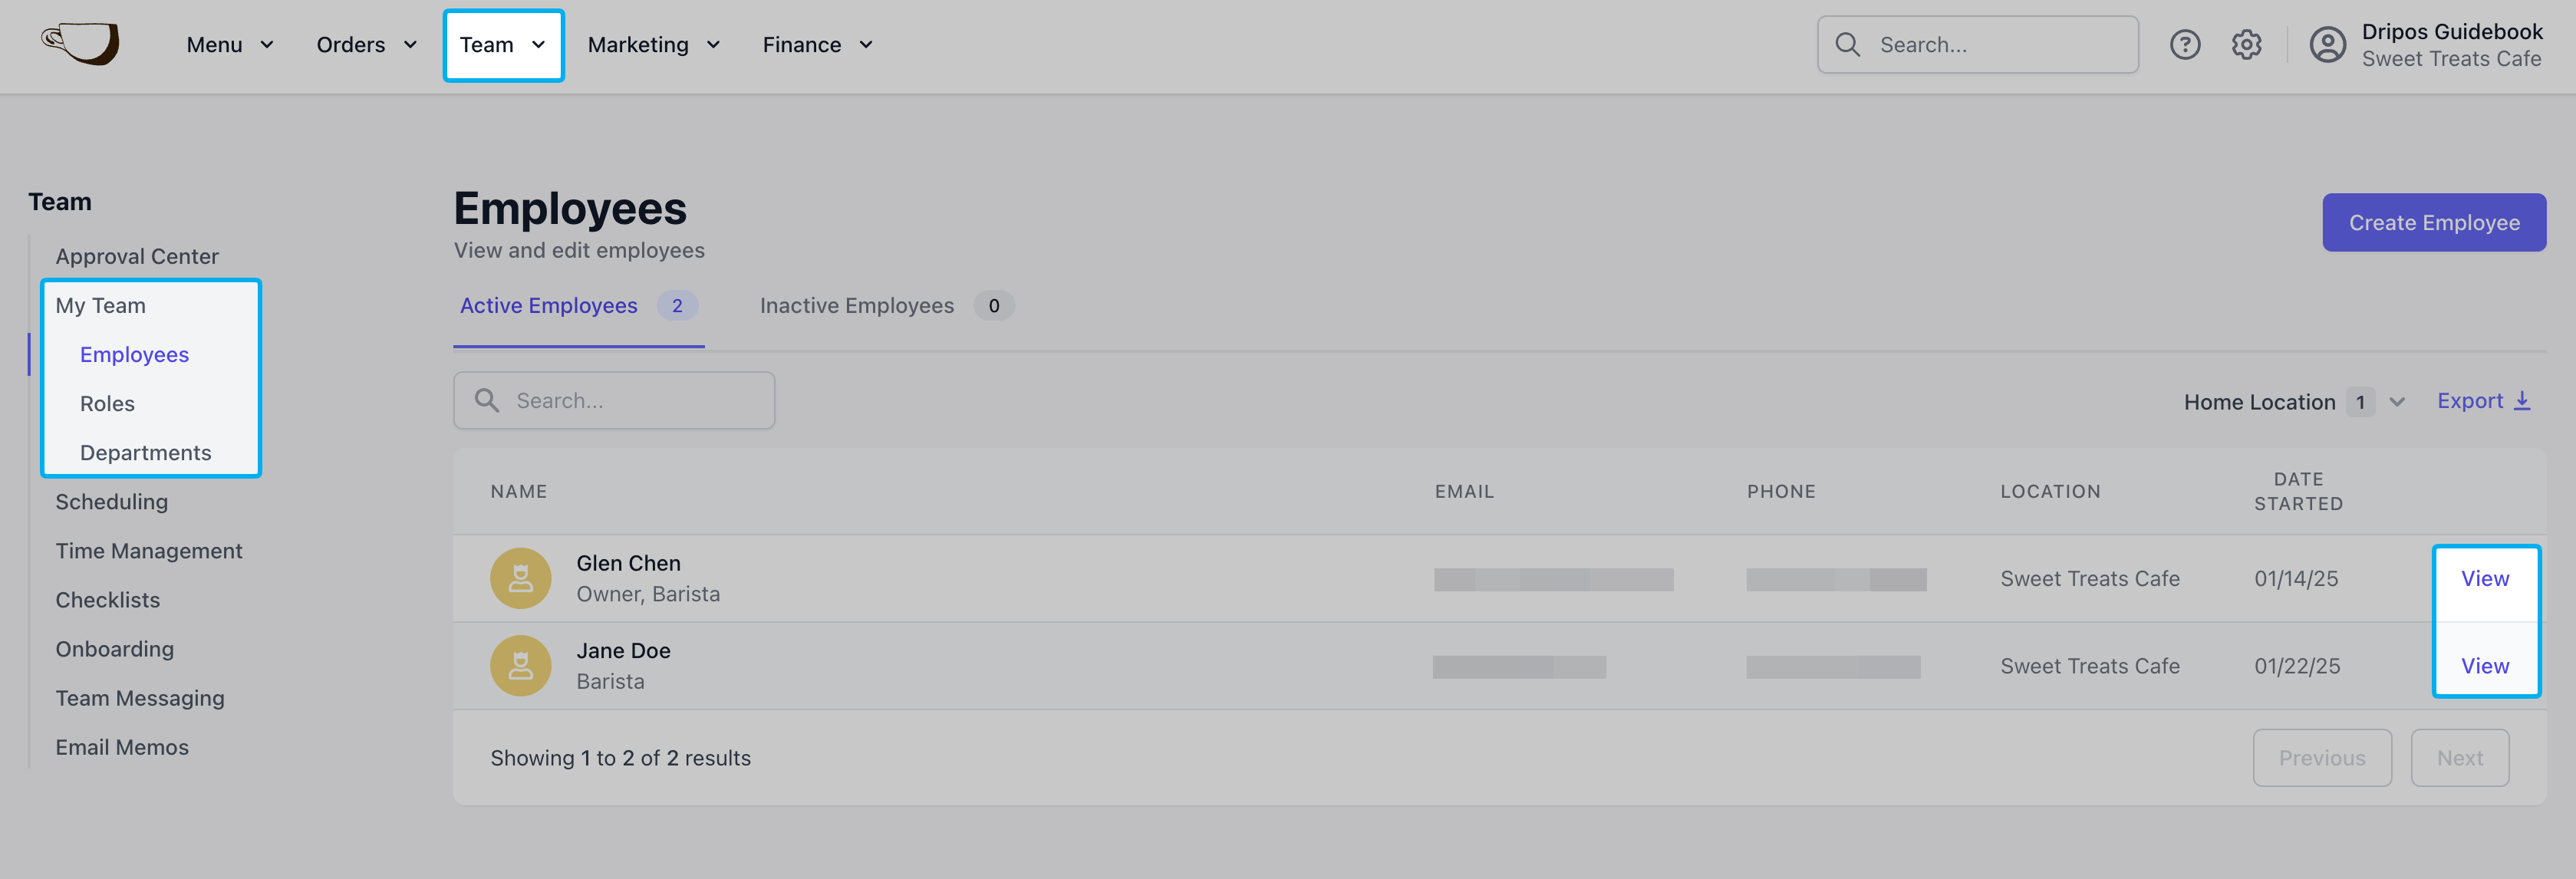
2
Terminate Employee
View employee > click Action > Terminate Employee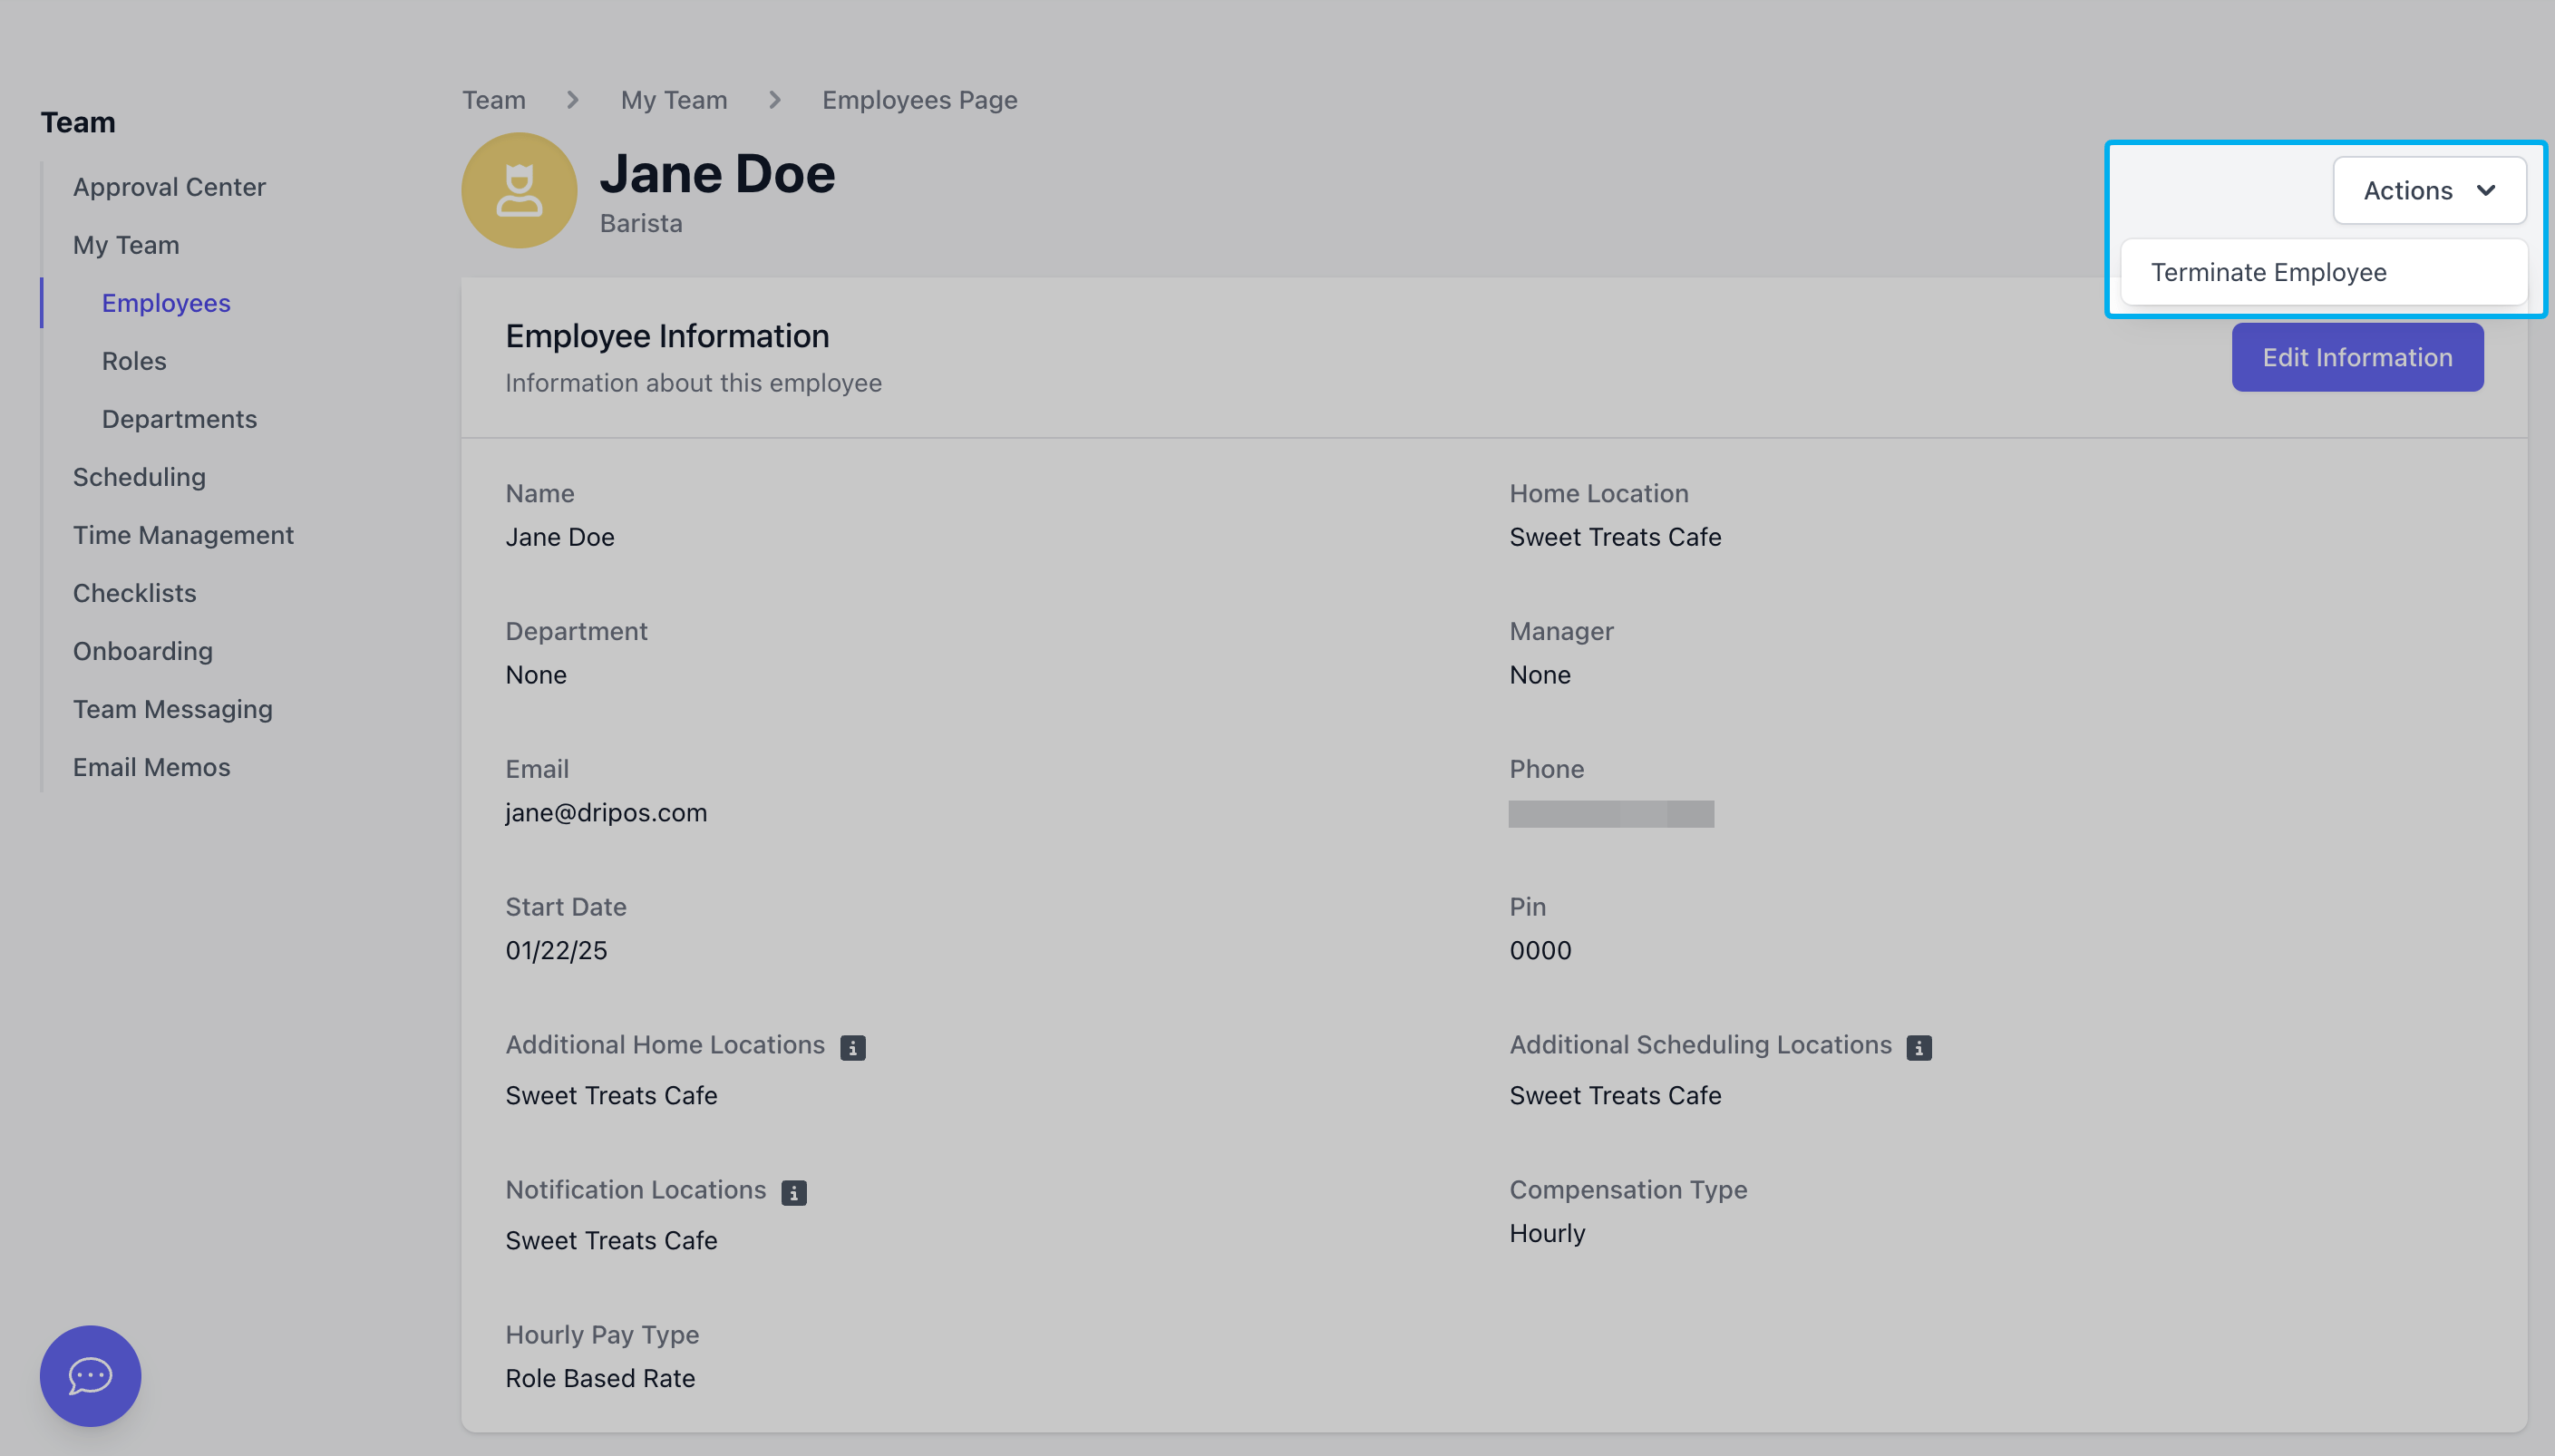
3
Complete following fields if applicable
Reactivate Employee
Reactivate Employee
View all terminated employees in the Inactive Employees tab. An employee profile will always live in the Dripos system and can be reactivated at anytime.
1
View Inactive Employee
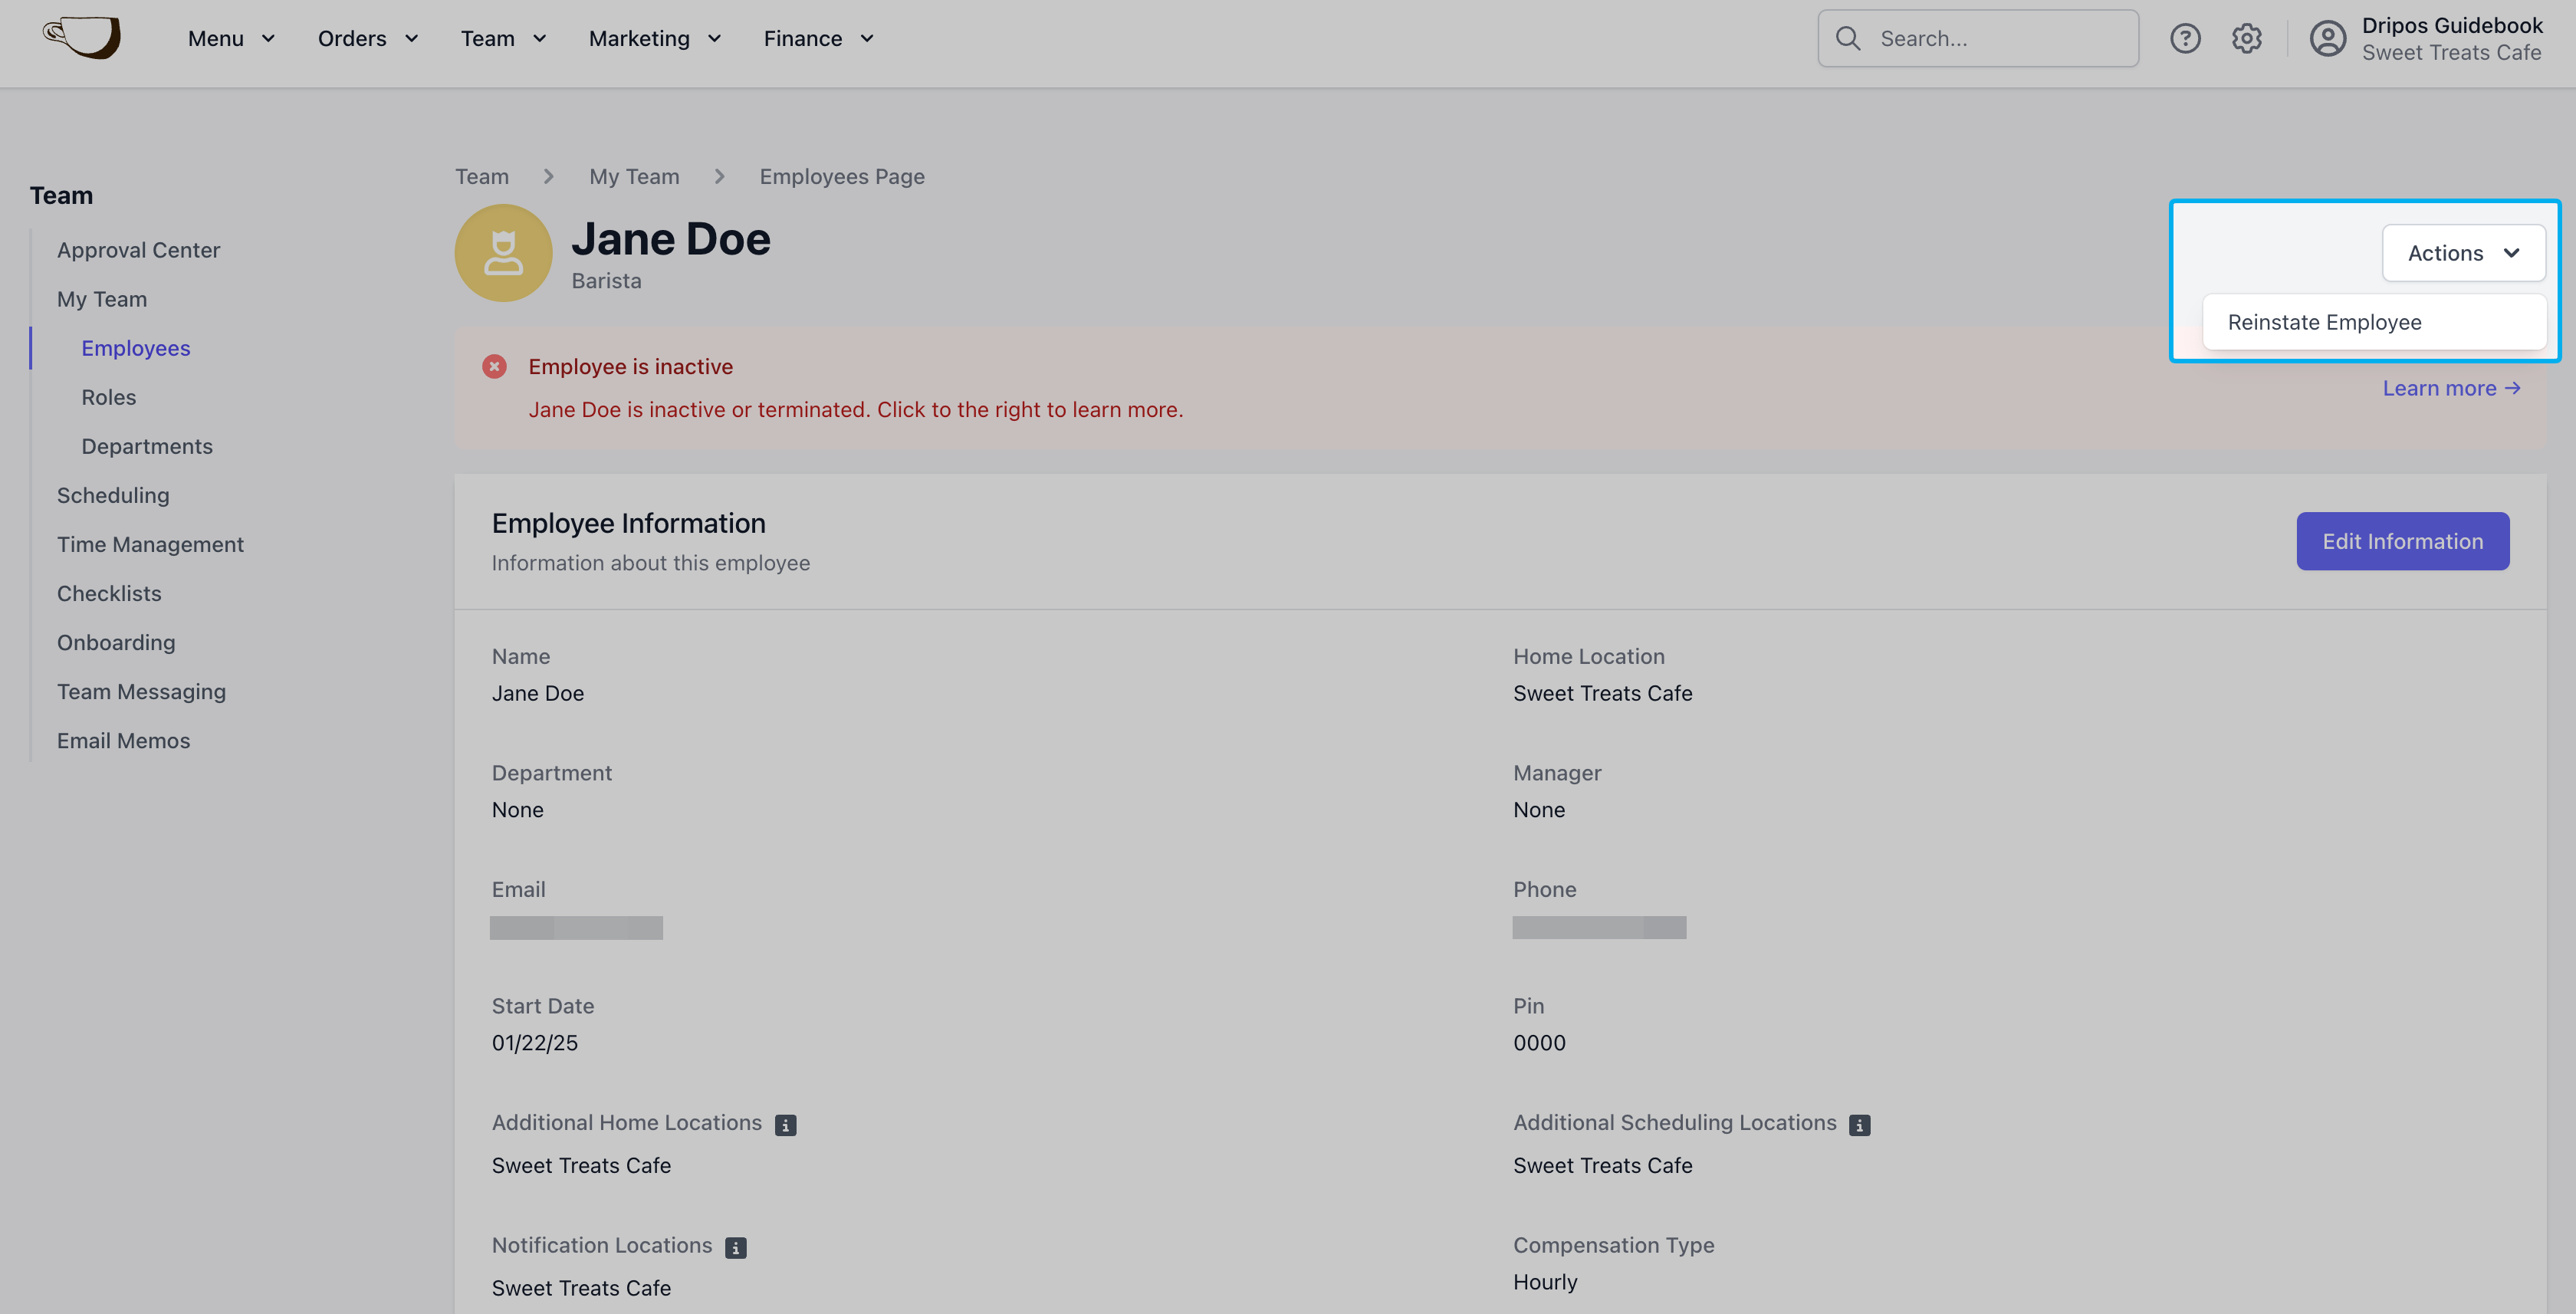
On the Dashboard click Team > My Team > Employees > Inactive Employees and click View on the employee you wish to reinstate.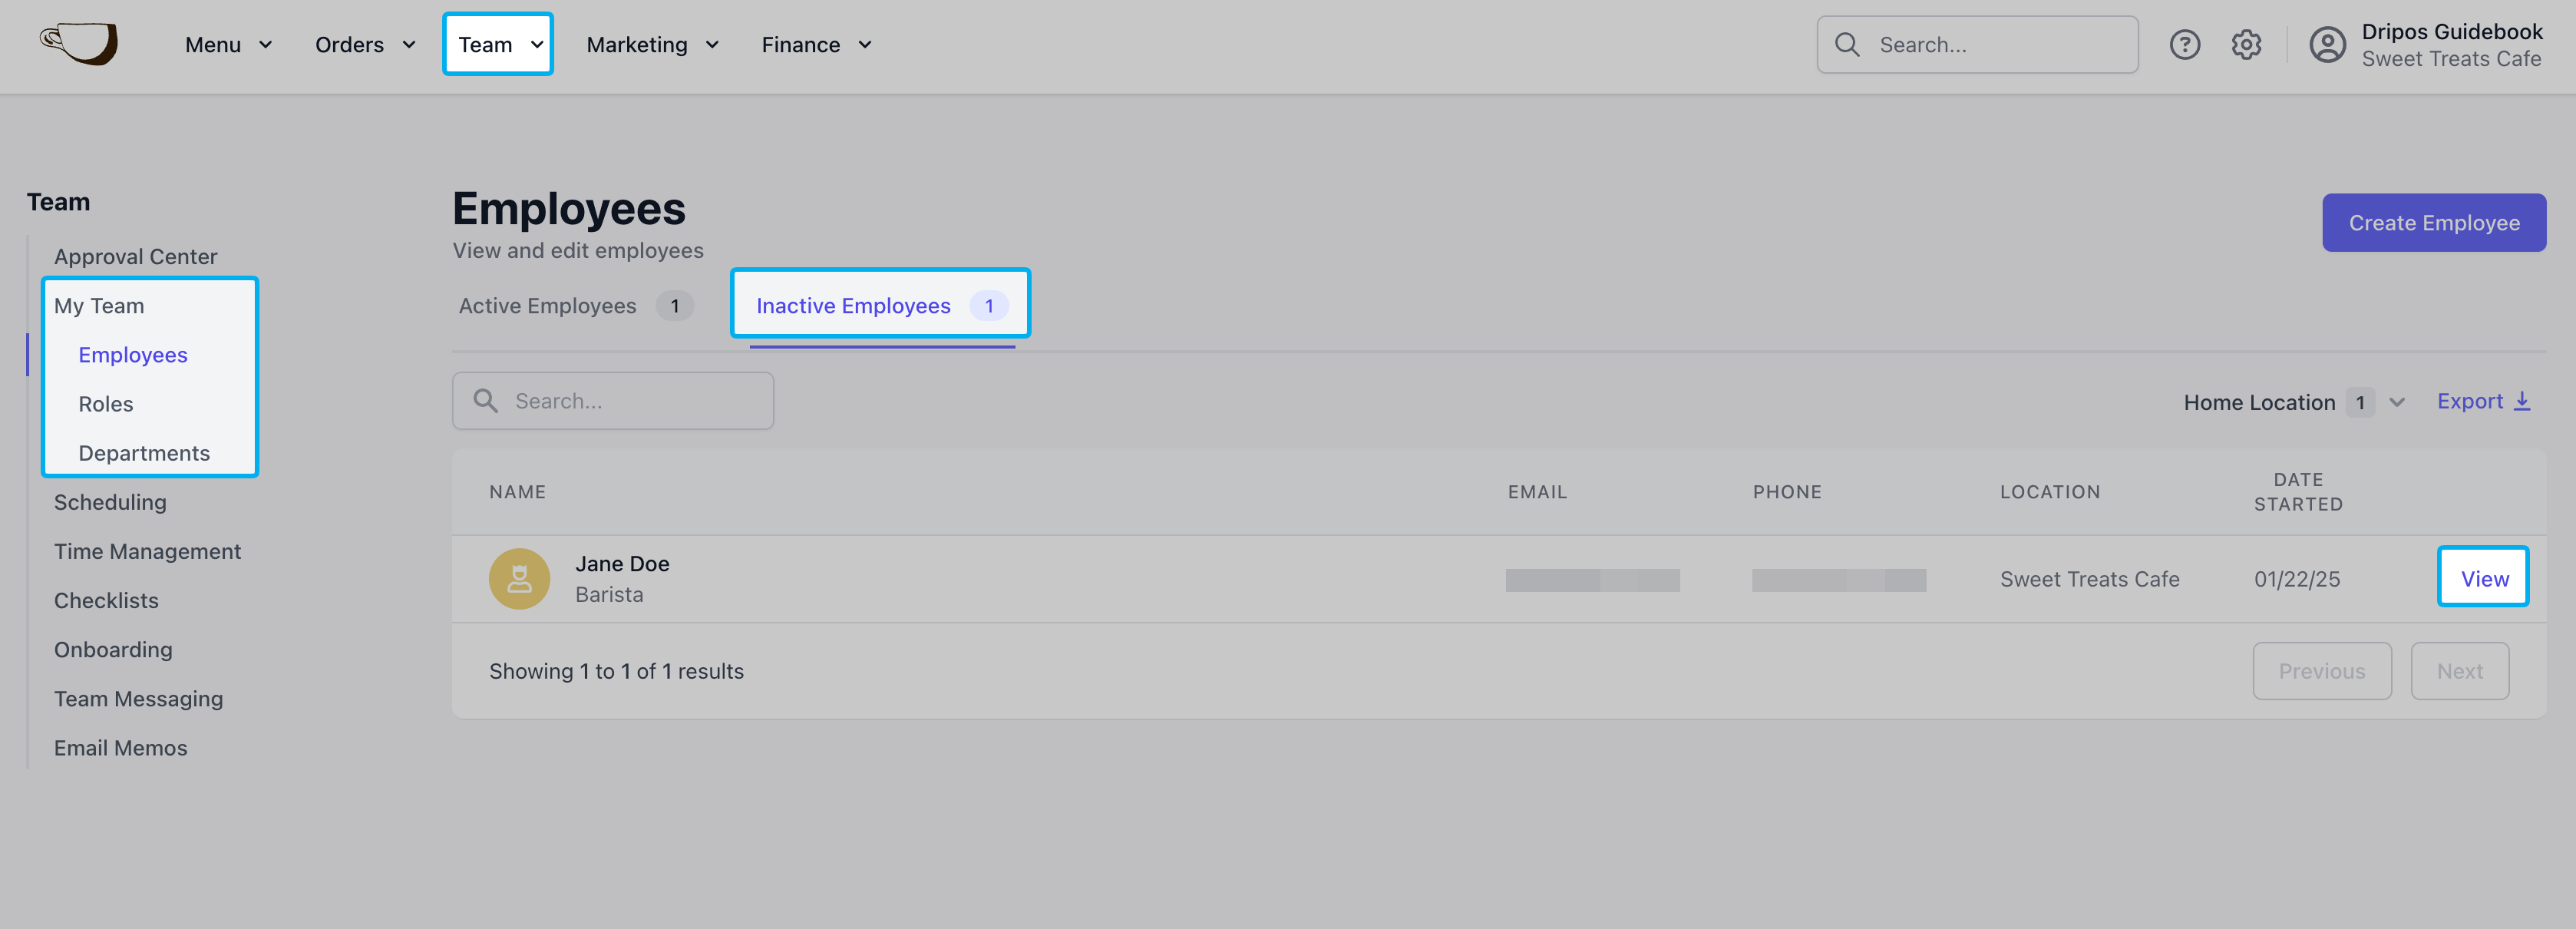
2
Reactivate Employee
View employee > click Action > Reinstate Employee