Create a Time Card
Time cards are created when an employee clocks in and out for a shift. Time cards can also be created manually by the employer from the Web Dashboard or the Hub app.Using the Time Clock
How to Clock In and Out on the Point of Sale
How to Clock In and Out on the Point of Sale
Manual Creation
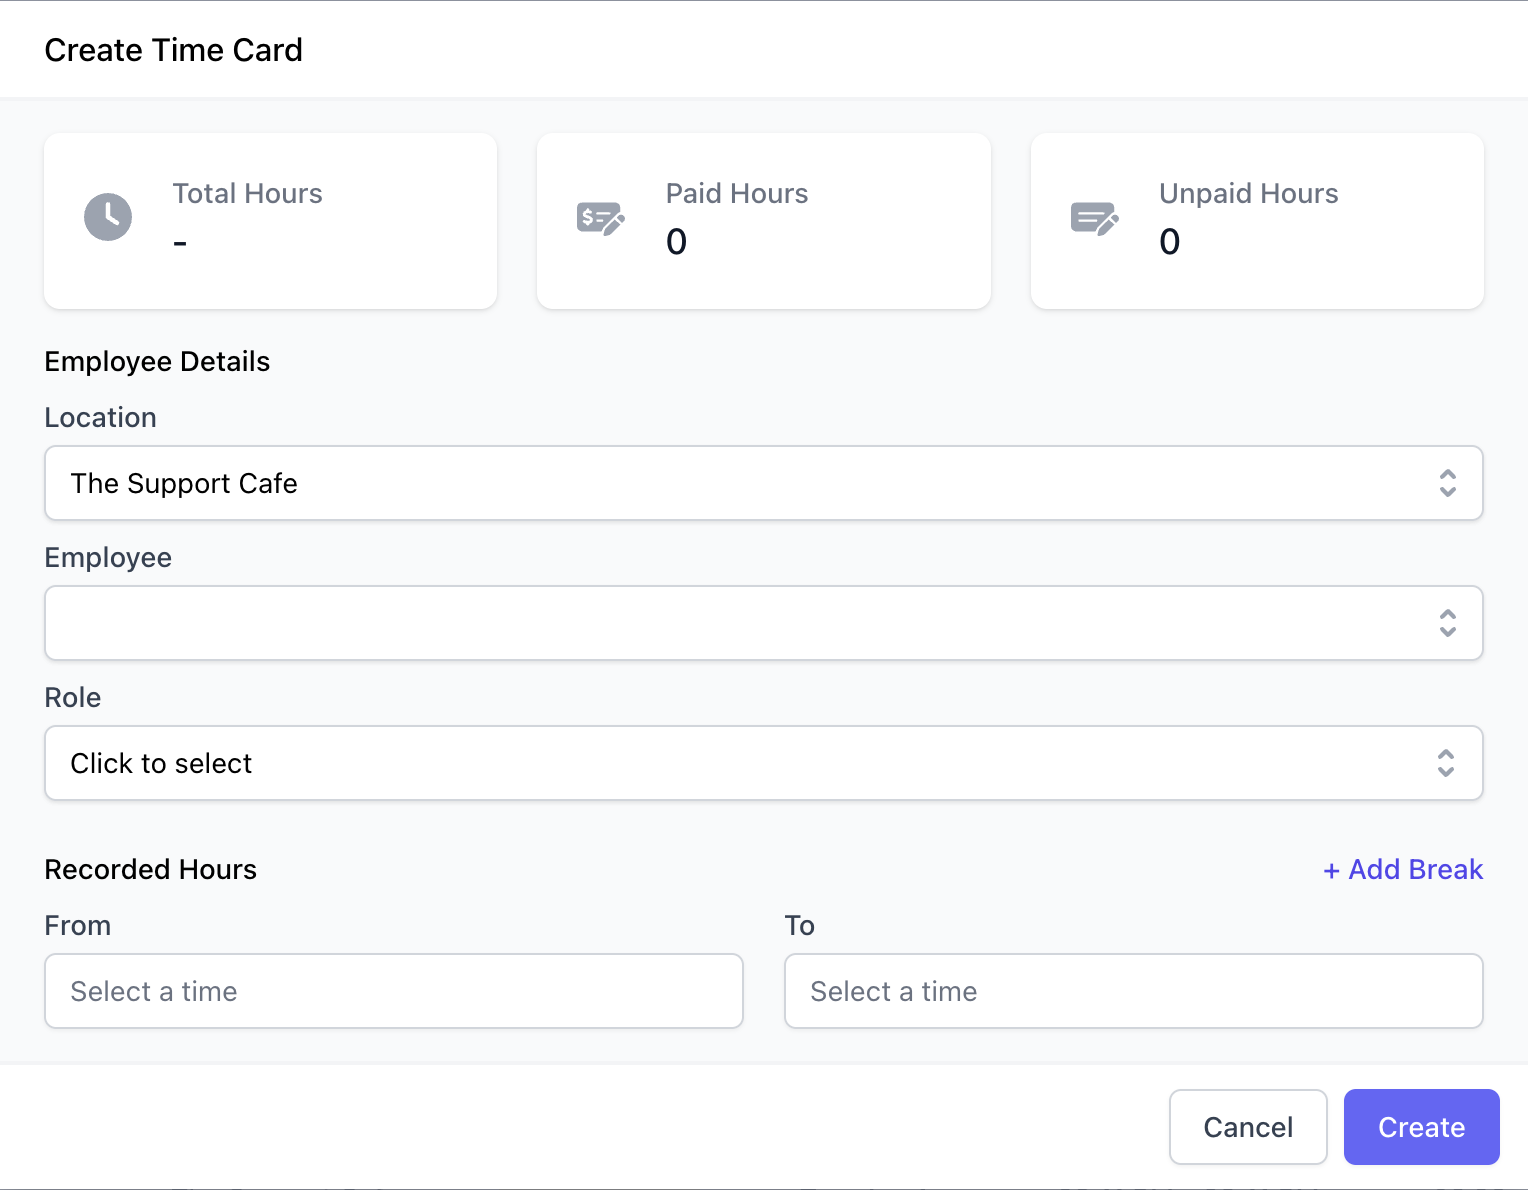
Did an employee forget to clock in today? No worries! You can easily create a time card with their correct start—and end—time, if needed.How to Create a Time Card from the Web Dashboard
How to Create a Time Card from the Web Dashboard
How to Create a Time Card from the Hub App
How to Create a Time Card from the Hub App
Time Card Components
Learn what makes up a Dripos time card.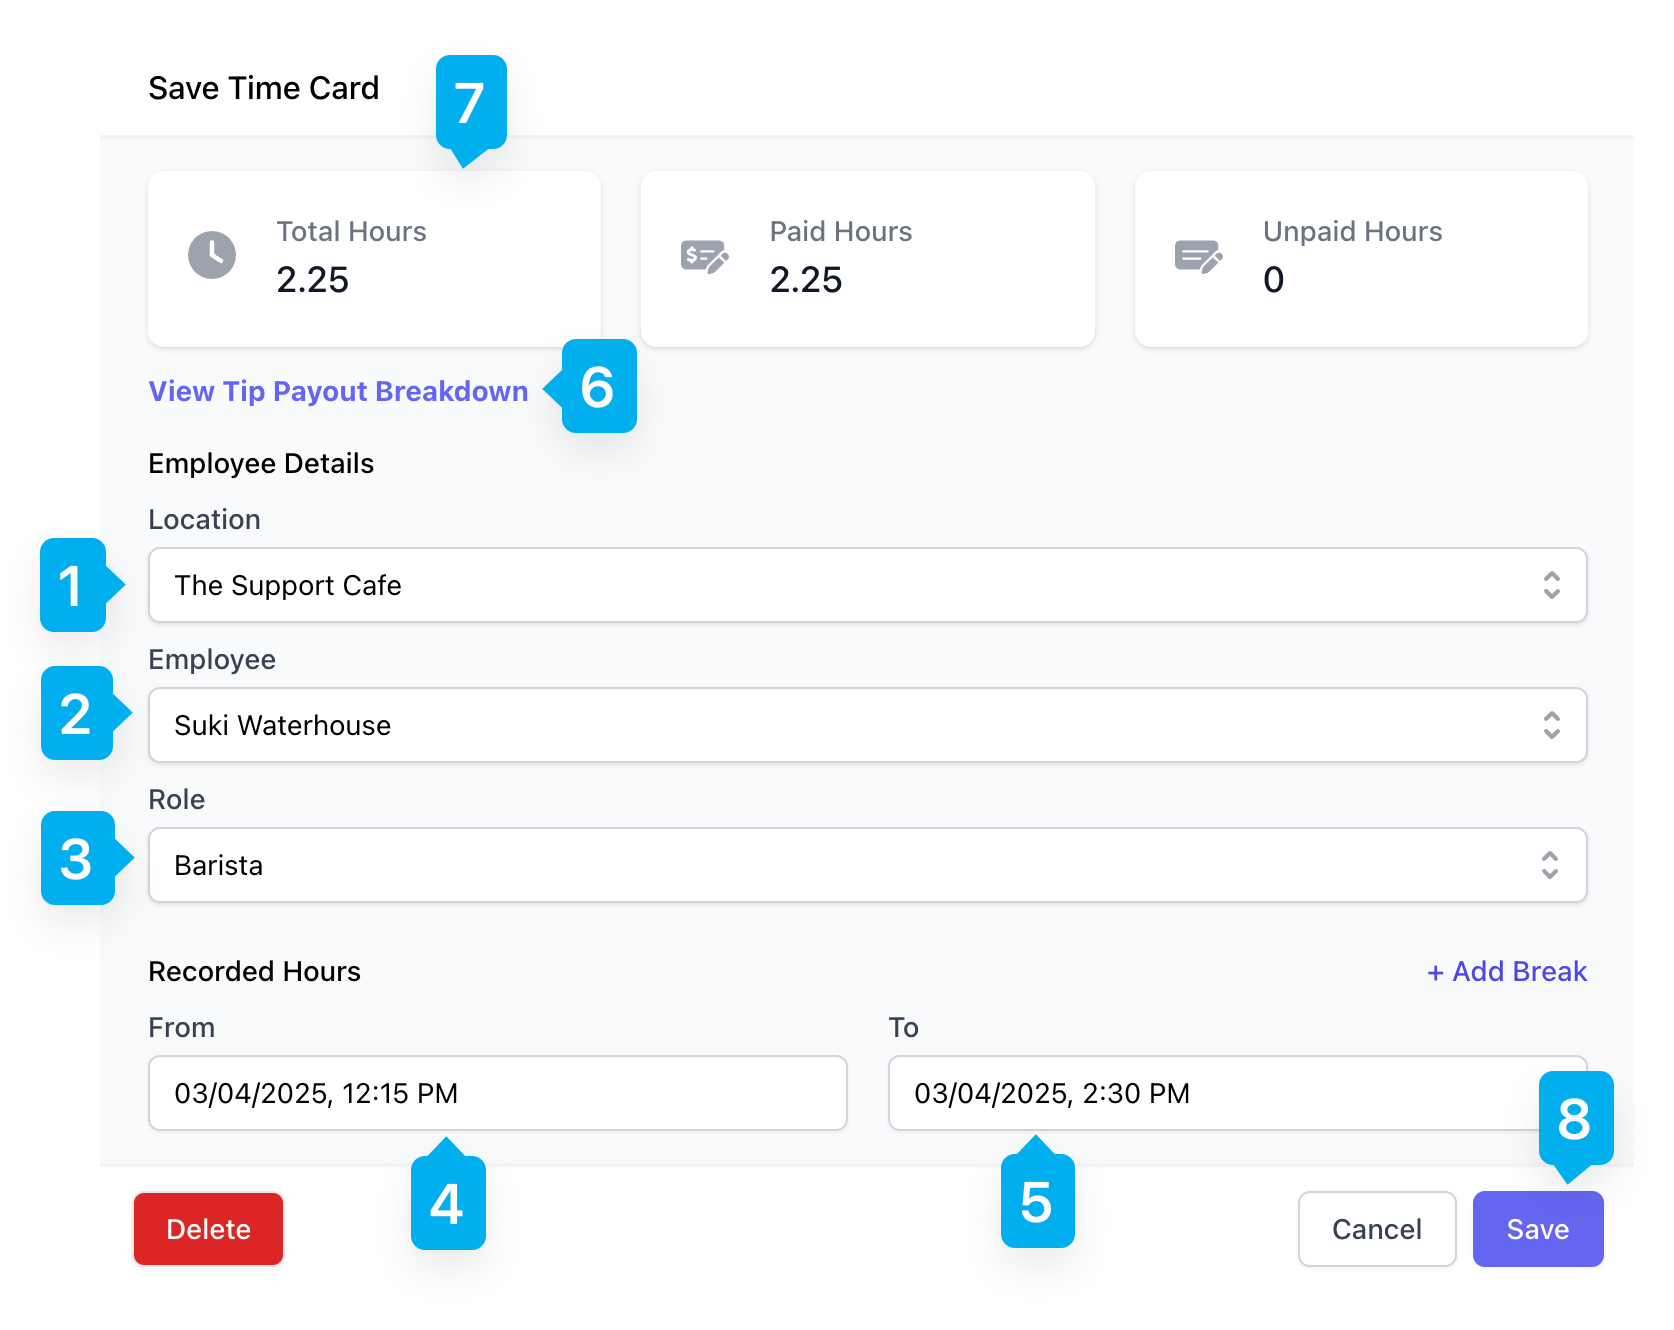
- 1
- 2
- 3
- 4
- 5
- 6
- 7
- 8
LocationThe shop that this employee clocked in at
View and Manage Time Cards
Review, edit, and understand tip breakdowns within employee time cards from multiple places within Dripos.Time Cards Page
View and manage time cards from the Time Cards page on the Web Dashboard. (Team > Time Management)Filter Time Cards
Filter Time Cards
Filter the Time Cards page by employee name, role, date range, and location.
View & Edit Time Cards
View & Edit Time Cards
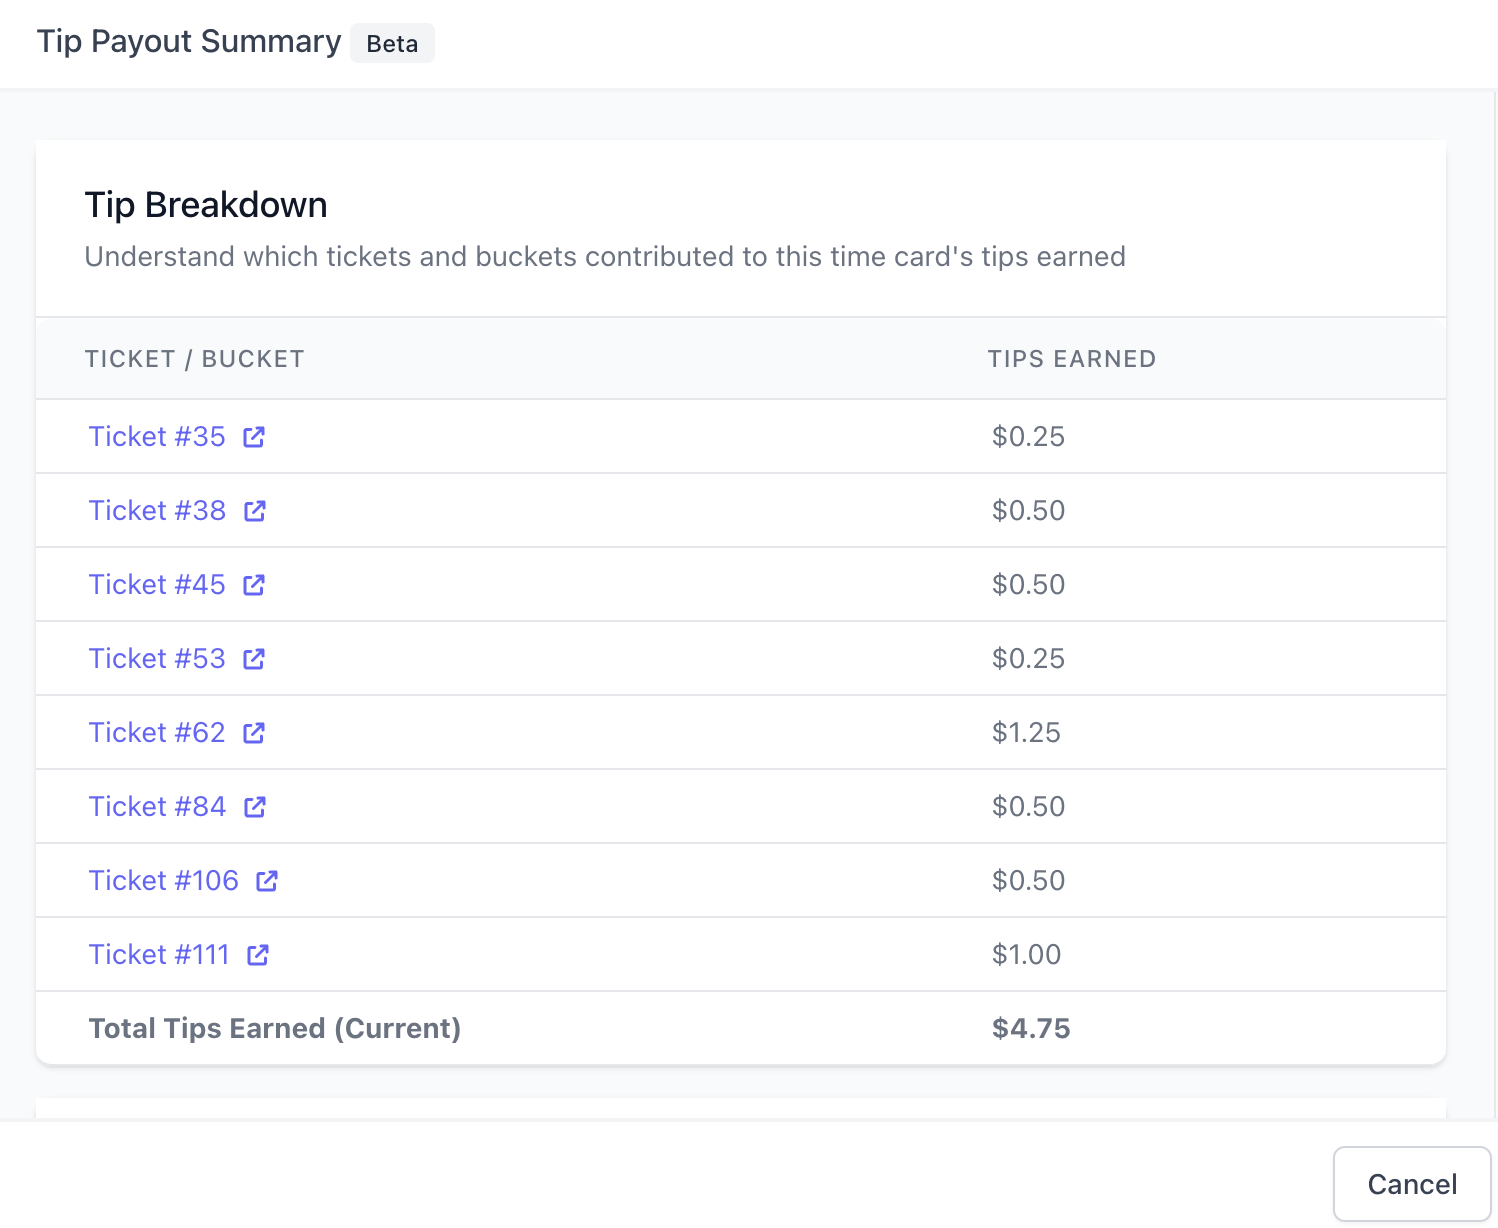
Edit a time card’s location, employee, role, and clock in & out times.View the tips earned on the time card by clicking View Tip Payout Breakdown
Employee Page
View and manage time cards from an Employee profile on the Web Dashboard (Team > My Team > Employees > View Employee)Filter Time Cards
Filter Time Cards
Filter time cards by location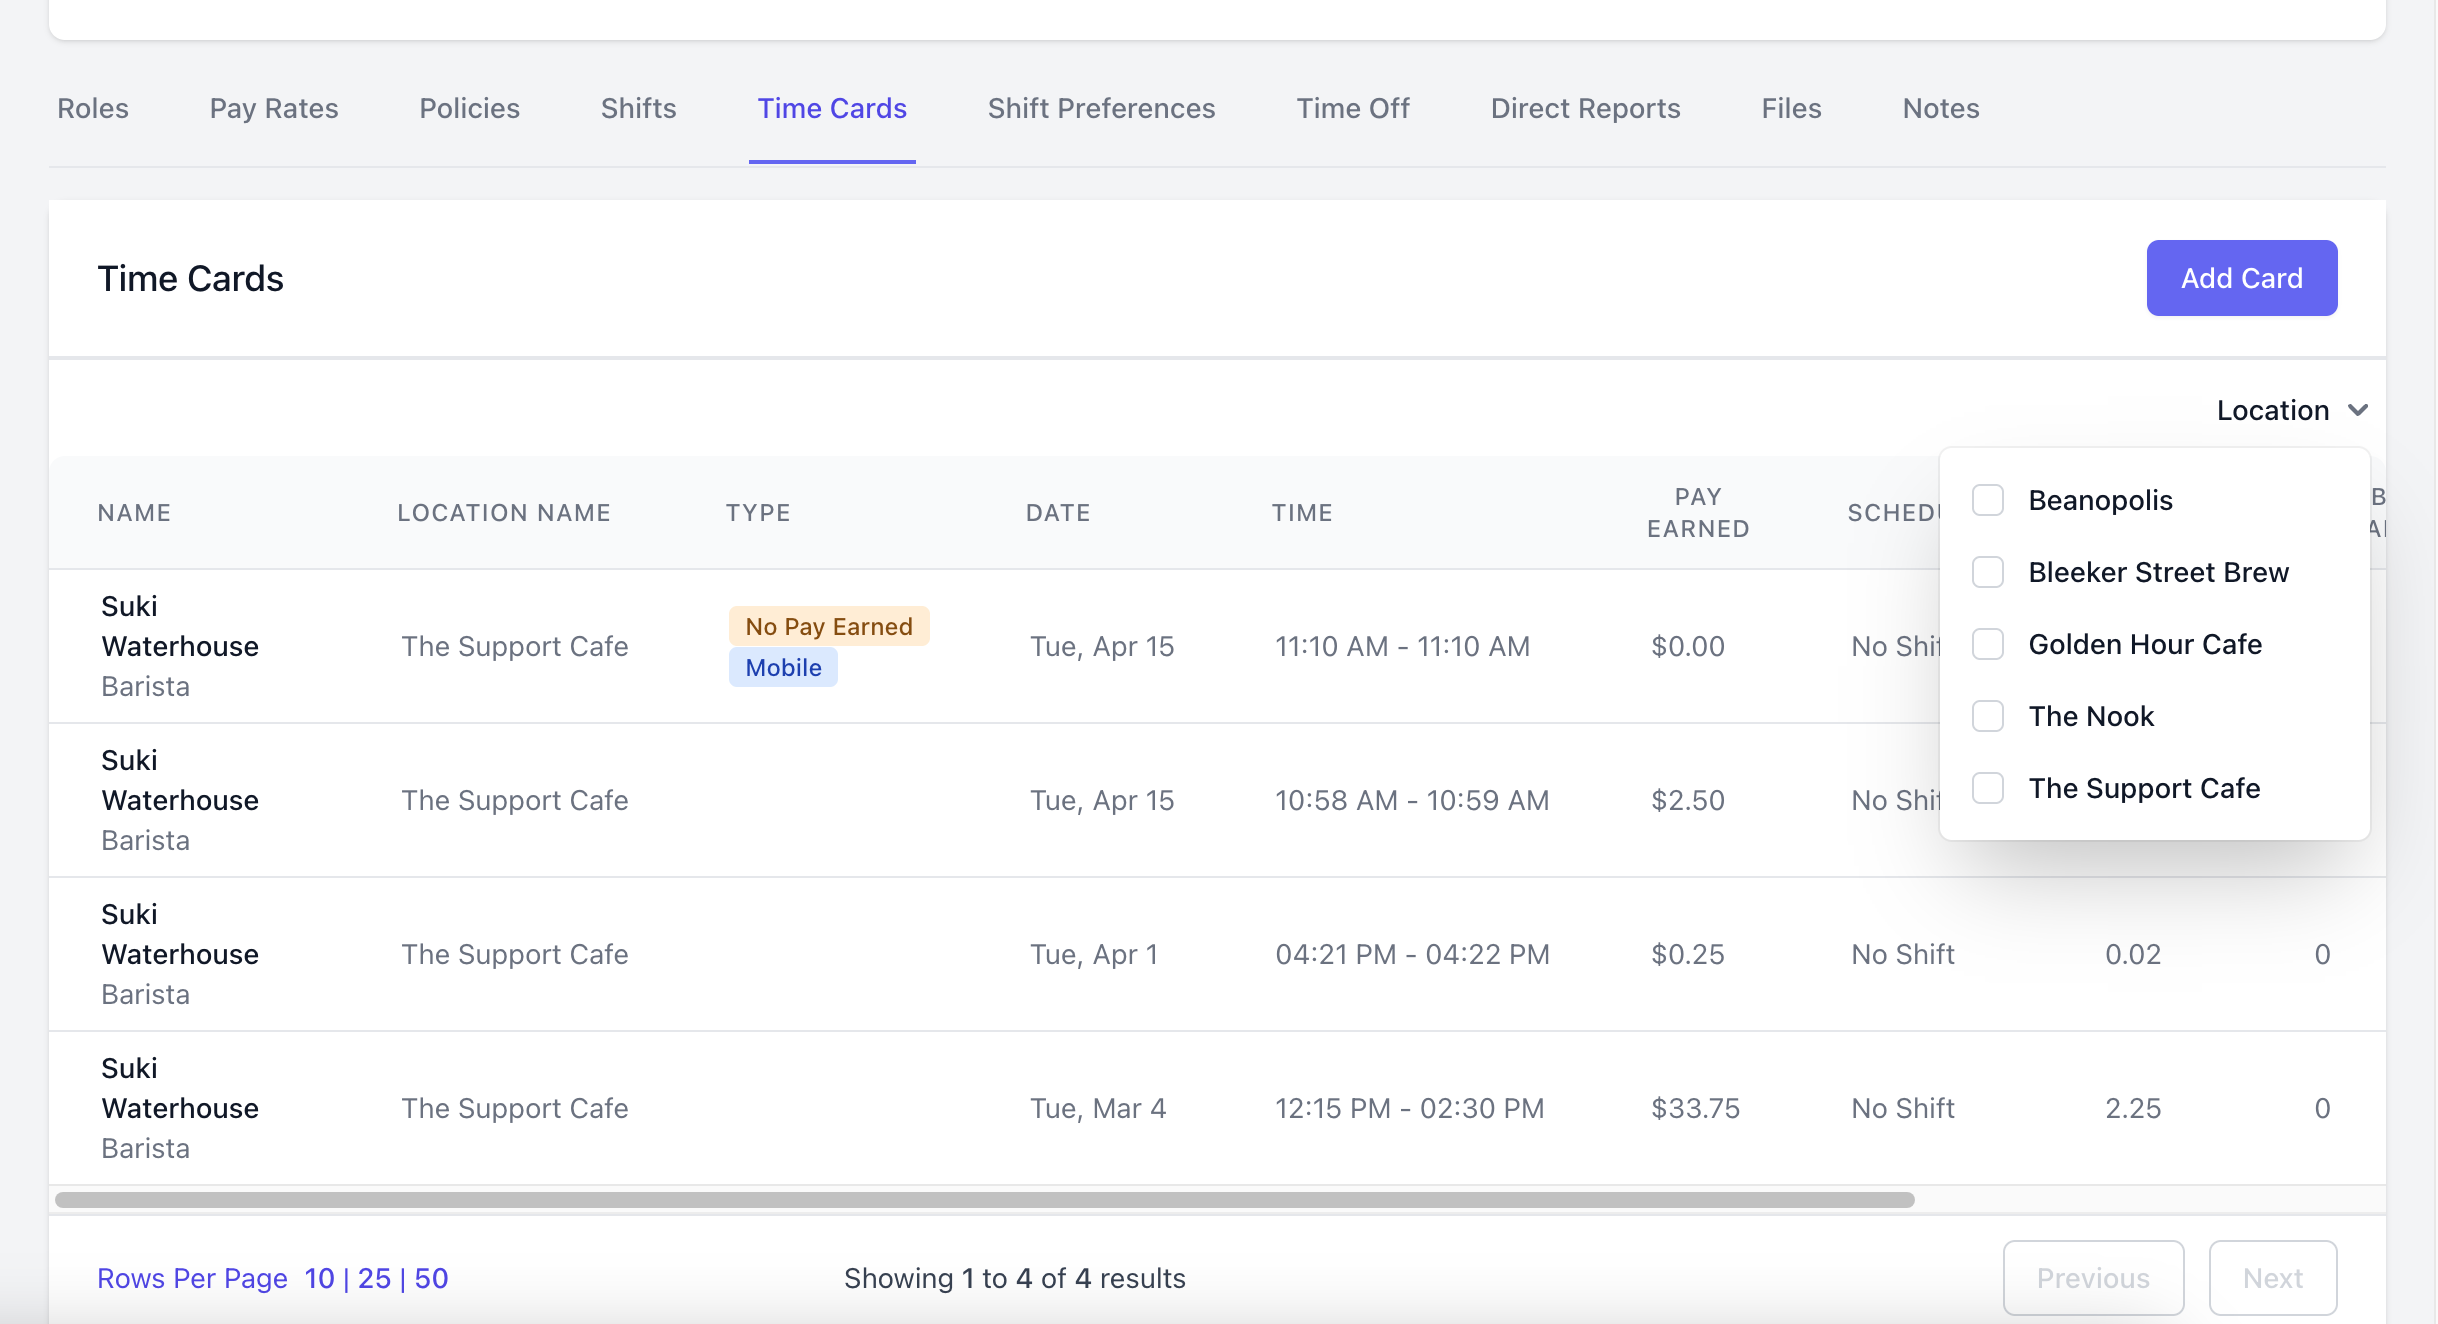
View & Edit Time Cards
View & Edit Time Cards
Edit a time card’s location, employee, role, and clock in & out times.View the tips earned on the time card by clicking View Tip Payout Breakdown
Time Card Report
View and manage time cards from the Time Card Report on the Web Dashboard (Finance > Reports > Time Cards)Filter Time Cards
Filter Time Cards
Filter the Time Card report by date, location, employee or role, and tip splitting methods
View & Edit Time Cards
View & Edit Time Cards
Edit a time card’s location, employee, role, and clock in & out times.View the tips earned on the time card by clicking View Tip Payout Breakdown
Approval Center
View and manage time cards from the Approval Center on the Web Dashboard Learn more about the Approval Center here (Team > Approval Center)View & Edit Time Cards
View & Edit Time Cards
Point of Sale
View and manage time cards from the Point of SaleView & Edit Time Cards
View & Edit Time Cards
Hub App
View and manage time cards from the Hub AppView & Edit Time Cards
View & Edit Time Cards