Create a Role
1
Add Role
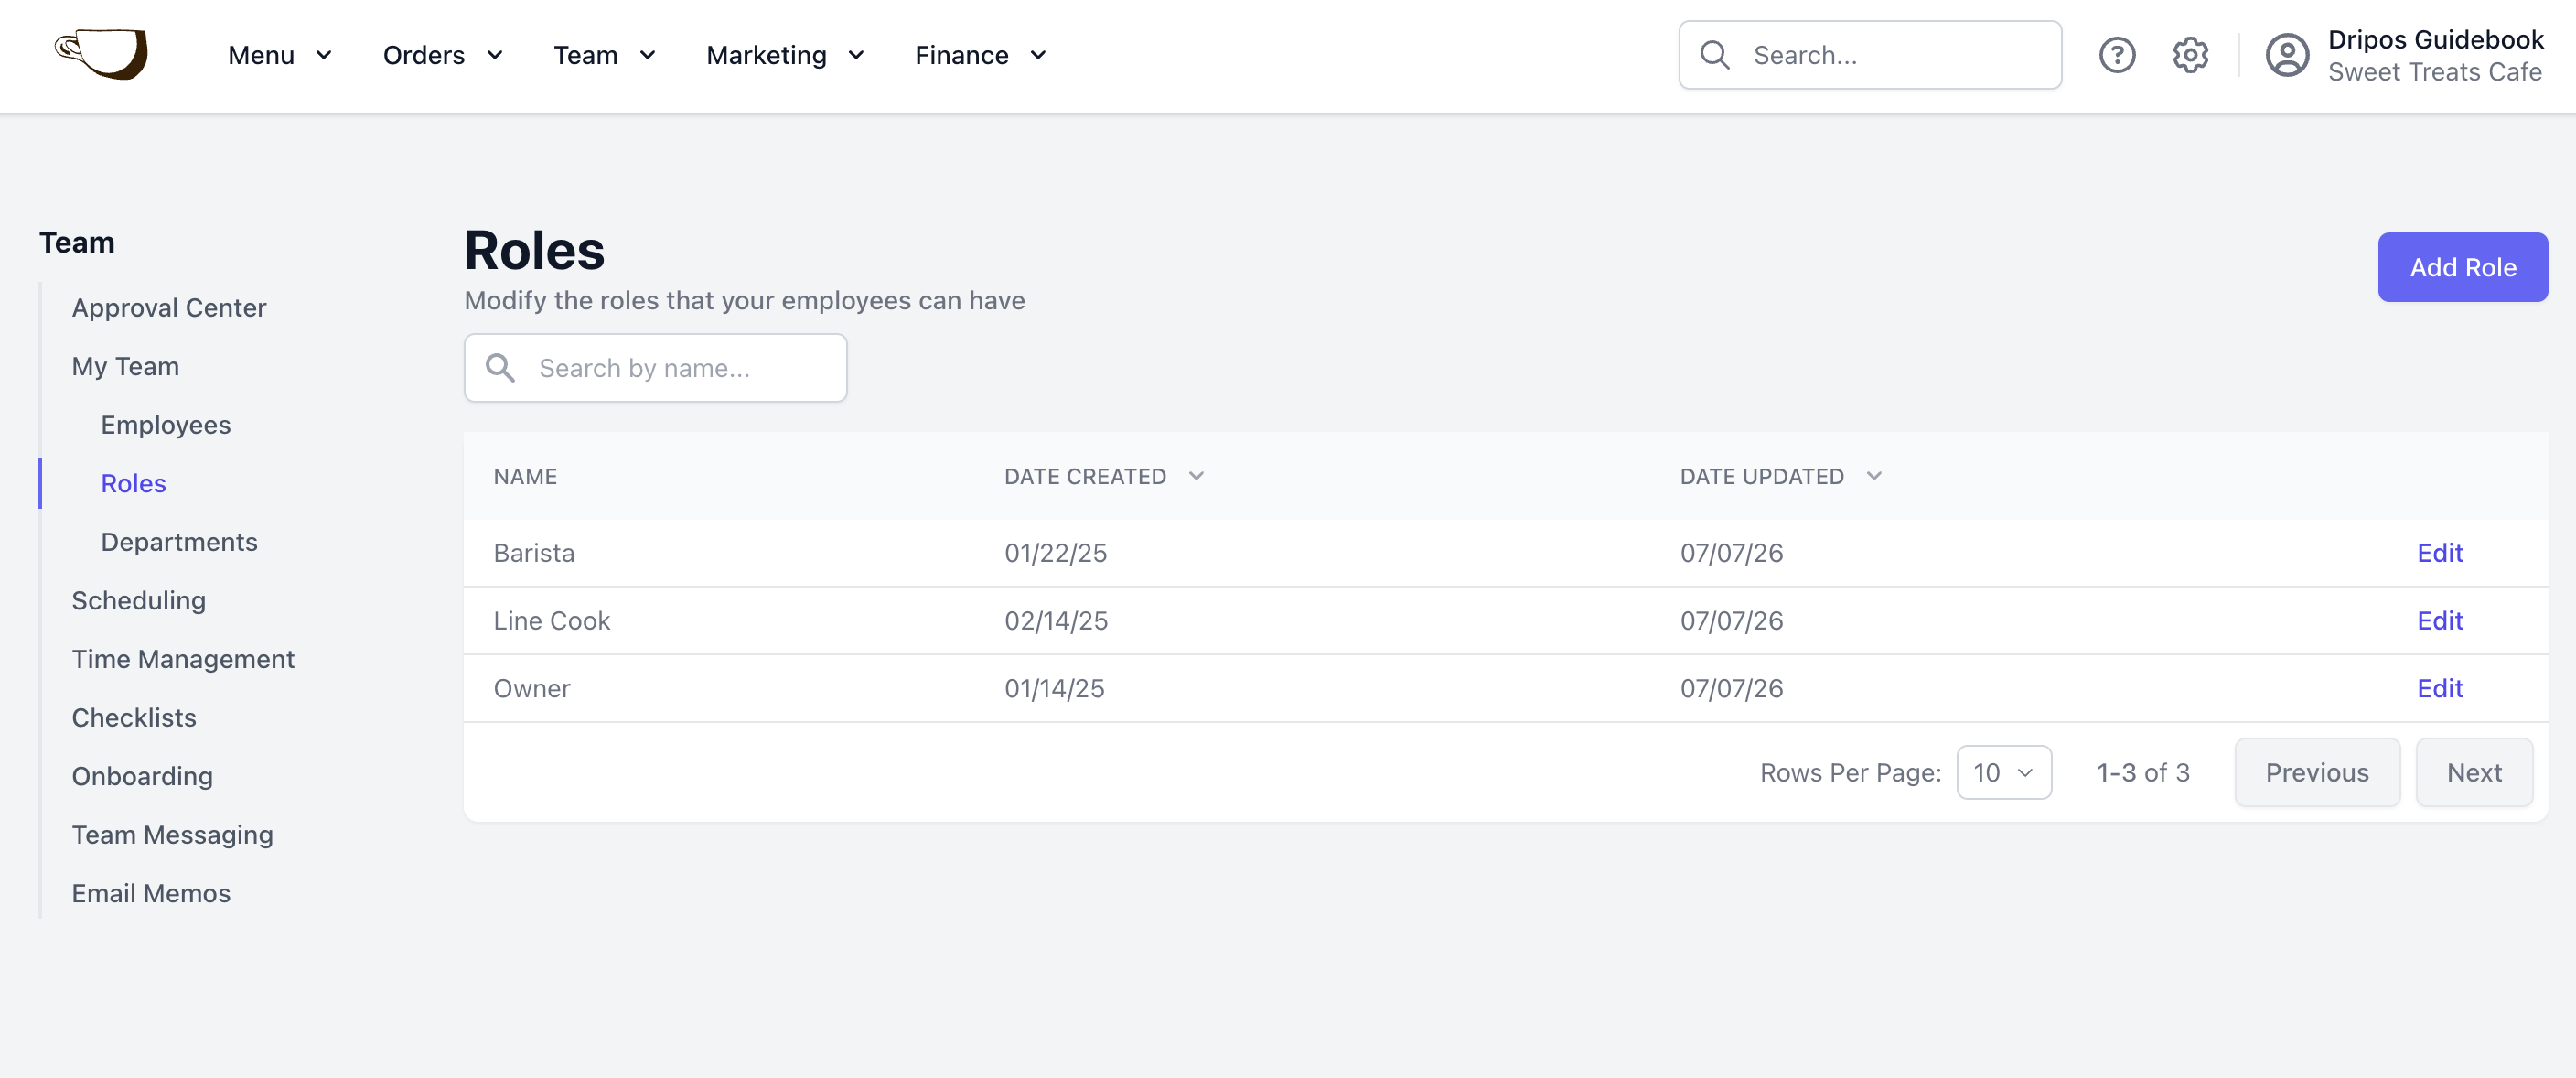
On the Web Dashboard click Team > My Team > Roles > Add Role
2
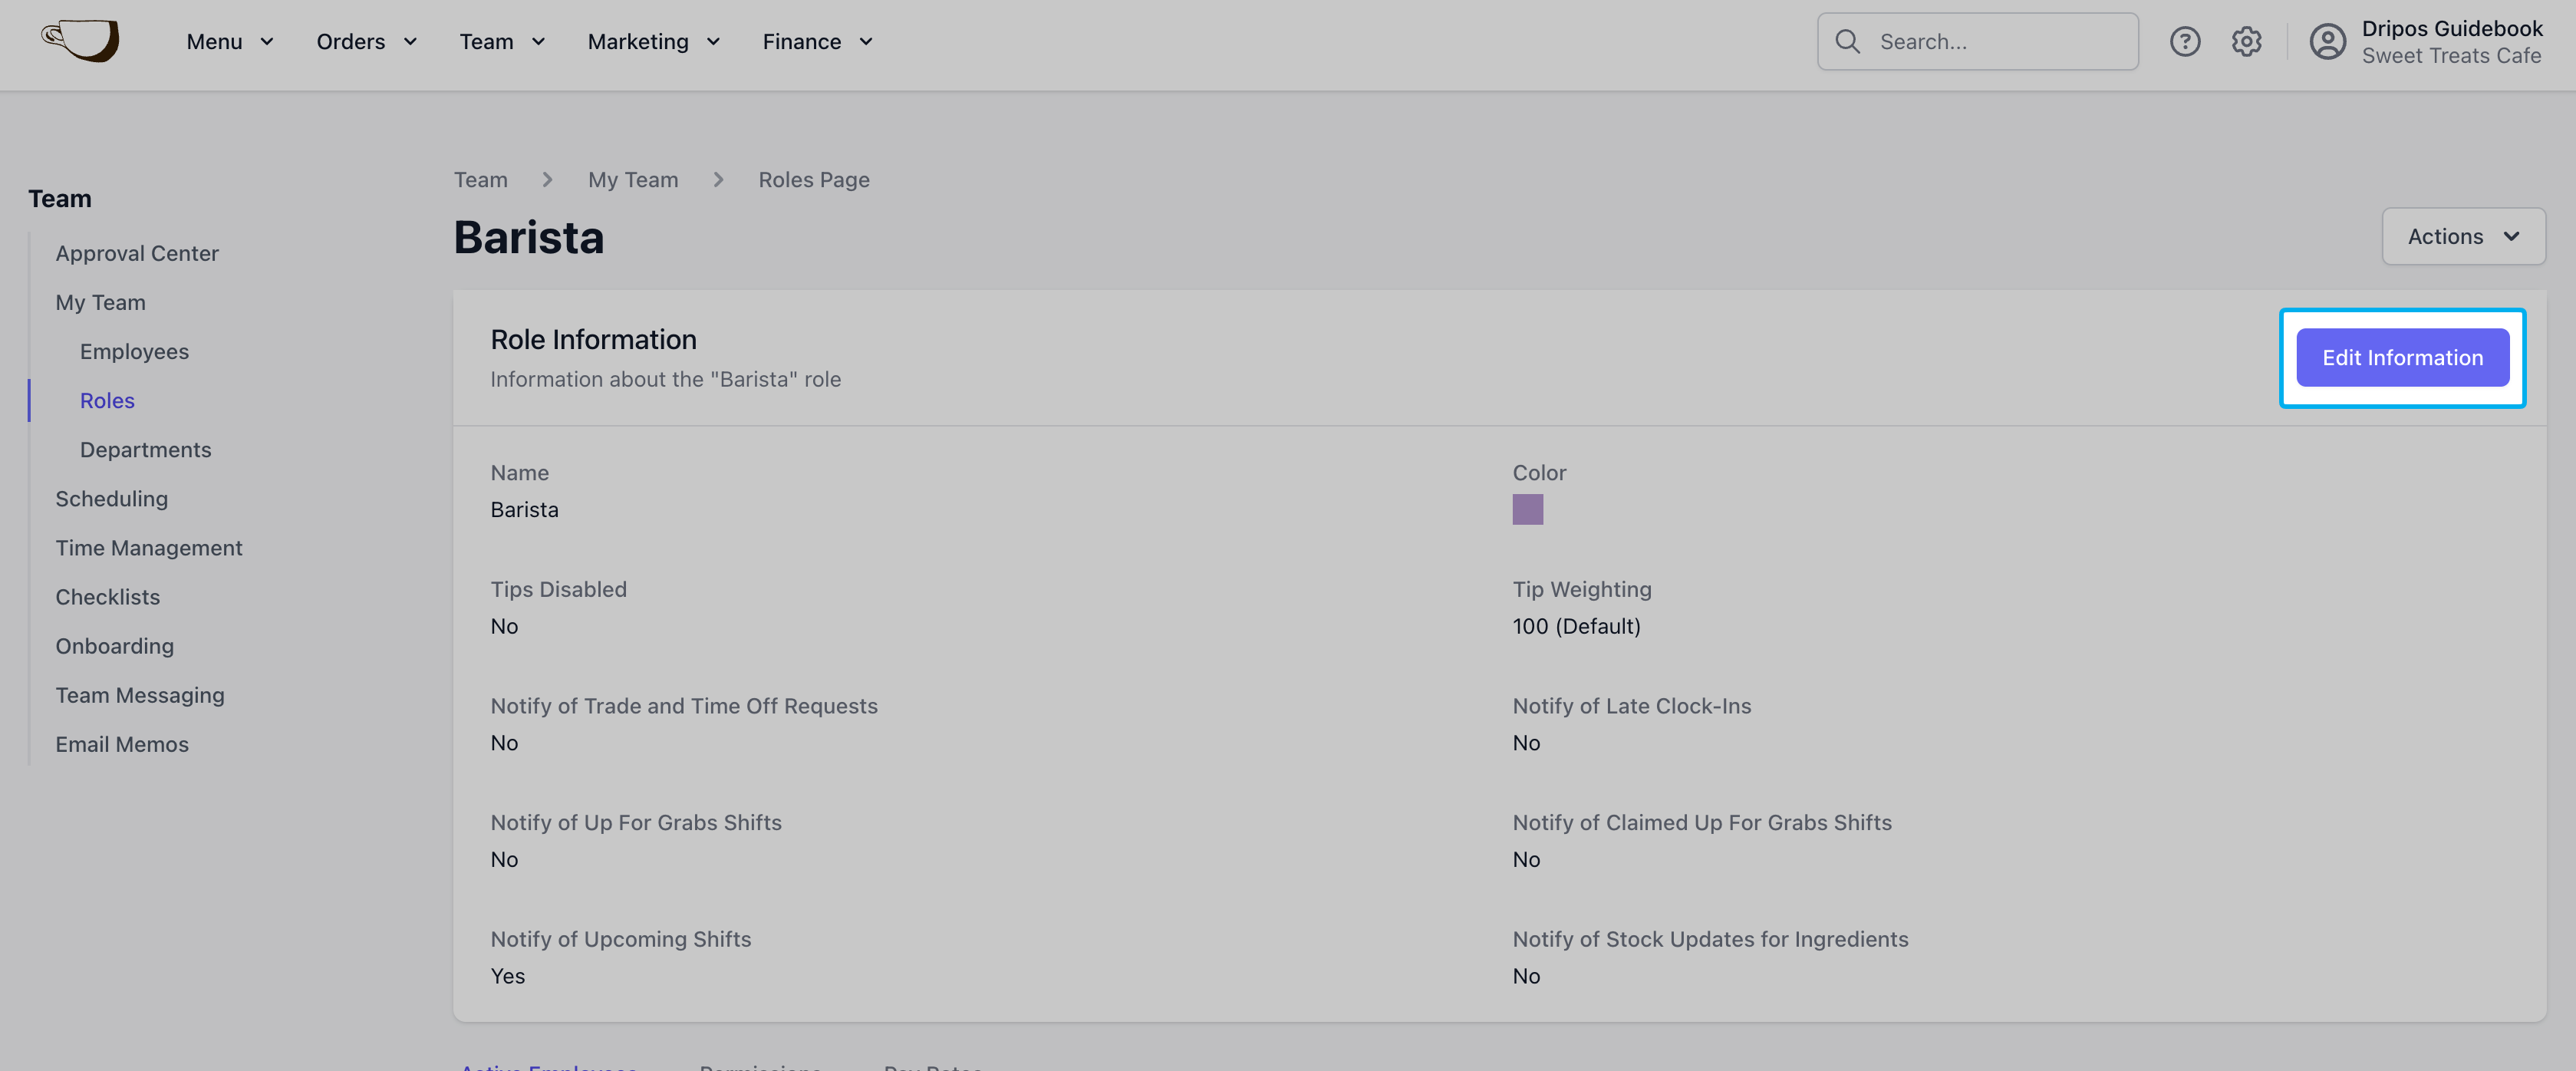
Enter Basic Information
Role Name
Role Name
Examples: Barista, Cashier, Manager, Line Cook
Color
Color
Assign a color for this role on the scheduler
Tips Disabled
Tips Disabled
No: Employees clock in with this role will be included in the tipping poolYes: Employees clock in with this role will not be included in the tipping pool
Notification of Trade and Time Off Requests
Notification of Trade and Time Off Requests
Employees with this role will receive notifications for all trade and time off requests placed. This setting is mainly for Owner or Manager roles.Select No for trade and time off request notifications not to be sent to employees with this role
Notify of Late Clock Ins
Notify of Late Clock Ins
Employees with this role will receive notifications for all late clock ins. This setting is mainly for Owner or Manager roles.Select No for late clock in notifications not to be sent to employees with this role
Notify of Upcoming Shifts
Notify of Upcoming Shifts
Employees with this role will receive Hub app push notifications for upcoming shifts within the next 2 hours.Select No for Hub app notifications not to be sent to employees with this role
Notify of Up For Grabs Shifts
Notify of Up For Grabs Shifts
Employees with this role will receive notifications when a shift is put up for grabs.Select No for up for grab shift notifications not to be sent to employees with this role
Notify of Claimed Up For Grabs Shifts
Notify of Claimed Up For Grabs Shifts
Employees with this role will receive notifications when an up for grabs shift is claimed and needs approval. This setting is mainly for Owner or Manager roles.Select No for claimed up for grab shift notifications not to be sent to employees with this role
3
Set Role Permissions
This is an optional step in the role creation process, and can always be modified after the role has been created.
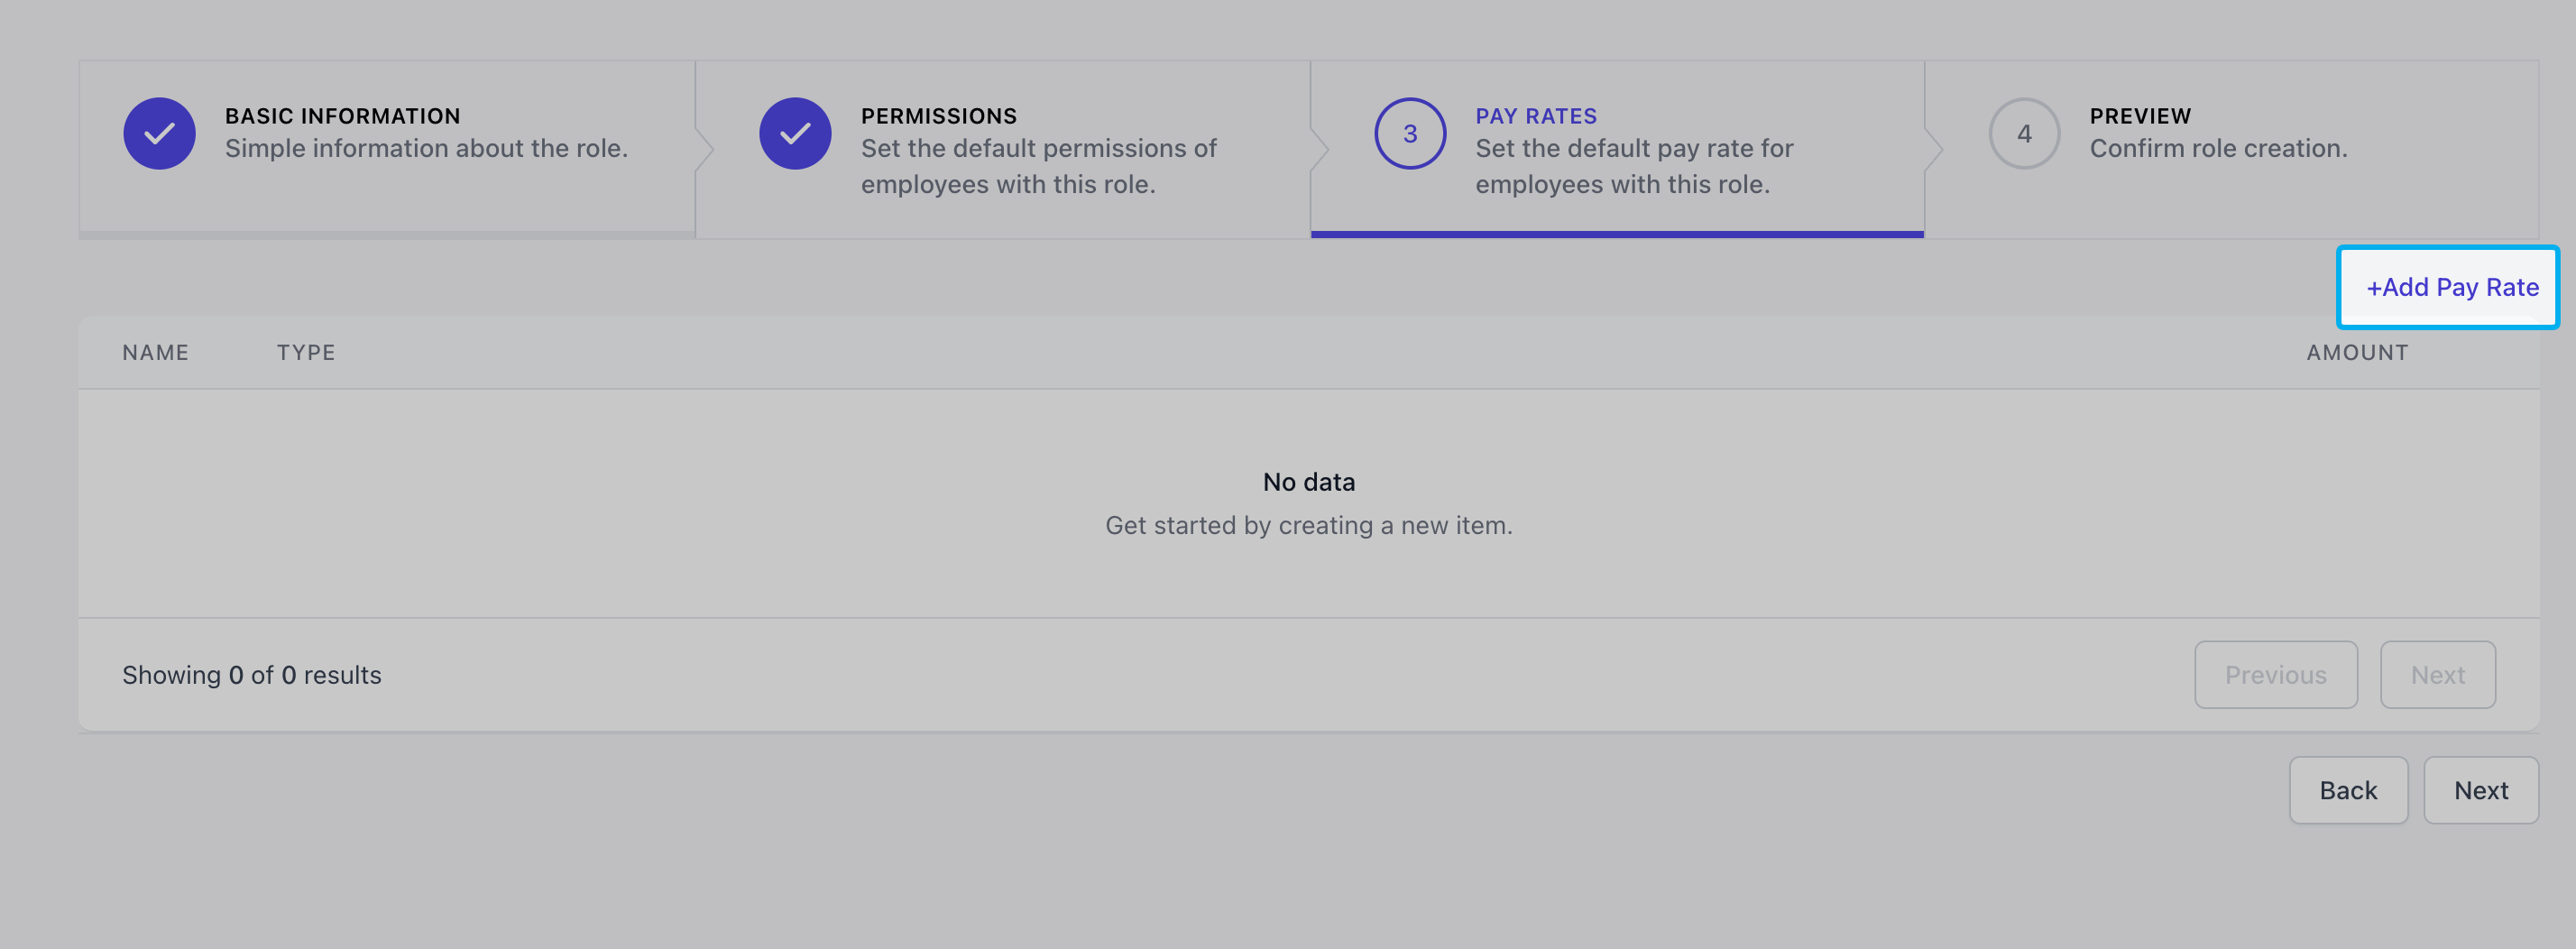
4
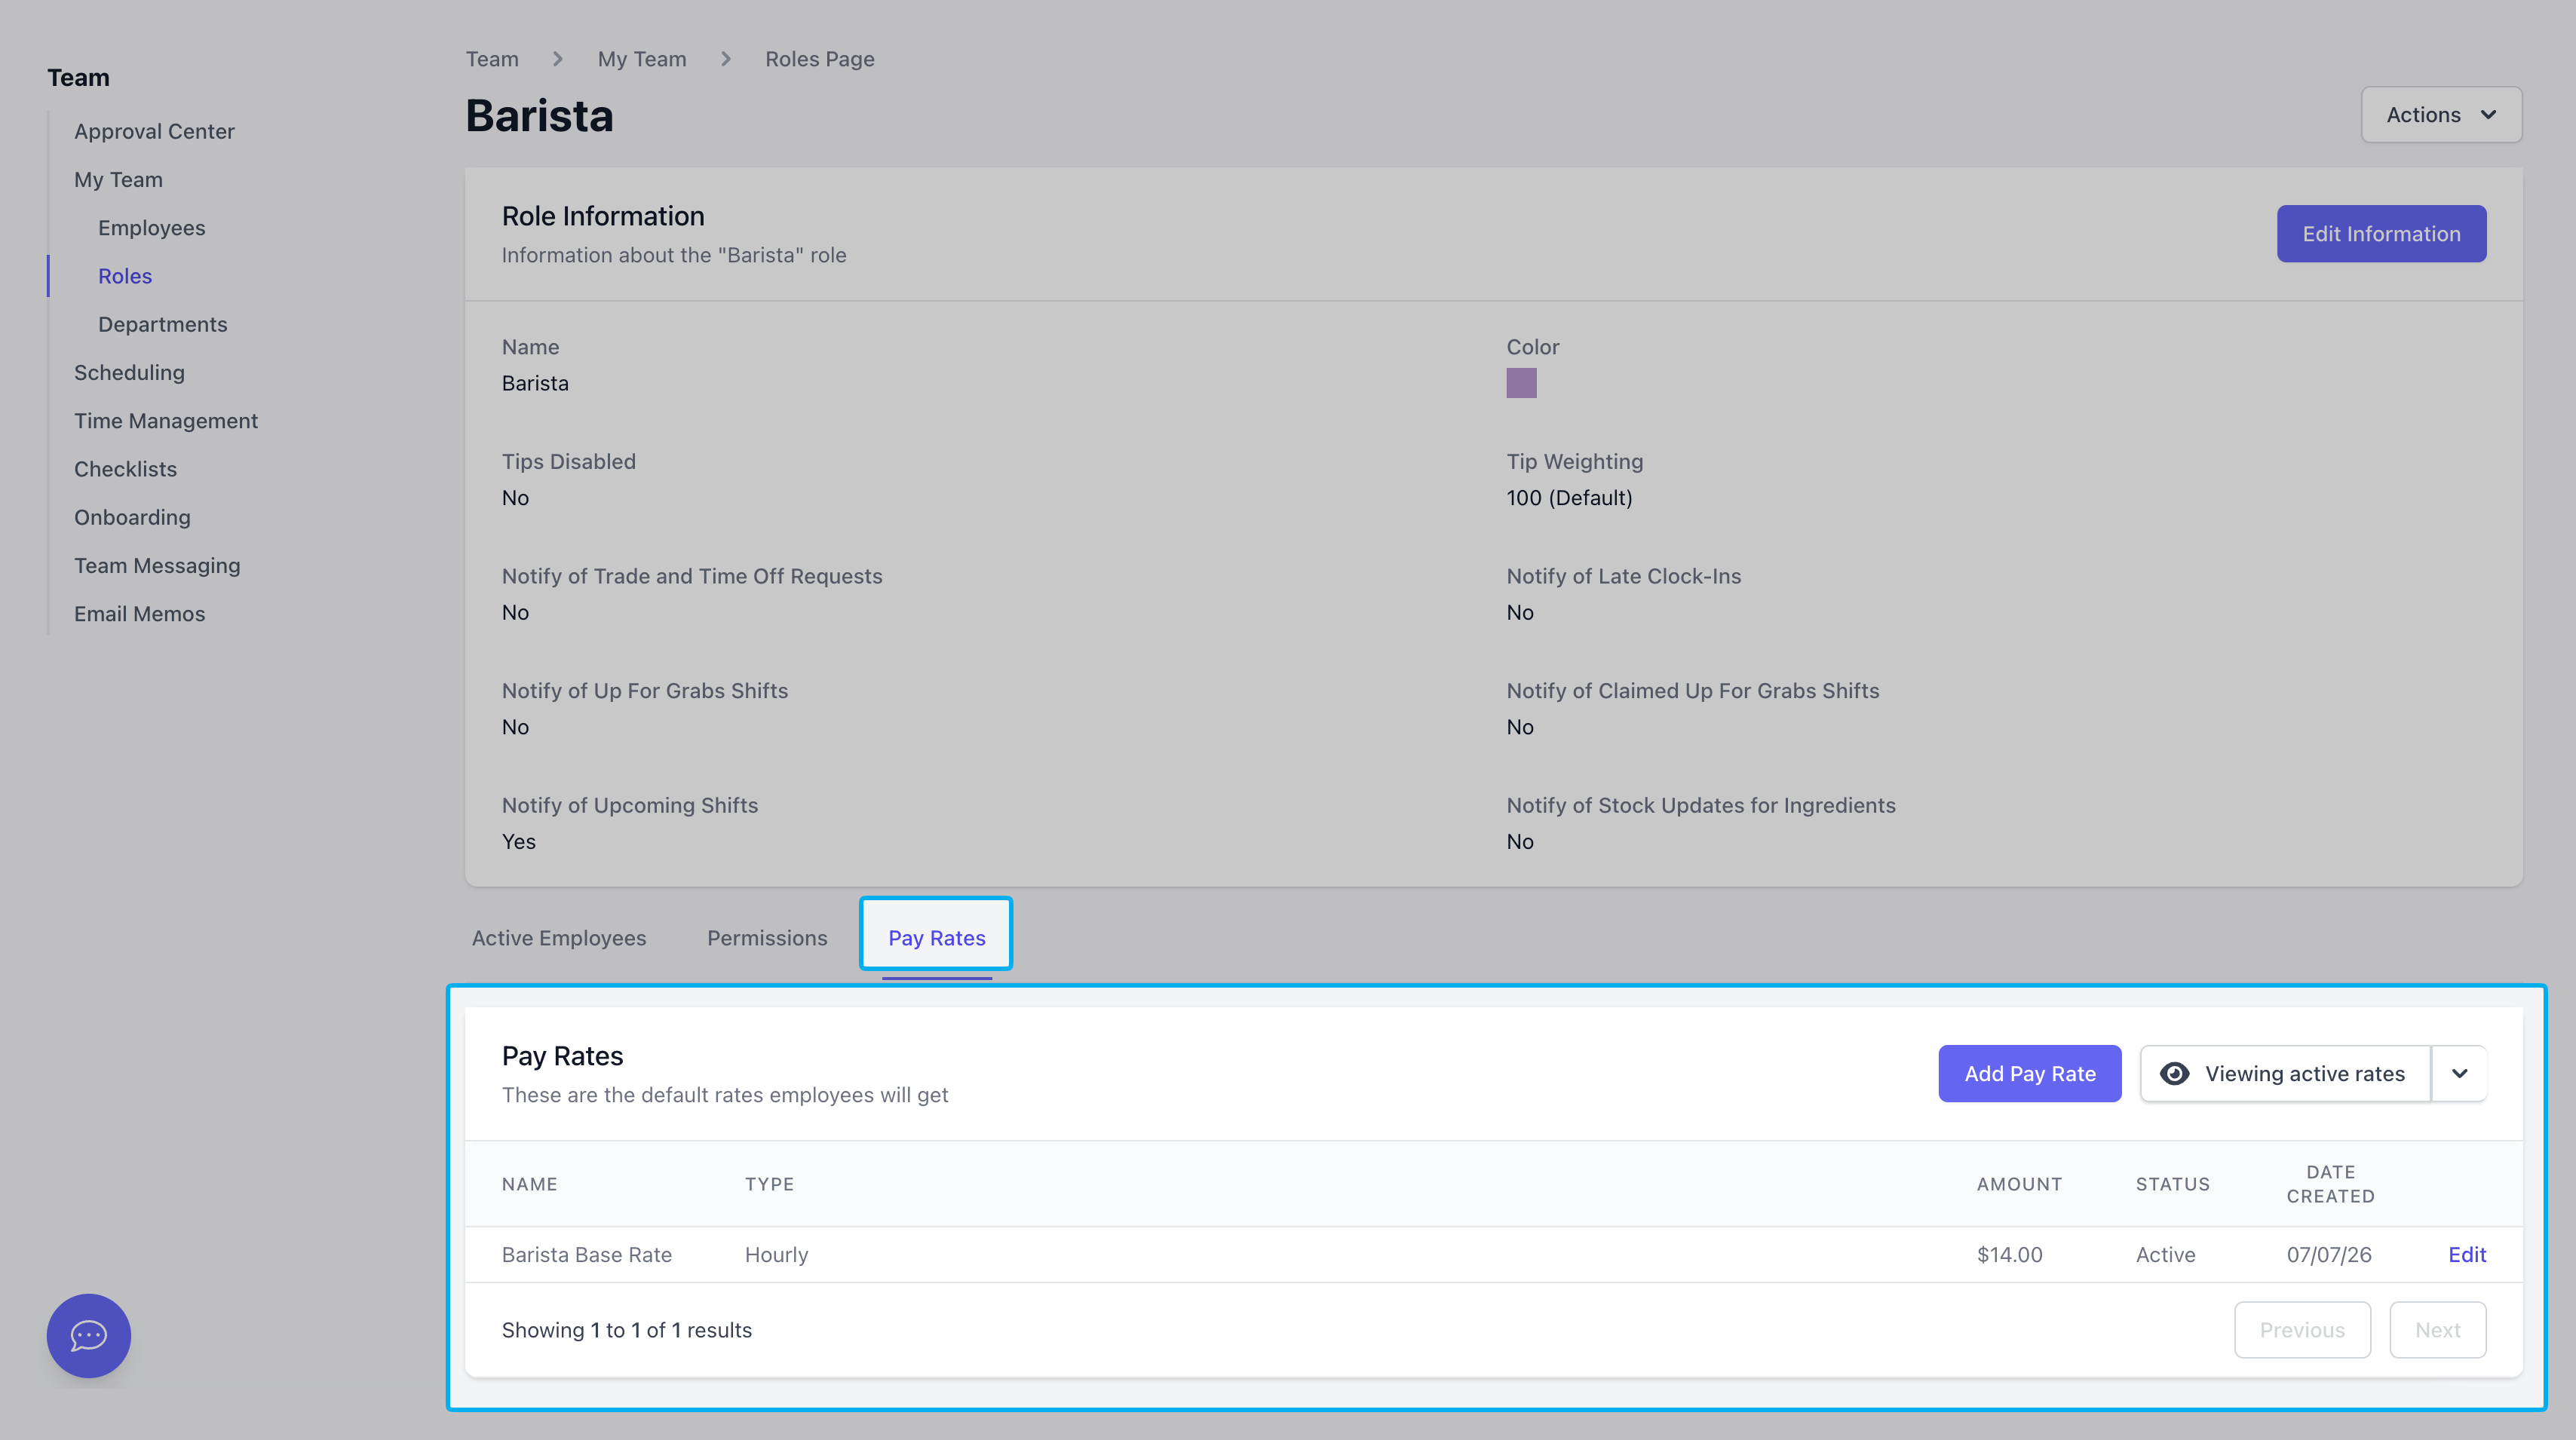
Determine Pay Rates
Click Add Pay Rate to set the default pay rate for employees with this role.
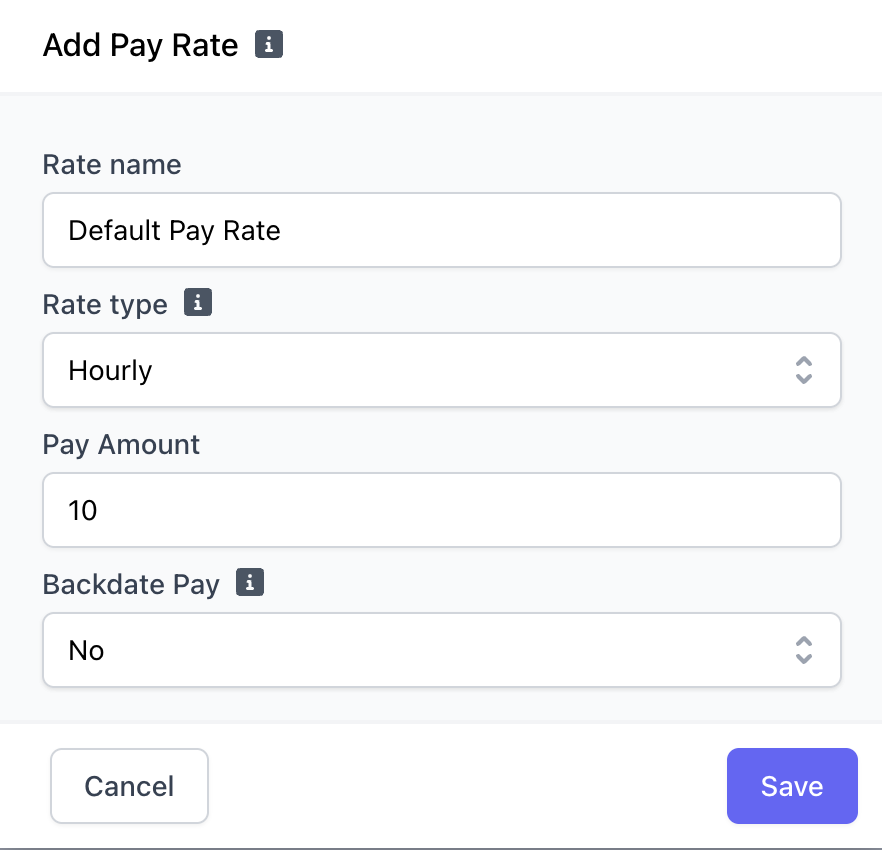
Rate Type
Rate Type
Hourly: Dollar amount earned per hour clocked in with this roleTime Range: Hourly rate to pay employees during a specifically time during the day(Example: employees in this role working the morning rush from 6AM-8AM are paid a rate that is 1.5x higher than the typically hourly rate)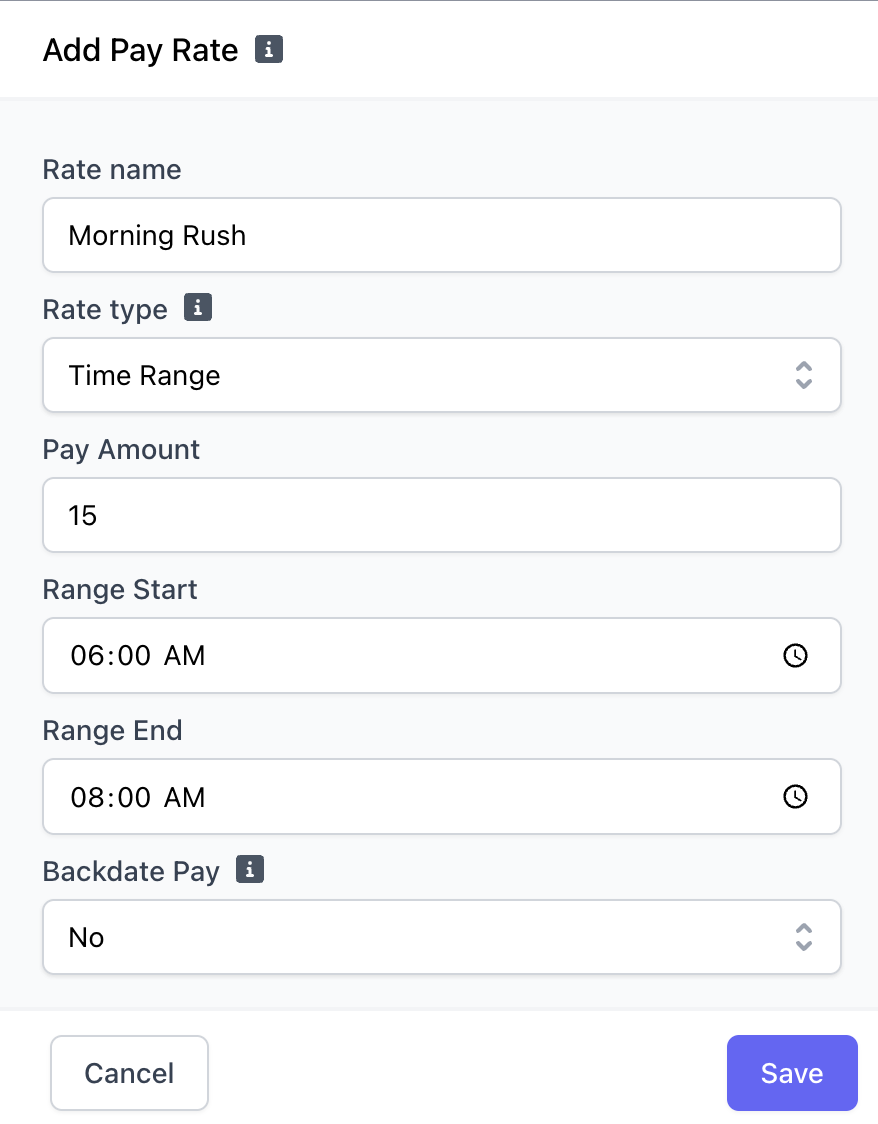
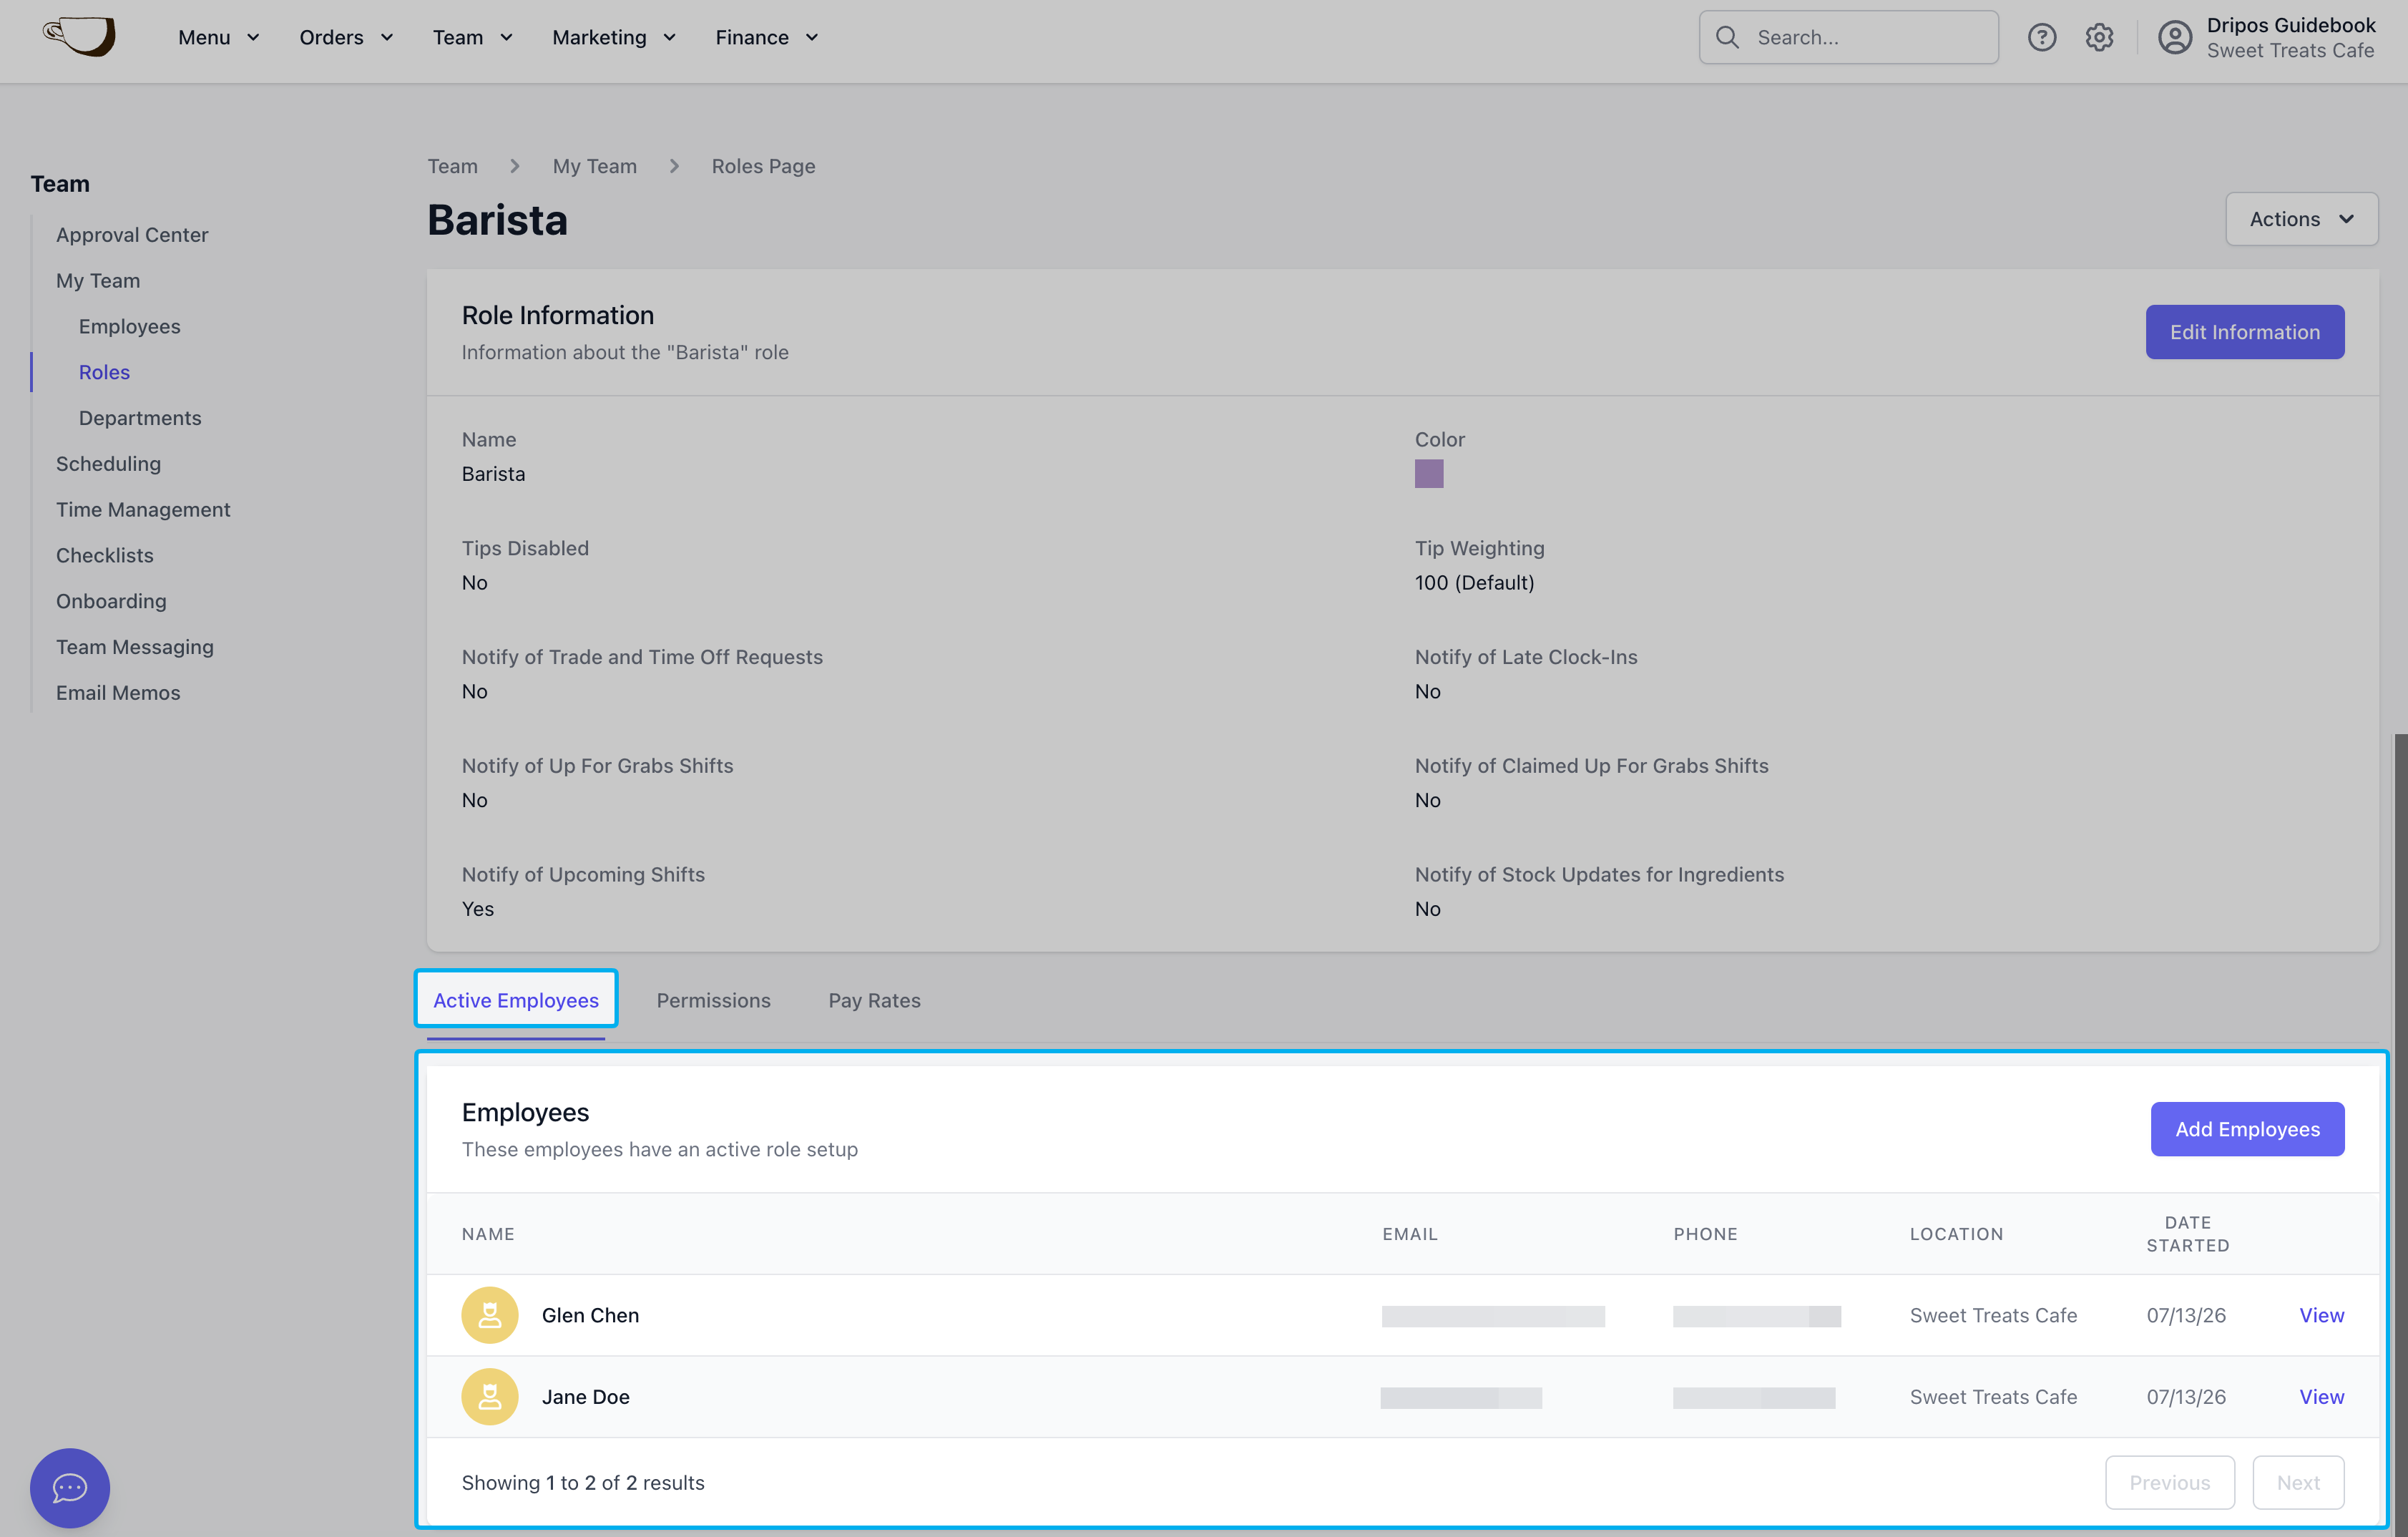
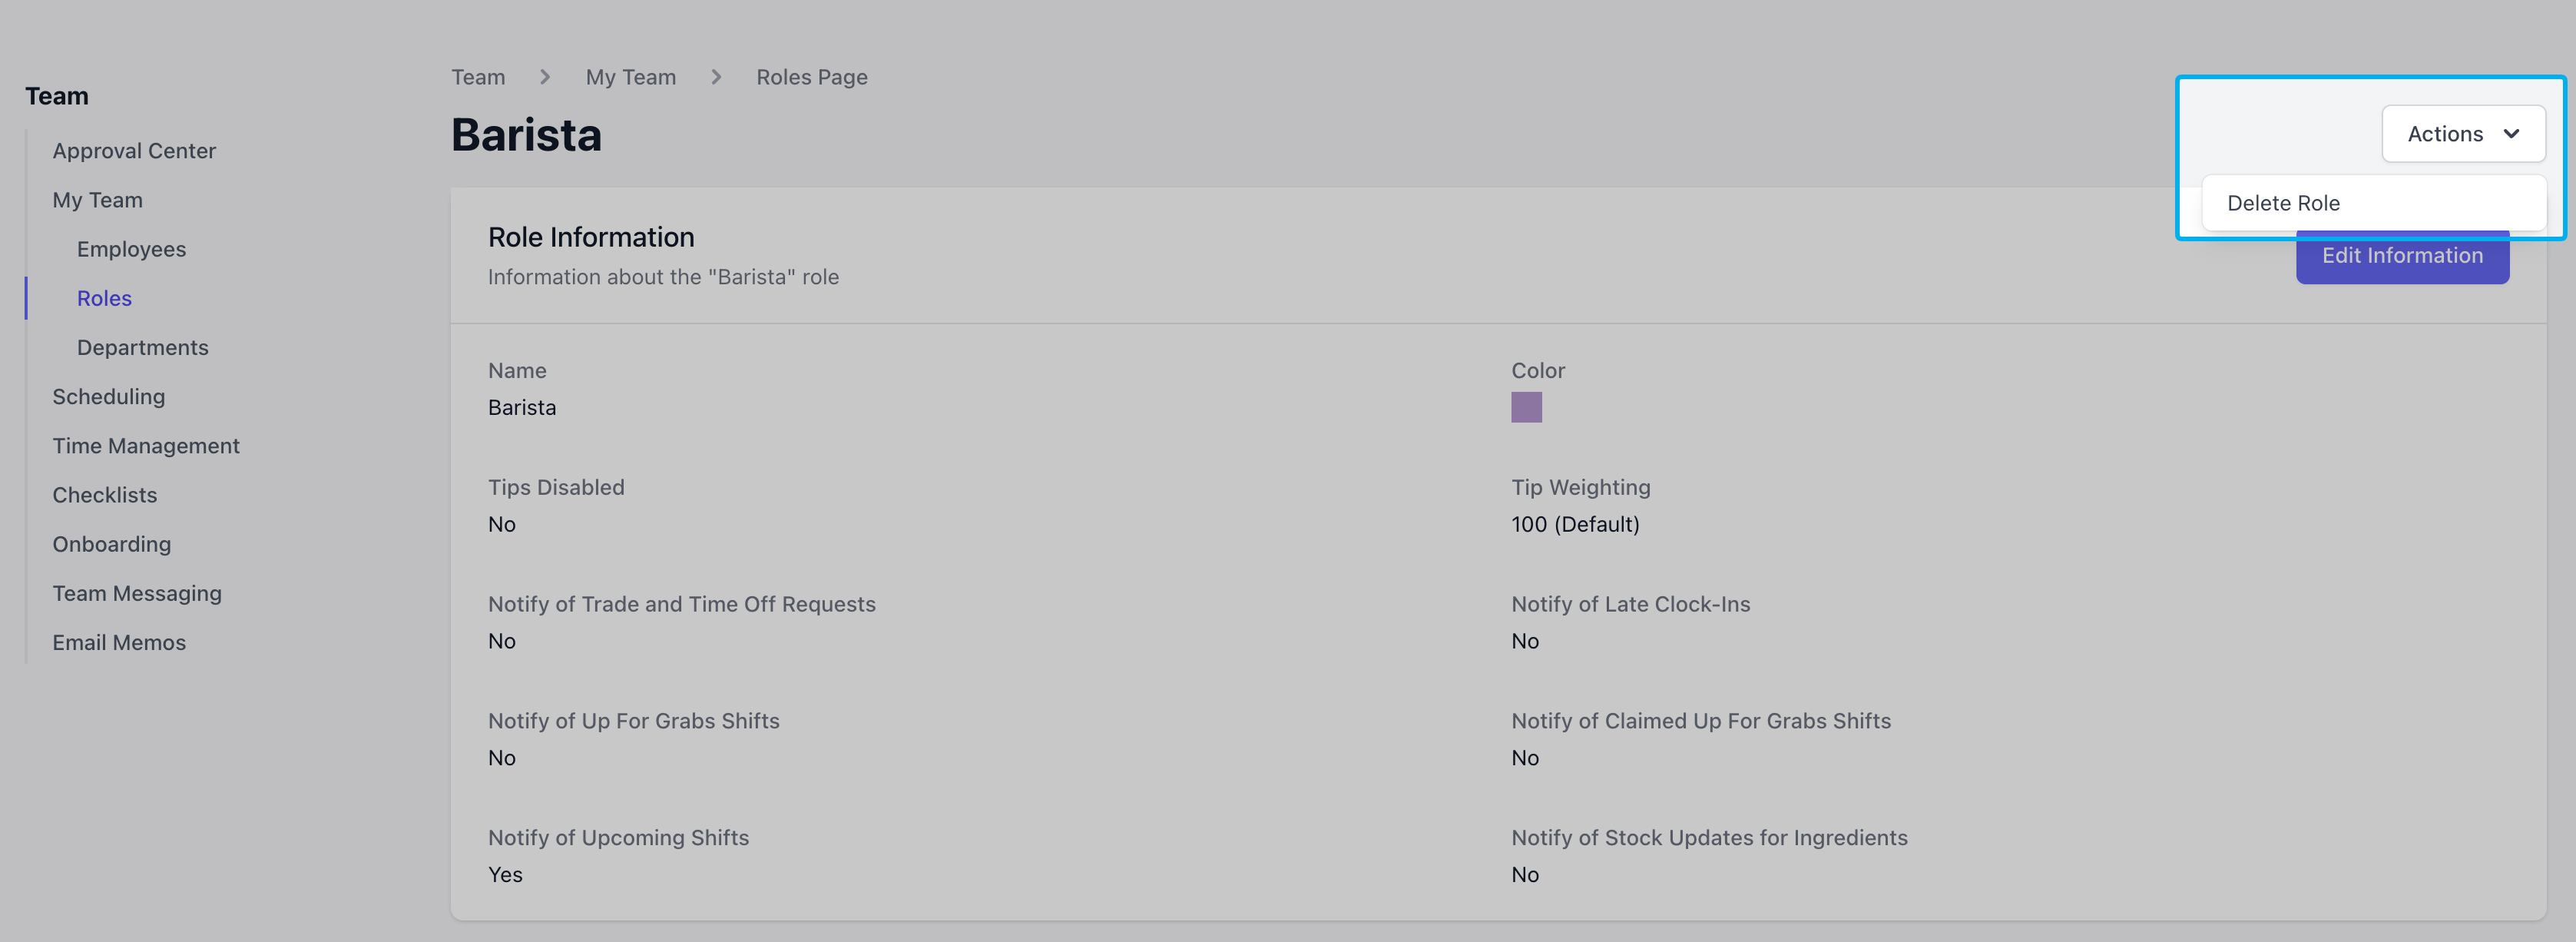
Edit a Role
Edit an existing role and its components at any time On the Web Dashboard click Team > My Team > Roles > Edit a role- Edit Information
- Add and Remove Employees
- Permissions
- Pay Rates
- Delete Role
Click the Edit Information button to edit the basic role information.