Create Break Type
To enable employees to start a break using the Dripos time clock, you’ll first need to create at least one break type in the system.1
On the Dashboard navigate to Team > Breaks > Create Break Option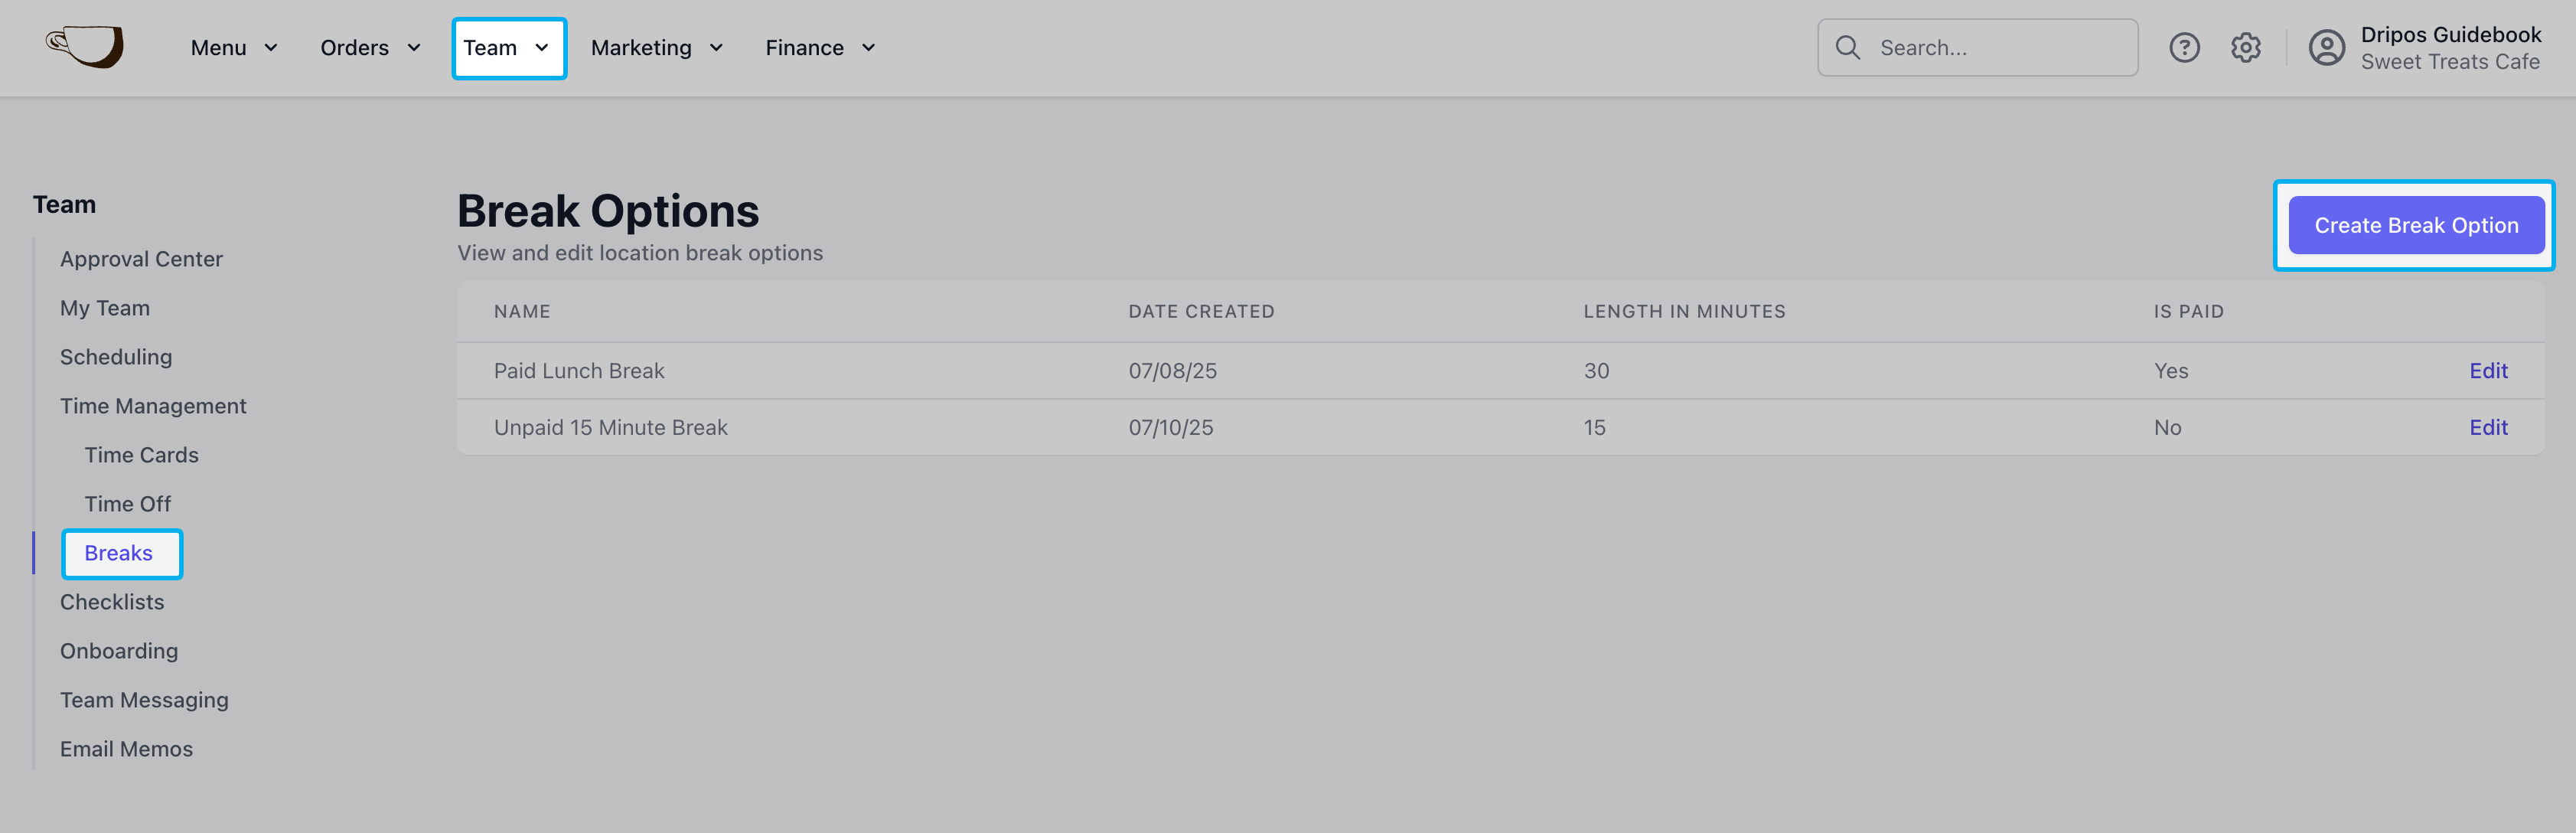
2
Enter the break time, the duration of the break in minutes, and indicate if the break is to be paid. Press the Add button to save.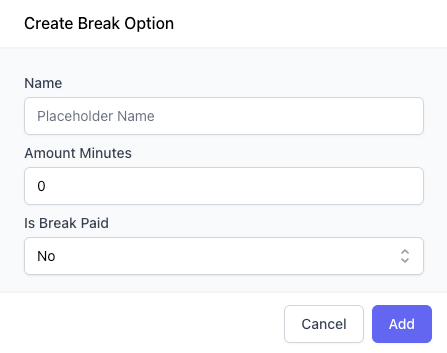
3
View and edit existing breaks on this page. Any break listed here can now be used with the Time Clock.
Start & End Breaks
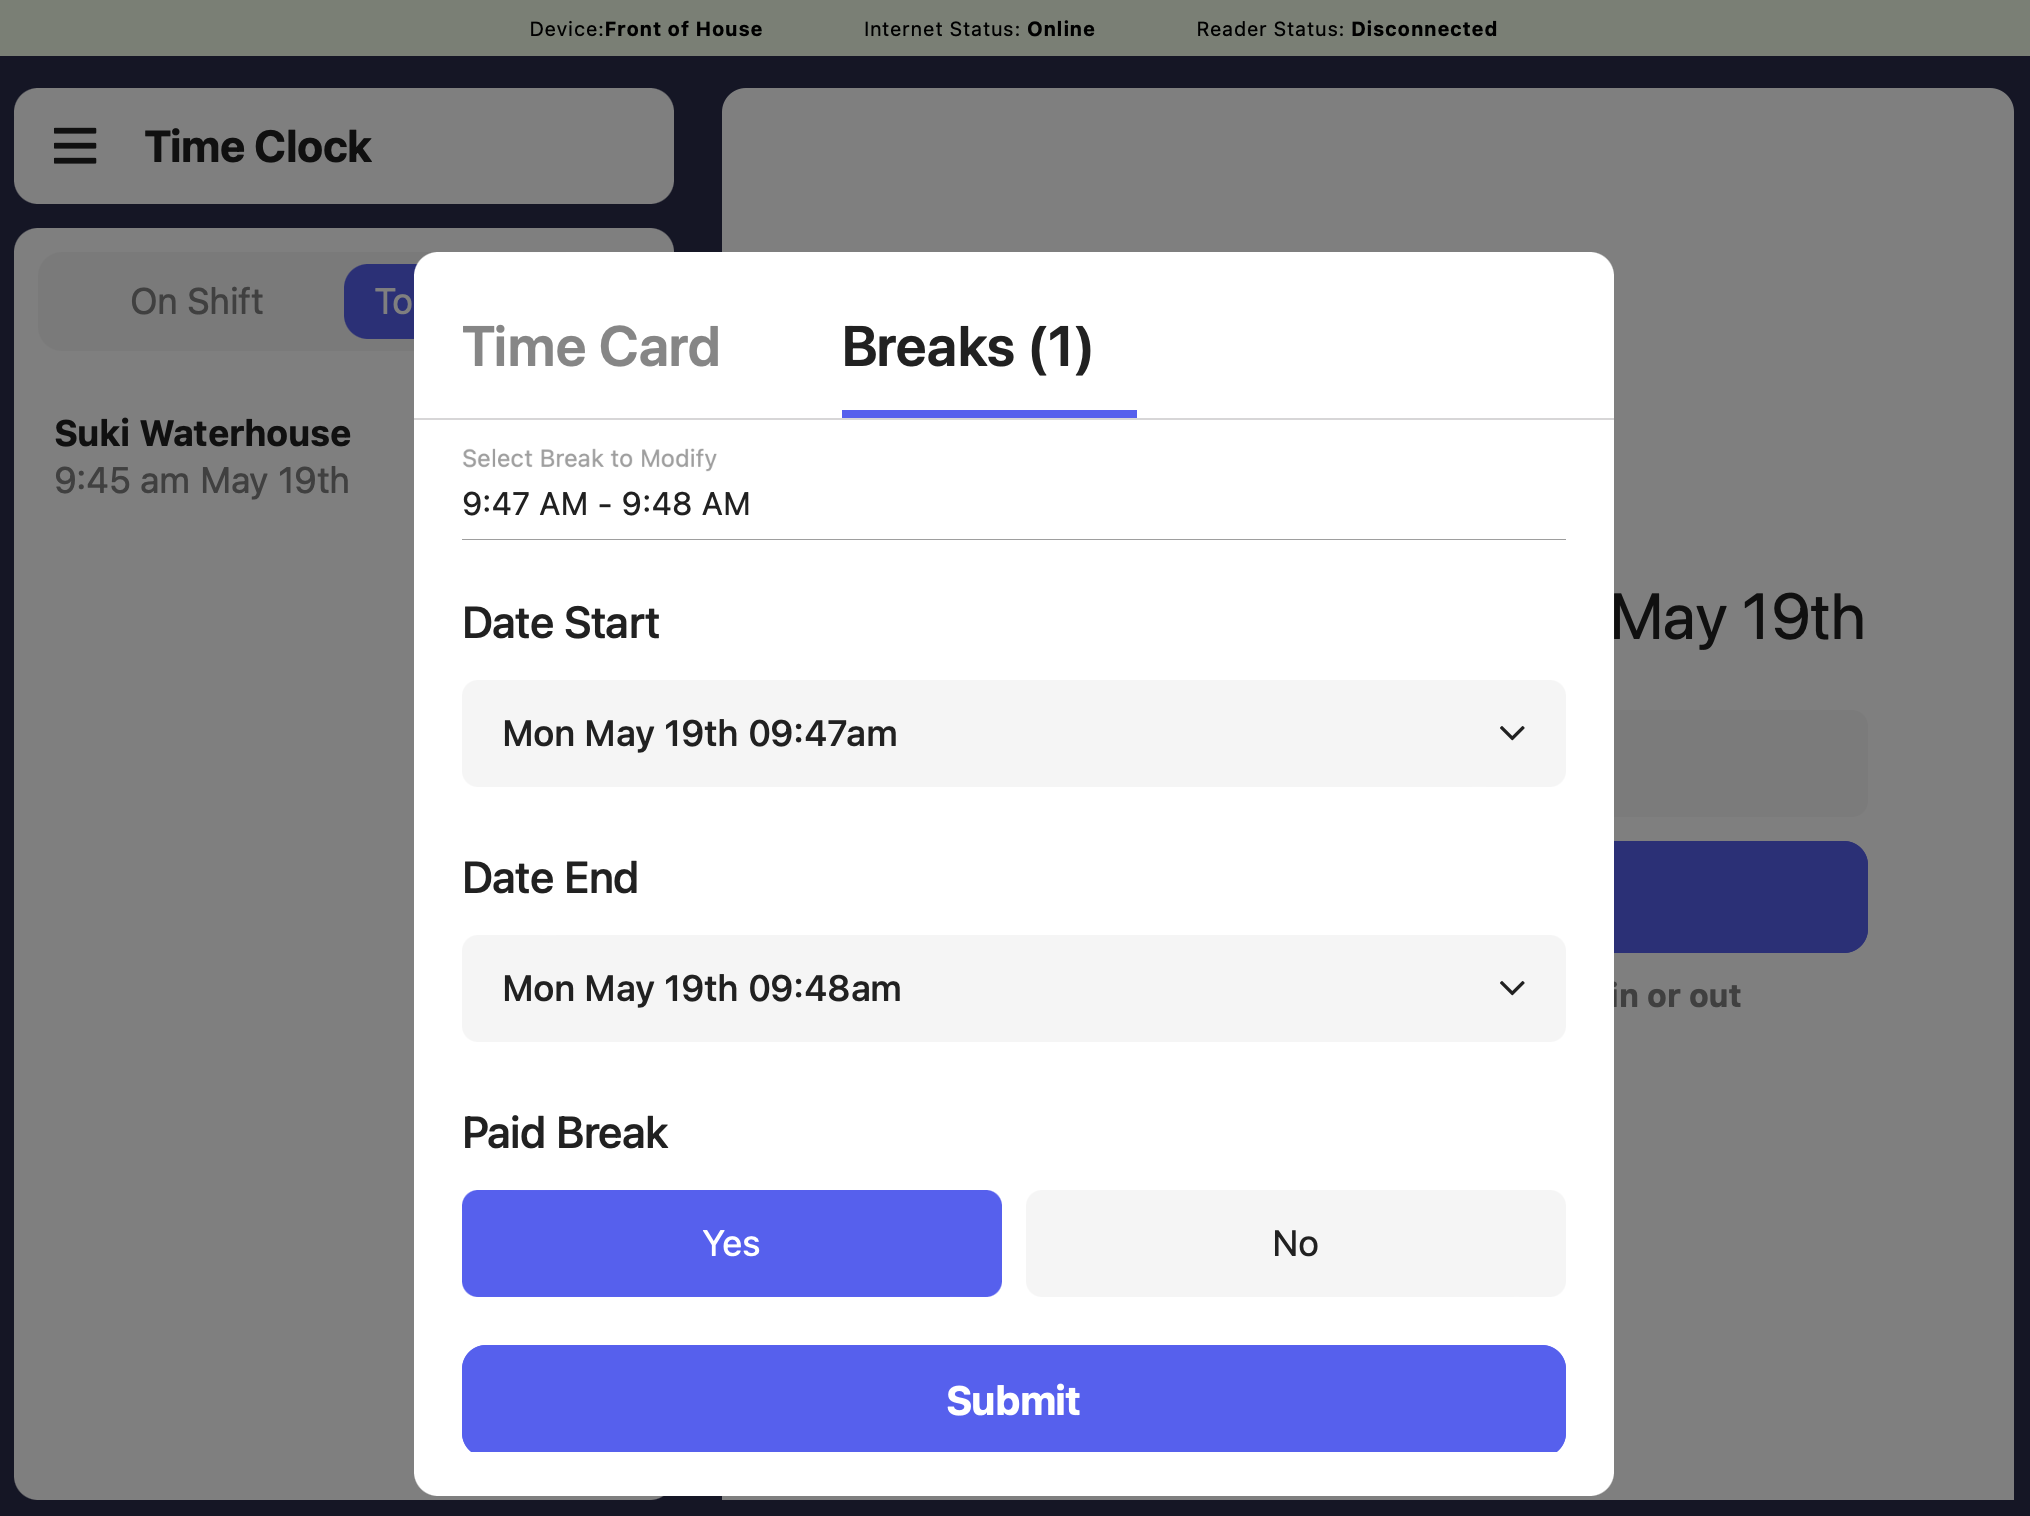
Start and end an employee break in real time from the Point of Sale.View and edit the employee break directly from their completed time card on the Point of Sale.
Add and Edit Breaks on Existing Time Cards
Did an employee forget to start and/or end their break in real time? Not a problem - add and edit breaks on existing time cards from the Dashboard.1
Navigate on the Dashboard to Team > Time Management > click on any time card line to edit.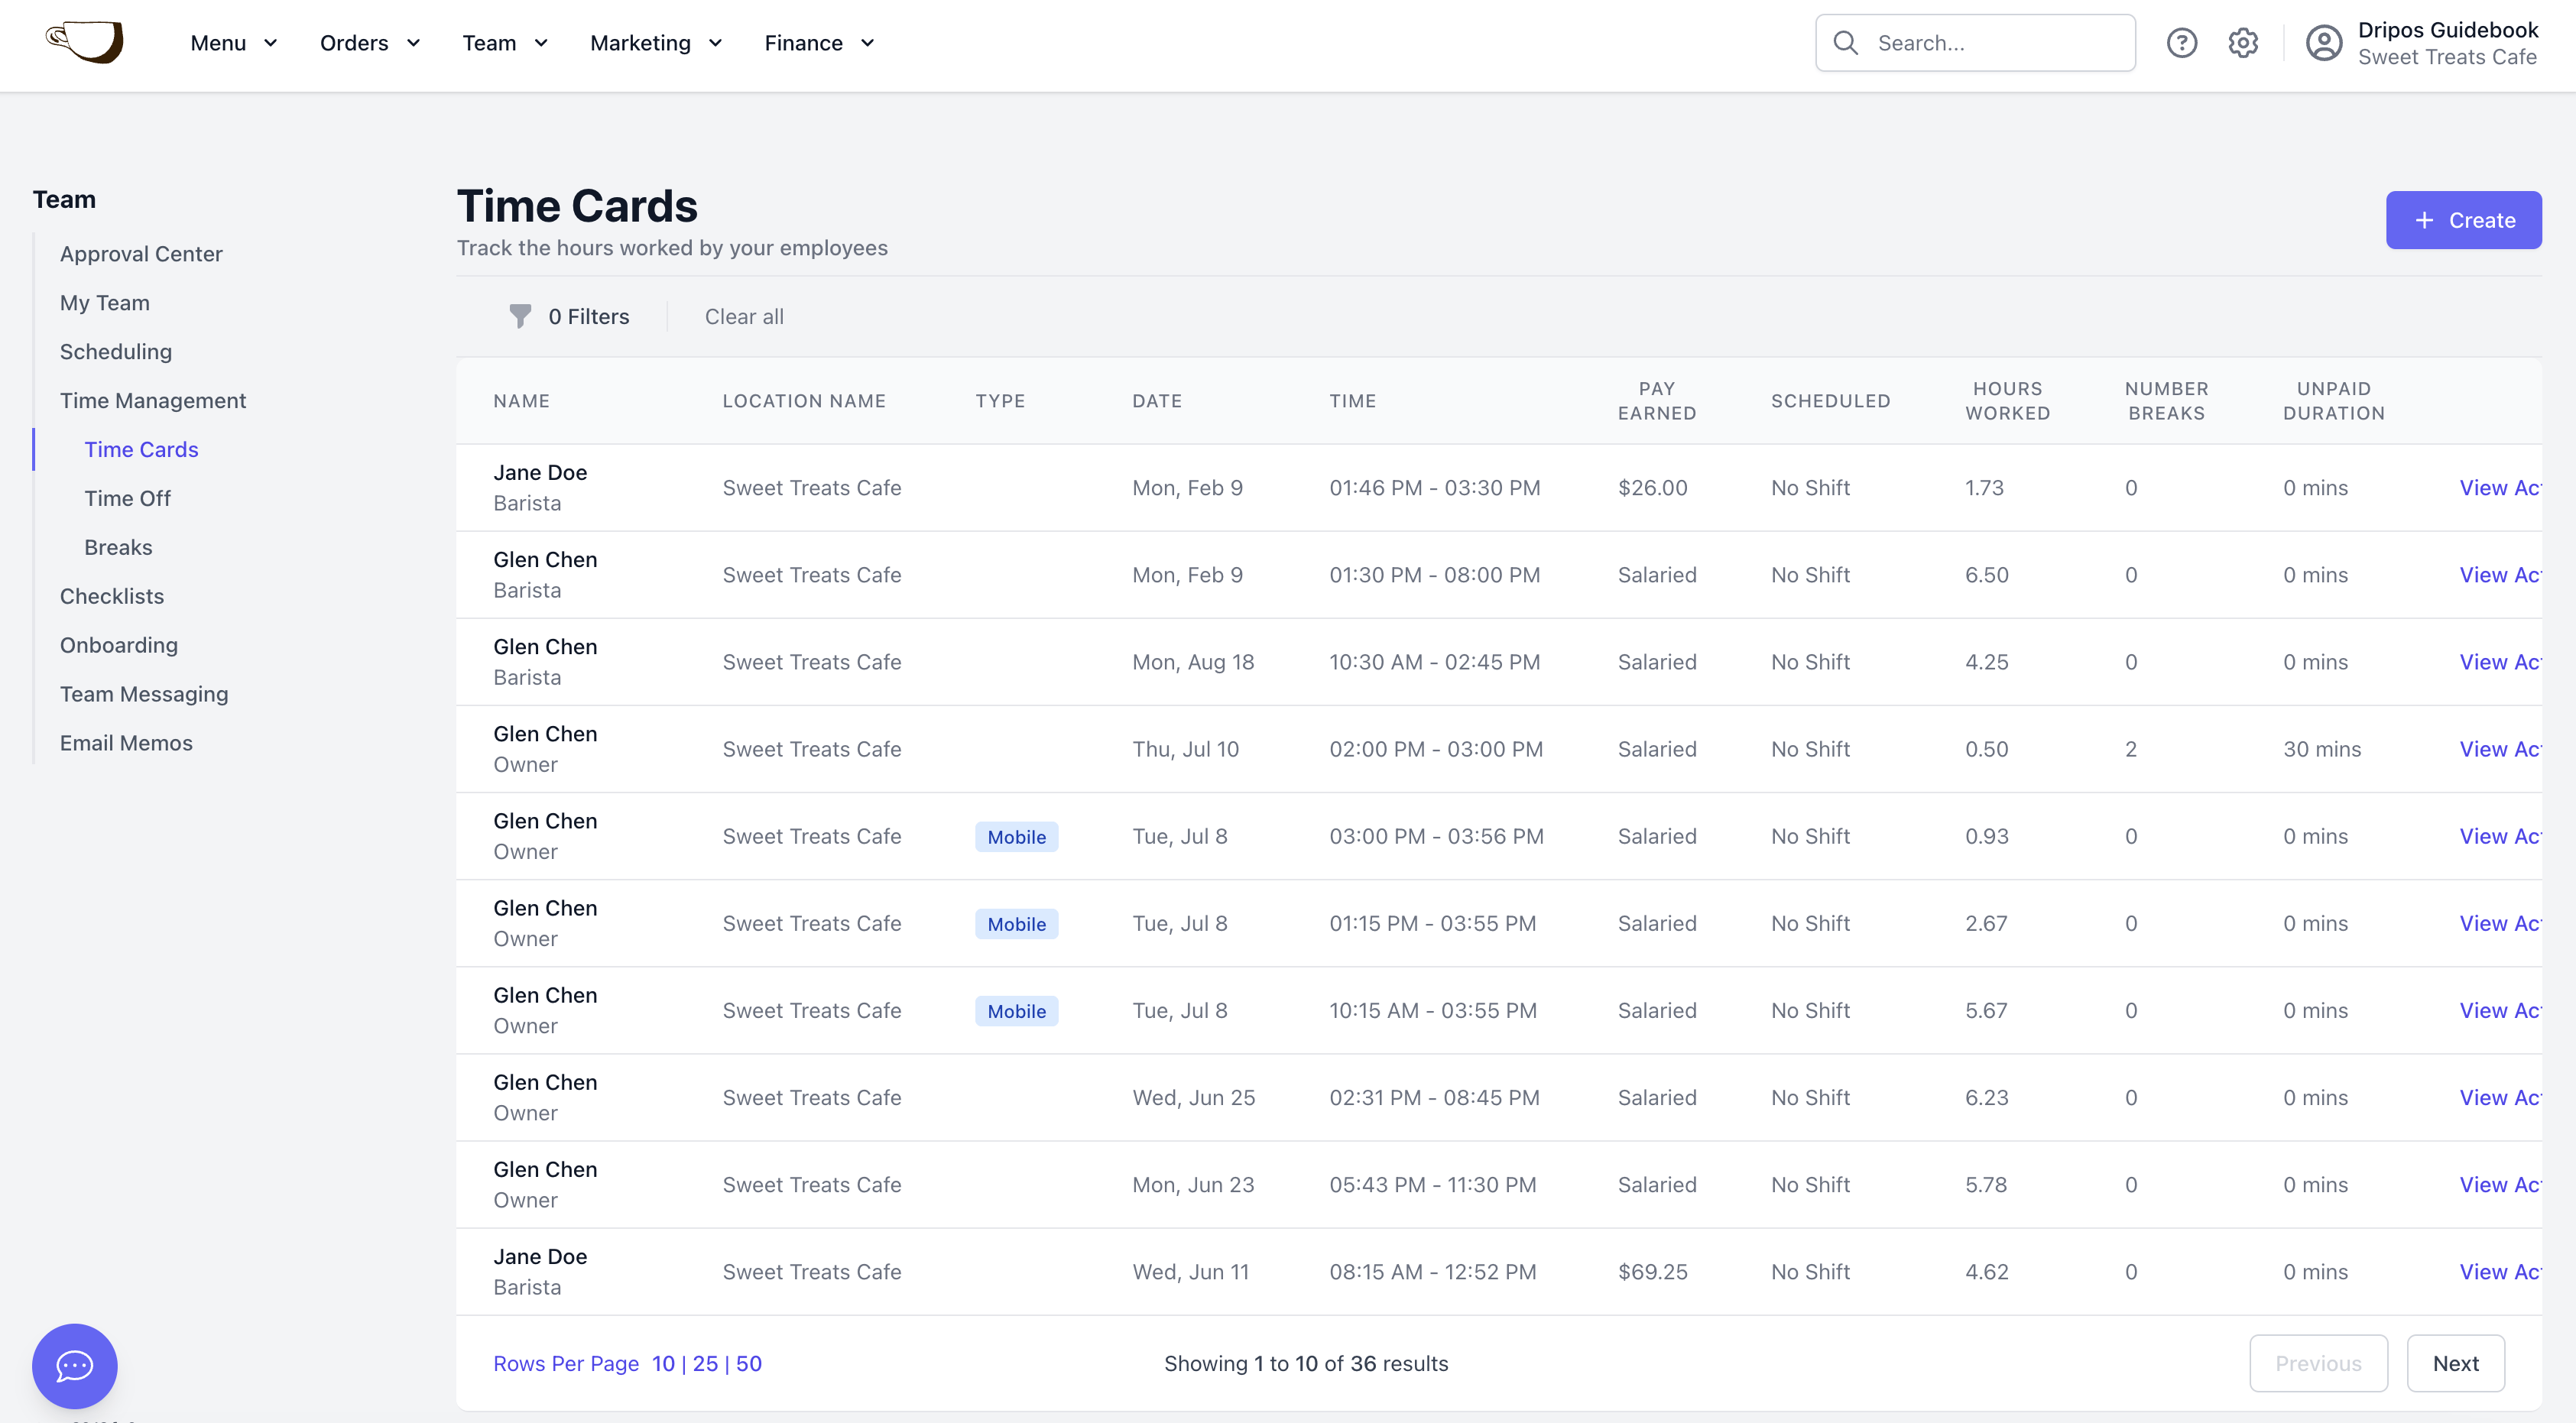
2
Edit existing break times and types at the bottom of the time card, or press the red X to delete the break.Click Add Break to add a new break to the existing time card.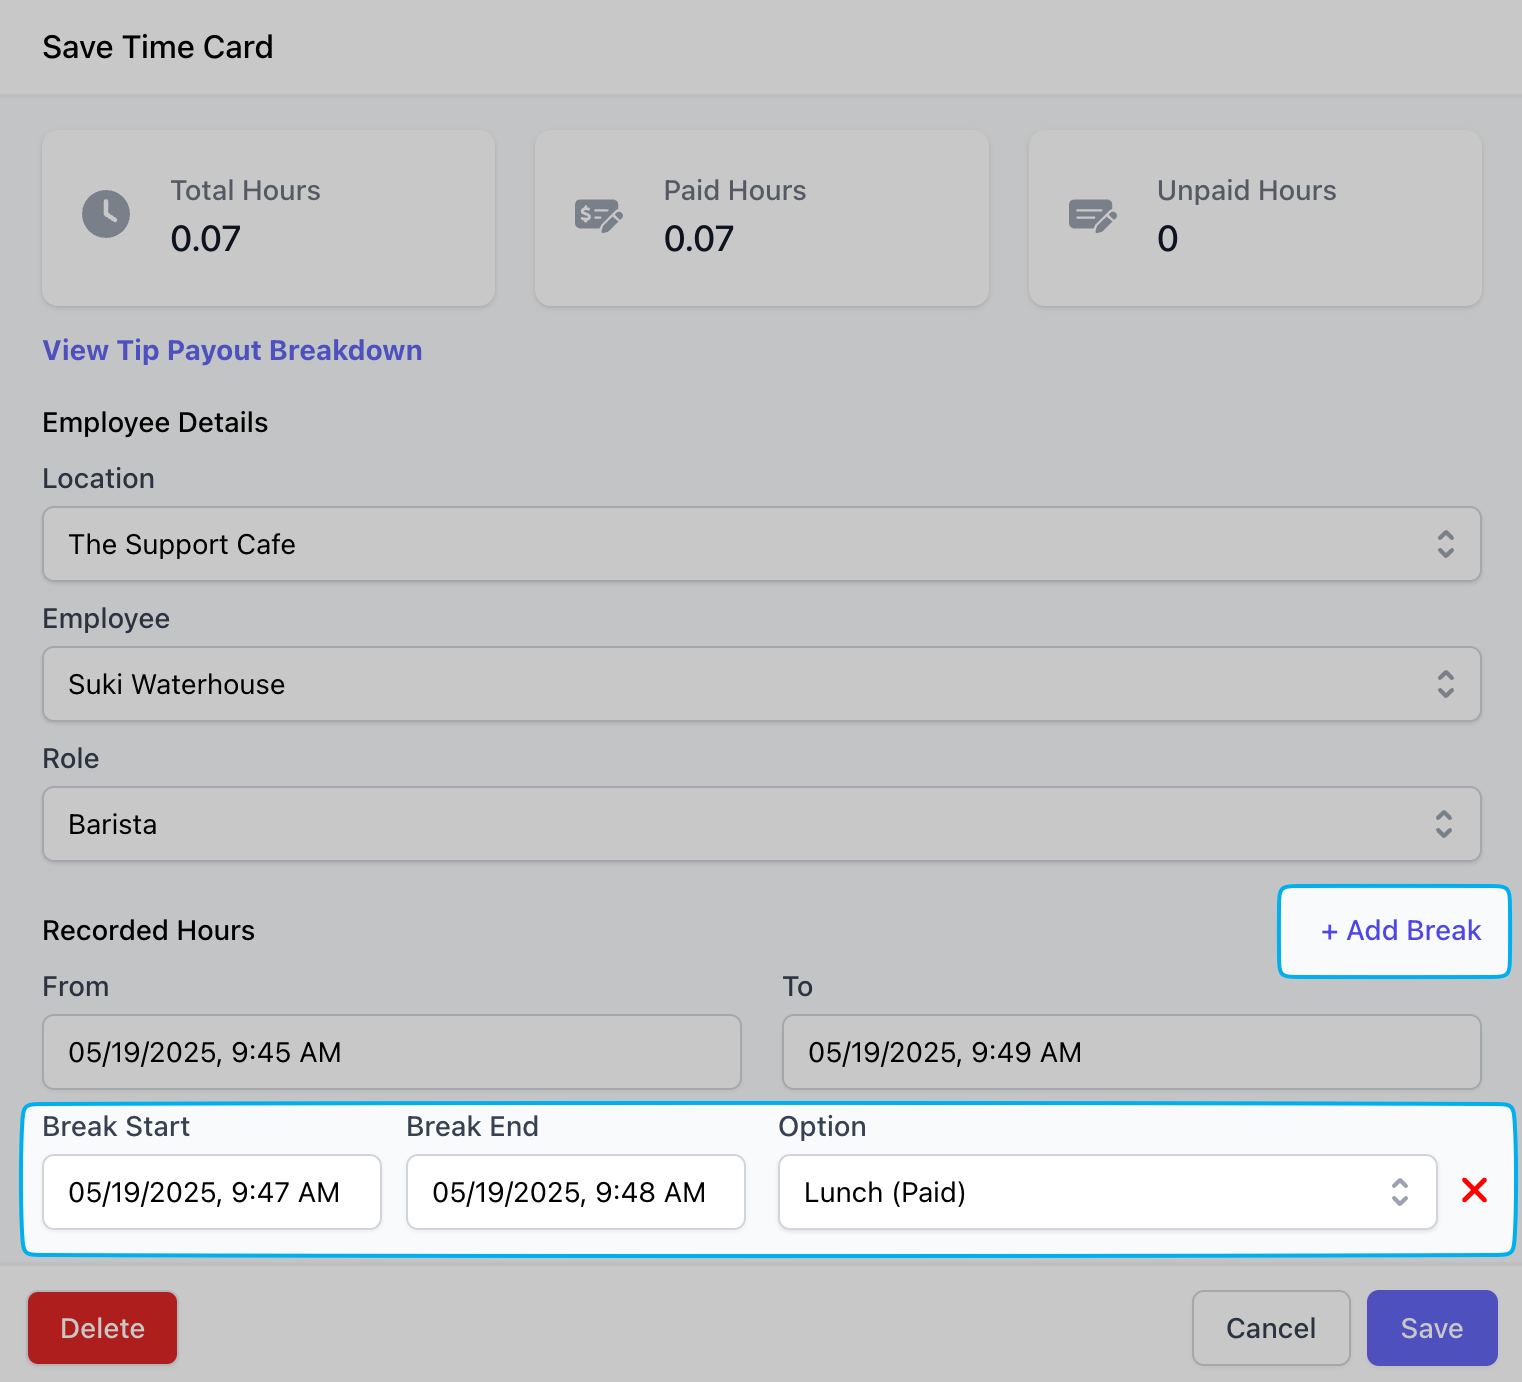
3
Click Save to confirm changes made.