Dripos QR codes allow you to add another channel of mobile ordering to your business. You can create custom QR codes that link to your order website and allow for targeting certain categories or generating patron sign-up forms.

Furthermore, by attaching any relevant internal or external facing notes to these QR codes, this feature can be utilized to create helpful workflows for your business, such as hybrid table service workflows.

Creating Web Ordering QR Codes

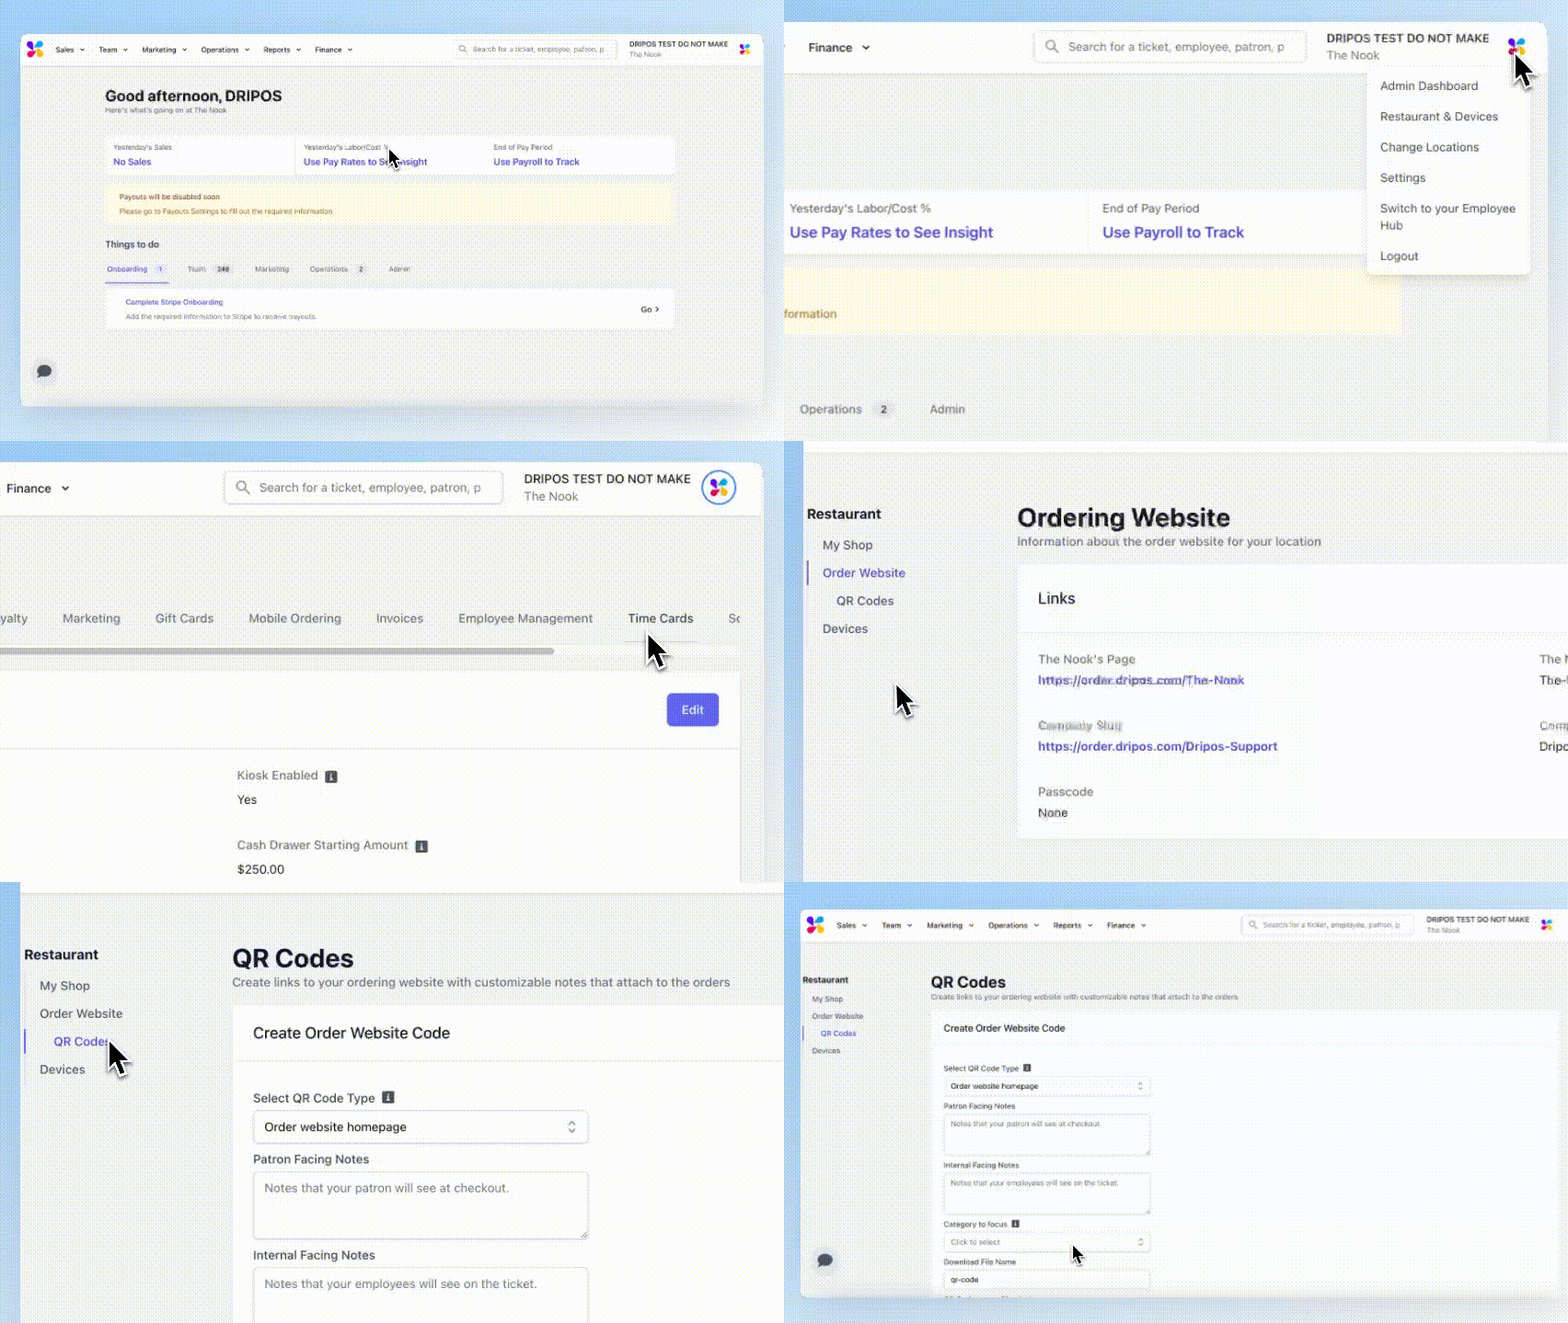
  1. To get started creating QR codes for web ordering, navigate to shop settings on the Web Dashboard.
  1. Then click on Order Website on the left side menu
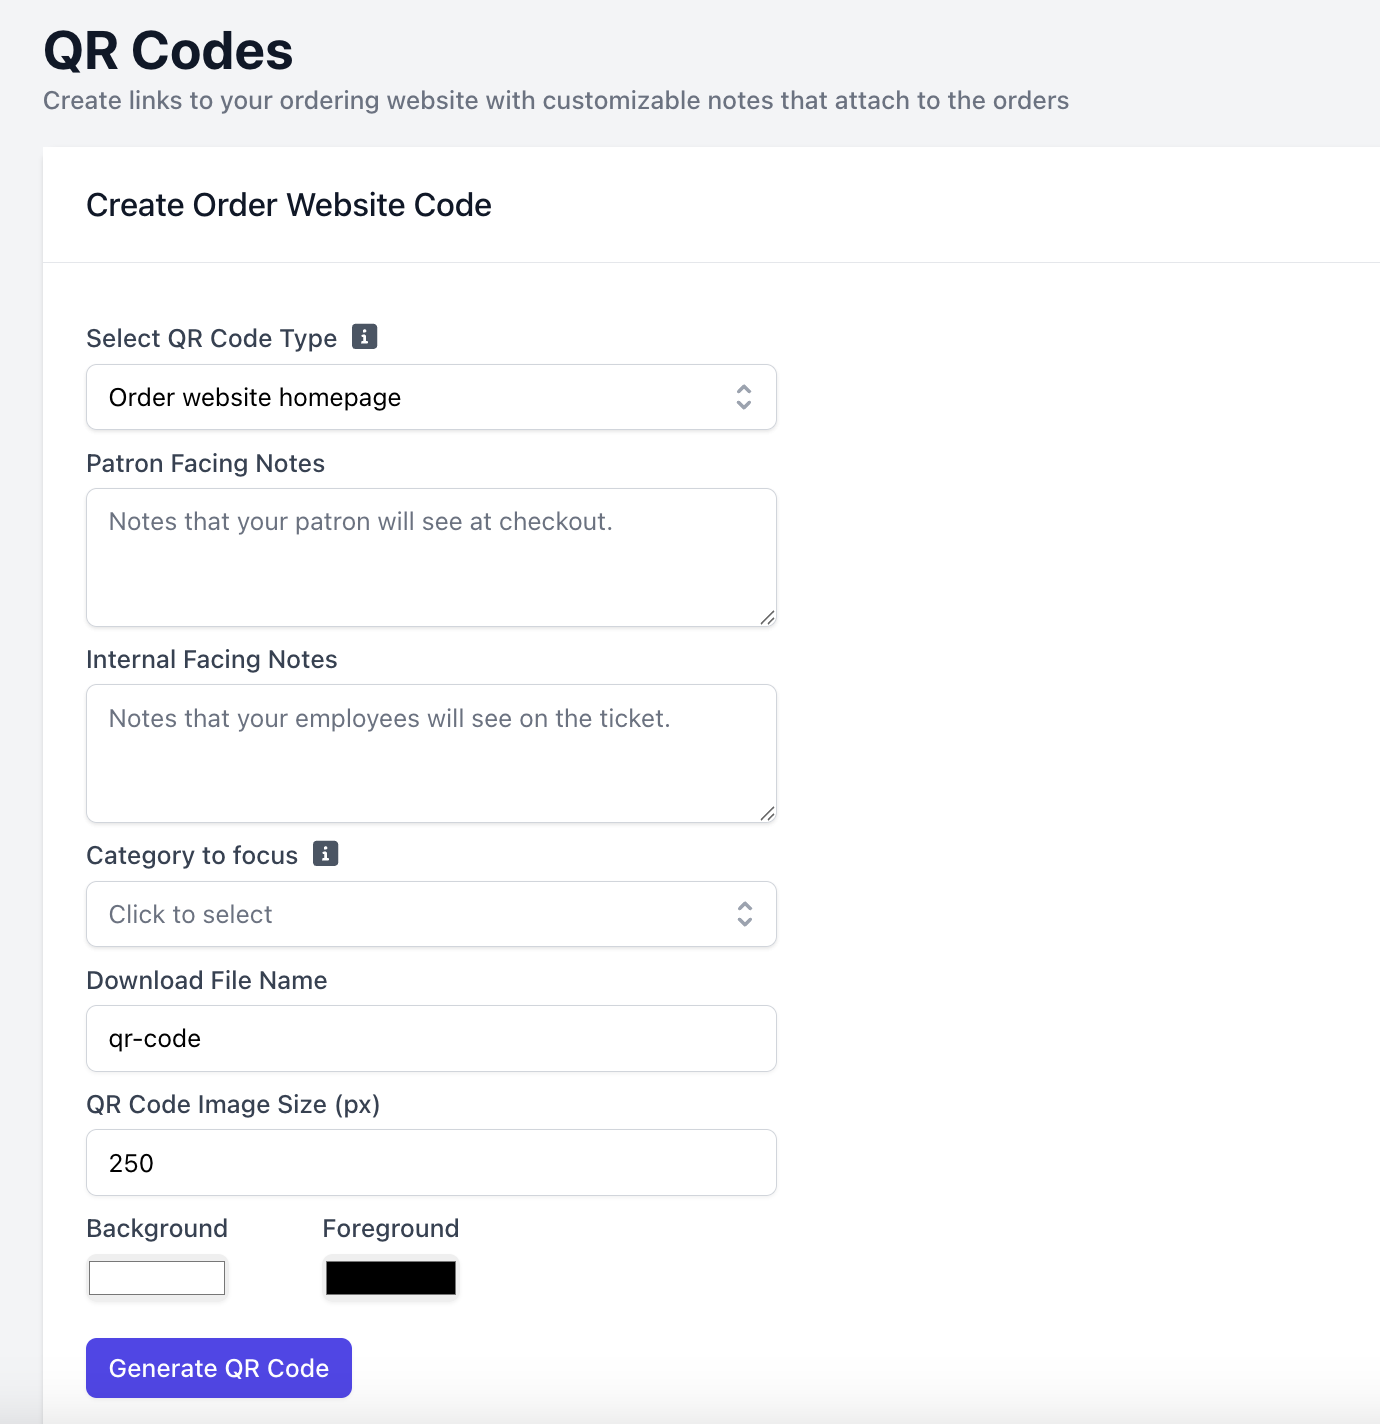
  1. Then click on QR Codes. That should take you to a page that looks like this:
  1. Leave the Generate Signup Link toggle set to No.

  2. Now let’s take a look at the following fields.

Patron Facing Notes: atron facing notes will be seen by patrons at checkout, and can be used to provide specific pickup instructions or other fullfillment information.

Internal Facing Notes: Internal facing notes will be seen on the KDS and will be printed on physical make tickets if applicable.

Category to Focus: If a category to focus is selected, scanning the QR code will link to that particular category selection on the order website.

Download File Name: Here you can customize the file name to be downloaded, so that you can organize and keep track of multiple QR codes created for your shop.

Image Sizing and Color Selection: The remaining 2 fields: QR Code Image Size and Background/Foreground color allow you to customize the image size and colors on the QR code to match your shop branding.

6.Once you’ve selected your colors, click Generate QR Code and Click Download Image to download the file.

Creating Patron Signup QR Codes

  1. To get started creating QR codes for web ordering, navigate to shop settings on the Web Dashboard.
  1. Then click on Order Website on the left side menu
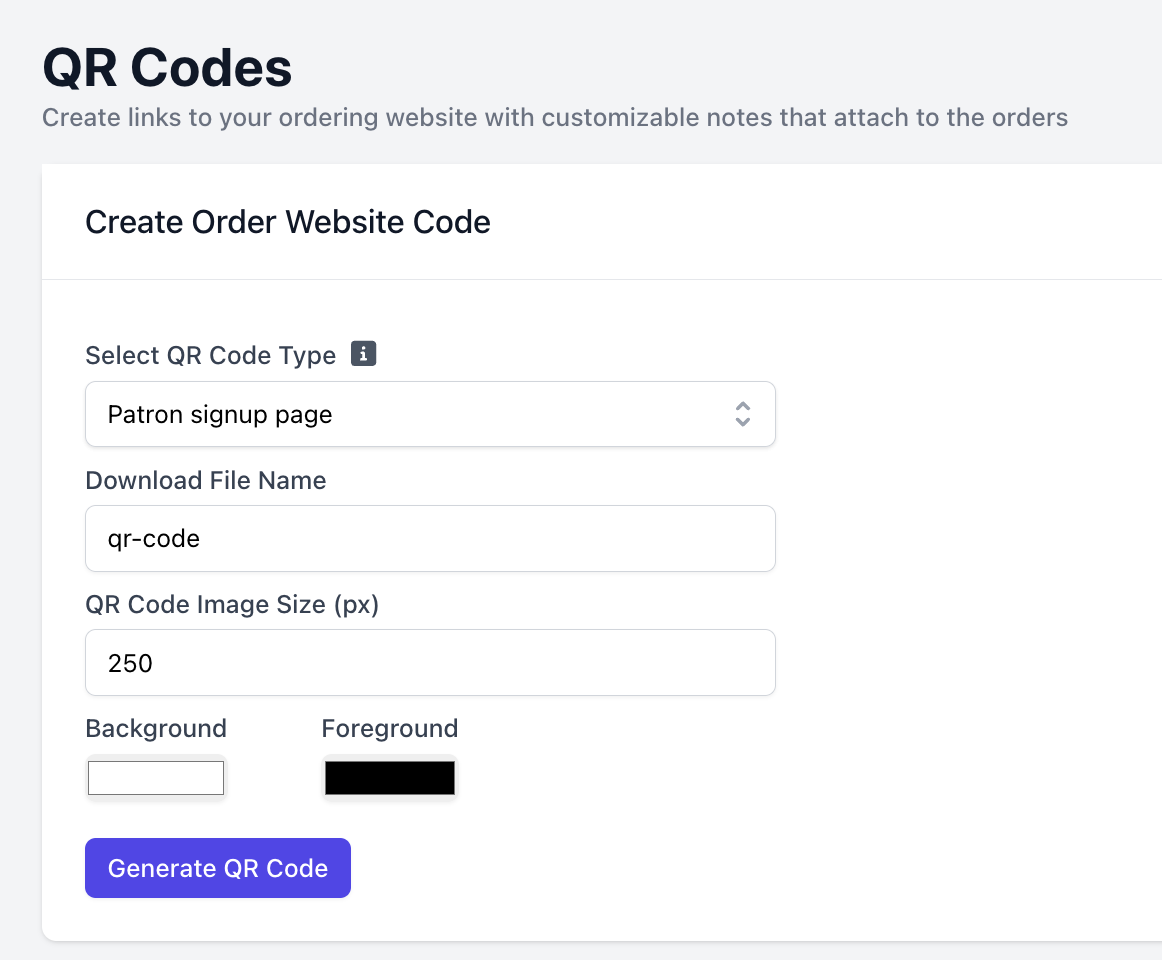
  1. Then click on QR Codes. That should take you to a page that looks like this:
  1. Leave the Generate Signup Link toggle set to Yes:
  1. Once selected, you’ll notice that the remaining fields are consolidated.

  2. Customize your file name, image size, and colors if applicable, and click *Generate QR Code. Click Download Image to download the file:

  1. Once Signup Link QR Code has been generated, patrons can scan them with their camera app or preferred QR code scanning app. We recommend the default camera app for most iOS and Android users.

  2. Once the QR code is recognized, click the link that appears directly in your camera app.

  3. That should take you to this link: order.dripos.com/[company]/signup

Keep in mind that these links are specific to each Dripos Company, so the link that another shop or company has created (such as our example above) will not be the same as your link.

  1. Once on this link, patrons can input their name, phone number, and email, and click Sign-Up!

Utilizing Mobile Ordering QR Codes

  1. Once Mobile Ordering QR Code has been generated, patrons can scan them with their camera app or preferred QR code scanning app. We recommend the default camera app for most iOS and Android users.

  2. Once the QR code is recognized, click the link that appears directly in your camera app.

  3. That should take you to this link: order.dripos.com/[company]

  4. Add selected products to cart, input any required contact and payment information, and submit your order normally by clicking Confirm Order.