Creating saved tickets on the Dripos Point of Sale allows you to add information to a transaction without having to check out immediately. This feature is useful for a variety of workflows, such as drive-thrus, call-in or scheduled orders, and even keeping tabs.

With saved tickets, you can initially add products to a ticket and then conveniently access the ticket to check out and pay it off whenever needed.

Create Saved Tickets

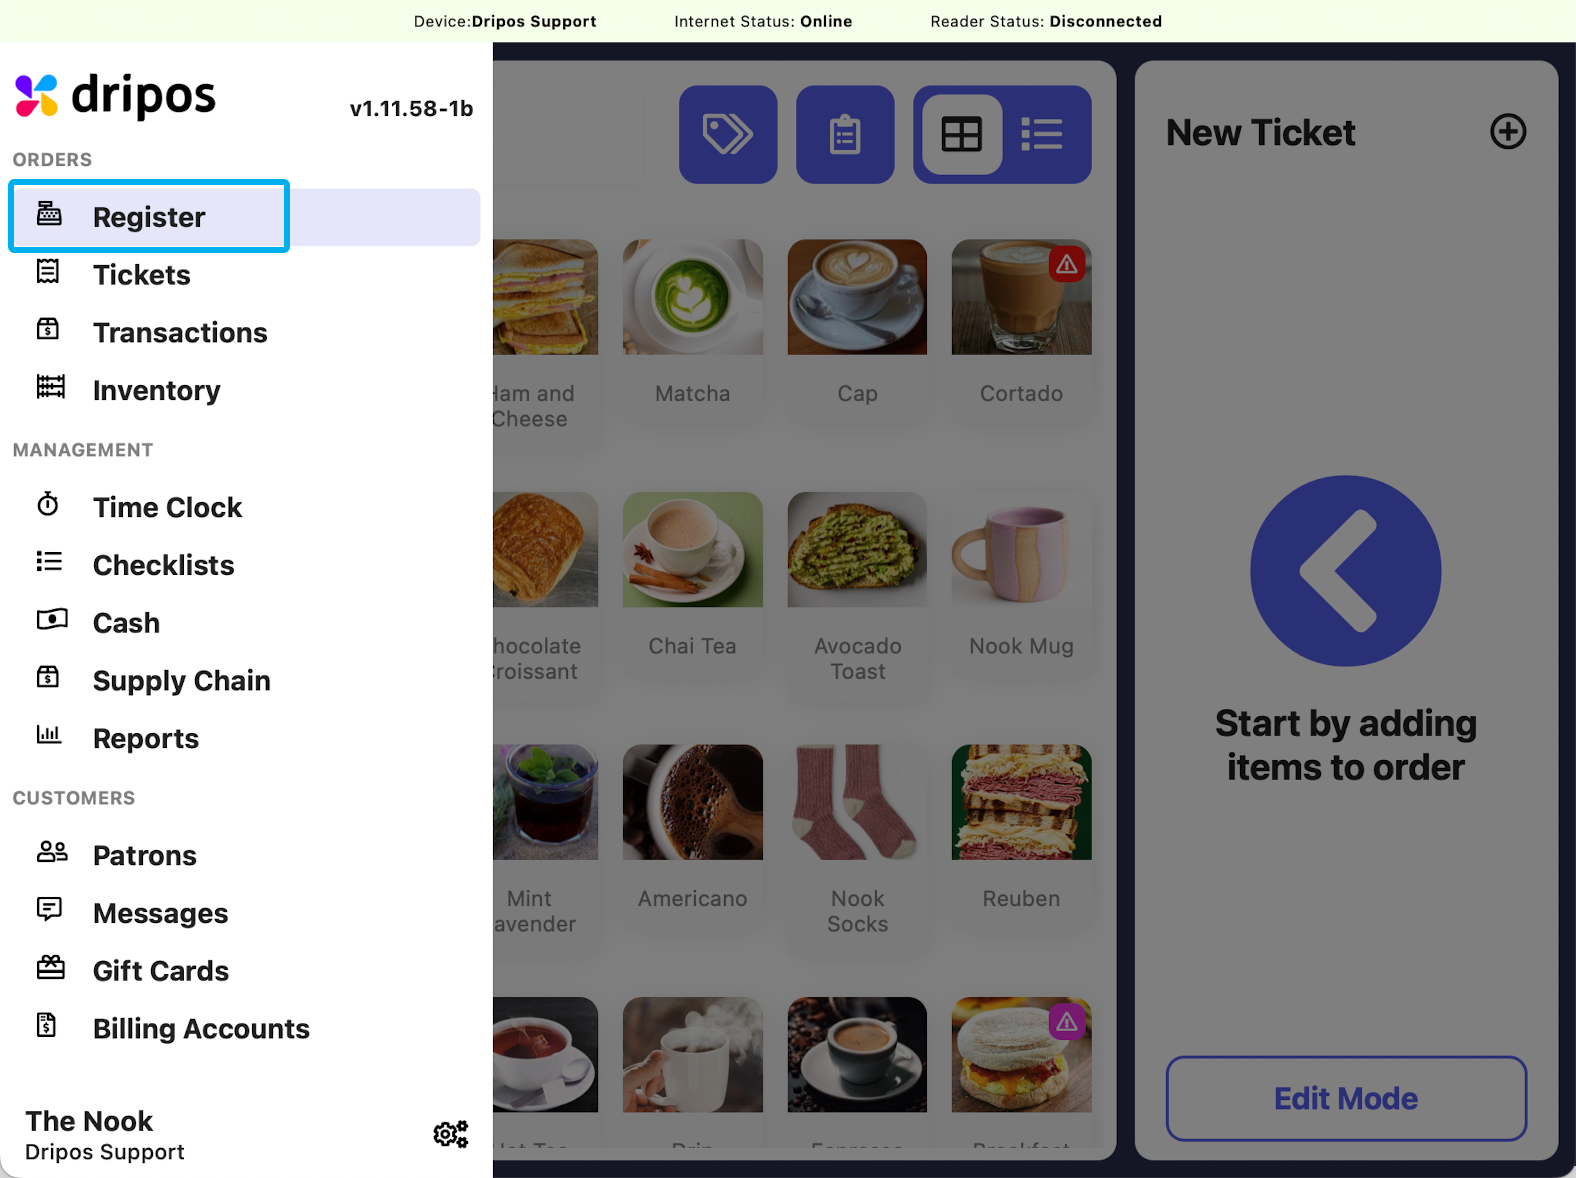
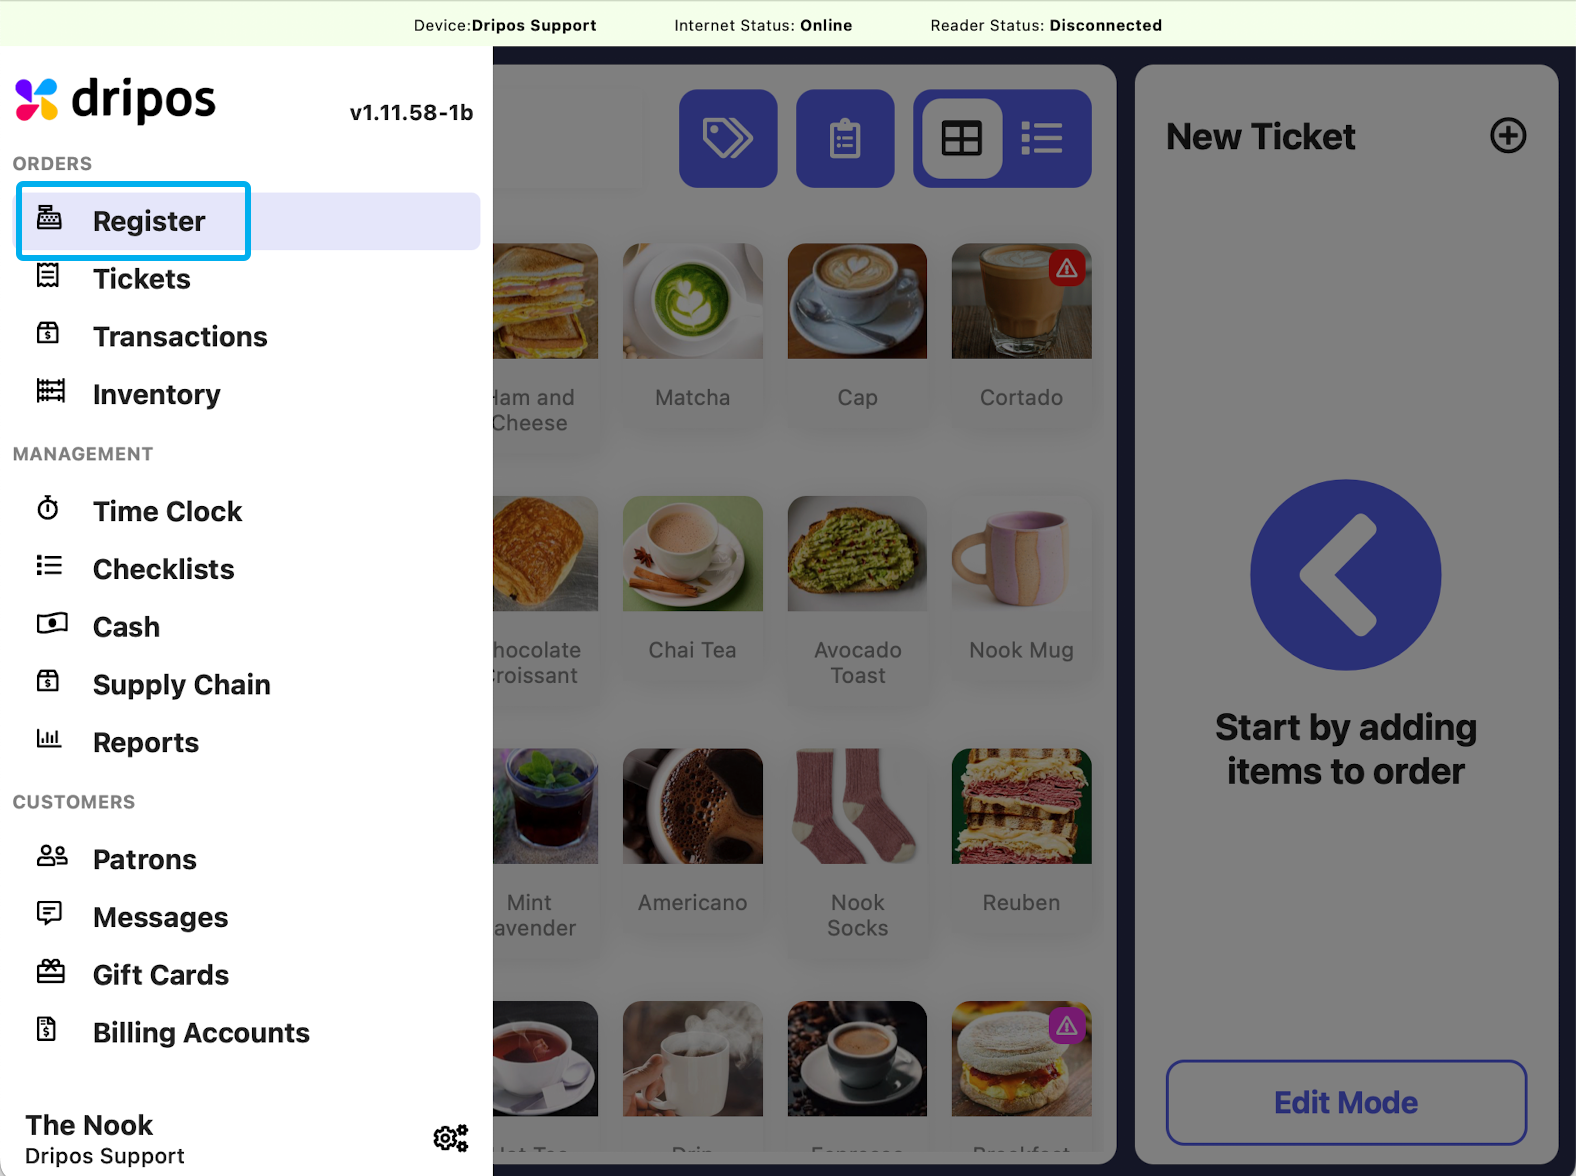
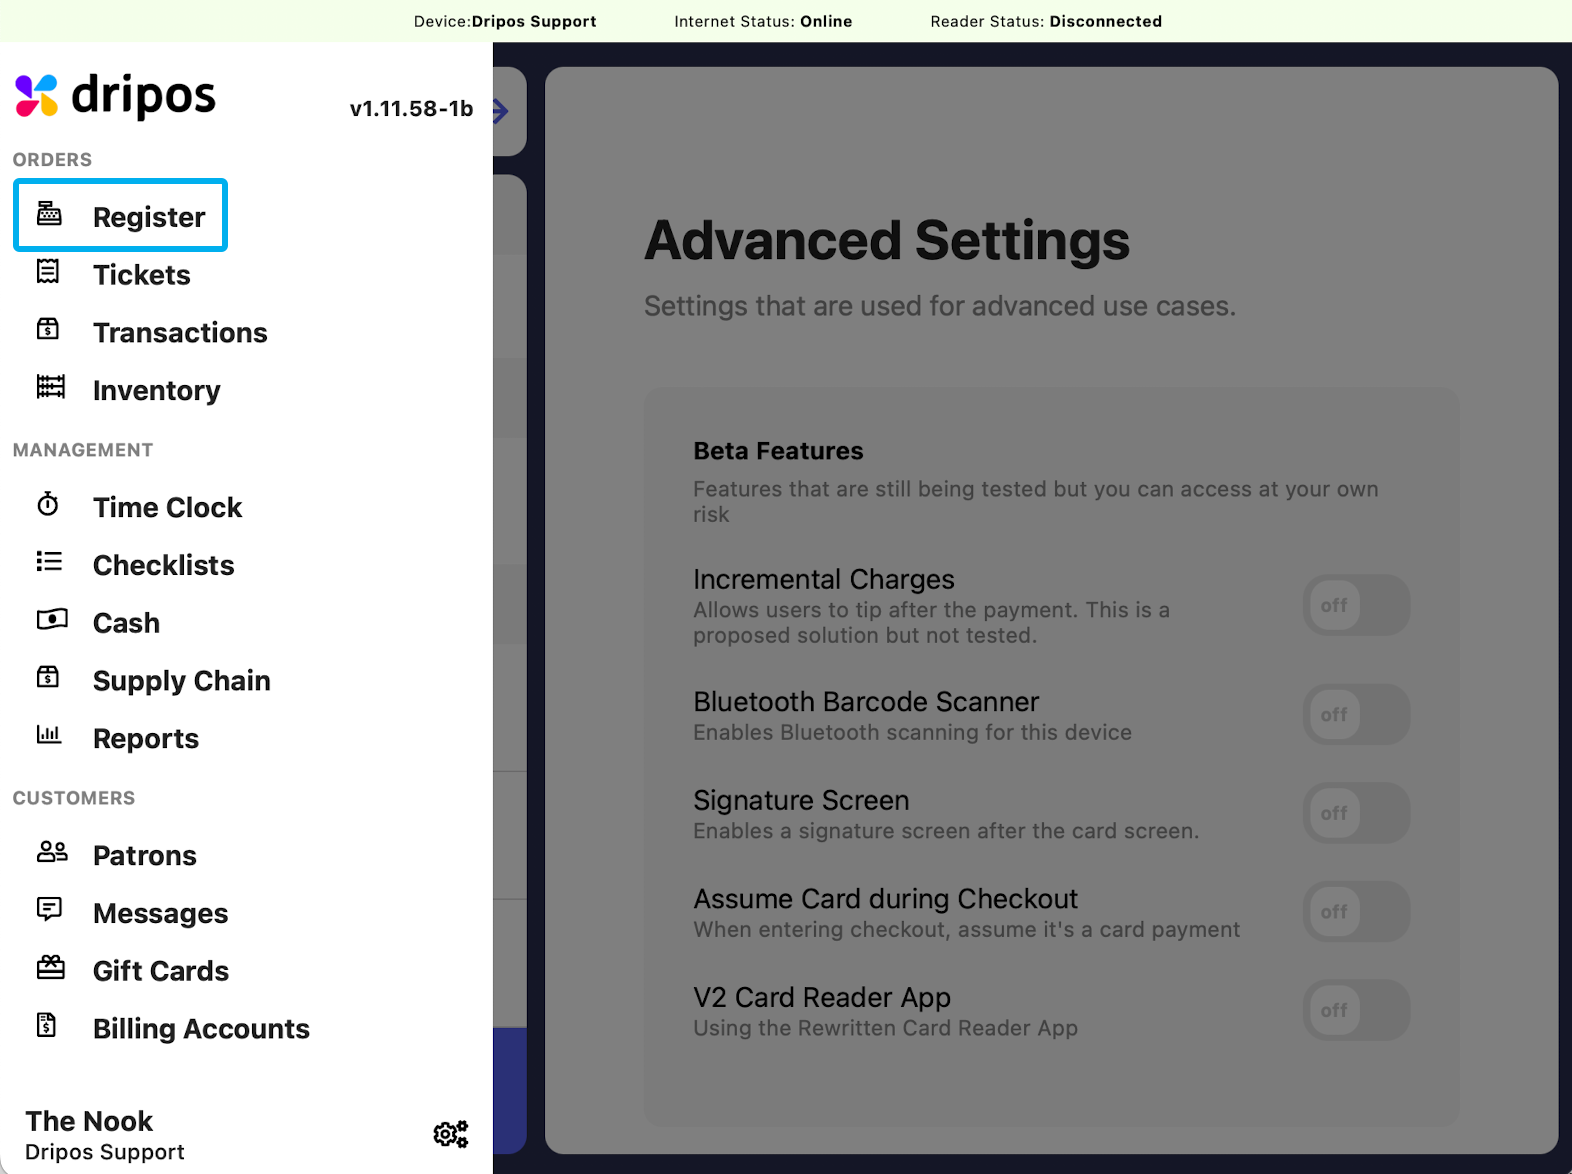
  1. Log on to the Point of Sale. Once signed in, click on the 3 line icon at the top left of the screen > Register:
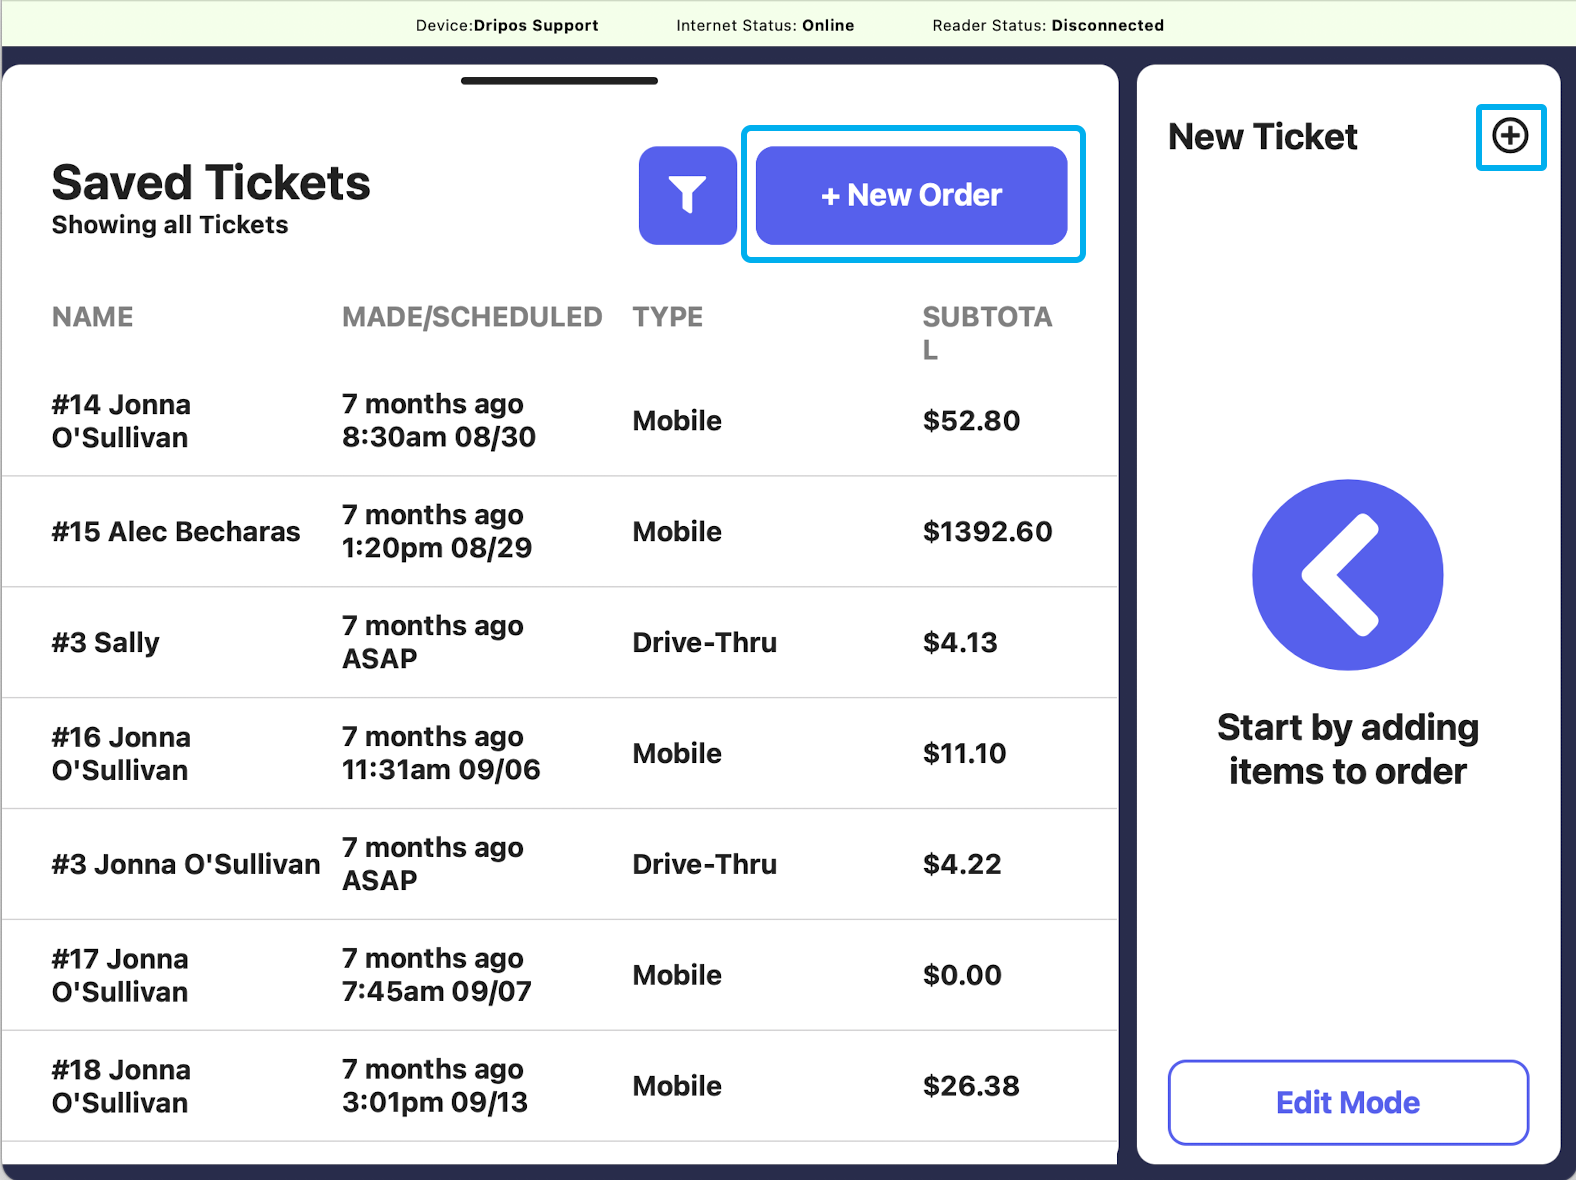
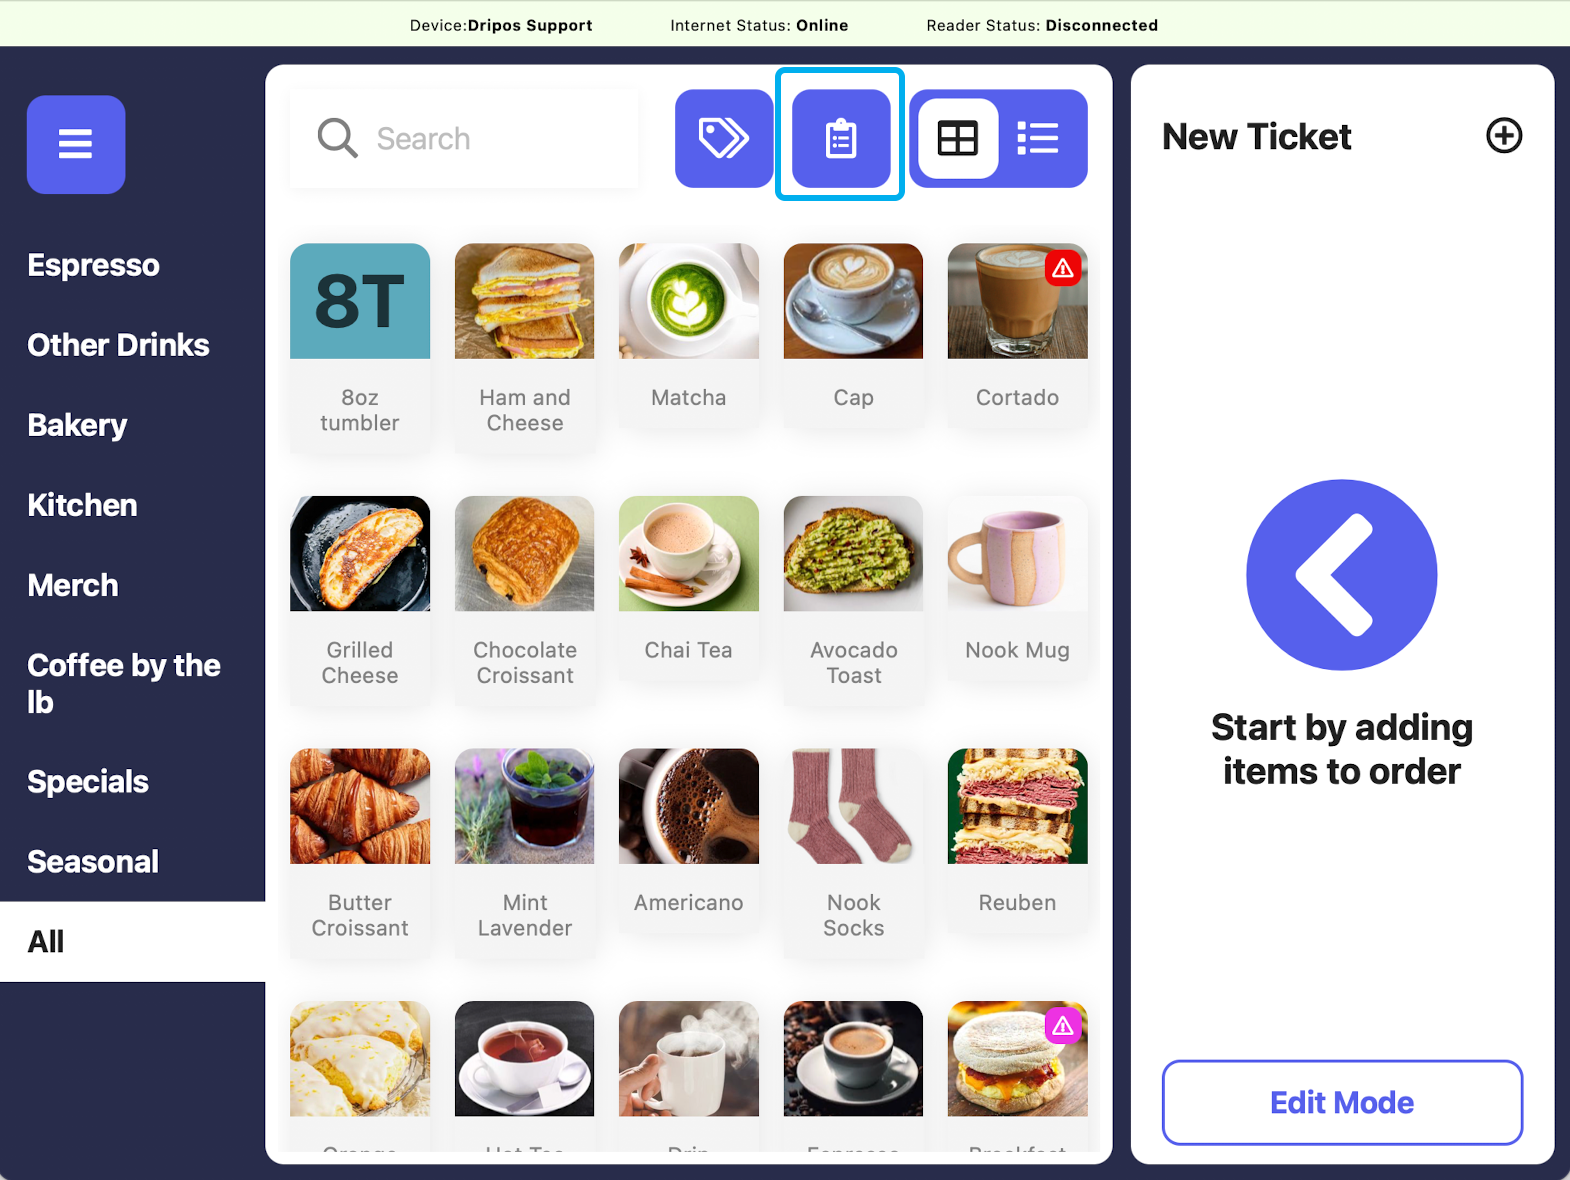
  1. To create a saved ticket you can either click the clipboard icon and select New Order, or click on the + icon next to New Ticket:
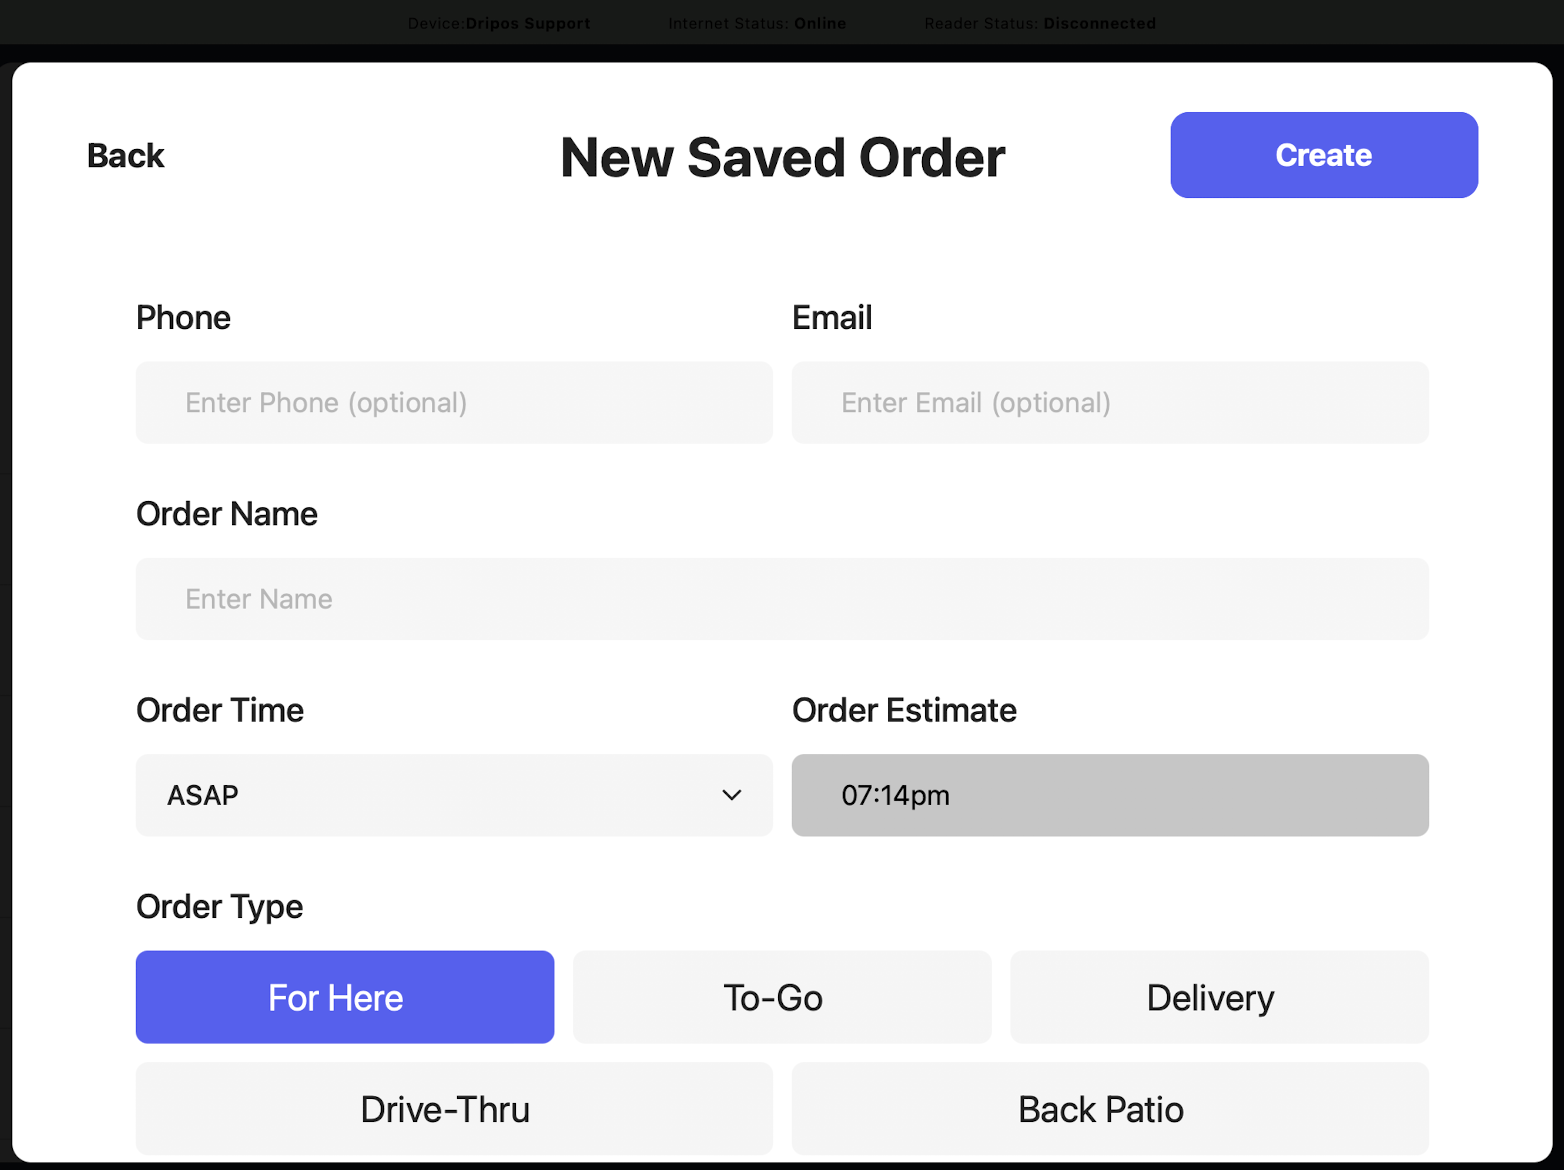
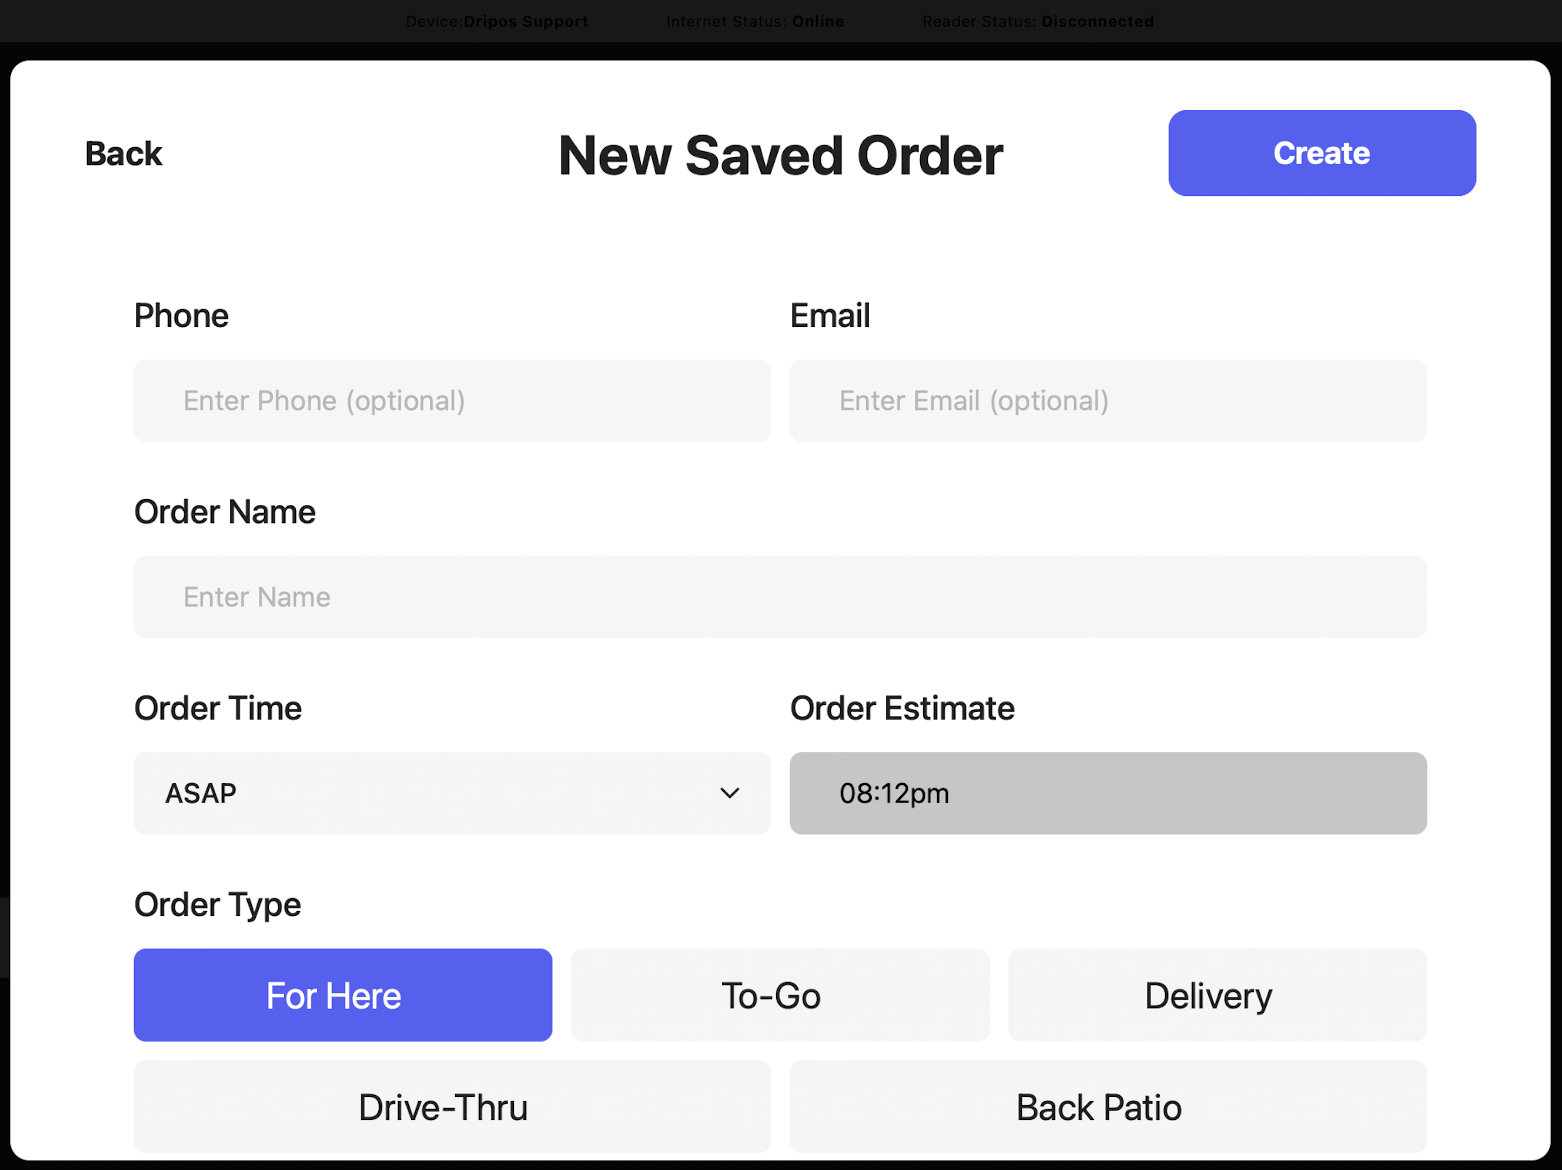
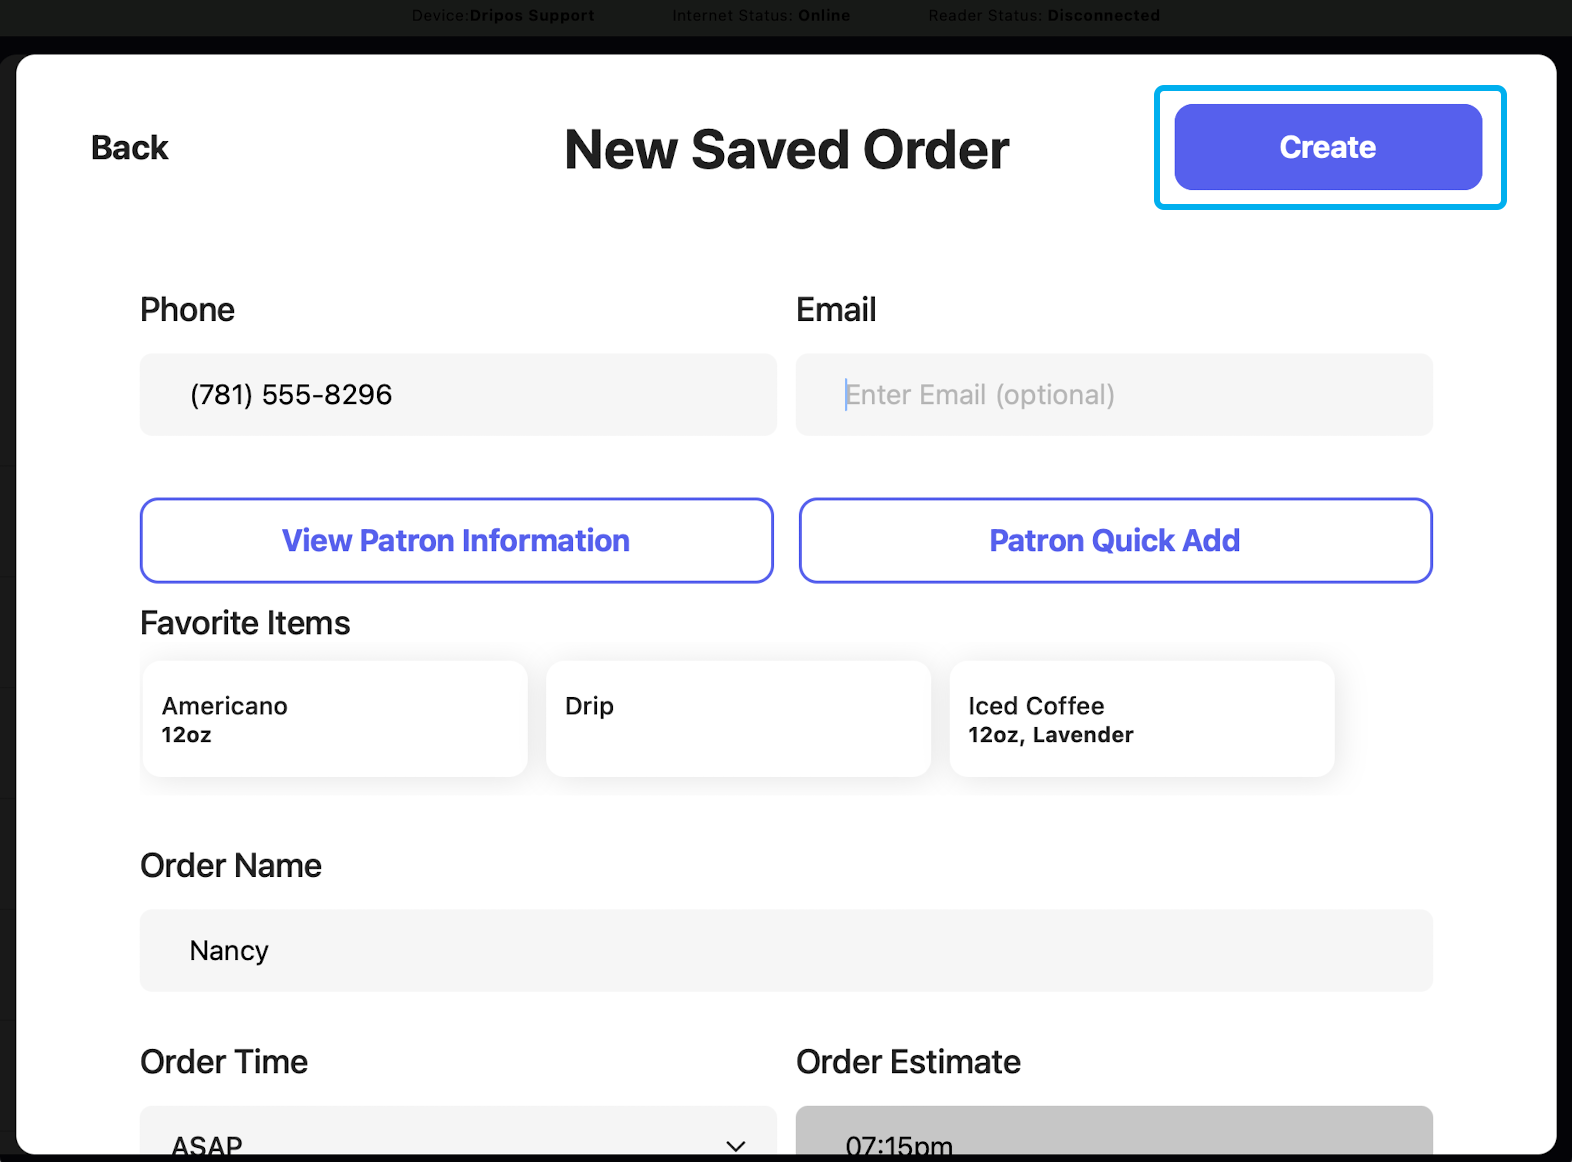
  1. This will prompt a pop-up to appear where you will need to fill in specific information pertaining to the saved order:

Phone: Here, you have the option to input a phone number that will be linked to the saved order.

If the number is connected to an existing patron, the rest of their information will be auto-filled.

Email: Here, you have the option to input an email address that will be linked to the saved order.

If the email is connected to an existing patron, the rest of their information will be auto-filled.

Order Name: Input a name for the order or link a patron with a phone number to fulfill this field.

Order Time: Click on the dropdown to select a order time for the order.

If this order should be made ASAP, you can select ASAP.

If you’d like to schedule this order for later, click the order time dropdown to select a future time.

Order Type: Select the order type for the saved ticket.

If you select Delivery as your ticket type, you will be prompted to enter a delivery address below.

If you do not select an order type, the order type will default to the first order type listed.

Notes: Here, you have the option to input any additional order notes that you would like your employees or the back of house to be aware. These notes will also appear on the ticket screen when the ticket gets saved.

Pre-Authorize a Card for Payment: You can pre-authorize a card for checkout on saved tickets. This means that instead of selecting Card or Manual Card payment like you normally would when checking out, you can take the card information ahead of time and simply charge the card later.

Pre-Authorized Tip: Here, you have the option to add a pre-authorized tip onto the order.

  1. Once you have finished filling in any necessary fields, click Create in the top right corner:
  1. The order name will then be displayed at the top of the cart:
  1. Next, add any desired products to the ticket as you normally would from your register:
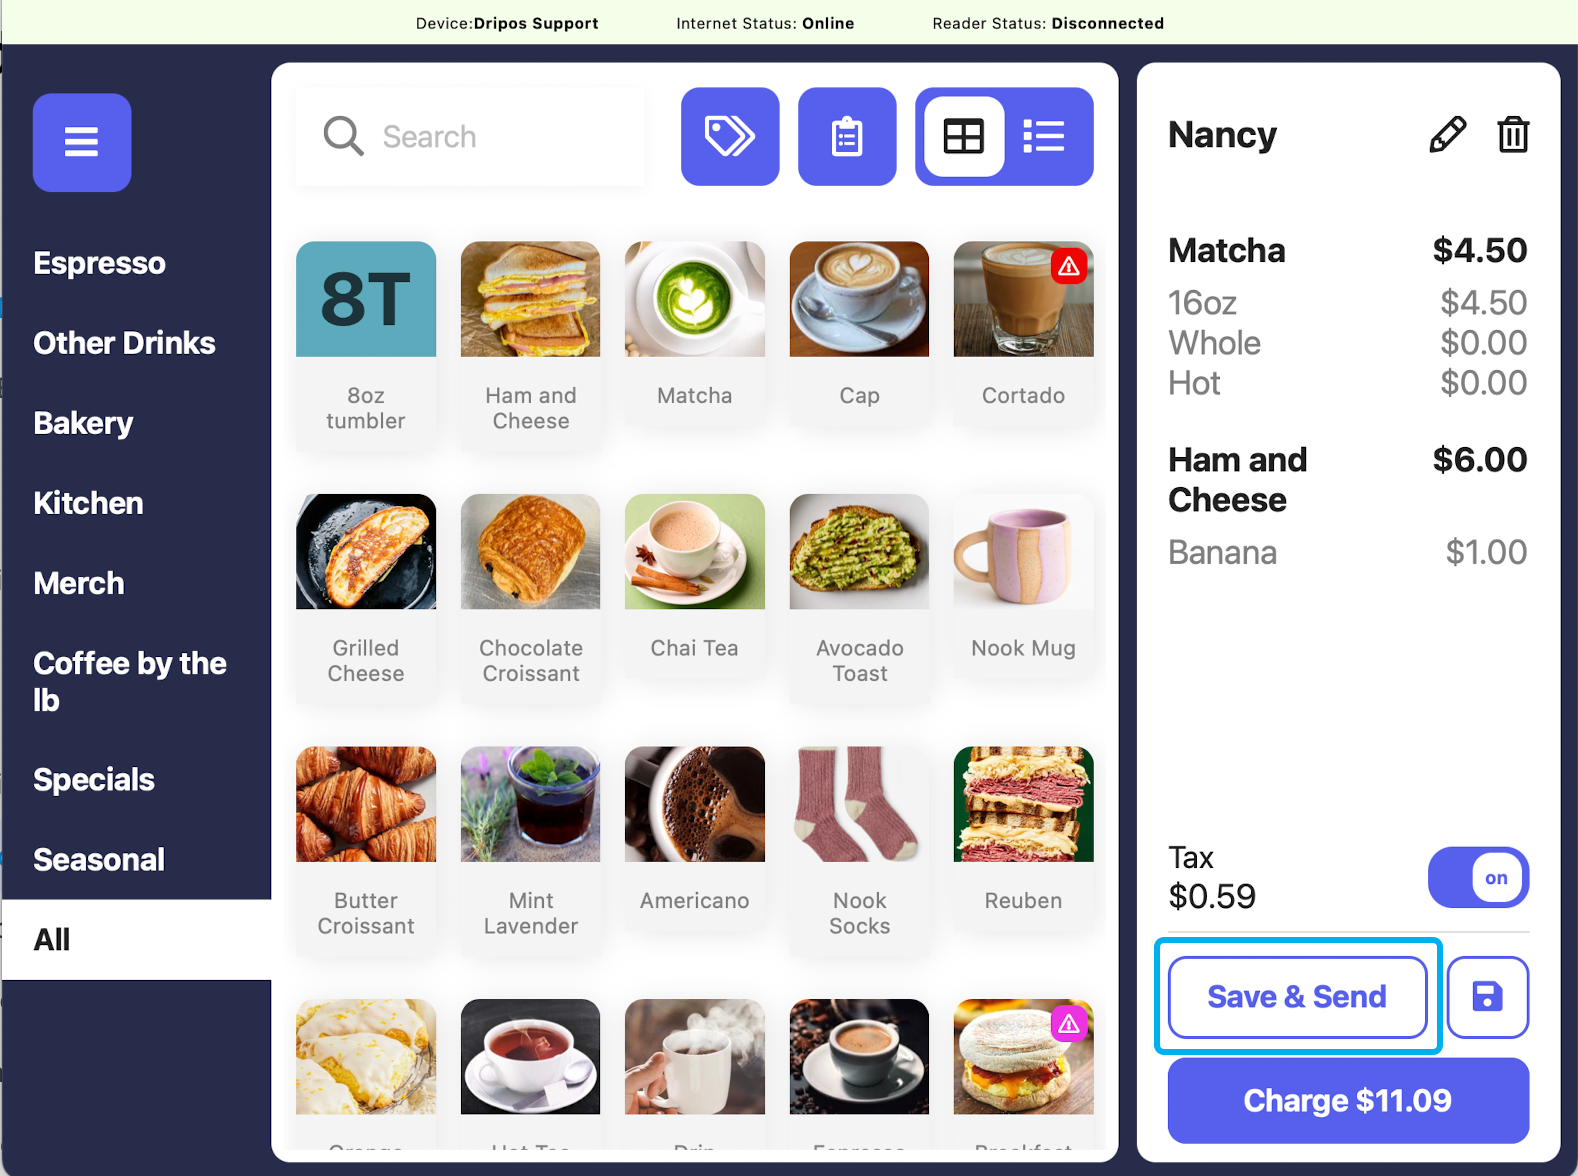
  1. To save the ticket at any time, click on the disk icon in the bottom right of the cart. If you would like to both save the ticket and send it to the ticket screen click on the Save & Send button in the bottom left of the cart:

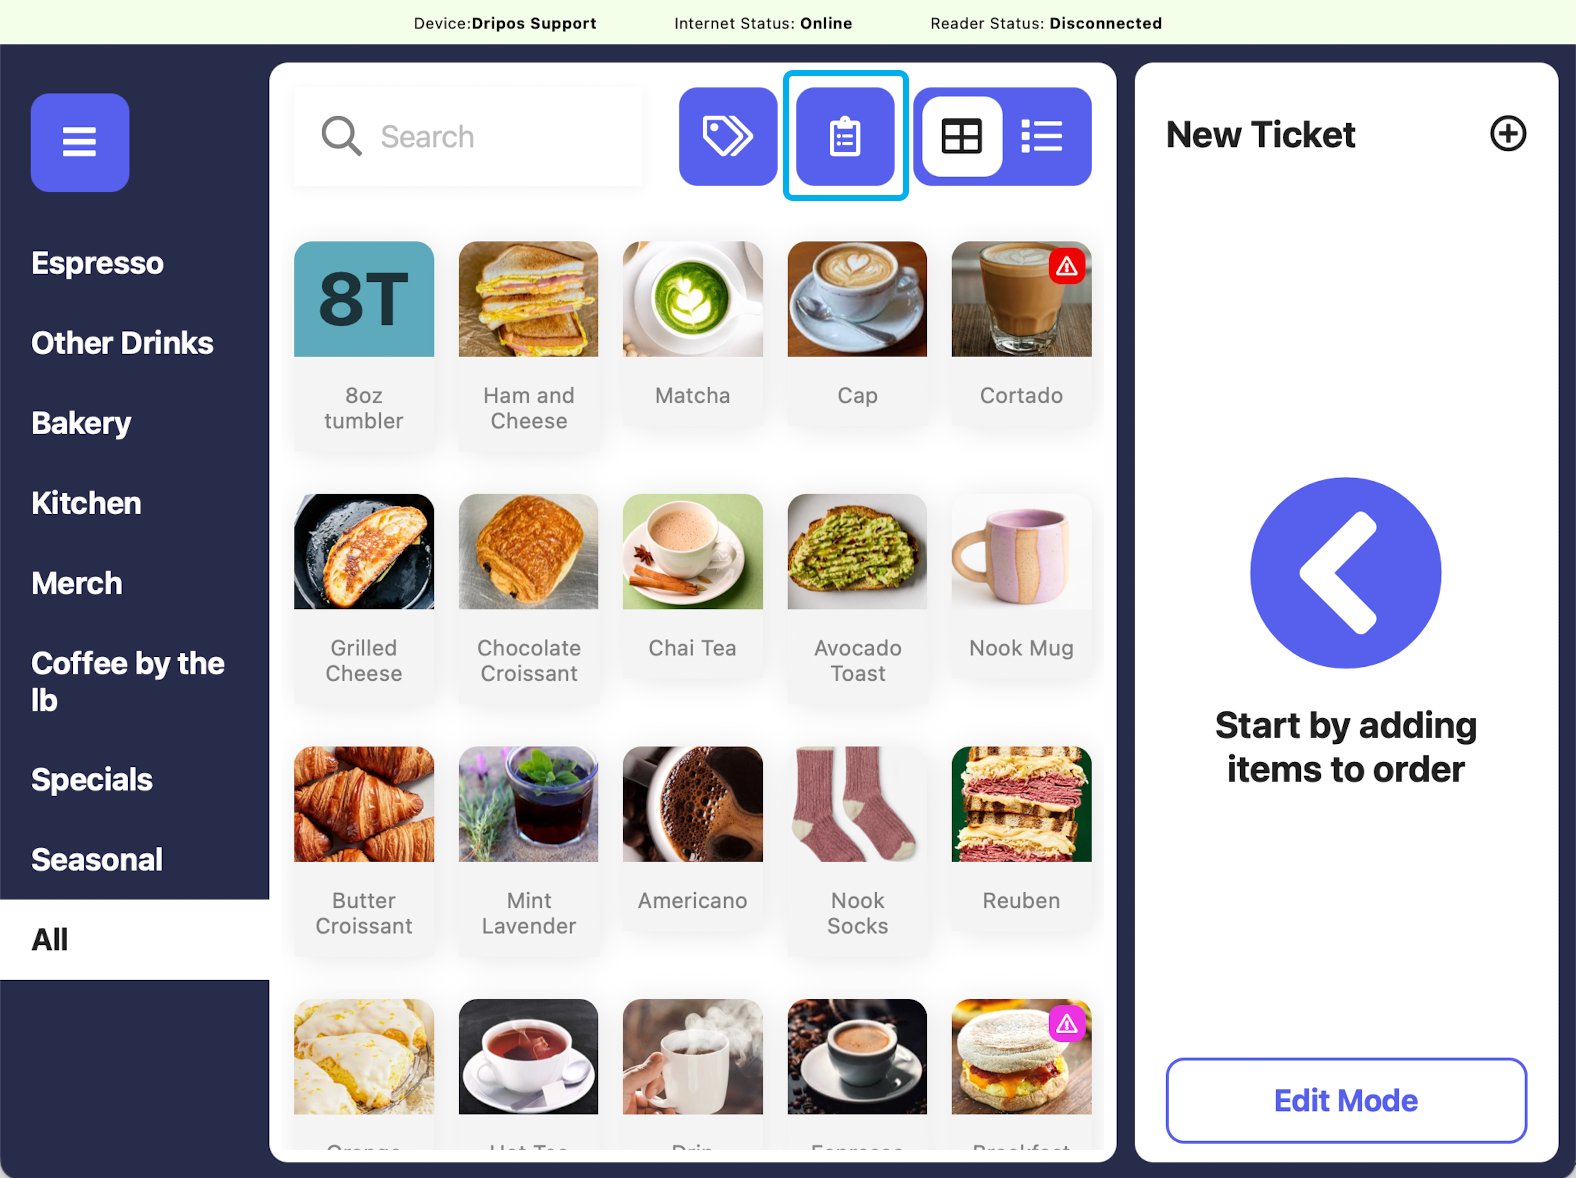
You can re-access saved tickets at any time by clicking the clipboard icon on the register screen.


View Saved Tickets

You can re-access any of your saved tickets on the Dripos Point of Sale to edit any information or begin checking them out.

  1. Log on to the Point of Sale. Once signed in, click on the 3 line icon at the top left of the screen > Register:
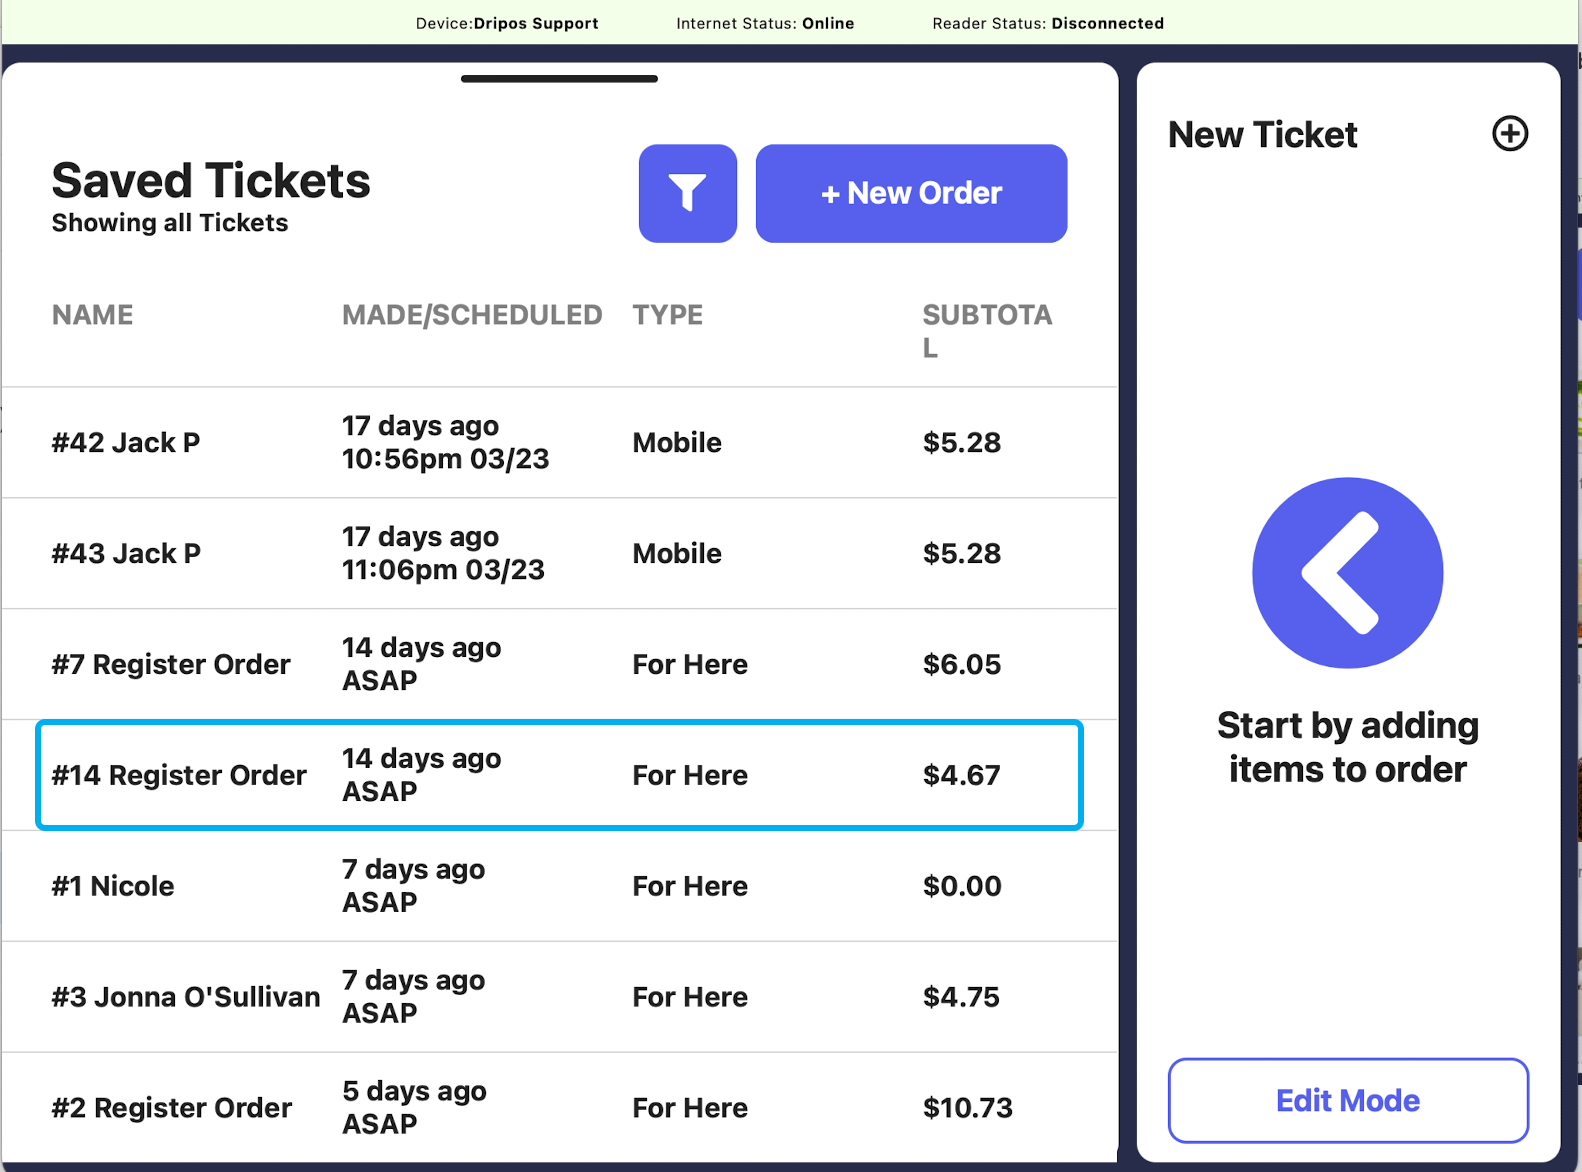
  1. To re-access saved tickets, click the clipboard icon on the register screen:

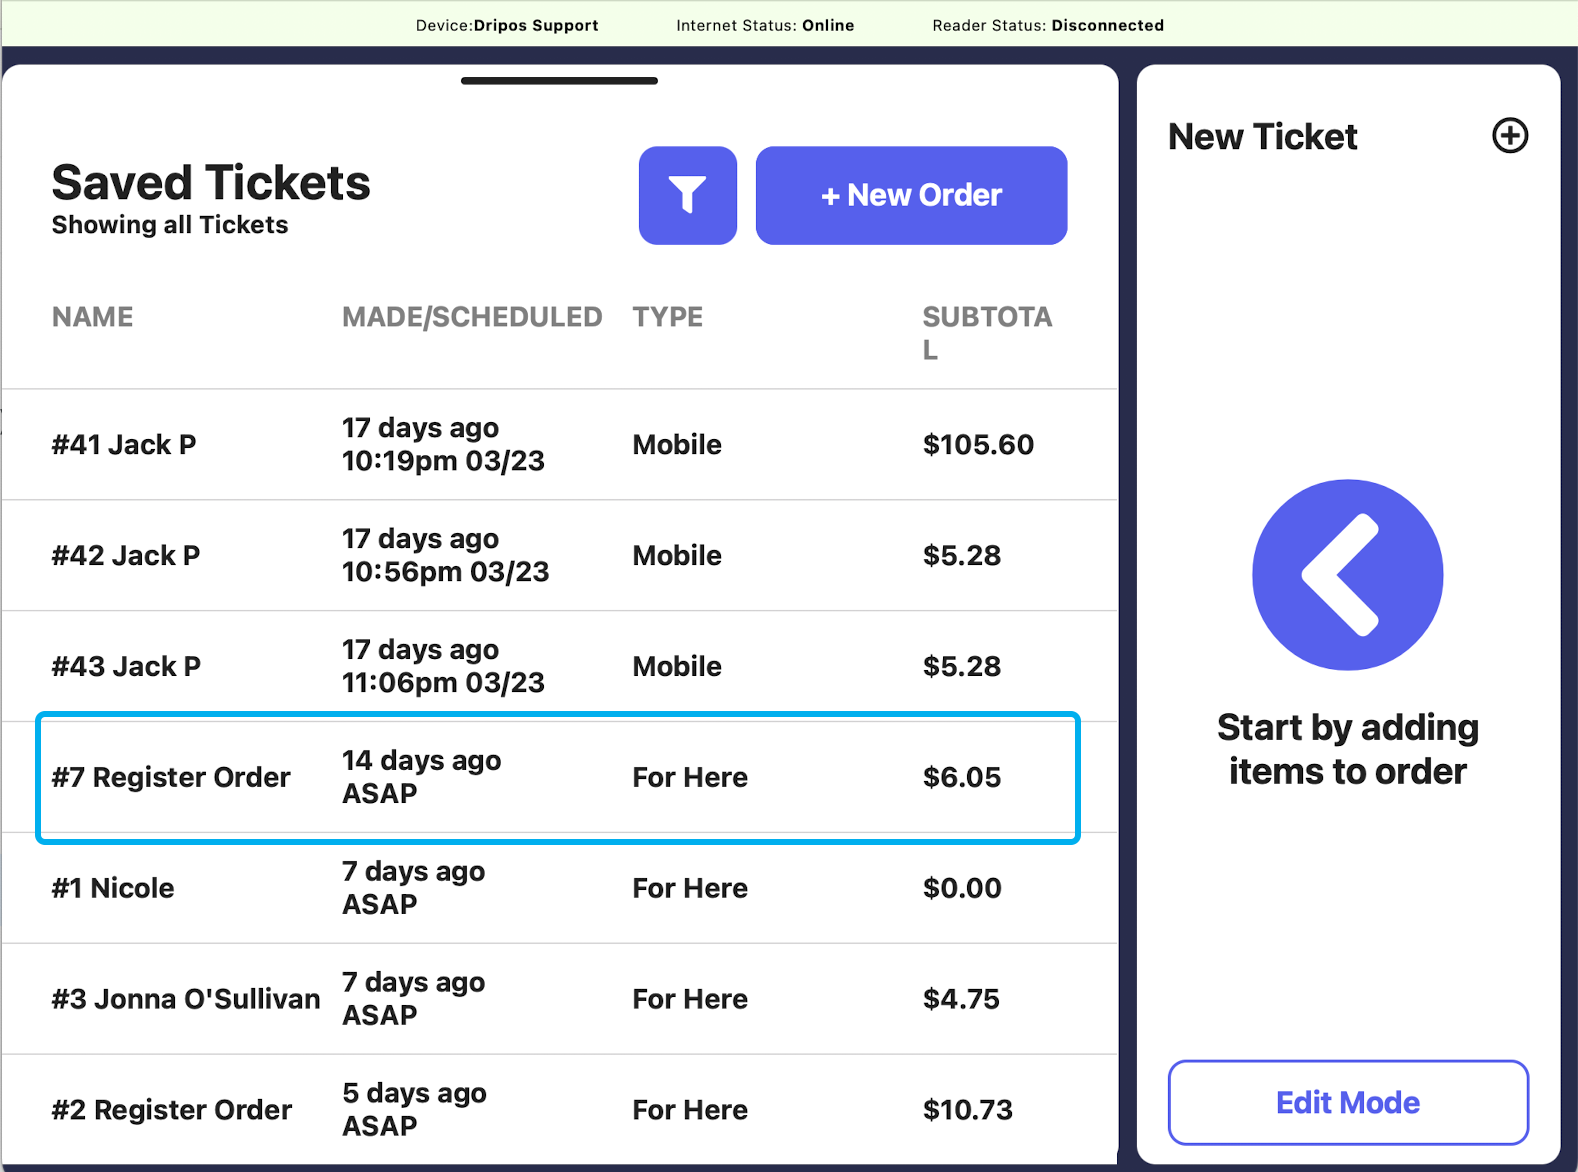
This screen will only display saved tickets that have not yet been charged.

  1. On this screen, you will be able to view the saved ticket’s order name, time the order was created, time the order was scheduled, order type, and subtotal:
  1. Click on any individual ticket to access its order details or continue adding items onto the order:
  1. From here, swipe down on the left hand side of your screen to re-access the register. You can then add products to the order, modify the order, and re-save the ticket:

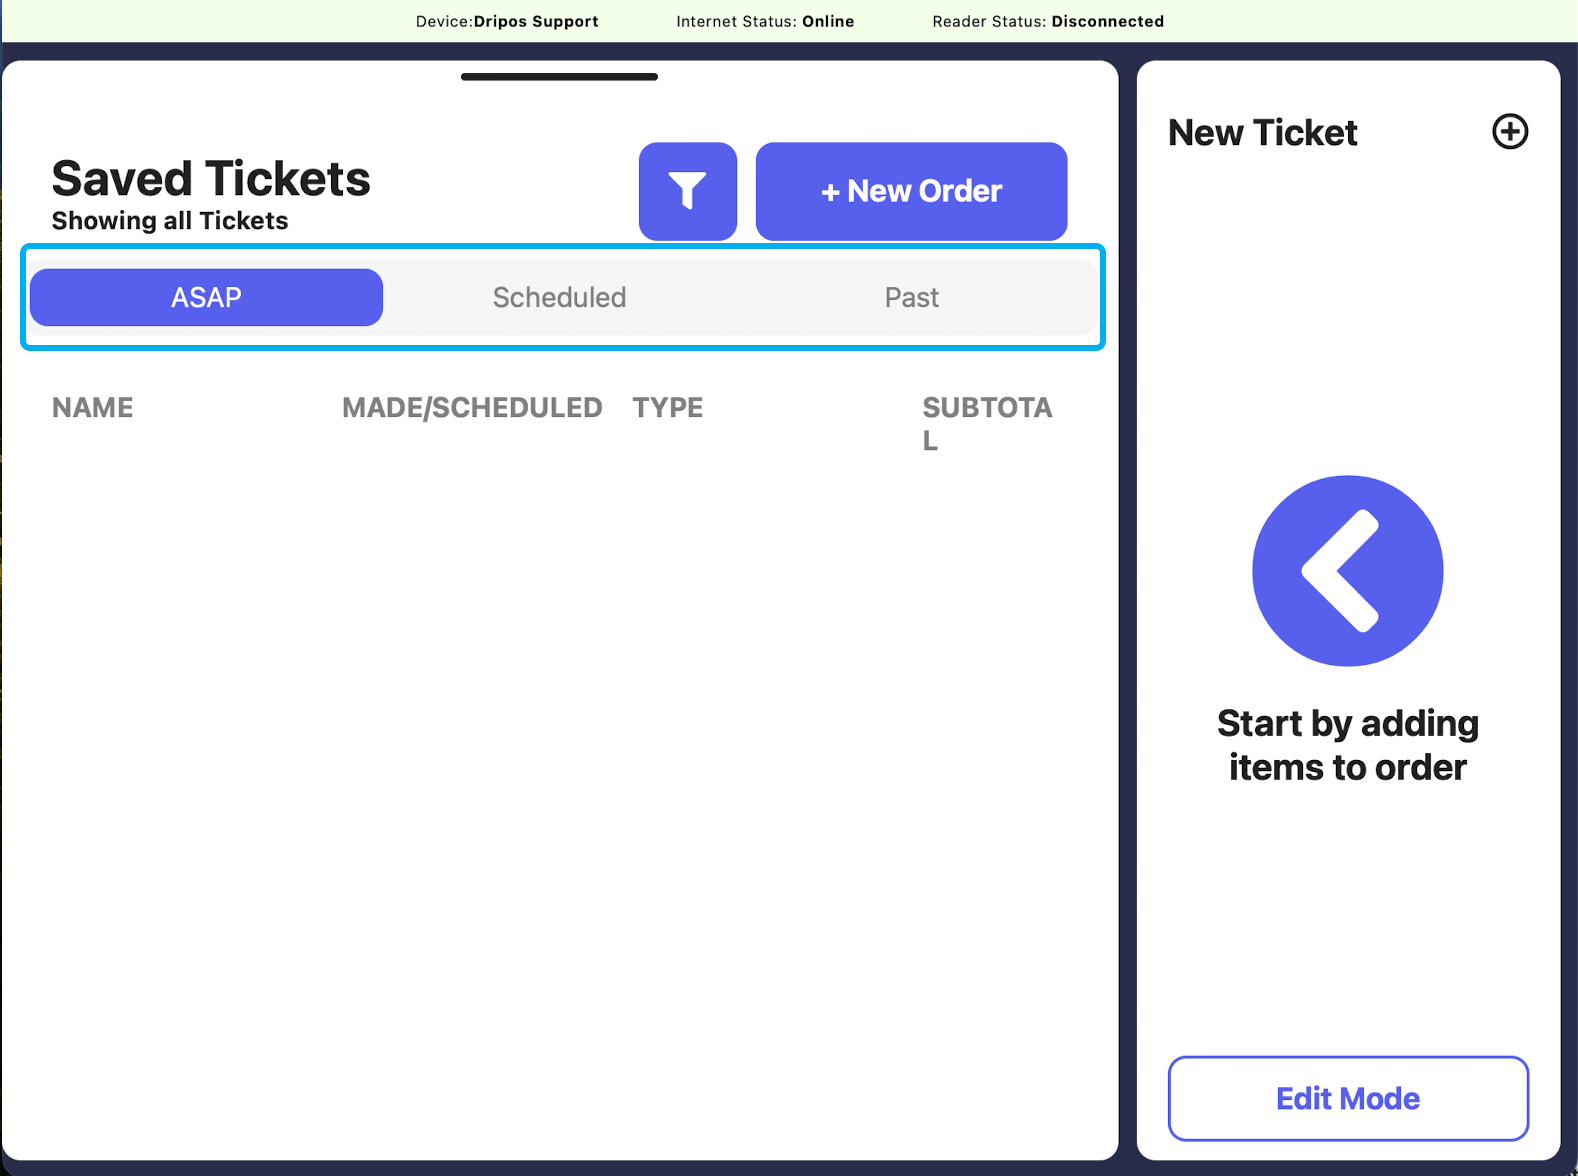
If your saved tickets screen is segmented, your saved ticket screen will display separate columns for ASAP tickets, Scheduled saved tickets, and Past saved tickets.

Edit Saved Tickets

  1. Log on to the Point of Sale. Once signed in, click on the 3 line icon at the top left of the screen > Register:
  1. Click the clipboard icon on the register screen:
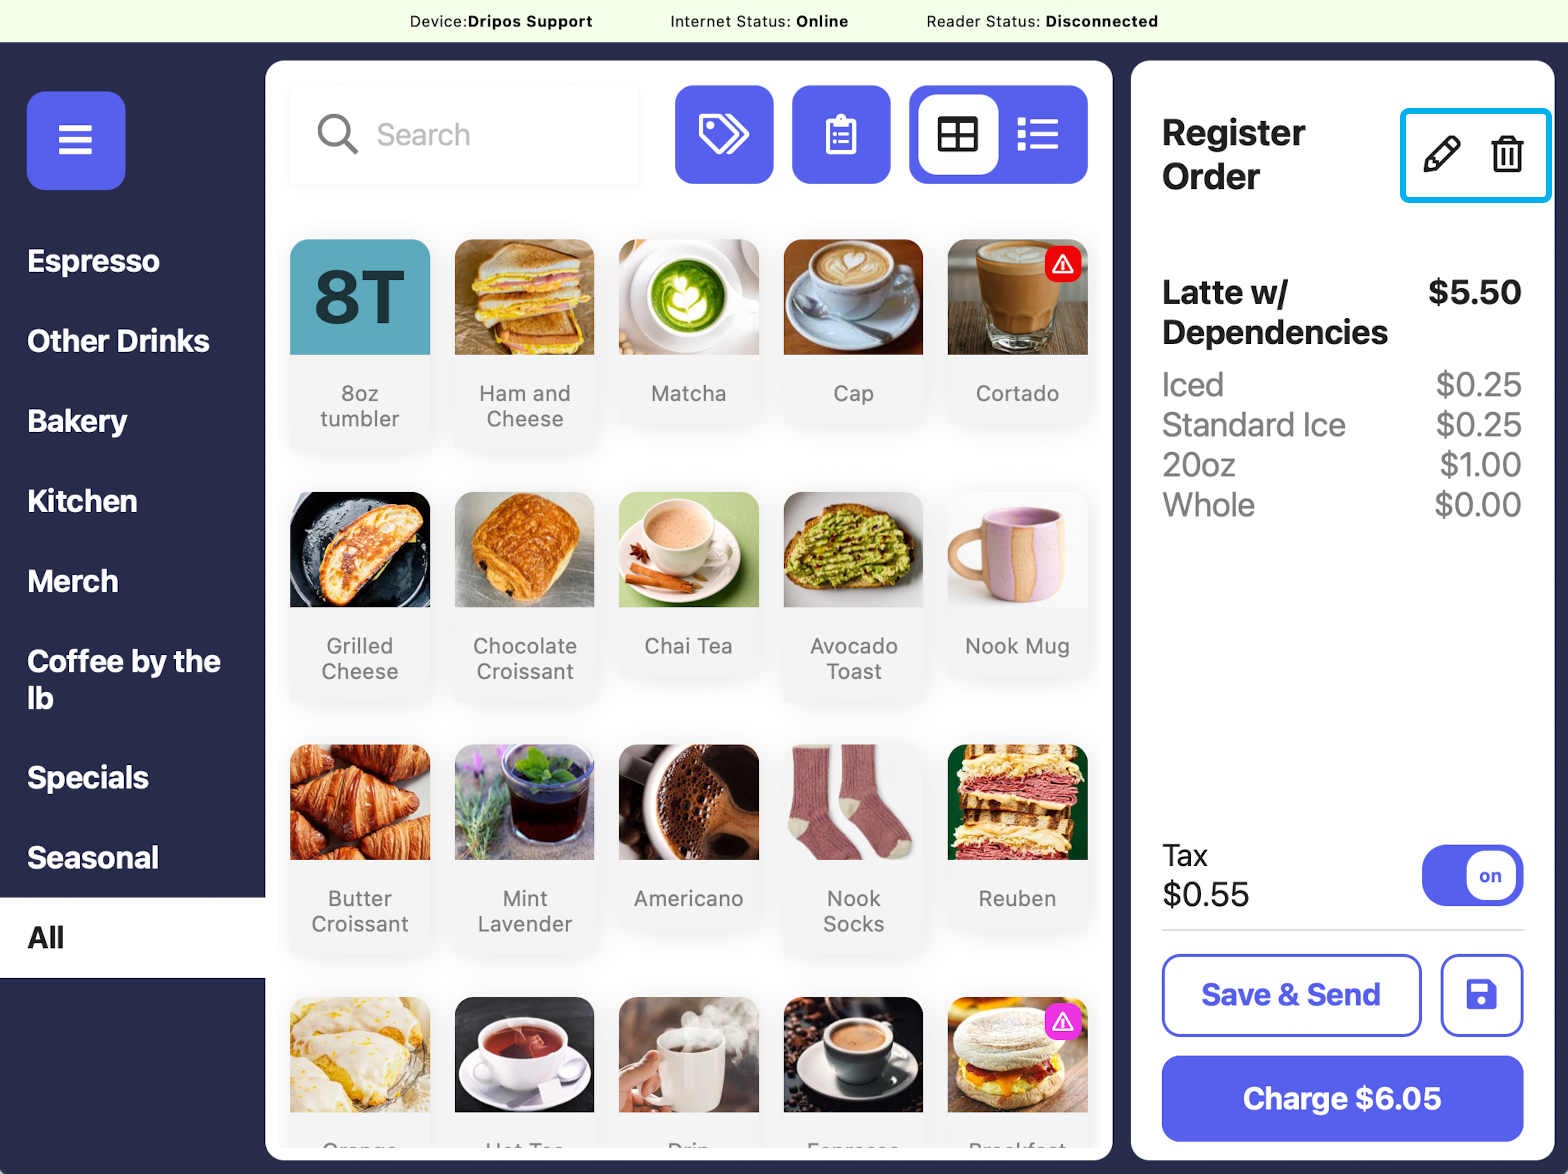
  1. Click on the saved ticket you wish to edit > click on the pencil icon in the top right of the cart, next to the order name:
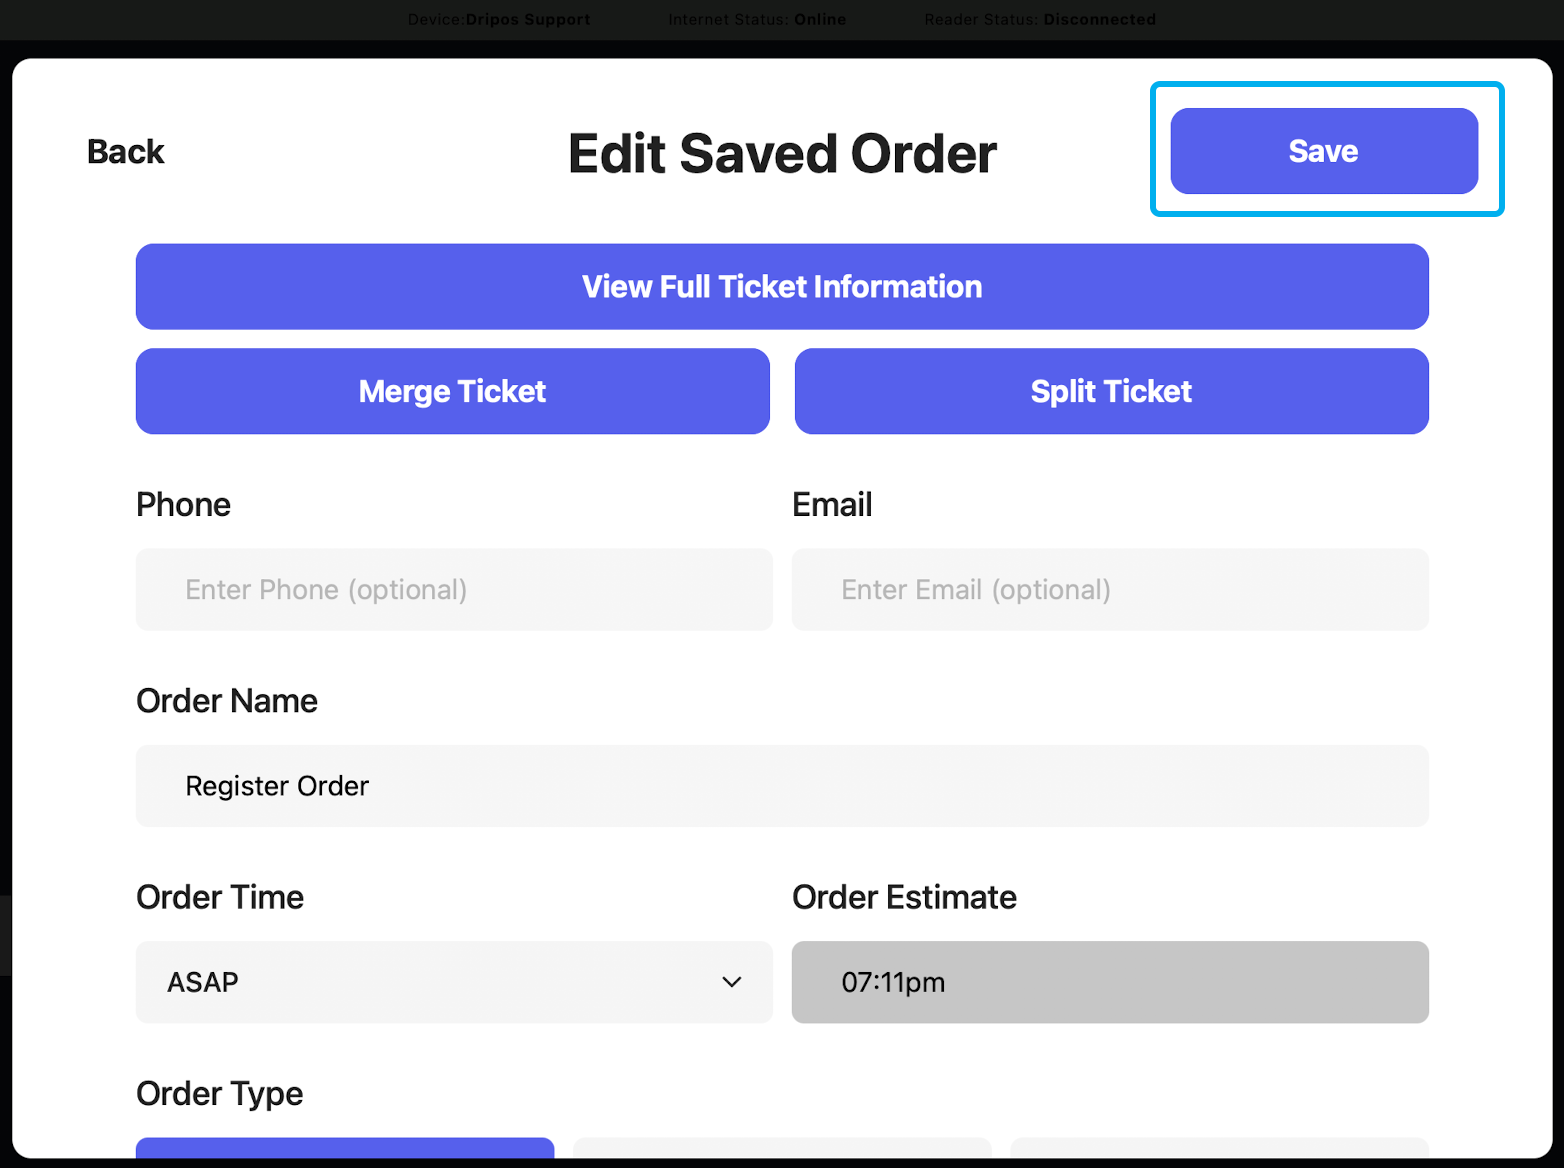
  1. You will then be re-directed to the Edit Saved Order screen. Here, you will be able to edit any of the information you initially entered for the saved ticket:
  1. Once you have finished making your desired edits, click Save:
  1. If you wish to delete a saved ticket, simply click on the trash icon at the top right of the cart:

Check Out Saved Tickets

  1. Log on to the Point of Sale. Once signed in, click on the 3 line icon at the top left of the screen > Register:
  1. Click the clipboard icon on the register screen:
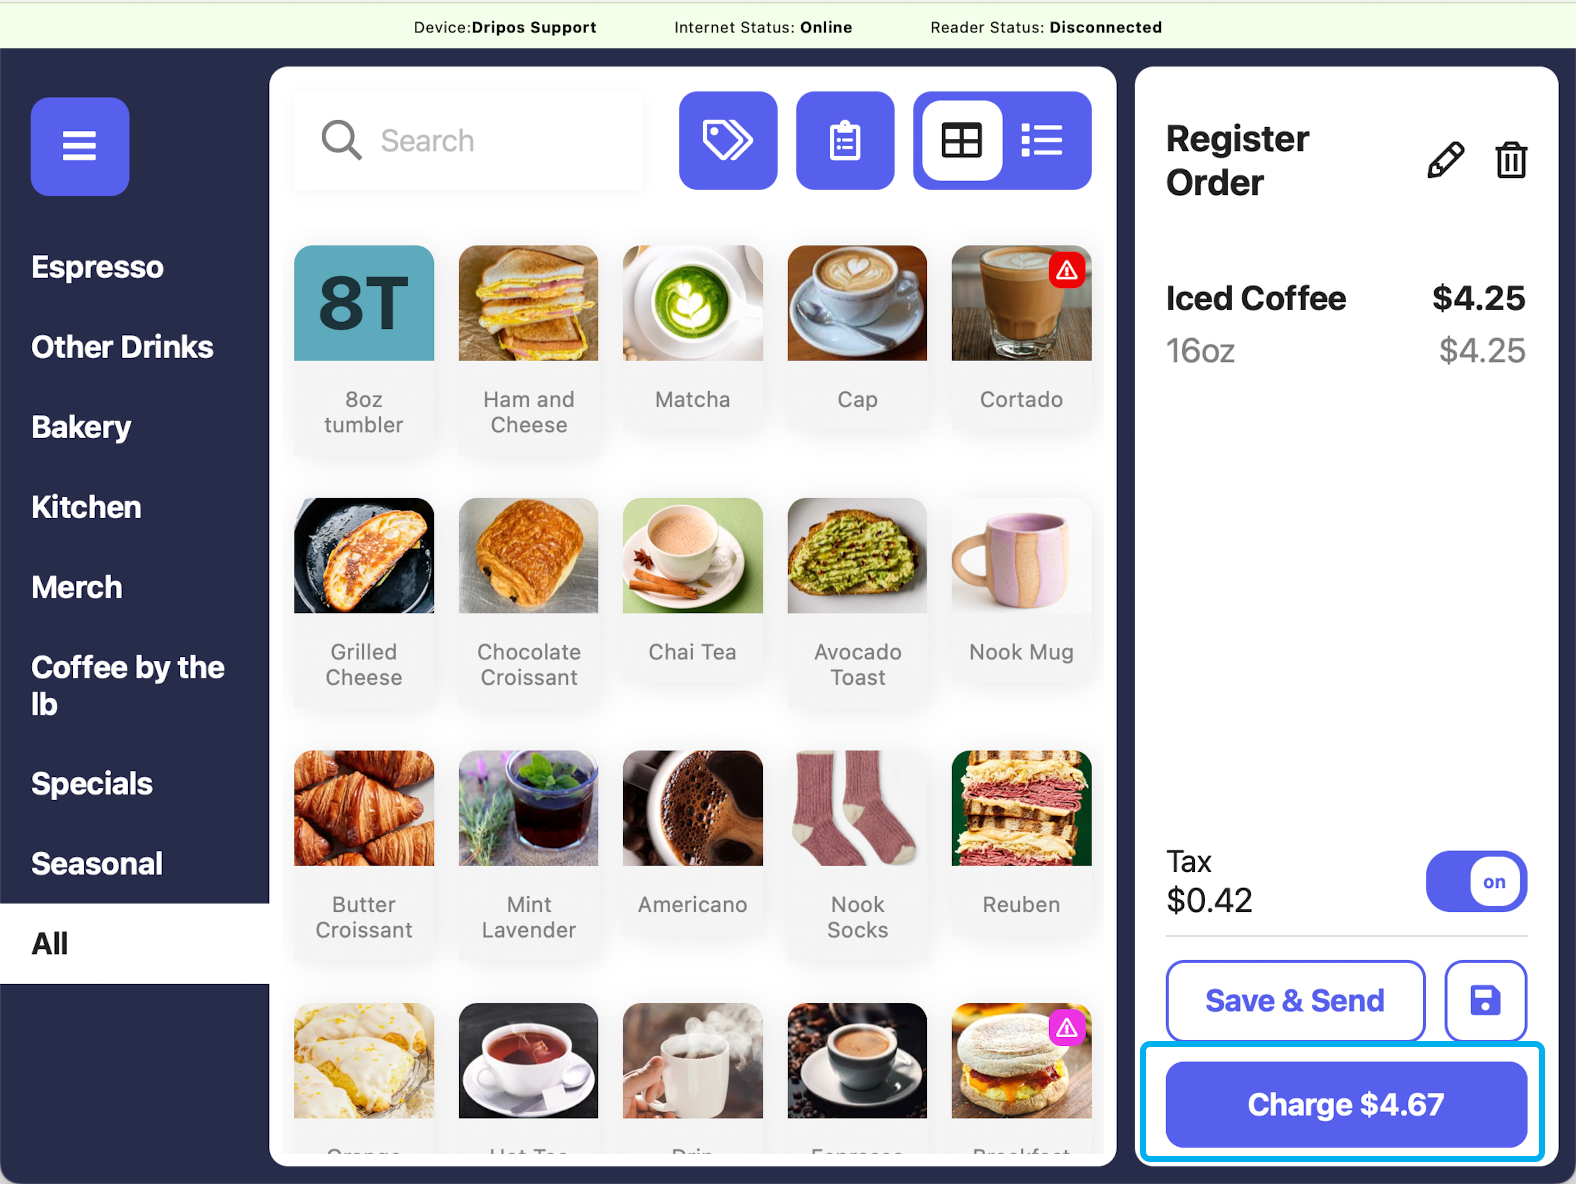
  1. To check out any of the saved tickets listed, click on the ticket you want to checkout > select the Charge button at the bottom of the cart:

You will then proceed through the checkout flow as normal.

If you have pre-authorized a credit card on a saved ticket, the payment methods screen will not be displayed during the checkout process, and you will be brought straight to the receipt screen.


Saved Ticket Settings

Breakdown Saved Tickets

  1. Log on to the Point of Sale. Once signed in, click on the 3 line icon at the top left of the screen > select the gear icon in the bottom right corner:
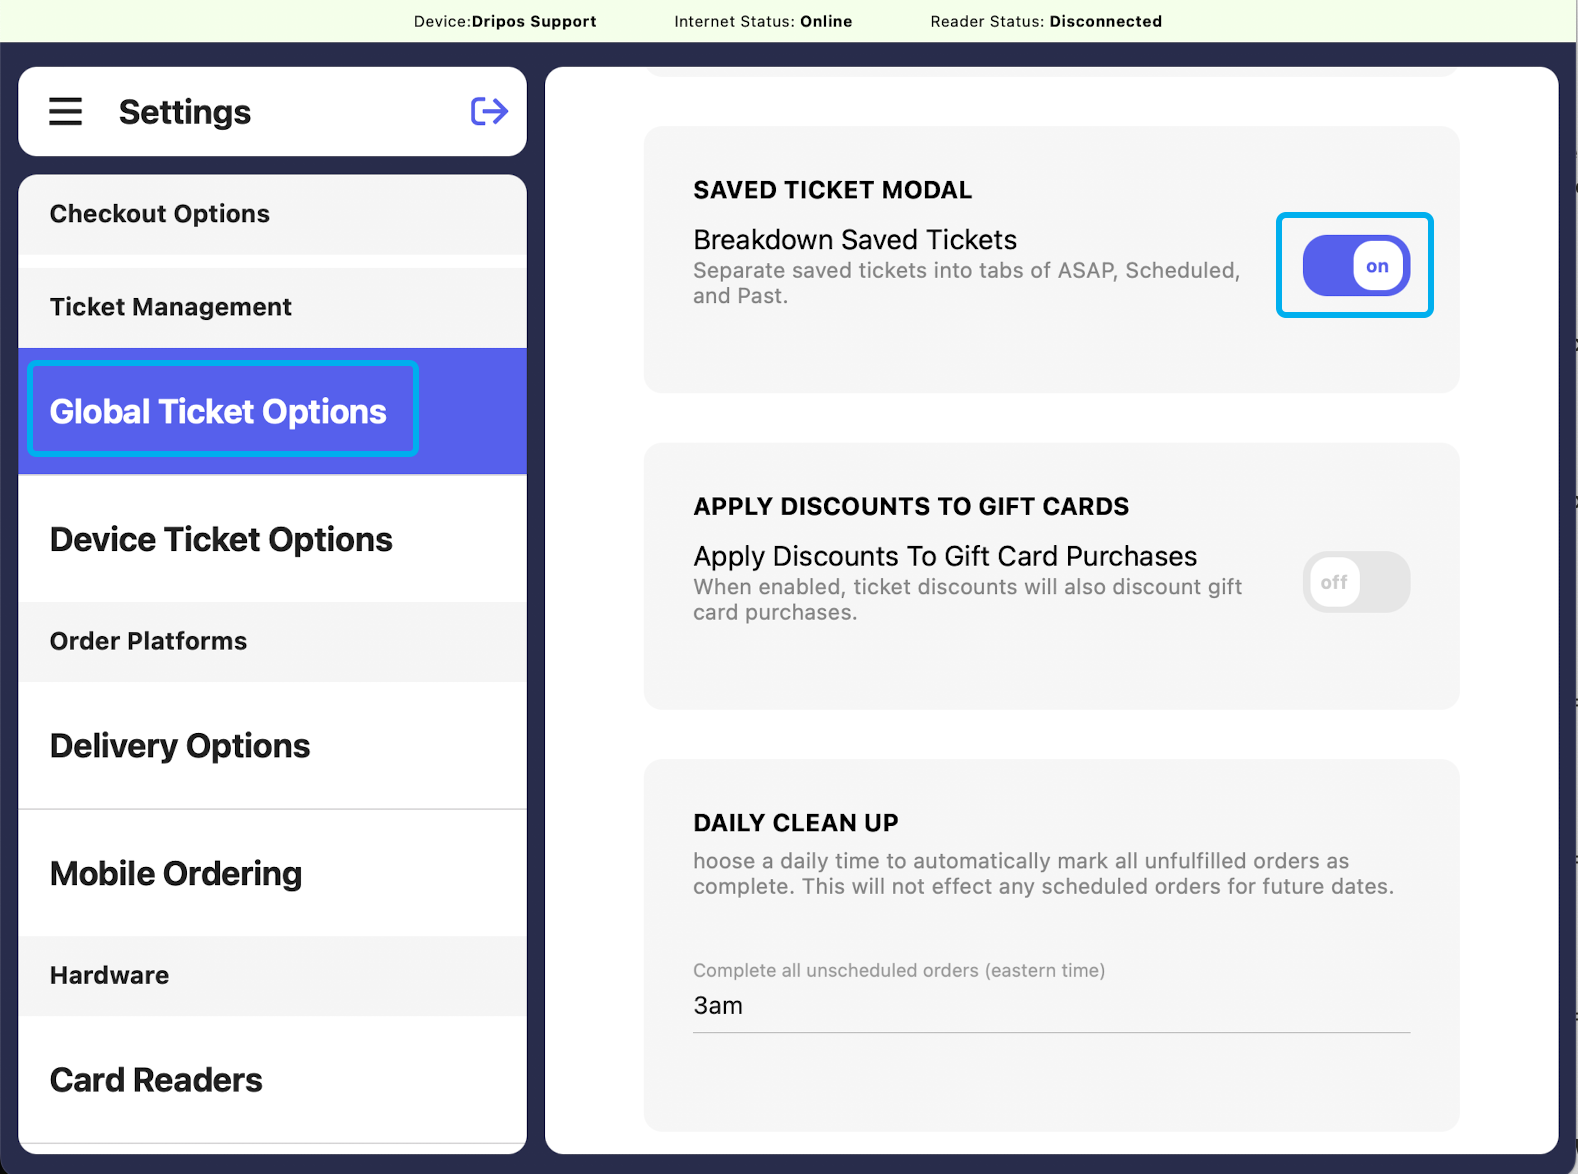
  1. Click on the Global Ticket Options tab in the left sidebar:
  1. To breakdown saved tickets, turn the Breakdown Saved Tickets toggle on:
  1. Your saved tickets screen will then display ASAP saved tickets, Scheduled saved tickets, and Past saved tickets in three distinct columns:

Default to Saved Ticket Screen

  1. Log on to the Point of Sale. Once signed in, click on the 3 line icon at the top left of the screen > select the gear icon in the bottom right corner:
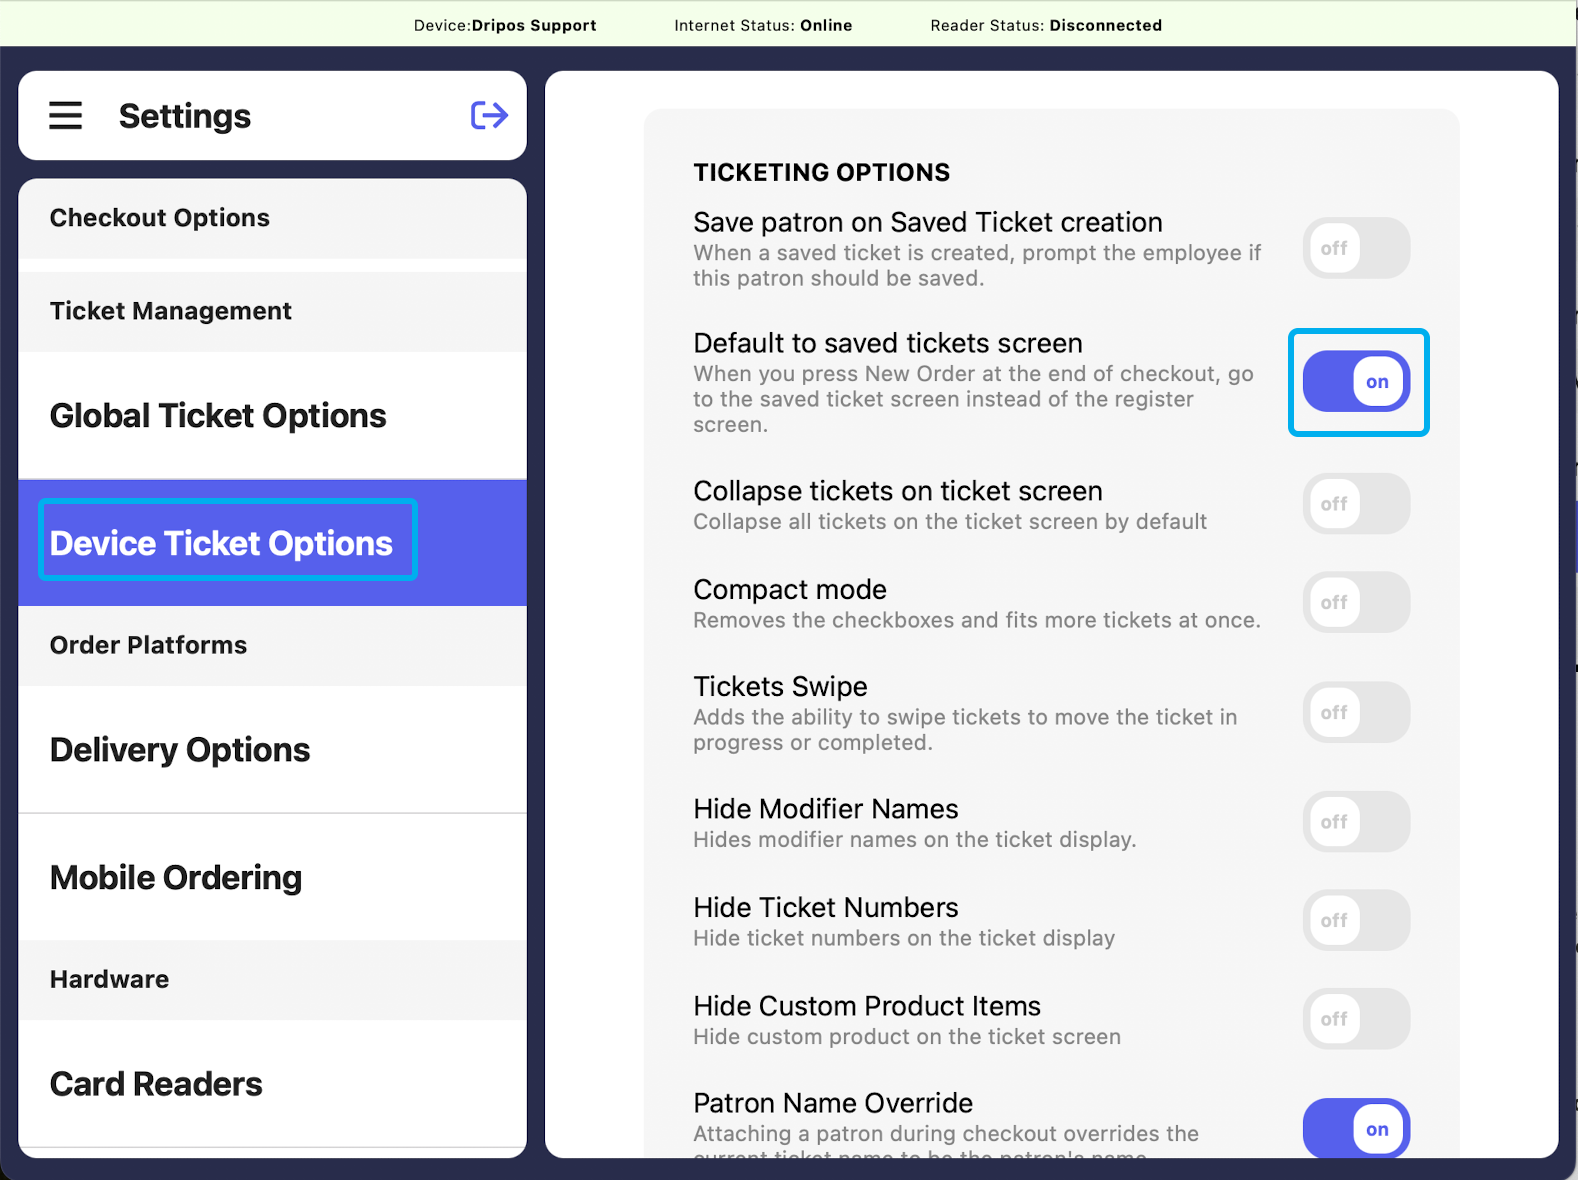
  1. Click on the Device Ticket Options tab in the left sidebar > turn the Default to Saved Tickets Screen toggle on:
  1. Once this has been enabled, when you press New Order at the end of a transaction, a new saved ticket pop-up will appear instead of your regular register screen:

This is a device-specific setting, meaning that this will only apply to the specific device you’re using, and not every tablet in the shop.

Follows the steps above on each device you wish to enable this feature on.

Save Patron When Creating a Saved Ticket

  1. Log on to the Point of Sale. Once signed in, click on the 3 line icon at the top left of the screen > select the gear icon in the bottom right corner:
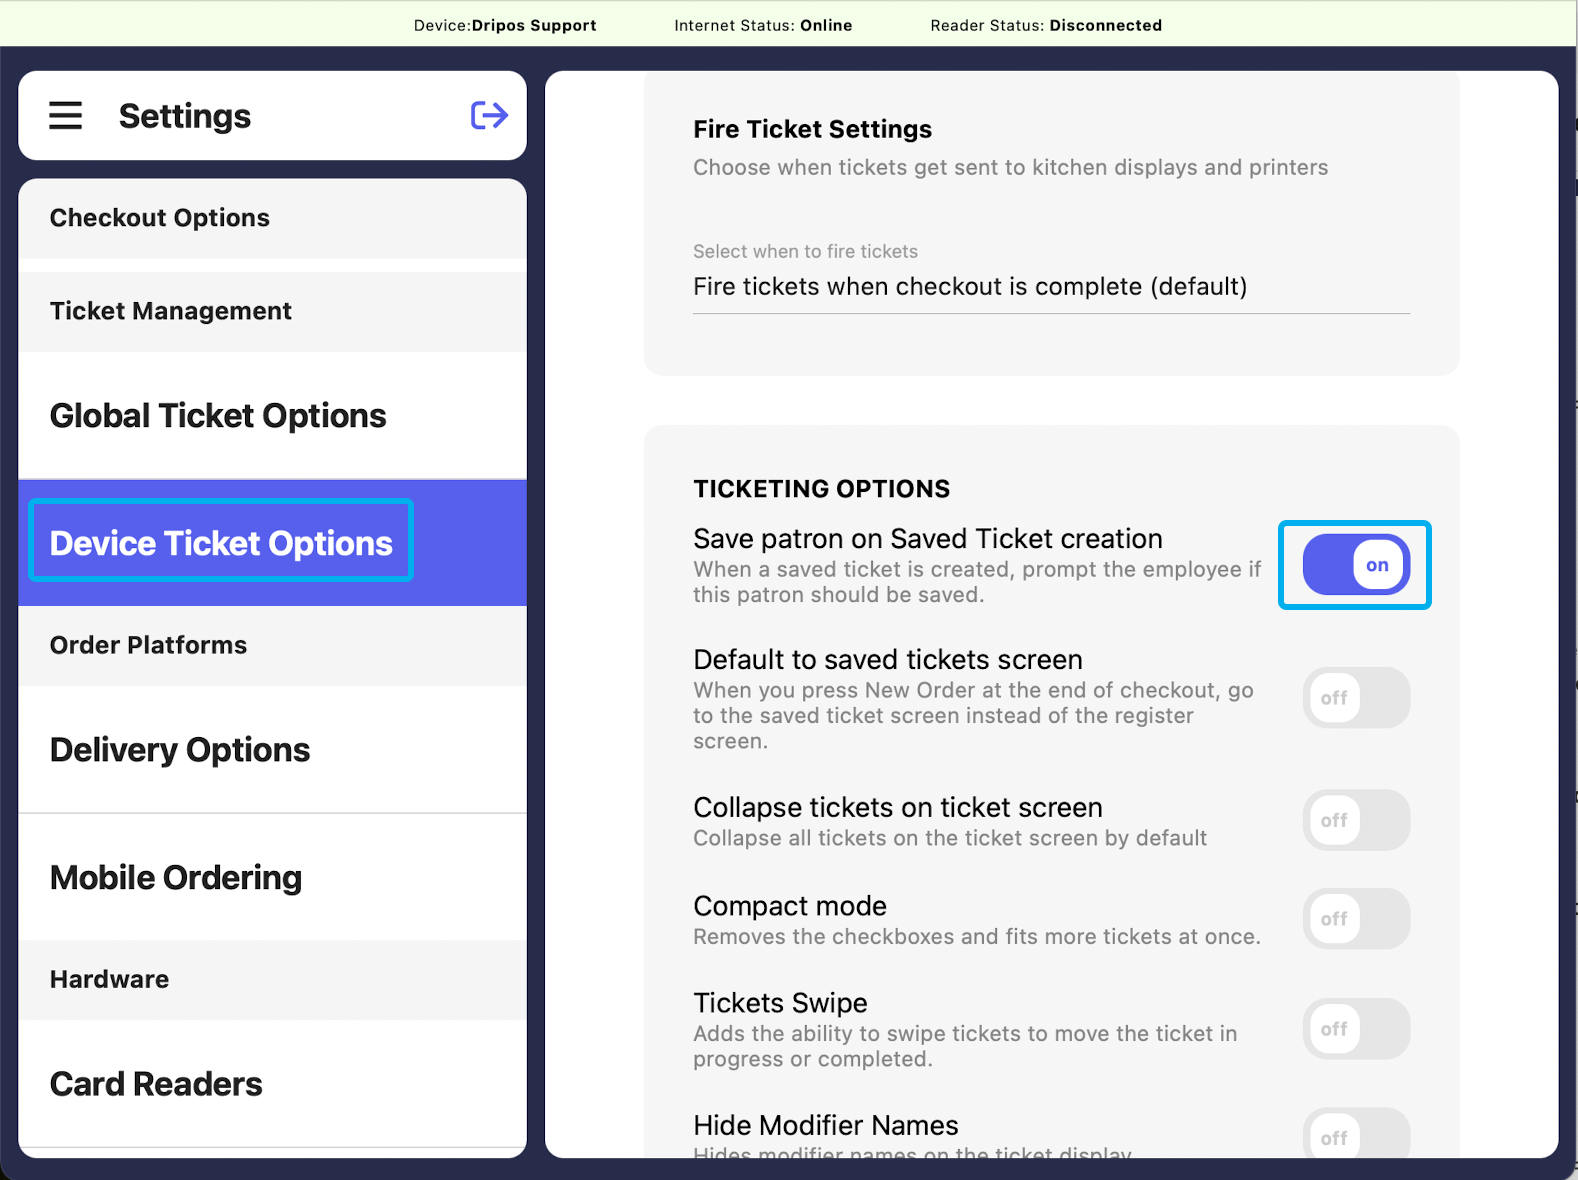
  1. Click on the Device Ticket Options tab > turn the Save Patron on Saved Ticket Create toggle on:
  1. Once this has been enabled, anytime a phone number is entered into the saved ticket pop-up that is not yet registered in the system, the POS will prompt you to select if you would like to create a new patron with the saved ticket information:

This is a device-specific setting, meaning that this will only apply to the specific device you’re using, and not every tablet in the shop.

Follows the steps above on each device you wish to enable this feature on.

Close Saved Tickets Modal on Select

  1. Log on to the Point of Sale. Once signed in, click on the 3 line icon at the top left of the screen > select the gear icon in the bottom right corner:
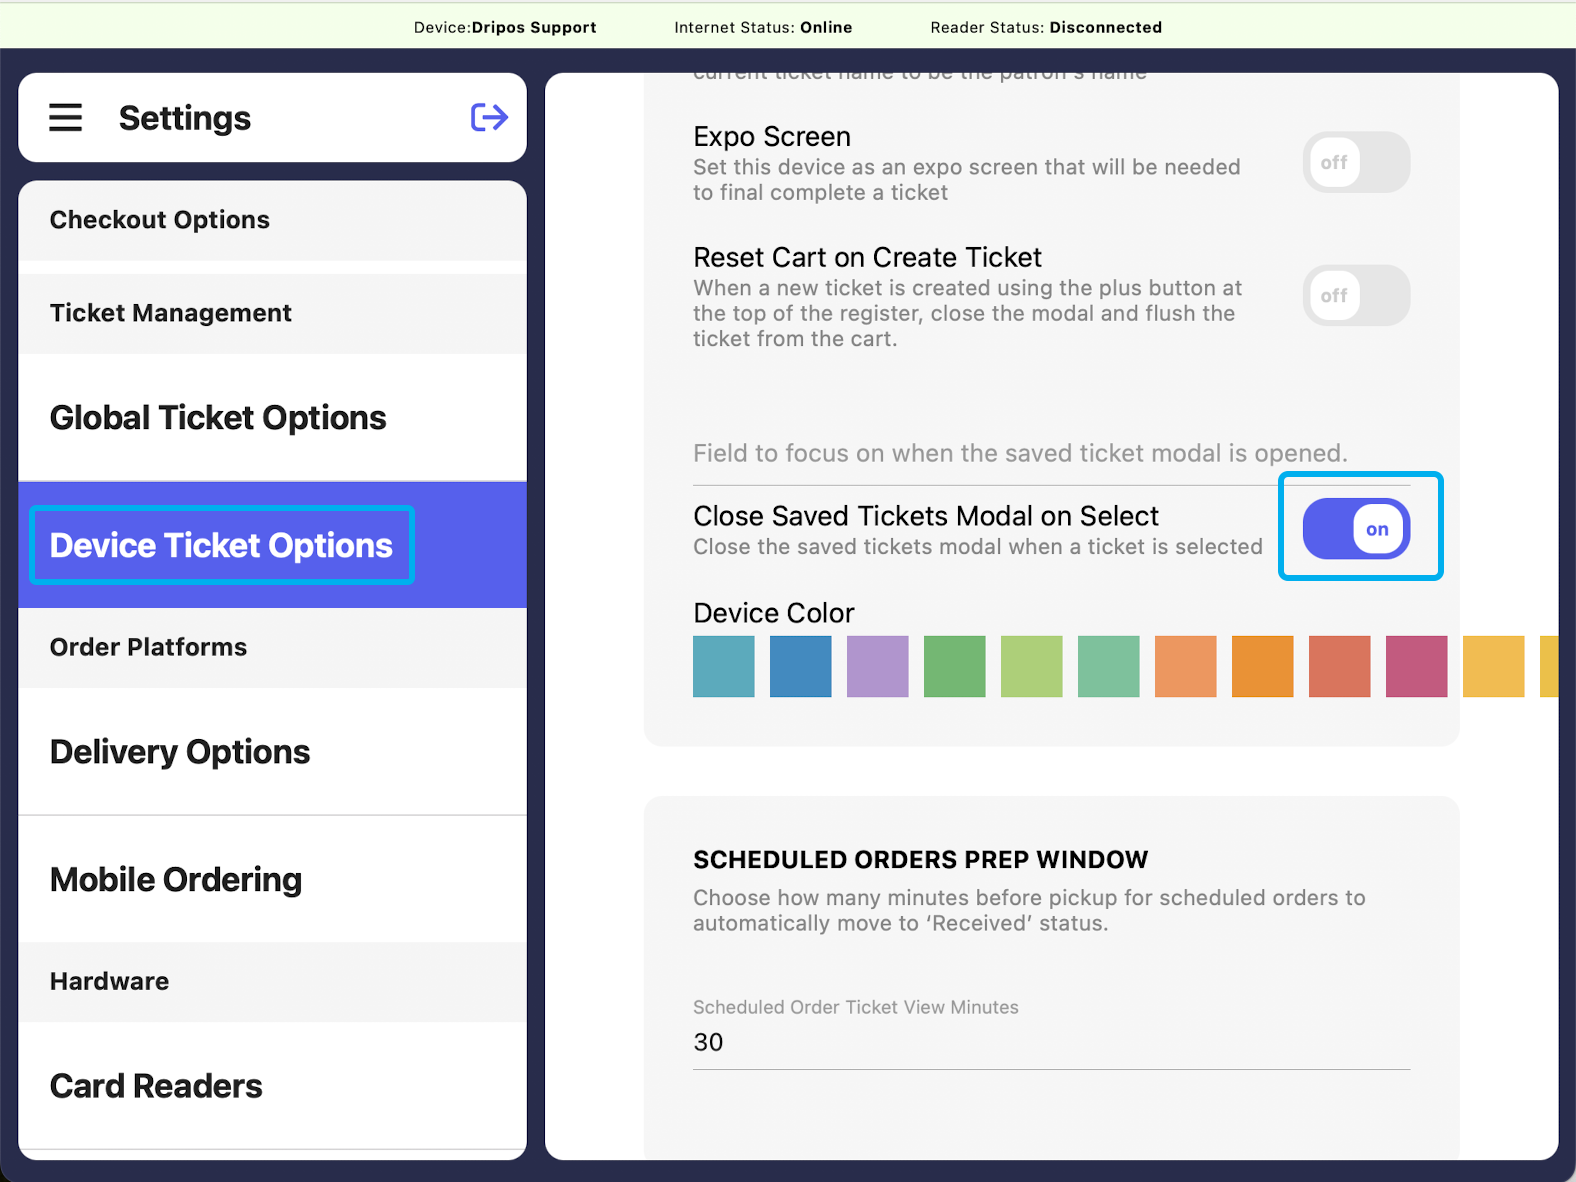
  1. Click on the Device Ticket Options tab > turn the Close Saved Tickets Modal on Select toggle on:
  1. Once this has been enabled, anytime a saved ticket is selected in the saved ticket modal, the saved ticket modal will automatically be closed and you will be re-directed straight to the POS register screen:

This is a device-specific setting, meaning that this will only apply to the specific device you’re using, and not every tablet in the shop.

Follows the steps above on each device you wish to enable this feature on.