Download Dripos Go
iOS (requires iPhone XS or later)
Click to Download
Android (requires NFC Compatible device)
Click to Download
Getting Started
Get Started with DriposGO
Get Started with DriposGO
1
Once downloaded, log-in using an Admin phone number and input the Authentication Code.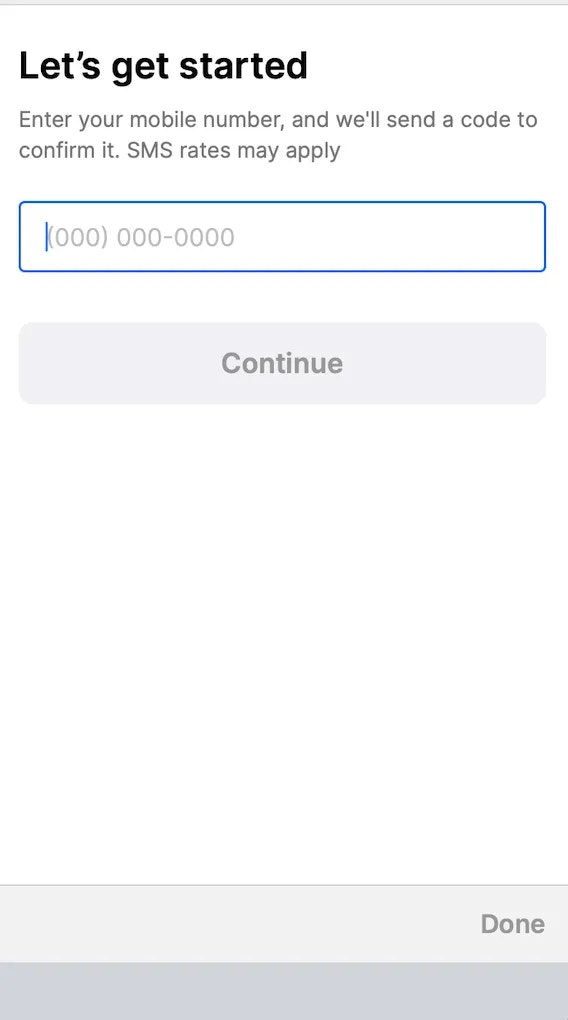
2
Select your location.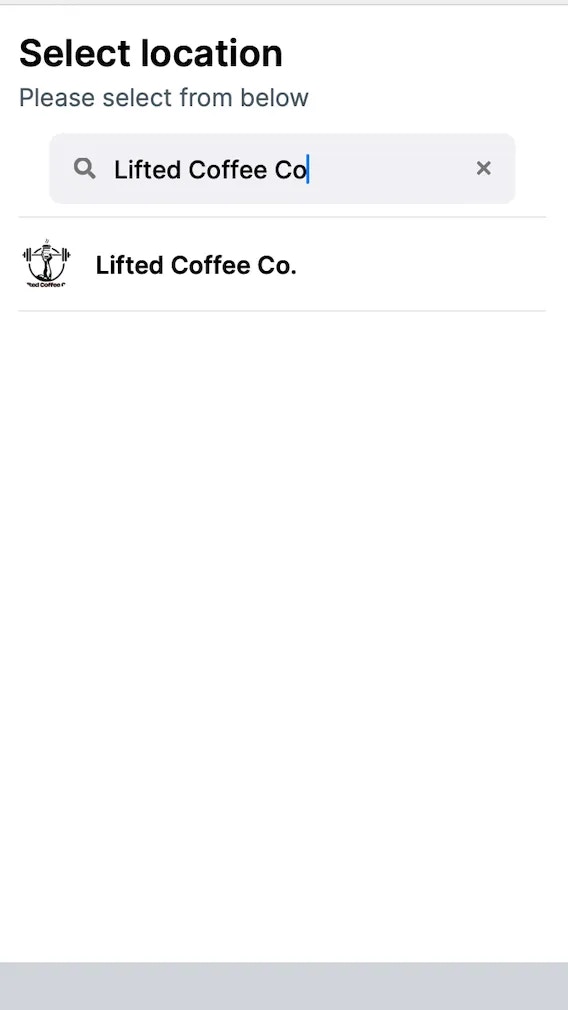
3
Select the device.

Create New Device Name
Create New Device Name
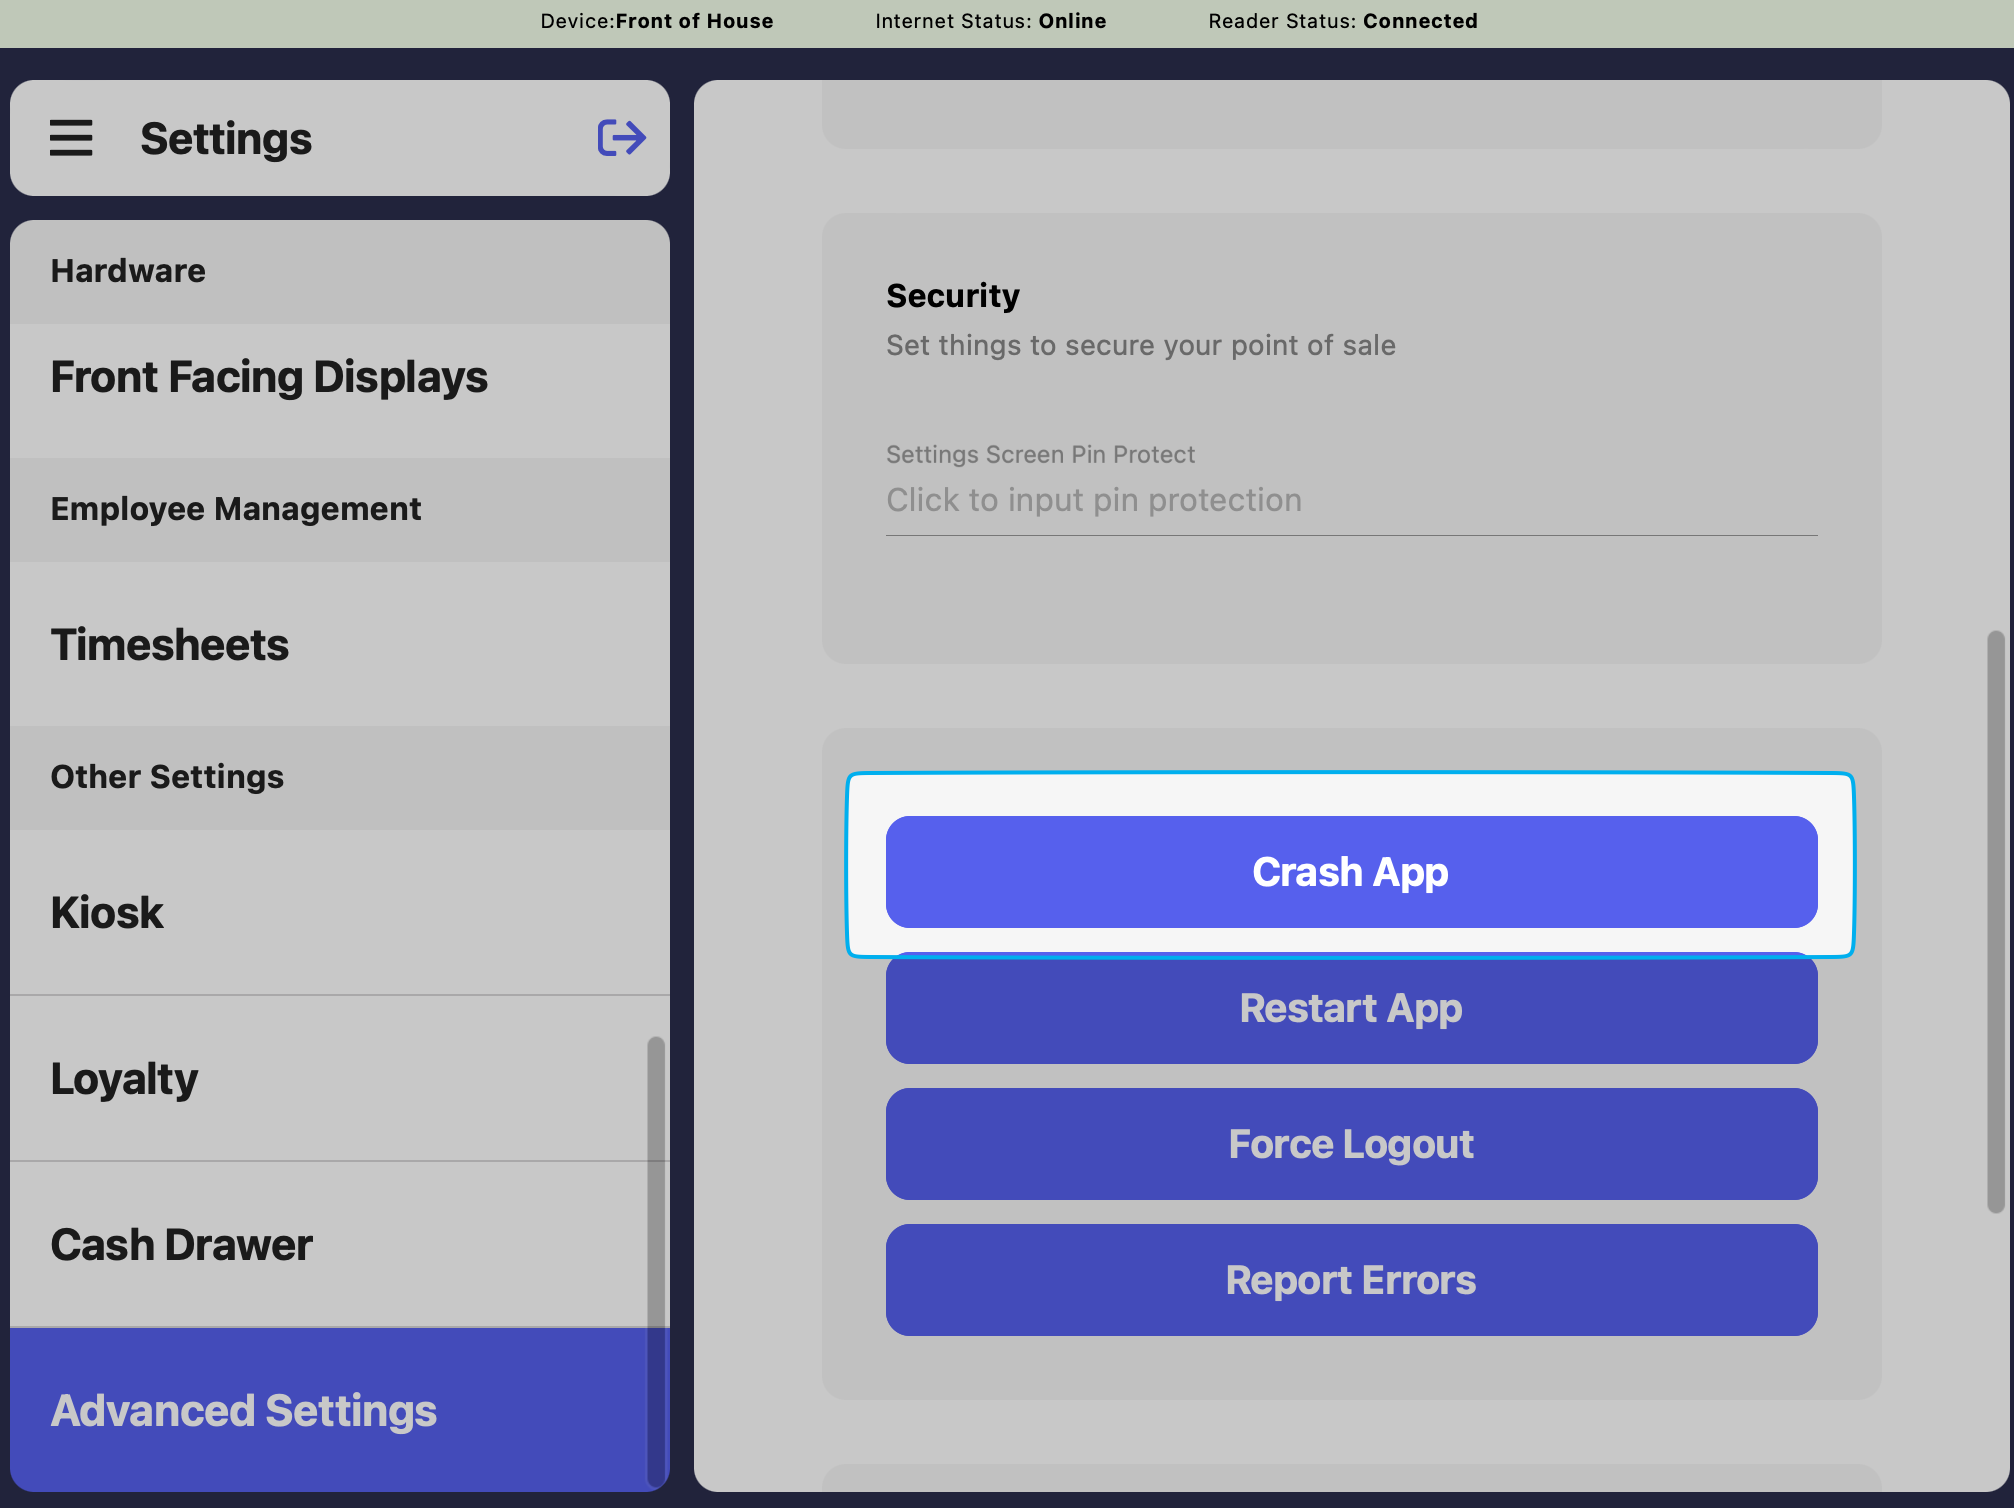
- On the Point of Sale press the tribar in the upper left screen corner > press the Settings button
- Scroll down to Advanced Settings > Crash App
- Select your location
- Select New Device > name the device for Dripos Go
- Navigate back to Advanced Settings > Crash App
- Select Existing Device and log back into your original POS device name
4
Watch the Tap to Pay video tutorial.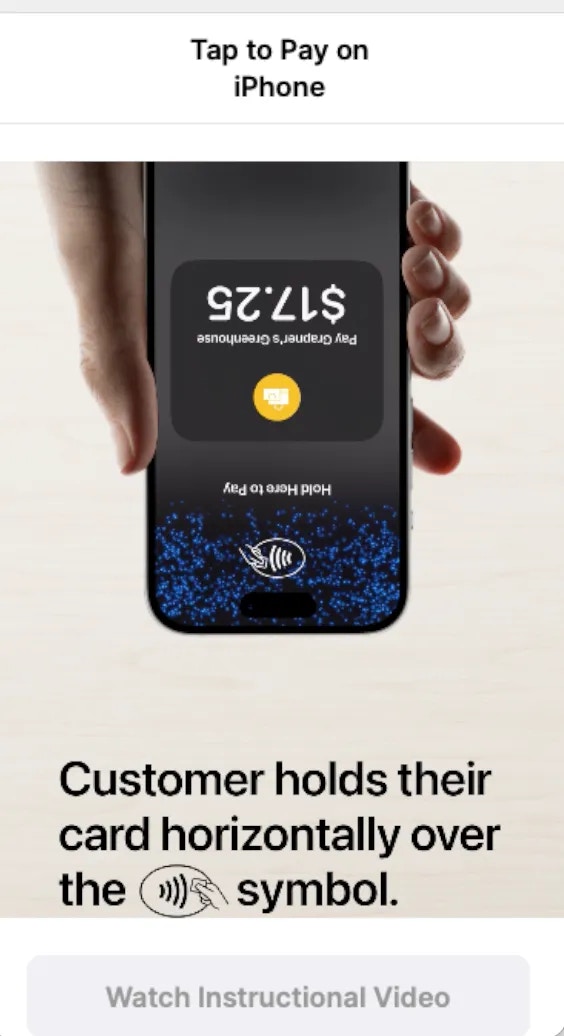
Navigating Dripos Go
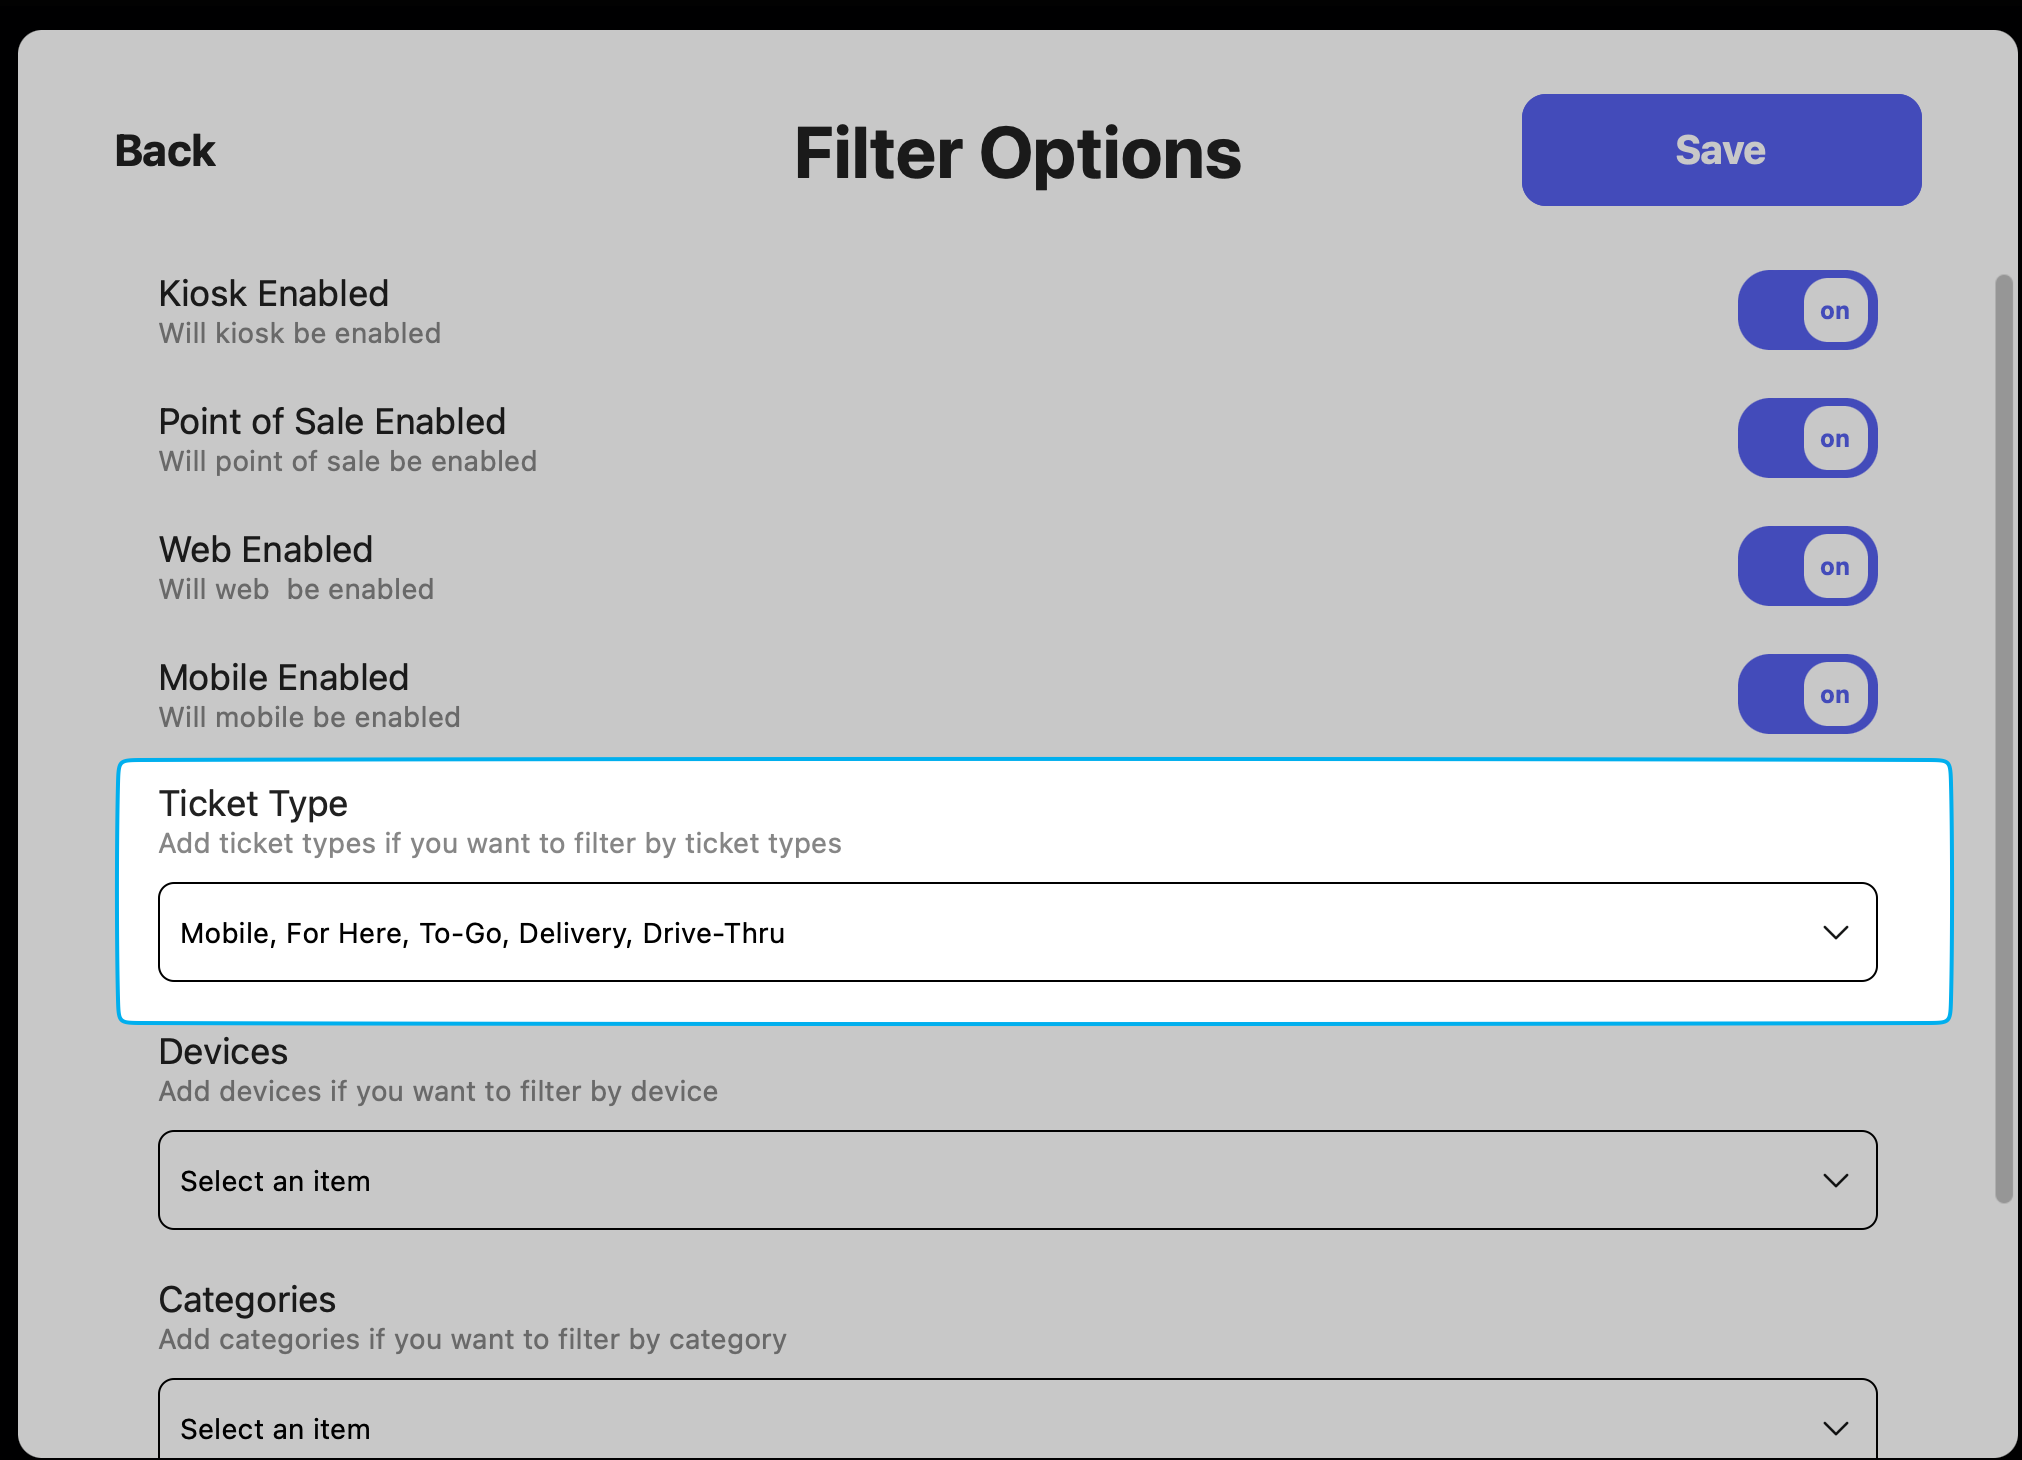
Create Ticket Type
Create Ticket Type
If applicable, create a new ticket type for checkout on Dripos Go.By doing so, sales from the Dripos Go app can be separated out from sales at the shop on the Point of Sale.Learn how to create a new ticket type here
Checkout Flow
Checkout Flow
Place orders, enter patron information, collect payment, and distribute receipts- all with DriposGO!Watch the video below on how to checkout using Dripos Go.
Create Saved Tickets
Create Saved Tickets
- Create a Saved Ticket to be paid at a later time.
- Press Saved at the bottom of the app > press the + button up top > enter in the ticket information > add items to cart
- Instead of checking out, press Save for Later.
- When ready to checkout, navigate to Saved at the bottom of the app > press the ticket you’ve created > navigate to cart and checkout
Add Discounts to Orders
Add Discounts to Orders
Add Product DiscountsPremade product discounts can be added to products ordered on Dripos GO.Learn how to premake product discounts for use here.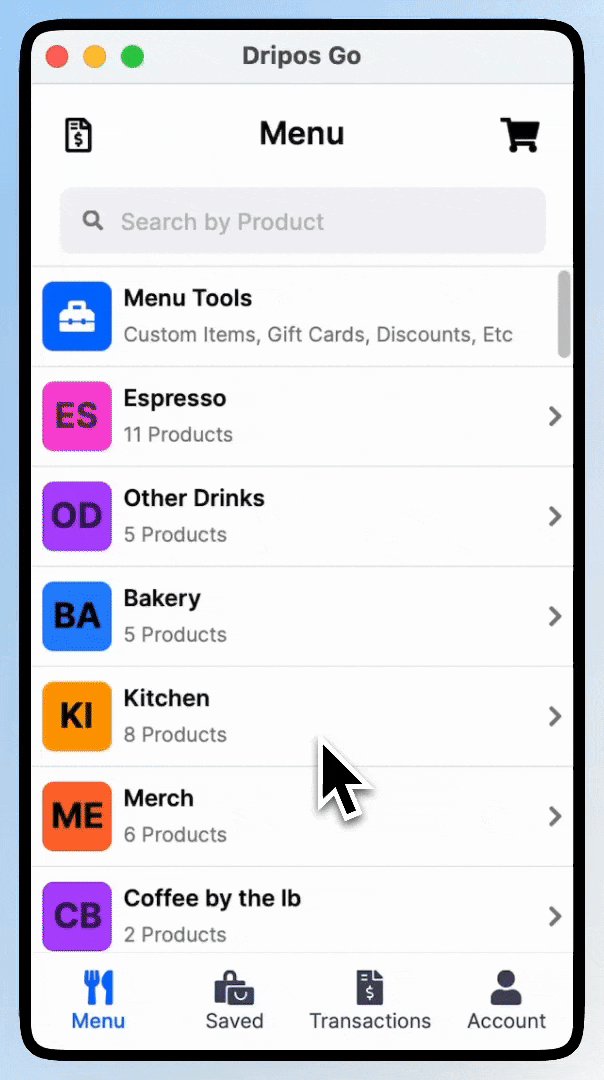
1
Select a product to add to cart
2
Before adding to cart, select the product discount listed at the bottom of the product’s page.
3
Any applicable product modifiers will be listed for use. Tap to add the discount and add the product to cart.
1
Add product to cart
2
Return back to menu home page and press Menu Tools
3
Press Discounts and add a premade ticket discount
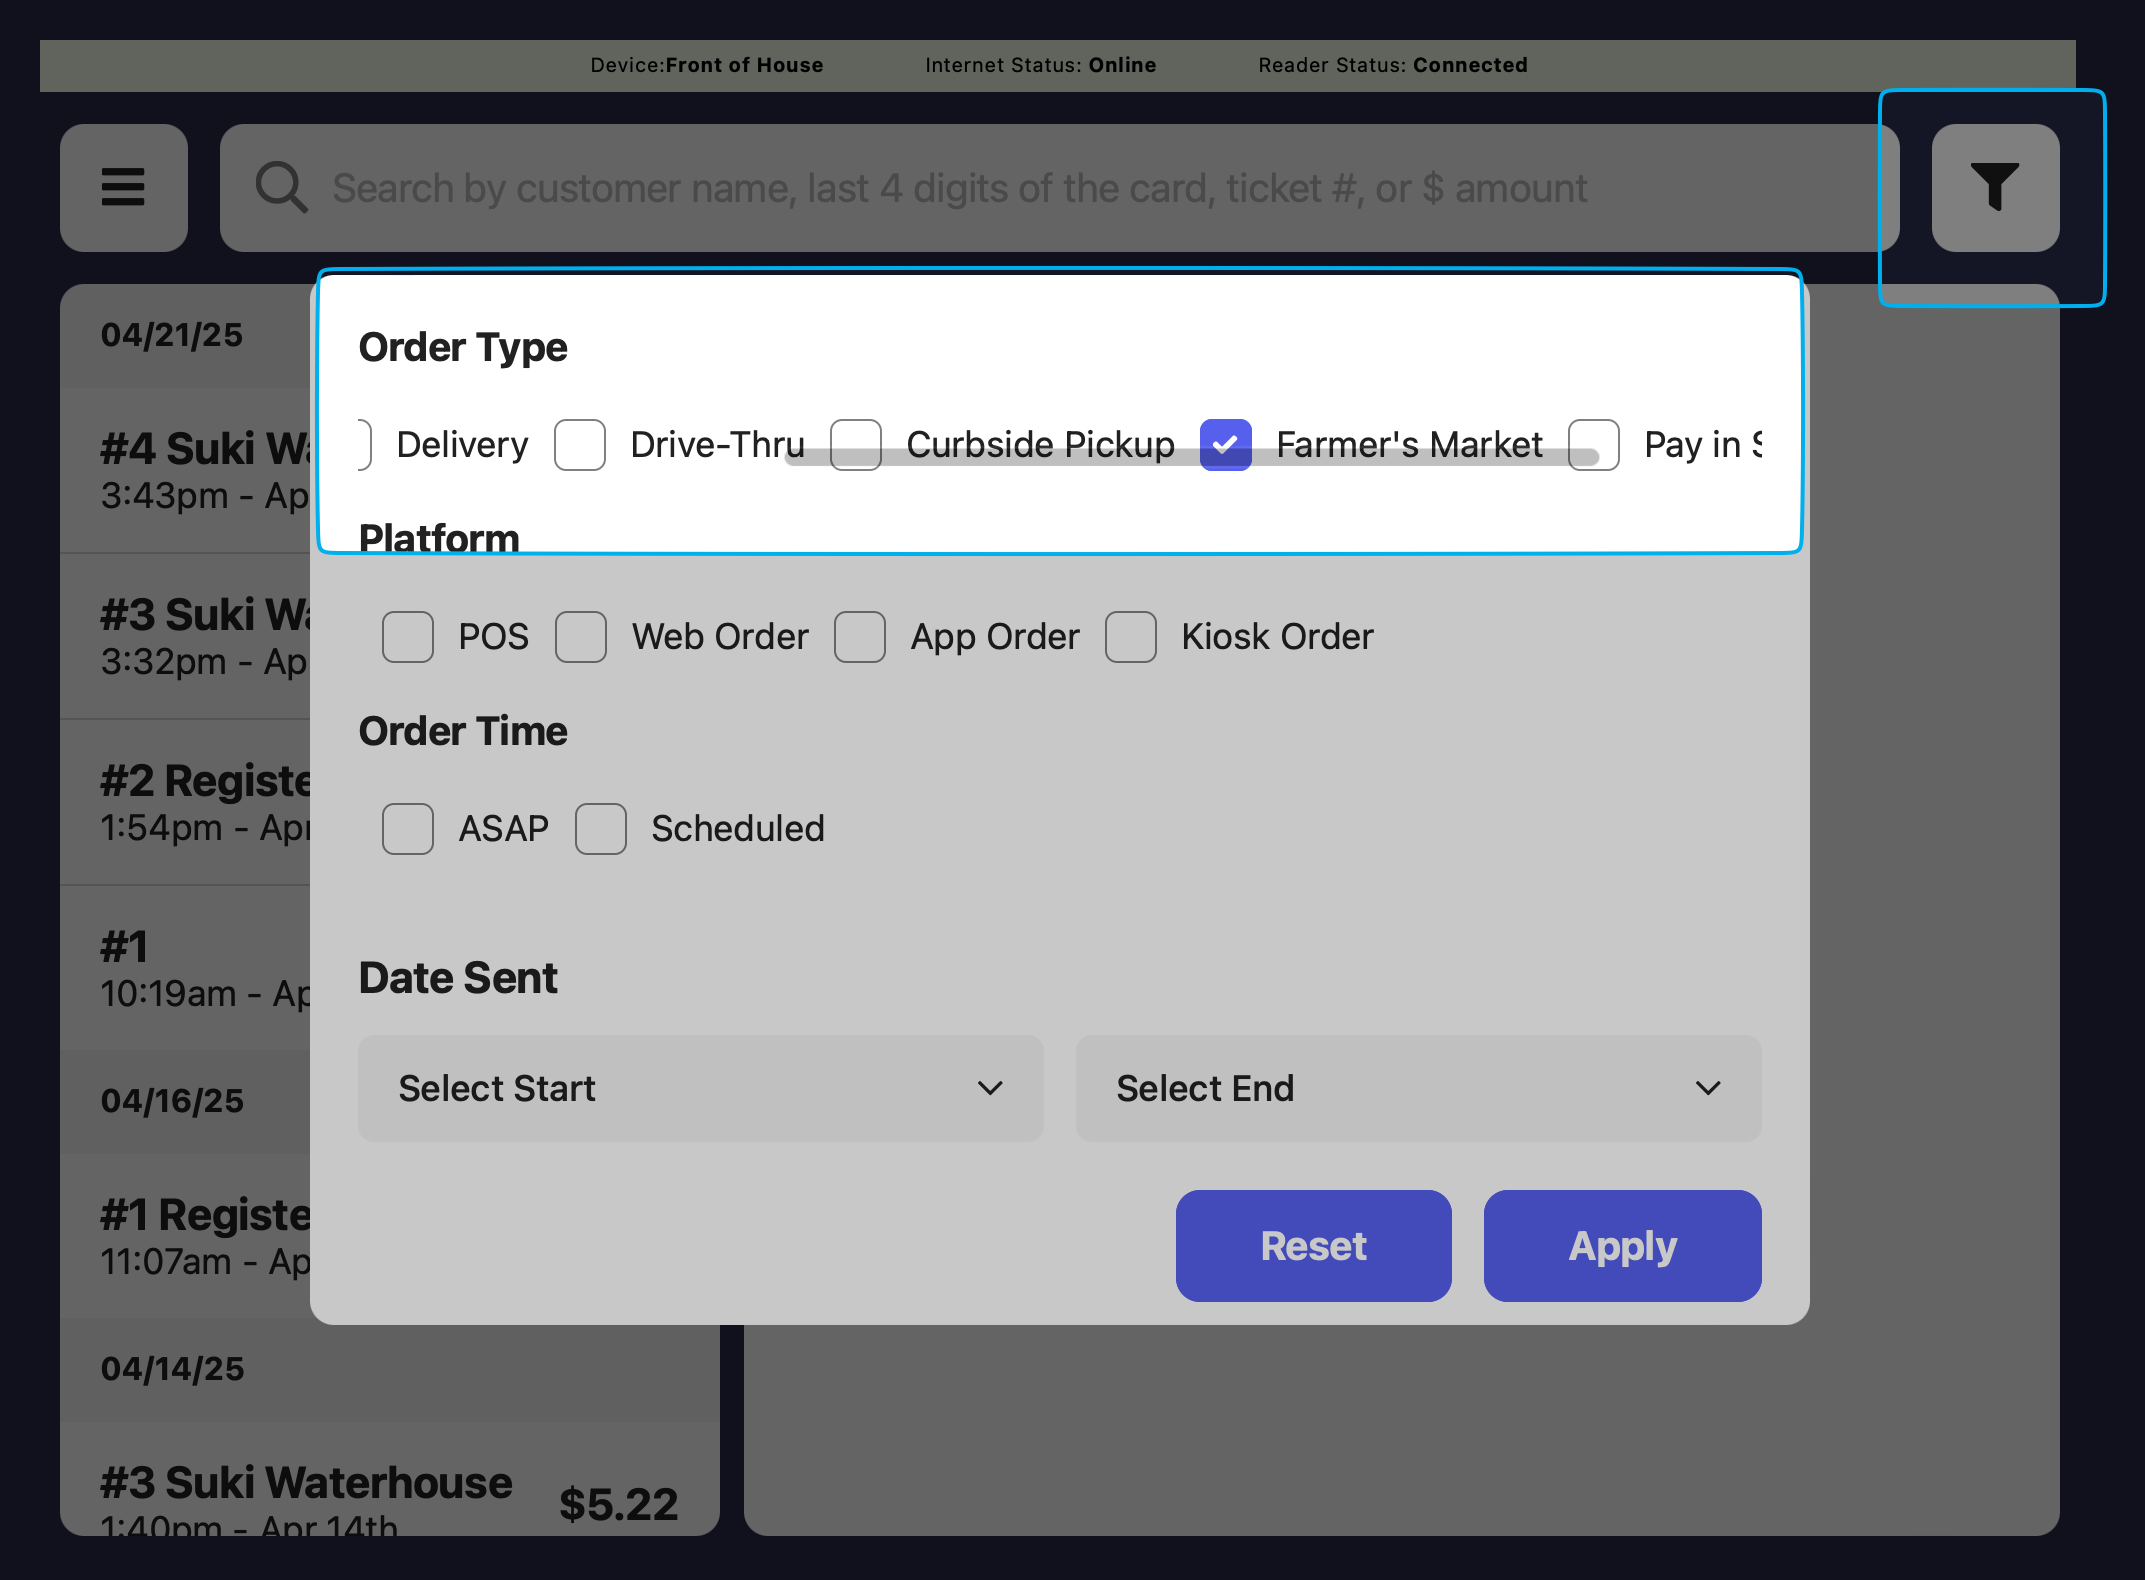
Filter DriposGO Tickets on Point of Sale
Filter DriposGO Tickets on Point of Sale
Include or exclude your Dripos Go tickets from your Point of Sale ticket screen.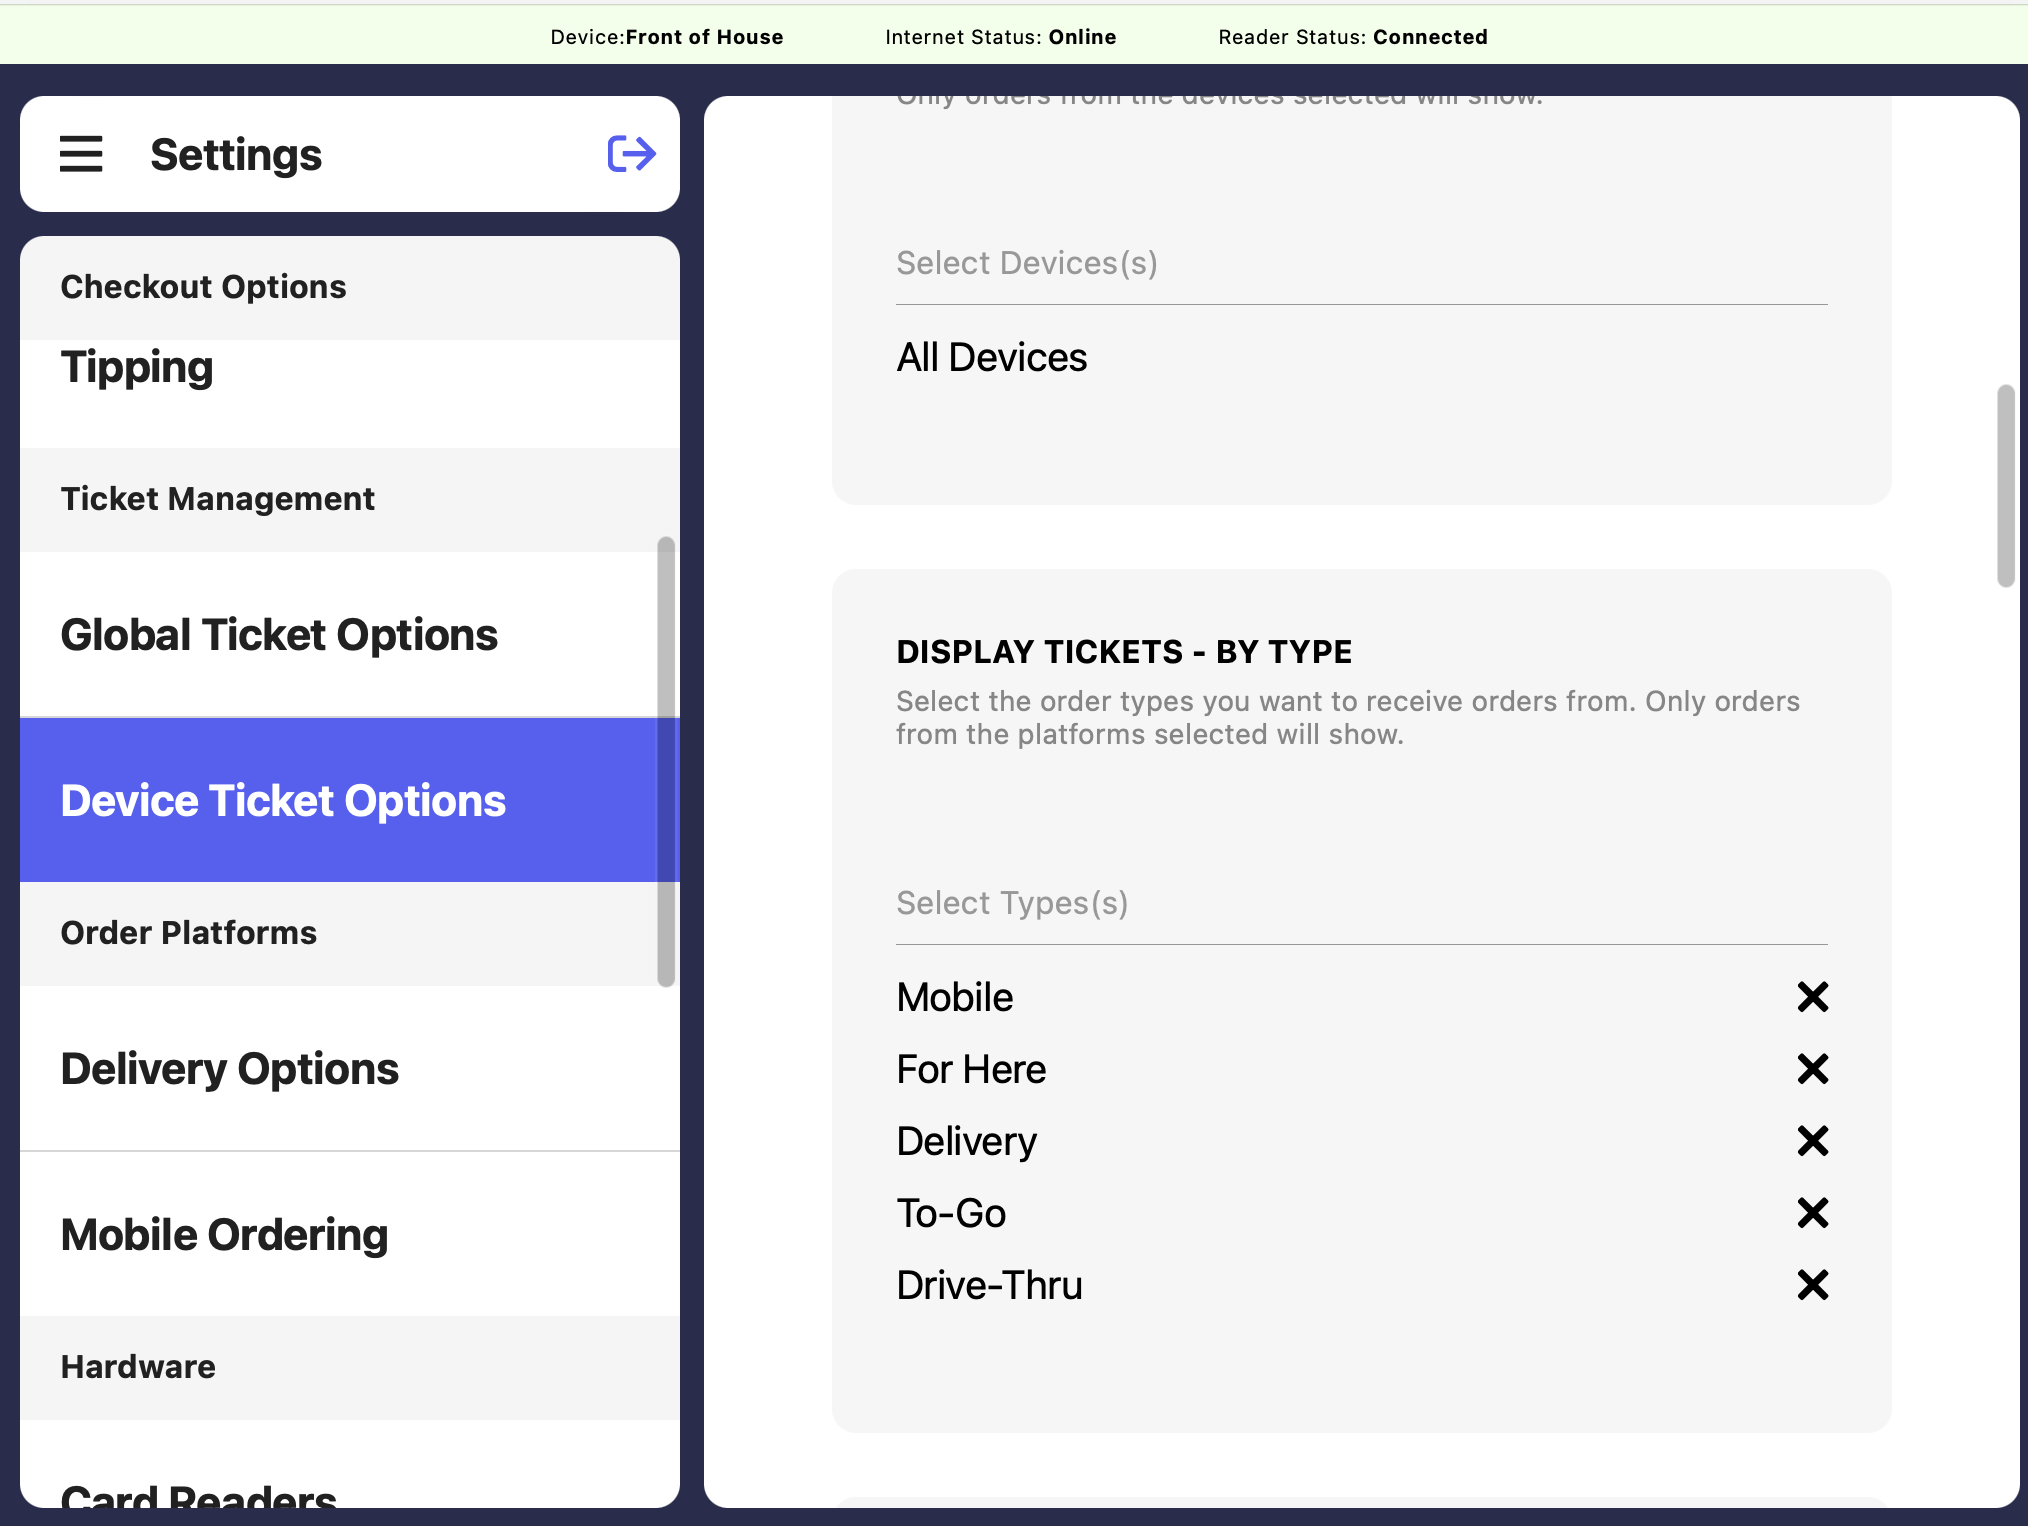
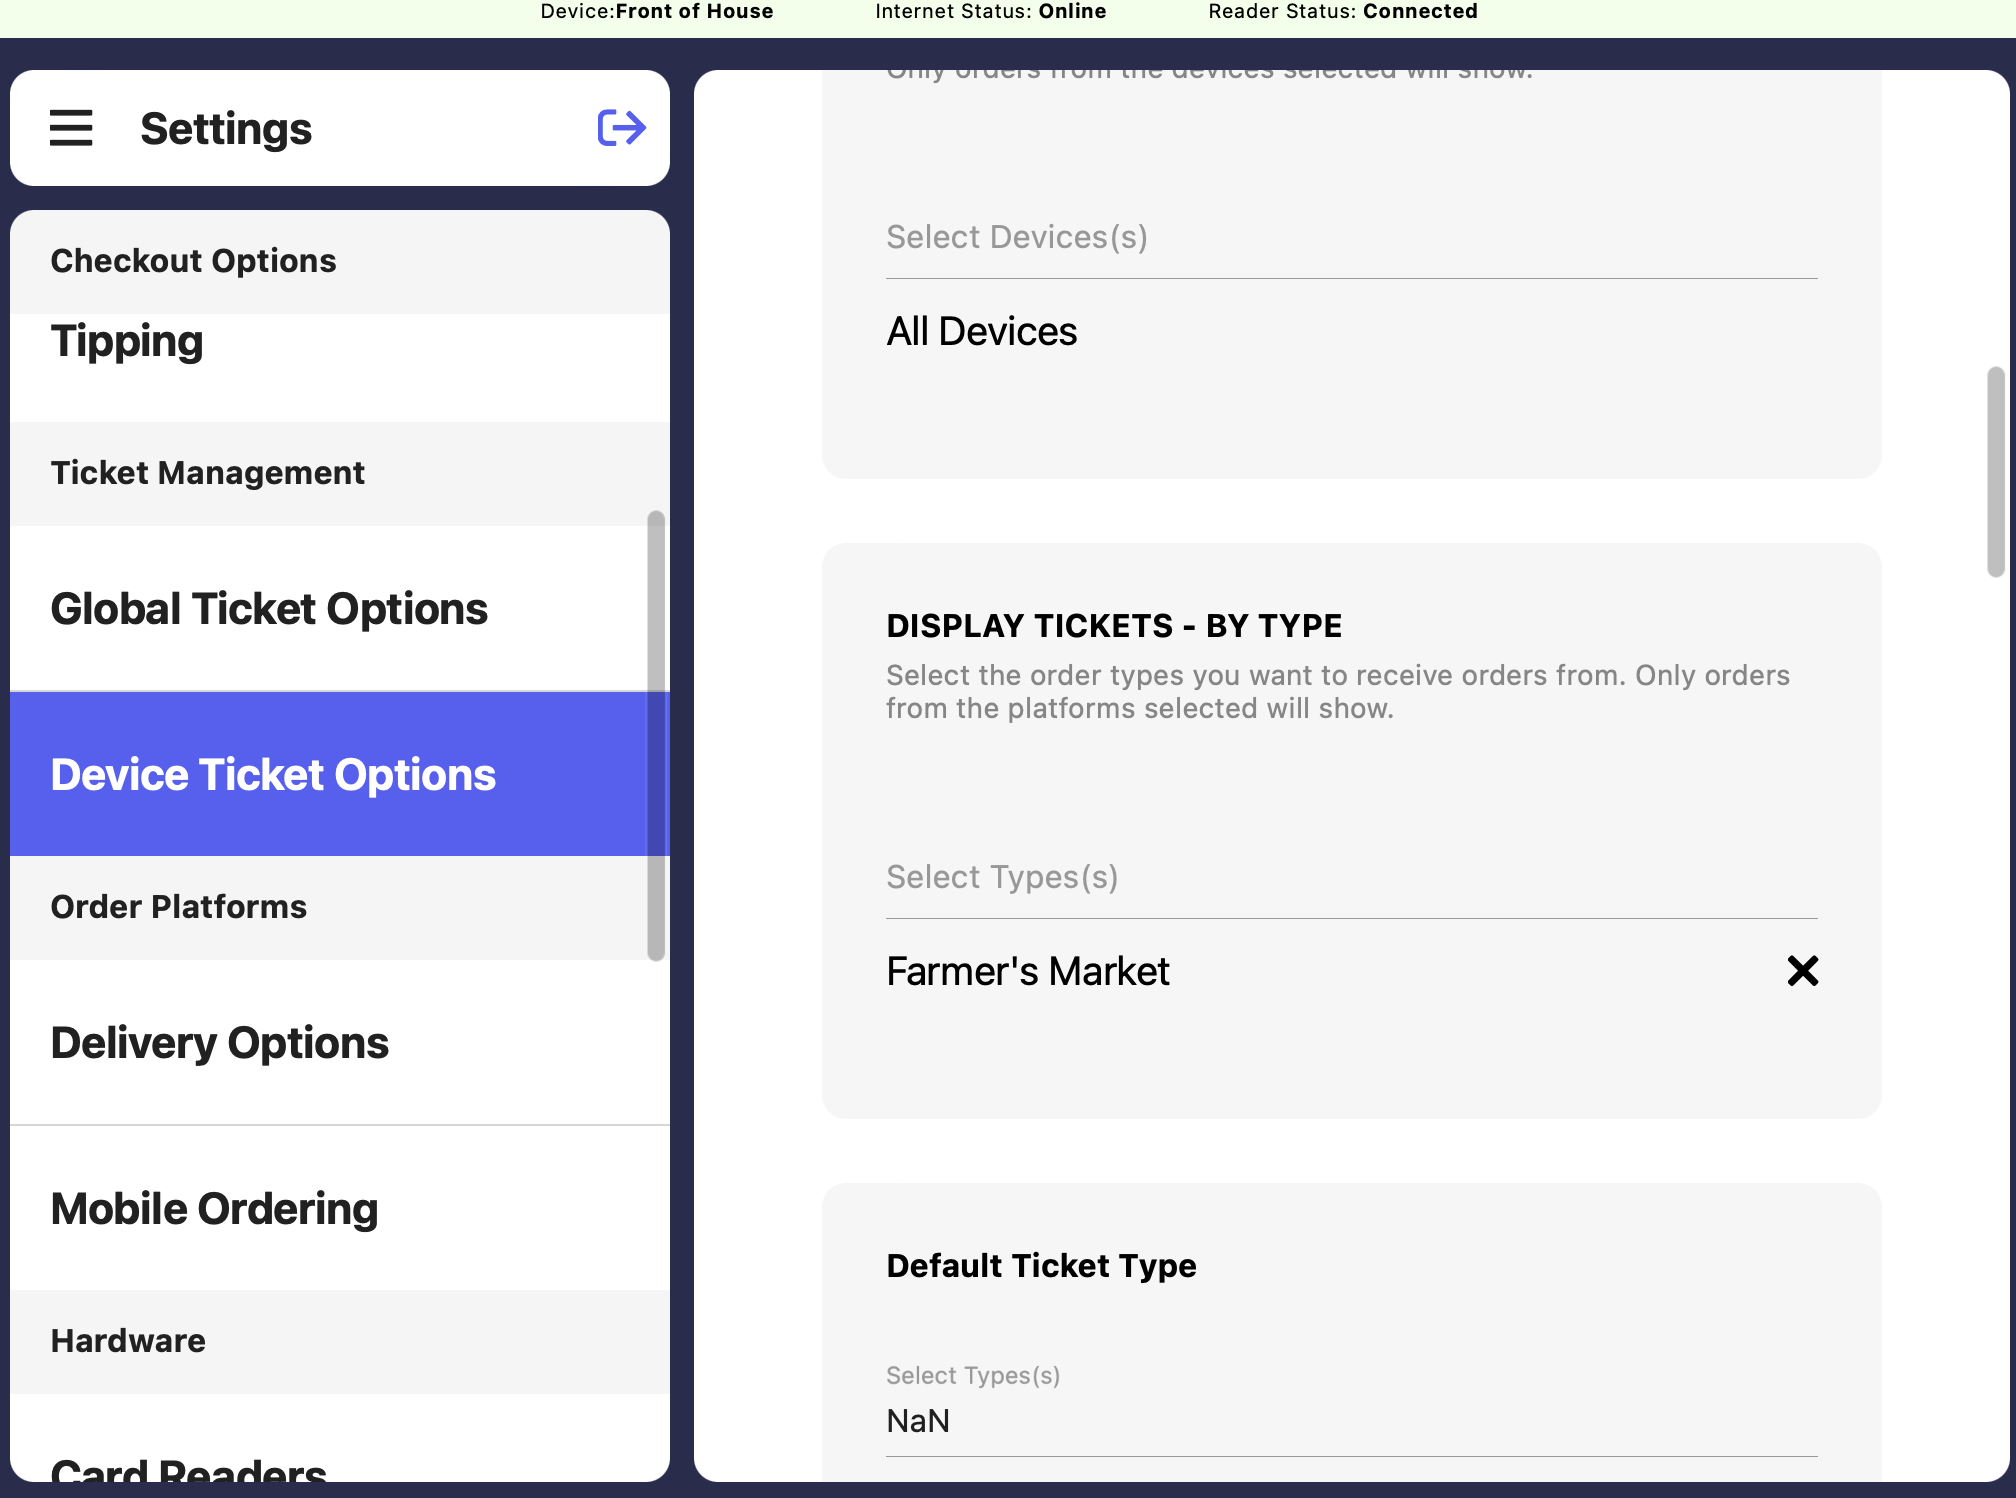
- On the Point of Sale device being used, press the tribar in the upper left screen corner > press the Settings button
- Navigate to Device Ticket Options
- If the Point of Sale is to exclude the Dripos Go ticket (i.e., ticket type named Farmers Market) from the ticket screen, filter the device by all tickets except Farmers Market
- If the Point of Sale is to include only the DriposGO ticket (i.e., ticket type named Farmers Market) in the ticket screen, filter the device by only the Farmers Market ticket type
Print DriposGo Tickets on the Point of Sale
Print DriposGo Tickets on the Point of Sale
Include or exclude your DriposGO tickets from printing at your Point of Sale.
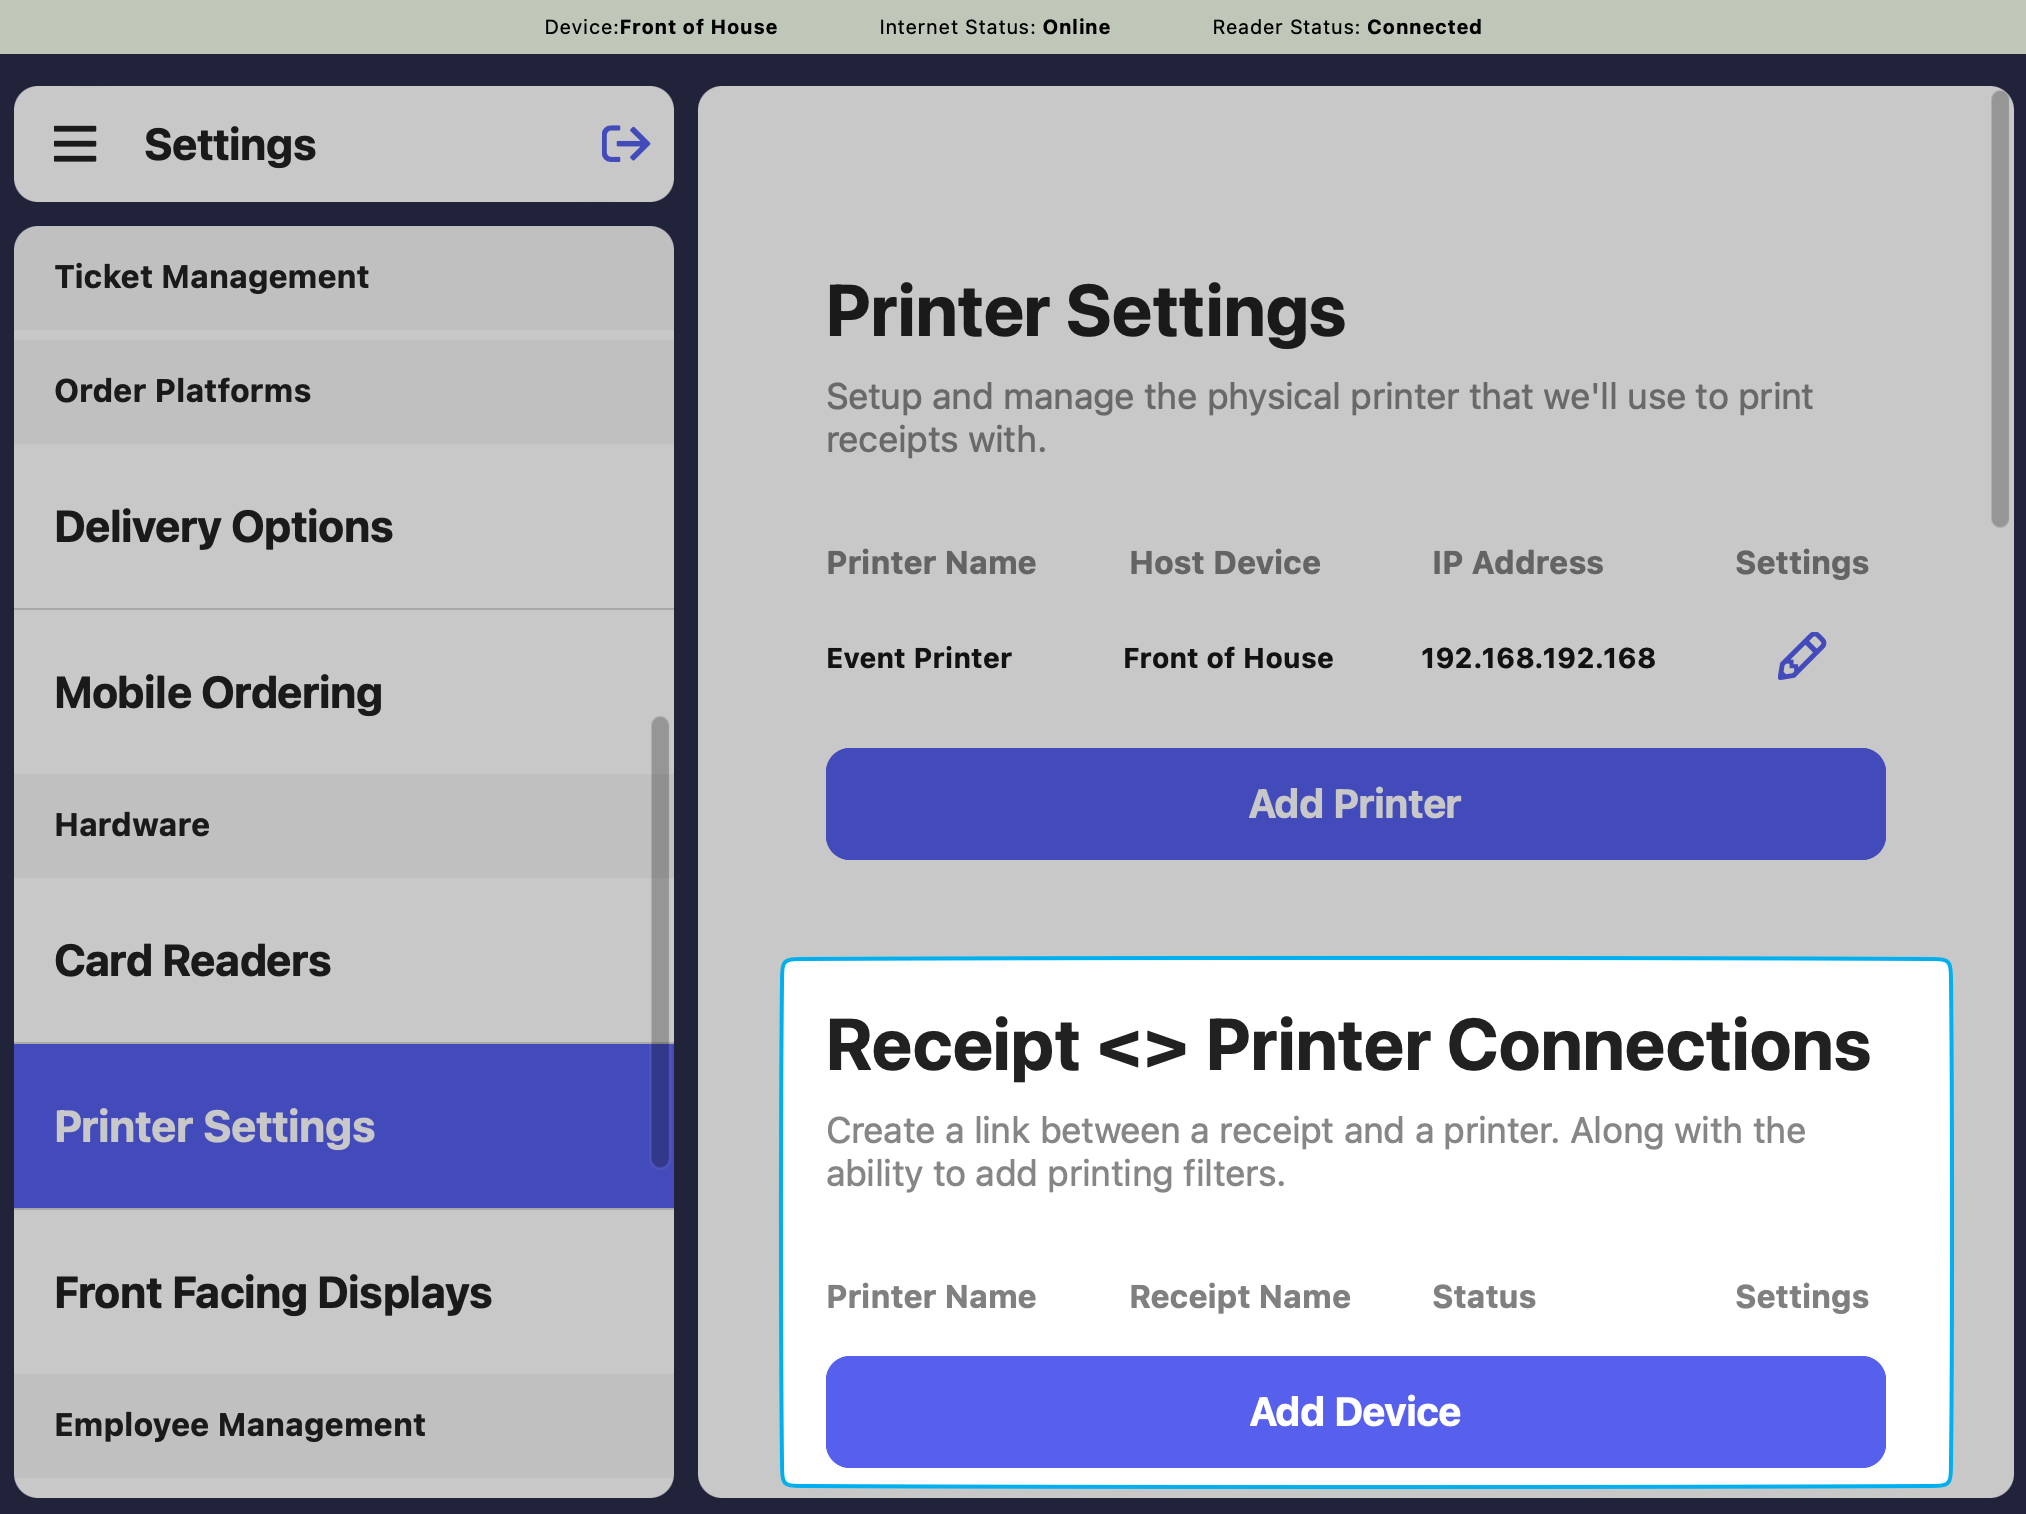

- On the Point of Sale device being used, press the tribar in the upper left screen corner > press the Settings button
- Navigate to Printer Settings
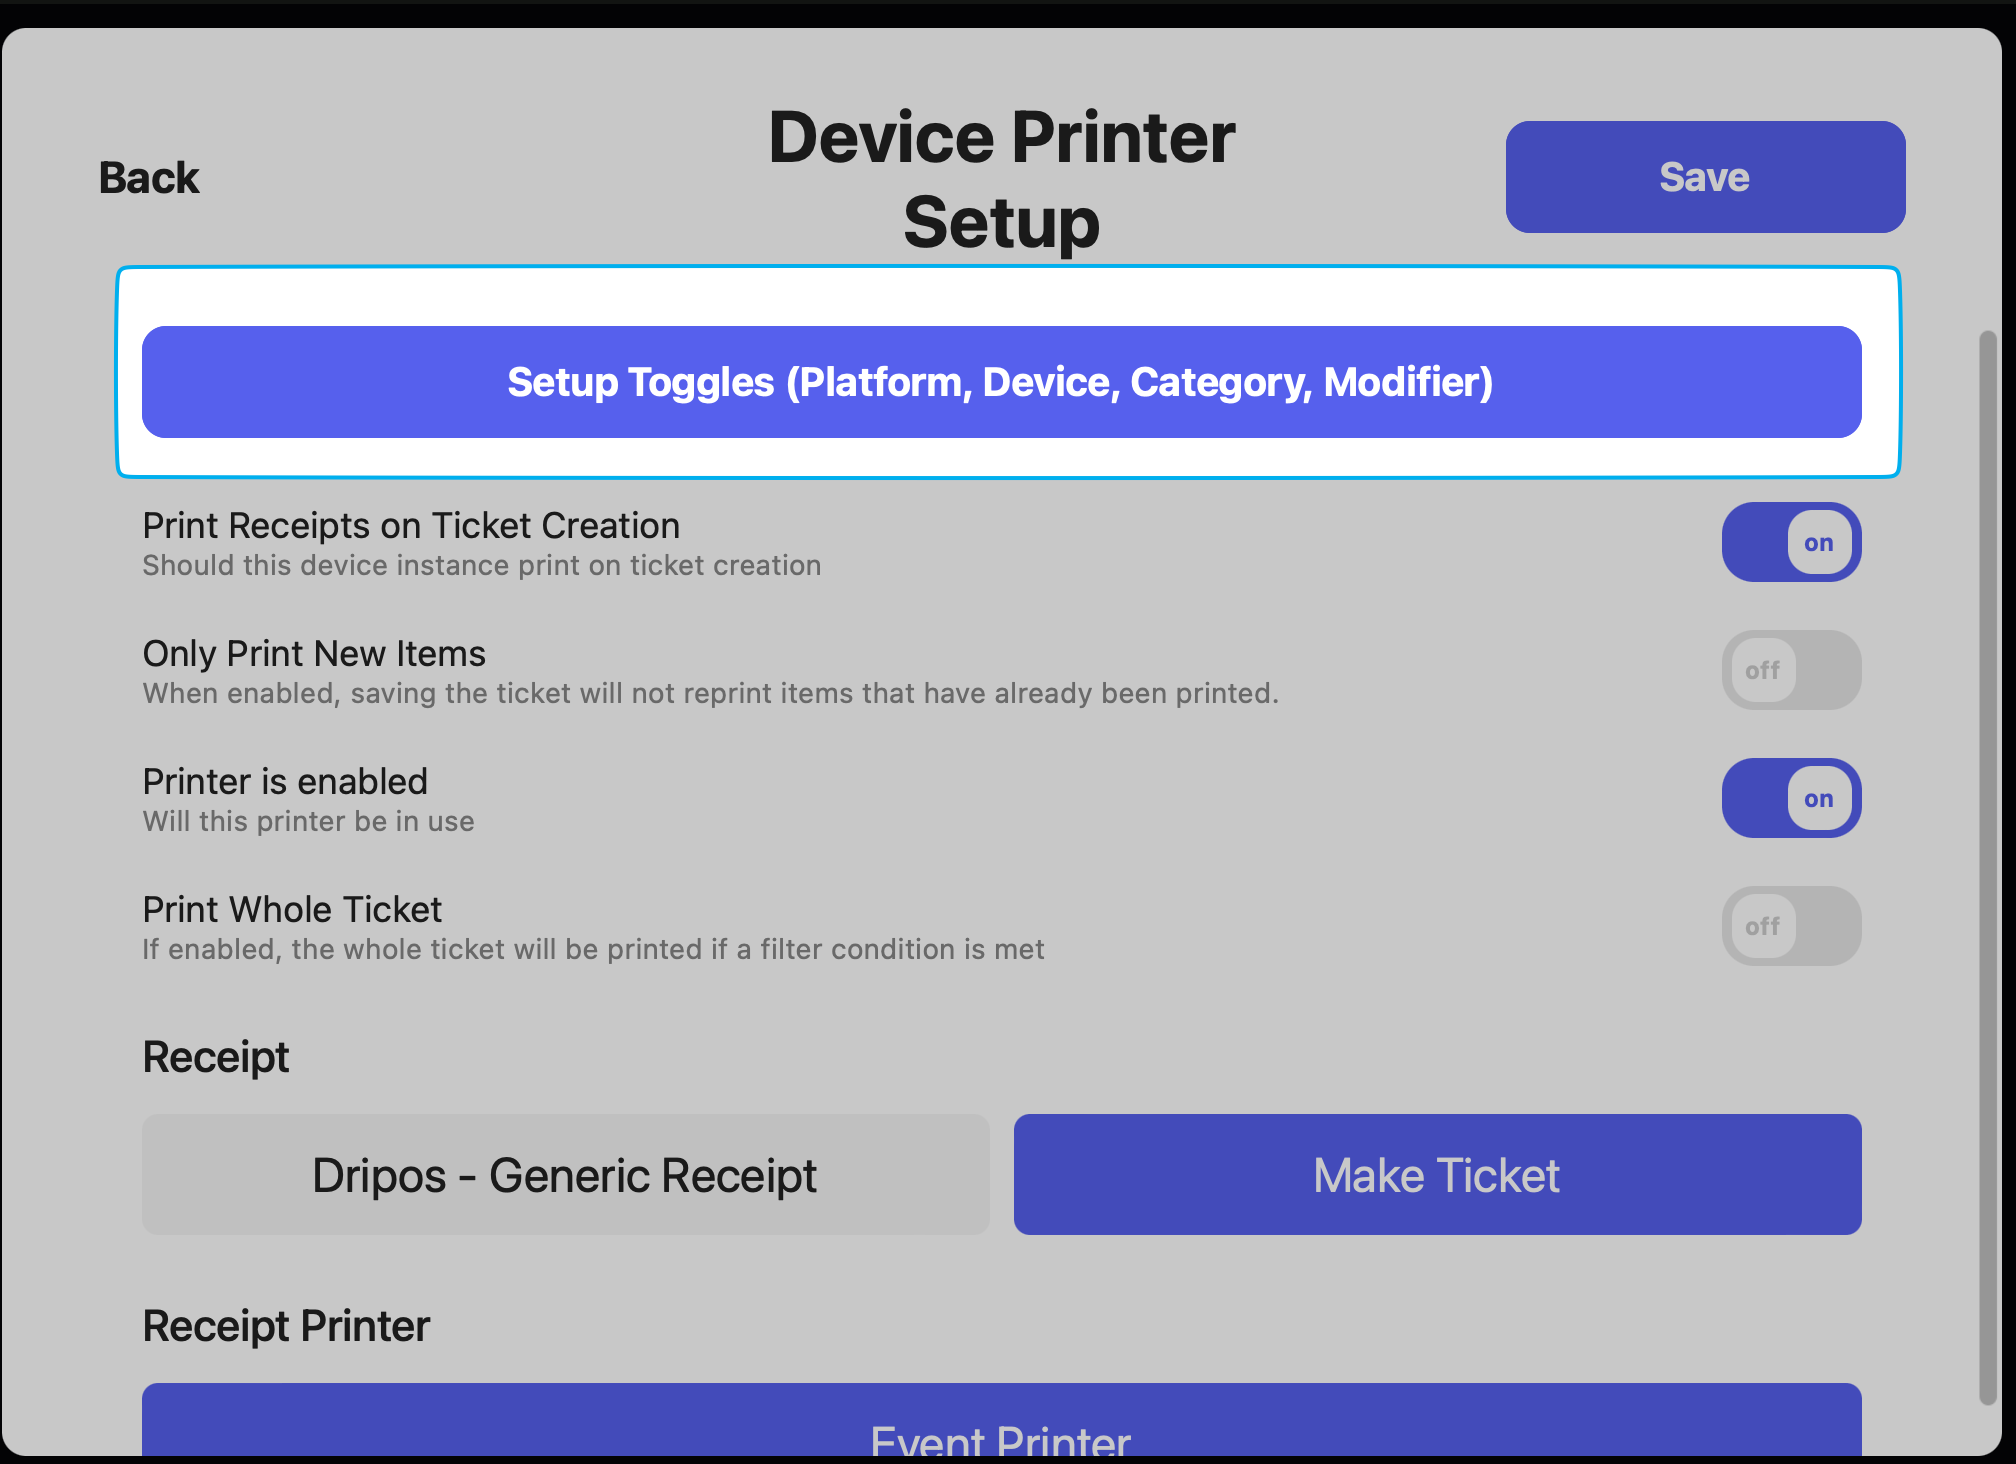
- Ensure printer is connected first > create new Receipt <> Printer Connection
- Click Setup Toggles
- If the Point of Sale is to exclude the Dripos Go ticket (i.e., ticket type named Farmers Market) from printing, filter the connection by all tickets except Farmers Market
- If the Point of Sale is to include only the Dripos Go ticket (i.e., ticket type named Farmers Market) in the ticket screen, filter the connection by only the Farmers Market ticket type
- Click Save
View Transactions
View Transactions
View all DriposGO transactions on multiple Dripos platforms
- Web Dashboard
- Point of Sale
- DriposGO
Web DashboardView all Dripos Go transactions on the Web Dashboard > Orders > Transactions > filter by Ticket Type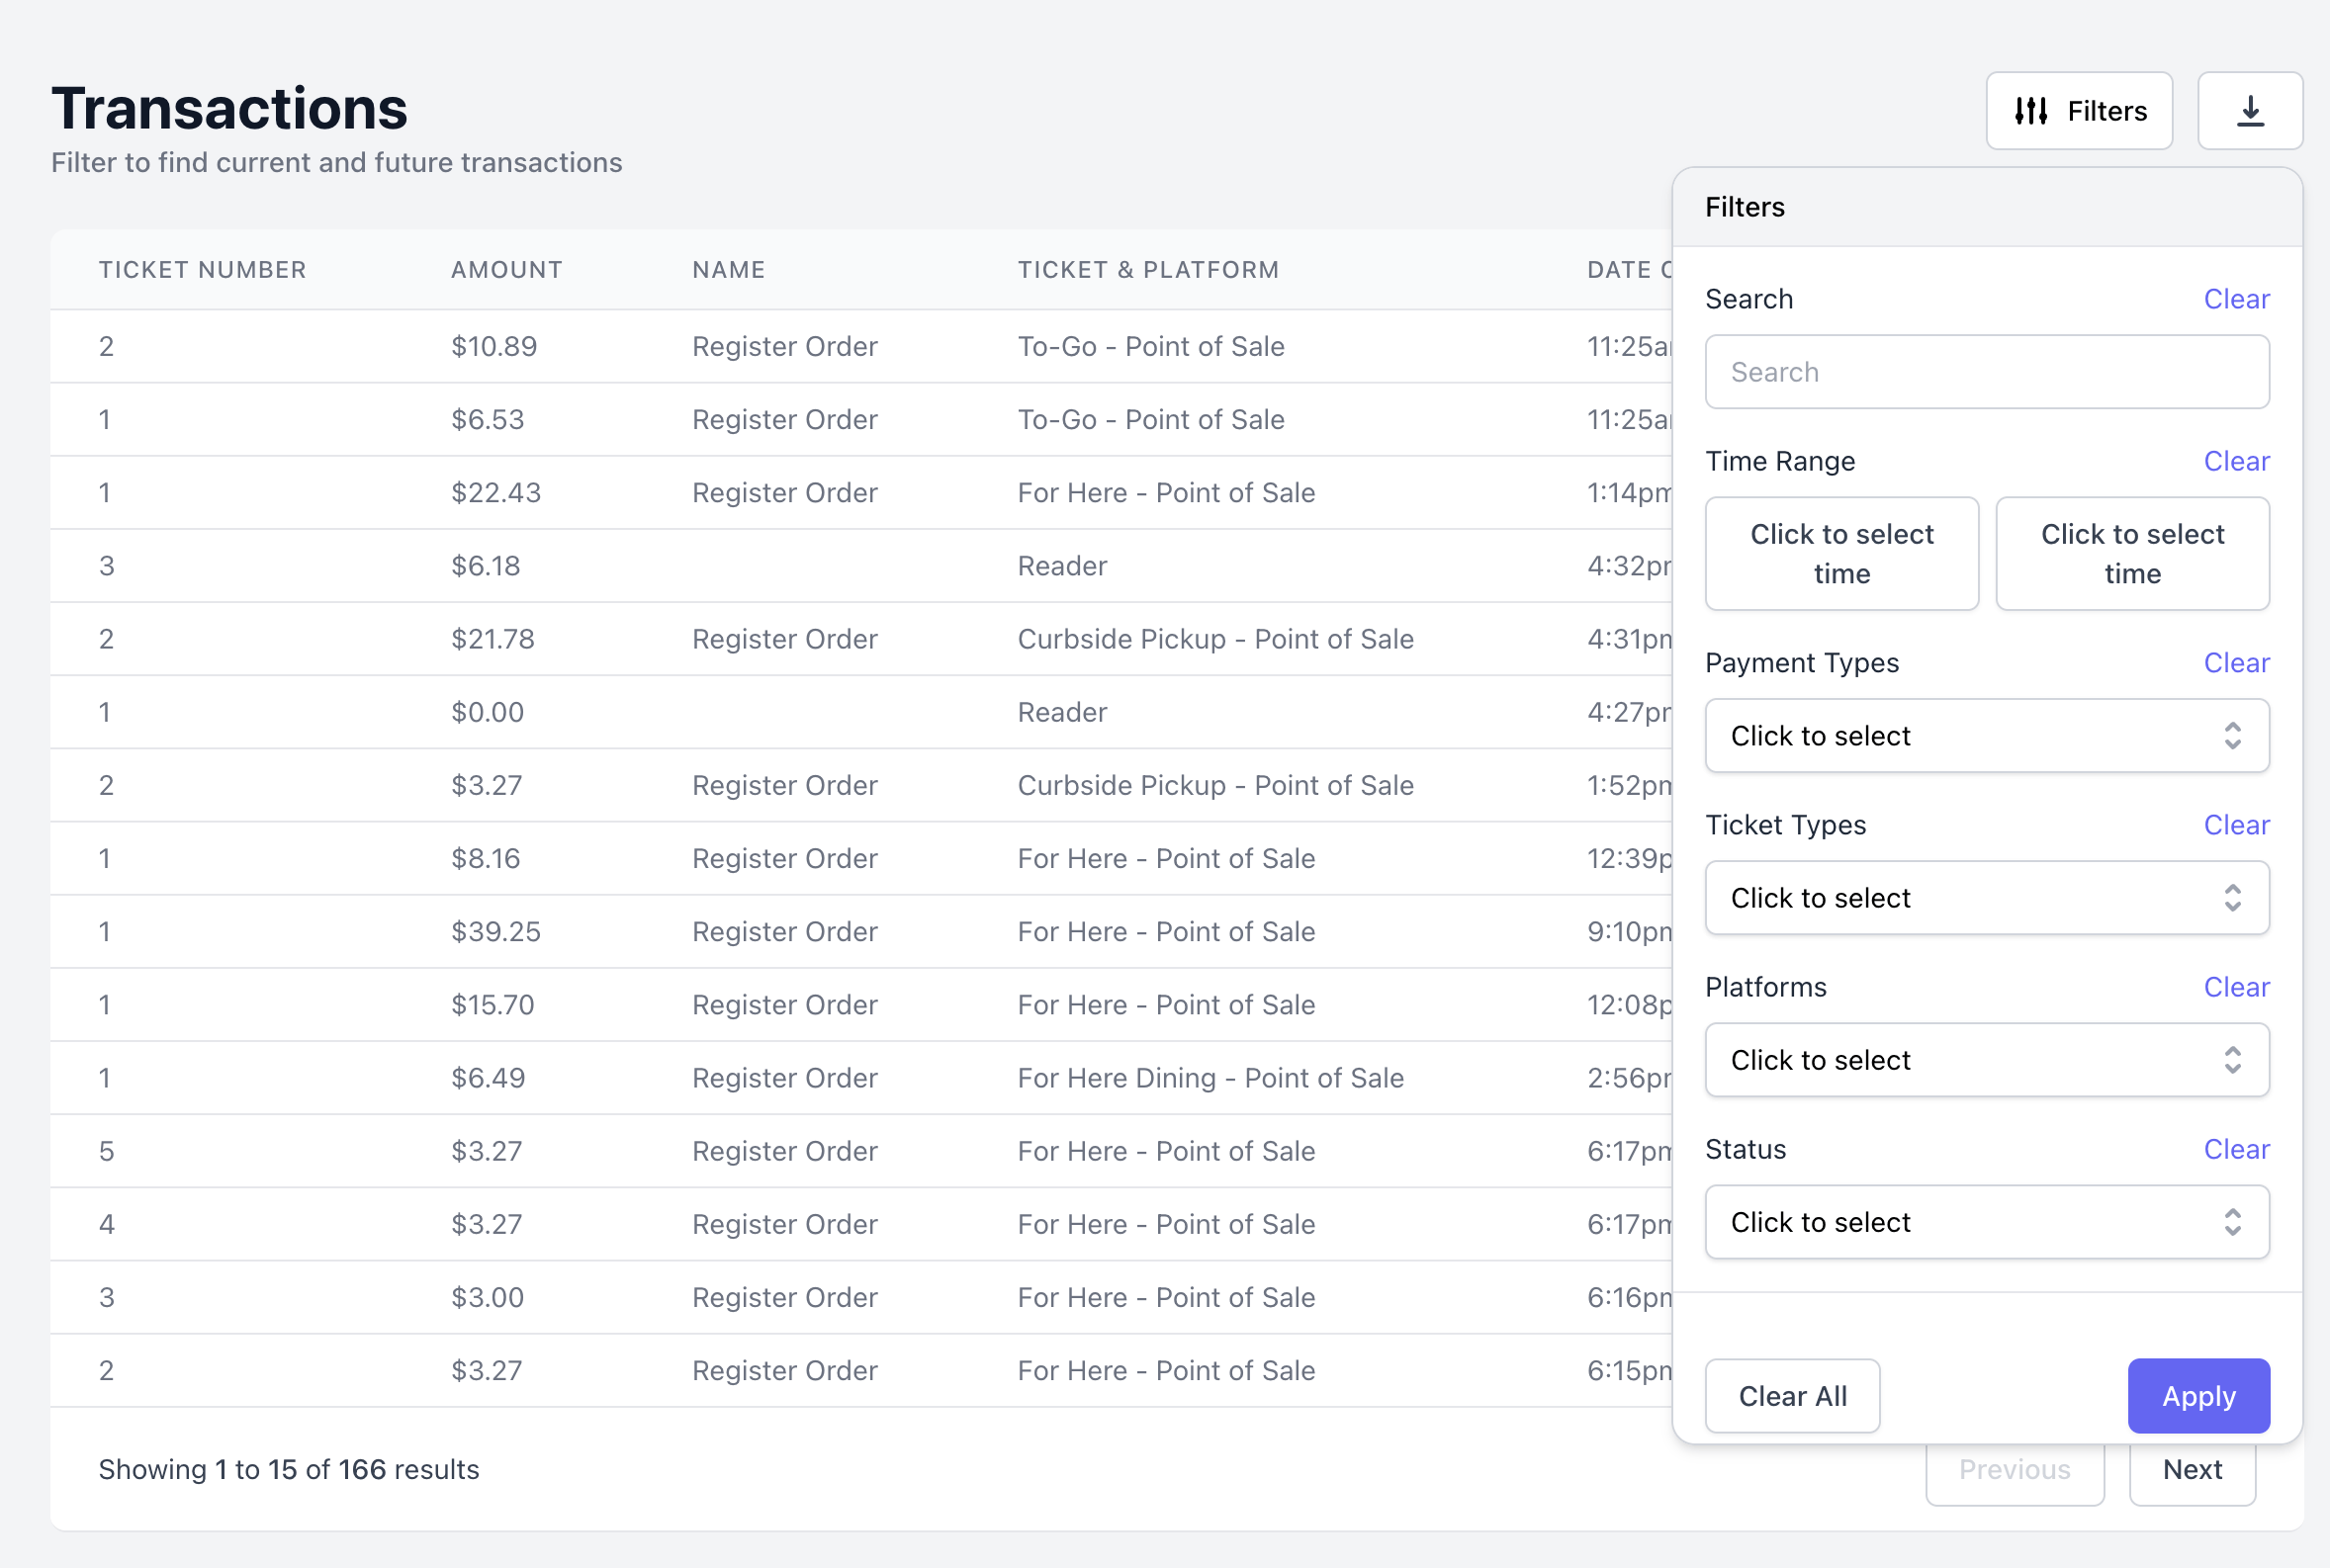
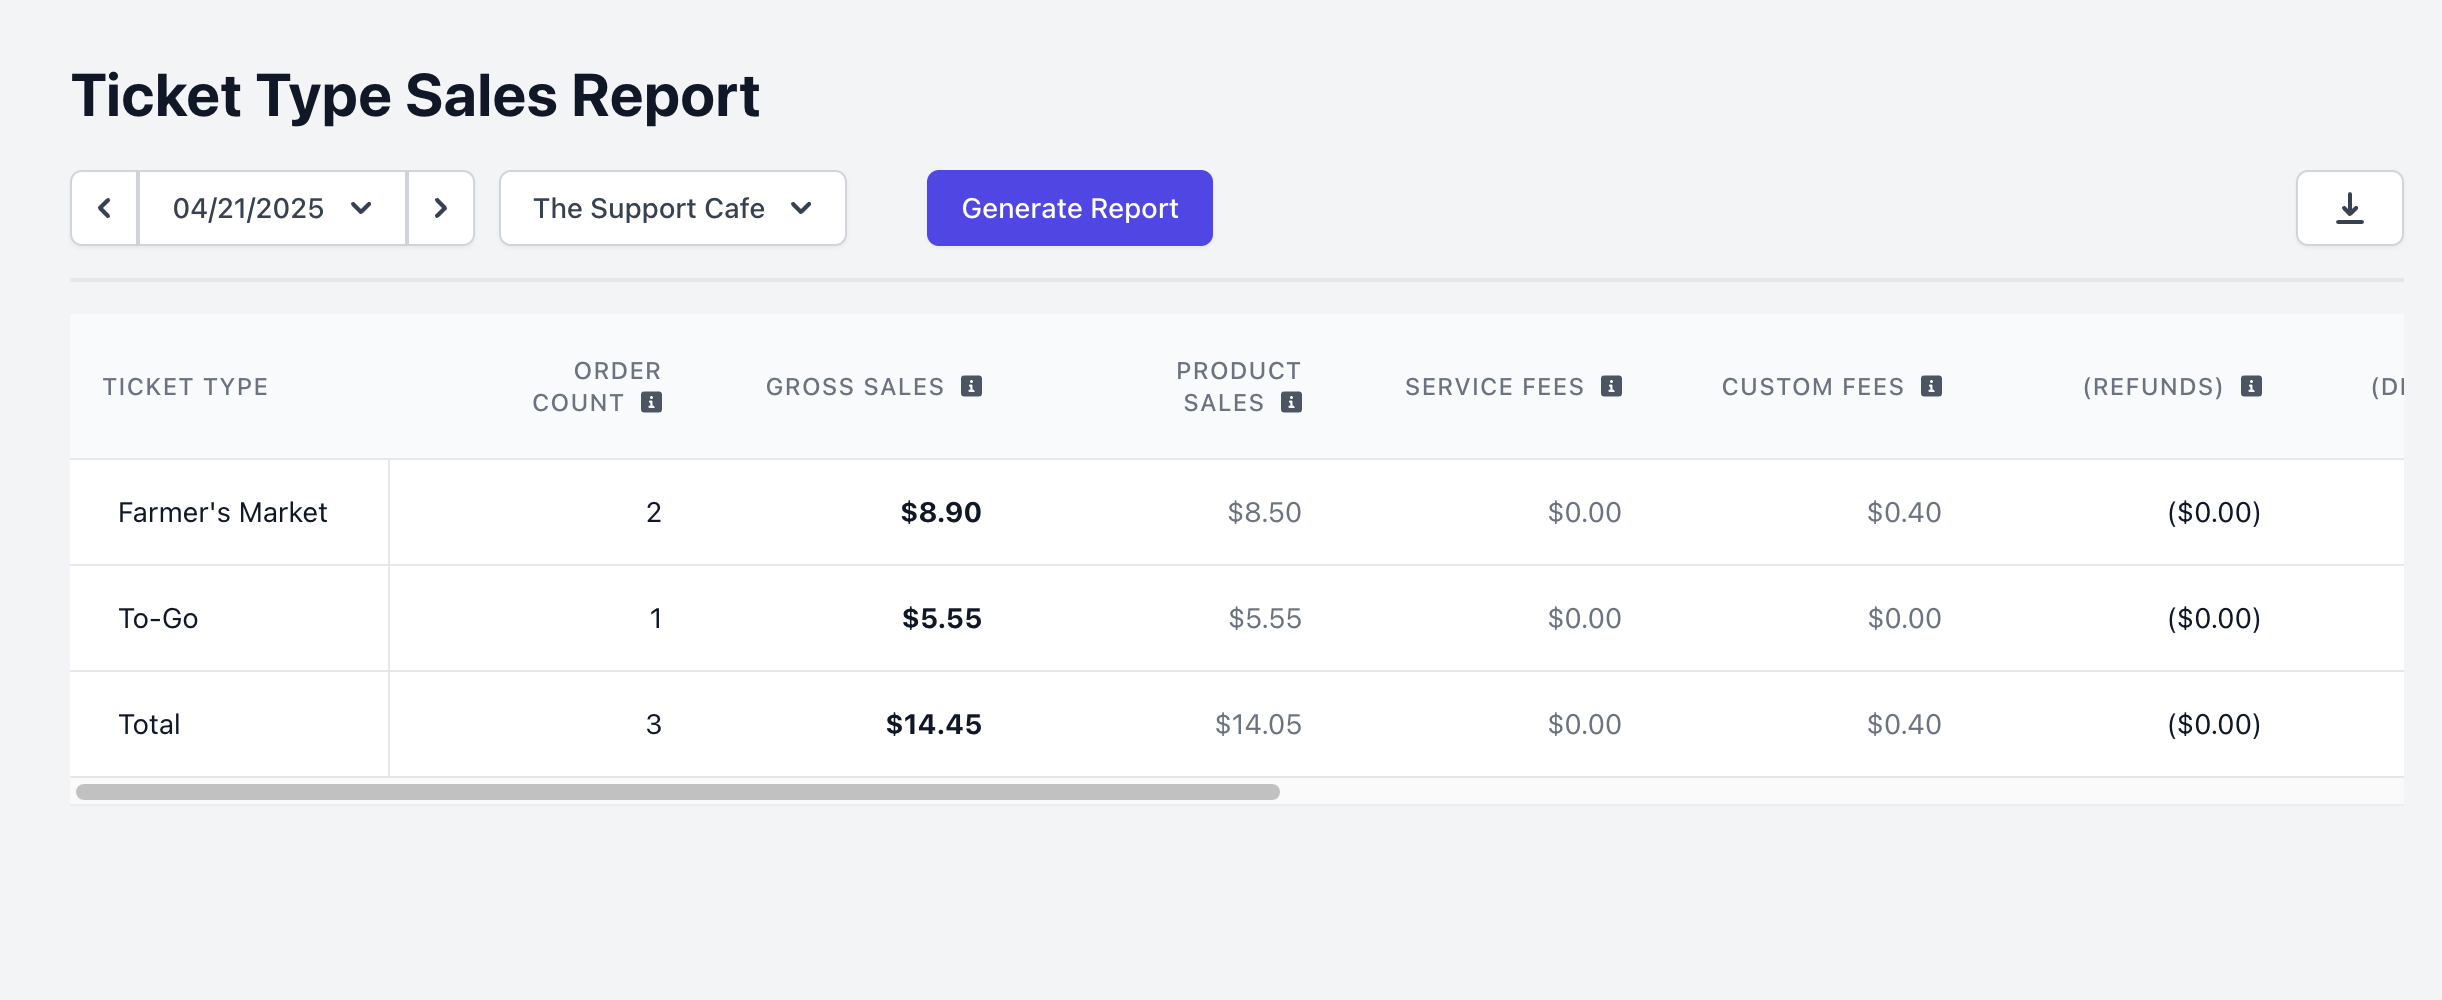
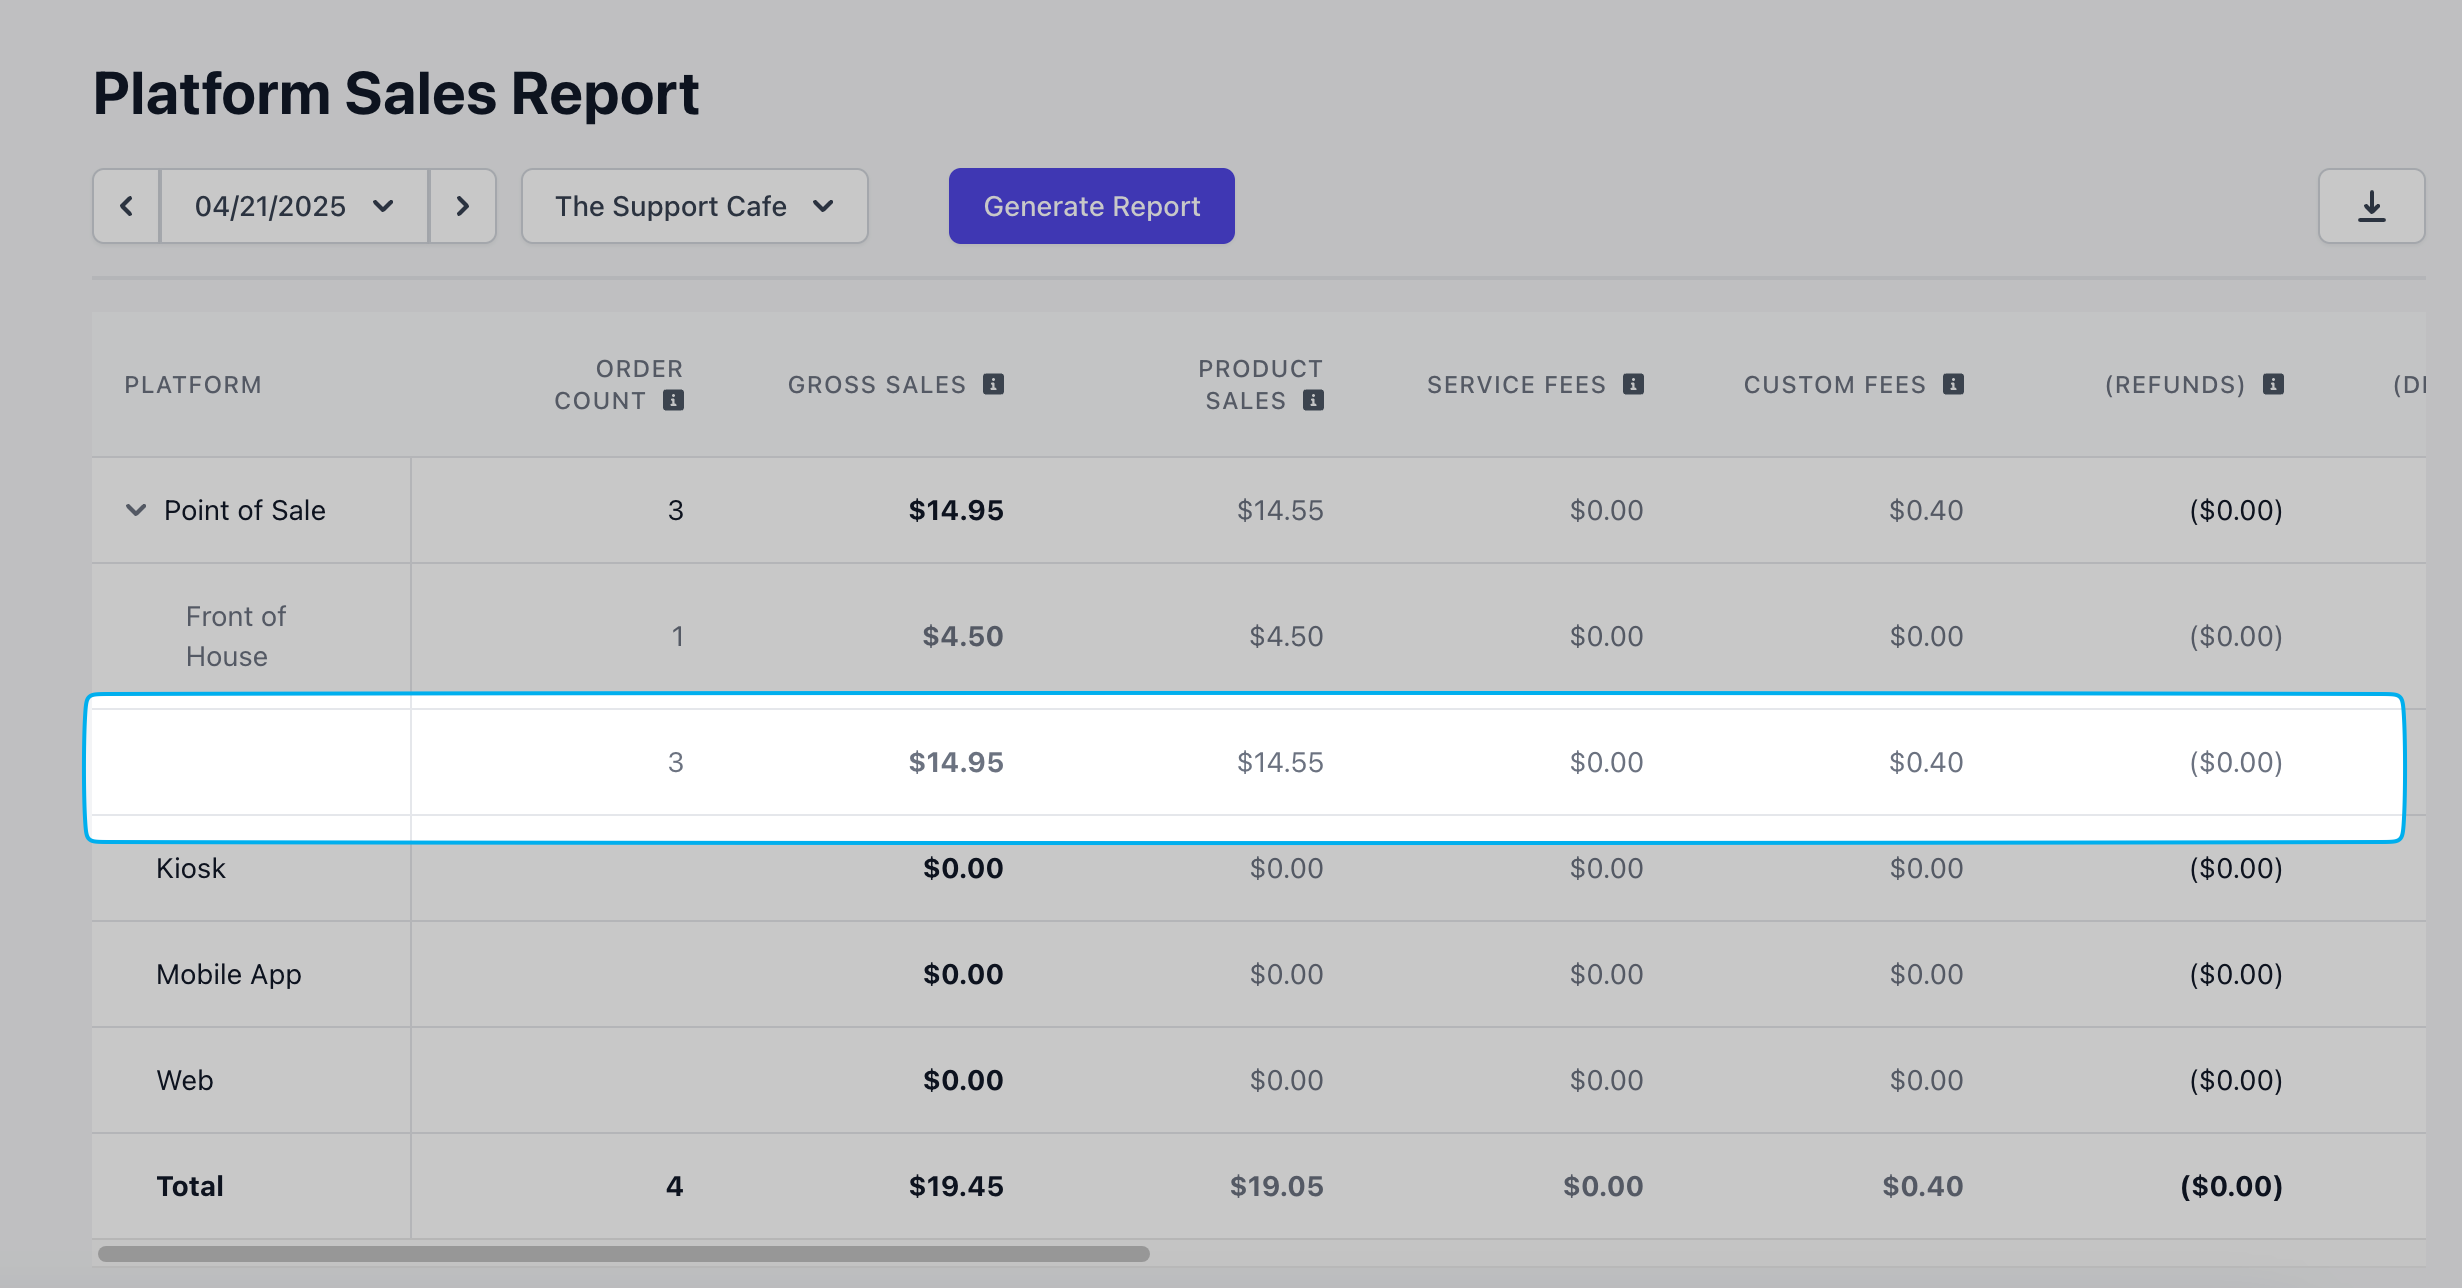
View DriposGO Sales Reports
View DriposGO Sales Reports
View Dripos Go sales from multiple Dripos ReportsTicket Type Sales Report