Device Specific Settings
Navigate to the Point of Sale settings by pressing the tribar (≡) at the top left of the screen > settings icon (⚙️) below > TicketsFilter Settings
Use filtering to customize which categories, products, ticket types, and device orders appear on each KDS screen.
Filter KDS by Category
Select menu categories for the set device to display on ticket screens. Only the selected categories will display.
Filter KDS by Product
Select products you would like the set device to always display on ticket screens even if a category filter is active.
Filter KDS by Device
Select devices you would like the set device to display orders from on ticket screens. Only orders created from the selected devices will show.
Filter KDS by Order Type
Select the order types you would like the set device to display on ticket screens. Only the selected order types will show.
Screen Settings
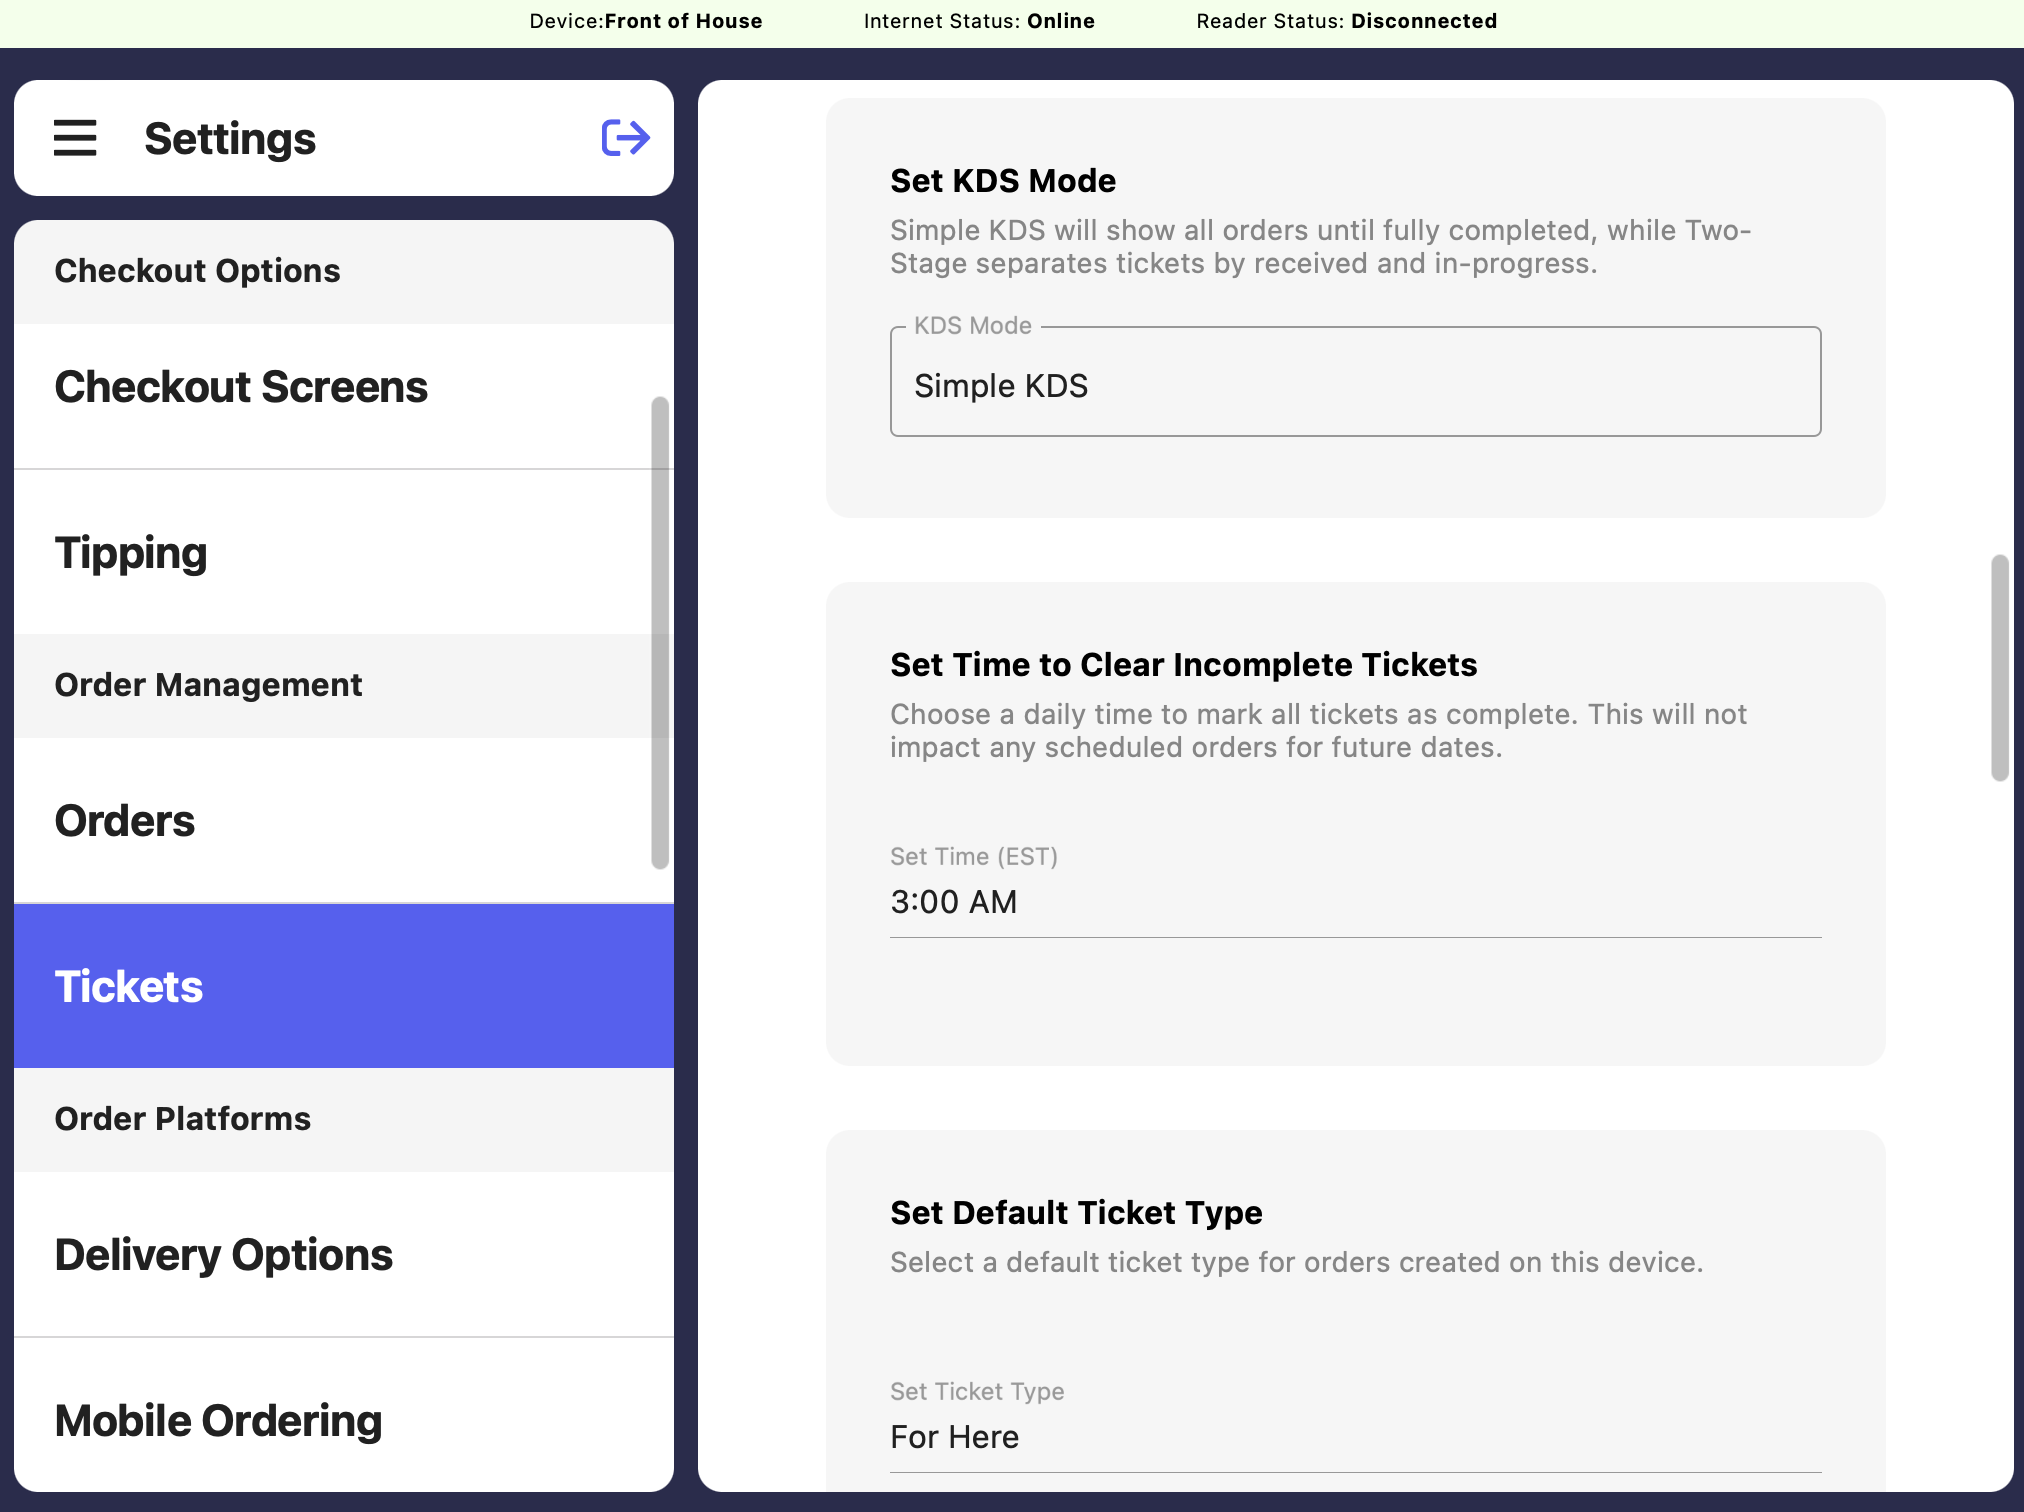
Set KDS Mode
Set KDS Mode
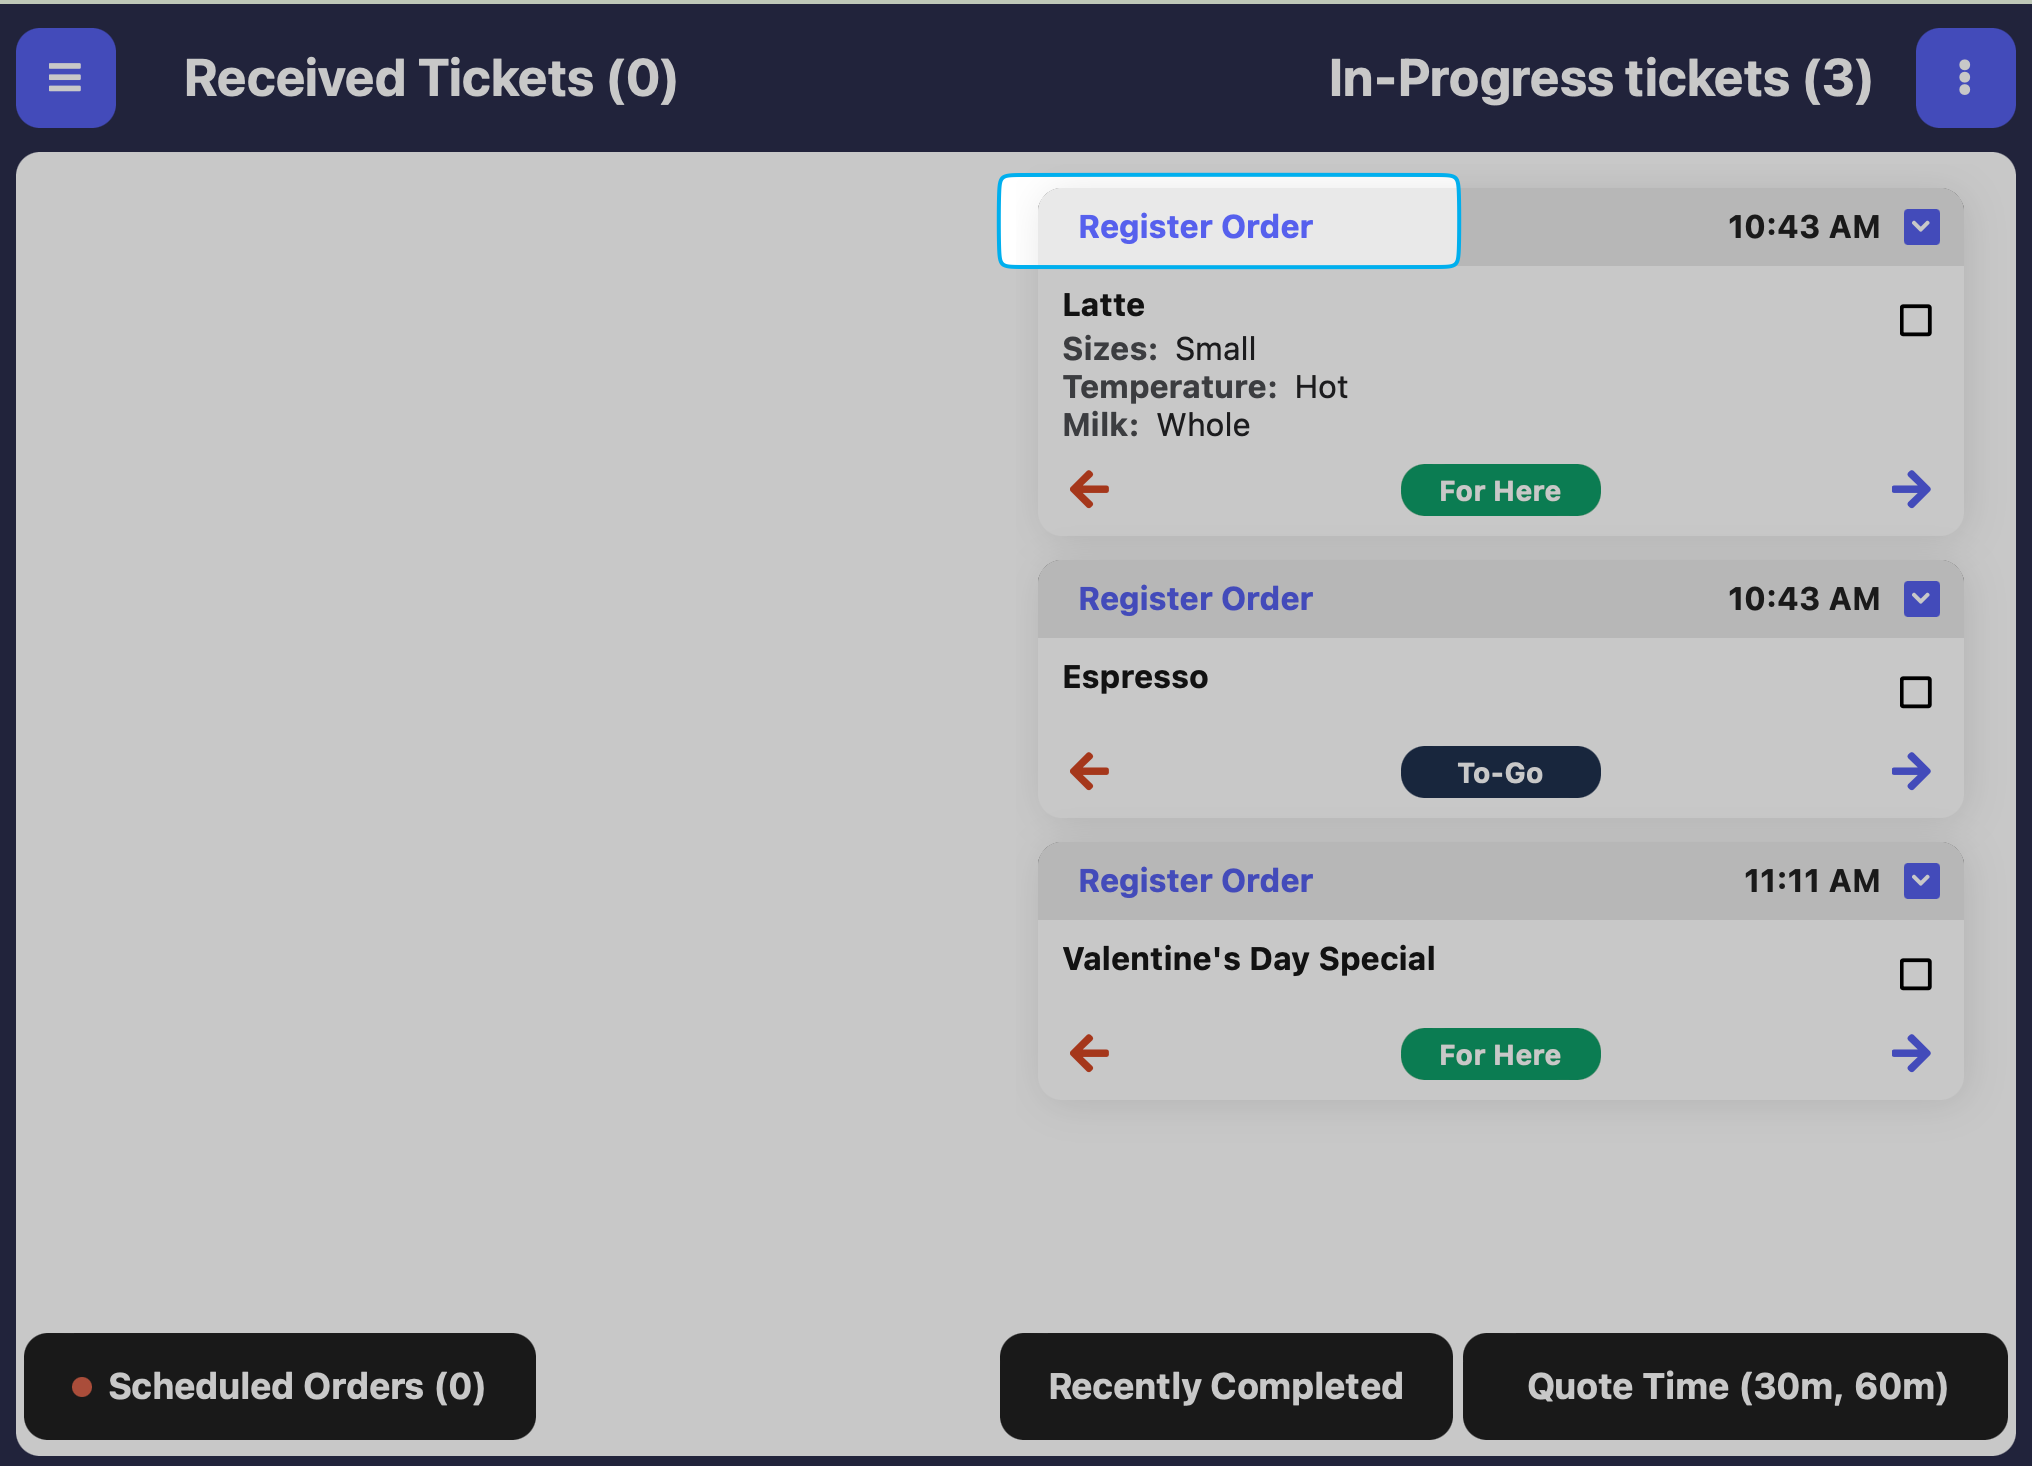
Use this setting to switch between our two KDS Modes: Simple KDS & Two-Stage KDS. Simple KDS will show all orders until completed, while two-stage separates tickets by received and in-progress.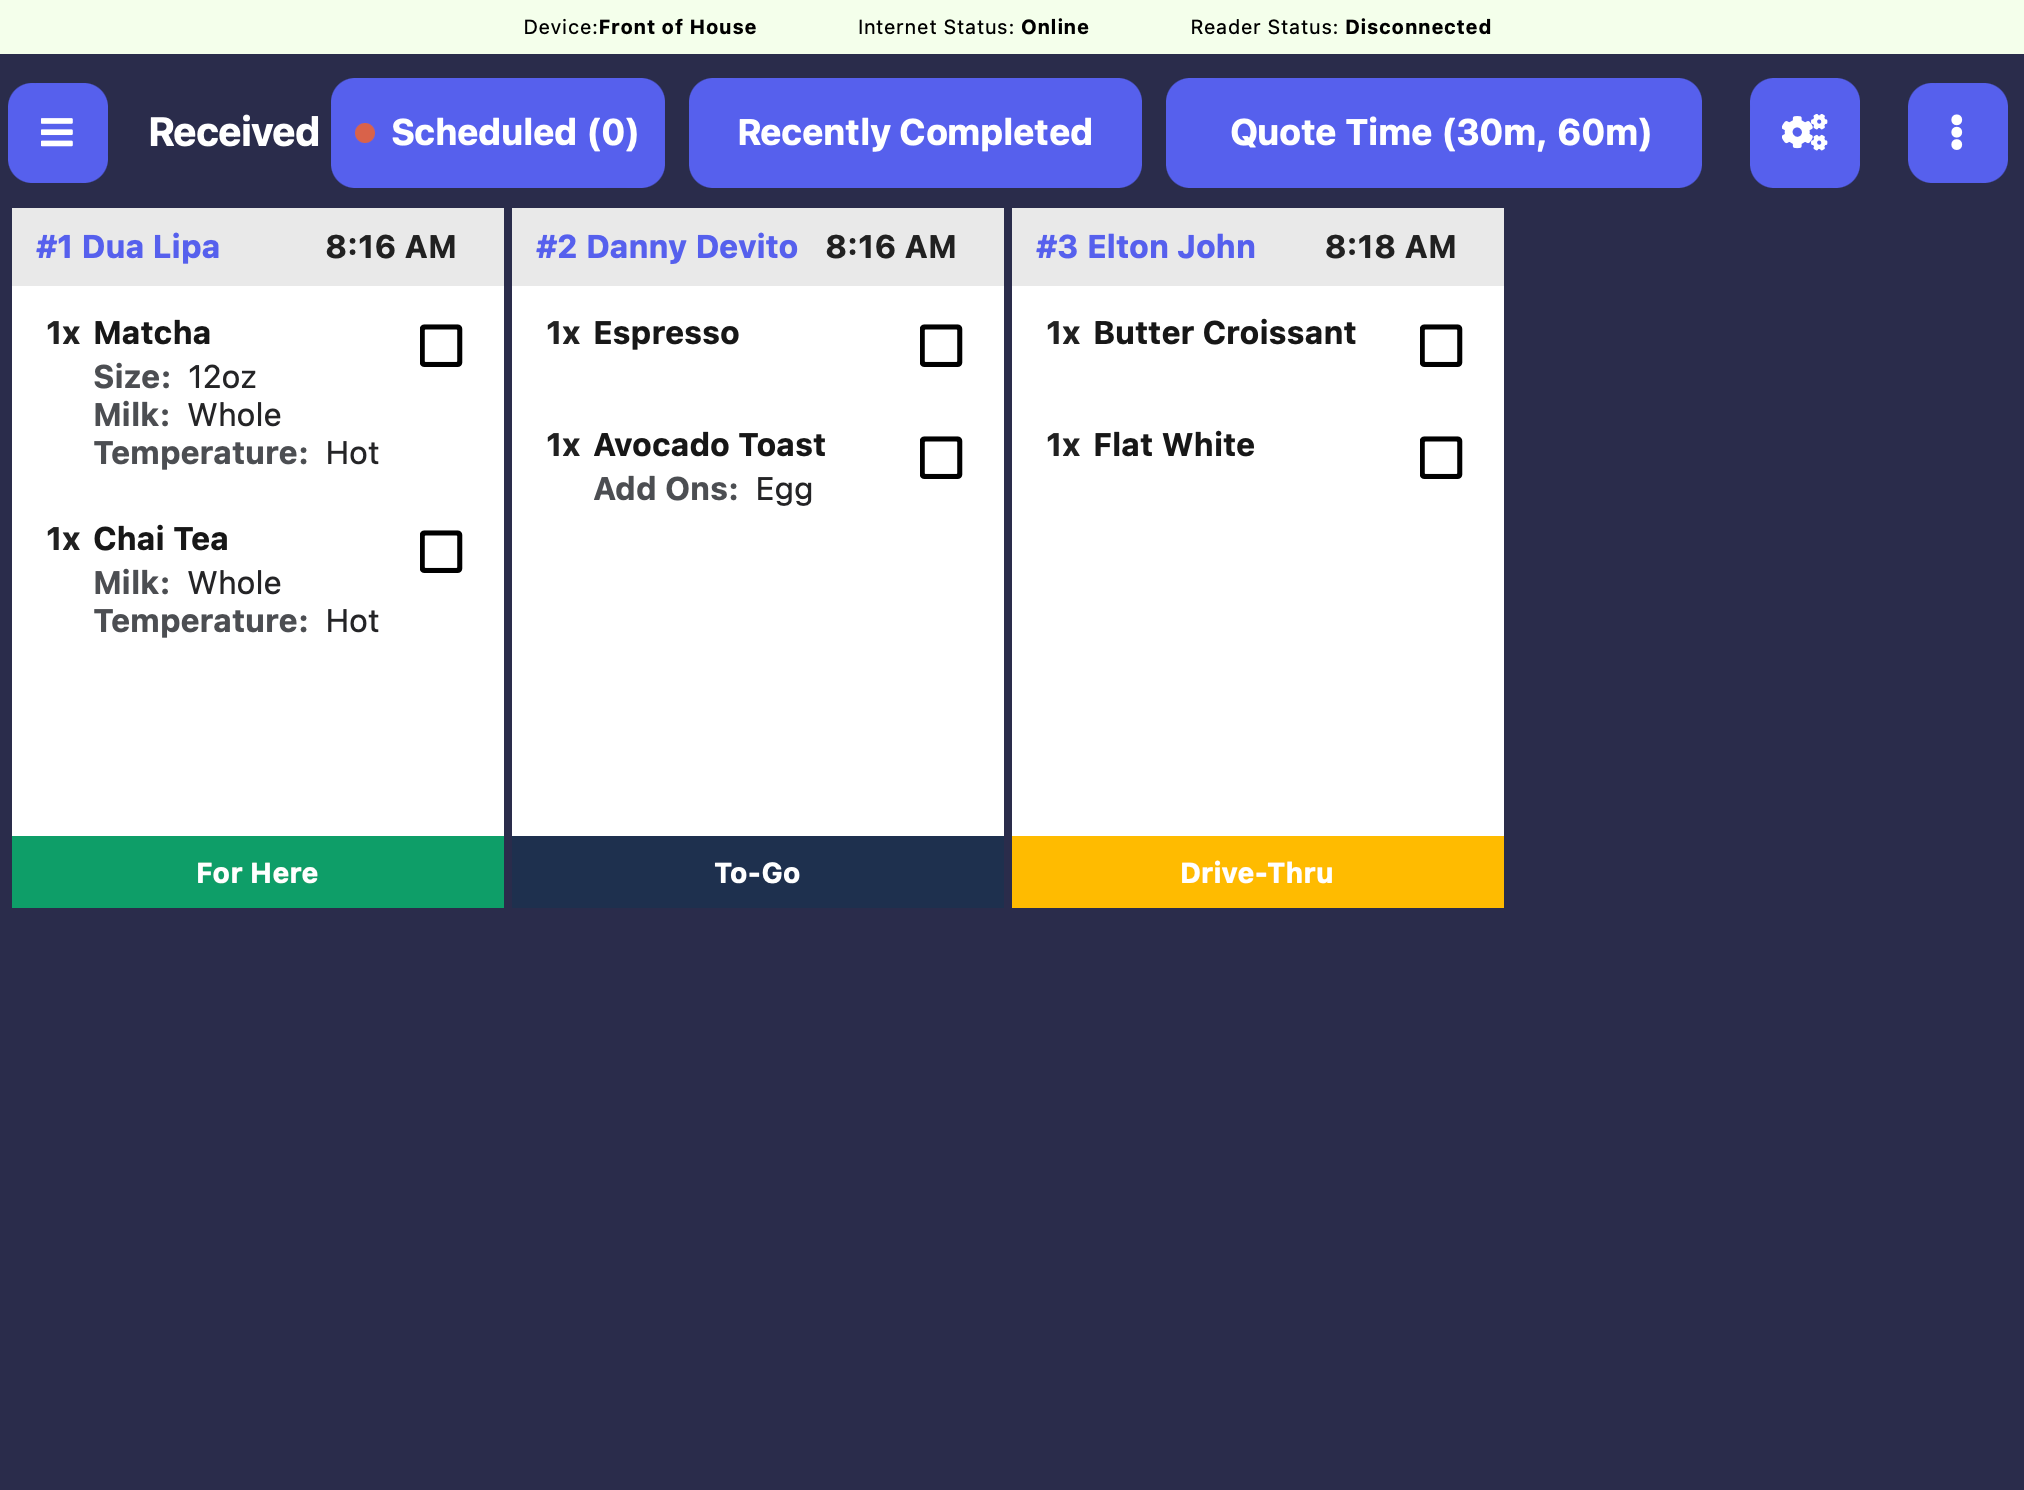
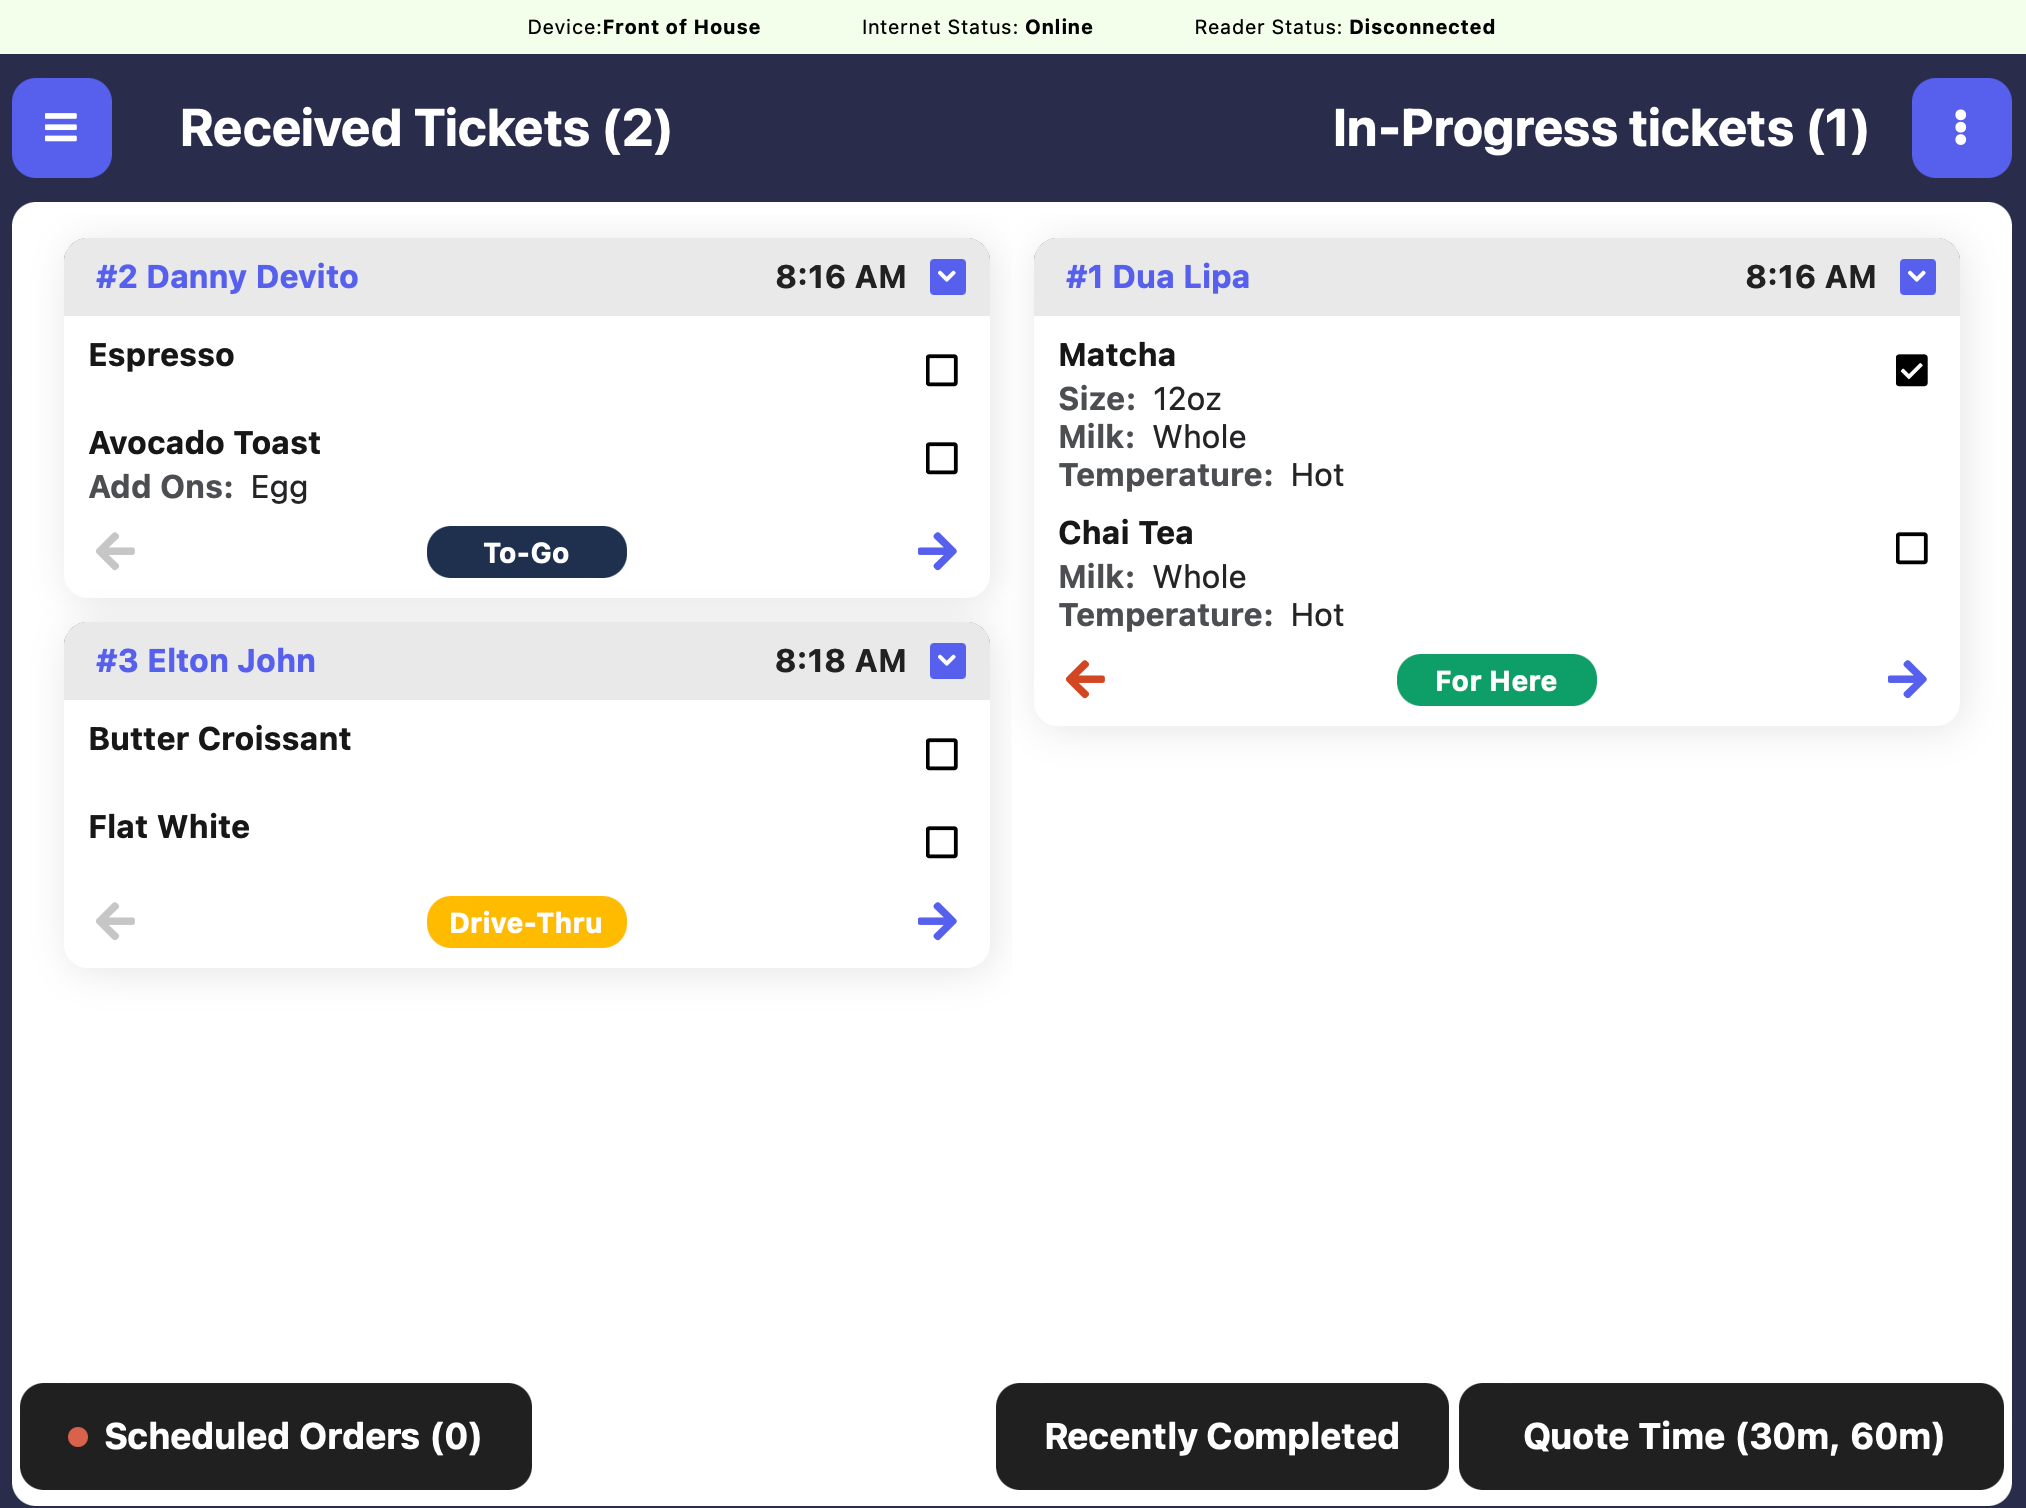
Simple Kitchen Display Screen
Quick Kitchen Display Screen
Set Time to Clear Incomplete Tickets
Set Time to Clear Incomplete Tickets
Choose a daily time to mark all orders as complete. This will not impact any scheduled orders for future dates.
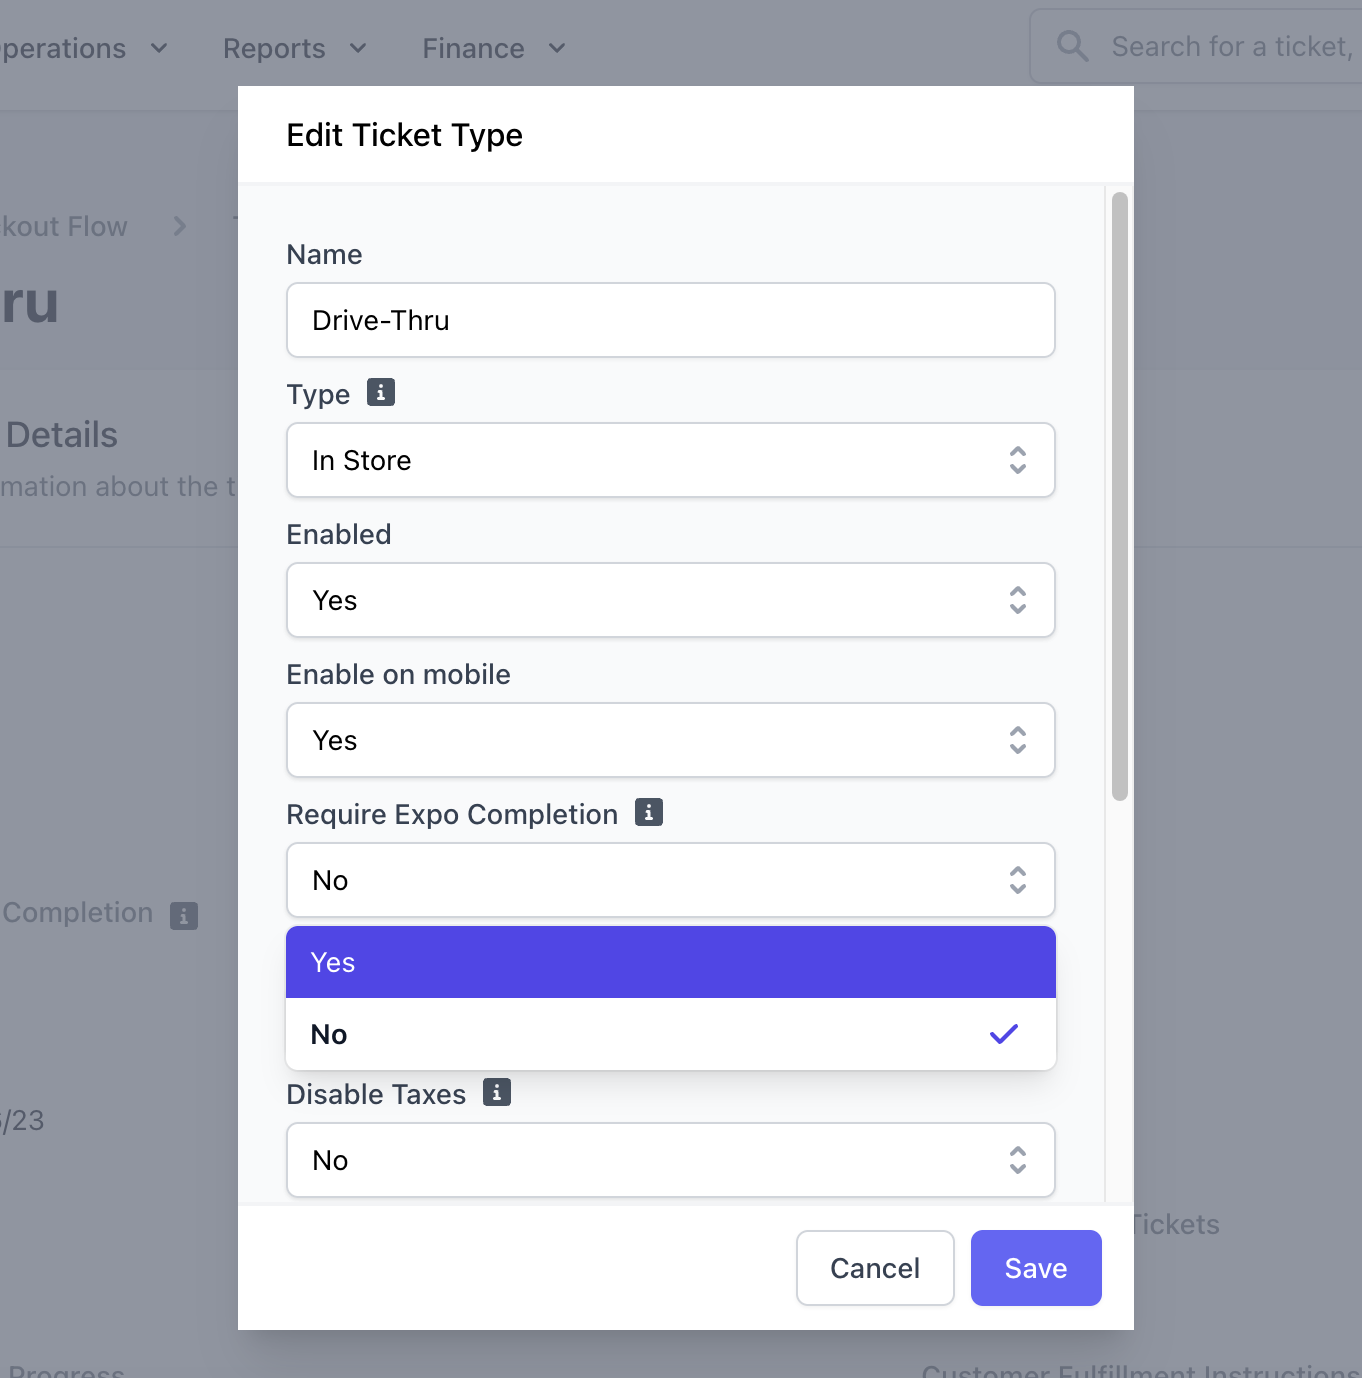
Set Default Ticket Type
Set Default Ticket Type
Select a default ticket type for orders created on the set device.
Fire Ticket Settings
Choose when orders are sent to kitchen display screens and printers.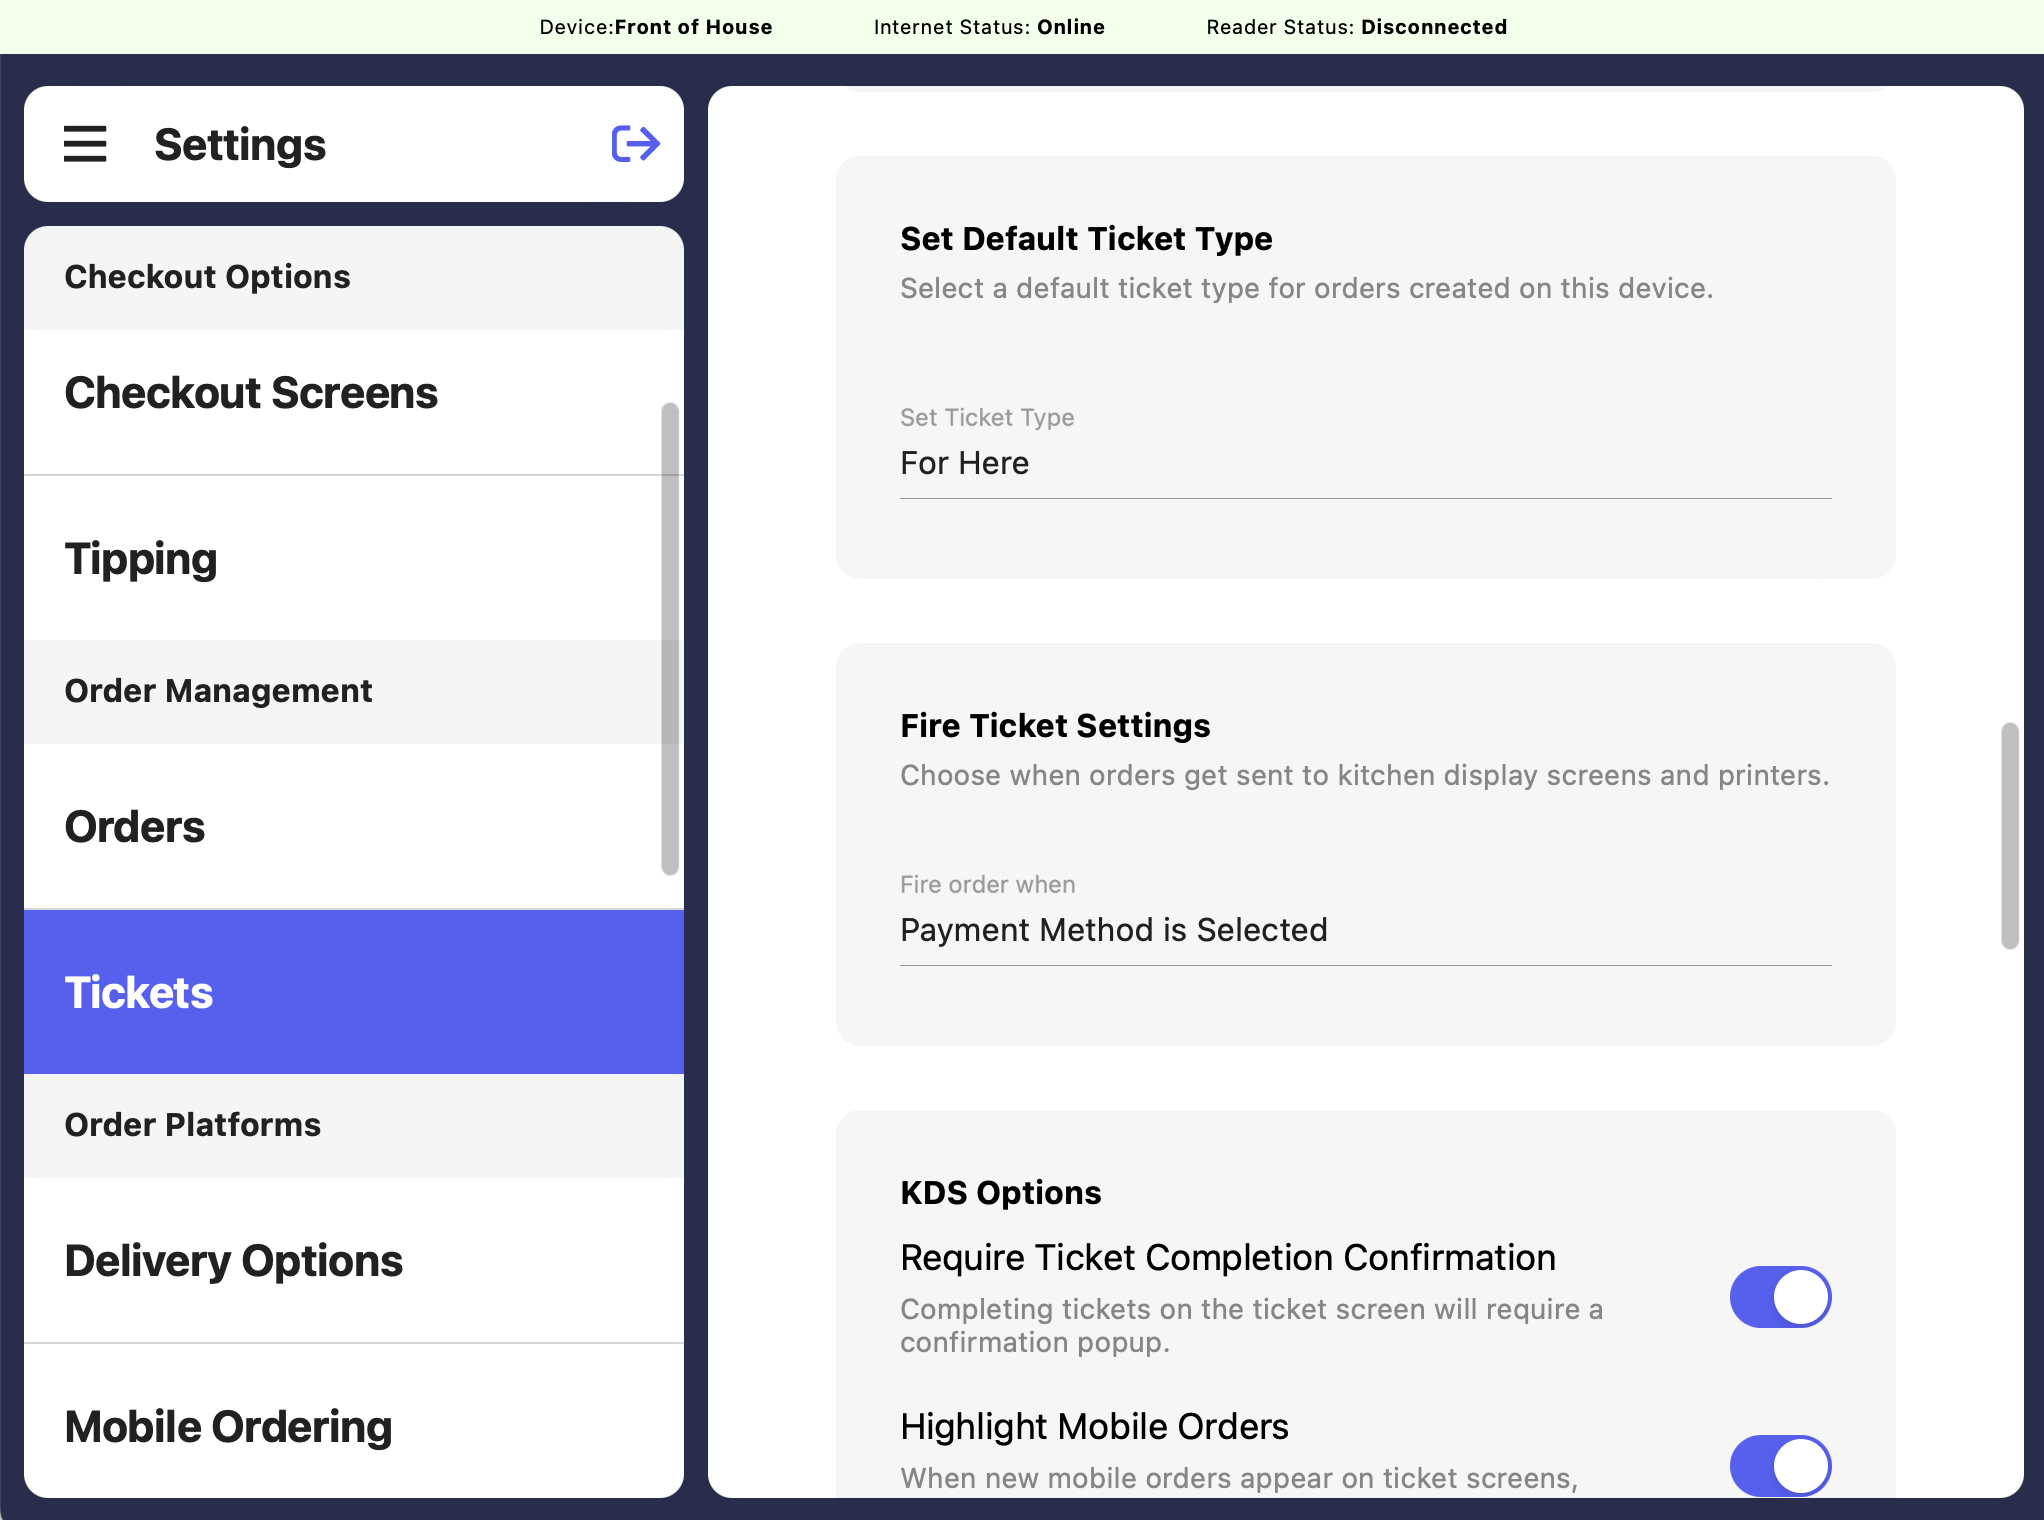
Checkout is complete (default)
Tickets appear on the Ticket screen as soon as the order is paid for.
Payment method is selected
As soon as a payment method is chosen (cash, card, etc.), the ticket will appear on the Ticket screen, even before payment is collected.
Order is named
Once an order is given a name—either through a Patron profile or a quick name entry—it will automatically appear on the Ticket screen.
Items added to cart
When a product is added to the cart, it will instantly appear on the Ticket screen—if it matches the selected filters.
KDS Options
Configure various KDS options to customize how tickets are completed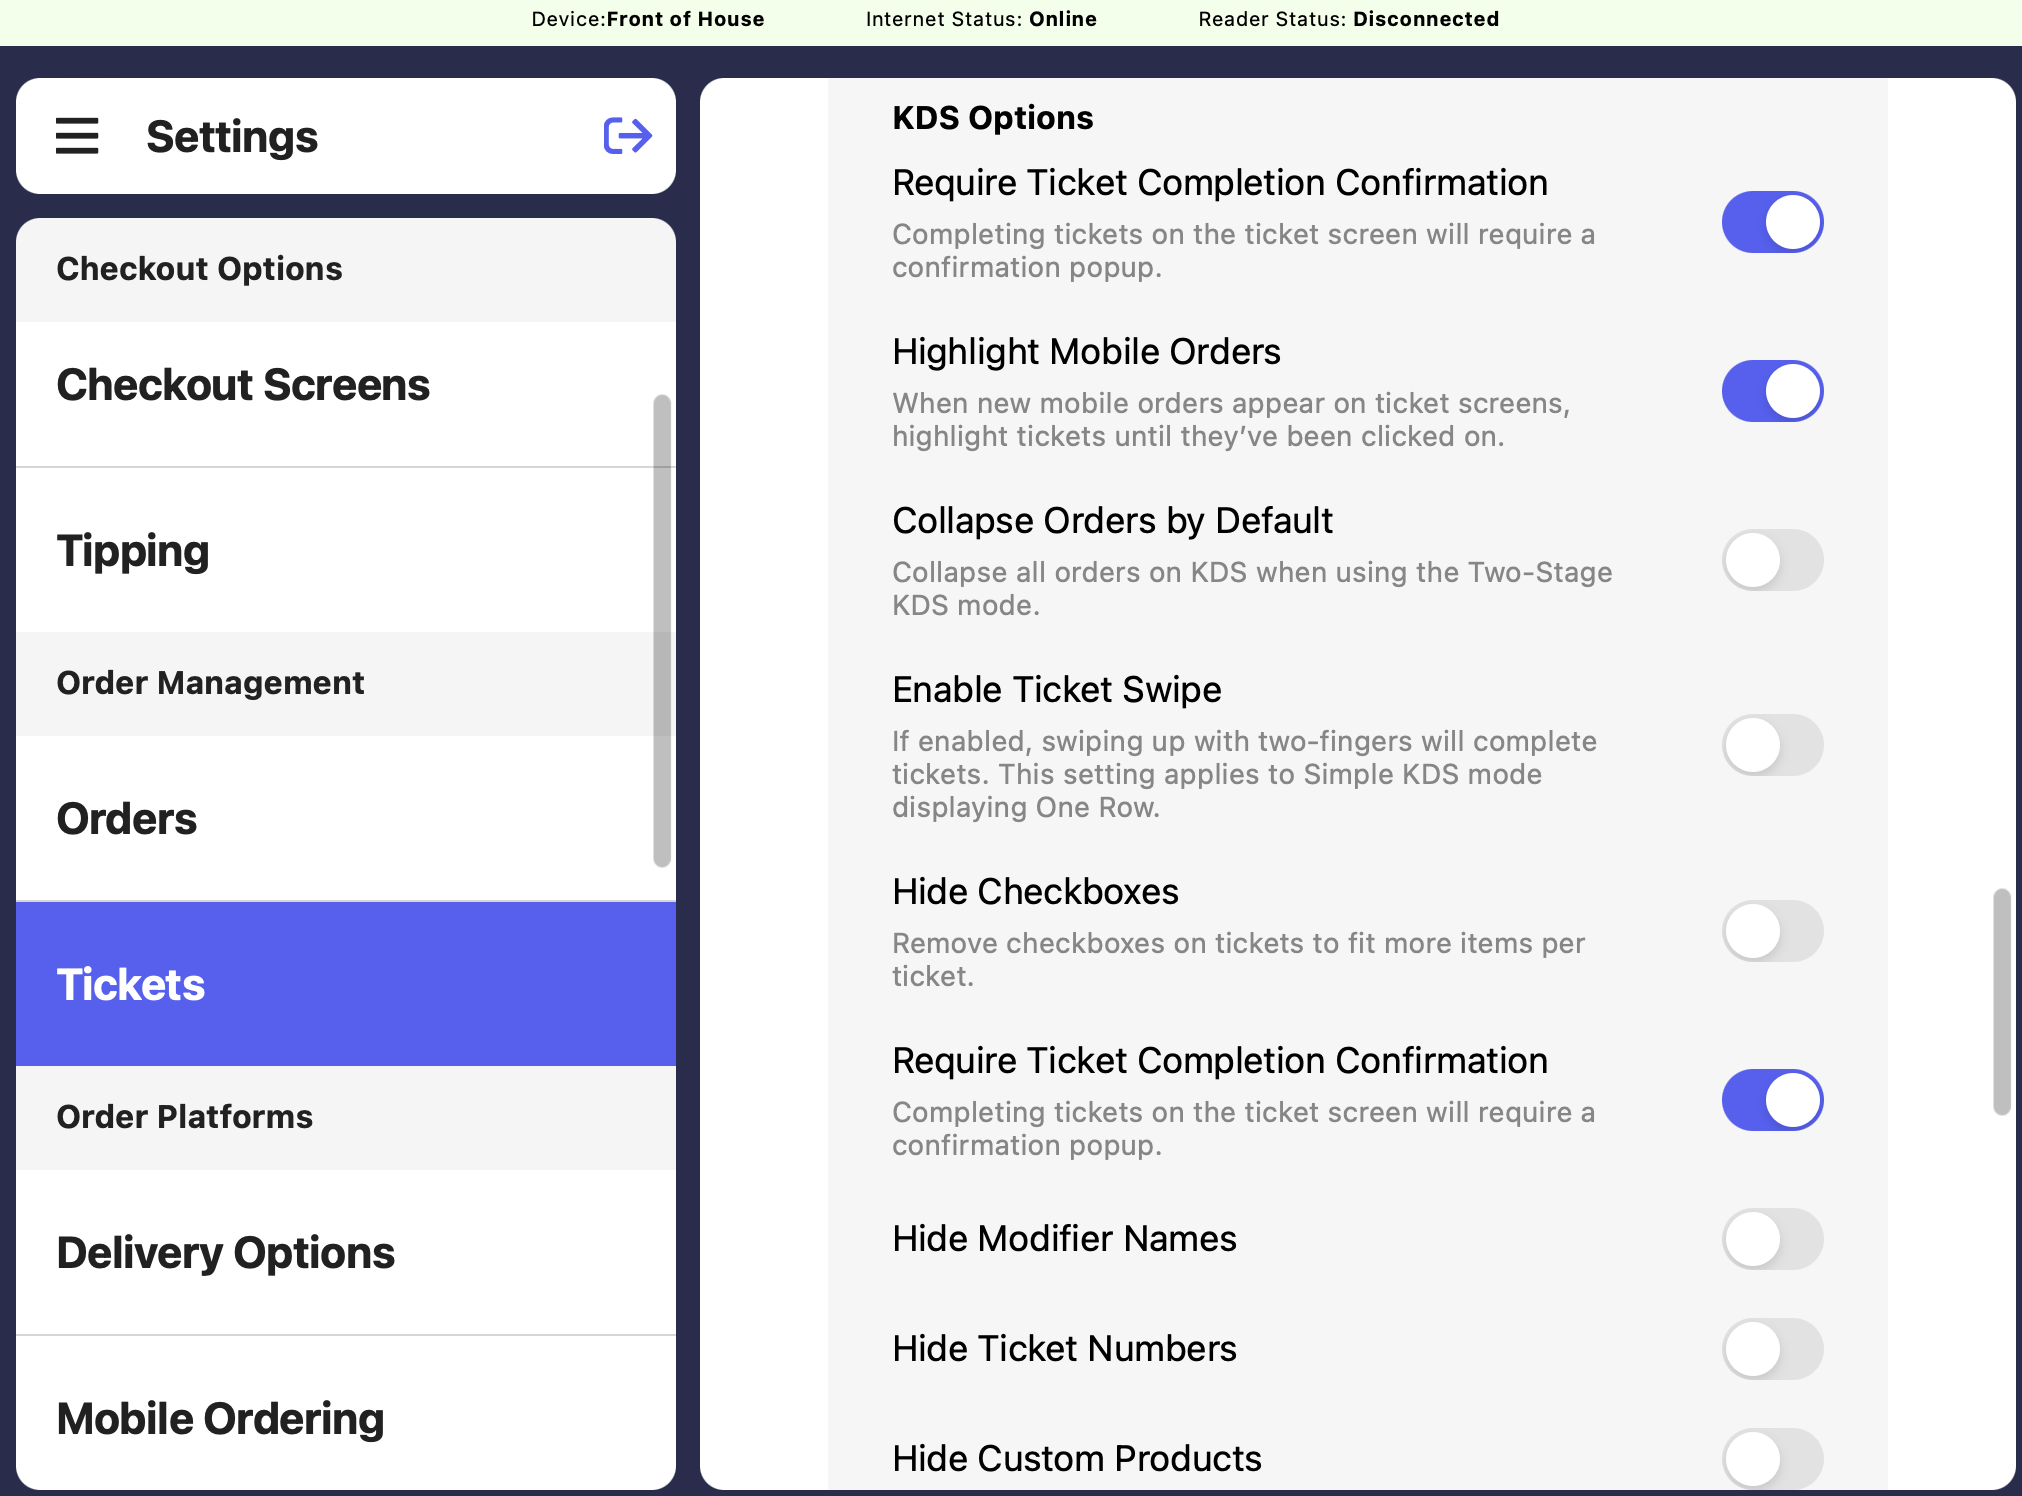
Require Ticket Completion Confirmation
Require Ticket Completion Confirmation
Completing tickets on the ticket screen will require a confirmation popup.
Highlight Mobile Orders
Highlight Mobile Orders
When new mobile orders appear on ticket screens, highlight tickets until they’ve been clicked on.
Collapse Orders by Default
Collapse Orders by Default
Collapse all orders on KDS when using the Two-Stage KDS mode.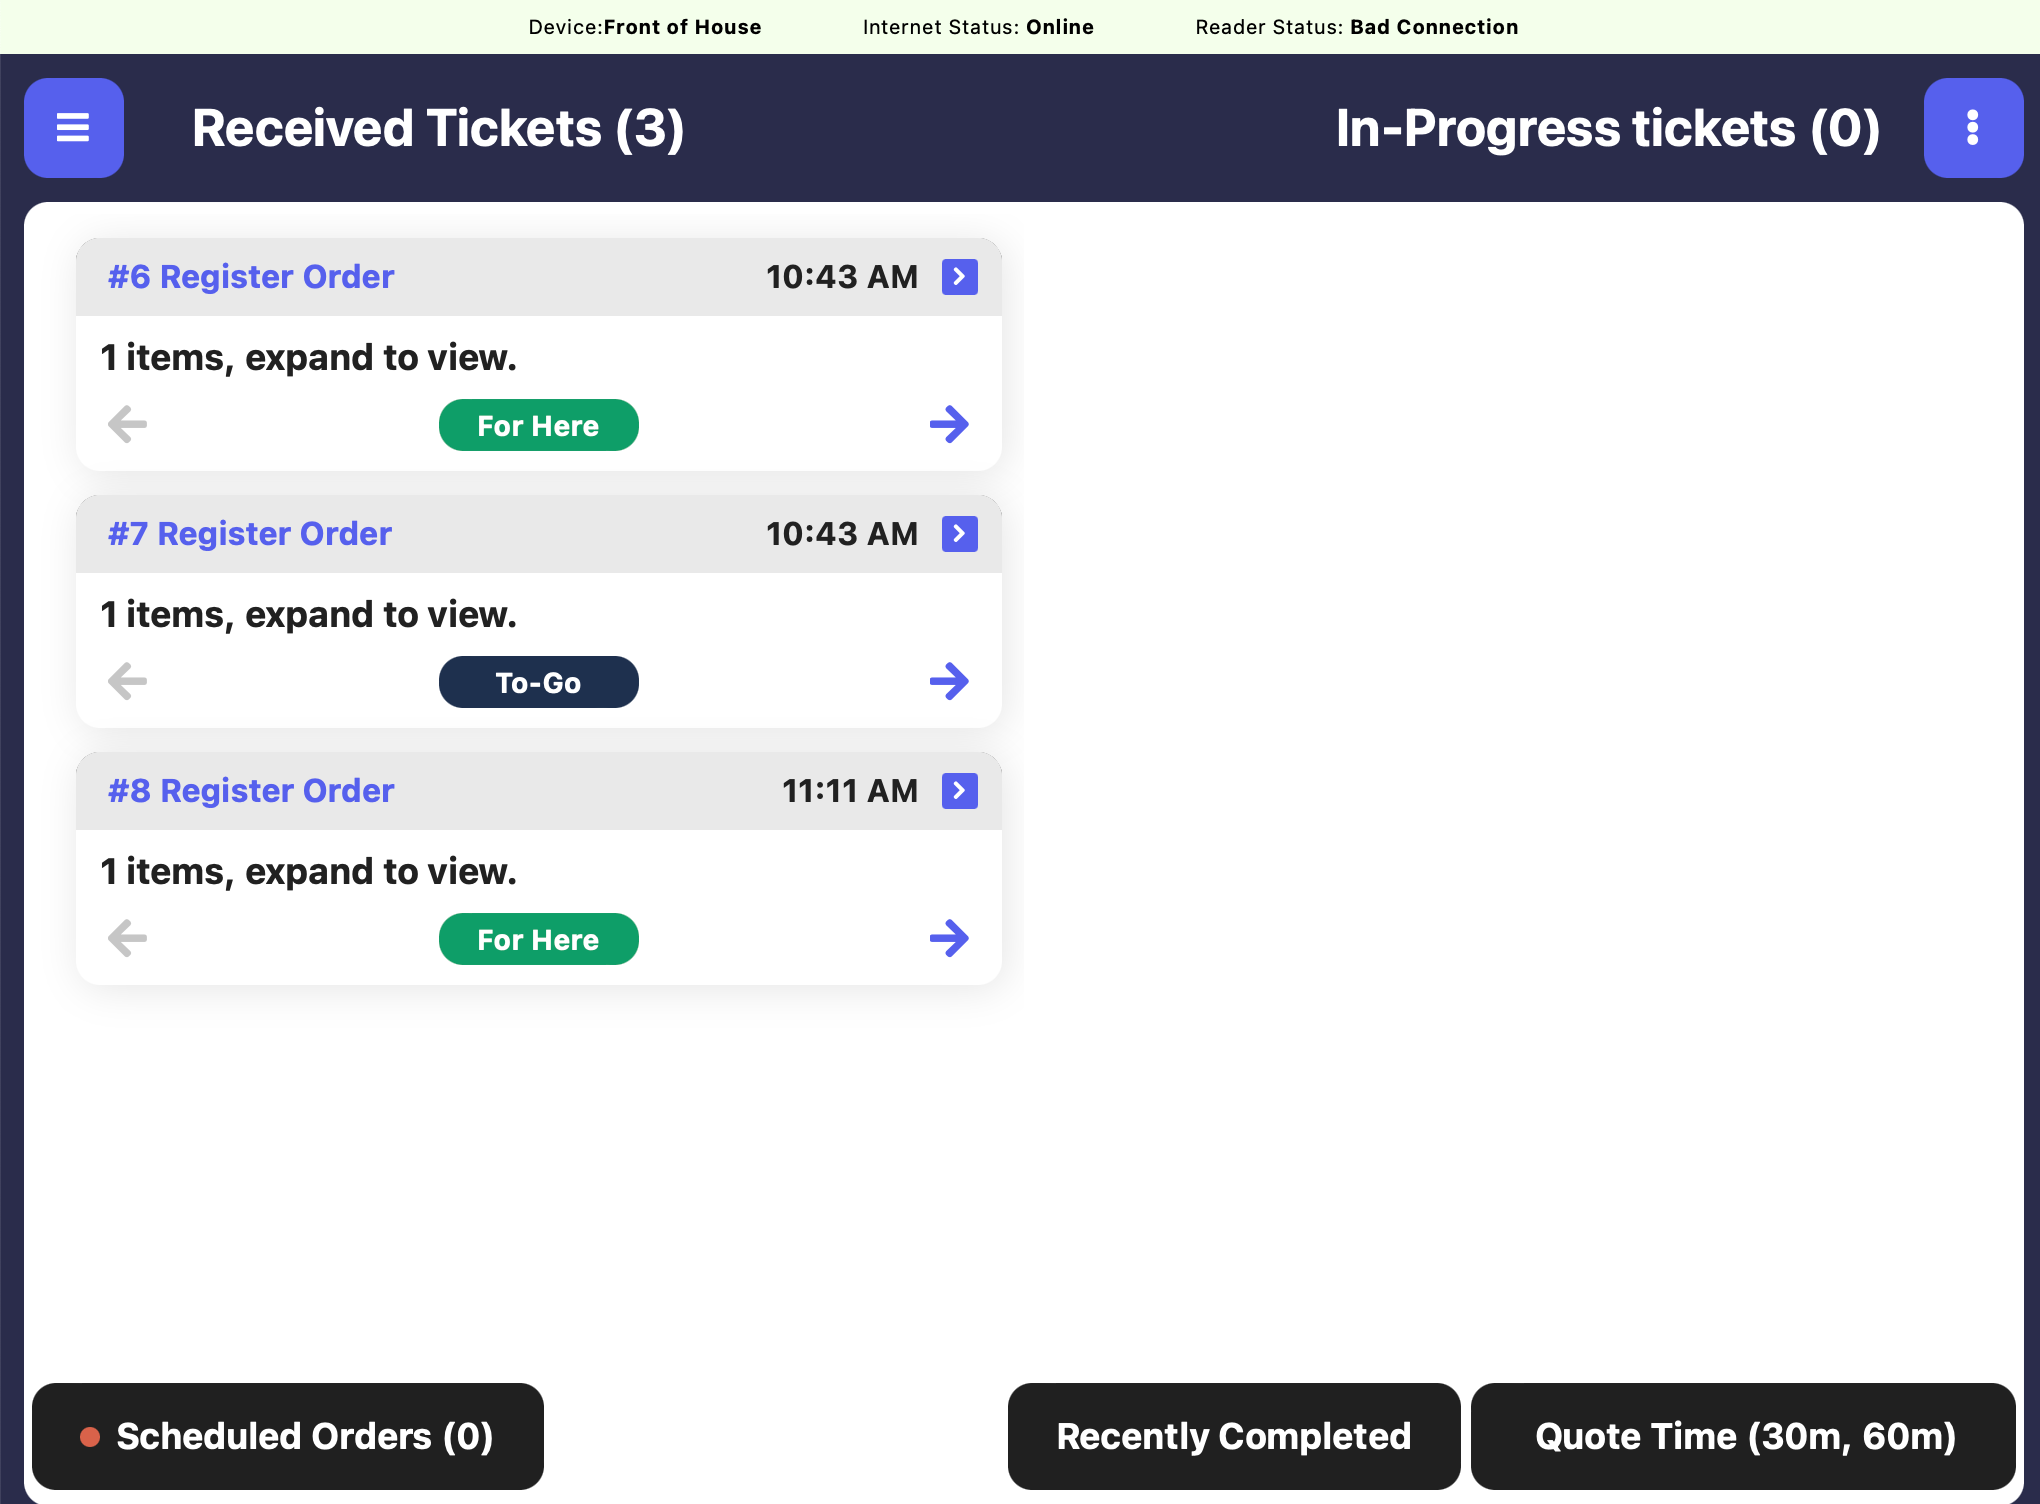
Enable Ticket Swipe
Enable Ticket Swipe
If enabled, swiping up with two-fingers will complete tickets. This setting applies to Simple KDS Mode displaying One Row.
Hide Checkboxes
Hide Checkboxes
Remove checkboxes on tickets to fit more items per ticket.
Require Ticket Completion Confirmation
Require Ticket Completion Confirmation
Completing tickets on the ticket screen will require a confirmation popup.
Hide Modifier Names
Hide Modifier Names
If enabled, this will hide modifier names (not modifier selections) on the KDS.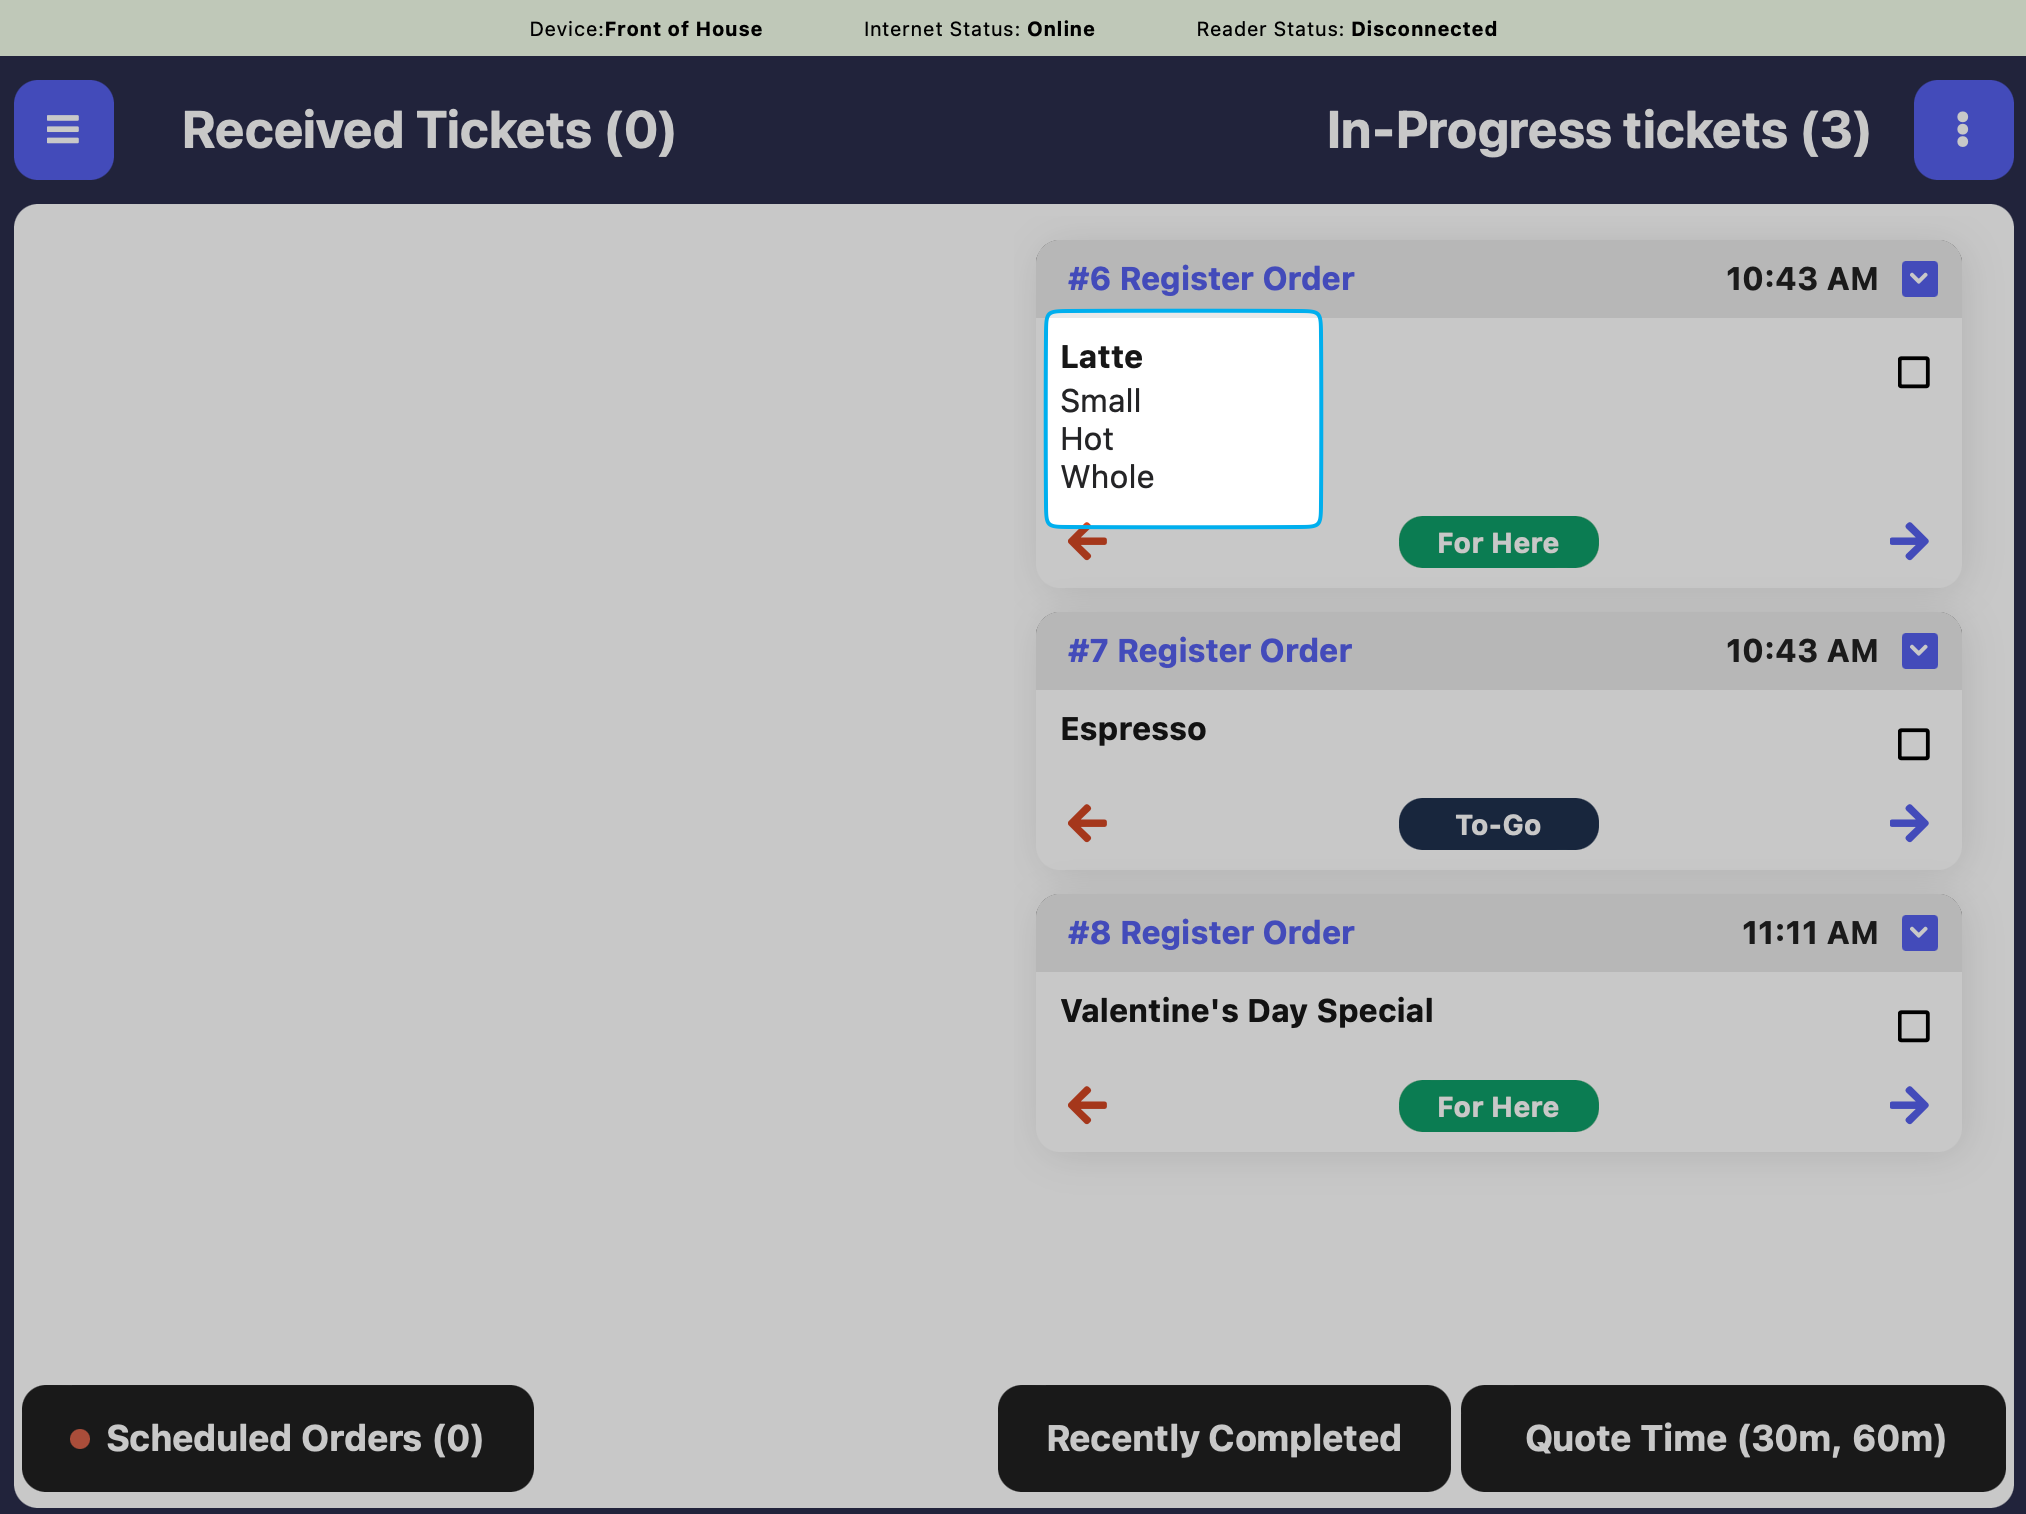
Hide Ticket Numbers
Hide Ticket Numbers
If enabled, this will hide ticket numbers on the KDS.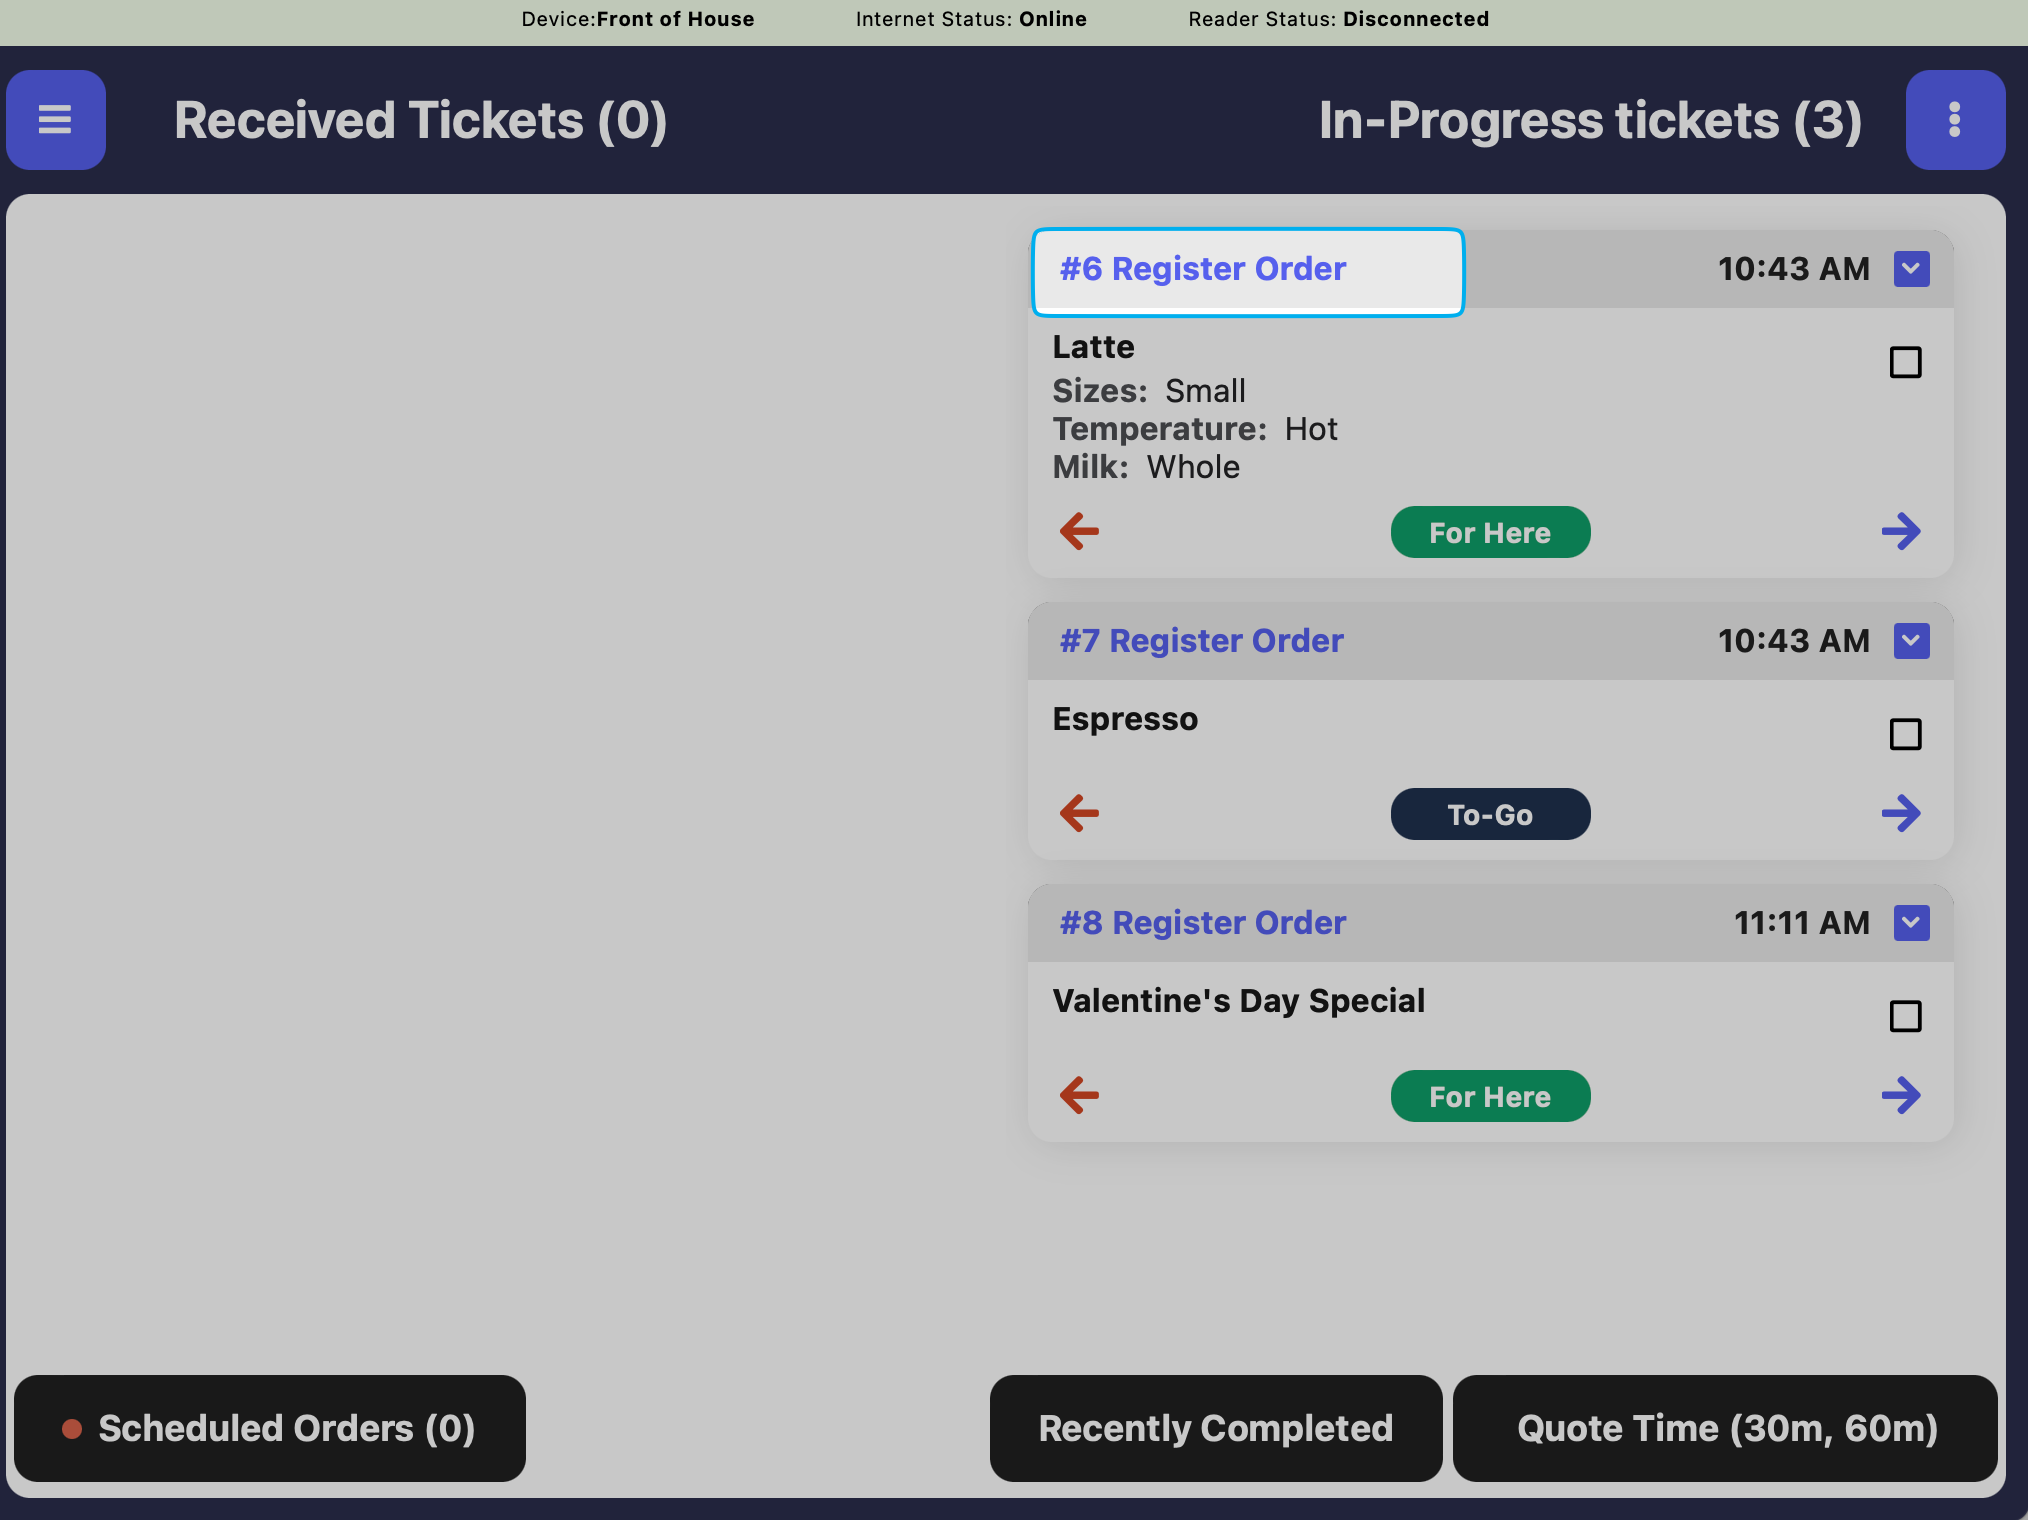
Display Ticket Number
Hide Ticket Number
Hide Custom Products
Hide Custom Products
If enabled, this will hide custom products from displaying on the KDS.
Show New Items Only
Show New Items Only
If enabled, this will hide completed items from tickets on the KDS and show only active items that still need to be prepared.
Set as Expo Screen
Set as Expo Screen
Set this device as an Expo Screen to complete expo tickets.
An Expo Screen adds one more additional check before an order can be marked as complete.Example workflow: The kitchen marks an order as complete from the Ticket screen. This order then is sent to the Expo screen at the front counter. The front counter employee then marks the order as comple from the Expo screen when it’s ready to hand to the customerComplete the following steps on all ticket types that will require Expo completion:
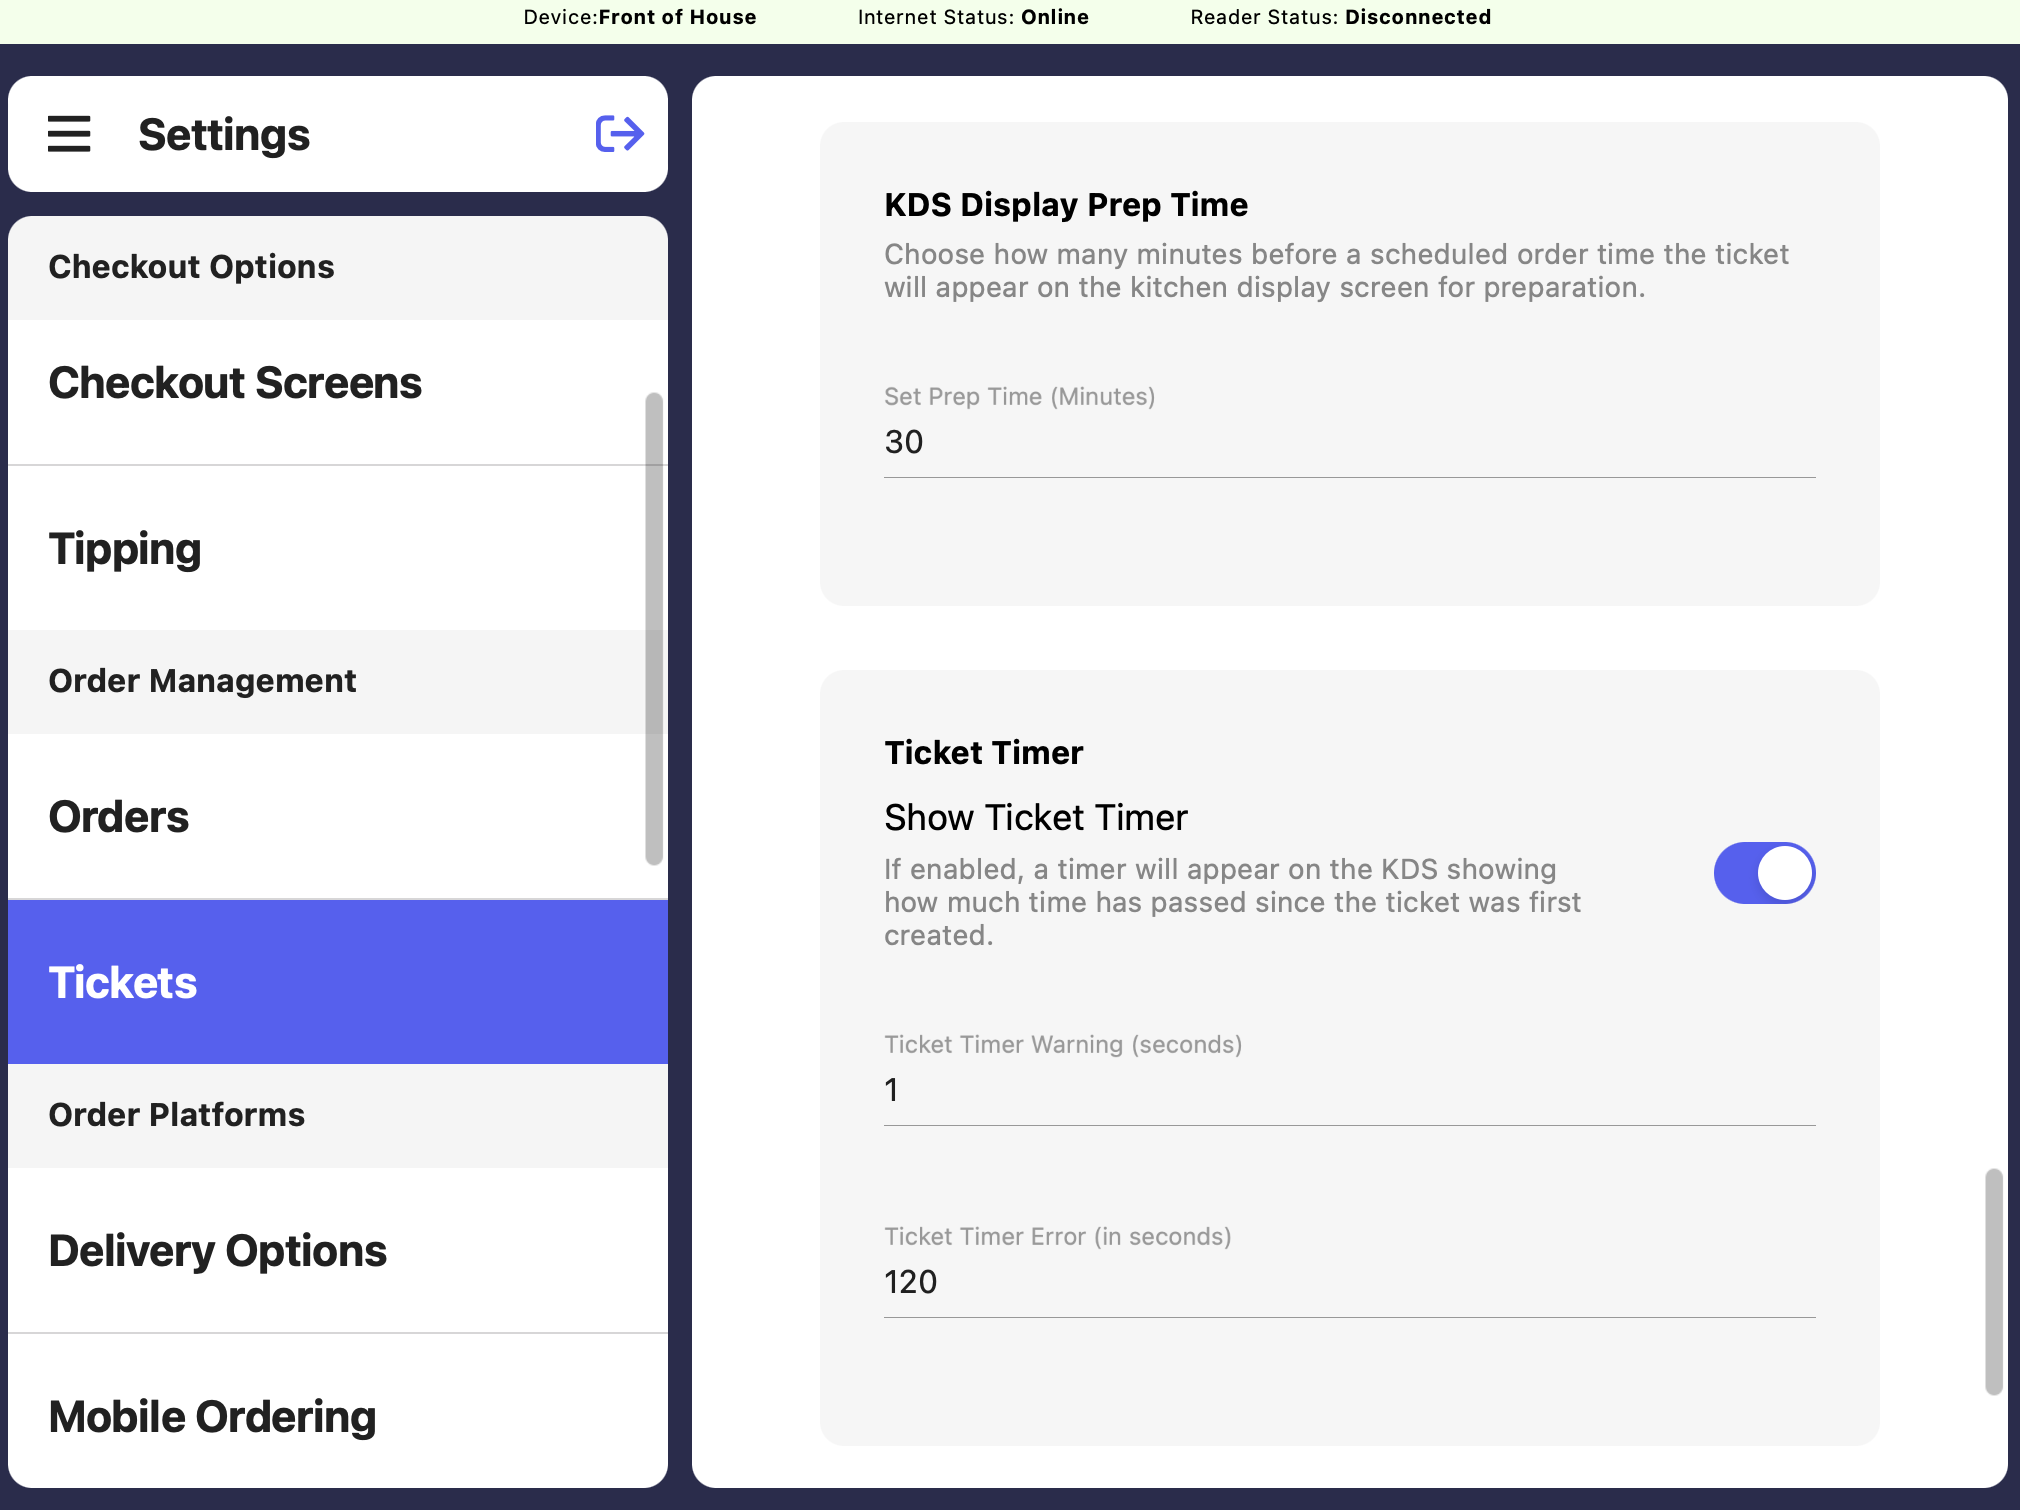
KDS Display Prep Time: Chose how many minutes before a scheduled order time the ticket will appear on the kitchen display screen for preparation. Show Ticket Timer: If enabled, a timer will appear on the KDS showing how much time has passed since the ticket was first created.
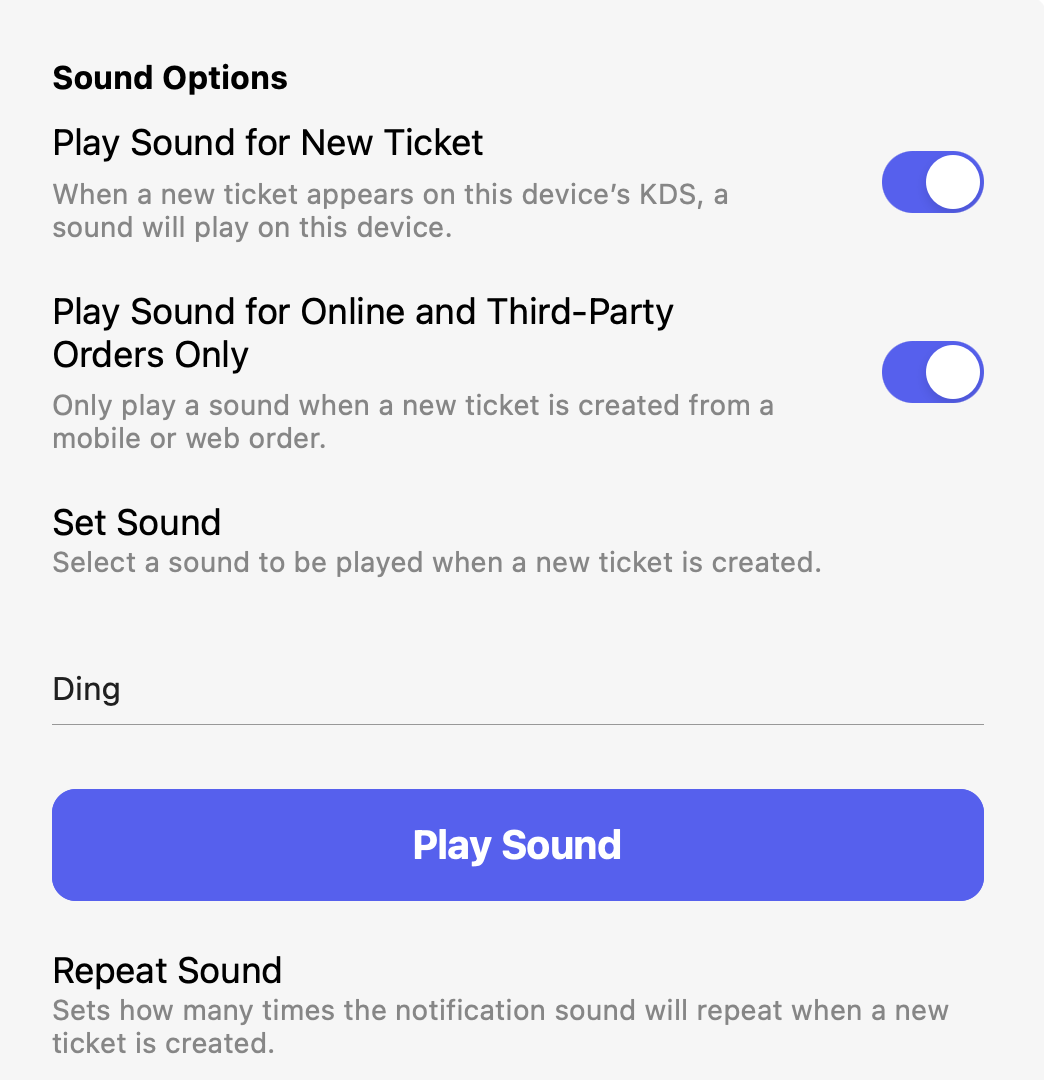
Sound Options
When a new ticket appears on the set device’s KDS, set a sound to play on the device.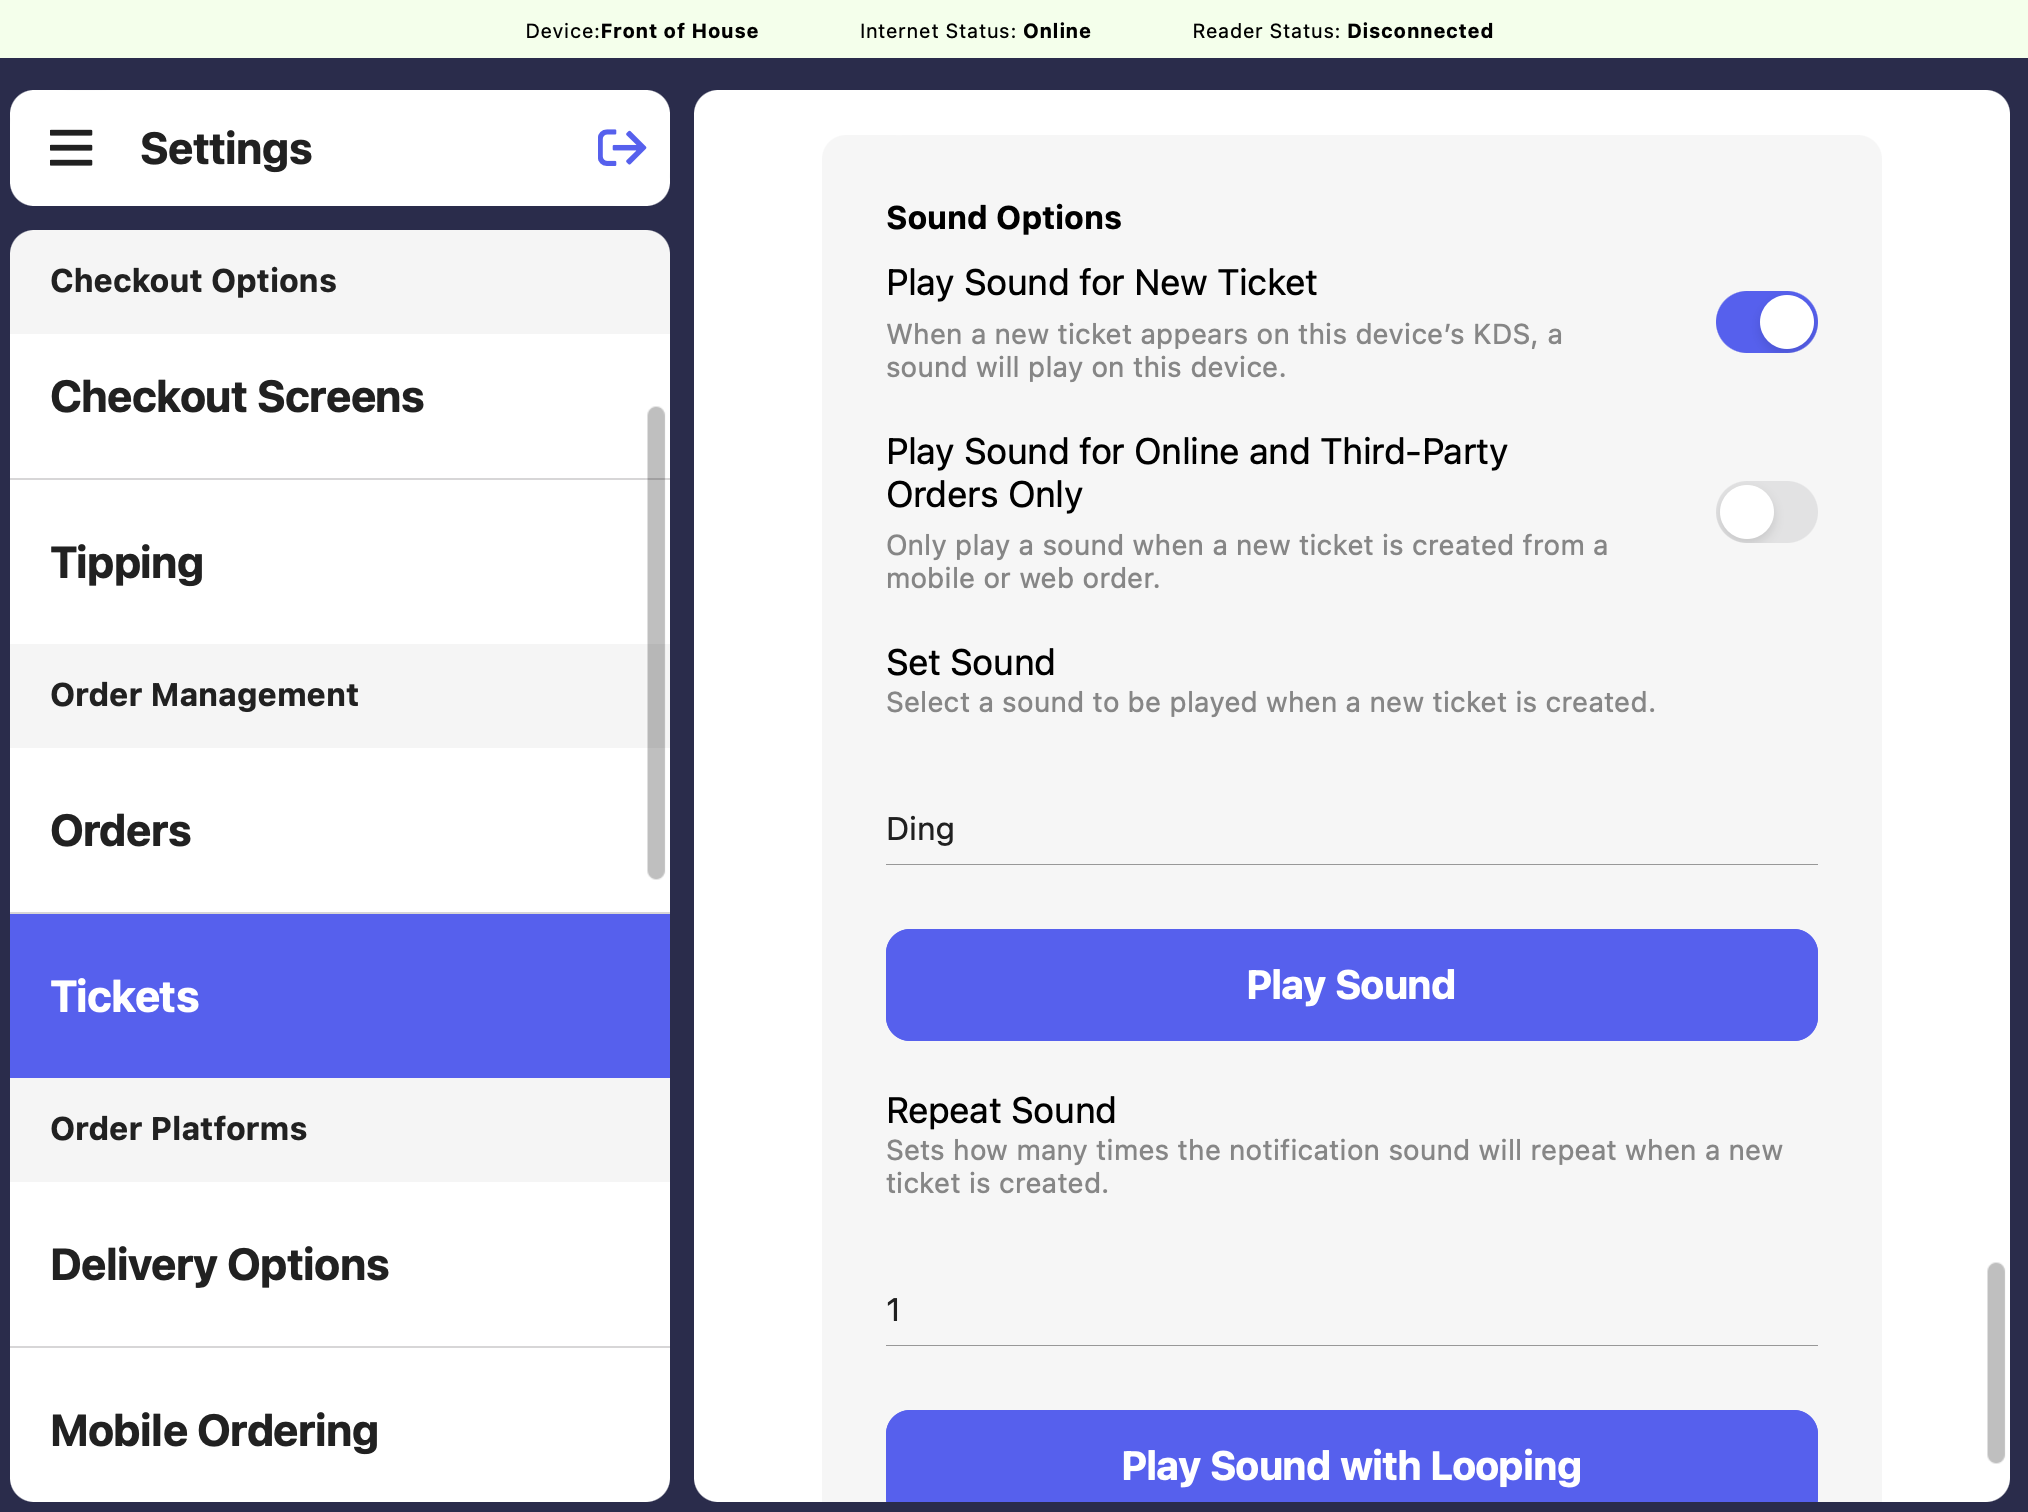
Play Sound for Online and Third-Party Orders Only
Play Sound for Online and Third-Party Orders Only
To enable sounds solely for online and third-party orders, toggle ON both sound options