Product Discounts
- Overview
- Create Product Discounts
- Apply Product Discounts
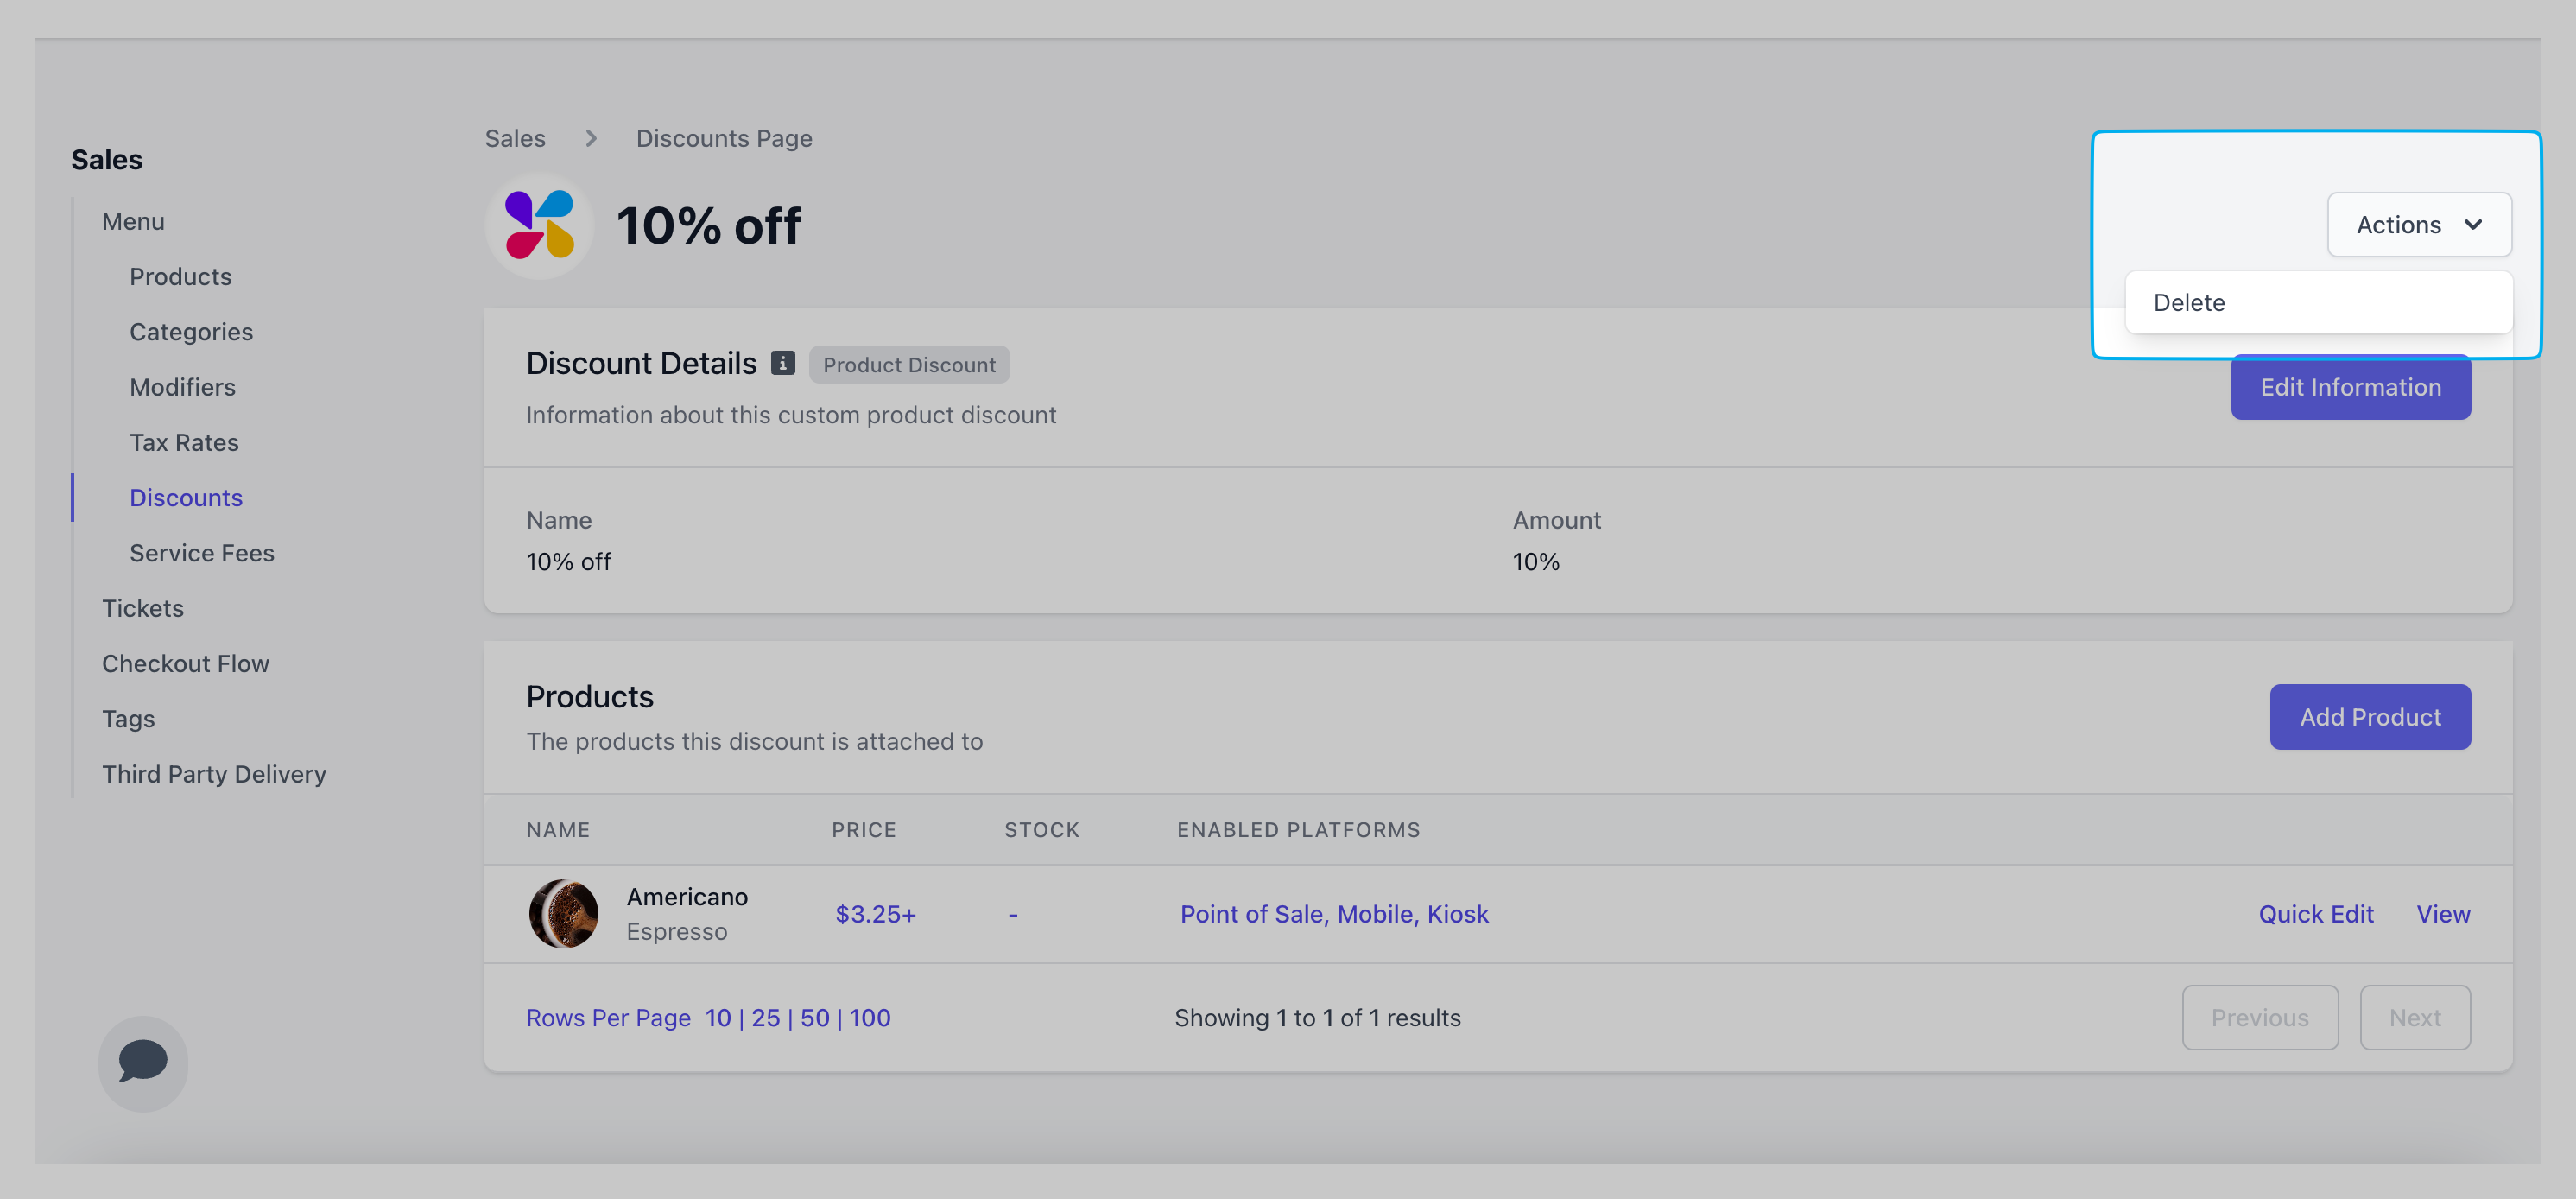
- Edit & Delete
Product discounts are discounts that can be applied to an individual product Product discounts are can be applied to a product when adding a product to cart Product discounts are only applied on the Point of Sale
Create Product Discounts
On the Dashboard, click Menu > Discounts. On the Discounts page, click Create Discount > Product Discount.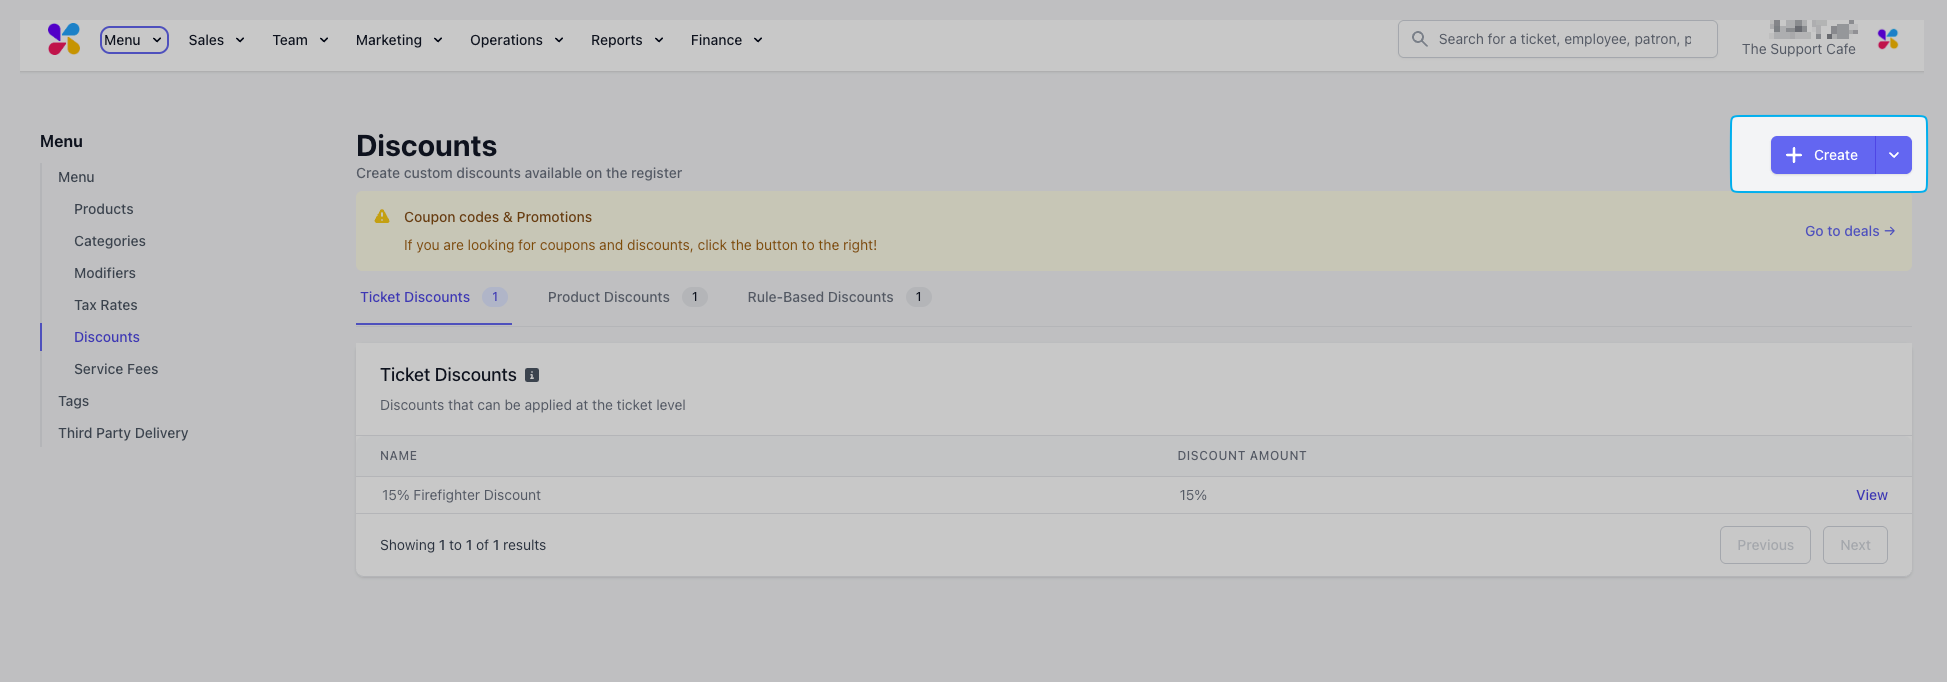
Complete the following fields and click Save: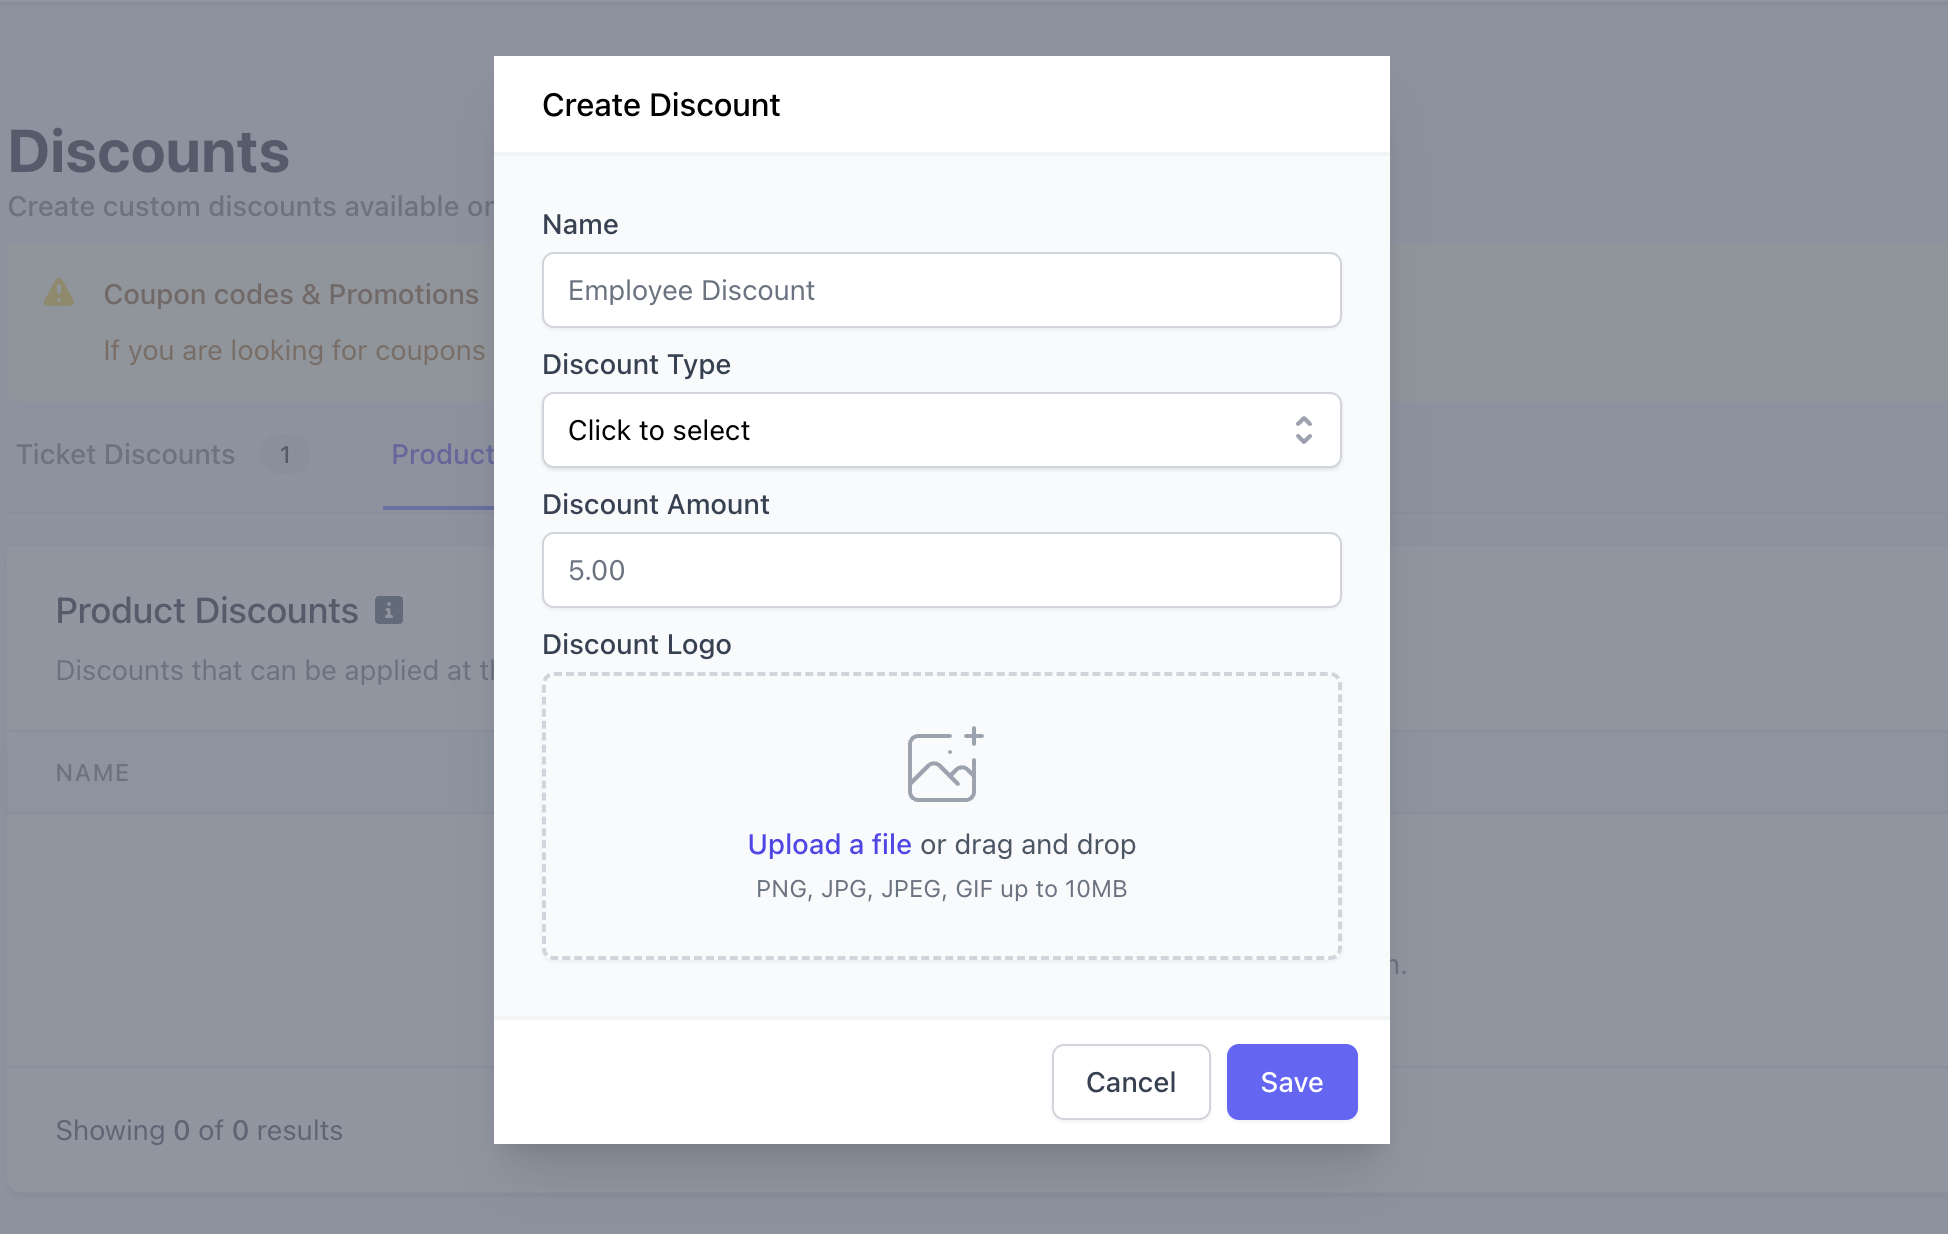
Discount Type & Amount
Flat: Dollar amount for the discount, Amount: 2, i.e. $2 off a productPercent: Percentage amount for the discount, Amount: 10, i.e. 10% off a product
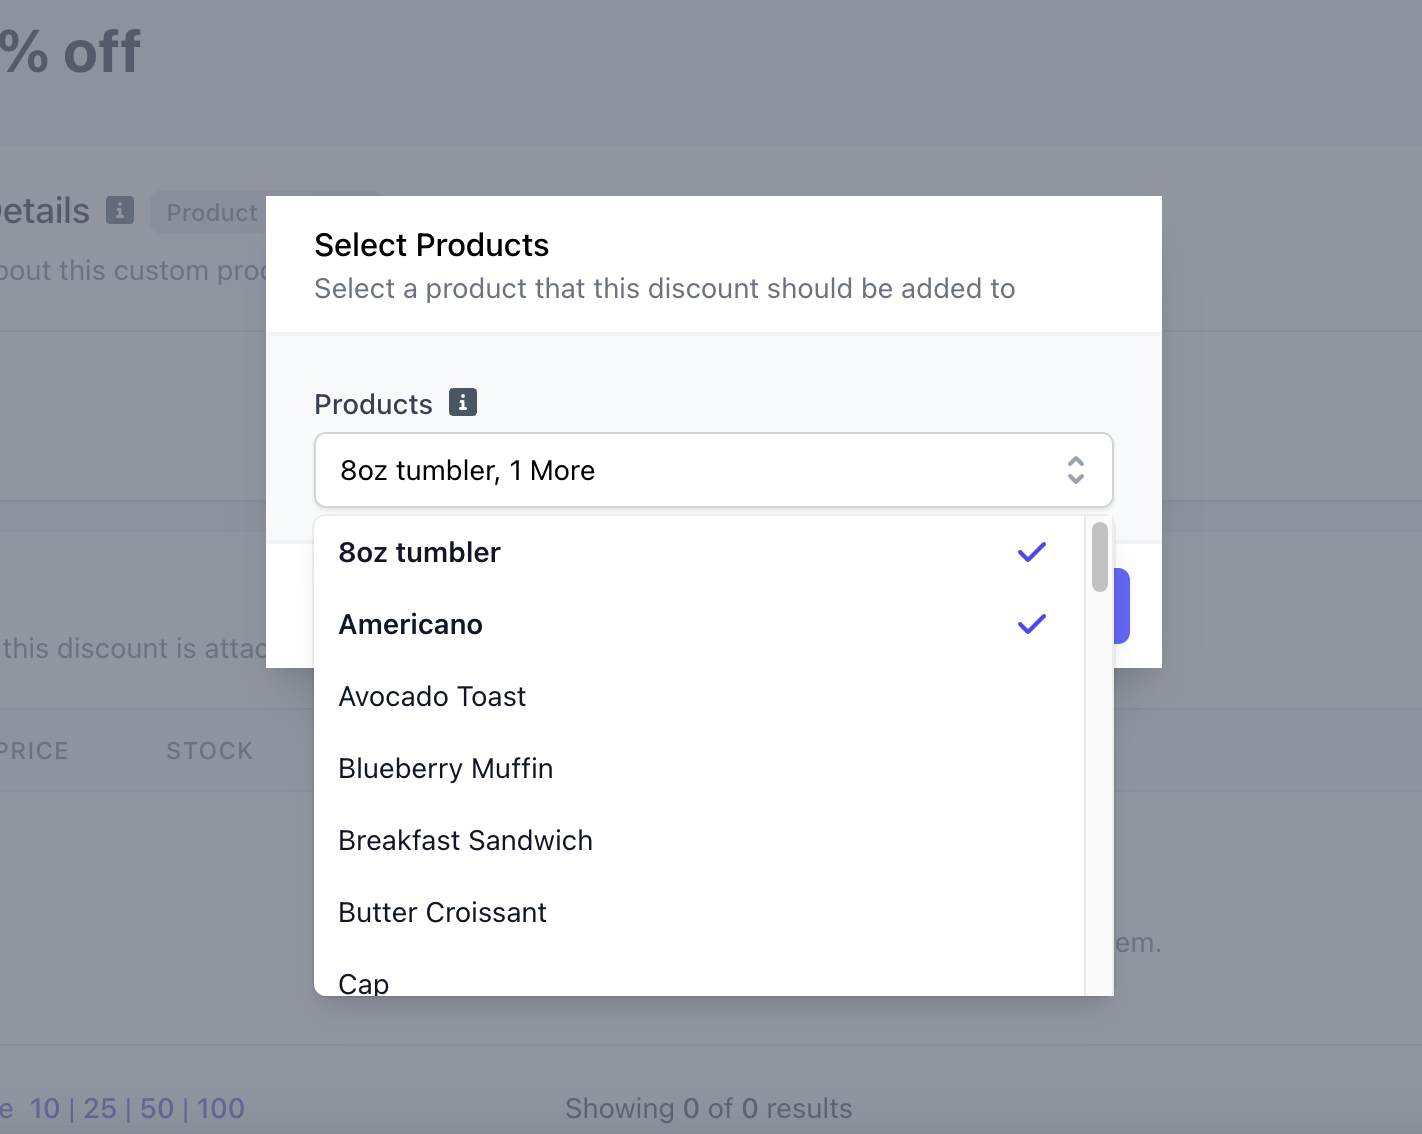
Select which products to attach this discount to:
Click Add Product.

Apply Product Discounts
Apply product discounts from the Point of Sale and DriposGOPoint of SaleDripos GO
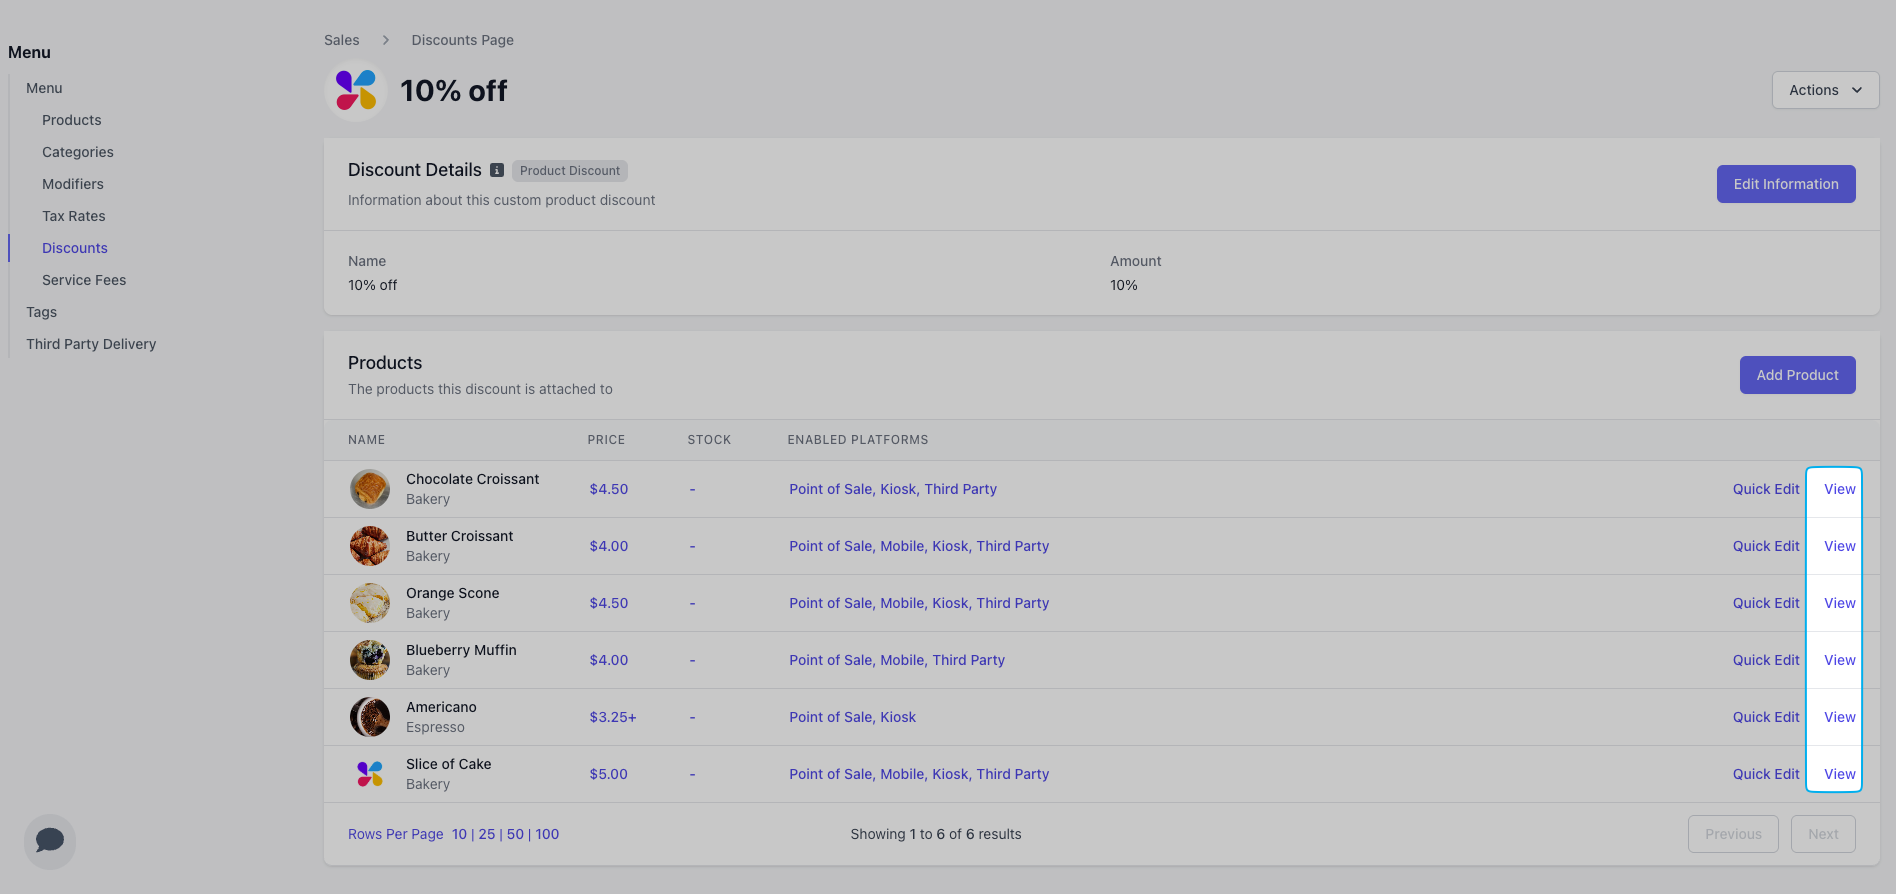
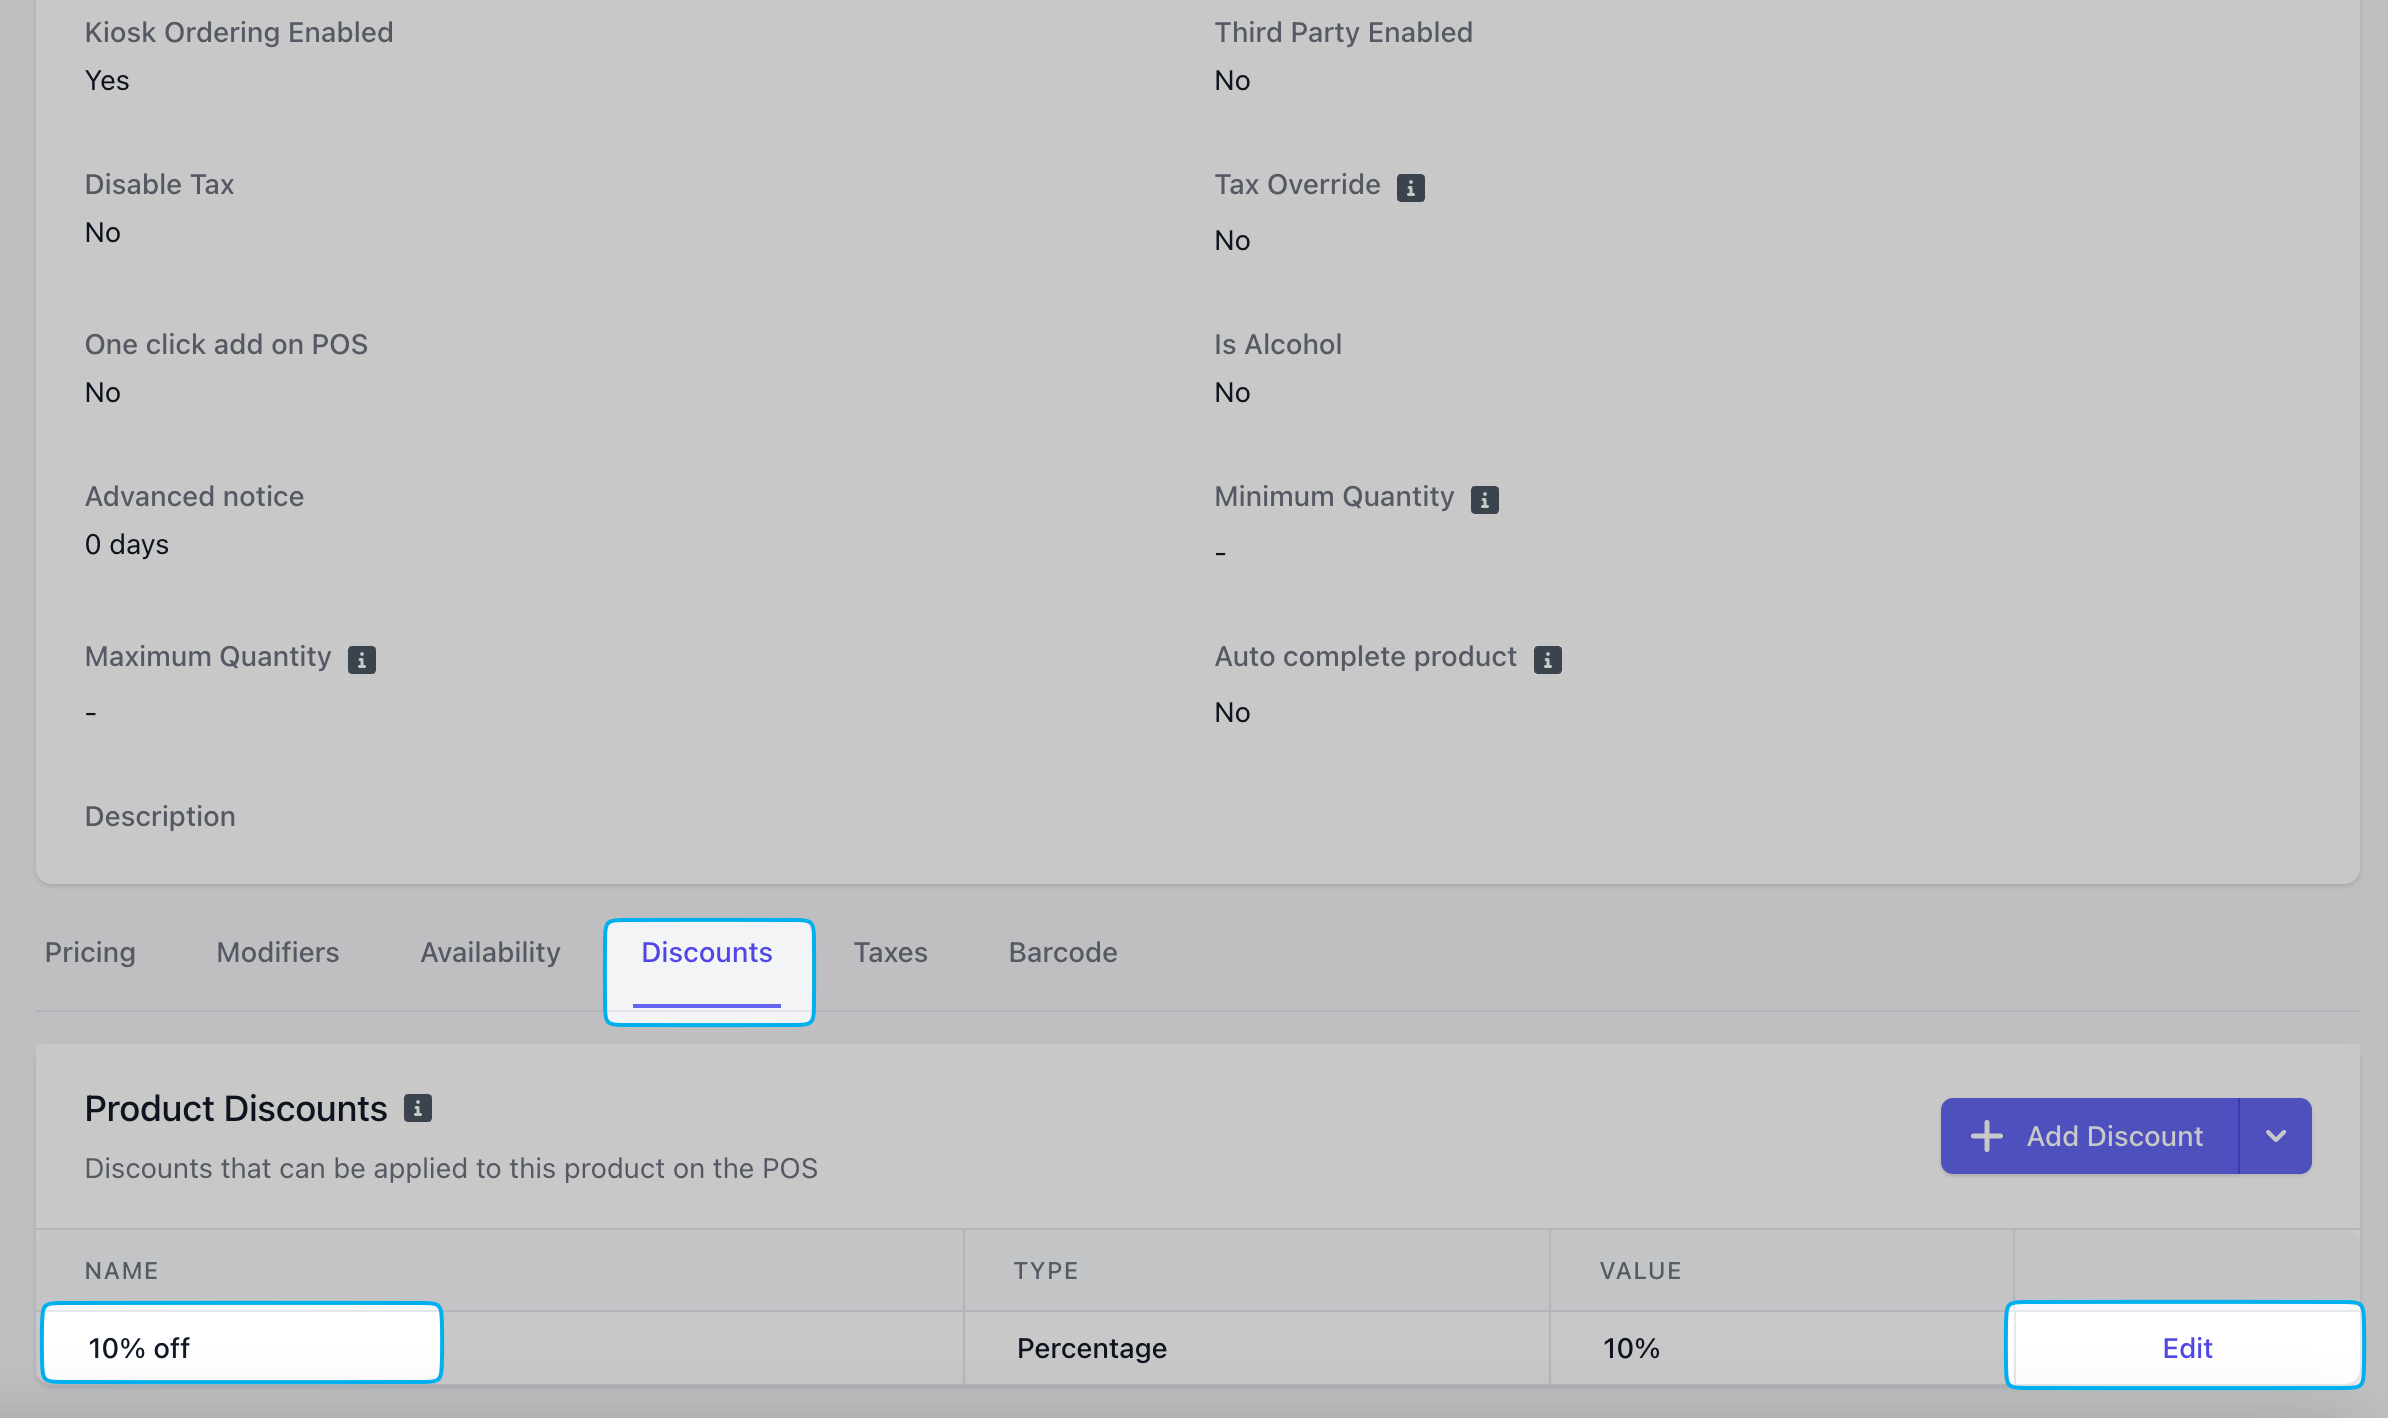
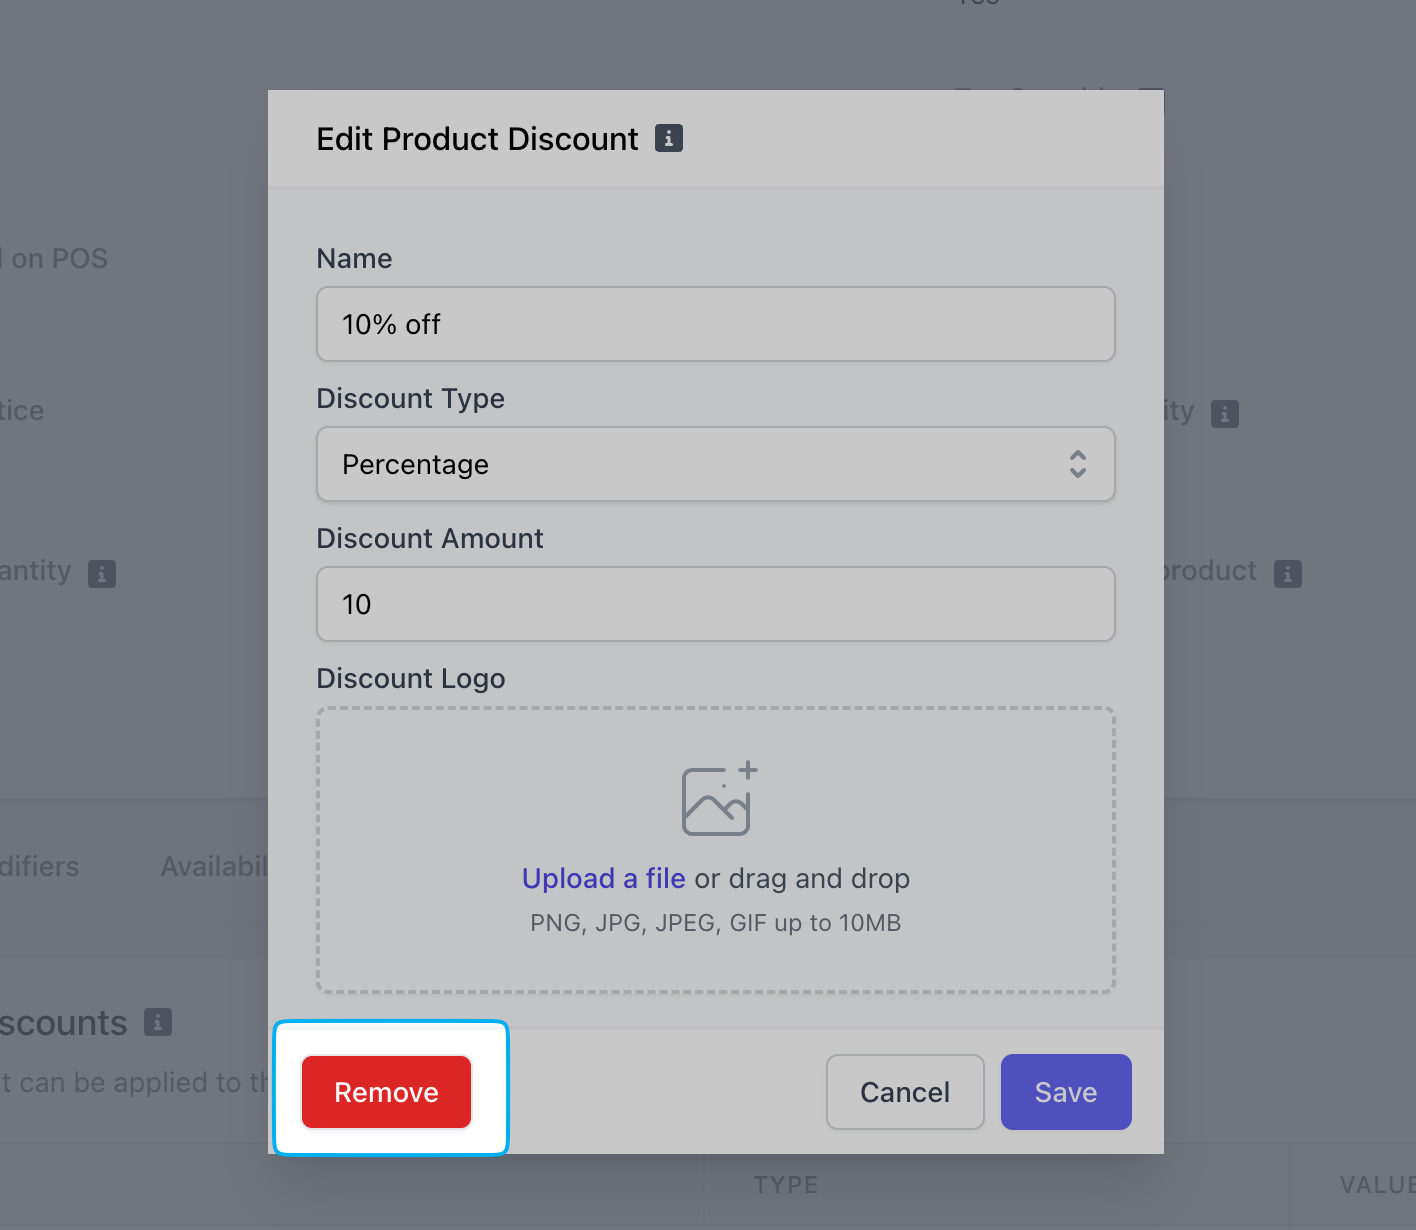
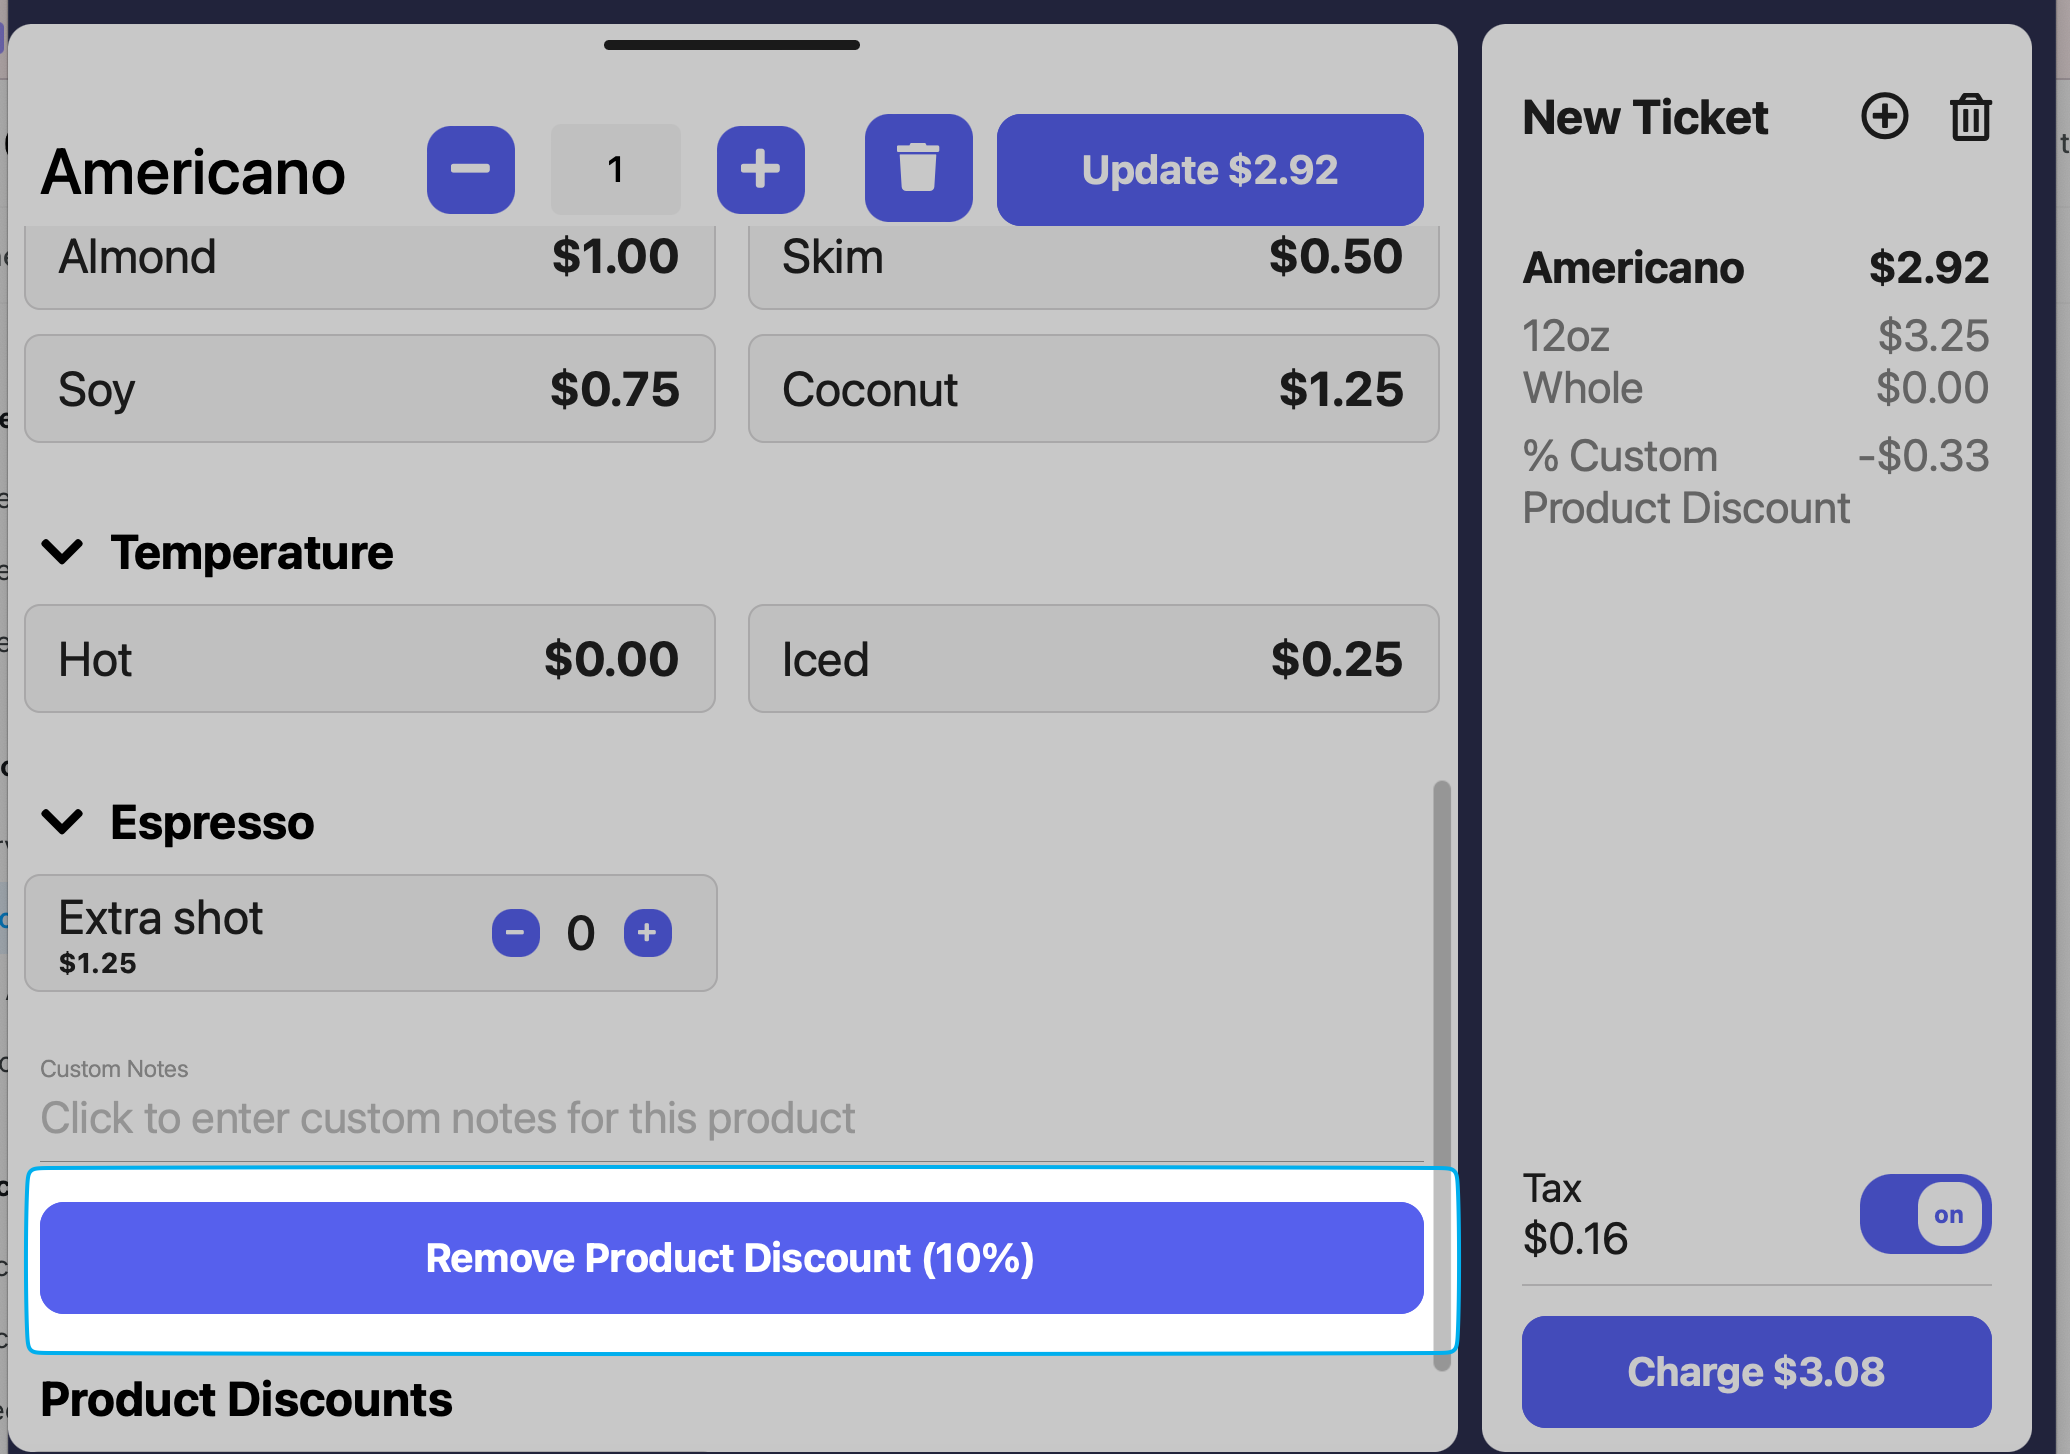
Remove Products from Discount
Remove Products from Discount
How to detach a discount from a product’s page:
Ticket Discounts
- Overview
- Create Ticket Discounts
- Apply Ticket Discounts
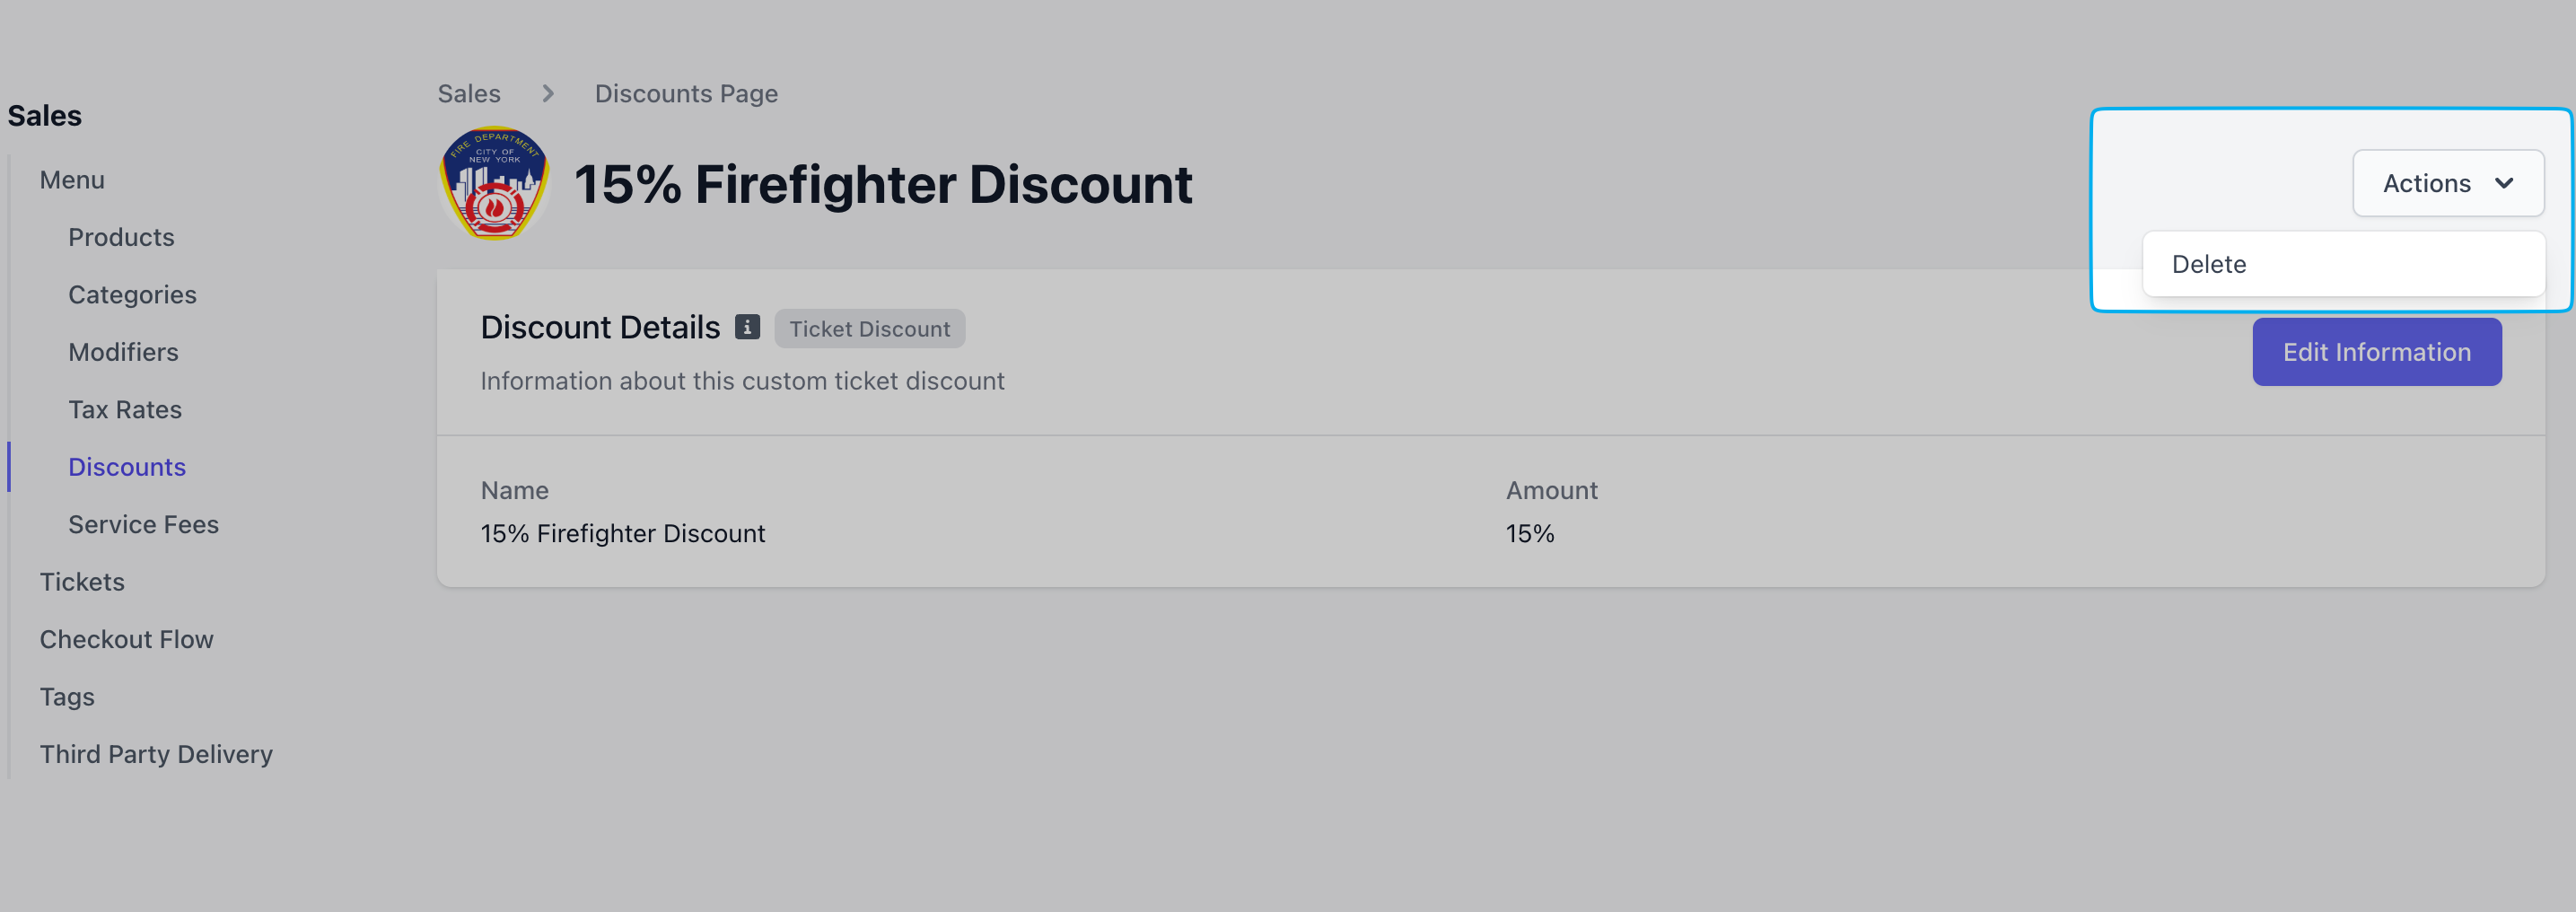
- Delete
Ticket discounts are discounts that will apply to an entire order Ticket discounts can be applied to an order at any point before clicking ‘Charge’ and proceeding to payment Ticket discounts are only applied on the Point of Sale
Create Ticket Discounts
On the Dashboard, click Menu > Discounts. On the Discounts page, click Create Discount > Ticket Discount
Complete the following fields and click Save:
Discount Type & Amount
Flat: Dollar amount for the discount, Amount: 5, i.e. $5 off an orderPercent: Percentage amount for the discount, Amount: 20, i.e. 20% off an order
Apply Ticket Discounts
Apply ticket discounts from the Point of Sale and Dripos GO.Point of SaleDripos GO
Rule-Based Discounts
- Overview
- Create Rule-Based Discounts
- Apply Rule-Based Discounts
- Edit & Delete
Rule-based discounts apply automatically to cart when the products in cart trigger a rule Rule-based discounts are best for BOGO discounts Rule-based discounts apply automatically to orders placed on the Point of Sale, Kiosk, Order Website, and Order App.
Create Rule-Based Discounts
Complete the following fields and click Add: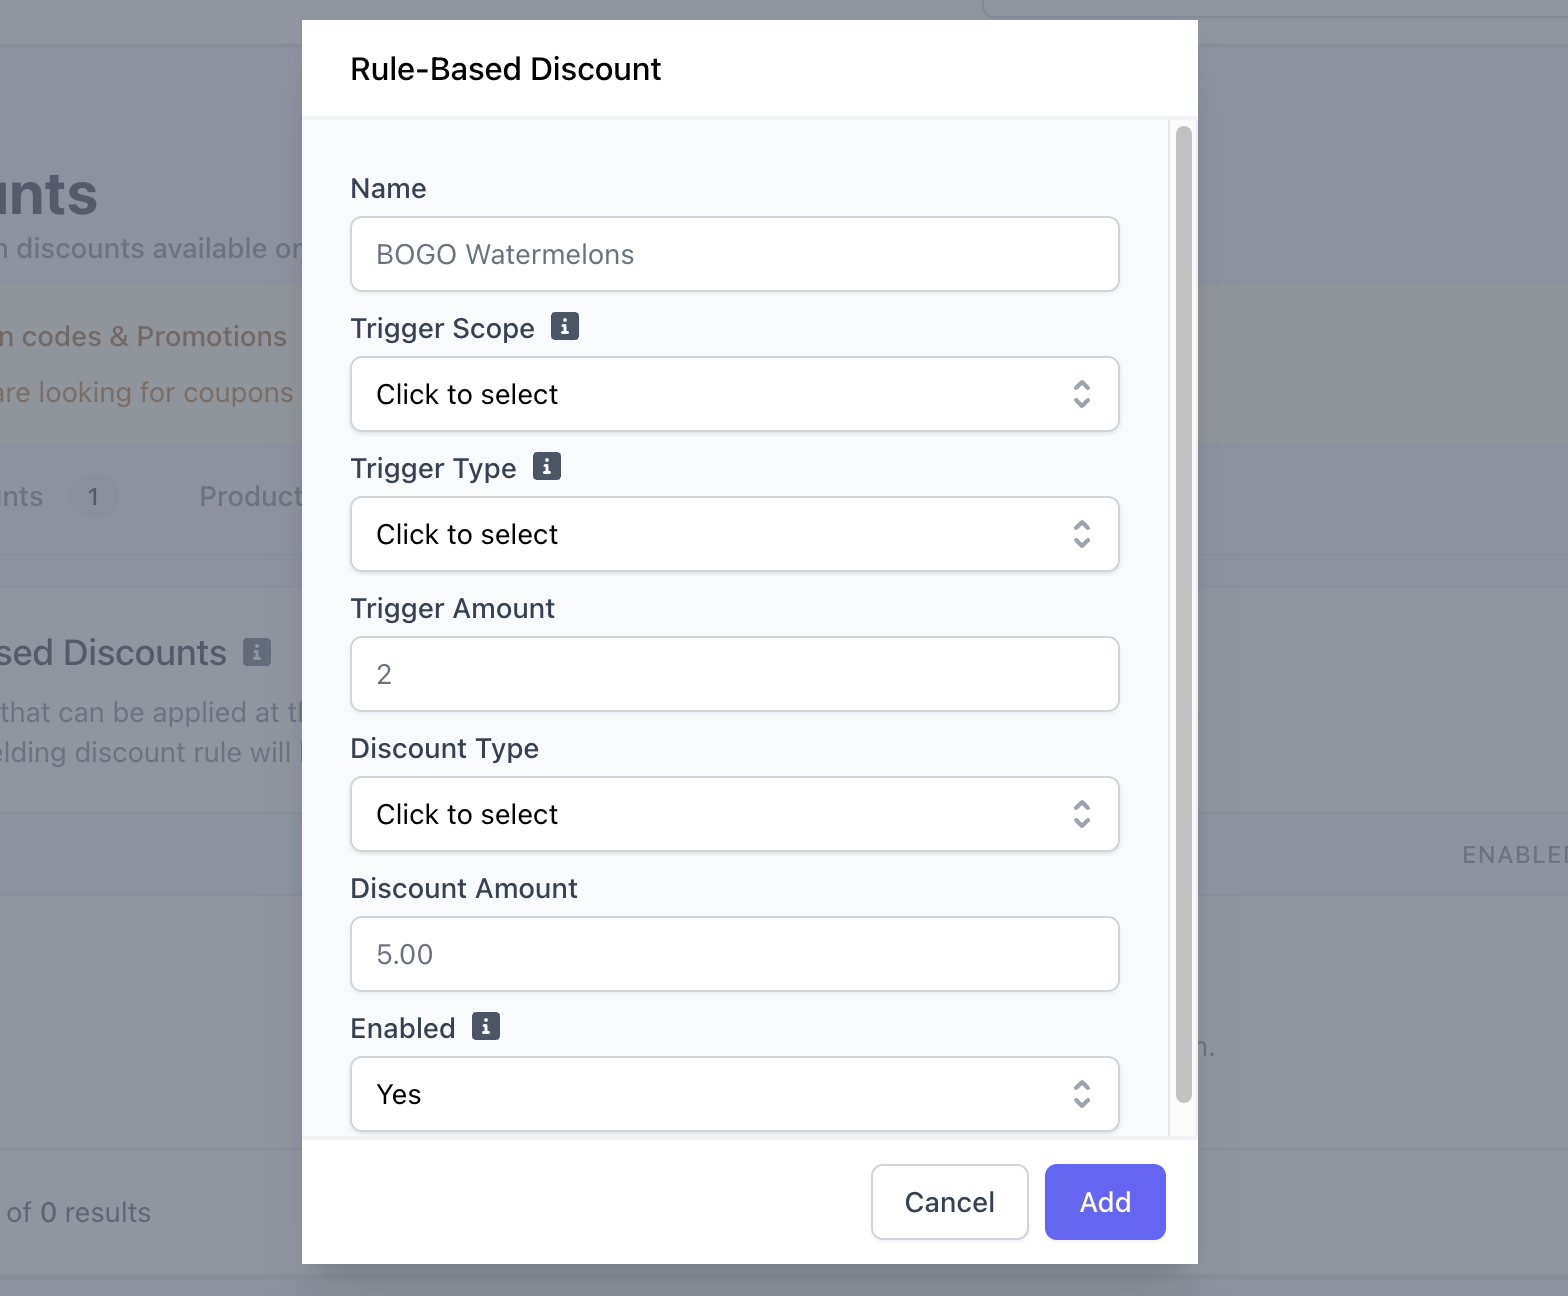
Trigger Scope
Trigger Scope
Product Discount: When added to cart, the products chosen for this rule will trigger this discount rule to apply to the order if the Trigger Type is met
Example: AmericanoCategory Discount: When added to cart, the products of the categories chosen for this rule will trigger this discount rule to apply to the order if the Trigger Type is met
Example: BakeryOrder Discount: Any products added to cart can trigger this discount rule to apply if the Trigger Type is met
Trigger Type & Amount
Trigger Type & Amount
Dollar Amount:Quantity:
Product Discount
If the specified products are added to cart and their total price equals or exceeds the Trigger Dollar Amount, the rule will applyExample: Amount is $5, if two Americanos are added to cart for a total of $6, this discount will trigger
Category Discount
If products added to cart are of the specified category and their total price equals or exceeds the Trigger Dollar Amount, the rule will applyExample: Amount is $10, if two scones and a muffin are added to cart for a total of $10, this discount will trigger
Order Discount
If the order’s total price equals or exceeds the Trigger Dollar Amount, regardless of what is in the cart, the rule will applyExample: Amount is $20, if the cart total is $20 or greater, this discount will trigger
Product Discount
If the specified products are added to cart and their total price equals or exceeds the Trigger Dollar Amount, the rule will applyExample: Amount is 2, if two Americanos are added to cart, this discount will trigger
Category Discount
If products added to cart are of the specified category and their total price equals or exceeds the Trigger Dollar Amount, the rule will applyExample: Amount is 3, if two scones and a muffin are added to cart, this discount will trigger
Order Discount
If the order’s total price equals or exceeds the Trigger Dollar Amount, regardless of what is in the cart, the rule will applyExample: Amount is 5, if five or more products are added to cart, this discount will trigger
Discount Type & Amount
Discount Type & Amount
Flat: Dollar discount amount, i.e. Discount Amount = 5 = $5Percent: Percent discount amount, i.e. Discount Amount = 10 = 10%
Product-based
Dollar amount to discount off one singular product in cart (the lowest priced product will be discounted)Example: Trigger amount is $5, Discount amount is $2, if two Americanos are added to cart ($3/ea), one Americano will be discounted $2
Category-based
Dollar amount to discount off one singular product of that category in cart (the lowest priced product will be discounted)Example: Trigger amount is 3, Discount amount is $1, if two scones ($2/ea) and a muffin ($3/ea) are added to cart, one scone will be discounted $1
Order-based
Dollar amount to discount from the order totalExample: Trigger amount is 5, Discount amount is 10%, if five or more products are added to cart, the order total will be discounted 10%
Product-based
Percentage amount to discount off one singular product in cart (the lowest priced product will be discounted)Example: Trigger amount is $5, Discount amount is 20%, if two Americanos are added to cart ($3/ea), one Americano will be discounted 20%
Category-based
Percentage amount to discount off one singular product of that category in cart (the lowest priced product will be discounted)Example: Trigger amount is 3, Discount amount is 20%, if two scones ($2/ea) and a muffin ($3/ea) are added to cart, one scone will be discounted 20%
Order-based
Percentage amount to discount the order totalExample: Trigger amount is 5, Discount amount is 10, if five or more products are added to cart, the order total will be discounted 10%
Enabled
Enabled
Yes: This rule-based discount will apply to cart automatically if triggered
No: This rule-based discount is not active and will not apply to cart automatically
Recurring Duration Settings
Recurring Duration Settings
Range Option
Select Forever keep this setting active indefinitely. Select Date Range to specify a start and end date for this rule-based discount.
Recurring Days
Select which days of the week this rule will be active on during the set date range.
Date Start/End
Select the date this discount will first be active. If Date Range was selected, select the end date of this rule-based discount.
Time Start/End
Select the start and end time that this discount will be active on the specified days of the week you’ve select.
Apply Rule-Based Discounts
When Enabled = Yes, a rule-based discount will apply automatically to cart when triggered upon checkout on all order platforms: Point of Sale Kiosk Order Website Order App Dripos GOWhen Enabled = No, a rule-based discount is considered inactive and will not apply to cart on any of the three order platforms.To edit or delete a rule-based discount, either click Edit Information or Actions > Delete, respectively.
Custom Discounts
- Overview
- Create & Apply Custom Discounts
Custom discounts are percentage or dollar discounts that can be applied to a product or order on the fly Custom discounts are only applied at the Point of Sale
Create & Apply Custom Discounts
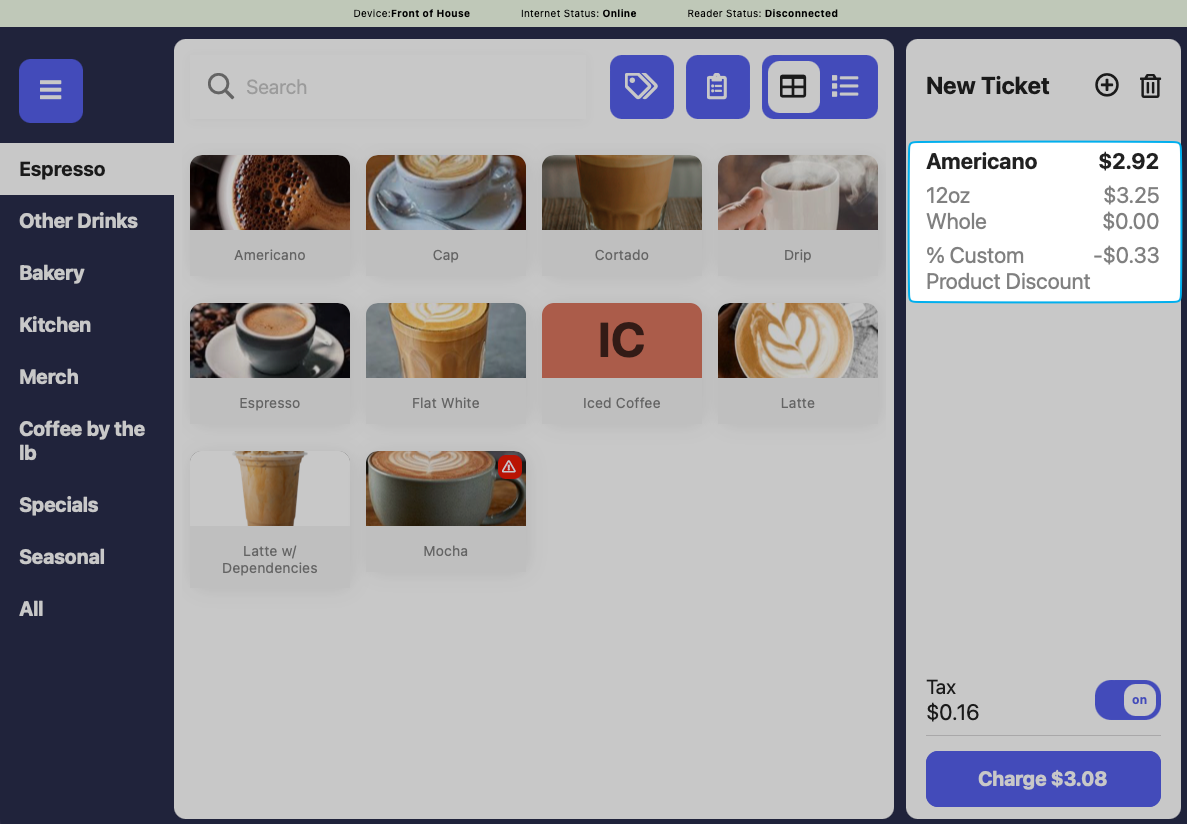
Custom Discounts can be applied at the product level and the ticket level from the Point of SaleCreate Custom Product Discount
Create Custom Product Discount
Select a product to add to cart
Before adding the product to cart, scroll to the bottom of the product’s page and select either Add Percent Discount or Add Dollar Discount.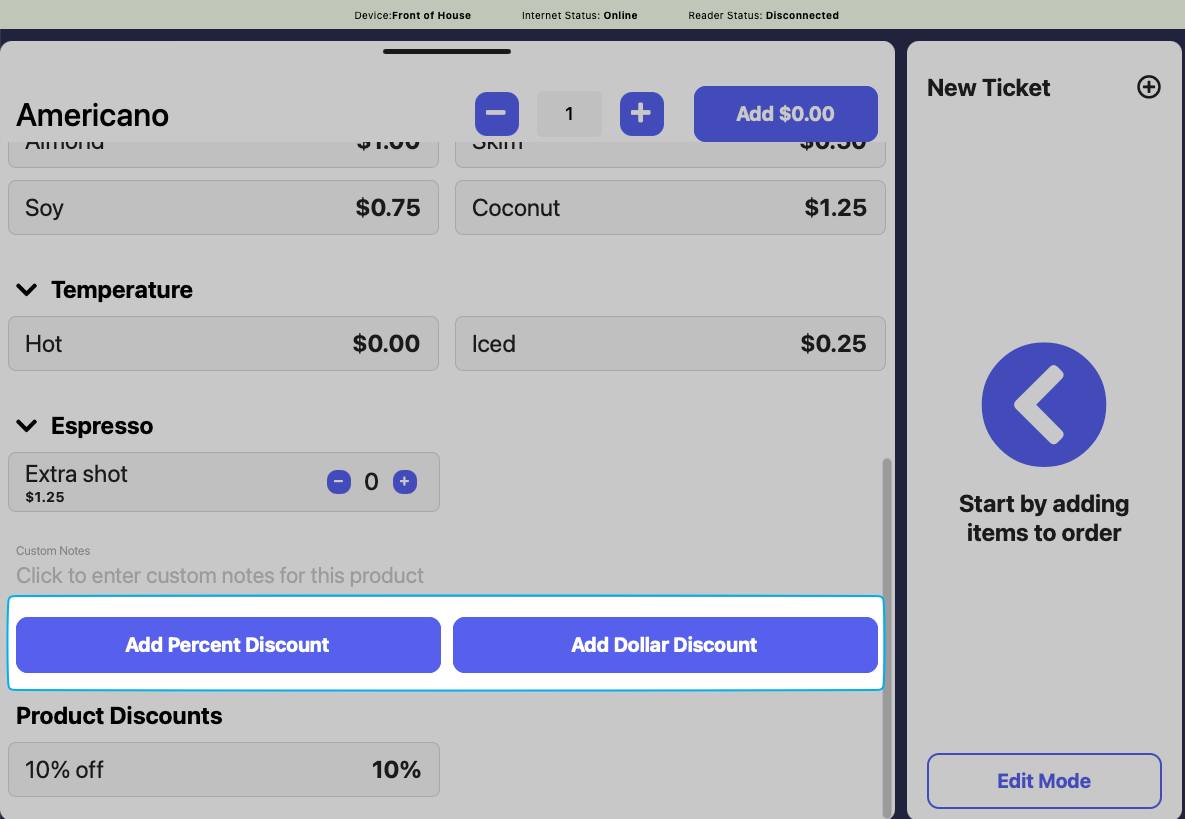
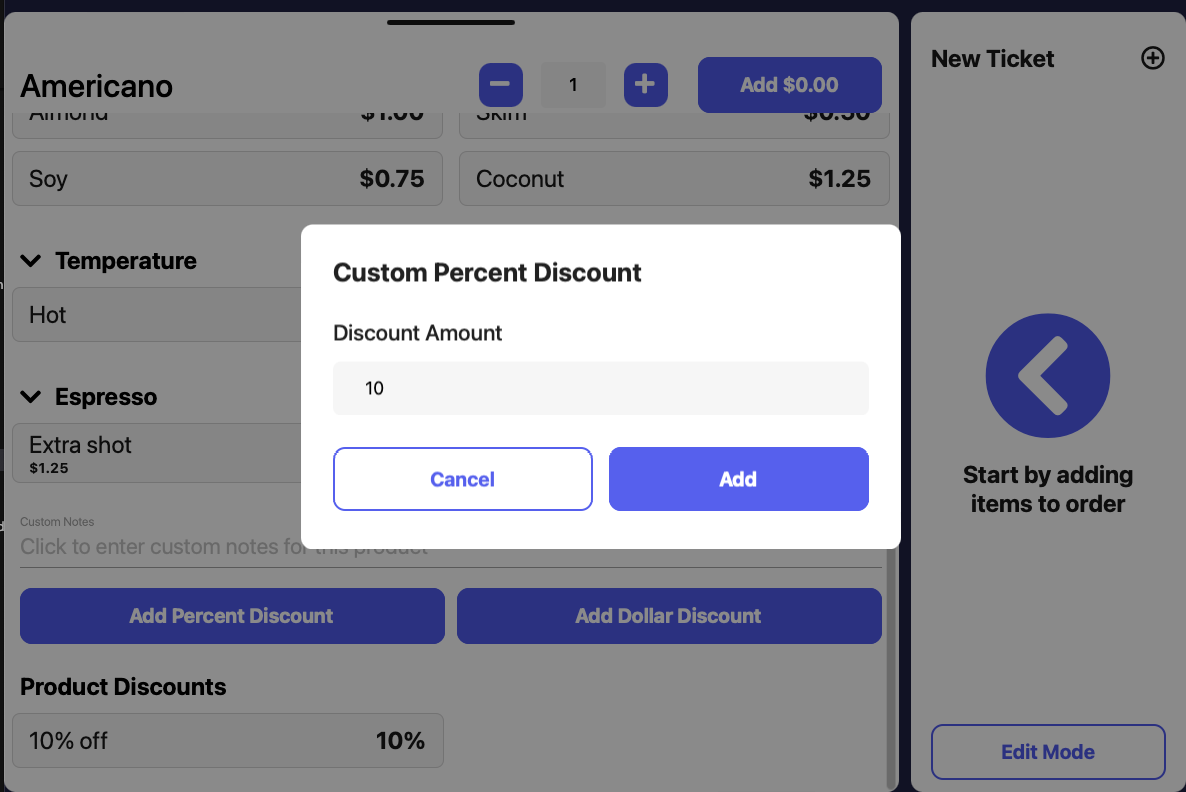
Create Custom Ticket Discount
Create Custom Ticket Discount
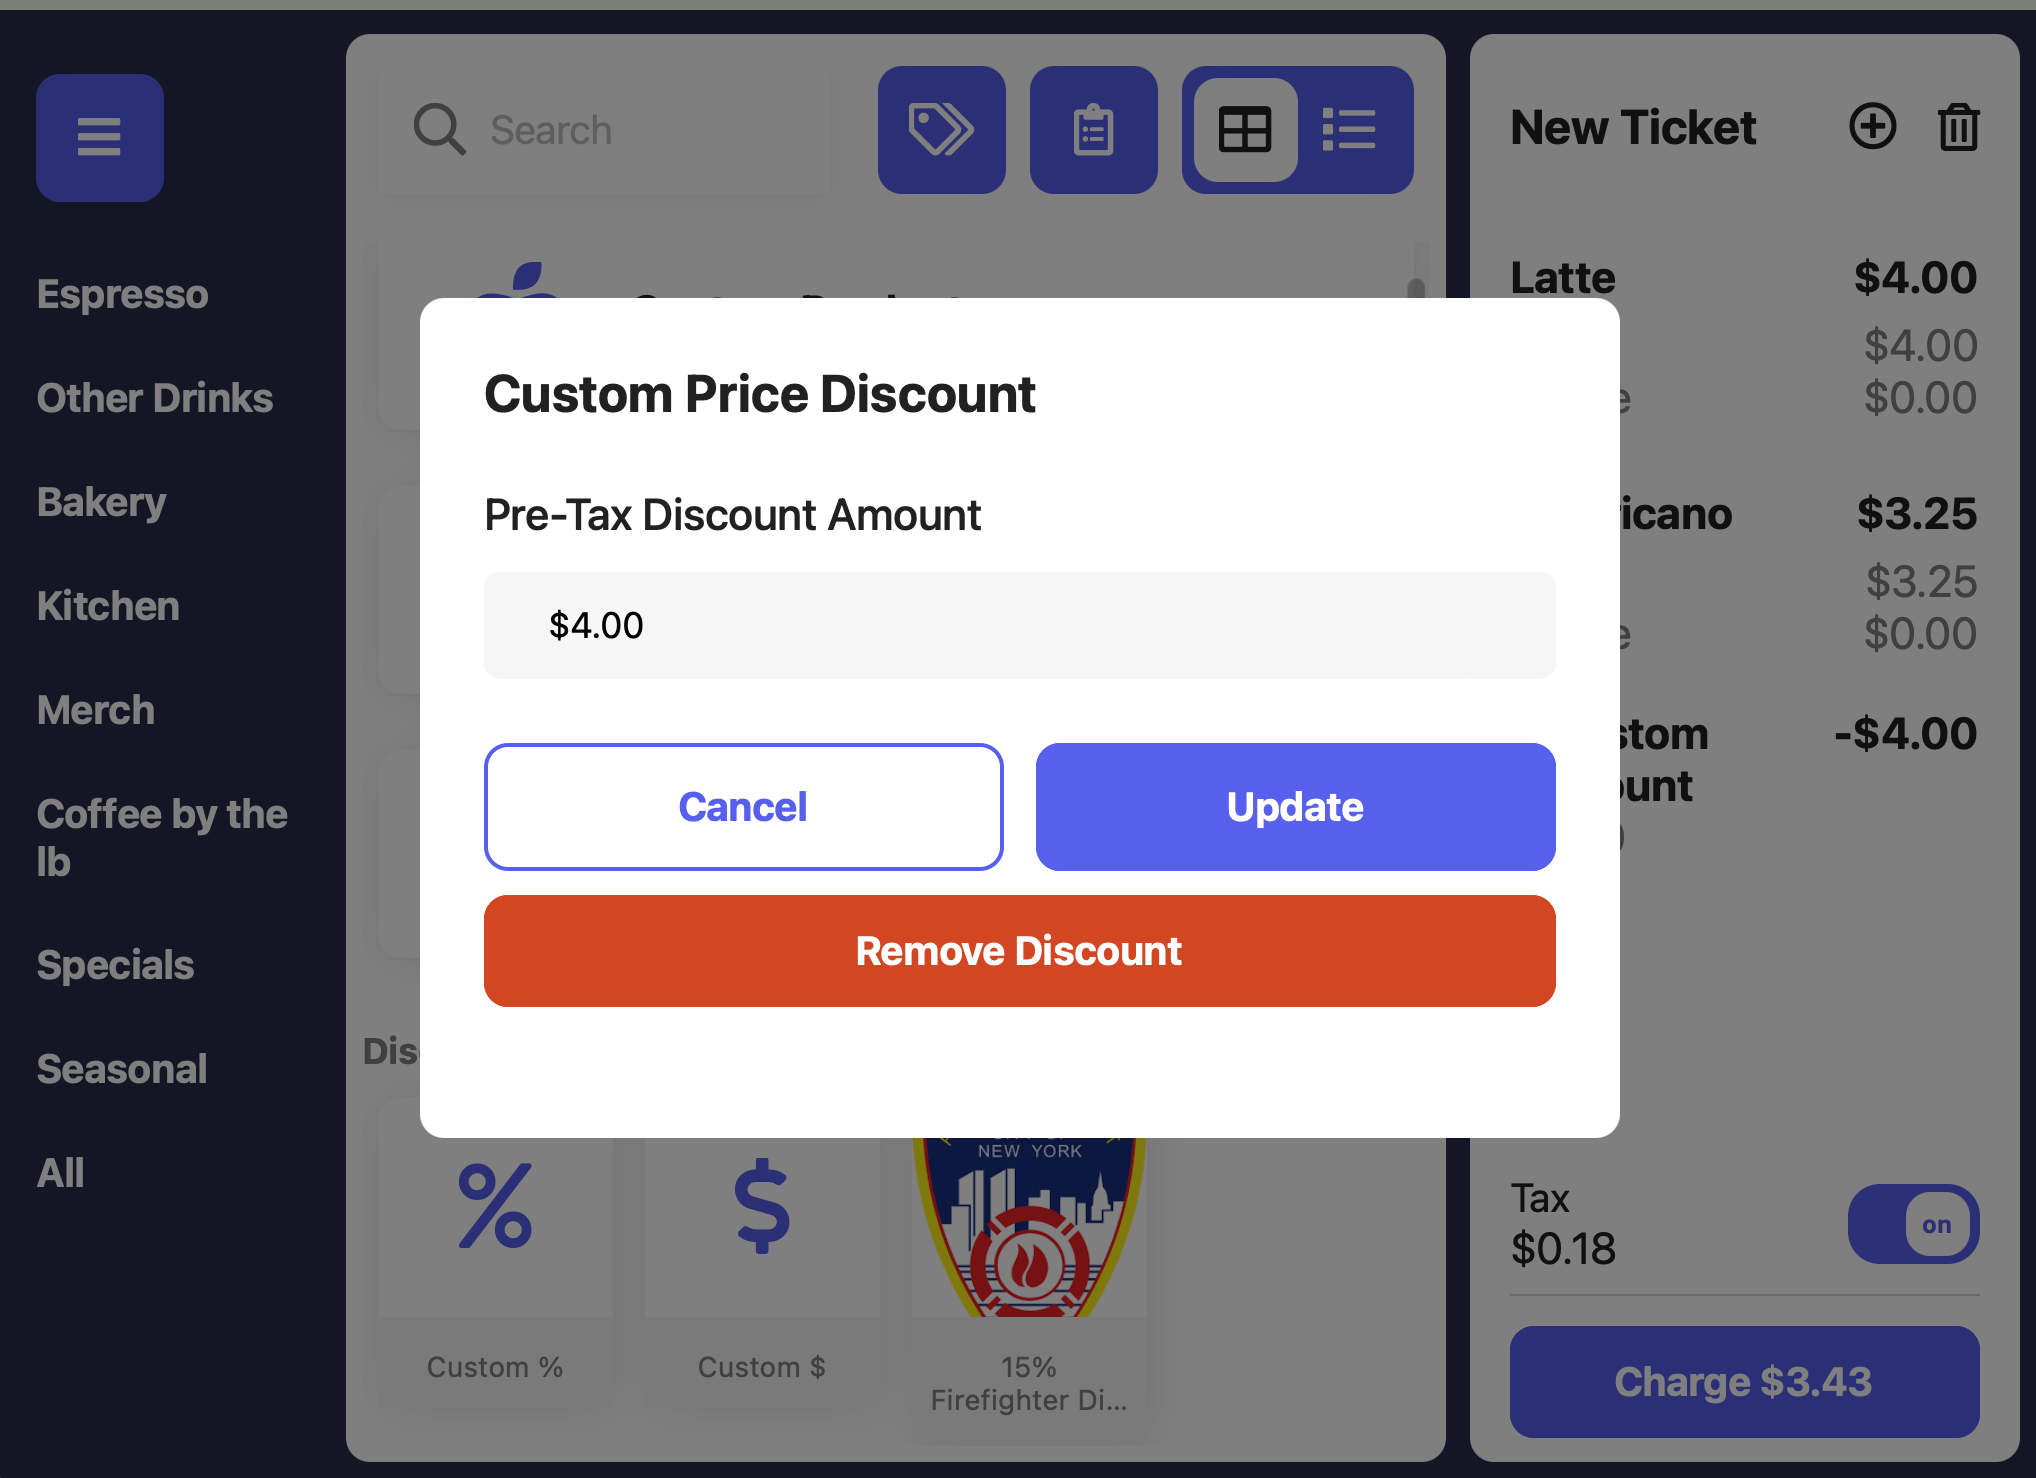
Before checkout, press the tag icon at the top of the register to navigate to the Main Register Page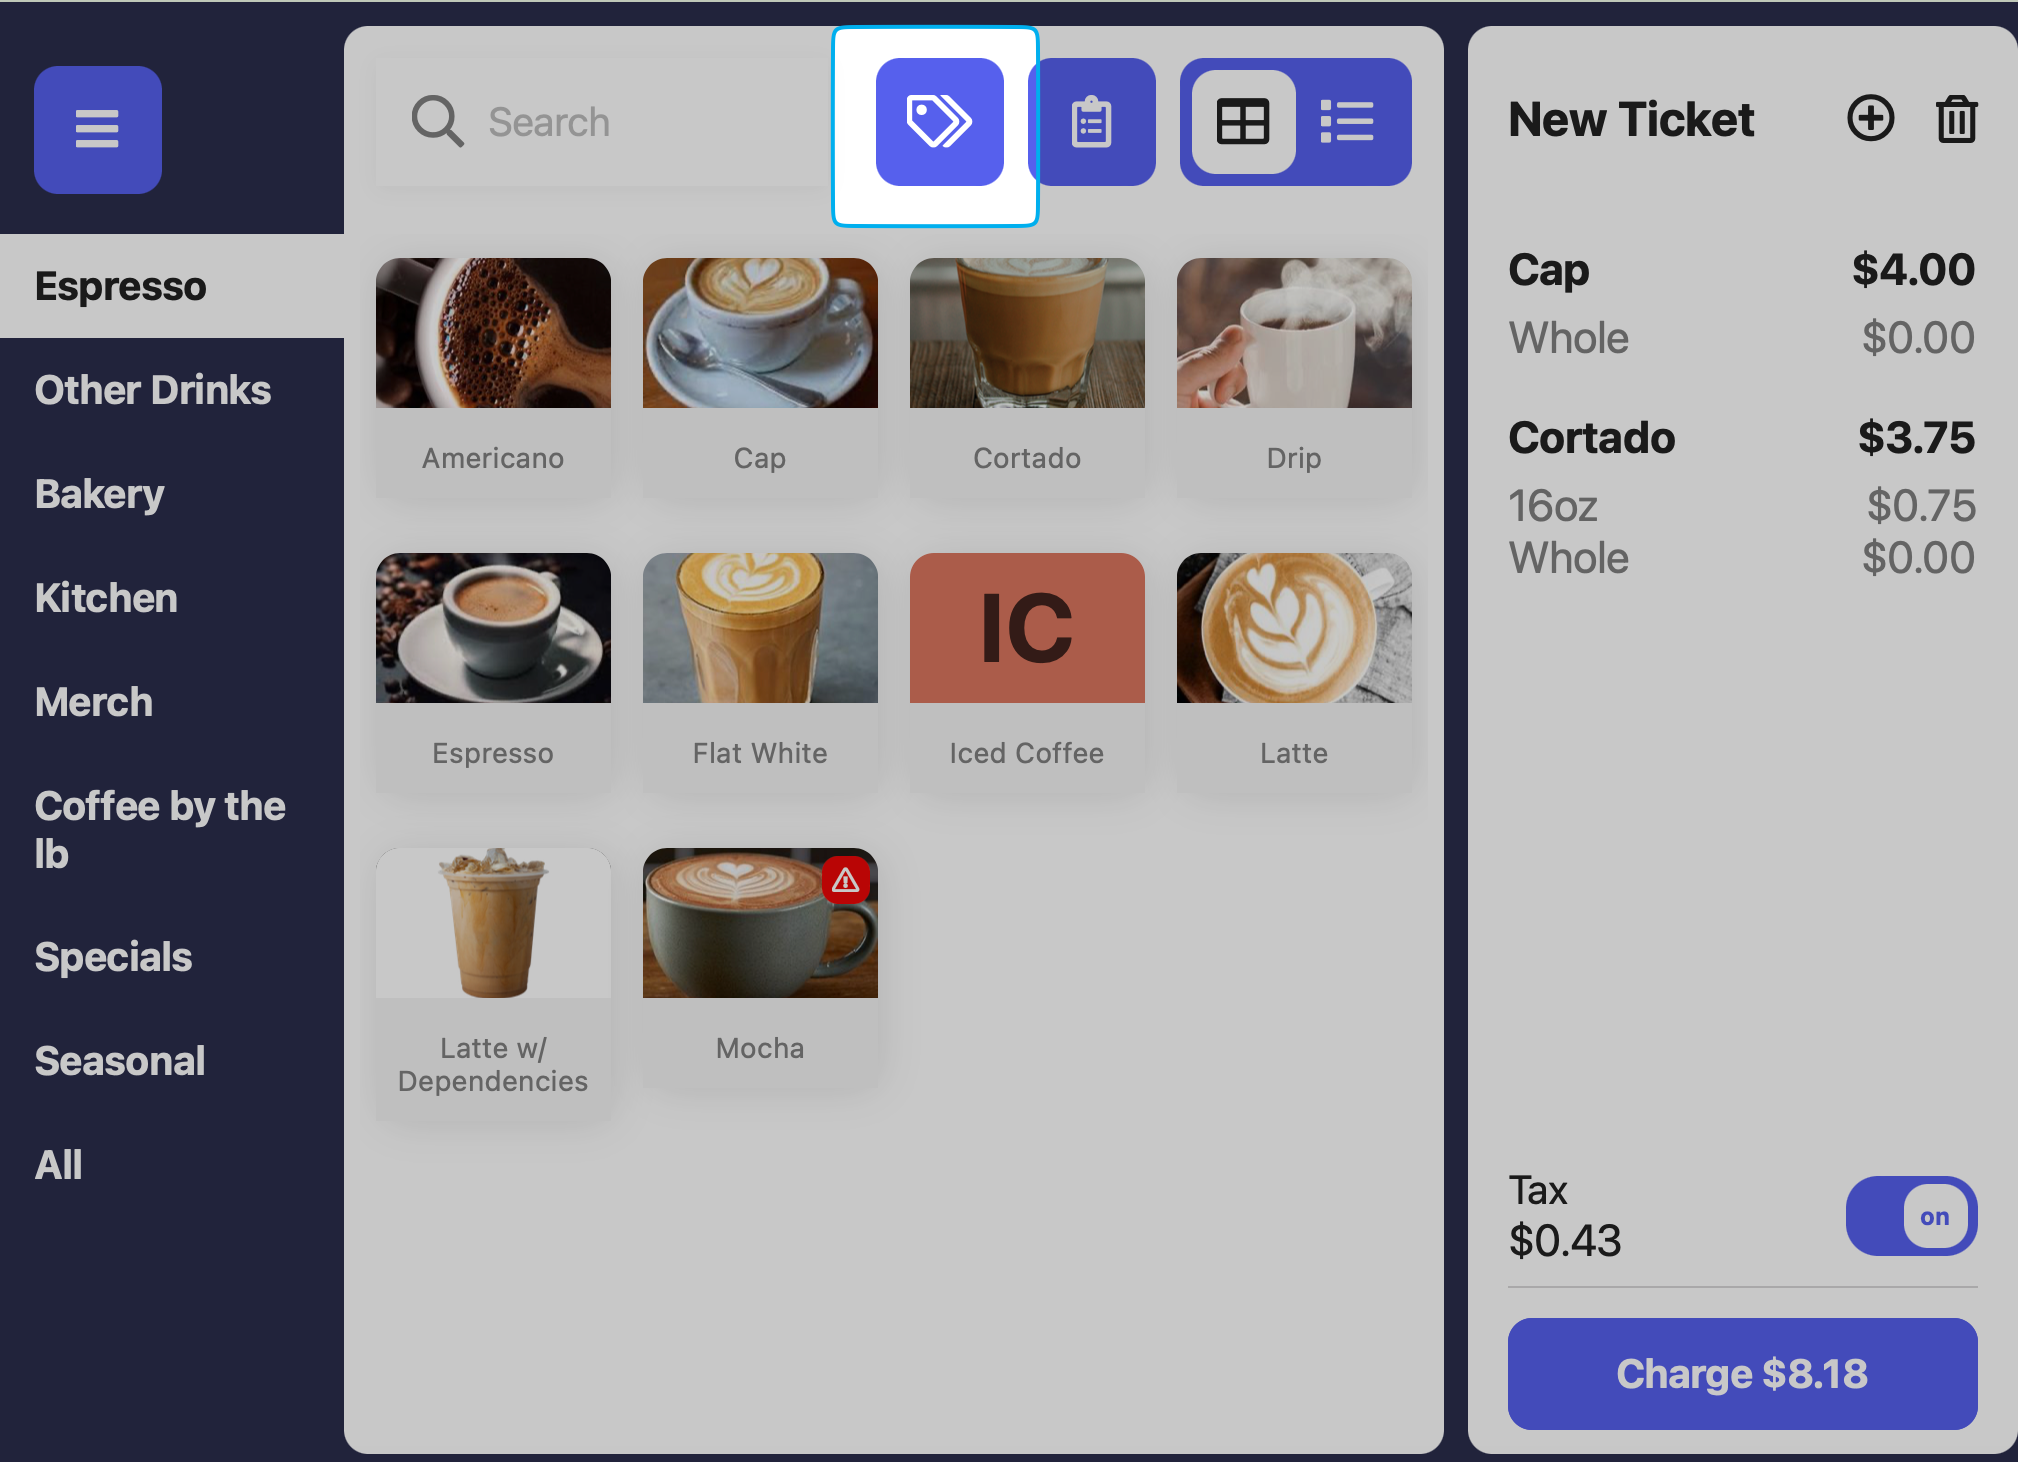
Near the bottom of the page, press Custom % or Customer $ to apply a customer percent or dollar discount, respectively.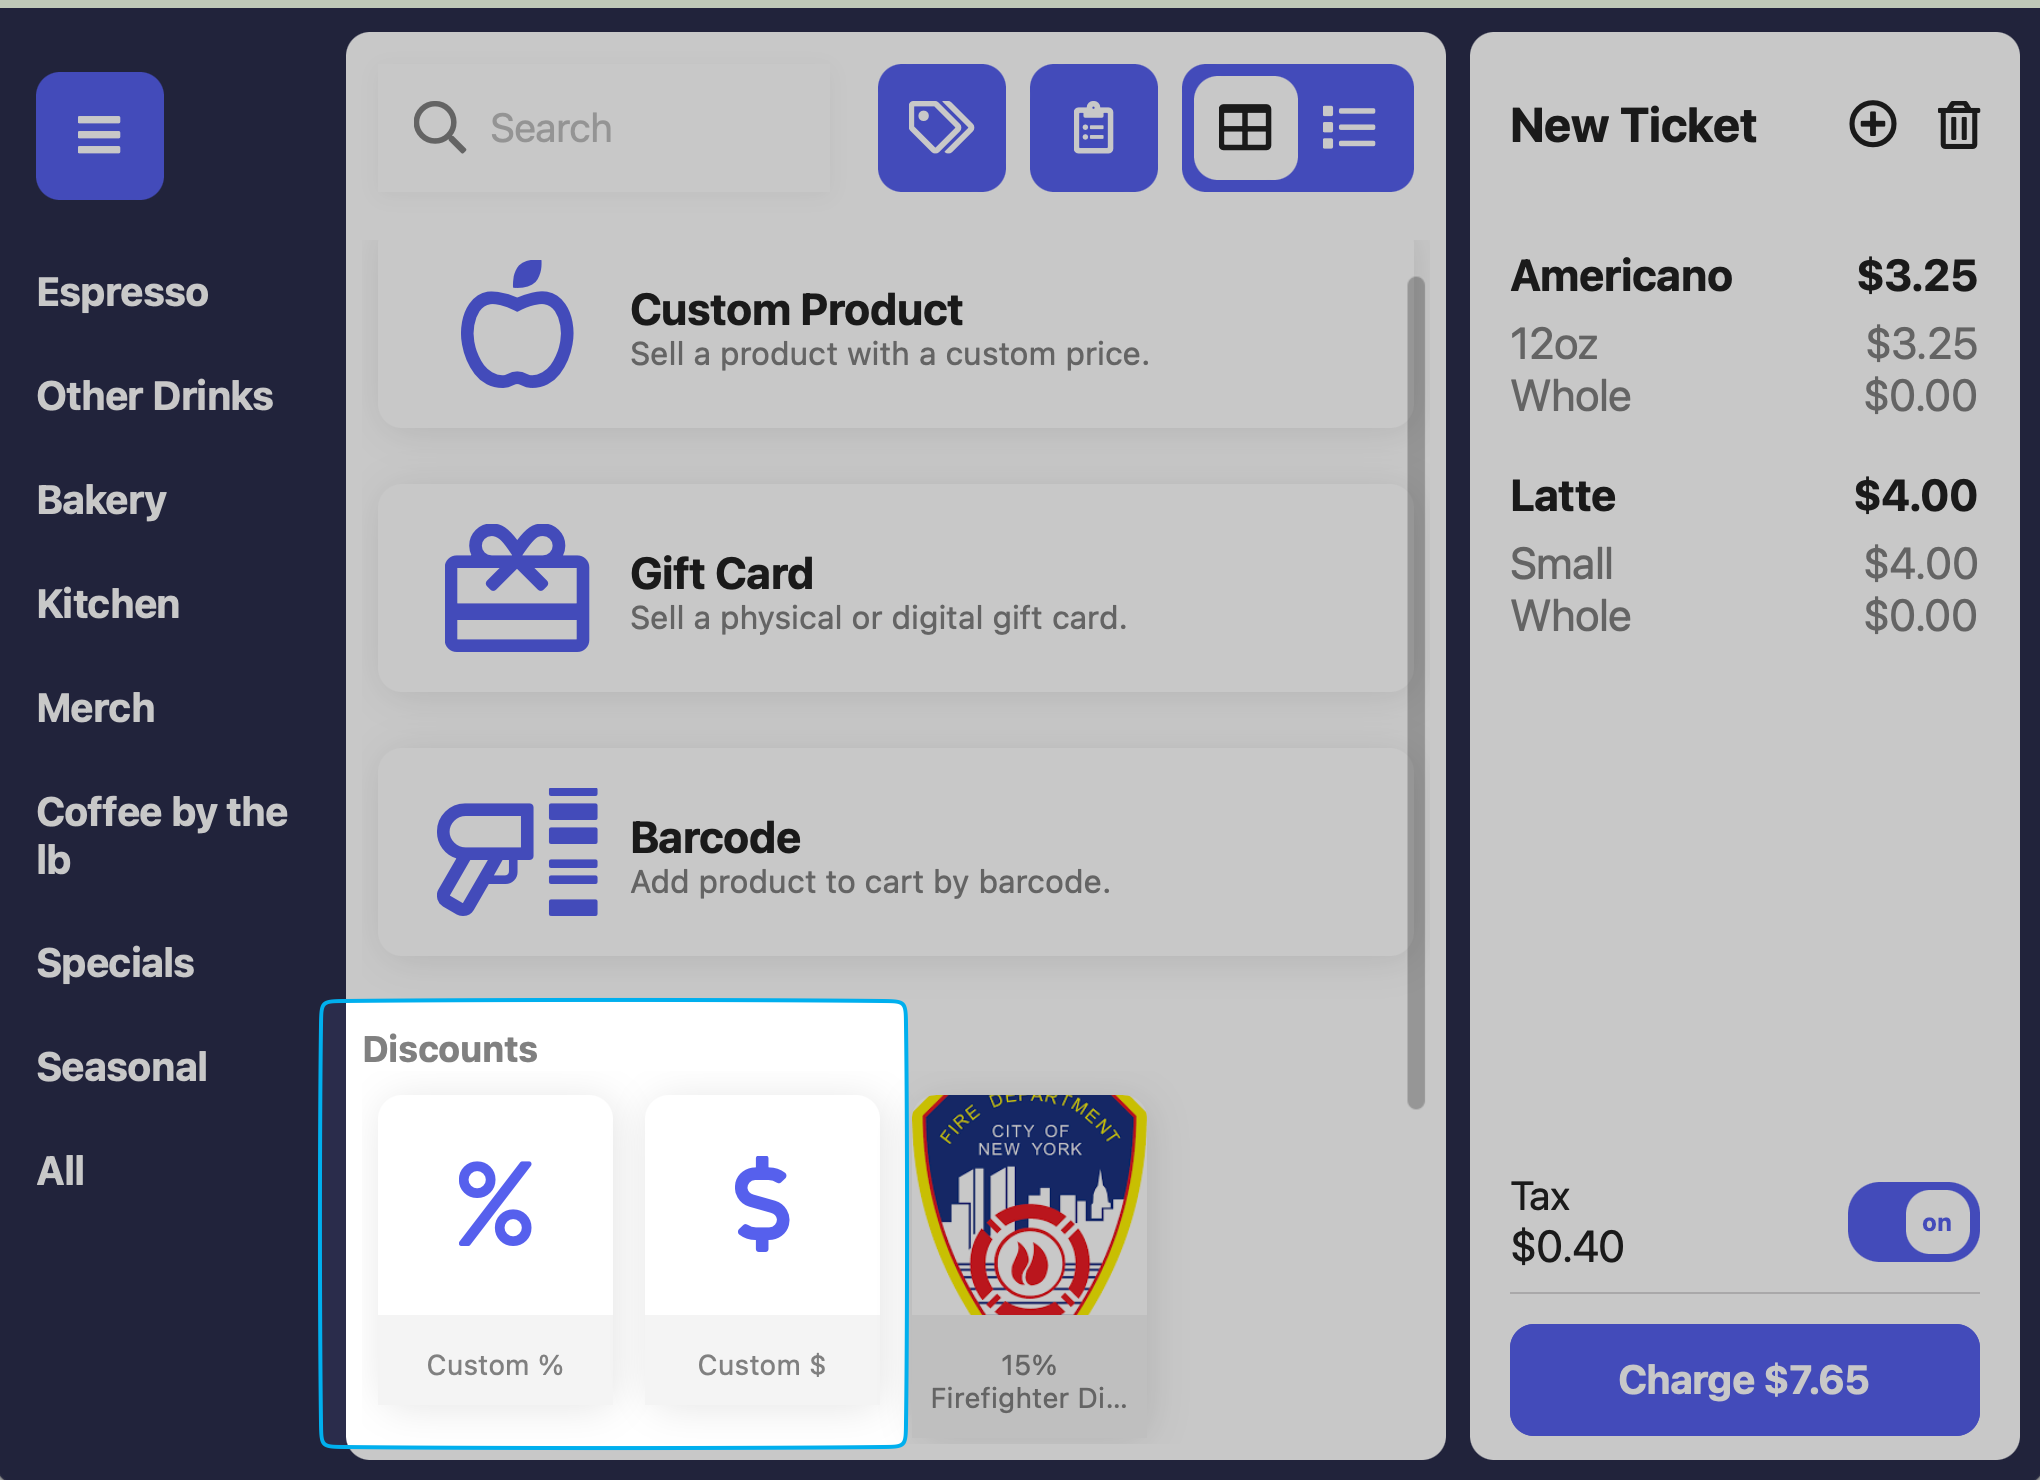
Type in the dollar or percent discount amount. This discount will apply to the entire order total.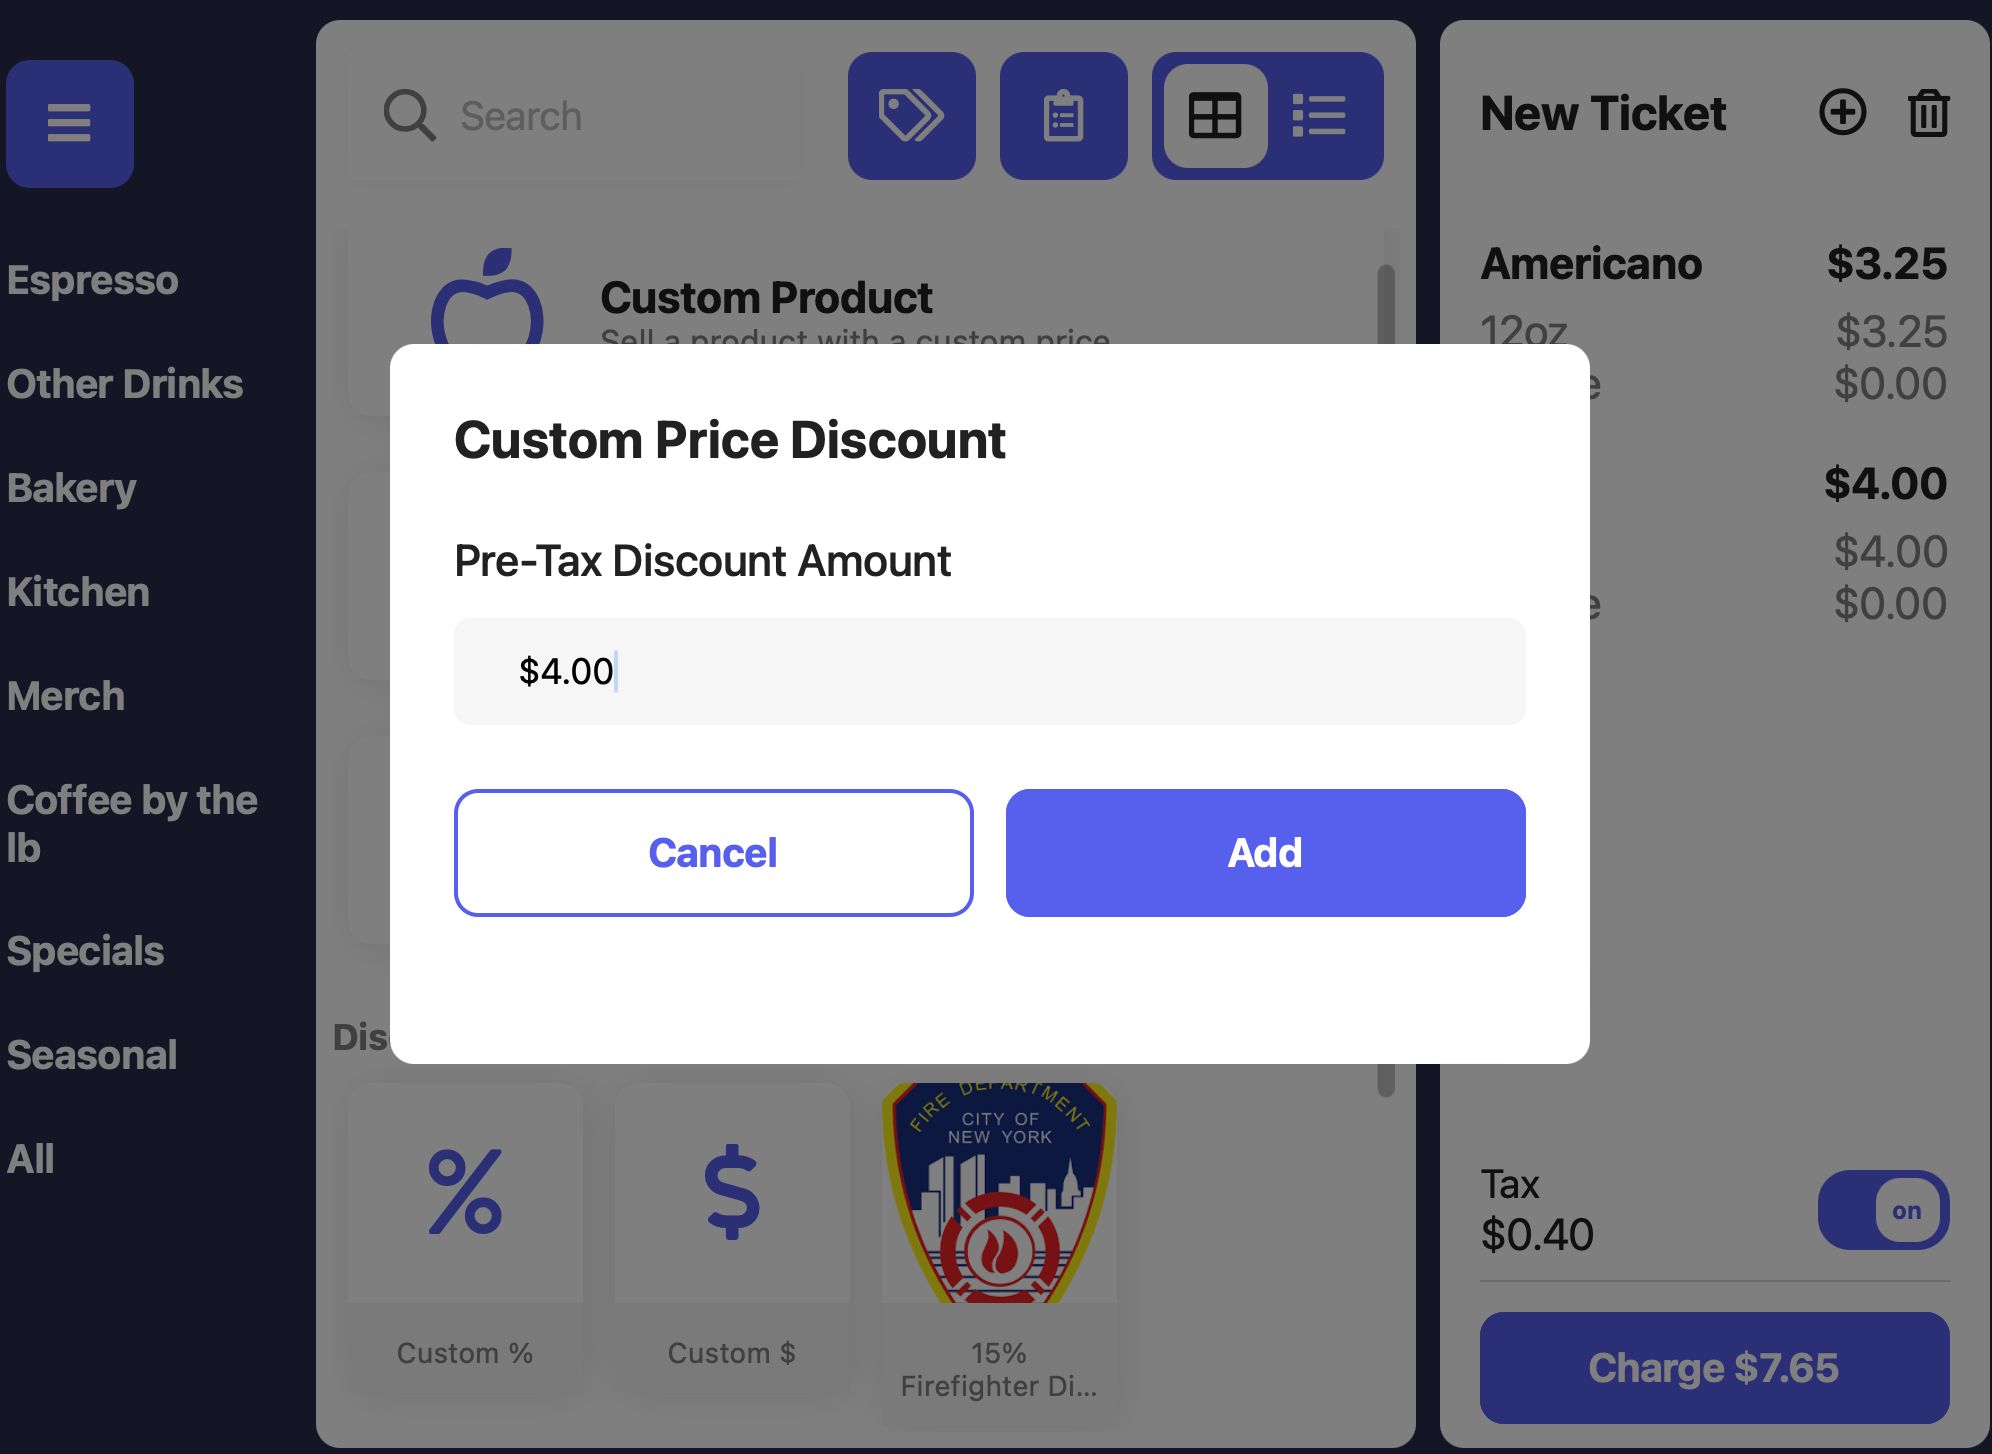
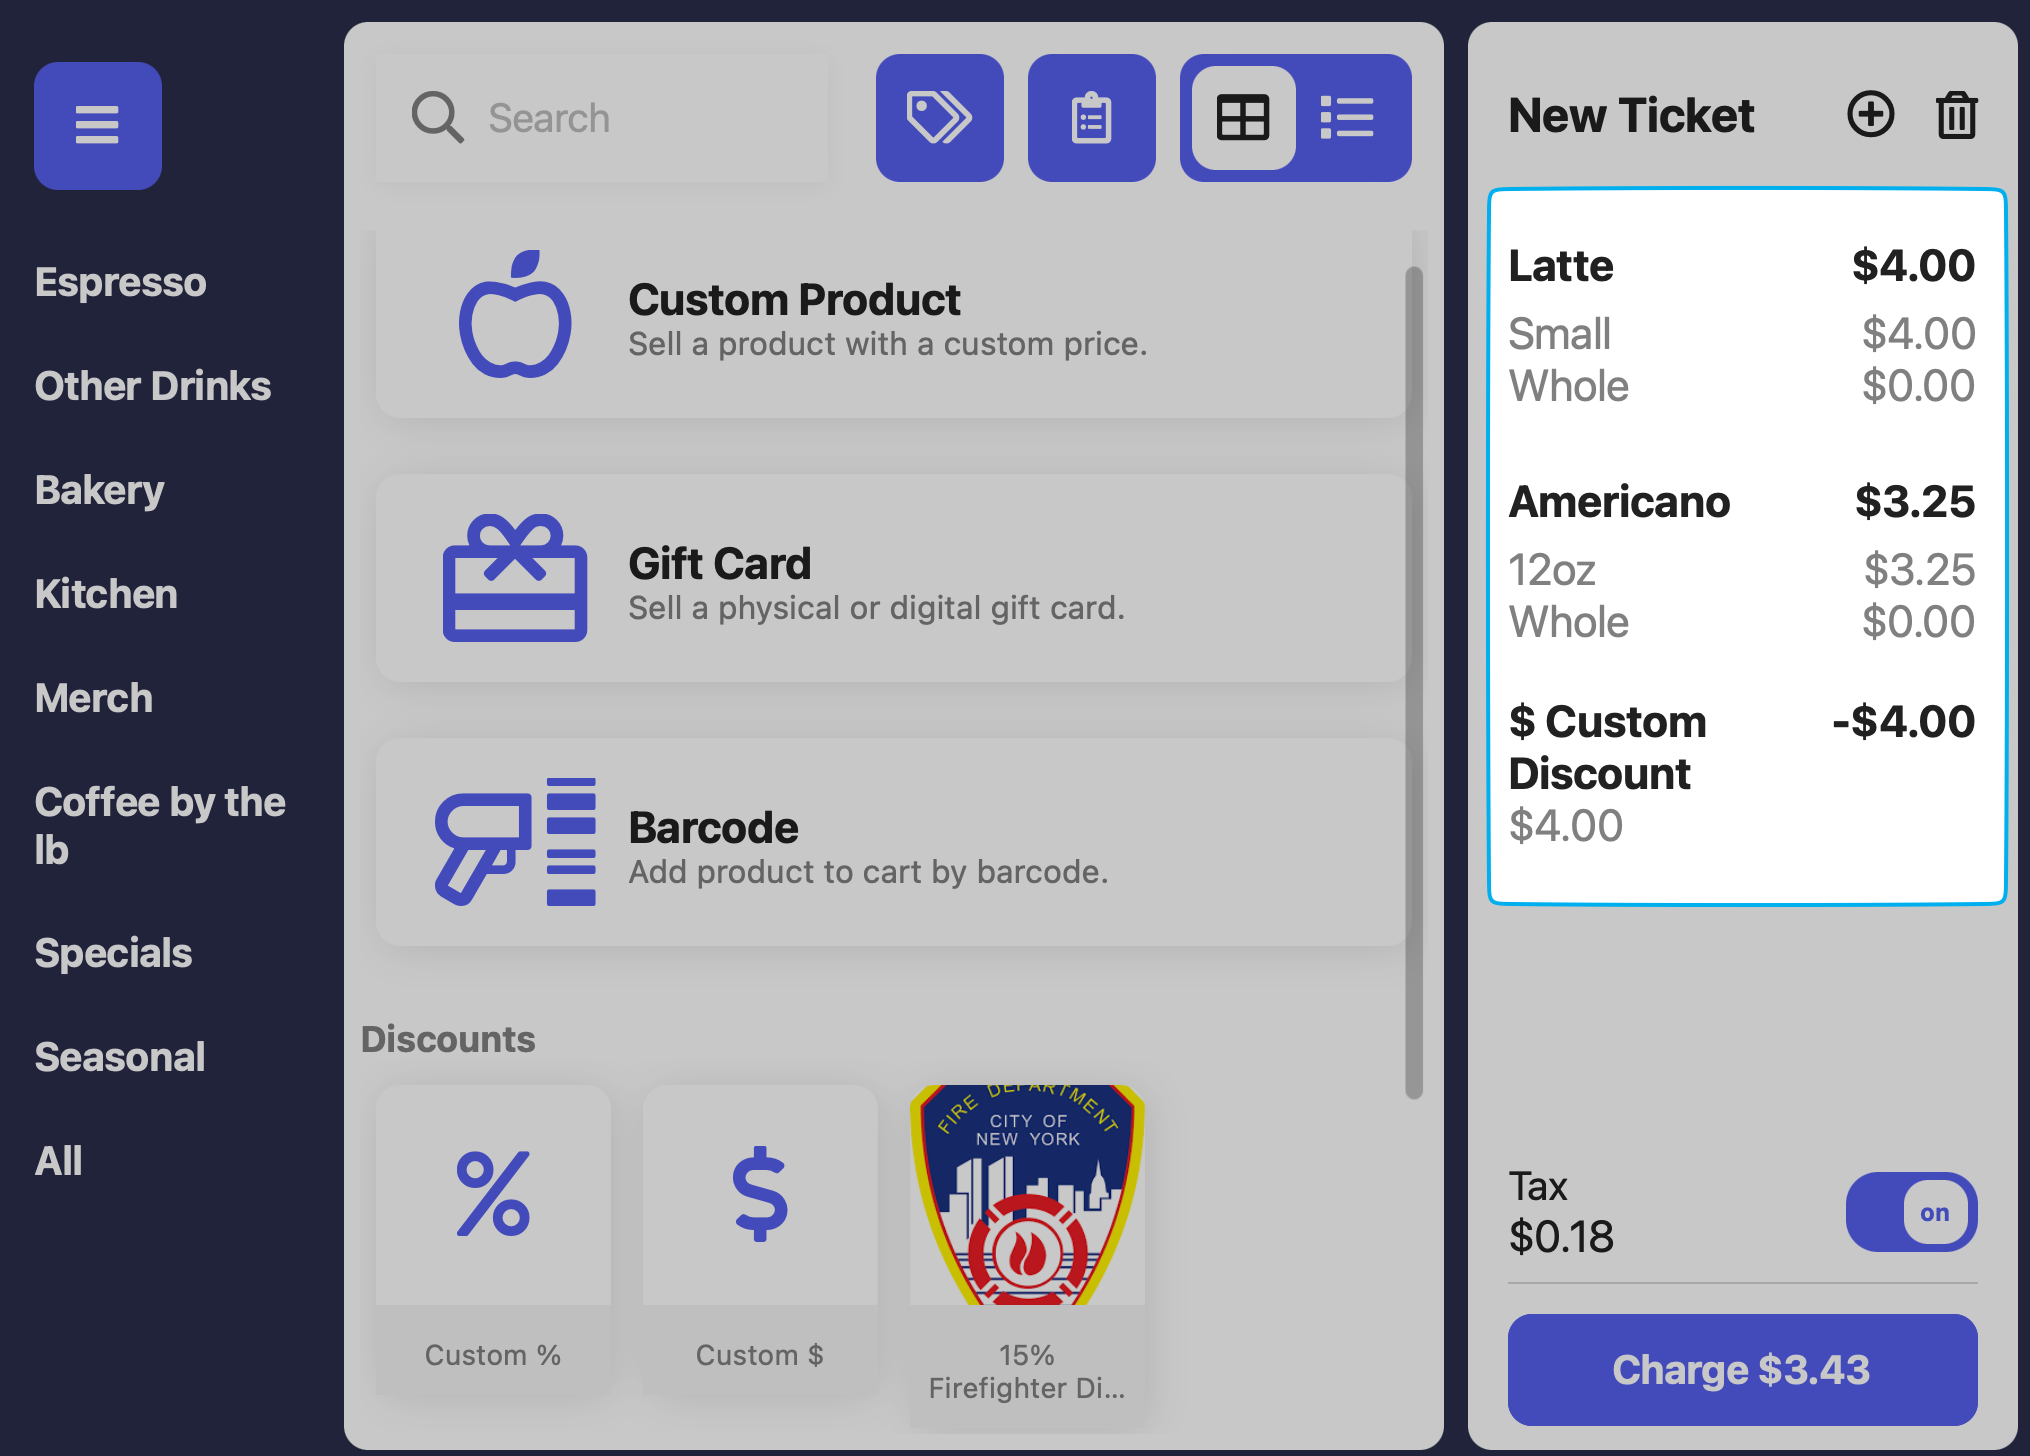
Custom ticket discounts will always apply to the order’s pre-tax total.