Create a Product
How to Create a Product
How to Create a Product
1
Create new product
On the Dashboard, select Menu > Products > Create Product
2
Fill in the following information:
- Product Name
- Product Category
- Product Description
- Product Image: Upload an image of the product that will display on all ordering platforms
- Preset Image: Select a preset image that will display next to the product on all ordering platforms
- Platforms: Select which of your ordering platforms you want the product to be enabled on for ordering
Tax Settings
Tax Settings
- Tax Disabled: If set to yes, this product will not be taxed.
- Tax Override: If set to yes, taxes will be applied to this product even if ordered with a tax disabled order type
POS Settings
POS Settings
- One Click: If set to yes, selecting this item on the POS will automatically add it to the cart.
- Auto Complete Product: If set to yes, the product will be automatically completed upon purchase, and will not appear on the ticket screen.
- Icon Color for the POS: Select a background color for the optional icon that will display on the register screen of the POS
- Abbreviation for the POS: Select up to a four-letter abbreviation of the product.
Mobile Settings
Mobile Settings
- Require Advanced Notice: If set to yes, the product will require advanced notice when ordering. You will then need to specify the number of days notice be given to order this product in the box below.
- Minimum Quantity: Optionally input a minimum quantity of this product that must be ordered for mobile orders. This does not impact POS orders.
- Maximum Quantity: Optionally input a maximum quantity of this product that can be purchased in a mobile order. This does not impact POS orders.
Miscellaneous
Miscellaneous
- Preparation Instructions: Optionally attach preparation instructions for the cooks / baristas to view when making the product. These instructions will be displayed on printed Make Tickets printed with the Legacy Printing mode.
- Is Alcohol: If set to yes, this indicates that the product contains alcohol
3
Save Product
Click Create in the bottom right corner. The product will then be added into the system and will display at the top of your product list.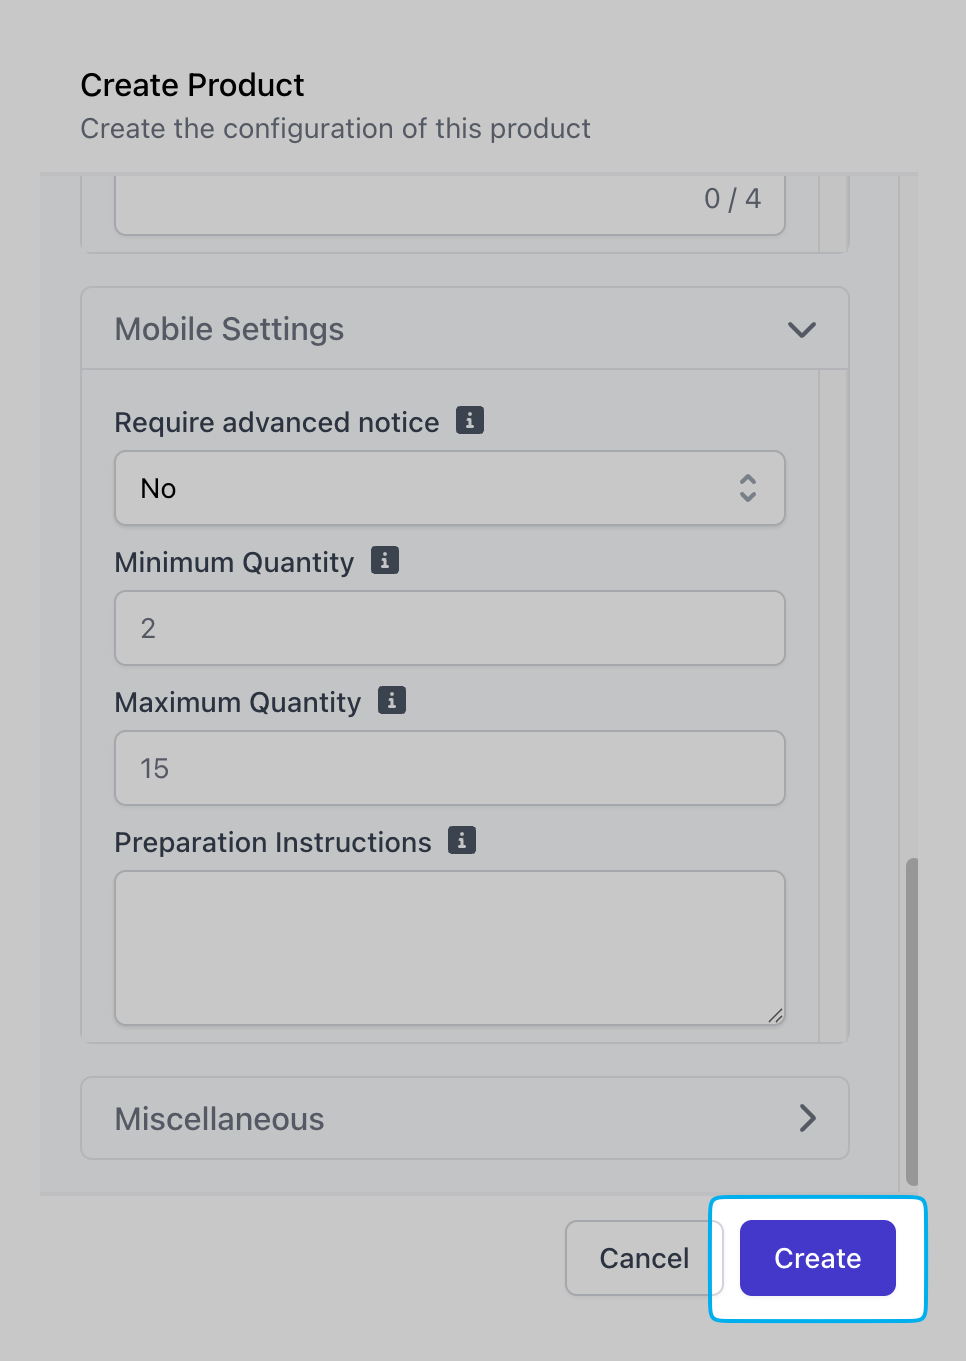
Product Pricing
There a multiple ways in which a product can be priced. To add pricing to a product,- Go to product’s page on the Dashboard (Menu > Products > View Product)
- Scroll down to the bottom of the product’s page
- Click the Pricing tab
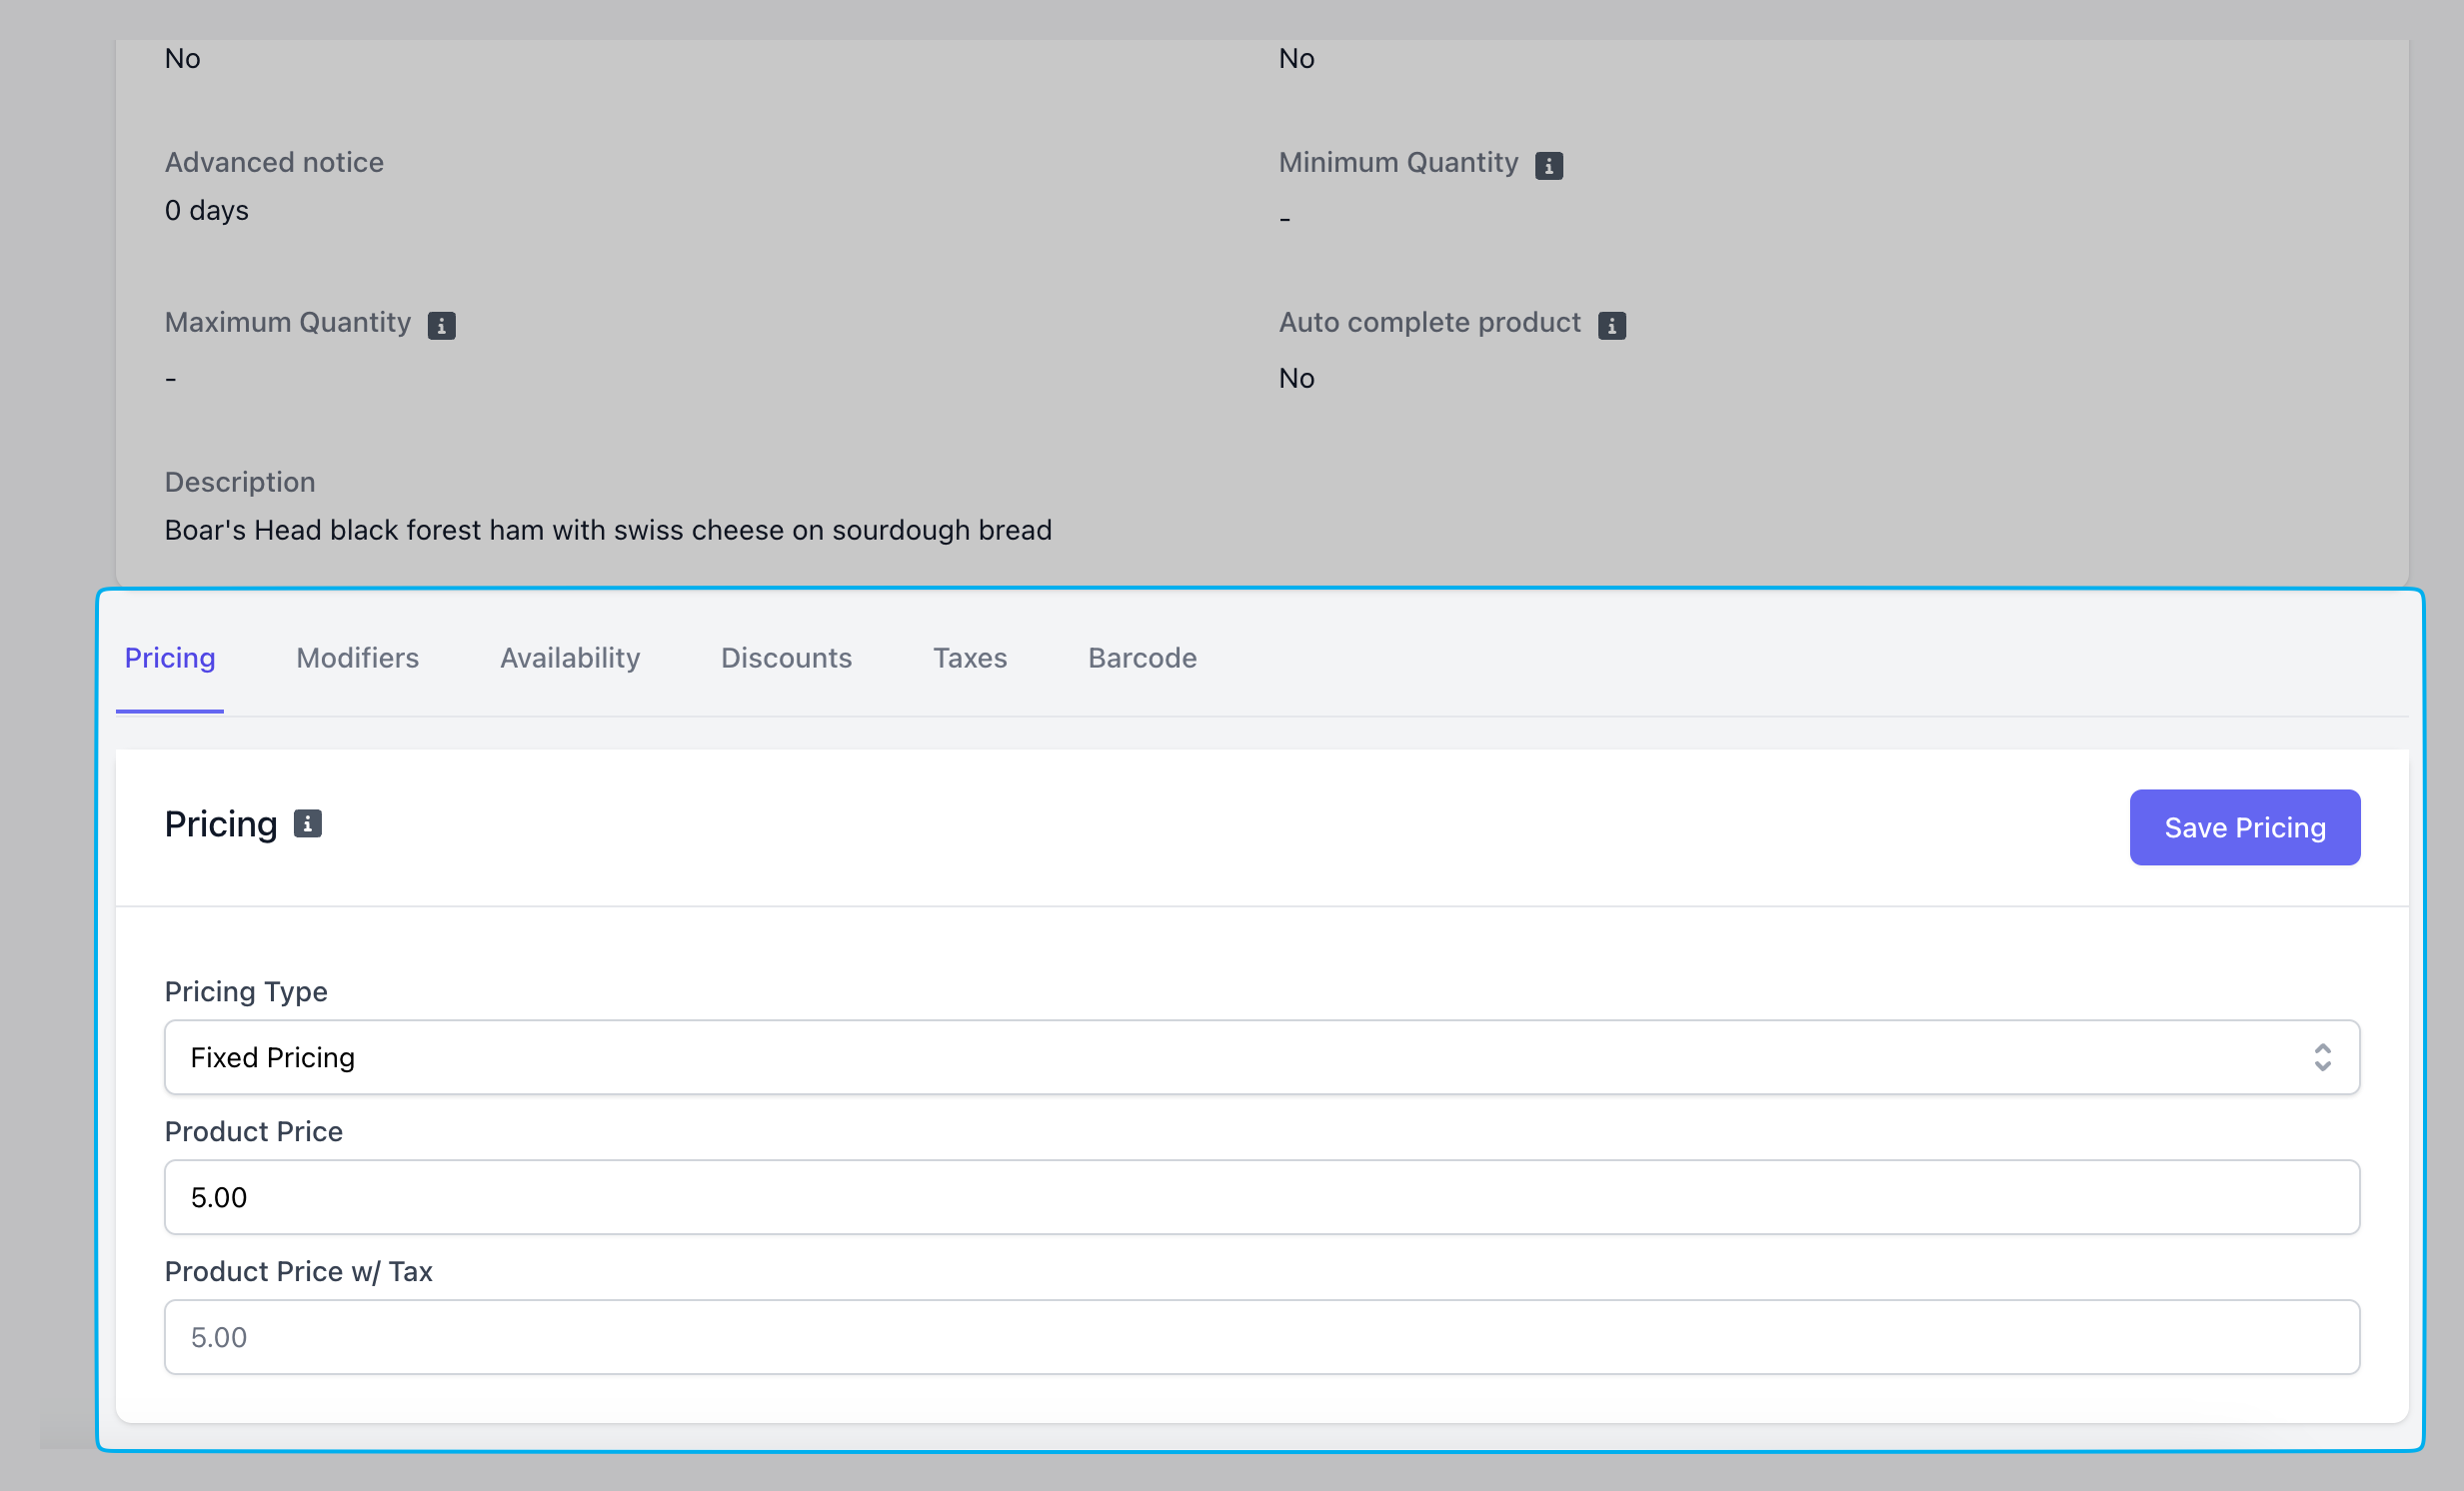
Fixed Pricing
Fixed Pricing
The product’s base price will be one fixed cost (i.e., a $3 muffin, a $5 one-sized cold brew)Modifiers can be added on to the base price to increase the product’s total cost at checkout.
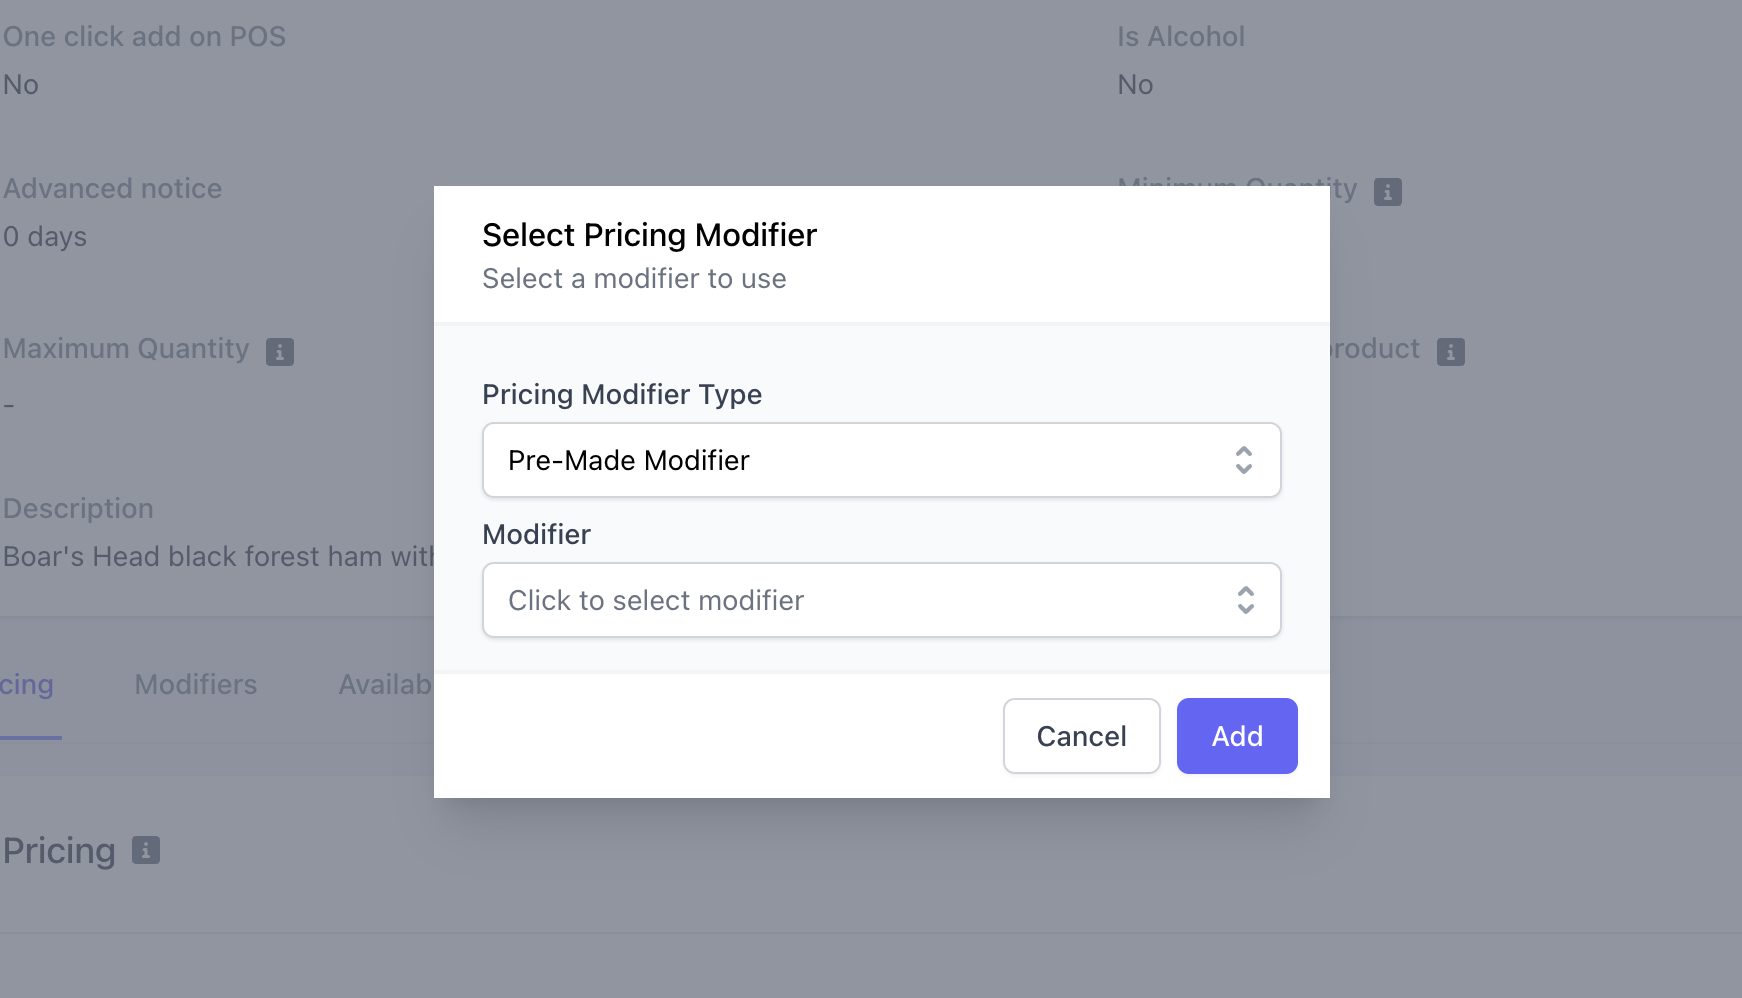
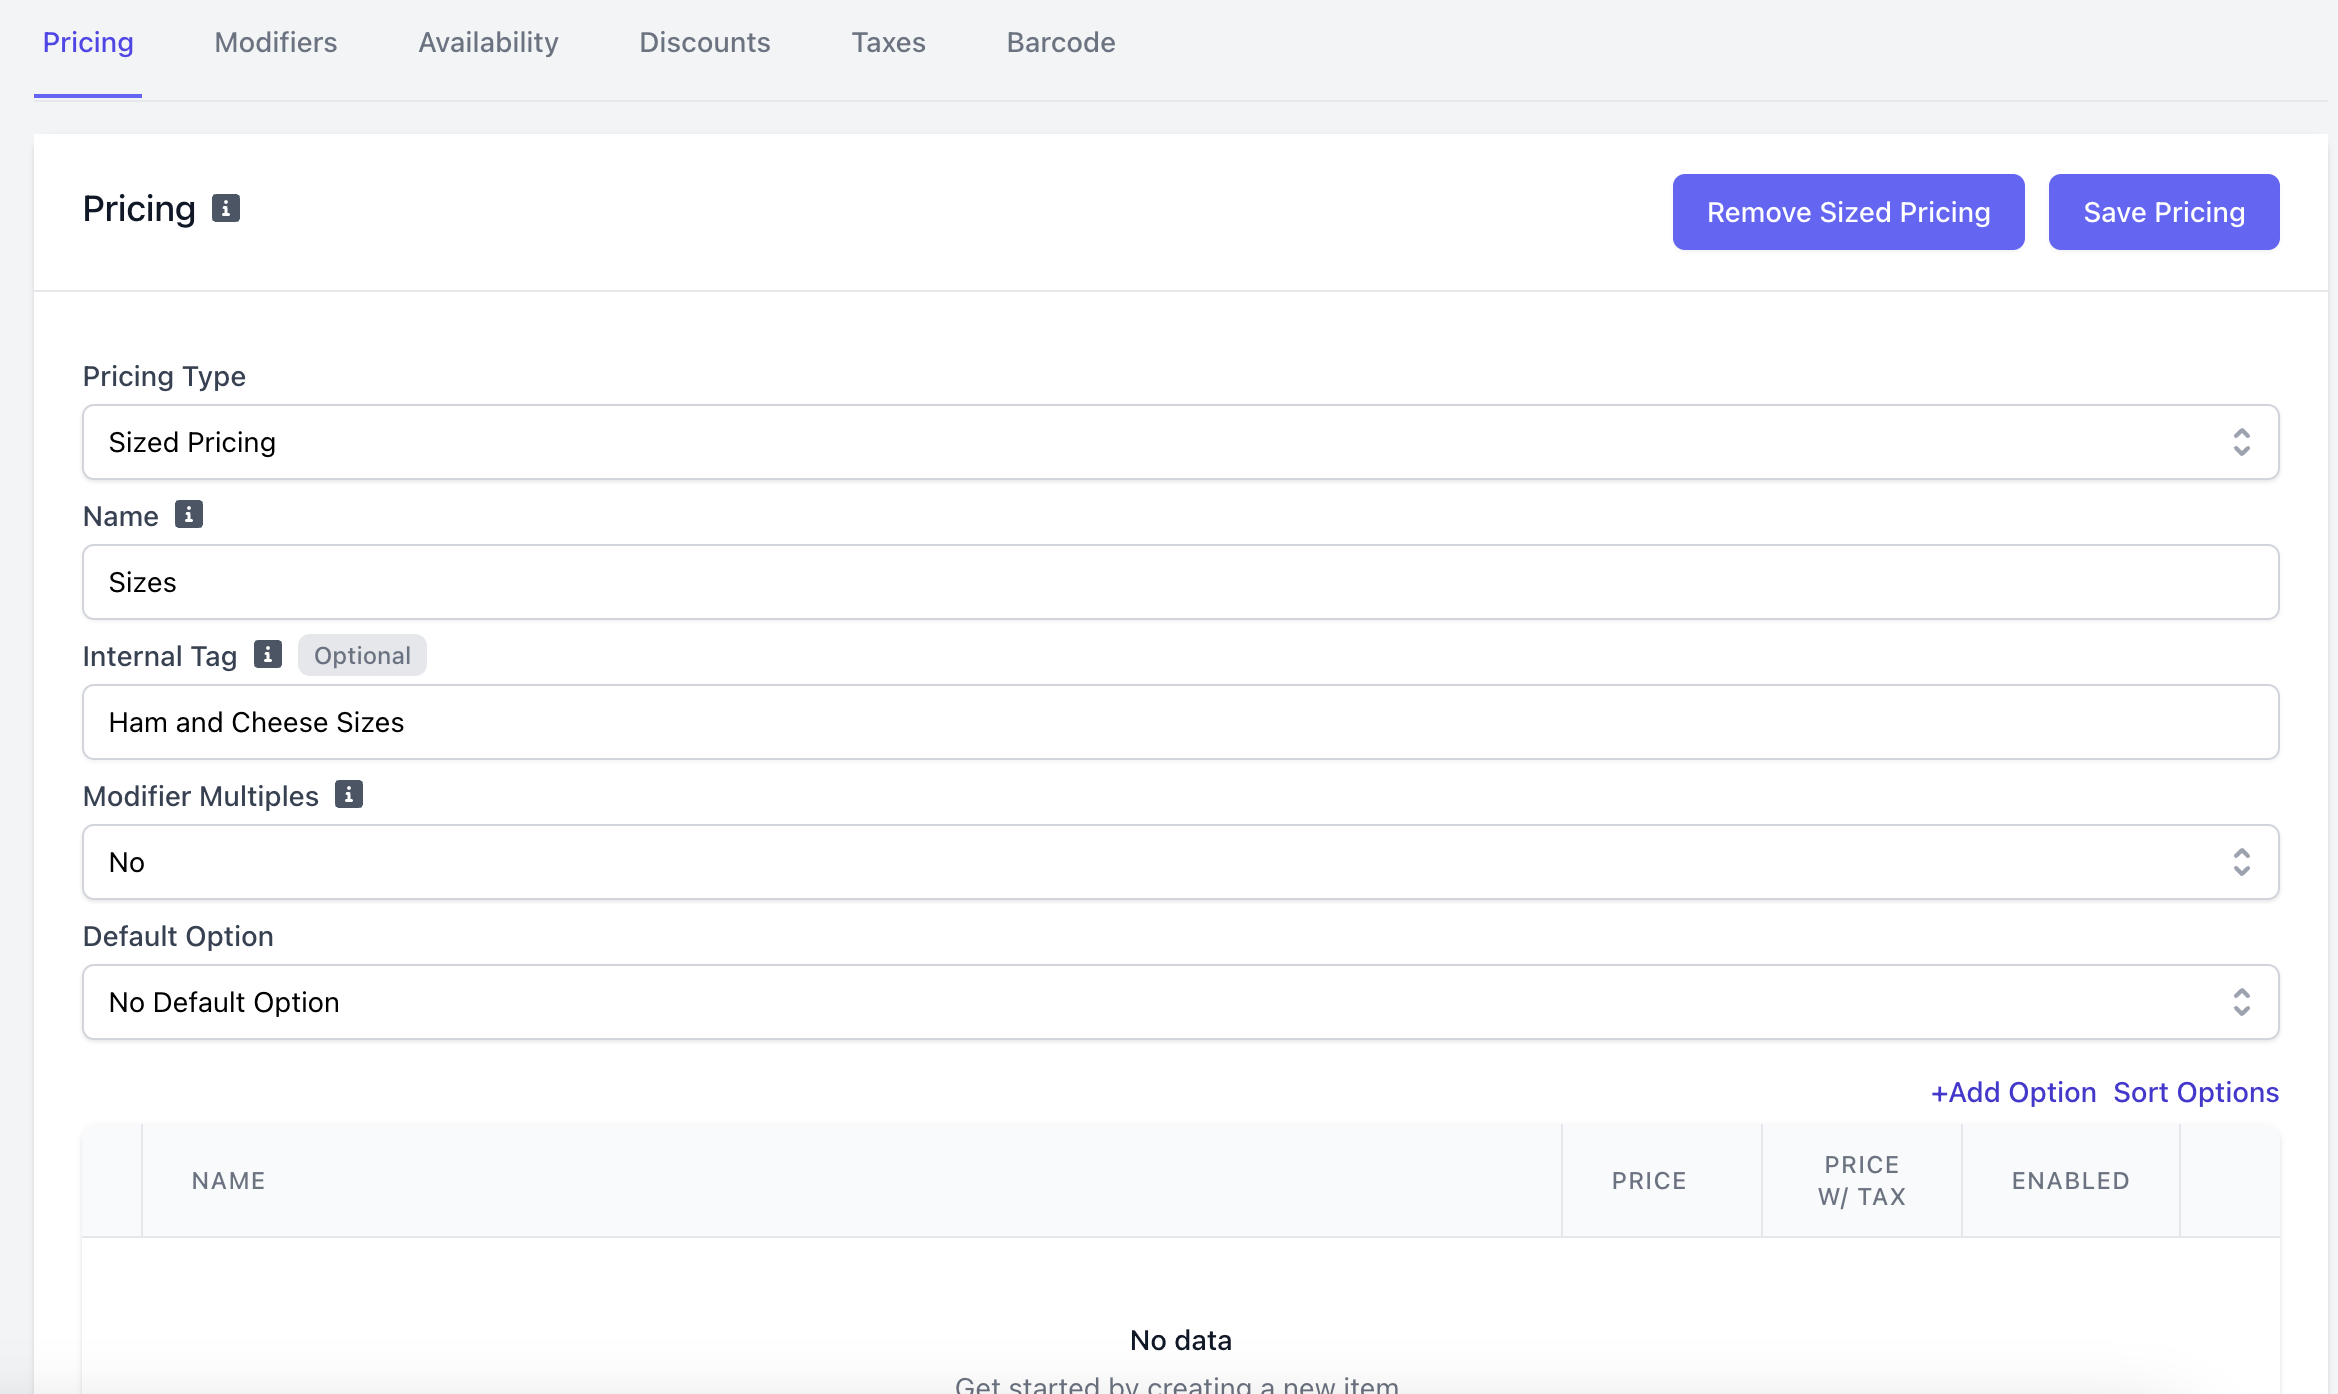
Sized Pricing
Sized Pricing
- Pre-made Modifier
- Custom Modifier

Variable Pricing
Variable Pricing
Price will be set at checkout on the Point of Sale. Set a base price and adjust the product total price upon checkout.
Weight Pricing
Weight Pricing
The price of the product will depend on its weight. Set a base price and adjust the product total price upon checkout.
Manage Products
Product Modifiers
Product Modifiers
Product Availability
Product Availability
Determine the days and time for which this product will be available for ordering on all Dripos platforms.
1
Add Availability
On the Dashboard under Menu > Products > View a product > see Availability at the bottom of the page > Add Availability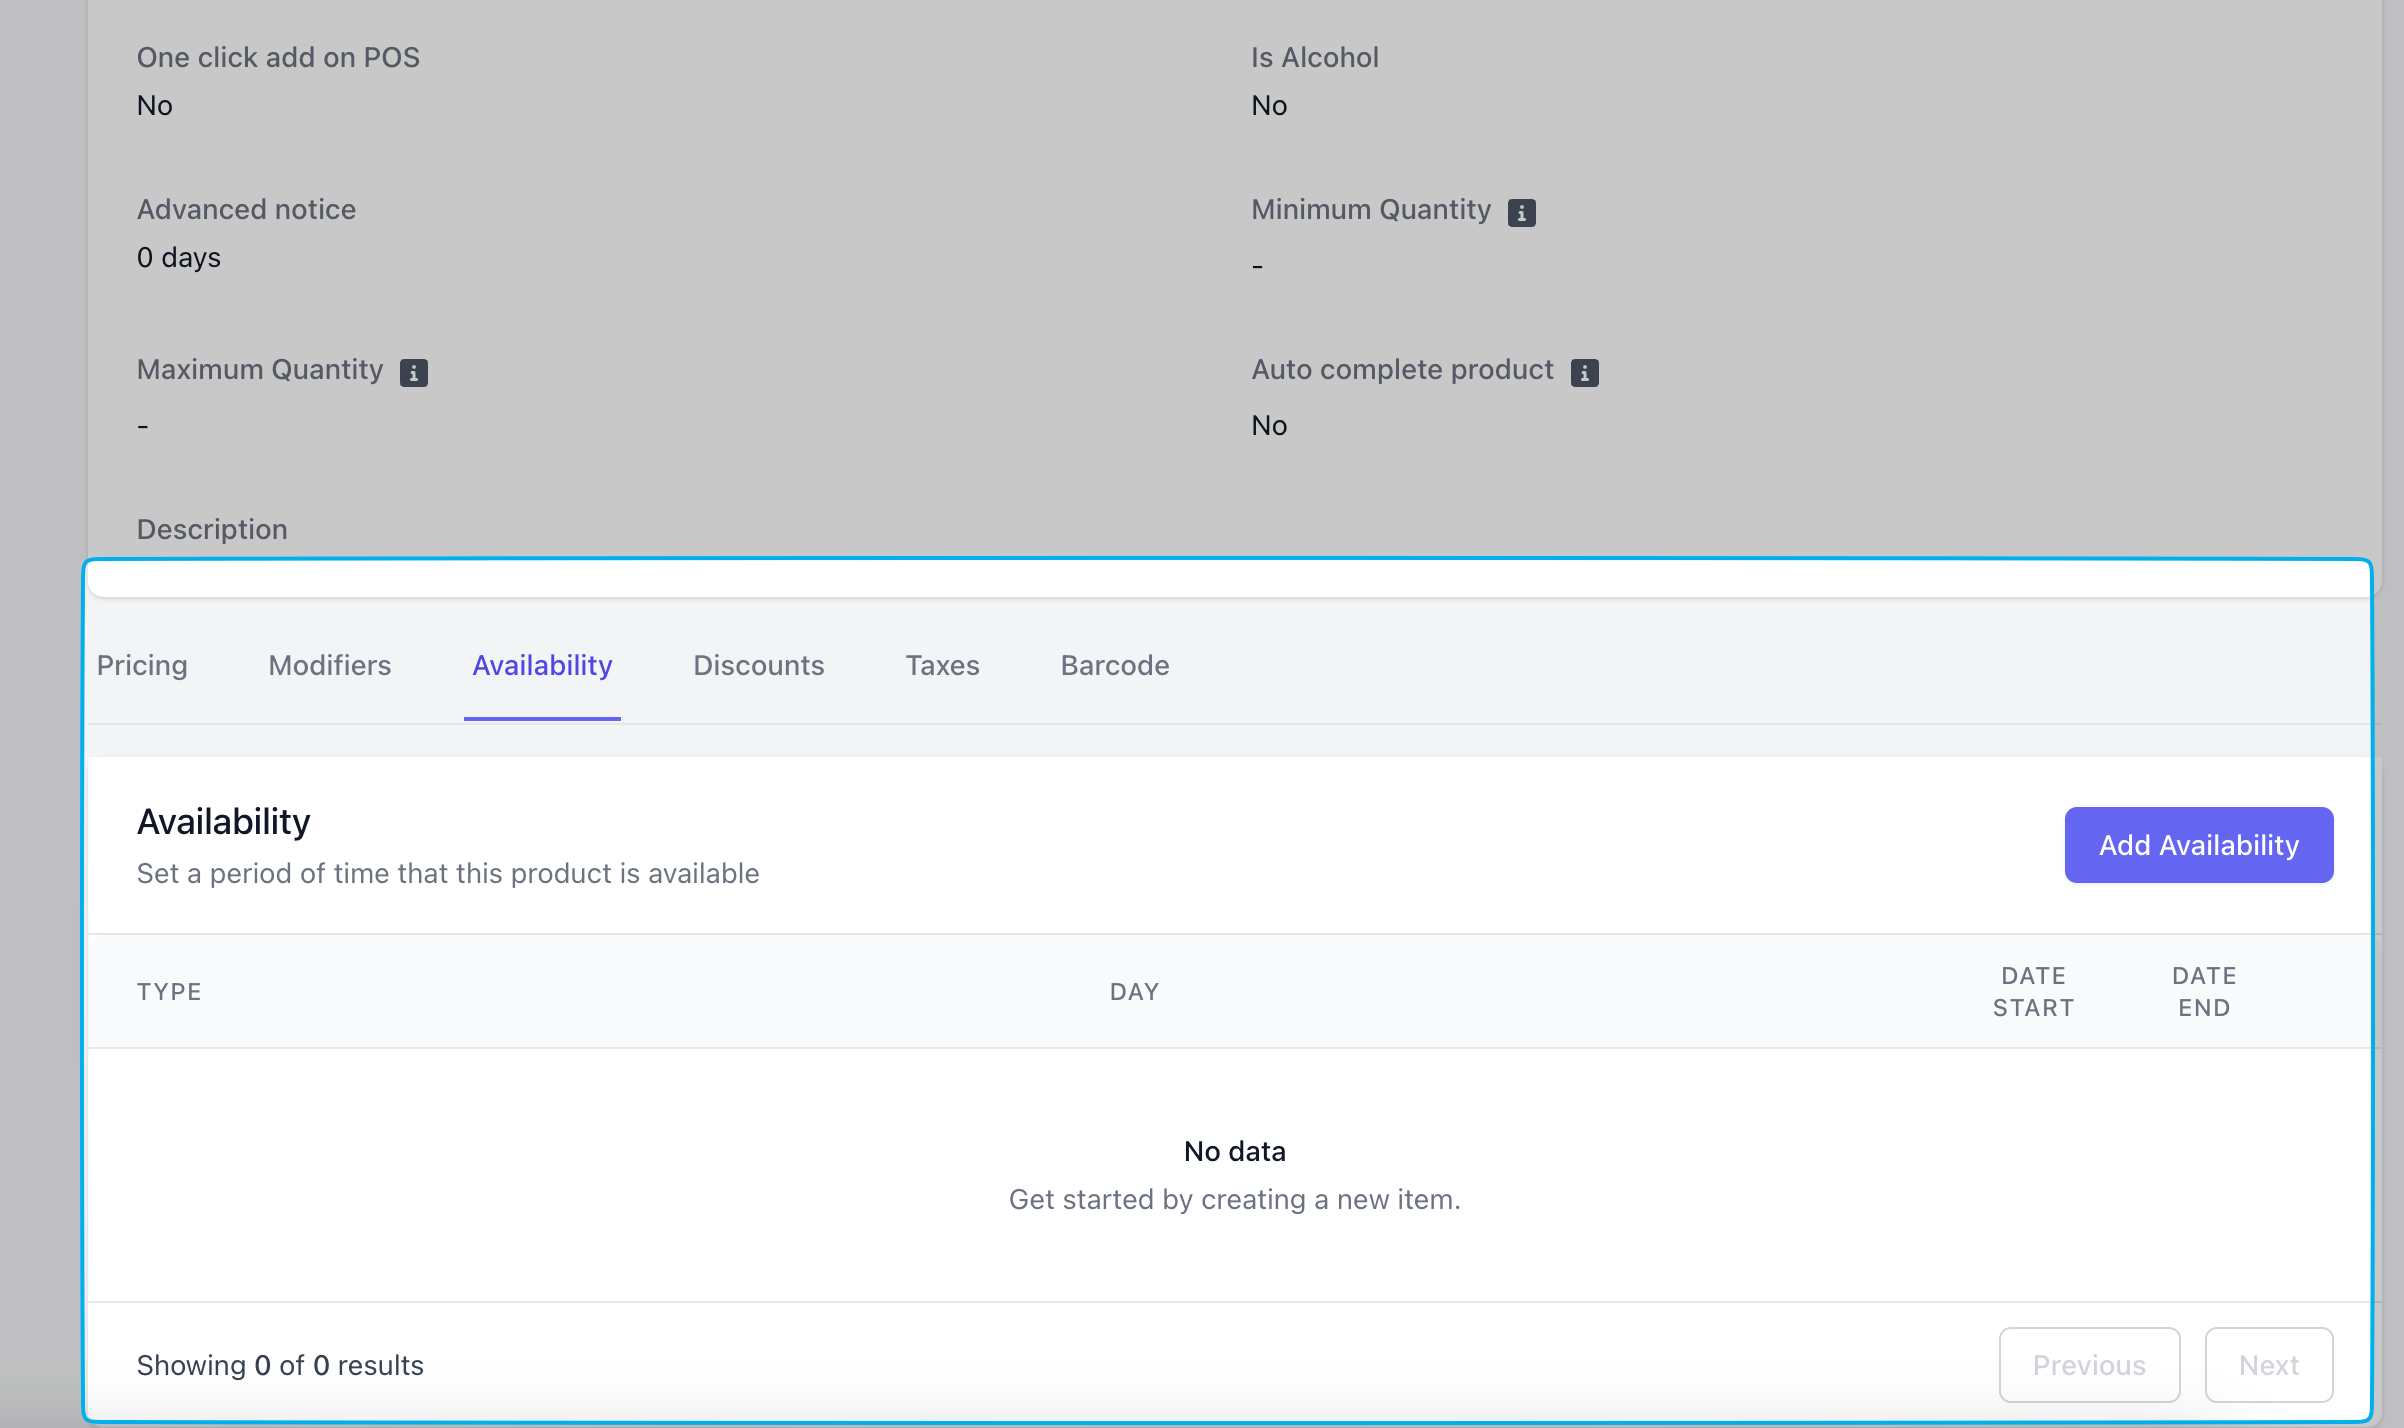
2
Pick Availability Type
- Date Range
- Daily Recurrence
Select a date range for when this order can be available.If Hide item when unavailable is set to Yes, customers will be able schedule an order ahead of time for pickup on the available date rangei.e., February 14th 8:00AM to February 15th 5:00PM, if item is not hidden a customer may place an order on February 8th for pickup on February 14th at 10AM
Product Tax Rates
Product Tax Rates
Add tax rates to a product at the very bottom of the product’s page.Additionally, if the product’s category has a tax rate applied to it that tax rate will automatically be applied to the product.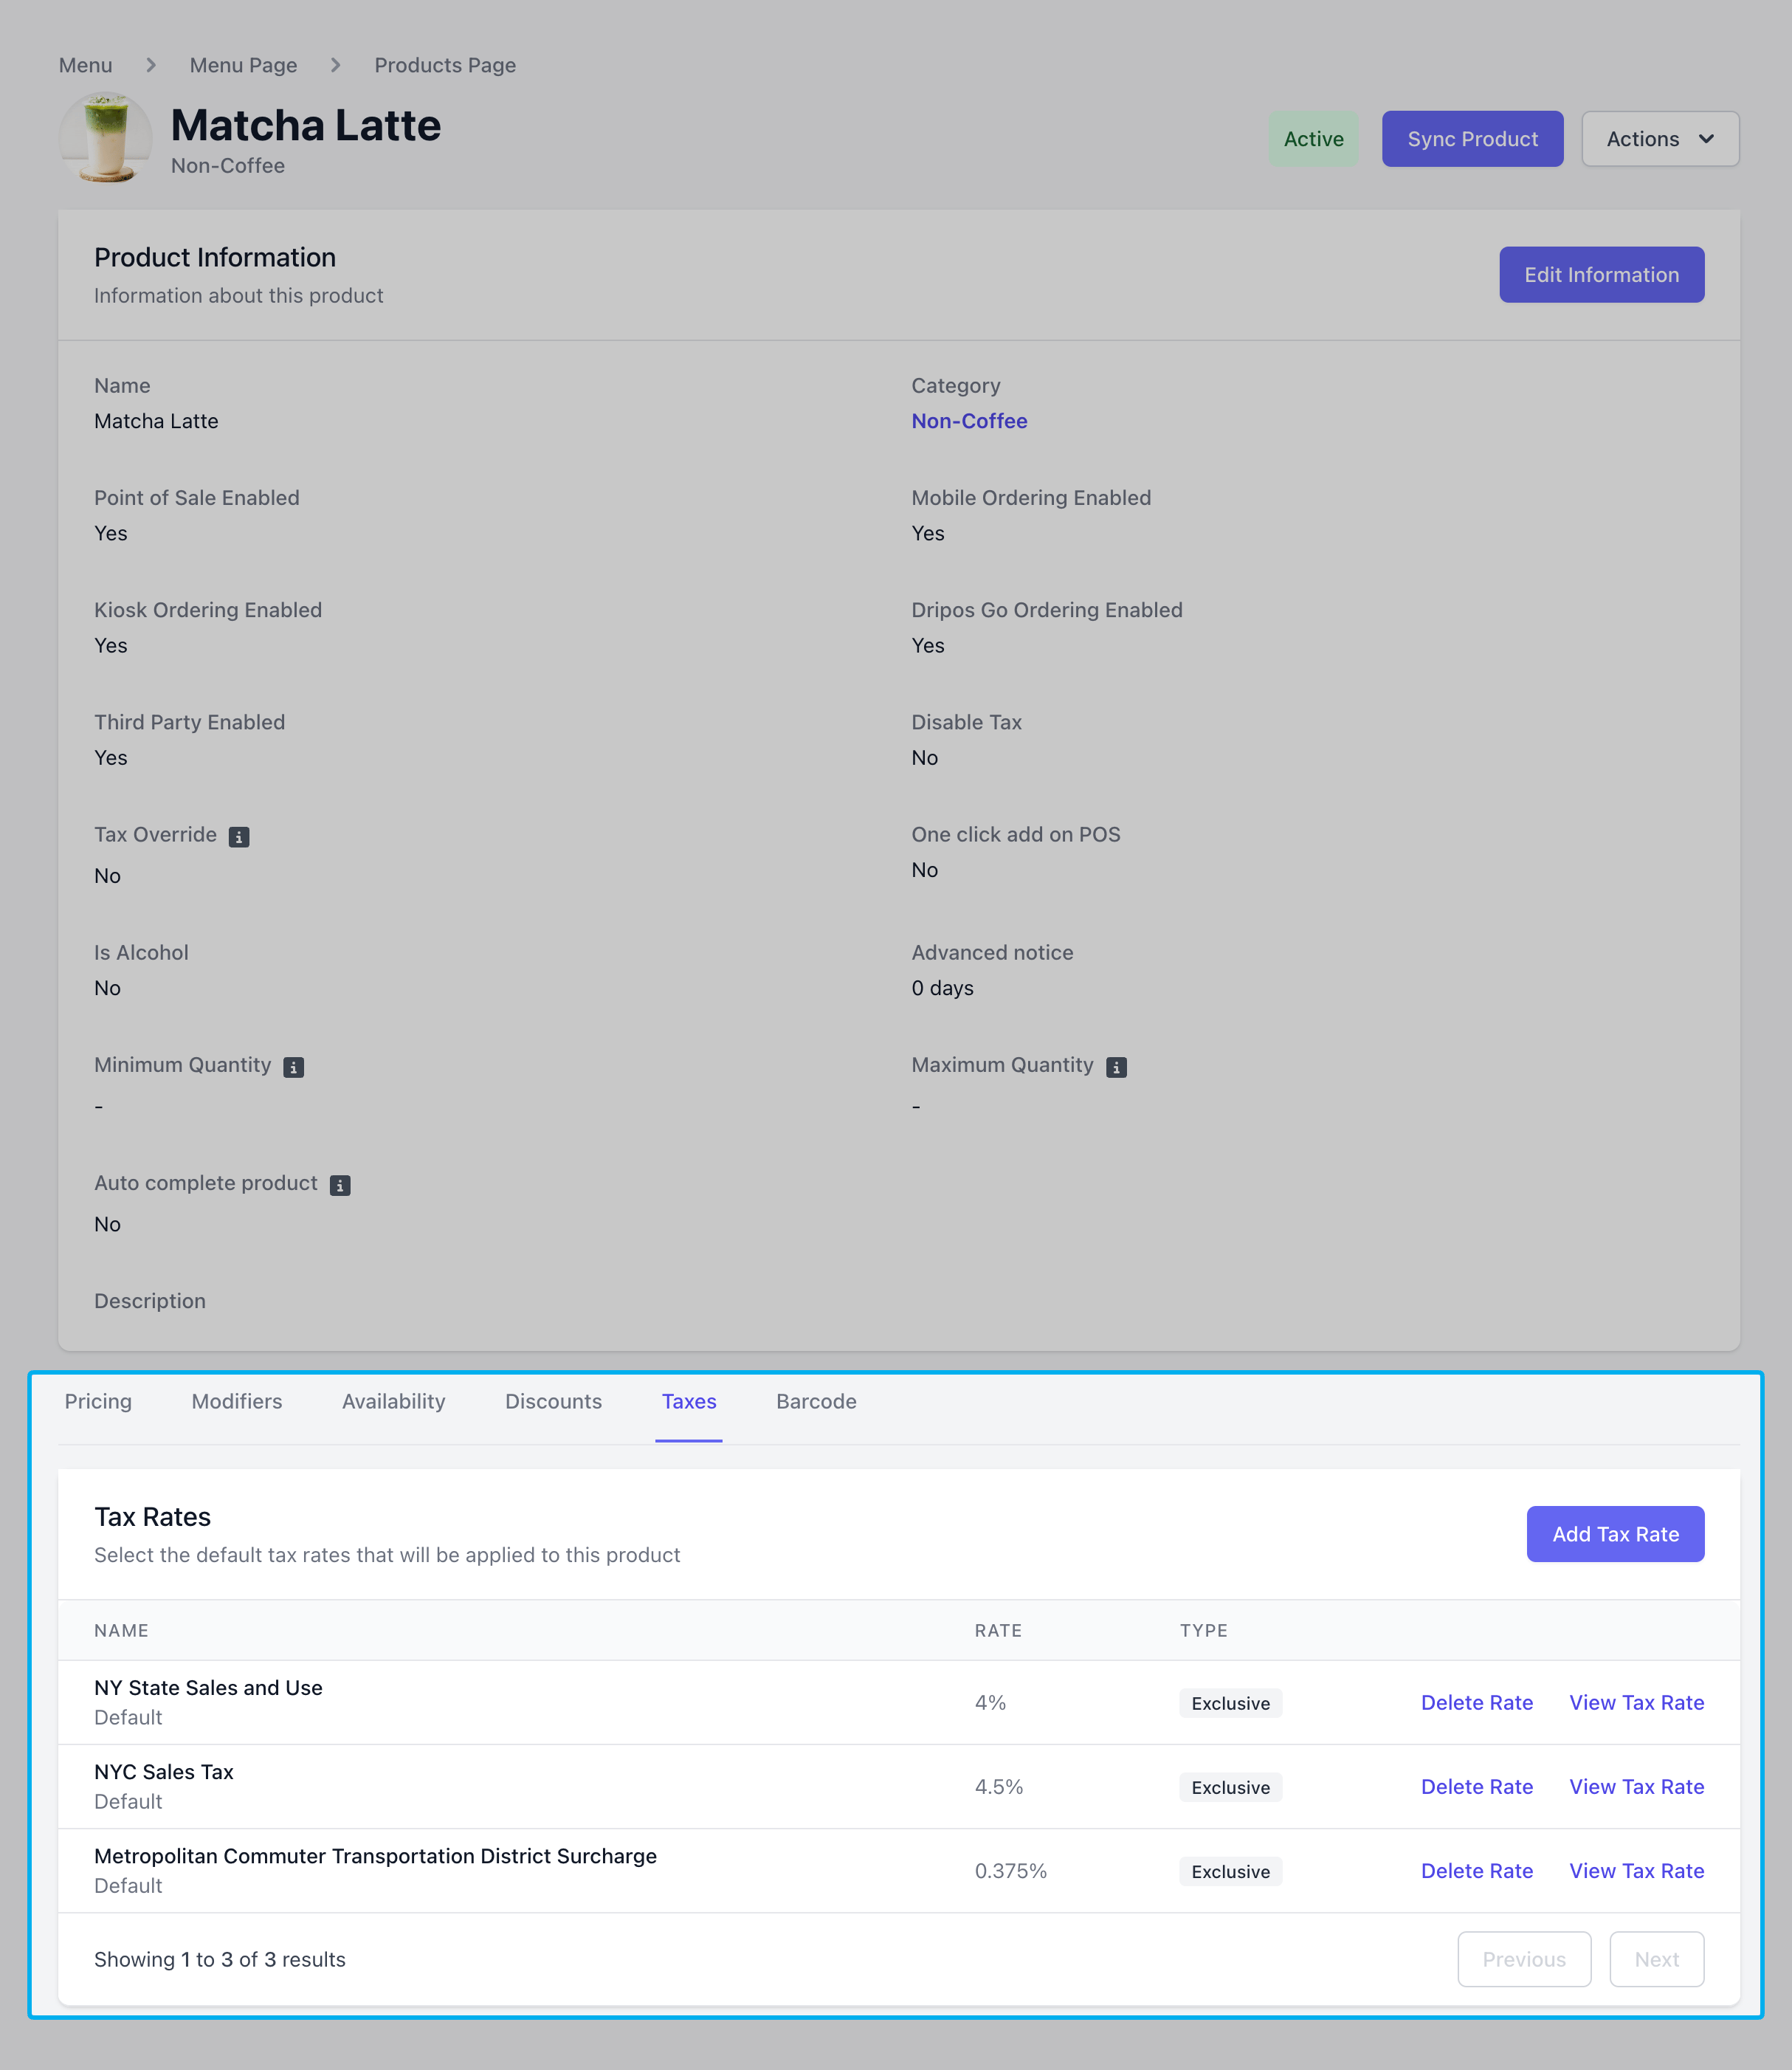
Product Discounts
Product Discounts
Duplicate a Product
Duplicate a product in it’s entirety onto your menuCustom Products
Create a one time product off the menu during checkout on the Point of SaleHow to Create a Custom Product
How to Create a Custom Product
1
Create Custom Product
2
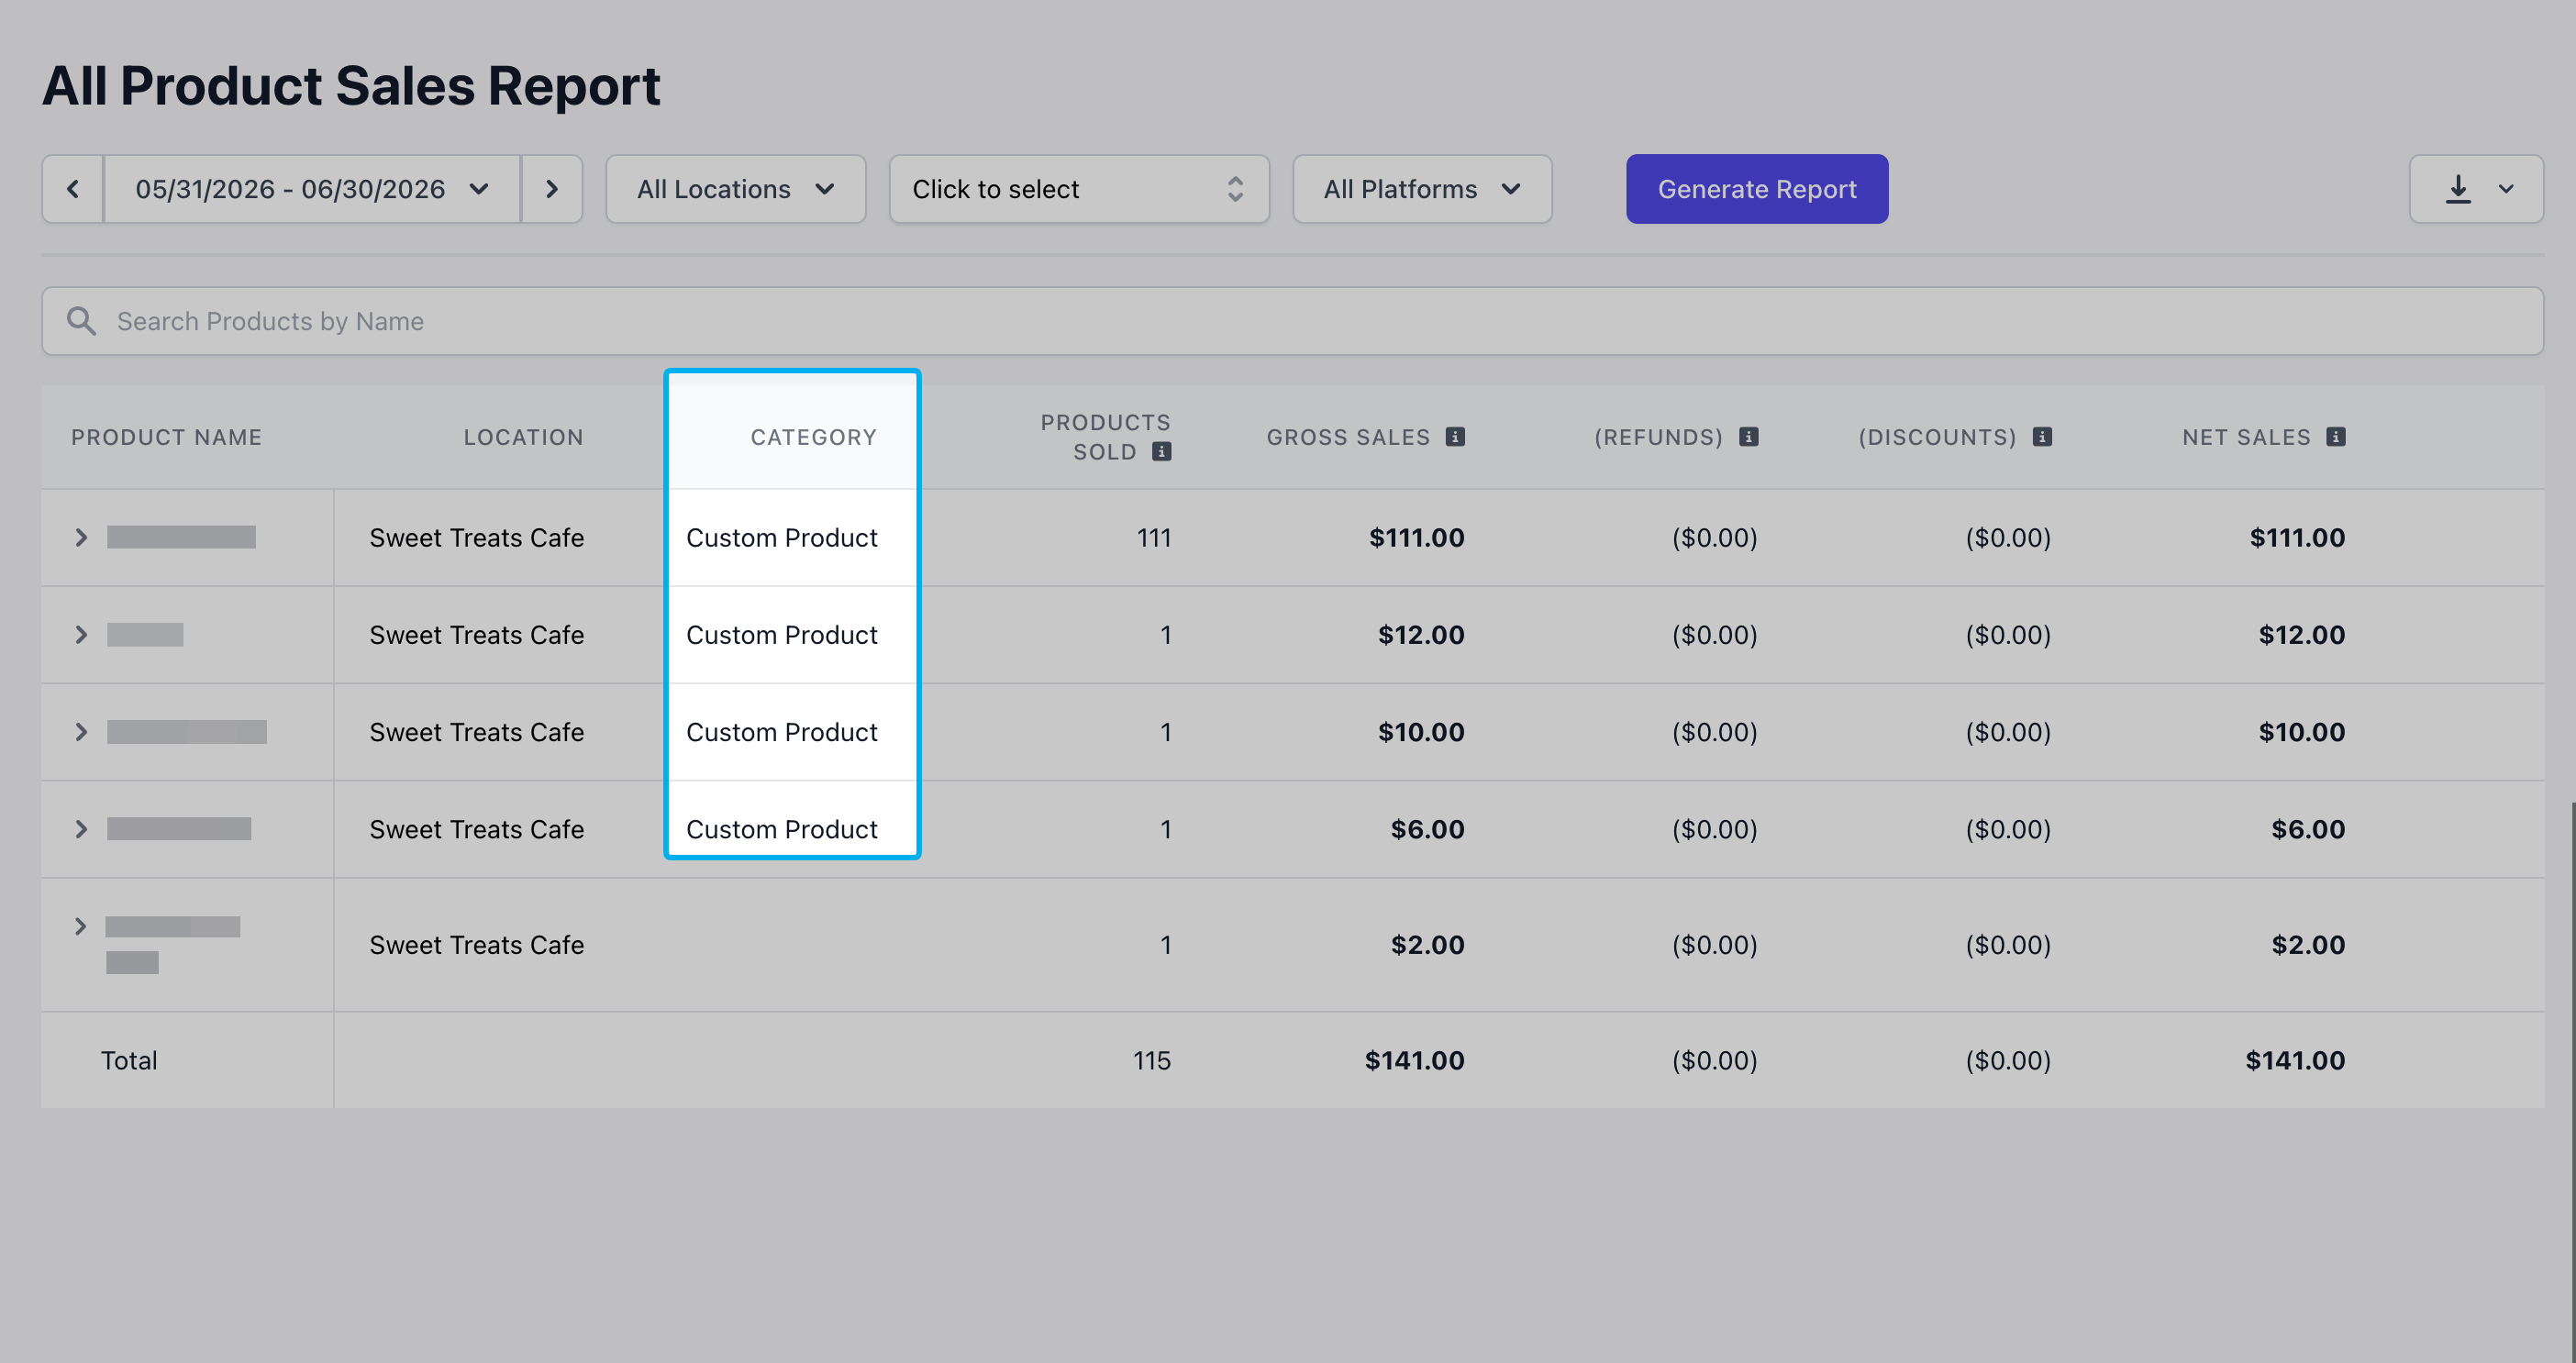
View Custom Product Sales
View custom product sales on the Web Dashboard under Reports > All Product Sales