Checkout Flow
Barcodes
Learn how to scan products and add to cart using barcodes.
Barcodes make it easy to scan and add items directly to the cart on your Point of Sale device.
Learn how to assign a barcode to a product on the Web Dashboard and pair a barcode scanner to your Point of Sale device.
Pair Barcode Scanner
How to Pair a Barcode Scanner to Dripos
How to Pair a Barcode Scanner to Dripos
For more information on initially setting up your barcode scanner, click here.
1
Log in to the Point of Sale. Press the tribar (≡) at the top left of the screen. Press the settings icon (⚙️)
2
Navigate to Global Ticket Options > Scroll down to the Barcode Scanner Host Device section at the bottom of the page
3
Select which device you want to make the host device or click the Set to this device button to set the device you are on as the host device: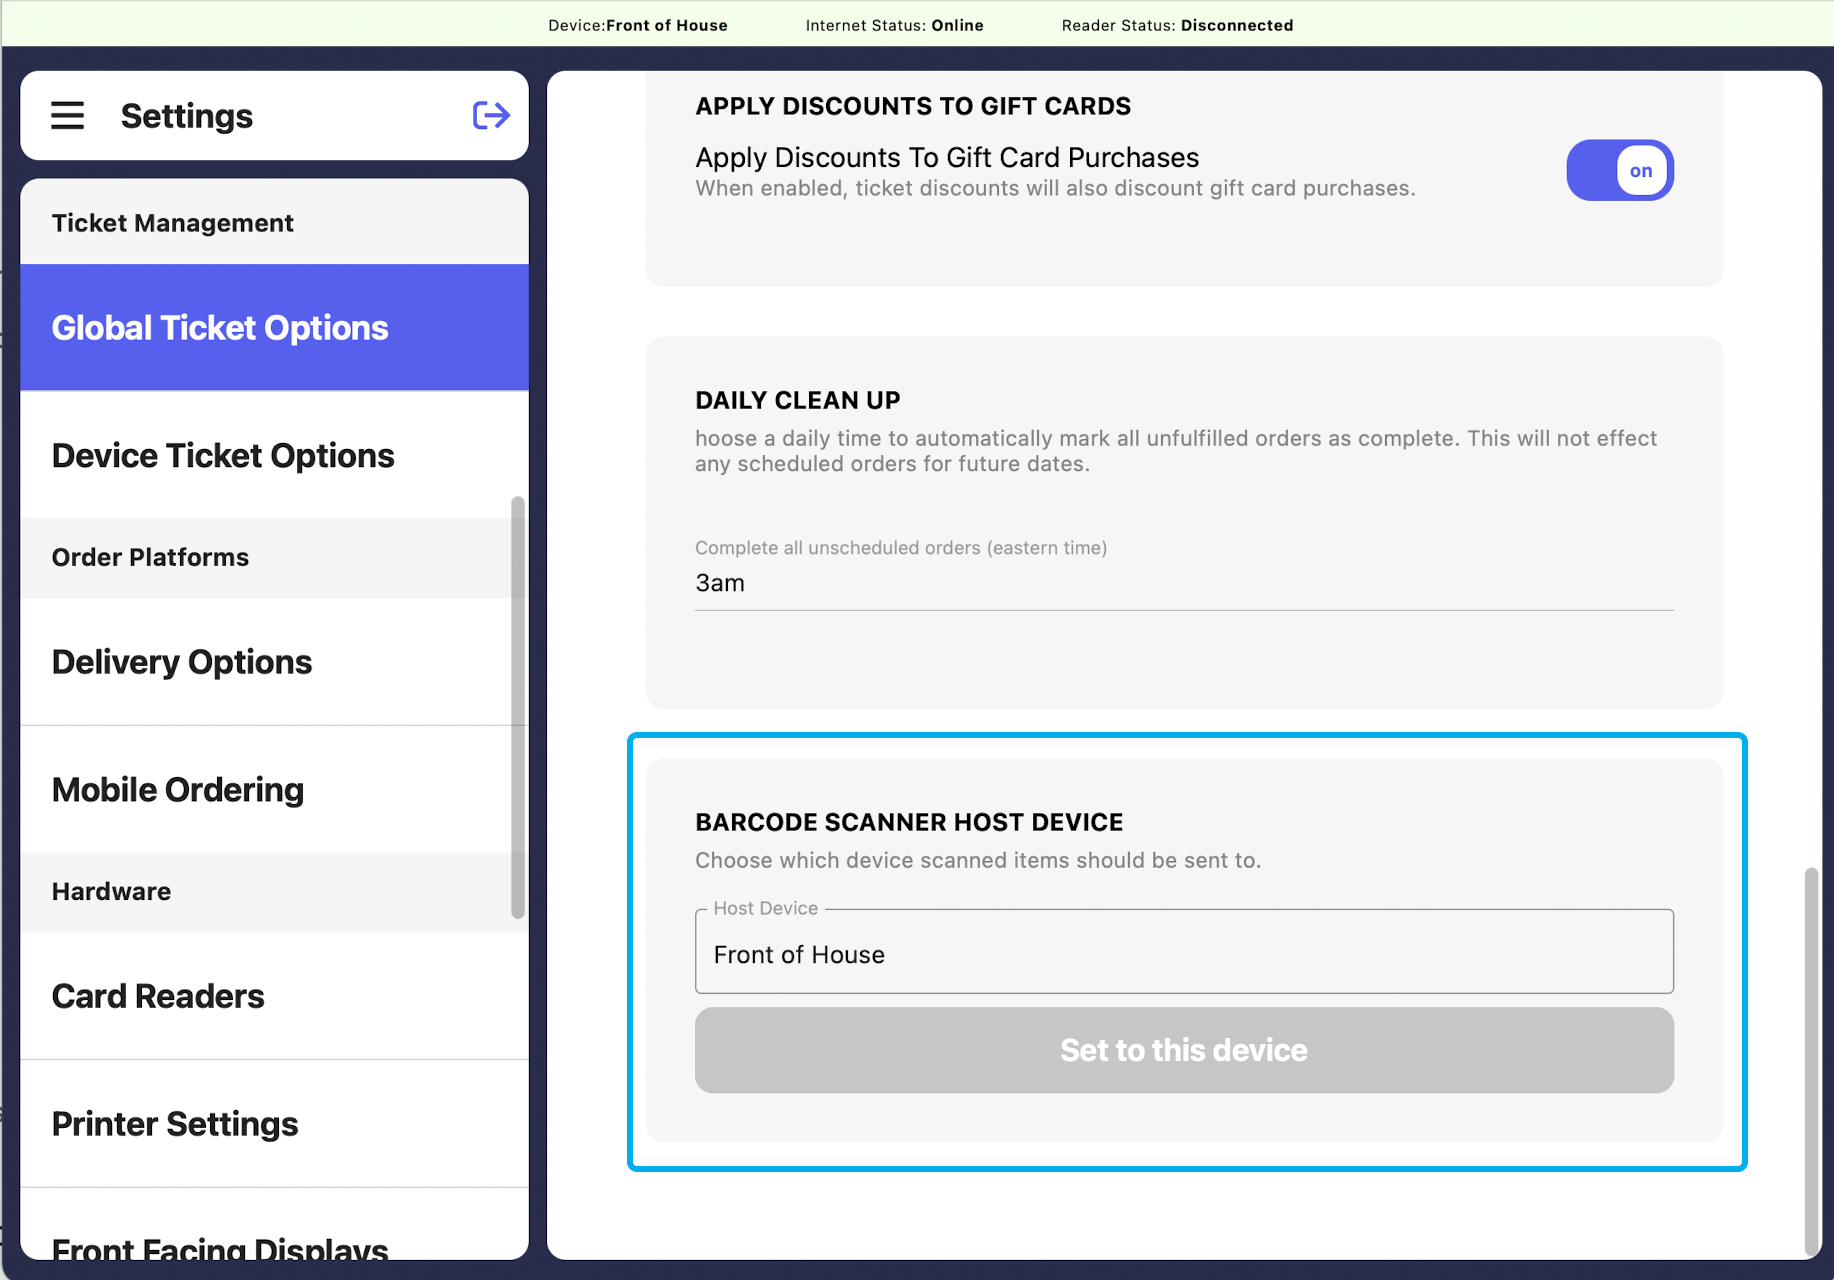
Assign Barcodes to Products
How to Assign a Barcode to a Product
How to Assign a Barcode to a Product
1
On the Web Dashboard click Sales > Menu > Products
2
Find the product to assign a barcode to and click View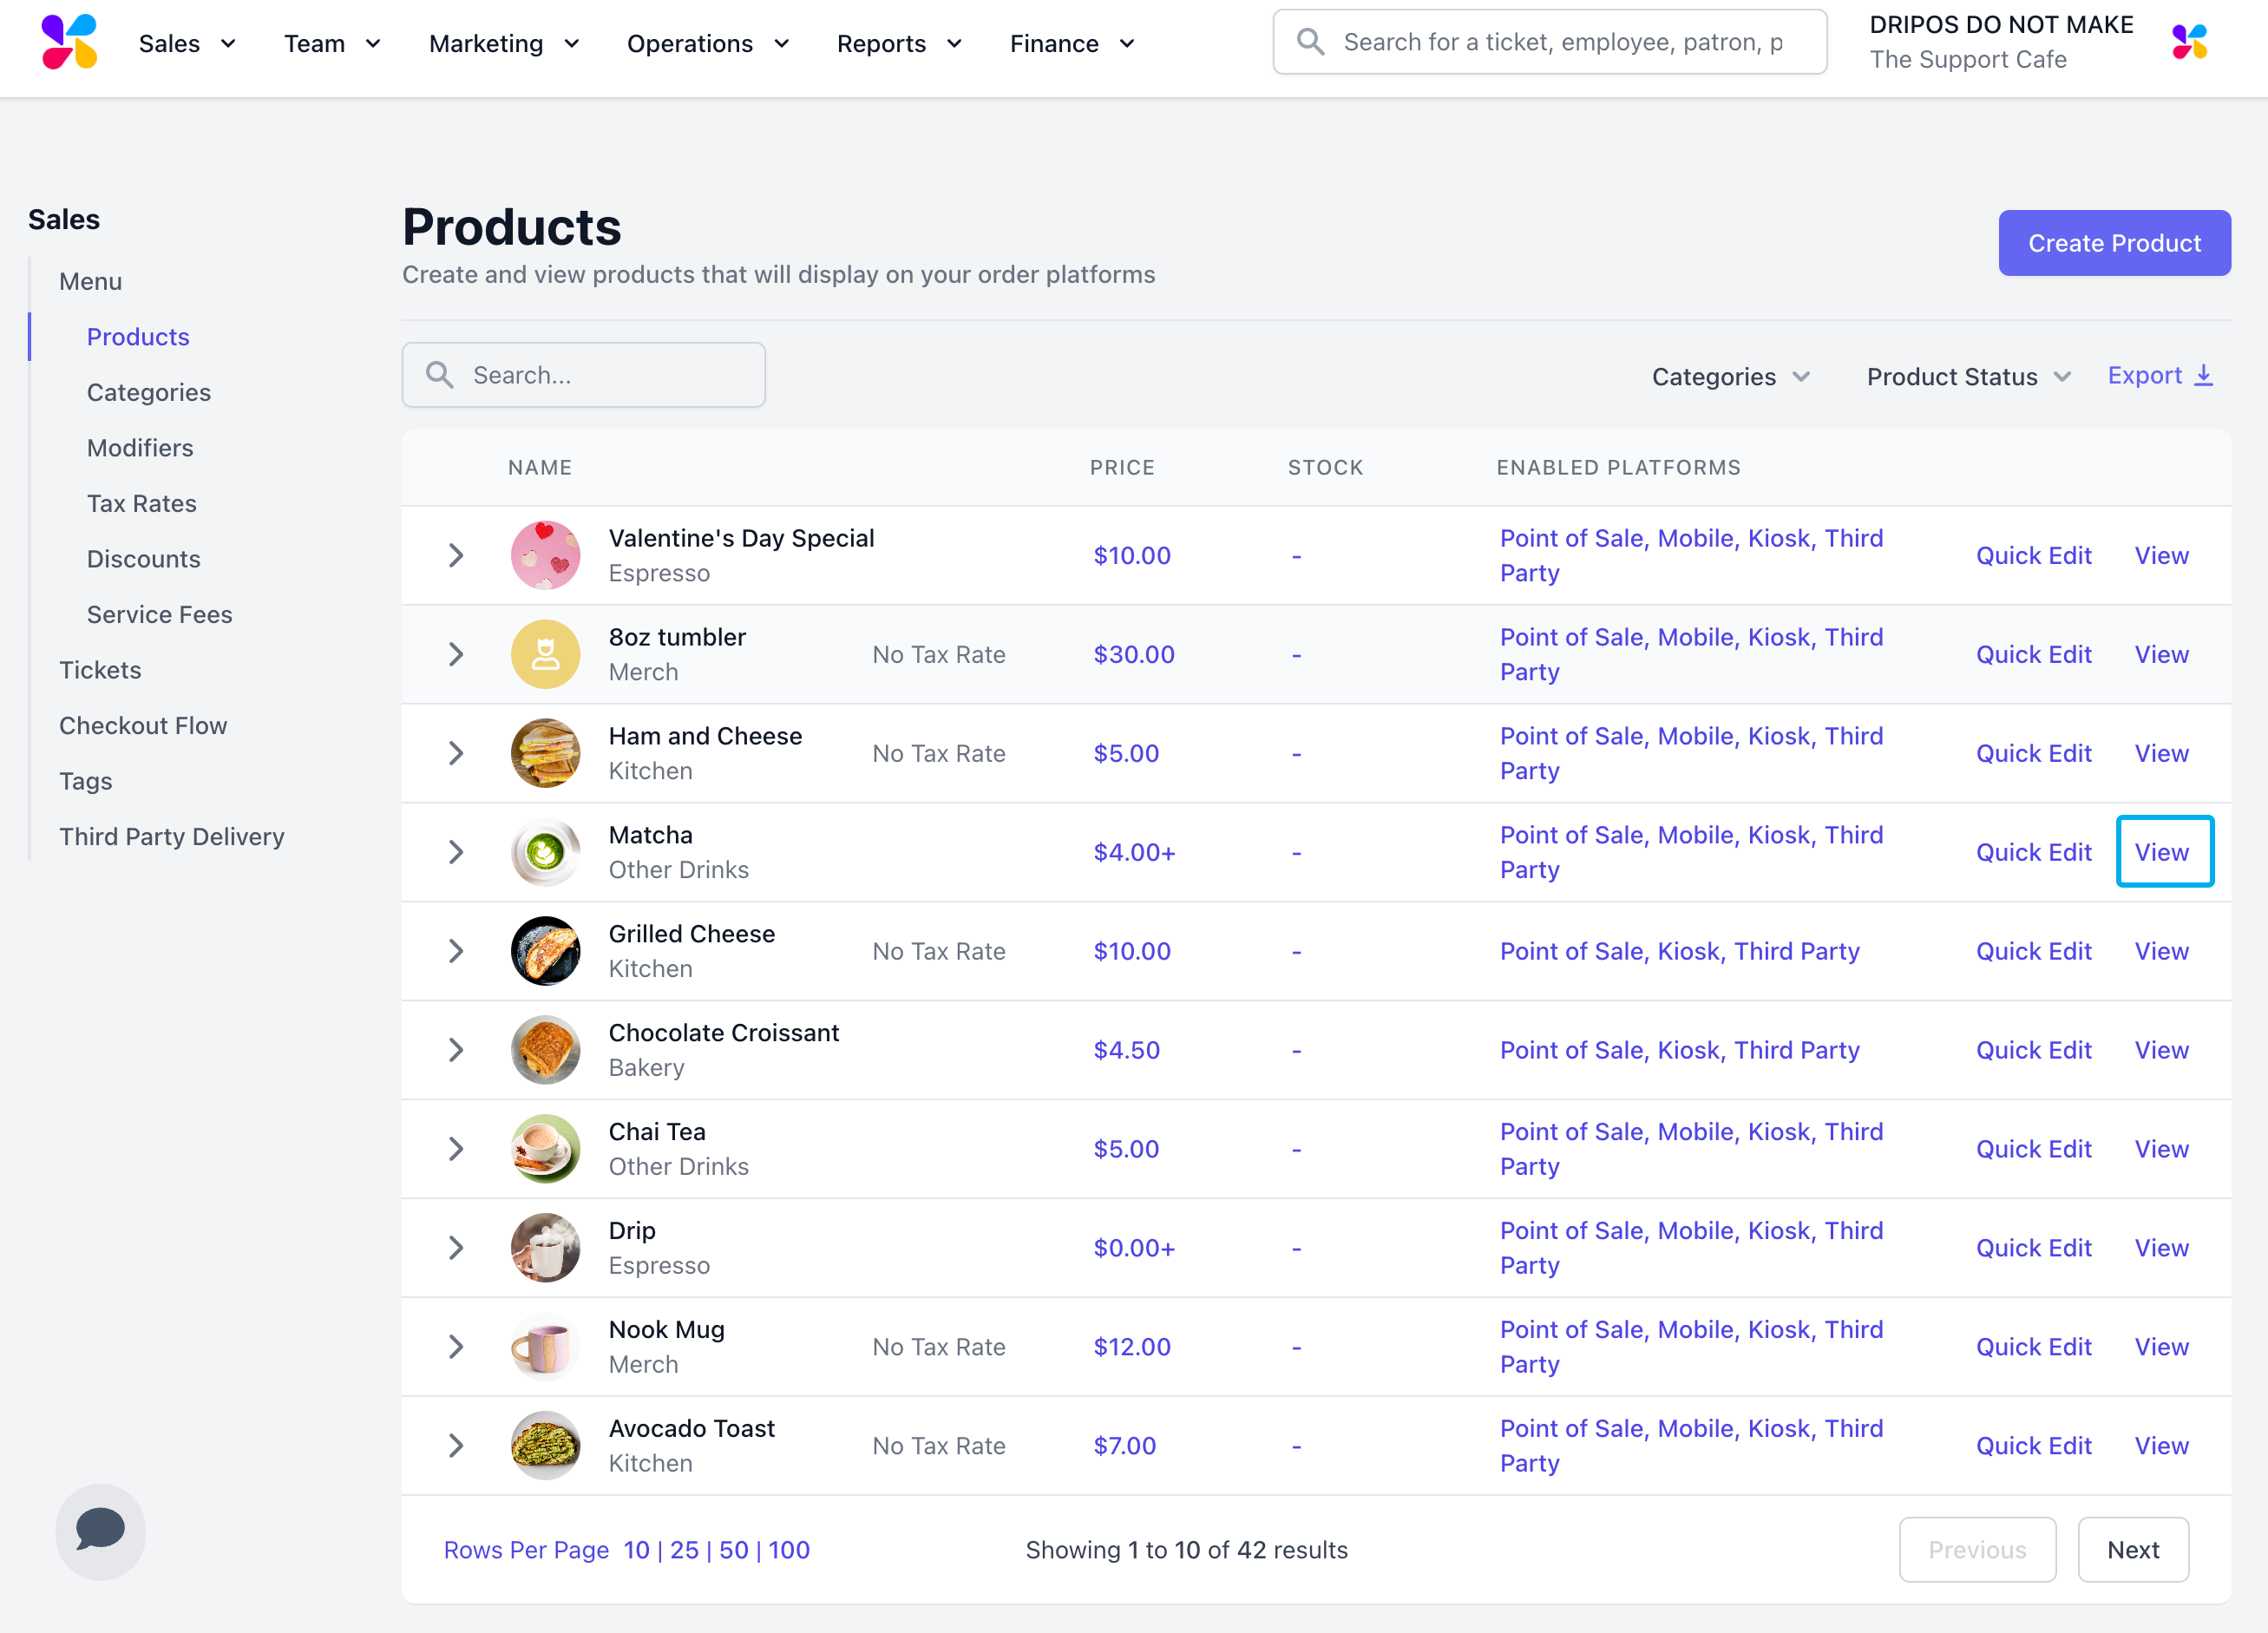
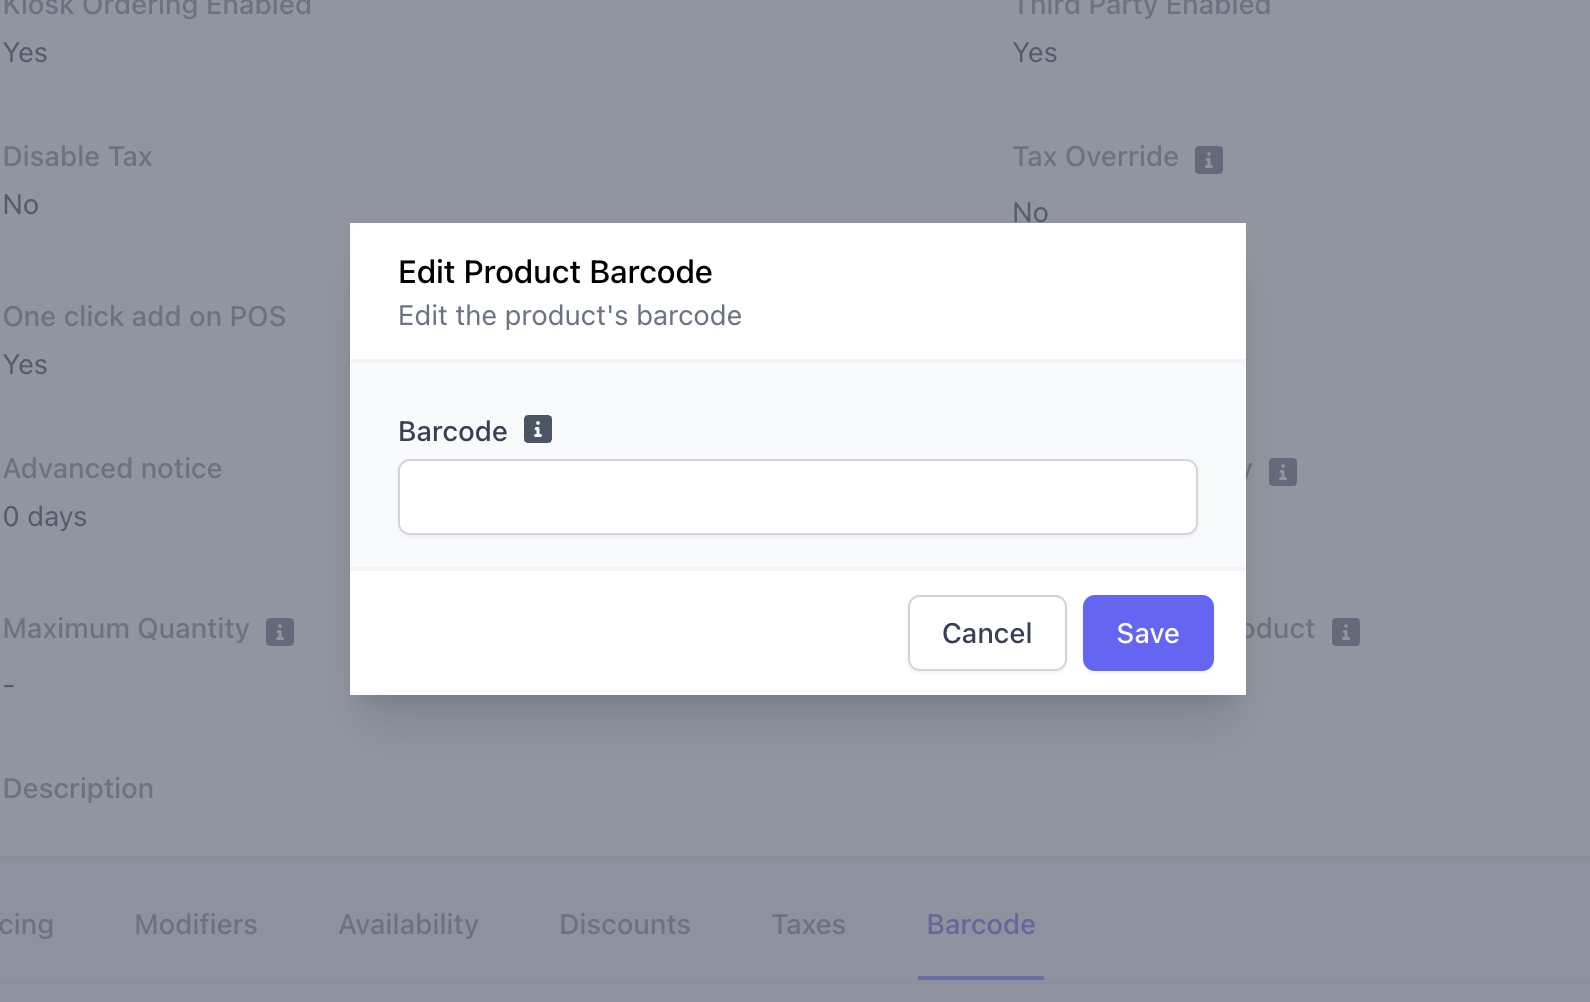
3
Scroll to the bottom of the page and select the Barcode tab > click Edit
4
Input the numbers listed on the barcode of the product > click Save